BRAND Transferpette-8 electronic Operating Manual
First class
Hide thumbs
Also See for Transferpette-8 electronic:
- Operating manual (257 pages) ,
- Manual (50 pages) ,
- Operating manual (132 pages)

Related Manuals for BRAND Transferpette-8 electronic


Summary of Contents for BRAND Transferpette-8 electronic
- Page 1 Liquid Handling · Easy Handling! Transferpette ® -8/-12 electronic F I R S T C L A S S · B R A N D Gebrauchsanleitung Operating Manual Mode d'emploi Instrucciones de manejo...
-
Page 2: Table Of Contents
Table of Contents Page Safety Instructions Functions and Limitations of Use Operating Exclusions Operating Elements The First Steps Setting the Volume Setting the Aspiration and Discharging Speed Correct Pipetting The Pipetting Programs - PIP mode - PIPmix mode - revPIP mode - Electrophoresis (GEL) mode - DISP mode Checking the Volume... -
Page 3: Safety Instructions
Safety Instructions This instrument may sometimes be used with hazardous materials, operations, and equipment. It is beyond the scope of this manual to address all of the safety problems associated with its use in such applications. It is the responsibility of the user of this pipette to consult and establish appropriate safety and health practices and determine the applicability of regulatory limitations prior to use. -
Page 4: Functions And Limitations Of Use
Functions and Limitations of Use ® The Transferpette -8/-12 electronic is a micro- When the instrument is used properly, the sample processor-controlled, battery-operated piston- only comes into contact with the tips and not with stroke multichannel pipette which uses the air- the Transferpette ®... -
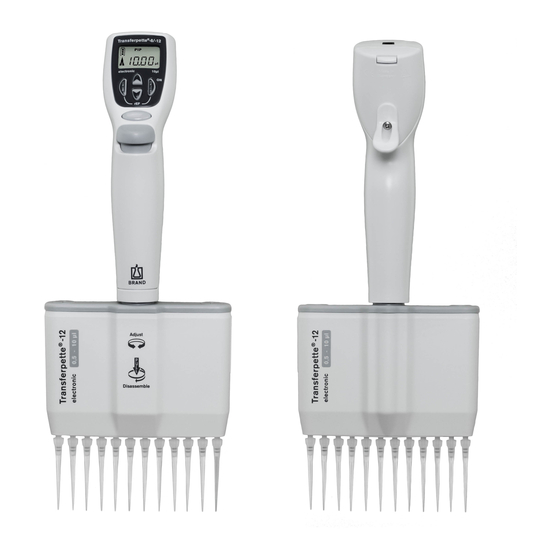
Page 5: Operating Elements
Operating Elements The Transferpette ® -8/-12 electronic is a microprocessor- controlled, battery-operated, piston-stroke multichannel pipette, which has been optimized for ergonomic opera- tion and ease of use. Charging jack Display Program keys Battery compartment Pipetting key Tip ejection key Finger rest ®... -
Page 6: The First Steps
The First Steps Is everything in the package? Confirm that your package includes: Transferpette ® -8 or -12 electronic pipette, battery, power supply unit with battery charging cable, 1 Tip-Box SL filled, 1 Tip-Rack for refill, 1 instrument stand, 1 reagent reservoir, silicone oil, operating manual and 1 set of V-rings made of Viton ®... -
Page 7: Setting The Volume
Setting the Volume The volume for the Transferpette ® -8/-12 electronic is set at the factory to the nominal volume of the instrument and can be changed quickly and easily. What to do How to do it Keys to press Display readout Activate volume Press one of the arrow... -
Page 8: Setting The Aspiration And Discharging Speed
Setting the Aspiration and Discharging Speed The aspiration and discharging speeds can be individually adjusted. When the menu is called up, the last speed setting is shown. Five speed levels are available. What to do How to do it Keys to press Display readout Setting the aspiration speed Bring up the menu... -
Page 9: Correct Pipetting
® with the Transferpette -8/-12 electronic Correct Pipetting The volume is set at the factory to the nominal volume for the Transferpette ® -8/-12 electronic and can be changed quickly and easily. See page 40. Quick start in the standard pipetting mode Attach the tips Note: Ensure the tips are seated firmly and seal against the nose cones. -
Page 10: The Pipetting Programs
The Pipetting Programs Page Normal Pipetting Mode Standard program. A previously set volume is aspirated into the pipette tips and then discharged. Mixing of Samples PIPmix Mode Program for mixing liquids. The sample is repeatedly aspirated and discharged. Reverse Pipetting revPIP Mode Program especially for pipetting liquids with a... -
Page 11: Pip Mode
The Programs · Settings and Use PIP Mode The standard program – a previously set volume is aspirated and then discharged. Volume and speed adjustments are described on pages 40 and 41. What to do How to do it Keys to press Display readout Bring up the menu Press the MENU key three... - Page 12 PIP Mode What to do How to do it Keys to press Display readout Discharge liquid Press the pipetting key once to discharge the liquid. The arrow in the display points downwards (discharge). Start blow-out? No action required! When pipetting in the PIP mode the blow-out function is performed automatically.
-
Page 13: Pipmix Mode
The Programs · Settings and Use PIPmix Mode Program for mixing of liquids. The sample is repeatedly aspirated and discharged. Volume and speed adjustments are described on pages 40 and 41. What to do How to do it Keys to press Display readout Bring up the menu Press the MENU key... - Page 14 PIPmix Mode What to do How to do it Keys to press Display readout Discharge liquid Press and hold the pipetting in the PIPmix key and the liquid is mode alternately aspirated and discharged. The display shows the up arrow for aspiration and the down arrow for discharging and press and hold...
-
Page 15: Revpip Mode
The Programs · Settings and Use revPIP Mode Program for pipetting of liquids with high viscosity, vapor pressure or that tend to foam. Volume and speed adjustments are described on pages 40 and 41. What to do How to do it Keys to press Display readout Bring up the menu... - Page 16 revPIPMode What to do How to do it Keys to press Display readout Press the pipetting key Repeat aspiration again and the set volume of liquid in revPIP is aspirated into the tips. mode Press the pipetting key again and the volume is discharged again, and so on...
-
Page 17: Electrophoresis (Gel) Mode
The Programs · Settings and Use Electrophoresis (GEL) Mode Program for loading electrophoresis gels. A predefined sample volume is aspirated into the pipette tips with high adjustable speed and then slowly discharged. Volume and speed adjustment is described on pages 40 and 41. What to do How to do it Keys to press... - Page 18 Electrophoresis (GEL) Mode What to do How to do it Keys to press Display readout Discharge liquid Press the pipetting key in the GEL mode once to discharge the liquid. The rhombus is shown in the display. The liquid is discharged very slowly.
-
Page 19: Disp Mode
The Programs · Settings and Use DISP Mode Program for discharging an aspirated liquid in pre-defined steps. The volume aspirated will be a little bit more than actually needed. Speed adjustment is described on page 41. What to do How to do it Keys to press Display readout Bring up the menu... - Page 20 DISP Mode What to do How to do it Keys to press Display readout Set the number Press the arrow keys (+/-) of steps to set the number of steps. 'Steps' continues to blink. – Confirm the Press the ENTER key. number of steps The display now shows the number of steps that has...
-
Page 21: Checking The Volume
Checking the Volume Depending on use, we recommend inspection of the instrument every 3 to 12 months. The cycle can, however, be adjusted to individual requirements. The gravimetric testing of the pipette volume is performed according to the following steps and is in accordance with DIN EN ISO 8655, Part 6. Set nominal volume See page 40 for procedure. -
Page 22: Accuracy Table
Accuracy Table Final test values related to the nominal capacity (maximum volume) indi- 20 °C cated on the instrument, obtained when instrument and distilled water are equilibrated at ambient temperature (20 °C/68 °F) and with smooth operation. According to DIN EN ISO 8655. Accuracy tolerances for the Transferpette ®... -
Page 23: Easy Calibration
® Adjustment of the Transferpette -8/-12 electronic Easy Calibration The calibration mode 'CAL' Adjustment The instrument should be set to either the nominal volume (for example 100 µl for a 100 µl pipette) or a specific test volume, in the standard pipetting mode (PIP). - Page 24 Easy Calibration Revert to factory default settings The continually displayed CAL symbol refers to a previously made adjustment. What to do How to do it Keys to press Display readout Bring up the CAL Press and hold the MENU mode key (>...
-
Page 25: Autoclaving
Autoclaving The manifold (M) of the Transferpette ® -8/-12 electronic (highlighted in picture) can be autoclaved at 121 °C at a pressure of 2 bar for 20 minutes according to DIN. Note: The handgrip can not be autoclaved! Eject the pipette tips. Unscrew the manifold from the grip. -
Page 26: Servicing And Cleaning
Servicing and Cleaning The three main components of the manifold can be easily separated and disassembled for servicing, cleaning or replacing parts. The procedures are illustrated on the following pages. Note: The changing of the V-rings/O-rings on the individual nose cones is described in detail in the instructions enclosed with the spare part. -
Page 27: Disassembling The Manifold
Disassembling the Manifold Removing of nose cones and seals for cleaning or replacing Unscrew the manifold from the handle. Turn both closures of the manifold housing cover 90° and slide off the housing. Push the mounting tool on the nose cone and unscrew it (Fig. - Page 28 Disassembling the Manifold Removing of pistons for cleaning or replacing Unscrew the manifold from the handle. Turn both closures of the manifold housing cover 90° and slide off the housing. Remove both outer Phillips screws on the nose cone assembly. Separate the piston and nose Screw off the piston nut Attention:...
-
Page 29: Charging And Replacing The Battery
Charging and Replacing the Battery A fully charged battery allows approx. eight hours of continuous pipetting of liquids with a viscosity and density similar to water. Important! Before charging the battery ensure that the AC adapter is compatible with the line voltage in the labora- tory. -
Page 30: Battery Regeneration Function
Charging and Replacing the Battery Battery display after a) After the battery is inserted, the display inserting a battery shows the full capacity indicator with a blinking frame, the instrument does not recognize the charging status right now. After 3.5 hours of charging time – safe full charging of the battery –... -
Page 31: Troubleshooting
Troubleshooting If an error occurs, the instrument display shows “Err” and the error number is also shown. The instrument will now only react to the ENTER key. Pressing the ENTER key will attempt to restart the instrument. Therefore, a reference run is automatically requested. Problem Error message Possible cause... -
Page 32: Ordering Information · Accessories · Spare Parts
Ordering Information · Accessories · Spare Parts Transferpette ® -8 electronic incl. AC adapter (110V/50-60 Hz) Volume 2 - 20 µl 10 - 200 µl 30 - 300 µl Cat. No. 27054 02 27054 08 27054 12 ® Transferpette -12 electronic incl. AC adapter (110V/50-60 Hz) Volume 2 - 20 µl 10 - 100 µl... -
Page 33: Repairs
Repairs If a problem cannot be fixed by following the troubleshooting guide, or by replacing one of the parts listed on page 61, then the instrument must be sent in for repair. Please note: for the safety of courriers and our employees, and to avoid violation of federal and local laws, only clean instruments free of any chemical, biological or radioactive hazards can be inspected and repaired!
Need help?
Do you have a question about the Transferpette-8 electronic and is the answer not in the manual?
Questions and answers