BRAND HandyStep S Operating Manual
Hide thumbs
Also See for HandyStep S:
- Operating manual (44 pages) ,
- Operating manual (149 pages) ,
- Operating manual (464 pages)

Subscribe to Our Youtube Channel
Related Manuals for BRAND HandyStep S


Summary of Contents for BRAND HandyStep S
- Page 1 HandyStep ® Gebrauchsanleitung · Operating Manual · Mode d'emploi Instrucciones de manejo · Istruzioni per l'uso · 操作手册...
-
Page 3: Table Of Contents
Inhaltsverzeichnis Seite Sicherheitsbestimmungen Funktion und Einsatzgrenzen Funktions- und Bedienelemente PD-Tip einsetzen Volumen einstellen PD-Tip füllen Repetitives Dosieren PD-Tip abwerfen Volumen kontrollieren Genauigkeitstabelle Wartung · Reinigung · UV-Entkeimung Bestelldaten · Zubehör Störung – was tun? Reparatur Kontaktadressen Kalibrierservice Mängelhaftung Entsorgung... -
Page 5: Sicherheitsbestimmungen
Sicherheitsbestimmungen Bitte unbedingt sorgfältig durchlesen! Dieses Gerät kann in Kombination mit gefährlichen Materialien, Arbeits- vorgängen und Apparaturen verwendet werden. Die Gebrauchsanleitung kann jedoch nicht alle Sicherheitsprobleme aufzeigen, die hierbei eventuell auftreten. Es liegt in der Verantwortung des Anwenders, die Einhaltung der Sicherheits- und Gesundheitsvorschriften sicherzustellen und die entspre- chenden Einschränkungen vor Gebrauch festzulegen. -
Page 6: Funktion Und Einsatzgrenzen
Funktion und Einsatzgrenzen S handelt es sich um einen Mehrfachdispenser zum Beim HandyStep ® schnellen und einfachen repetitiven Dosieren von Flüssigkeiten. Durch die Kombination der verwendeten PD-Tip-Größe und der am Hubeinstell- rad eingestellten Hubeinstellung können Volumina zwischen 2 µl und 5 ml mit höchster Präzision und Richtigkeit dosiert werden. -
Page 7: Funktions- Und Bedienelemente
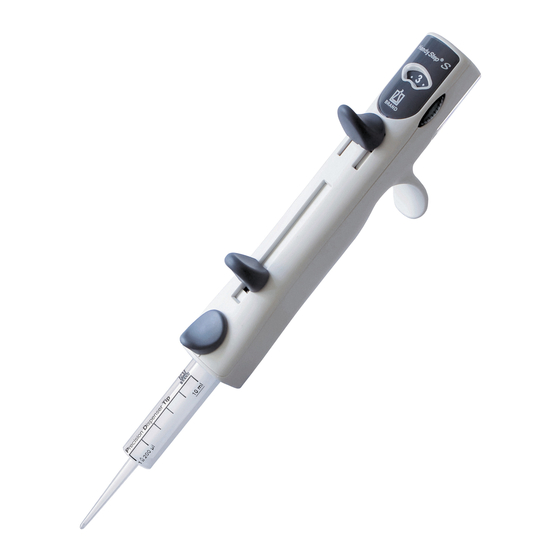
Funktions- und Bedienelemente Volumentabelle Geräterückseite, Hubanzeige unter Klarsichtclip (Zahl = mm pro Hub) Hubeinstellrad Dosierhebel (Startposition) Fingerbügel Griffteil Arretier-/Füllhebel • Kolben arretieren/ entkoppeln • Aufsaugen Die Tabelle auf der • Restentleerung Geräterückseite ist doppelseitig bedruckt. Abwurftaste Zum Wechseln, Clip einfach hochschieben, Zylinder freigeben Tabelle umdrehen und (PD-Tip abwerfen) -
Page 8: Pd-Tip Einsetzen
PD-Tip einsetzen • Zum Einsatz der 25 ml und 50 ml PD-Tips wird der zu den Spitzen mitgelieferte wiederverwendbare Adapter benötigt. Dieser wird über einen Bajonettverschluss an die PD-Tips gekoppelt und kann nach der Verwendung wieder gelöst werden. • PD-Tips sind Einmalartikel! Arretier-/ Arretier-/ Füllhebel bis... -
Page 9: Volumen Einstellen
Volumen einstellen S sind in Tabellen aufge- Die möglichen Dosiervolumina des HandyStep ® führt. Diese befinden sich unter dem Klarsichtclip auf der Geräterückseite. Die Hubeinstellung hat 9 halbzahlige Positionen von 1 bis 5. Das gewünschte Dosiervolumen (Volume) in der Tabelle suchen. Zum verwendeten PD-Tip (Tip size) die zum Volumen gehörige Hub- zahl (Setting) mit dem Hubeinstellrad einstellen. -
Page 10: Pd-Tip Füllen
PD-Tip füllen Flüssigkeit aufsaugen Hinweis: Wir empfehlen einen neuen PD-Tip vor der Verwendung zu entlüften. Dafür die Spitze minimal mit der Flüssigkeit füllen und wieder entleeren. Kleine Luftblasen im Bereich des Kolbens nach dem Ent- lüften beeinflussen das Ergebnis nicht. Arretier-/Füllhebel bis zum unteren Anschlag schieben. -
Page 11: Repetitives Dosieren
Repetitives Dosieren Dosiervorgang Volumeneinstellung nochmals überprüfen. (Einstellungen mit der Volumentabelle vergleichen!) Außen anhaftende Flüssigkeit an der PD-Tip Spitze mit faserfreiem Zellstoff abwischen. Spitze des PD-Tip an die Gefäßwand anlegen. Flüssigkeit jeweils durch vollständiges Herunterdrücken des Dosierhebels abgeben und diesen ganz nach oben zurückgleiten lassen. -
Page 12: Pd-Tip Abwerfen
PD-Tip abwerfen Handhabung S über ein Gefäß halten. HandyStep ® PD-Tip durch Schieben des Arretier-/ Füllhebels bis zum unteren Anschlag entleeren. Arretier-/Füllhebel nach vorne herausschwenken (der Kolben wird dadurch entkoppelt). HandyStep S über Abfallbehälter ® halten. Abwurftaste nach unten drücken (hiermit wird der Zylinder freigegeben). -
Page 13: Volumen Kontrollieren
Volumen kontrollieren Wir empfehlen, je nach Einsatz, alle 3-12 Monate eine gravimetrische Volumenprüfung des Gerätes durchzuführen. Dieser Zyklus sollte den individuellen Anforderungen angepasst werden. Die gravimetrische Volu- menprüfung nach DIN EN ISO 8655-5 erfolgt in folgenden Schritten: Gerät vorbereiten Spitze aufstecken. Diese Prüfung kann mit jeder PD-Tip-Größe durchgeführt werden. - Page 14 – 1 *) = Berechnung von Richtigkeit (R%) und Variationskoeffizient (VK%): R% und VK% werden nach den Formeln der statistischen Qualitäts- kontrolle berechnet. Hinweis: Prüfanweisungen (SOPs) und eine Demoversion der Kalibriersoftware EASYCAL ™ 4.0 stehen unter www.brand.de zum Download bereit.
-
Page 15: Genauigkeitstabelle
Genauigkeitstabelle Technische Daten PD-Tips II von BRAND, 20 °C 'Ex' PD-Tip Volumen- ± % < < – – Größe bereich Hubeinstellung % vom Hubeinstellung % vom (µl) Nennvolumen Nennvolumen 0,1 ml 0,5 ml 10 - 1,0 ml 20 - 100... -
Page 16: Wartung · Reinigung · Uv-Entkeimung
Geräteinnere gelangt! Sollte dennoch Flüssigkeit eintreten, lassen Sie das Gerät durch eine autorisierte Service- stelle öffnen und reinigen oder senden Sie das Gerät zu BRAND. Der Regalhalter ist zur Montage mit einem Klebestreifen ausgestattet. Ohne den Streifen ist er in den 6-fach Tischständer der Transferpette... -
Page 17: Bestelldaten · Zubehör
Bestelldaten · Zubehör HandyStep ® Verp.-Einh. 1 Stück, 1 Regalhalter, Regalhalter 3 PD-Tips II (0,1 ml, 1 ml, 10 ml) Verp.-Einh. 1 Stück Best.-Nr. 7051 10 Best.-Nr. 7051 30 PD-Tips II (Präzisions-Dispenser-Tips) Größe Verp.- unsteril BIO-CERT ® Einheit Best.-Nr. Best.-Nr. 0,1 ml 7057 00 7057 30... -
Page 18: Störung - Was Tun
Störung – was tun? Störung Mögliche Ursache Was tun? PD-Tip-Kolben lässt Arretier-/Füllhebel Erst Abwurftaste sich nicht arretieren ist nicht ganz nach betätigen und PD-Tip nachdem PD-Tip unten geschoben entfernen, dann Arre- eingesetzt wurde. und nicht nach vorne tier-/Füllhebel ganz nach geschwenkt. -
Page 19: Reparatur
Gerät an Hersteller oder Händler senden. Vor- drucke können beim Händler oder Hersteller angefordert werden bzw. stehen unter www.brand.de zum Download bereit. In den USA und Kanada: – Bitte klären Sie mit BrandTech Scientific, Inc. die Voraussetzungen für die Rücksendung bevor Sie das Gerät zum Service einschicken. -
Page 20: Kontaktadressen
Kontaktadressen BRAND GMBH + CO KG Otto-Schott-Straße 25 97877 Wertheim (Germany) Tel.: +49 9342 808-0 Fax: +49 9342 808-98000 E-Mail: info@brand.de www.brand.de USA und Kanada: BrandTech Scientific, Inc. ® 11 Bokum Road Essex, CT 06426-1506 (USA) Tel.: +1-860-767 2562 Fax: +1-860-767 2563 www.brandtech.com... -
Page 21: Kalibrierservice
Medien sollte häufiger geprüft werden. Die ausführliche Prüfanweisung steht unter www.brand.de bzw. www.brandtech.com zum Download bereit. BRAND bietet Ihnen darüber hinaus die Möglichkeit, Ihre Geräte durch unseren Werks-Kalibrierservice oder durch das BRAND-DAkkS-Labor kalibrieren zu lassen. Schicken Sie uns einfach die zu kalibrierenden Geräte mit der Angabe, welche Art der Kalibrierung Sie wünschen. -
Page 22: Mängelhaftung
Mängelhaftung Wir haften nicht für Folgen unsachgemäßer Behandlung, Verwendung, Wartung, Bedienung oder nicht autorisierter Reparatur des Gerätes oder für Folgen normaler Abnutzung, insbesondere von Verschleißteilen wie z.B. Kolben, Dichtungen, Ventilen sowie bei Glasbruch. Gleiches gilt für die Nichtbeachtung der Gebrauchsanleitung. Insbesondere übernehmen wir keine Haftung für entstandene Schäden, wenn das Gerät weiter zer- legt wurde als in der Gebrauchsanleitung beschrieben oder wenn fremde Zubehör- bzw. - Page 23 Table of Contents Page Safety Instructions Function and Limitations of Use Operating and Control Elements Inserting the PD-Tip Setting the Volume Filling the PD-Tip Repetitive Dispensing Ejecting the PD-Tip Checking the Volume Accuracy Table Servicing · Cleaning · UV sterilization Ordering Information ·...
-
Page 25: Safety Instructions
Safety Instructions Please read the following carefully! This instrument may sometimes be used with hazardous materials, opera- tions, and equipment. It is beyond the scope of this manual to address all of the potential safety risks associated with its use in such applications. It is the responsibility of the user of this pipette to consult and establish appropriate safety and health practices and determine the applicability of regulatory limitations prior to use. -
Page 26: Function And Limitations Of Use
Function and Limitations of Use S is a repetitive pipette for quick and simple repetitive The HandyStep ® dispensing of liquids. Volumes from 2 µl to 5 ml can be dispensed with the highest precision and accuracy through combinations of the PD-Tip size used and adjustment of the stroke setting on the stroke-setting wheel. -
Page 27: Operating And Control Elements
Operating and Control Elements Volume table Instrument backside, Stroke indicator under transparent clip (Number = mm per stroke) Stroke setting wheel Dispensing lever (Start position) Finger rest Hand grip Locking/filling lever • Lock/decouple piston • Aspirate • Empty completely The volume table on the instrument back- side is printed on both Ejection key... -
Page 28: Inserting The Pd-Tip
Inserting the PD-Tip • Use of the 25 ml and 50 ml PD-Tips requires the reusable adapter supplied with the PD-Tips. This is coupled to the PD-Tips with a bayonet lock, and can be detached after use. • PD-Tips are disposables. Push the Swing out the locking/... -
Page 29: Setting The Volume
Setting the Volume S are listed in tables. The possible dispensing volumes of the HandyStep ® These are found beneath the transparent clip on the backside of the instrument. There are 9 half-integral stroke setting positions, from 1 to 5. Look for the desired dispensing volume (Volume) in the table. -
Page 30: Filling The Pd-Tip
Filling the PD-Tip Aspirating Liquid Note: We recomend that a new PD tip has to be primed before use. For this, fill the tip at a minimum with the liquid and then empty it again. Small air bubbles in the area of the piston after priming do not affect the results. -
Page 31: Repetitive Dispensing
Repetitive Dispensing Dispensing Operation Check the volume setting once again. (Compare with the settings in the volume table.) Wipe off any liquid adhering to the outside of the PD-Tip orifice with a lint-free tissue. Place the orifice of the PD-Tip against the wall of the vessel. -
Page 32: Ejecting The Pd-Tip
Ejecting the PD-Tip Operation S over a vessel. Hold the HandyStep ® Empty the PD-Tip by pushing the locking/filling lever to its lower stop. Swing out the locking/filling lever (the piston will then be decoupled). Hold the HandyStep S over the ®... -
Page 33: Checking The Volume
Checking the Volume Depending on use, we recommend that gravimetric testing of the instru- ment be carried out every 3-12 months. This time frame should be adjusted to individual requirements. Gravimetric volume testing according to DIN EN ISO 8655-5 is performed as follows: Preparation of the instrument Fitting tip. - Page 34 *) = Calculation of accuracy (A%) and variation coefficient (CV%): A% and CV% are calculated according to the formulas for statistical control. Note: Testing instructions (SOPs) and a demo version of the EASYCAL calibration software are available for download at www.brand.de.
-
Page 35: Accuracy Table
Accuracy Table Technical Data PD-Tips II from BRAND, 20 °C 'Ex' PD-Tip Volume ± % < < – – size range (µl) Stroke setting Stroke setting of nominal volume of nominal volume 0.1 ml 0.5 ml 10 - 1.0 ml 20 - 100 1.25 ml... -
Page 36: Servicing · Cleaning · Uv Sterilization
In case this happens, let the instrument be opened and cleaned by an autho- rized service center, or send it back to BRAND. The rack mount is provided with an adhesive strip for mounting. It can be used without the strip in the... -
Page 37: Ordering Information · Accessories
Ordering Information · Accessories HandyStep ® pack of 1, 1 shelf/rack mount, Shelf/rack mount 3 PD-Tips II (0.1 ml, 1 ml, 10 ml). pack of 1. Cat. No. 7051 10 Cat. No. 7051 30 PD-Tips II (Positive Displacement Tips) Capacity Pack of non sterile BIO-CERT... -
Page 38: Troubleshooting
Troubleshooting Problem Possible cause Corrective action PD-Tip piston Locking/filling lever First press the ejection cannot be locked is not pushed down key and remove the after the PD-Tip completely and is not PD-Tip, then push the has been inserted. swung out. locking/filling lever all the way down and swing it out completely. -
Page 39: Repairs
– Complete the “Declaration on Absence of Health Hazards” and send the instrument to the manufacturer or supplier. Ask your supplier or manufac- turer for the form. The form can also be downloaded from www.brand.de. In the U.S. and Canada: –... -
Page 40: Contact Addresses
Contact addresses BRAND GMBH + CO KG Otto-Schott-Straße 25 97877 Wertheim (Germany) Tel.: +49 9342 808-0 Fax: +49 9342 808-98000 E-Mail: info@brand.de www.brand.de USA and Canada: BrandTech Scientific, Inc. ® 11 Bokum Road Essex, CT 06426-1506 (USA) Tel.: +1-860-767 2562 Fax: +1-860-767 2563 www.brandtech.com... -
Page 41: Calibration Service
Service. Just send in the instruments to be calibrated, accompanied by an indication of which kind of calibration you wish. Your instruments will be returned within a few days together with a test report (BRAND Calibration Service) or with a DAkkS Calibration Certificate. For further information, please contact your dealer or BRAND. -
Page 42: Warranty Information
Warranty We shall not be liable for the consequences of improper handling, use, servicing, operating or unauthorized repairs of the instrument or the consequences of normal wear and tear especially of wearing parts such as pistons, seals, valves and the breakage of glass as well as the failure to follow the instructions of the operating manual. - Page 43 Table des matières Page Règles de sécurité Fonction et limites d'emploi Eléments de fonction et de commande Emboîter la pointe DD tip Réglage du volume Remplissage de la pointe DD tip Distribution répétitive Ejection de la pointe DD tip Contrôle du volume Table de précision Entretien ·...
-
Page 45: Règles De Sécurité
Règles de sécurité A lire attentivement! Cet appareil peut être utilisé avec des matériaux dangereux ou en relation avec des appareillages ou procédés dangereux. Le livret mode d'emploi n'a pas pour but d‘exposer tous les problèmes de sécurité pouvant en résulter. -
Page 46: Fonction Et Limites D'emploi
Fonction et limites d'emploi S est un distributeur à répétition pour une distribution Le HandyStep ® répétitive facile de milieux de façon rapide et simple. Grâce à la combi- naison de la taille de pointe DD tip utilisée et du réglage sur la roue de réglage de la course, des volumes de 2 µl à... -
Page 47: Eléments De Fonction Et De Commande
Eléments de fonction et de commande Tableau des volumes Au dos sous Indication de la course clip transparent (Nombre = mm par course) Roue de réglage de la course Levier de distribution (Position de démarrage) Anse de maintien Poignée Levier de blocage/ remplissage •... -
Page 48: Emboîter La Pointe Dd Tip
Emboîter la pointe DD tip • Pour l'utilisation des pointes DD tip 25 ml et 50 ml, il faut l'adaptateur réutilisable fourni avec les pointes. Ce dernier est rattaché aux pointes DD tip au moyen d'une fermeture à baïonnette et peut être desserré après l'utilisation. -
Page 49: Réglage Du Volume
Réglage du volume S sont indiqués dans Les volumes de distribution possibles du HandyStep ® des tableaux. Ils se trouvent sous le clip transparent sur le dos de l'appareil. Le réglage de la course compte 9 positions en demi-nombres de 1 à 5. Rechercher le volume de distribution souhaité... -
Page 50: Remplissage De La Pointe Dd Tip
Remplissage de la pointe DD tip Aspiration de milieu Remarque: Nous conseillons d’évacuer l’air des pointes DD-tip neuves avant utilisation. Pour cela, remplir la pointe avec une très petite quantité de liquide puis la vider. Les petites bulles d’air présentes au niveau du piston après l’évacuation de l’air n’ont aucun impact sur le résultat. -
Page 51: Distribution Répétitive
Distribution répétitif Opération de distribution Vérifier encore une fois le réglage du volume. (Comparer les réglages avec le tableau de volumes!) Essuyer le liquide attaché à l'extérieur de la pointe DD tip avec de la cellu- lose sans fibres. Appuyer l’orifice de la pointe DD tip contre la paroi intérieure du récipient. -
Page 52: Ejection De La Pointe Dd Tip
Ejection de la pointe DD tip Manipulation S au-dessus d’un Tenir le HandyStep ® récipient. Vider la pointe DD tip en poussant le levier de blocage/remplissage jusqu’à la butée inférieure. Tourner le levier de blocage/remplis- sage vers l'avant (le piston est alors découplé). -
Page 53: Contrôle Du Volume
Contrôle du volume Selon l'utilisation, nous recommandons l'exécution d'un contrôle gravi- métrique du volume de l'appareil tous les 3-12 mois. Ce cycle doit être adapté en fonction des exigences individuelles. Le contrôle gravimé- trique du volume selon DIN EN ISO 8655-5 se déroule selon les étapes suivantes: Préparation de l'appareil Pose de la pointe. - Page 54 E% et CV% seront calculés selon les formules utilisés pour le contrôle statistique de qualité. Remarque: Des instructions de contrôle (SOPs) et une version de démonstration du logiciel de calibrage EASYCAL ™ 4.0 peuvent être téléchargées sur le site www.brand.de.
- Page 55 Table de précision Données techniques Pointes DD tips II de BRAND, 20 °C 'Ex' Pointe DD tips Gamme ± % < < – – Capacité de volume Course ajustée Course ajustée (µl) de volume nominal de volume nominal 0,1 ml...
-
Page 56: Entretien · Nettoyage · Désinfection Aux Rayons Uv
à BRAND. Le support pour étagère est équipé d'un ruban adhésif pour le montage. Sans le ruban, il peut être posé... -
Page 57: Données De Commande · Accessoires
Données de commande · Accessoires HandyStep ® emballage standard 1 unité, 1 support pour étagère, 3 pointes Support pour étagère DD tips II (0,1 ml, 1 ml, 10 ml). emballage standard 1 unité. Réf. Réf. 7051 10 7051 30 Pointes DD tips II (pointes de précision pour distribution) Capacité... -
Page 58: Dérangement - Que Faire
Dérangement – que faire? Dérangement Cause possible Que faire? Après la mise en Le levier de blocage/ En premier actionner place de la pointe DD remplissage n'est pas la touche d'éjection et tip, le piston de la complètement en bas enlever la pointe DD tip, pointe DD tip ne peut et n'est pas tourné... -
Page 59: Réparation
– Remplir l’»Attestation de Décontamination» et la retourner avec l’appareil au fabricant ou au fournisseur. Demander le formulaire au fournisseur ou au fabricant ou bien en téléchargement gratuit sous www.brand.de. Aux États-Unis et au Canada: – Veuillez contacter BrandTech Scientific, Inc. pour demander les condi- tions de retour de l’appareil avant de le renvoyer au service après-... -
Page 60: Adresses De Contact
Adresses de contact BRAND GMBH + CO KG Otto-Schott-Straße 25 97877 Wertheim (Germany) Tel.: +49 9342 808-0 Fax: +49 9342 808-98000 E-Mail: info@brand.de www.brand.de États-Unis et Canada: BrandTech Scientific, Inc. ® 11 Bokum Road Essex, CT 06426-1506 (USA) Tel.: +1-860-767 2562 Fax: +1-860-767 2563 www.brandtech.com... -
Page 61: Service De Calibration
Les instructions de contrôle détaillés sont disponibles en téléchargement gratuit sur www.brand.de ou www.brandtech.com. BRAND vous offre également la possibilité de faire calibrer vos instru- ments par notre service de calibration ou par le laboratoire de calibration DAkkS de BRAND. Envoyer simplement les appareils à calibrer et indi- quer, quelle sorte de calibration vous désirez. -
Page 62: Garantie
Garantie Nous déclinons toute responsabilité en cas de conséquences d'un traite- ment, d'une utilisation, d'un entretien et d'une manipulation incorrecte, d'une réparation non-autorisée de l'appareil ou d'une usure normale, notamment des pièces d'usure, telles que les pistons, les joints d'étan- chéité, les soupapes et de rupture de pièces en verre. - Page 63 Contenido Página Normas de seguridad Función y limitaciones de empleo Elementos funcionales y operativos Colocación de la punta PD Ajuste de volumen Llenado de la punta PD Dosificación repetitiva Expulsar la punta PD Controlar el volumen Tabla de precisión Mantenimiento · Limpieza · Esterilización con UV 76 Referencias ·...
-
Page 65: Normas De Seguridad
Normas de seguridad ¡Rogamos lea este documento cuidadosamente! Este aparato puede entrar en contacto con instalaciones, aplicaciones o materiales peligrosos. Estas instrucciones de manejo no tienen por objeto enumerar todas las limitaciones de seguridad que pueden presentarse durante el uso. El usuario del aparato tiene responsabilidad de tomar las medidas suficientes para su seguridad y su salud, así... -
Page 66: Función Y Limitaciones De Empleo
Función y limitaciones de empleo S es un dispensador manual para fácil dosificación repe- El HandyStep ® titiva de muestras de manera rápida y sencilla. Mediante la combinación del tamaño de la punta PD utilizada y el ajuste de la carrera en la rueda de ajuste, es posible dosificar volúmenes entre 2 µl y 5 ml con máxima precisión y exactitud. -
Page 67: Elementos Funcionales Y Operativos
Elementos funcionales y operativos Tabla de volúmenes Parte posterior debajo del clip transparente Indicación de la carrera (Cifra = mm por carrera) Rueda de ajuste de carrera Palanca de dosificación (Posición inicial) Estribo para dedo Empuñadura Palanca de bloqueo/ llenado •... -
Page 68: Colocación De La Punta Pd
Colocación de la punta PD • Para utilizar las puntas PD de 25 y 50 ml se requiere el adaptador reutilizable suministrado junto con las puntas. Este se acopla a las puntas PD mediante un cierre bayoneta y después del uso puede retirar nuevamente. -
Page 69: Ajuste De Volumen
Ajuste de volumen S están indi- Los volúmenes de dosificación posibles con el HandyStep ® cados en la tabla. Estos se encuentran debajo del clip transparente en la parte posterior del aparato. El ajuste de la carrera tiene 9 posiciones de números fraccionados, de 1 a 5. Buscar en la tabla el volumen a dosificar deseado (Volume). -
Page 70: Llenado De La Punta Pd
Llenado de la punta PD Aspiración de muestra Nota: Recomendamos utilizar una punta PD nueva, BRAND recomienda purgarla. Para ello, llene mínimamente la punta con el líquido y luego vacíela. Después de la purga, la presencia de pequeñas burbujas de aire en el área del émbolo no influye en el resultado. -
Page 71: Dosificación Repetitiva
Dosificación repetitiva Proceso de dosificación Verificar nuevamente el ajuste de volumen. (Comparar los ajustes con la tabla de volúmenes.) Limpiar el líquido adherido exterior- mente al orificio de la punta PD con un paño suave exento de pelusas. Colocar el orificio de la punta PD tocando la pared interior del reci- piente. -
Page 72: Expulsar La Punta Pd
Expulsar de la punta PD Manejo S sobre un Mantener el HandyStep ® recipiente. Vaciar la punta PD desplazando la palanca de bloqueo/llenado hasta el tope inferior. Girar la palanca de bloqueo/llenado hacia adelante (esto producirá el desacople del émbolo). S por Mantener el HandyStep ®... -
Page 73: Controlar El Volumen
Controlar el volumen Dependiendo de la aplicación, recomendamos realizar un control gravi- métrico de volumen del aparato cada 3 a 12 meses. La periodicidad debe adaptarse a los requisitos individuales. El control gravimétrico de volumen según DIN EN ISO 8655-5 se realiza en tres pasos: Preparación del aparato Este control se puede realizar con una punta PD de cualquier capaci- dad, habitualmente se utiliza la punta PD de 5 ml. - Page 74 *) = Cálculo de la exactitud (E%) y el coeficiente de variación (CV%): E% y CV% se calculan según las fórmulas de control estadístico de calidad. Nota: Bajo www.brand.de se encuentran instrucciones de ensayo disponibles, como así también una versión del programa de calibración ™ EASYCAL...
-
Page 75: Tabla De Precisión
Tabla de precisión Datos técnicos Puntas PD II de BRAND, 20 °C 'Ex' punta PD Gama de ± % < < – – volumen ajuste (µl) Carrera ajustada Carrera ajustada de volumen nominal de volumen nominal 0,1 ml 0,5 ml... -
Page 76: Mantenimiento · Limpieza · Esterilización Con Uv
No obstante, si ingresara líquido, hacer abrir y limpiar el aparato por un centro de servicio autorizado, o enviarlo a BRAND. El soporte de estante está provisto de una tira adhesiva para su monta- je. Sin la tira, puede utilizárselo en el soporte de mesa séxtuple de la... -
Page 77: Referencias · Accesorios
Referencias · Accesorios HandyStep ® 1 unidad por embalaje, 1 soporte de estante, 3 puntas PD II (0,1 ml, Soporte de estante 1 ml, 10 ml). 1 unidad por embalaje. Ref. 7051 10 Ref. 7051 30 Puntas PD II (puntas de desplazamente directo) Capacidad unidades por sin esterilizar... -
Page 78: Qué Hacer En Caso De Avería
¿Qué hacer en caso de avería? Avería Causa probable ¿Qué hacer? No se puede La palanca de bloqueo/ En primer lugar accionar la bloquear el émbolo llenado no está total- tecla de expulsión y retirar la de la punta PD mente deslizada hacia punta PD, después empujar después de haber... -
Page 79: Reparación
– Rellenar la “Declaración sobre la ausencia de riesgos para la salud” y enviarla con el aparato al fabricante o al distribuidor. Pedir el formulario al proveedor o al fabricante, o se encuentran bajo www.brand.de para un download. En los EE.UU. y Canadá: –... -
Page 80: Direcciones De Contacto
Direcciones de contacto BRAND GMBH + CO KG Otto-Schott-Straße 25 97877 Wertheim (Germany) Tel.: +49 9342 808-0 Fax: +49 9342 808-98000 E-Mail: info@brand.de www.brand.de EE. UU. y Canadá: BrandTech Scientific, Inc. ® 11 Bokum Road Essex, CT 06426-1506 (USA) Tel.: +1-860-767 2562 Fax: +1-860-767 2563 www.brandtech.com... -
Page 81: Servicio De Calibración
Además, BRAND le ofrece la posibilidad de calibrar sus instrumentos por medio del servicio de calibrado de BRAND o por el laboratorio de calibra- do DAkkS. Mándenos sencillamente los instrumentos a calibrar con la información qué tipo de calibrado desea. Recibirá los instrumentos con un certificado de fábrica o con un certificado de calibrado DAkkS después... -
Page 82: Garantía
Garantía No seremos responsables de las consecuencias derivadas del trato, manejo, mantenimiento, uso incorrecto o reparación no autorizada del aparato, ni de las consecuencias derivadas del desgaste normal, en especial de partes susceptibles de abrasión, tales como émbolos, juntas hermeticas, valvulas, ni de la rotura de partes de vidrio o del incumpli- miento de las instrucciones de manejo. - Page 83 Indice Pagina Norme di sicurezza Funzioni e limitazioni all'uso Elementi funzionali e di comando Inserimento del PD-Tip Regolazione del volume Riempimento del PD-Tip Dosaggio ripetitivo Espulsione del PD-Tip Controllo del volume Tabella di precisione Manutenzione · Pulizia · Sterilizzazione UV Dati per l'ordinazione ·...
-
Page 85: Norme Di Sicurezza
Norme di sicurezza Leggere con attenzione! Questo strumento può essere utilizzato con materiali, procedure e apparec- chiature pericolosi. Le istruzioni per l'uso non possono però coprire tutte le eventuali problematiche di sicurezza che possono presentarsi. È respon- sabilità dell'utilizzatore osservare adeguate prescrizioni per la sicurezza e la salute e definire prima dell'uso le opportune limitazioni. -
Page 86: Funzioni E Limitazioni All'uso
Funzioni e limiti all'uso S è una pipetta automatica a dosaggio ripetitivo per ese- HandyStep ® guire in modo veloce e facile il dosaggio ripetitivo di liquidi. Grazie alla combinazione della misura del PD-Tip usato e alla regolazione della corsa mediante l’apposita rotella, si possono dosare volumi da 2 µl a 5 ml con grande precisione e accuratezza. -
Page 87: Elementi Funzionali E Di Comando
Elementi funzionali e di comando Tabella volumi Parte posteriore dietro Indicatore corsa il fermaglio trasparente (Numero = mm per corsa) Rotella di regolazione corsa Levetta di dosaggio Posizione iniziale Manico dell'impugnatura Impugnatura Levetta di arresto/ riempimento • Arretramento/sgancio pistone La tabella sulla parte •... -
Page 88: Inserimento Del Pd-Tip
Inserimento del PD-Tip • Per l'uso dei PD-Tip da 25 ml e da 50 ml, usare l'adattatore riutilizza- bile fornito con PD-Tips. Questo viene accoppiato ai PD-Tip mediante un innesto a baionetta e può essere rimosso dopo l'uso. • PD-Tips sono articoli monouso! Spingere Far ruotare la levetta... -
Page 89: Regolazione Del Volume
Regolazione del volume desiderato S sono riportati nelle tabelle. I possibili volumi di dosaggio di HandyStep ® Esse si trovano sotto il fermaglio trasparente sulla parte posteriore dello strumento. Ci sono 9 posizioni intere e decimali di regolazione della corsa, da 1 a 5. Cercare il volume di dosaggio desiderato (Volume) nella tabella. -
Page 90: Riempimento Del Pd-Tip
Riempimento del PD-Tip Aspirazione del liquido Nota: Raccomandiamo sfiatare un PD-Tip nuovo prima dell’uso. A tale scopo, riempire il puntale con il minimo di liquido e quindi svuotarlo. Piccole bolle d’aria nella zona del pistone dopo lo sfiato non influiscono sul risultato. Spingere la levetta di arresto/riempi- mento fino al fermo inferiore. -
Page 91: Dosaggio Ripetitivo
Dosaggio ripetitivo Dosaggio Verificare ancora un volta la rego- lazione del volume. (Confrontare le impostazioni con la tabella dei volumi!) Asciugare il liquido rimasto all’esterno del puntale PD-Tip con un panno di cellulosa privo di peli. Appoggiare la punta del PD-Tip solla parete del recipiente. -
Page 92: Espulsione Del Pd-Tip
Espulsione del PD-Tip S sopra un Tenere l'HandyStep ® contenitore. Svuotare il PD-Tip spingendo la levetta di arresto/riempimento fino al fermo inferiore. Far ruotare la levetta di arresto/riem- pimento in avanti (in questo modo si sgancia il pistone). S sopra un Tenere HandyStep ®... -
Page 93: Controllo Del Volume
Controllo del volume Si consiglia, in base al tipo di impiego, una verifica gravimetrica del volume dello strumento ogni 3-12 mesi. L’intervallo va calcolato in funzione della frequenza di utilizzo. La verifica gravimetrica del volume va eseguita se- condo la norma DIN EN ISO 8655-5, secondo la seguente procedura: Preparare lo strumento Inserire il puntale. - Page 94 *) = calcolo dell’accuratezza (A%) e del coefficiente di variazione (CV%): A% e CV% vengono calcolati secondo le formule del controllo di qualità statistico. Nota: Le Procedure operative standard (SOP) e una versione demo del soft- ware di calibrazione EASYCAL ™ 4.0 possono essere scaricate da www.brand.de.
-
Page 95: Tabella Di Precisione
Tabella della precisione Caratteristiche tecniche PD-Tips II di BRAND, 20 °C 'Ex' Puntali PD-Tip Volume ± % < < – – Capacità range Posizione selettore Posizione selettore (µl) del volume nominale del volume nominale 0,1 ml 0,5 ml 10 -... -
Page 96: Manutenzione · Pulizia · Sterilizzazione Uv
Qualora ciò dovesse comunque succedere, far aprire e pulire lo strumento da un centro di assistenza autorizzato o inviarlo a BRAND. Il supporto è previsto di una striscia adesiva per il montaggio. Senza la striscia può essere inserito nel... -
Page 97: Dati Per L'ordinazione · Accessori
Dati per l'ordinazione · Accessori HandyStep ® confezione da 1, 1 supporto da parete, 3 PD-Tips II (0,1 ml, 1 ml, Supporto da parete 10 ml). confezione da 1. Codice 7051 10 Codice 7051 30 PD-Tips II (Puntali di precisione per dosatori) Capacità... -
Page 98: Individuazione E Risoluzione Dei Problemi
Individuazione e risoluzione dei problemi Difetto Causa possibile Rimedio Dopo aver inserito il La levetta di arresto/ Premere prima il tasto di PD-Tip non si riesce riempimento non è espulsione e rimuovere il a bloccare il relativo stata spinta completa- PD-Tip, quindi spingere pistone. -
Page 99: Riparazioni
I moduli possono essere richiesti al distributore o al produttore, oppure si possono scari- care dal sito www.brand.de. Dentro di Stati Uniti e del Canada: – Si invita a chiarire i requisiti per la restituzione con BrandTech Scienti- fic, Inc. -
Page 100: Indirizzi Di Contatto
Indirizzi di contatto BRAND GMBH + CO KG Otto-Schott-Straße 25 97877 Wertheim (Germany) Tel.: +49 9342 808-0 Fax: +49 9342 808-98000 E-Mail: info@brand.de www.brand.de Stati Uniti e Canada: BrandTech Scientific, Inc. ® 11 Bokum Road Essex, CT 06426-1506 (USA) Tel.: +1-860-767 2562 Fax: +1-860-767 2563 www.brandtech.com... -
Page 101: Servizio Calibrazione
Inoltre, BRAND vi offre la possibilità di far tarare i vostri strumenti dal nostro Servizio calibrazione o dal Laboratorio DAkkS BRAND. Inviateci semplicemente i vostri strumenti con le indicazioni del tipo di taratura richiesta. -
Page 102: Garanzia
Garanzia Non ci assumiamo alcuna responsabilità per le conseguenze di manipo- lazione, uso, manutenzione e impiego non corretti, o per riparazioni non autorizzate dello strumento o per le conseguenze del normale consumo, in particolare dei componenti soggetti ad usura, come ad esempio pistoni, guarnizioni e valvole, e in caso di rottura del vetro. - Page 103 目录 中 页码 文 安全指导 功能与使用限制 操作与控制原件 插入PD-吸头 设置体积 PD-吸头补液 连续分液 褪出PD-吸头 检查体积 精度表 清洁 · 服务 · UV紫外灭菌 订购信息 · 附件 故障诊断 维修 联系地址 校准服务 担保信息 丢弃...
- Page 105 安全指导 请仔细阅读下面的提示! 中 该装置可能与有害的物质、操作和设备一起使用 。本手册不可能提示这 文 些应用中所有的潜在安全风险。用户有责任在使用前咨询并建立恰当的 安全与健康规程,并决定规章限制的适用性。 1. 在使用前每位使用者必需阅读并理解本操作手册,并在使用时遵循本 手册相关指导。 2. 遵循有害防护与安全指导的通用规章;比如,穿着防护服,佩戴防护 镜与手套。 当操作具有感染性或者有危害的样品时,须遵守所有适用规章并采取 预防措施。 3. 请遵守试剂供应商的相关信息。 4. 仅移取符合本仪器“使用与操作限制”规定的液体。请遵守 “禁止操作”指导(参见106页)!如有疑问,请联络厂方或经销商。 5. 确保操作不会伤害使用者或者其他人员。避免溅撒。只能使用合适的 容器。 6. 使用有危害的样品时避免接触吸头吸嘴。 7. 绝对不可野蛮操作此仪器! 8. 请勿试图对本仪器进行任何技术改造。不要拆卸本仪器。 9. 使用前请检查仪器有无可见损伤。如果仪器在操作时有潜在的故障迹 象,请立即停止分液。咨询本手册的“故障诊断”(参见118页),有 必要的话请联系供应商。...
- Page 106 功能与使用限制 S 是用于快速,简便地连续重复分配液体的连续分液器。 HandyStep ® 使用不同量程的 PD-吸头配合档位拨轮的档数设定,可以实现从 2 µl 到 5 ml最高精确度与准确度的分液。 极限工作条件 本仪器设计用于分配样品,请遵循下列工作极限: – +15 °C 至 + 40 °C (仪器与试剂 – 其他温度请咨询) – 最大蒸汽压至 500 mbar – 粘度: 20 mPa s 对于 50 ml PD-吸头 260 mPa s 对于 5 ml PD-吸头 977 mPa s 对于...
- Page 107 操作与控制原件 量程表 中 仪器背面,在透明 文 档位指示 夹片后 数字= 每一步的mm数 档位设定拨轮 移液杆 (起始位置) 指托 握杆 锁止/补液杆 • 锁止/解除锁止活塞 • 吸液 • 完全清空 褪吸头键 仪器背面的量程选择 表为双面的。更换表 释放活塞腔(褪出吸头) 格,仅需将其从夹片 中推出,换面,再插 入即可。 吸头 正面 背面 档位设定 量程选择表...
- Page 108 插入PD-吸头 • 使用 25 ml 与 50 ml PD-吸头时需要配合附赠的可重复使用的转换接 头。接头与 PD-吸头通过一个旋扣配对,可在使用后打开。 • PD-吸头为一次性消耗品。 将锁止/补液 向下扳开锁 杆按至最低 止/补液杆。 点。 从下往上垂 将锁止/补液 直插入PD-吸 杆扳上锁住 头。 吸头。 转换接头...
- Page 109 设置体积 S 可执行的分液体积呈列于表中。在仪器背后的透明夹片下 HandyStep ® 可以找到。 中 文 从1到5档,有9个半整数的档位设定。 在表中查找希望分配的体积(Volume)。 使用档位设定拨轮拨至对应PD-吸头(Tip size)正确的档数 (Setting)。 分液步(次)数:取决于PD-吸头的量程(ml),相同的单次分液体 积可以分不同的次数(见下面例子)。分液步数越少,对应体积的准 确度越高。 举例: 希望每步分配的体积: 200 µl 使用PD-吸头的量程: 2.5 ml = 档位数设定 4 = 最多 11 次分液 5 ml = 档位数设定 2 = 最多 24 次分液 10 ml = 档位数设定 1 = 最多 49 次分液 Tip size (ml) 1.25 2.5 12.5...
- Page 110 PD-吸头补液 吸液 提示: 我们建议在使用前对新的 PD-吸头进行 排气。为此在尖部充入最少量的液体, 并再次排空。活塞区域的小气泡在排气 后将不影响结果。 将锁止/补液杆按至最低点。 将PD-吸头的吸嘴垂直浸入液体 3-10 mm深。 将锁止/补液杆慢慢拉至最高点以避 免形成气泡。 提示: 靠近活塞的气泡可以忽略,因为在最后 一步分液后有锁止机制来防止残余体积 被意外排出。...
- Page 111 连续分液 分液操作 中 文 再次检查体积设定。(与量程选择表 进行比较。) 使用无尘纸巾擦去粘附在PD-吸头吸 嘴外壁的液体。 把PD-吸头的吸嘴靠在容器器壁上。 完全按下移液杆进行分配液体,然后 任其滑回原位。 平滑均匀地分液。 重要! 第一步的分液需要舍弃!...
- Page 112 褪出PD-吸头 操作 S 对着一个容器。 将HandyStep ® 将锁止/补液杆按至最低点清空PD-吸 头。 向下扳开锁止/补液杆(活塞即被松 开)。 S 对着废物箱。按褪吸 将HandyStep ® 头按键,释放活塞腔。PD-吸头即被 弹出。 警告! 吸头的吸嘴仍可能有残留试剂。只能使 用不危及使用者及其他人员的方式褪出 PD-吸头。 提示! PD-吸头密封的严密性在反复分配高粘 度的试剂时无法保证。...
- Page 113 检查体积 根据使用情况,我们建议每隔 3-12个月对本仪器进行一次重力法测试。 测试的时间间隔可根据各自的情况进行调整。根据国际标准 DIN ISO 中 8655-5的重力法测试执行如下: 文 准备仪器 安装吸头。测试可使用各种量程的PD-吸头。当然,通常使用5 ml的 吸头进行测试。 执行测试 S 的档位数设定在 5 (10%量程)。 a) 将HandyStep ® b) 将PD-吸头垂直浸入测试液体补液。 c) 舍弃第一步排液;其作用仅仅用于内部机构对准。 d) 将称量容器(包含一小部分去离子水)置于天平上并将天平调 零。 e) 将第二步液体排入容器。以一个固定的速率按下移液杆并保持。 然后将吸头的吸嘴在器壁上滑动约10 mm 左右将粘附液体擦入容 器。 f) 在测试记录上记录称量值。 g) 重复步骤 D 至 F 10 次。 (对于第...
- Page 114 V – V 100 s A% = · 100 CV% = = 标称体积 标准偏差 Σ (x – x ) s = Z · n – 1 *) = 计算准确度(A %) 与偏差系数 (CV %): A %与CV %根据统计学控制 公式计算。 提示: 4.0的试用版可在 测试指导(SOP)与校准软件EASYCAL www.brand.de下载。...
- Page 115 精度表 技术数据 中 文 使用BRAND PD-吸头 II ,20 °C 'Ex' 体积范围 PD-吸头 ± % < < – – 量程 (µl) 档数设定 档数设定 标称量程 标称量程 0.1 ml 0.5 ml 10 - 1.0 ml 20 - 100 1.25 ml 25 - 125 2.5 ml...
- Page 116 清洁与服务 S 经过出厂校准并无需特殊保养。 HandyStep ® 本仪器不可拆卸! 如遇到外部污染,我们建议使用水或异丙醇擦拭仪器。 UV 紫外灭菌 该仪器可耐受通常的紫外灭菌灯照 射。UV紫外照射可能导致一些颜色 改变。 重要! 避免液体浸入仪器内部。 如发生这种情况,保持仪器开启状态 并请授权服务中心进行清洁,或寄回 BRAND进行清洁。 挂架带有背胶方便安装。无需背胶 S 的旋 即可安装于 Transferpette ® 转移液器架上。...
- Page 117 订购信息 · 附件 HandyStep ® 挂架 1个/包,1个挂架,3个PD-吸头 II 中 1个/包。 (0.1 ml, 1 ml, 10 ml)。 文 货号 货号 7051 10 7051 30 PD-吸头 II (外置活塞吸头) 量程 包装规格 未灭菌 BIO-CERT ® 货号 货号 0,1 ml 7057 00 7057 30 0,5 ml 7057 02 7057 32 1,0 ml...
- Page 118 故障诊断 问题 可能的原因 应对方法 锁止/补液杆未压至底 首先按褪吸头键褪出吸 PD-吸头插入后活塞 部并且没有扳开。 头,然后将锁止/补液杆 无法锁止。 按到底并完全扳开。 非指定分液体积。 档位拨轮未至正确位 确认档位拨轮正确进入 置。 档位。 PD-吸头活塞下的气 PD-吸头泄漏。 更换PD-吸头。 泡变大。 PD-吸头泄漏。 准确度A与偏差系数 更换PD-吸头。 CV超出容差范围。 分液吸头移动困难。 更换PD-吸头或使用更 顺畅的分液吸头。 移液杆未完全并均匀地 均匀地将移液杆按至 按下。 底部。 第一步液体未被舍弃。 舍弃第一步液体。 完全按下锁止/补液杆并 PD-吸头在完全清空 PD-吸头插入不恰当。 将其扳开。 后无法释放。...
- Page 119 维修 仪器送修 中 文 重要! 未经同意运输有毒害的物品是违反联邦法律的。 – 请仔细完整地清洁仪器并去除污染。 – 必须附上故障与使用试剂的准确描述。 如果缺失使用试剂的相关信 息,仪器将不能得到维修。 – 运输费用与风险由发送者承担。 除美国与加拿大外: – 填写"无健康危害申明"并发给您的供应商或生产商。向您的供应商或 生产商索要此表格。此表格可在 www.brand.de下载。 在美国与加拿大: – 在寄回仪器之前联系 BrandTech Scientific, Inc. 获取返修的授权号码。 – 仅接受寄回清洁的并去除污染的仪器,必须附上返修授权号码并粘贴 在外包装显眼的位置,寄回返修授权号码对应的地址。...
- Page 120 联系地址 BRAND GMBH + CO KG Otto-Schott-Straße 25 97877 Wertheim (Germany) Tel.: +49 9342 808-0 Fax: +49 9342 808-98000 E-Mail: info@brand.de www.brand.de USA and Canada: BrandTech Scientific, Inc. ® 11 Bokum Road Essex, CT 06426-1506 (USA) Tel.: +1-860-767 2562 Fax: +1-860-767 2563 www.brandtech.com...
- Page 121 校准服务 ISO 9001 与 GLP 要求定期检查体积计量仪器。我们建议每隔3-12个 中 月进行检查。时间间隔由使用的要求决定。如使用频繁或经常具有侵 文 蚀性的试剂,间隔应该短一些。具体的测试指南可在 www.brand.de 或 www.brandtech.com下载。 BRAND 也提供厂方的校准服务或 BRAND 具有的 DAkkS 校准服务。 只需寄回需要校准的仪器与需要哪种校准服务的申请。您可在数日内重 新获得经过校准的仪器与相应的厂方校准证书或者是 DAkkS 校准 证书。需要了解更多信息,请联系您的经销商或者 BRAND。 完整的订购信息可在 www.brand.de下载(参见技术文档)。...
- Page 122 担保信息 我们不能承担由于不当拿取,使用,服务,操作或未授权的仪器维修产 生的结果,我们同样不能承担由于正常易损件如活塞,密封垫圈,阀门 的磨损或者玻璃破损而产生的结果,我们也不能承担由于不按照操作手 册指导的操作而产生的结果。我们不能承担由于进行任何操作手册未描 述的操作与使用或由于非原装配件的使用而产生的结果。 美国与加拿大 担保信息请看 www.brandtech.com. 丢弃 请遵照当地现行法律对仪器和吸头进行丢弃处理。 如有技术变更,恕不另行通知。 对于印刷或排版错误,我方不承担任何责任。...
- Page 123 HandyStep S is made in Germany under BRAND patents ® US 8,652,418; the German utility models DE 20 2010 009 747 U1 and DE 20 2010 010 942 U1 and further patent applications pending.
- Page 124 9974 63 · Printed in Germany · 5/0619/8...
Need help?
Do you have a question about the HandyStep S and is the answer not in the manual?
Questions and answers