BRAND Transferpette electronic Operating Manual
Motor diven single channel pipette
Hide thumbs
Also See for Transferpette electronic:
- Operating manual (725 pages) ,
- Operating manual (30 pages) ,
- Operating manual (233 pages)
Table of Contents
Advertisement
Quick Links
Download this manual
See also:
Operating Manual
Advertisement
Chapters
Table of Contents

Related Manuals for BRAND Transferpette electronic


Summary of Contents for BRAND Transferpette electronic
- Page 1 Transferpette ® electronic 操作手册 Operating Manual · · BRAND. For lab. For life.
-
Page 3: Table Of Contents
目录 中 页码 文 安全说明 功能与使用限制 禁止操作 操作元件 第一步 设定体积 设定吸液与排液速度 正确移液 移液程序 移液 (PIP 模式) 样品混合(PIPmix模式) 反相移液(revPIP模式) 电泳上样(GEL模式) 连续分液(DISP模式) 检查体积 准确度表 易校准(调整) 灭菌 参考运行(rEF) 保养与清洁 电池充电与更换电池 电池再生功能 故障诊断 订购信息 · 附件 · 零备件 维修和 · 联系地址 校准服务 担保信息 · 丢弃... - Page 4 安全说明 该设备可能与有害的物质、操作和设备一起使用。本手册不可能提示这些应用中所有的潜在安全风险。 用户有责任在使用前咨询并建立恰当的安全与健康规程,并决定规章限制的适用性。 请仔细阅读下列说明! 1. 所有使用者在使用该设备之前必须阅读并理解 9. 请仅使用原厂配件。切勿试图对本仪器进行任 本操作手册,并在使用过程中遵守这些说明。 何技术改造。不要对本仪器进行超过操作手册 描述范围的拆卸。 2. 遵循有害防护与安全指导的通用规章;比如, 10. 使用前请检查仪器有无可见损伤。如果仪器在 穿着防护服,佩戴防护镜与手套。 操作时有潜在的故障迹象(比如,活塞移动困 当操作具有感染性或者有危害的样品时,须遵 难,泄漏),请立即停止移液。咨询本手册的“ 守所有适用规章并采取预防措施。 故障诊断”参见31页),有必要的话请联系供应 3. 请遵守试剂供应商提供的所有安全注意事项。 商。 4. 绝不可以在有爆炸危险的环境中使用本仪器。 11. 请勿使用其他不可充电或者可充电电池替换原 不可移取易燃液体。 装电池。 5. 本仪器仅可用于液体移取,所移液体需严格符 12. 为镍氢电池充电,请仅适用原装AC电源适配 合“禁止操作”与“操作限制”的规定(参见第5 器。 页)。如有疑问,请联系厂方或者供应商。 13. AC电源适配器须防止受潮。仅可使用在本设 6. 请始终以对用户及他人均安全的方式进行操 备上。...
-
Page 5: 功能与使用限制
功能与使用限制 在正确操作过程中, 样品仅与吸头接触,不会与 Transferpette electronic 电子移液器是一款微处理 ® Transferpette electronic 接触。 ® 器控制、电池驱动活塞的移液器,采用空气活塞 中 式原理,用于移取一般密度和粘度的水相溶液。 文 使用限制 操作限制 粘稠或高粘性的液体可能会导致体积失准。移液 Transferpette -8/-12 electronic 设计用于在下列使 ® 的准确度同样可能受到温度的影响(当液体温度 用限制范围内的移液操作: 与室温的温差大于± 5 °C / 41 °F)。 – 设备和溶液的温度应为15 °C~40 °C (59 °F ~104 °F)。若使用的温度不在此范围内,请咨 询供应商。 –... -
Page 6: 操作元件
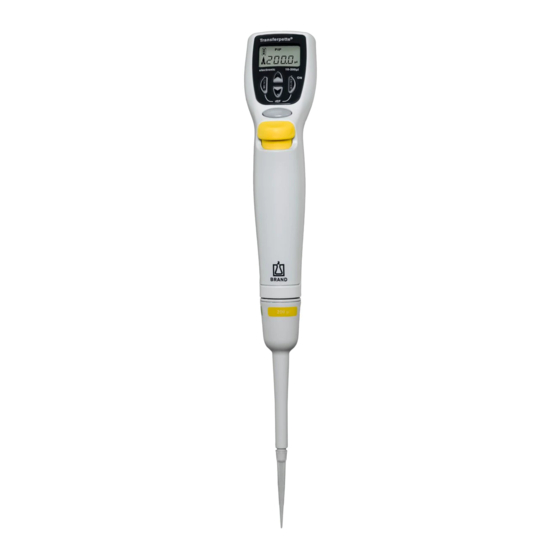
操作元件 Transferpette electronic电子移液器是一款微处理器控制、电池驱动活塞的 ® 多通道移液器,根据人体工程学进行优化,简便易用。 充电插口 显示屏 程序键 电池仓 移液控制键 吸头脱卸键 指托 Transferpette ® electronic 采用 人体工程学设计, 操 作 舒 适 。 指 托 高 握柄 度可通过一颗螺丝调 节,从而允许对手的姿 势进行微调,使操作功能 按钮更轻松。 按键功能 下半支机身 向上键 (+) Enter确认/电 选择键 源“打开”键 向下键 (-) 移液控制键 吸头锥... -
Page 7: 第一步
第一步 核对包装内容 确认您的包装内包含: Transferpette electronic 电子移液器,电 ® 中 池,AC电源适配器带充电线,硅油,本操作手册与一小包样品吸头。 文 第一次使用 Transferpette electronic ® 插入电池 a) 打开电池仓盖。 b) 确保电池上的插头与移液器的插座牢固连 接。放入电池。 c) 盖上电池仓盖。 激活设备 插入电池后,Transferpette ® electronic会自动要求进行参 考运行。按下移液控制键之 后,进行参考运行,然后可 以进行移液操作。 显示屏显示标准出厂设置 移液模式 (移液模式/PIP)和标称量 程(例如 200.0 µl)。默认的 电量提示 吸液和排液速度为最大值。 量程和速度的调节将在下面 内容中描述。 向上箭头, 代表吸液... -
Page 8: 设定体积
设定体积 Transferpette electronic的出厂量程设置为标称量程,可以快速方便地进行更改。 ® 操作步骤 操作方法 操作按钮 屏幕显示 激活量程设定 按任意一个箭头键,激活 量程选择功能。“VOL”图标 闪烁。 改变体积 减少体积 按向下箭头键(-)减少体 积。 按住箭头键不放可以加快更 改速度。‚“VOL”图标继续 – 闪烁。 增加体积 按向上箭头键(+)增加体 积。 按住箭头键不放可以加快 更改速度。“VOL”图标继续 闪烁。 确认体积设定 按 ENTER 确认键。显示屏 将显示新的体积,在这里, PIP 模式下为 102.8 µl。 重要提示: 按MENU菜单键可取消任何步骤!接着显示屏进入下一设置或返回至初始屏幕(取决于实际进行的 选择)。... -
Page 9: 设定吸液与排液速度
设定吸液与排液速度 吸液和排液速度可单独调节。调出菜单之后,将显示上次速度的设置。有五个速度级别可供选择。 中 文 操作步骤 操作方法 操作按钮 屏幕显示 设定吸液速度 调出菜单 按 MENU 菜单键一次,可调 出吸液速度菜单。“Speed” 速度图标闪烁。 更改吸液速度 按箭头键(+/-)选择需要 的速度(这个例子里选的 是,第五档)。“Speed"速度 图标继续闪烁。 – 确认速度设置 按 ENTER 确认键。显示返 回当前模式(这个例子中为 标准PIP移液模式)。 设定排液速度 调出菜单 按 MENU 菜单键两次,可调 出排液速度菜单。“Speed” 速度图标闪烁。 更改排液速度 按箭头键(+/-)选择需要 的速度(这个例子里选的 是,第二档)。“Speed”速度 图标继续闪烁。 – 确认速度设置... -
Page 10: 正确移液
正确移液 使用 Transferpette electronic ® Transferpette electronic 的出厂量程设置为标称量程,可以快速方便地进行更改。参见第 8 页。 ® 在标准移液模式下快速启动 安装吸头 请根据量程范围或颜色标识使用正确规格的吸头。确保牢固安装吸头。当使 用具有弹性吸头锥的下半支机身时,如有必要,请更换吸头脱卸套管调节 圈。 吸头为一次性物品! 吸取液体 垂直握持移液器并将吸头浸入液体2-3mm。 按移液控制键将液体吸入 吸头。显示屏上的向上的 箭头,指示正处于吸液 状态。 提示: 将吸头继续保持浸入液体约 1s,以防止吸入空气。 排出液体 吸液之后,显示屏上的箭头向下,指示进入排液状 态。 手握移液器呈 30-45° 的角度,将吸头贴在容器壁 上。 再次按移液控制键将液体 完全排出,吹出为自动执 行。将吸头贴在容器壁上擦 去残液。 退除吸头 手持移液器,将多道移液仓 悬空置于合适的处置容器上 方,然后按吸头脱卸键。... -
Page 11: 移液程序
移液程序 中 文 页码 标准移液 模式 标准程序。移液器吸取之前设定体积的液体,然 后排出液体。 样品混合 PIPmix 模式 该程序可完成样品混合操作。反复吸取和排 出样品。 反相移液 revPIP 模式 专为移取高黏度、高蒸汽压或易发泡液体所设 计的程序。 凝胶电泳上样 模式 该程序模式可用于凝胶电泳上样。以较高的 可调速度吸取预定义体积的样品,然后缓慢 排出样品。 连续分液 DISP 模式 连续等分移液的程序。可将所吸取的液体分 次排出。 Transferpette electronic 1000 µl 与 5000 µl 不提供 GEL 模式。 ®... -
Page 12: Pip 模式
PIP模式 程序 · 设置与使用 标准程序。移液器吸取之前设定体积的液体,然后排出液体。 体积和速度调整参见第 8 和 9 页。 操作步骤 操作方法 操作按钮 屏幕显示 调出菜单 按MENU菜单键三次,可调 出模式选择菜单。“Mode” 模式图标闪烁。 选择PIP模式 使用任意一个箭头键滚动模 式菜单,直至 “PIP”选项出 现。 “Mode”模式图标继续 闪烁。 确认PIP模式 按 ENTER 确认键。 显示屏将显示 “blo” 吹出, 指示进行吹出操作。 准备移液 按移液控制键,执行吹出动 作(移液器在任何程序确认 后都自动要求执行吹出,确 保吸头中没有上轮操作的残 液),活塞移动至起始位置。 显示屏上的箭头显示向上 (吸液)。... - Page 13 PIP模式 中 文 操作步骤 操作方法 操作按钮 屏幕显示 排出液体 按移液控制键排出液体。显 示屏上的箭头在吸取完液体 后指示自动转为向下 (排液)。 吹出? 无需进行操作! 在PIP模式下进行移液时, 将自动执行吹出功能。 手动调出吹出功能 如有必要,可随时手动调出吹出功能。 调出吹出功能 按 ENTER(回车)键。显示 屏将显示 “blo”吹出。 进行吹出 按移液控制键进行吹出。执 行完毕后显示屏将返回至选 定移液模式的初始界面。 提示: 执行吹出时,移液器活塞将移动至最低位置。使用者必须确保安全排出所有残 留液体。 若按住移液控制键不放,活塞将保持在最低位置,从而可避免意外吸入液体。 释放此键,活塞将返回至起始位置。...
-
Page 14: Pipmix 模式
PIPmix模式 程序 · 设置与使用 该程序可完成样品混合操作。反复吸取和排出样品。 体积和速度调整参见第8和9页。 操作步骤 操作方法 操作按钮 屏幕显示 调出菜单 按 MENU 菜单键三次,可调 出模式选择菜单。“Mode” 模式图标闪烁。 选择 PIPmix模式 使用任意一个箭头键滚动模 式菜单,直至 “PIP”选项出 现。 “Mode”模式图标继续 闪烁。 确认 PIPmix模式 按 ENTER 确认键。 显示屏将显示 “blo”吹出, 指示进行吹出操作。 准备移液 按移液控制键,执行吹出动 作(移液器在任何程序确认 后都自动要求执行吹出,确 保吸头中没有上轮操作的残 液),活塞移动至起始位 置。显示屏上的箭头显示向 上(吸液)。 吸取液体... - Page 15 PIPmix-模式 中 文 操作步骤 操作方法 操作按钮 屏幕显示 在PIPmix模式下排 按住移液控制键不放,即可 液 吸取或排出液体。显示屏显 示向上箭头表示吸液 ,向下 箭头表示排液,并显示吸排 液的轮数。 按住移液控制键不放 结束移液 按移液控制键,将排出液体 并启动吹出功能。 排出残留液体(吹出)之 后,显示将返回至起始界 面。 提示: 显示屏可显示的吸排液的轮数最多为19轮。...
-
Page 16: Revpip 模式
revPIP模式 程序 · 设置与使用 专为移取高黏度、高蒸汽压或易发泡液体所设计的程序。 体积和速度调整参见第 8 和 9 页。 操作步骤 操作方法 操作按钮 屏幕显示 调出菜单 按 MENU 菜单键三次,可调 出模式选择菜单。“Mode” 模式图标闪烁。 选择revPIP模式 使用任意一个箭头键滚动模 式菜单,直至 “revPIP”选项 出现。 “Mode”模式图标继 续闪烁。 确认revPIP模式 按 ENTER 确认键。 显示屏将显示 “blo”吹出, 指示进行吹出操作。 准备移液 按移液控制键,执行吹出动 作(移液器在任何程序确 认后都自动要求执行吹出, 确保吸头中没有上轮操作的 残液),活塞移动至起始位 置。显示屏上的箭头显示向... - Page 17 revPIP模式 中 文 操作步骤 操作方法 操作按钮 屏幕显示 在revPIP模式下重复 再次按移液控制键,设定体 吸液 积的液体将被吸入吸头。之 后再次按移液控制键,此体 积的液体将被再次排出,以 此循环… 启动吹出功能 在最后一次移液操作之后按 ENTER(回车)键。显示屏 将显示 “blo”吹出。 按移液控制键执行吹出。残 留液体被排出。 结束移液 排出残留液体(吹出)之 后,显示将返回至起始界 面。...
-
Page 18: Gel 模式
胶电泳(GEL)模式 程序 · 设置与使用 该程序模式可用于凝胶电泳上样。以较高的可调速度吸取预定义体积的样品,然后缓慢排出样品。 体积和速度调整参见第8和9页。 操作步骤 操作方法 操作按钮 屏幕显示 调出菜单 按 MENU 菜单键三次,可调 出模式选择菜单。“Mode” 模式图标闪烁。 选择GEL模式 使用任意一个箭头键滚动 模式菜单,直至 “GEL”选项 出现。 “Mode”模式图标继续闪烁。 确认GEL模式 按 ENTER 确认键。 显示屏将显示 “blo”吹出, 指示进行吹出操作。 准备移液 按移液控制键,执行吹出动 作(移液器在任何程序确 认后都自动要求执行吹出, 确保吸头中没有上轮操作的 残液),活塞移动至起始位 置。显示屏上的箭头显示向 上(吸液)。 吸取液体 按移液控制键。设定体积的 液体将被吸入吸头。 吸取超量的液体... - Page 19 胶电泳(GEL)模式 中 文 操作步骤 操作方法 操作按钮 屏幕显示 在GEL模式下排液 按移液控制键排液。显示屏 此时显示一个菱形图标。液 体被非常缓慢地排出。 中断排液 如需中断排液,再次按移液 控制键。 显示屏显示已排 出体积。 启动吹出功能 在最后一次移液操作之后按 ENTER确认键。显示屏将显 示 “blo”吹出。 按移液控制键执行吹出。残 留液体被排出。 结束移液 排出残留液体(吹出)之 后,显示将返回至起始界 面。 提示: 在GEL模式下,排液速度非常缓慢,以防止样品产生涡流。为确保达到最佳的凝胶上样效果,GEL模式 的排液速度为固定值。此速度远远小于1档速度设定,并且不可单独进行选择。...
-
Page 20: Disp 模式
DISP模式 程序 · 设置与使用 连续等分移液的程序。可将所吸取的液体分次排出。 速度调整参见第9页。 操作步骤 操作方法 操作按钮 屏幕显示 调出菜单 按 MENU 菜单键三次,可调 出模式选择菜单。“Mode” 模式图标闪烁。 选择DISP模式 使用任意一个箭头键滚动模 式菜单,直至 “DISP”选项 出现。 “Mode”模式图标继续闪烁。 确认DISP模式 按 ENTER 确认键。 显示屏将显示 “blo”吹出, 指示进行吹出操作。 准备分液 按移液控制键,执行吹出动 作(移液器在任何程序确认 后都自动要求执行吹出,确 保吸头中没有上轮操作的残 液),活塞移动至起始位 置。显示屏上的箭头显示向 上(吸液)。 设定单次分液体积 按箭头键(+/-)设定体 积。按住箭头键不放可以加 快更改速度。“VOL”闪烁。... - Page 21 DISP模式 中 文 操作步骤 操作方法 操作按钮 屏幕显示 设定分液次数 按箭头键(+/-)设定分液 次数。“Steps”次数图标继 续闪烁。 – 确认分液次数 按 ENTER 确认键。显示屏 将显示设定的分液次数。 吸取液体 按移液控制键吸取液体。 连续分配液体 每按一次移液控制键,将执 行一次分液。显示屏上的箭 头向下(排液)。显示屏显示 剩余的分液次数。 启动吹出功能 在最后一次移液操作之后按 ENTER 确认键。显示屏将显 示 “blo”吹出。 按移液控制键执行吹出。残 留液体被排出。(也可参见 19页) 结束移液 排出残留液体(吹出)之 后,显示将返回至起始界 面。...
-
Page 22: 检查体积
检查体积 根据使用情况,建议每 3 至 12 个月对移液器进行一次校准。根据具体情况可对检查周期时间 进行调整。 依据DIN EN ISO 8655第6部分,使用重力法按下列步骤对移液器进行测试。 设定标称量程 将体积设定为移液器的最大量程。 操作步骤参见第 8 页。 调整移液器状态 在测试之前,安装一个移液器吸头,并用测试液体(蒸馏水)进行五次吸液 和排液操作。然后弃置该吸头。 执行测试 a) 安装一个新的吸头,并用测试液体吸液一次润洗吸头。 b) 吸取测试液体,并将其移取至称量容器内。 c) 用分析天平称量所移取液体。 请遵守天平制造商的操作说明。 d) 在考虑温度条件的情况下计算体积。 e) 建议每个通道在三个量程段(标称量程的100 %、50 %、10 % 体积) 进行 3-10 次移液和称量操作 ,以便进行统计分析。 计算(标称量程 ) = 称量结果... -
Page 23: 准确度表
0.5 - 0.02 0.5 - 20 - 200 2 - 200 100 - 1000 1000 50 - 1000 500 - 5000 5000 500 - 5000 2500 * A = 准确度, CV = 偏差系数 提示 测试指南(SOP)和 EASYCAL 4.0 校准软件的试用版可在 www.brand.de 上下载。 ™... - Page 24 Easy Calibration 易校准 调整 Transferpette electronic ® 校准模式,“CAL” 调整 在标准移液(PIP)模式下,将移液器设定为标称量程(例如标称量程为 100 µl 的移液器设置为200 µl)或者特定的测试体积。 操作步骤见第 8 与 12 页。假设:在标称量程时实测体积为 201.3 µl。 操作步骤 操作方法 操作按钮 屏幕显示 调出CAL模式 按住 MENU 菜单键(> 3 s) ,直至 “CAL”图标出现。 >3s 显示屏显示 “off” 关闭字 样。“CAL”图标闪烁。 激活CAL模式 按任意一个箭头键,激活 CAL 模式。显示由...
- Page 25 Easy Calibration 易校准 中 恢复出厂默认设置 文 “CAL”固定显示表示移液器进行过调整。 操作步骤 操作方法 操作按钮 屏幕显示 调出CAL模式 按住 MENU 菜单键(> 3 s), 直至 “CAL”图标出现。 >3s 显示屏显示“ON”开启字 样。“CAL”图标闪烁。 关闭CAL模式 按任意一个箭头键。显示 由 “on” 开启变为 “off” 关 闭。“CAL”图标继续闪烁。 恢复出厂默认设置 按 ENTER 确认键。CAL图 标消失。现在,移液器量程 已恢复至出厂默认设置。 重要提示: 对 Transferpette electronic 进行调整时,进行了体积补偿 ,这 ®...
-
Page 26: 参考运行 (Ref)
灭菌 依据 DIN EN 285,可在121 °C (250 °F)、2 bar (30 psi) 条件下对 Transferpette electronic 的多道移液仓(P) (图中 ® 高亮部分) 进行至少 15 分钟的高温高压湿热灭菌。 注意: 握柄部分不可高温灭菌! 退掉吸头。 从握柄上旋下下半支机身。 对整个多道移液仓(无需进一步拆卸 )进行高温高 压灭菌。 等待多道移液仓完全冷却并干燥。 将多道移液仓旋入手柄。 执行参考运行(rEF)。 提示: 灭菌效果须由使用者判断。 采用真空灭菌最可靠。建议使用灭菌袋 。 若经常对多道移液仓进行高温高压灭菌 ,应使用随附的 硅油润滑活塞,以使其移动顺滑。 参考运行 (rEF) 每次将多道移液仓重新装上握柄之后,必须进行手动参考运行。参... -
Page 27: 保养与清洁
保养与清洁 量程至1000 µl 的Transferpette electronic 移液器 ® 为确保功能正常,请定期保养和清洁 Transferpette ® electronic移液器。 中 文 保养 检查吸头锥是否损坏。 检查活塞和密封圈是否被污染或损坏。 对仪器的活塞密封性进行测试。我们推荐使用 BRAND 的 移液器泄漏检测仪 PLT 进行测试。 或者:进行此测试 时,安装一个系头,并吸取样品。将仪器垂直握持,让样 品在吸头内保持约10 s。若在吸头吸嘴有液滴形成,请参 见31页的故障诊断。 拆卸和清洗 从握杆上拧下移液器下半支(S)。 轻轻向下拉,断开移液器下半支与握柄的磁力连 接。 从移液器下半支机身上旋下吸头脱卸套管上部(A)。 将活塞套管(D)从吸头脱卸套管(E)拉出。 拧松活塞单元(B)。 提示: 活塞保持与活塞单元(B)连 接。 取下带弹簧的密封圈(C)。 用温和的肥皂液或异丙醇清洁所示部件,然后用蒸 馏水冲洗。... - Page 28 保养与清洁 electronic 500-5000 µl 移液器 Transferpette ® 为确保功能正常,请定期保养和清洁 Transferpette ® electronic移液器。 保养 检查吸头锥是否损坏。 检查活塞和密封圈是否被污染或损坏。 对仪器的活塞密封性进行测试。我们推荐使用 BRAND 的移液器泄漏检测仪 PLT 进行测试。 或者:进行此测试 时,安装一个系头,并吸取样品。将仪器垂直握持,让 样品在吸头内保持约 10 s。若在吸头吸嘴有液滴形成, 请参见31页的故障诊断。 拆卸和清洗 同时按下半支机身两侧的压扣(J),取下吸头 脱卸套管(G’) 从握杆上拧下活塞套管(H+I)。 轻轻向下拉,断开移液器下半支与握柄的磁力连 接。移去吸头脱卸套管的上部(G)。 从活塞套管(I)上旋开并取出活塞单元(H) 从活塞单元上取下O形环密封圈,并进行清洗。 提示: 请勿进一步拆卸活塞单元(H)! 用温和的肥皂液或异丙醇清洗活塞单元(H)和活 塞套管(I),然后用蒸馏水冲洗。 将所有部件晾干(最高温度 120 °C/ 248 °F)并...
-
Page 29: 电池充电与更换电池
电池充电与更换电池 充满电的电池可连续使用约8小时 (所移取液体的粘度和密度接近于水)。 中 重要提示! 文 充电之前,请确保AC电源适配器与实验室的电压相符合。请勿在有爆炸风险的环境下充电。仅可在 Transferpette electronic 内为电池充电。 ® 电池充电 a) 将AC电源适配器的充电插头插入Transfer- pette electronic 顶部的插口;充电将自动 ® 开始。 b) 充电过程中,电量指示进度条将从底部到顶 部反复变化。电池充满电时,显示屏上的电 量指示将停止运动。 充电过程中进行移液? 充电过程中,您可以继续使用 Transferpette electronic。若电池完全放电, ® 在达到安全操作需要的最小电量之前会有几分钟时间无法操作。 提示: 最后一次操作的设置储存在移液器的存储器内 。即便电池完全放电或者更换电池之后,这 些设置仍然保存着。 更换电池 a) 打开电池仓盖。取出电池,将电池插头从插 座中小心拔出。 b) 将新电池上的插头与移液器的插座牢固连 接。放入电池。 c) 盖上并关闭电池仓盖。... -
Page 30: 电池再生功能
电池充电与更换电池 插入电池后的显示 a) 插入电池之后,电量指示为满格但外框闪 烁,此时,移液器不识别充电状态。 充电 3.5 小时之后 - 安全为电池充满电 - 电 量指示图标框外框停止闪烁。 提示: 插入电池之后,充电时间始终应为 3.5 个小时! 几次完全充电之后电池电量将达到最优。 电池再生功能 (恢复功能) electronic 具有再生功能(恢复功能)。该程序可 为延长电池使用寿命并优化电池性能,Transferpette ® 对电池实现受控式完全放电和充电。为优化电池性能,应定期运行再生功能。 执行再生功能 a) 将AC电源适配器的充电插头插入Transferpette ® electronic 顶部的插口。 b) 按住向下箭头键并保持 > 3 s。 放电过程中,电量指示进度 条将从顶部到底部反复运动。 1x >3s c) 受控放电(最多3小时)之后,充电过程... -
Page 31: 故障诊断
故障诊断 若发生错误,显示屏将显示“Err”和错误编号。 按 ENTER 确认键,移液器将做出反应。 按 ENTER 确认 键,移液器尝试重启。 因此,将自动请求执行参考运行 中 文 问题 错误提示 可能的原因 处理措施 移液器无反应 在不进行操作的情况下为 电池没电或者故障 电池充电至少 5 分钟,然 后仅可在插入充电器的情 况下进行操作,直至电池 充满电。如有必要,更换 电池。 电子元件故障 将仪器送修。 电子元件故障 将仪器送修。 移液器无反应 移液器无反应 不可预知的程序错误 按ENTER确认键确认错 误。移液器将重新初始 化 。 移液器无反应 电池未插入 插入电池。 电池失效... -
Page 32: 订购信息 · 附件 · 零备件
7053 91 适合英国/爱尔兰地区使用 (230V/50-60 Hz) 适合美国/日本地区使用 (110V/50-60 Hz) 7053 52 7053 92 适合美国/日本地区使用(110V/50-60 Hz) 适合澳大利亚地区使用 (240V/50-60 Hz) 7053 53 7053 93 适合澳大利亚地区使用(240V/50-60 Hz) 电池 BRAND高品质移液器吸头,未灭菌,PP材质 electronic 用于Transferpette ® 量程 包装规格 货号 货号 7055 00 散装 硅油 0.1 - 20 µl... - Page 33 订购信息 · 附件 · 零备件 量程至1000 µl 的Transferpette electronic移液器的配件。 ® 中 文 各仪器的部件会因标称量程不同而略有不同。(图中所示 为 Transferpette electronic 20-200 µl 移液器的零备件) ® 吸头脱卸套 带弹簧的密 带吸头脱卸弹 吸头脱卸 整个机身下 活塞单元 管上部 封圈 簧的活塞套管 套管下部 半支 量程 0.5 - 10 µl 7055 10 7055 18 –...
- Page 34 – 填写"无健康危害申明"并发给您的供应商或生产商。向您的供应商或生产 商索要此表格。此表格可在www.brand.de下载。 在美国与加拿大: – 在寄回仪器之前联系BrandTech Scientific, Inc. 获取返修的授权号码。 – 仅接受寄回清洁的并去除污染的仪器,必须附上返修授权号码并粘贴在外 包装显眼的位置,寄回返修授权号码对应的地址。 联系地址 BRAND GMBH + CO KG India: Otto-Schott-Straße 25 BRAND Scientific Equipment Pvt. Ltd. 97877 Wertheim (Germany) 303, 3rd Floor, ‘C‘ Wing, Delphi Hiranandani Business Park, Powai Tel.: +49 9342 808-0...
- Page 35 校准服务 · 担保信息 校准服务 中 文 ISO 9001与GLP要求定期检查体积计量仪器。我们建议每隔3-12个 月进行检查。时间间隔由使用的要求决定。如使用频繁或经常具有侵 蚀性的试剂,间隔应该短一些。具体的测试指南可在www.brand.de 或 www.brandtech.com下载。 BRAND也提供厂方的校准服务或BRAND具有的DAkkS 校准服务。 只需寄回需要校准的仪器与需要哪种校准服务的申请。您可在数日内重 新获得经过校准的仪器与相应的厂方校准证书或者是DAkkS校准 证书。需要了解更多信息,请联系您的经销商或者BRAND。 完整的订购信息可在www.brand.de下载(参见技术文档)。 担保信息 我们不能承担由于不当拿取,使用,服务,操作或未授权的仪器维修产 生的结果,我们同样不能承担由于正常易损件如活塞,密封垫圈,阀门 的磨损或者玻璃破损而产生的结果,我们也不能承担由于不按照操作手 册指导的操作而产生的结果。我们不能承担由于进行任何操作手册未描 述的操作与使用或由于非原装配件的使用而产生的结果。 美国与加拿大 担保信息请看www.brandtech.com.
- Page 36 丢弃 右侧的标志代表电池与电子设备在寿命终结后须分别处置(不可与生活垃圾 混合)。 - 根据欧洲议会 2002/96/EC 指令和 2003 年1月 27 日的废弃电子电气设 备指令(WEEE),电子设备应依据国家有关处置法规进行处 置。 - 电池含有对环境与人体健康有害的物质。因此根据根据欧 洲议会 2006 年 9 月 6 日关于废弃电池的2002/96/EC 指 令,电池应依据国家有关处置法规进行处置。只有在完全放 电之后才能丢弃。 警告! 不可短路电池进行放电! 如有技术变更,恕不另行通知。 对于印刷或排版错误,我方不承担任何责任。...
- Page 37 Table of Contents Page Safety Instructions Functions and Limitations of Use Operating Exclusions Operating Elements The First Steps Setting the Volume Setting the Aspiration and Discharging Speed Correct Pipetting The Pipetting Programs PIP mode PIPmix mode revPIP mode Electrophoresis (GEL) mode DISP mode Checking the Volume Accuracy Table...
-
Page 38: Safety Instructions
Safety Instructions This instrument may sometimes be used with hazardous materials, operations, and equipment. It is be- yond the scope of this manual to address all of the potential safety problems associated with its use in such applications. It is the responsibility of the user of this pipette to consult and establish appropriate safety and health practices and determine the applicability of regulatory limitations prior to use. -
Page 39: Functions And Limitations Of Use
Functions and Limitations of Use The Transferpette electronic is a microprocessor- When the instrument is used properly, the sample ® controlled, battery-operated piston-stroke pipette only comes into contact with the tip and not with which uses the air-displacement principle for the the Transferpette electronic. -
Page 40: Operating Elements
Operating Elements The Transferpette electronic is a microprocessor-con- ® trolled, battery-operated, piston-stroke pipette, which has been optimized for ergonomic operation and ease of use. Charging jack Display Program keys Battery compartment Pipetting key Tip ejection key Finger rest The Transferpette ®... -
Page 41: The First Steps
The First Steps Is everything in the package? Confirm that your package includes: Transferpette electronic pipette, battery, ® AC adapter with battery charging cable, silicone oil, operating manual and one bag with sample pipette tips. Initializing the Transferpette electronic ® Insert the a) Open the cover of the battery compartment. -
Page 42: Setting The Volume
Setting the Volume The volume for the Transferpette electronic is set at the factory to the nominal volume of ® the instrument and can be changed quickly and easily. What to do How to do it Keys to press Display readout Activate volume Press one of the arrow keys setting... -
Page 43: Setting The Aspiration And Discharging Speed
Setting the Aspiration and Discharging Speed The aspiration and discharging speeds can be individually adjusted. When the menu is called up, the last speed setting is shown. Five speed levels are available. What to do How to do it Keys to press Display readout Setting the aspiration speed Bring up the menu... -
Page 44: Correct Pipetting
Correct Pipetting with the Transferpette electronic ® The volume is set at the factory to the nominal volume for the Transferpette electronic and ® can be changed quickly and easily. See page 42. Quick start in the standard pipetting mode Attach the tip Use the correct tip according to the volume range or the color code. -
Page 45: The Pipetting Programs
The Pipetting Programs Page Normal Pipetting Mode Standard program. A previously set volume is aspirated into the pipette tip and then discharged. Mixing of Samples PIPmix Mode Program for mixing liquids. The sample is repeatedly aspirated and discharged. Reverse Pipetting revPIP Mode Program especially for pipetting liquids with a... -
Page 46: Pip Mode
PIP Mode The Programs · Settings and Use The standard program – a previously set volume is aspirated and then discharged. Volume and speed adjustments are described on pages 42 and 43. What to do How to do it Keys to press Display readout Bring up the menu Press the MENU key three... - Page 47 PIP Mode What to do How to do it Keys to press Display readout Discharge liquid Press the pipetting key once to discharge the liquid. The arrow in the display points downwards (discharge). Start blow-out? No action required! When pipetting in the PIP mode the blow-out function is performed automati- cally.
-
Page 48: Pipmix Mode
PIPmix Mode The Programs · Settings and Use Program for mixing of liquids. The sample is repeatedly aspirated and discharged. Volume and speed adjustments are described on pages 42 and 43. What to do How to do it Keys to press Display readout Bring up the menu Press the MENU key three... - Page 49 PIPmix Mode What to do How to do it Keys to press Display readout Discharge liquid Press and hold the pipet- in the PIPmix ting key and the liquid is mode alternately aspirated and dis- charged. The display shows the up arrow for aspiration and the down arrow for discharging and the number press and hold...
-
Page 50: Revpip Mode
revPIP Mode The Programs · Settings and Use Program for pipetting of liquids with high viscosity, vapor pressure or that tend to foam. Volume and speed adjustments are described on pages 42 and 43. What to do How to do it Keys to press Display readout Bring up the menu... - Page 51 revPIP Mode What to do How to do it Keys to press Display readout Repeat aspiration Press the pipetting key of liquid in revPIP again and the set volume is mode aspirated into the tip. Press the pipetting key again and the volume is discharged again, and so on...
-
Page 52: Electrophoresis (Gel) Mode
Electrophoresis (GEL) Mode The Programs · Settings and Use Program for loading electrophoresis gels. A predefined sample volume is aspirated into the pipette tip with high adjustable speed and then slowly discharged. Volume and speed adjustment is described on pages 42 and 43. What to do How to do it Keys to press... - Page 53 Electrophoresis (GEL) Mode What to do How to do it Keys to press Display readout Discharge liquid Press the pipetting key once in the GEL mode to discharge the liquid. The rhombus is shown in the dis- play. The liquid is discharged very slowly.
-
Page 54: Disp Mode
DISP Mode The Programs · Settings and Use Program for discharging an aspirated liquid in pre-defined steps. The volume aspirated will be a little bit more than actually needed. Speed adjustment is described on page 43. What to do How to do it Keys to press Display readout Bring up the menu... - Page 55 DISP Mode What to do How to do it Keys to press Display readout Set the number Press the arrow keys (+/-) of steps to set the number of steps. ‚Steps‘ continues to blink. – Confirm the Press the ENTER key. number of steps The display now shows the number of steps that has...
-
Page 56: Checking The Volume
Checking the Volume Depending on use, we recommend inspection of the instrument every 3 to 12 months. The cycle can, however, be adjusted to individual requirements. The gravimetric testing of the pipette volume is performed according to the following steps and is in accordance with DIN EN ISO 8655, Part 6. -
Page 57: Accuracy Table
50 - 1000 500 - 5000 5000 500 - 5000 2500 * A = Accuracy, CV = Coefficient of Variation Note: ™ Testing instructions (SOPs) and a demo version of the EASYCAL 4.0 calibration software are available for download at www.brand.de. -
Page 58: Easy Calibration (Adjustment)
Easy Calibration Adjustment of the Transferpette electronic ® The calibration mode ‚CAL‘ Adjustment The instrument should be set to either the nominal volume (for example 200 µl for a 200 µl pipette) or a specific test volume, in the standard pipetting mode (PIP). - Page 59 Easy Calibration Revert to factory default settings The continually displayed CAL symbol refers to a previously made adjustment. What to do How to do it Keys to press Display readout Bring up the CAL Press and hold the MENU mode key (>...
-
Page 60: Autoclaving
Autoclaving The pipette shaft of the Transferpette electronic (highlighted in ® picture) can be autoclaved at 121 °C (250 °F) at a pressure of 2 bar (30 psi) with a holding time of at least 15 minutes according to DIN EN 285. Attention: The handgrip can not be autoclaved! Eject the pipette tip. -
Page 61: Servicing And Cleaning
Inspect the piston and seal for contamination and damage. Test the sealing of the instrument. We recommend using the BRAND leak testing instrument PLT unit. Alternatively: to do this aspirate a sample, and then hold the instrument in a vertical position for about 10 sec. If a drop forms at the tip orifice, see the troubleshooting guide on page 65. - Page 62 Inspect the piston and seal for contamination and damage. Test the sealing of the instrument. We recommend using the BRAND leak testing instrument PLT unit. Alterna- tively: to do this aspirate a sample, and then hold the instrument in a vertical position for about 10 sec. If a drop forms at the tip orifice, see the troubleshooting guide on page 65.
-
Page 63: Charging And Replacing The Battery
Charging and Replacing the Battery A fully charged battery allows approx. eight hours (equals more than 4000 pipetting cycles) of continuous pipetting of liquids with a viscosity and density similar to water. Important! Before charging the battery ensure that the AC adapter is compatible with the line voltage in the labora- tory. -
Page 64: Battery Regeneration Function
Charging and Replacing the Battery Battery display after a) After the battery is inserted, the display inserting a battery shows the full capacity indicator with a blinking frame, the instrument does not recognize the charging status right now. After 3.5 hours of charging time – safe full charging of the battery –... -
Page 65: Troubleshooting
Troubleshooting If an error occurs, the instrument display shows "Err" and the error number is also shown. The instrument will now only react to the ENTER key. Pressing the ENTER key will attempt to restart the instrument. Therefore, a reference run is automatically requested. Problem Error message Possible cause... -
Page 66: Ordering Information · Accessories · Spare Parts
UK/Ireland 7053 91 for USA/Japan 7053 52 for USA/Japan 7053 92 for Australia 7053 53 for Australia 7053 93 Quality pipette tips from BRAND, Replacement battery non-sterile, PP for Transferpette electronic ® Volume Pack of Cat. No. Cat. No. - Page 67 Ordering Information · Accessories · Spare Parts Spare parts for Transferpette electronic up to 1000 µl ® Parts will differ slightly depending on nominal volume of instrument. (Fig. shows spare parts for Transferpette ® electronic 20 - 200 µl). Upper part Spring Shaft with Lower part...
-
Page 68: Repairs · Contact Addresses
– Complete the “Declaration on Absence of Health Hazards” and send the instru- ment to the manufacturer or supplier. Ask your supplier or manufacturer for the form. The form can also be downloaded from www.brand.de. In the U.S. and Canada: –... -
Page 69: Calibration Service
Just send in the instruments to be calibrated, accompanied by an indication of which kind of calibration you wish. Your instruments will be returned within a few days together with a test report (BRAND Calibration Service) or with a DAkkS Calibration Certificate. For further information, please contact your dealer or BRAND. -
Page 70: Warranty Information · Disposal
Disposal The adjoining symbol means that storage batteries and electronic devices must be disposed of separately from household trash (mixed municipal waste) at the end of their service life. - According to the Directive 2002/96/EC of the European Parliament and of the Council on Waste Electrical and Electronic Equipment (WEEE) of 27 January 2003, elec- tronic equipment requires disposal according to the relevant national disposal regulations. - Page 73 Transferpette electronic 为德国制造,并受 BRAND 专利 US6,627,160B2, US7,344,680B2, US 7,344,680B2, EP1136127B1, EP1329262B1 ® 与 EP1329262B1保护。...
- Page 74 普兰德公司网址:www.brand.cn.com · 电子邮件地址:info@brand.cn.com BRAND GMBH + CO KG · Postfach 11 55 · 97861 Wertheim · Germany Tel.: +49 9342 808-0 · Fax: +49 9342 808-98000 · E-Mail: info@brand.de · Internet: www.brand.de 9974 35 · Printed in Germany · 0117/5...
Need help?
Do you have a question about the Transferpette electronic and is the answer not in the manual?
Questions and answers