BRAND Transferpette electronic Operating Manual
Micropipettes
Hide thumbs
Also See for Transferpette electronic:
- Operating manual (725 pages) ,
- Operating manual (74 pages) ,
- Operating manual (176 pages)

Related Manuals for BRAND Transferpette electronic


Summary of Contents for BRAND Transferpette electronic
- Page 1 Gebrauchsanleitung | Operating manual | Mode d'emploi | Instrucciones de manejo | Istruzione | 操作 手册 Transferpette® electronic Mikroliterpipetten | Micropipettes...
- Page 2 Impressum BRAND GMBH + CO KG Otto-Schott-Str. 25 97877 Wertheim (Germany) T +49 9342 808 0 F +49 9342 808 98000 info@brand.de www.brand.de Languages Gebrauchsanleitung............2 Operating manual ............45 Mode d'emploi ..............82 Instrucciones de manejo ..........120 Istruzione............... 158 操作手册...
- Page 5 Declaration of conformity – China RoHS 2 BRAND GMBH + CO KG has made reasonable efforts to ensure that hazardous materials and substances may not be used in BRAND products. In order to determine the concentration of hazardous substances in all homogeneous materials of the subassemblies, a “Product Conformity Assessment”...
- Page 6 (PBB), and polybrominated diphenyl ethers (PBDE). Products manufactured by BRAND may enter into further devices or can be used together with other appli- ances. With these third party products and appliances in particular, please note the EFUP labeled on these products.
-
Page 7: Table Of Contents
Inhaltsverzeichnis 1 Einleitung ........... 8 11 Störung – Was tun? .......35 Lieferumfang ........12 Kennzeichnung auf dem Produkt ...36 Gebrauchsbestimmung ....13 Bestellinformationen ......37 2 Sicherheitsbestimmungen ....9 13.1 Bestelldaten........37 Allgemeine Sicherheitsbestimmun- 13.2 Ersatzteile .......... 39 gen ............ 13.3 Weiteres Zubehör ...... -
Page 8: Einleitung
1 Einleitung 1.1 Lieferumfang Transferpette® electronic , ein Akku, das Netzteil mit Akku-Ladekabel, Silikonfett, diese Gebrauchsan- leitung sowie 1 Musterbeutel Pipettenspitzen. 1.2 Gebrauchsbestimmung • Lesen Sie die Gebrauchsanleitung vor dem ersten Gebrauch sorgfältig durch. • Die Gebrauchsanleitung ist Teil des Geräts und muss leicht zugänglich aufbewahrt werden. •... -
Page 9: Sicherheitsbestimmungen
2 Sicherheitsbestimmungen 2 Sicherheitsbestimmungen 2.1 Allgemeine Sicherheitsbestimmungen Bitte unbedingt sorgfältig durchlesen! Das Laborgerät Transferpette® electronic kann in Kombination mit gefährlichen Materialien, Arbeits- vorgängen und Apparaturen verwendet werden. Die Gebrauchsanleitung kann jedoch nicht alle Si- cherheitsprobleme aufzeigen, die hierbei eventuell auftreten. Es liegt in der Verantwortung des An- wenders, die Einhaltung der Sicherheits- und Gesundheitsvorschriften sicherzustellen und die ent- sprechenden Einschränkungen vor Gebrauch festzulegen. -
Page 10: Verwendungszweck
2 Sicherheitsbestimmungen 2.2 Verwendungszweck Bei der Transferpette® electronic handelt es sich um eine mikroprozessorgesteuerte, akkubetriebene Kolbenhubpipette nach dem Luftpolsterprinzip zum Pipettieren von wässrigen Lösungen mittlerer Dichte und Viskosität. Bei richtiger Handhabung des Gerätes kommt die zu dosierende Probe nur mit der Spitze und nicht mit der Transferpette®... -
Page 11: Funktions- Und Bedienelemente
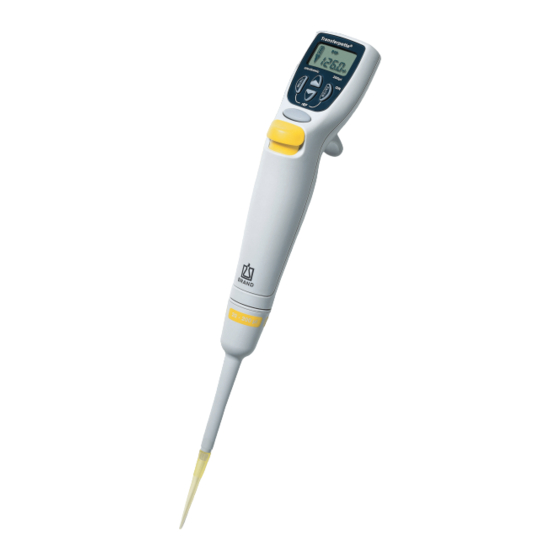
3 Funktions- und Bedienelemente 3 Funktions- und Bedienelemente Ladesteckerbuchse Akkufach Menüauswahltaste Pfeiltaste (+) Enter-Taste: Eingabebestätigung/Power Pfeiltaste (-) 'On'*) Fingerbügel Griffteil Pipettenschaft Spitzenaufnahmekonus Spitzenabwurftaste Pipettiertaste Display *) Das Gerät wird durch Betätigung der Enter-Taste eingeschaltet! Durch anschließendes Drücken der Pipettiertaste ist das Gerät pipettierbereit. Die Transferpette®... -
Page 12: Inbetriebnahme
4 Inbetriebnahme 4 Inbetriebnahme 4.1 Erste Schritte 1. Akku einsetzen Deckel des Akku-Fachs öffnen. Akku einlegen. Darauf achten, dass der Stecker des Ak- kus fest in die Buchse im Gerät eingesteckt wird. Deckel des Akku-Fachs wieder einsetzen und schließen. 2. Gerät aktivieren Die Transferpette®... -
Page 13: Volumen Einstellen
4 Inbetriebnahme 4.2 Volumen einstellen Das Volumen ist werkseitig auf das jeweilige Nennvolumen der Transferpette® electronic eingestellt und kann einfach und schnell individuell verändert werden. Durch Drücken einer der Pfeiltasten erfolgt die direkte Auswahl eines Volumens. ð 'VOL' blinkt. Durch Drücken der Pfeiltaste (-) wird das Volumen ver- ringert. -
Page 14: Pièces Détachées
4 Inbetriebnahme Aufsauggeschwindigkeit einstellen Durch einmaliges, kurzes Drücken der Menü-Taste ge- langt man in das Menü Aufsauggeschwindigkeit. ð 'Speed' blinkt. Durch Betätigung der Pfeiltasten (+/-) wird die Ge- schwindigkeitsstufe ausgewählt (z. B. Stufe 5). ð 'Speed' blinkt weiterhin. Enter-Taste drücken. ð... -
Page 15: Pipettieren
4 Inbetriebnahme Enter-Taste drücken. ð Das Display kehrt wieder in den Grundzustand des je- weils eingestellten Modus zurück, hier z. B. das Display des standardmäßigen PIP-Modus. 4.4 Pipettieren Das Volumen ist werkseitig auf das jeweilige Nennvolumen der Transferpette® electronic eingestellt und kann einfach und schnell individuell verändert werden, siehe Volumen einstellen, S. 13. -
Page 16: Blow-Out Direkt Auslösen
4 Inbetriebnahme Spitze abwerfen: Pipettenschaft über einen geeigneten Entsorgungsbehälter halten und die Spitzenabwurftas- te niederdrücken. HINWEIS Die ISO 8655 schreibt vor, die Pipettenspitze vor dem eigent- lichen Pipettiervorgang einmal mit der Probenflüssigkeit vor- zuspülen. 4.5 Blow-out direkt auslösen Der Überhub (Blow-out) kann, wenn nötig, jederzeit auch direkt ausgelöst werden. Blow-out-Funktion aufrufen: Enter-Taste drücken. -
Page 17: Pipettierprogramme
5 Pipettierprogramme 5 Pipettierprogramme Tätigkeit Bezeichnung Info Normales Pipet- PIP-Modus, siehe PIP-Mo- Standard-Programm. tieren dus, S. 17 Ein zuvor eingegebenes Volumen wird aufgenommen und wieder abgegeben Pipettieren bei GEL-Modus, siehe Elektro- Programm zum Beladen von Elektrophorese-Gelen. Ein Elektrophorese phorese(GEL)-Mo- vorher definiertes Probenvolumen wird bei hoher, ver- dus, S. 22 änderbarer Geschwindigkeit aufgesaugt und langsam wieder abgegeben. - Page 18 5 Pipettierprogramme PIP-Modus einstellen: Mit einer der Pfeiltasten die Modi durchscrollen bis 'PIP' erscheint. ð 'Mode' blinkt weiterhin. PIP-Modus bestätigen: Enter-Taste drücken. ð Das Display zeigt jetzt 'blo' für blow-out (Überhub). Vorbereiten zum Pipettieren: Durch einmaliges Drücken der Pipettiertaste wird der Kolben in seine Startposition gefahren.
-
Page 19: Pipmix-Modus
5 Pipettierprogramme 5.2 PIPmix-Modus Programm zum Durchmischen von Flüssigkeiten. Probe wird ständig wiederholt aufgesaugt und abge- geben. Volumen- und Geschwindigkeitseinstellung, siehe Volumen einstellen, S. 13 und Aufsaug- und Abga- begeschwindigkeit einstellen, S. 13. Menü-Selektion aufrufen: Durch dreimaliges Drücken der Menü-Taste gelangt man in die Programm-Selekti- ð... -
Page 20: Revpip-Modus
5 Pipettierprogramme Flüssigkeit im PIPmix-Modus abgeben: Durch anhalten- des Drücken der Pipettiertaste erfolgt die wechselnde Abgabe und Aufnahme der Flüssigkeit. Im Display wer- den abwechselnd das Pfeilsymbol für Aufnahme bzw. Gedrückt halten Abgabe, sowie die Anzahl der Zyklen angezeigt. Pipettieren beenden: Durch einmaliges Drücken der Pi- pettiertaste wird die Flüssigkeit abgegeben und der Überhub (blow-out) ausgelöst. - Page 21 5 Pipettierprogramme Vorbereiten zum Pipettieren: Durch einmaliges Drücken der Pipettiertaste wird der Kolben in seine Startposition gefahren. ð Der Pfeil im Display zeigt nach oben (Aufnahme). Flüssigkeit aufsaugen: Zum Aufsaugen der Flüssigkeit Pipettiertaste einmal drücken. HINWEIS Beim Aufsaugen der Flüssigkeit wird etwas mehr Volumen aufgenommen als eingestellt! Flüssigkeit im revPIP-Modus abgeben: Zur Abgabe ein- mal Pipettiertaste drücken.
-
Page 22: Elektrophorese(Gel)-Modus
5 Pipettierprogramme 5.4 Elektrophorese(GEL)-Modus Programm zum Beladen von Elektrophorese-Gelen. Ein vorher definiertes Probenvolumen wird bei hoher, veränderbarer Geschwindigkeit aufgesaugt und langsam wieder abgegeben. Volumen- und Geschwindigkeitseinstellung, siehe Volumen einstellen, S. 13 und Aufsaug- und Abga- begeschwindigkeit einstellen, S. 13. Menü-Selektion aufrufen: Durch dreimaliges Drücken der Menü-Taste gelangt man in die Programm-Selekti- ð... -
Page 23: Disp-Modus
5 Pipettierprogramme Um mehr Flüssigkeit aufzusaugen als eingestellt (bis max. 110% des Nennvolumens), Pipettiertaste während des Aufsaugvorgangs so lange gedrückt halten, bis ge- Gedrückt wünschtes Volumen aufgesaugt wurde. halten ð Im Display wird eine Raute angezeigt. Flüssigkeit im GEL-Modus abgeben: Zur Abgabe einmal Pipettiertaste kurz drücken. - Page 24 5 Pipettierprogramme Menü-Selektion aufrufen: Durch dreimaliges Drücken der Menü-Taste gelangt man in die Programm-Selekti- ð 'Mode' blinkt. DISP-Modus einstellen: Mit einer der Pfeiltasten die Mo- di durchscrollen bis 'DISP' erscheint. ð 'Mode' blinkt weiterhin. DISP-Modus bestätigen: Enter-Taste drücken. ð Das Display zeigt jetzt 'blo' für blow-out (Überhub). Vorbereiten zum Pipettieren: Durch einmaliges Drucken der Pipettiertaste wird der Kolben in seine Startposition gefahren.
- Page 25 5 Pipettierprogramme Anzahl Steps einstellen: Durch Drücken der Pfeiltaste (+/-) wird die Anzahl der Steps eingestellt. ð 'steps' blinkt weiterhin. Anzahl Steps bestätigen: Enter-Taste drücken. ð Das Display zeigt die eingestellte Anzahl der Steps an. Flüssigkeit aufsaugen: Zum Aufsaugen der Flüssigkeit Pipettiertaste einmal drücken.
-
Page 26: Volumen Kontrollieren
6 Volumen kontrollieren 6 Volumen kontrollieren Wir empfehlen, je nach Einsatz, alle 3-12 Monate eine Prüfung des Gerätes. Der Zyklus kann aber den individuellen Anforderungen angepasst werden. Die gravimetrische Volumenprüfung der Pipette er- folgt durch nachfolgende Schritte und entspricht der DIN EN ISO 8655, Teil 6. 1. -
Page 27: Genauigkeitstabelle
7 Genauigkeitstabelle *) = Berechnung von Richtigkeit (R%) und Variationskoeffizient (VK%): R% und VK% werden nach den Formeln der statistischen Qualitätskontrolle berechnet. HINWEIS Prüfanweisungen (SOPs) stehen unter www.brand.de als Download zur Verfügung. 7 Genauigkeitstabelle Volumen- Teil- R* ≤ ± % VK* ≤... -
Page 28: Justieren - Easy Calibration
8 Justieren – Easy Calibration 8 Justieren – Easy Calibration 8.1 Justieren Das Nennvolumen bzw. zu prüfendes Volumen ist eingestellt, Standard-Modus Pipettieren (PIP), z. B. 200,0 µl (Vorgehens- weise siehe PIP-Modus, S. 17). Bsp.: Volumen entsprechend Volumenprüfung 201,3 µl. CAL-Modus aufrufen: Durch anhaltendes Drücken (> 3 Sek.) der Menü-Taste wird der CAL-Modus aufgerufen. -
Page 29: Werkseinstellung Wiederherstellen
8 Justieren – Easy Calibration Volumen bestätigen: Enter-Taste drücken. ð Im Display erscheint das geprüfte und korrigierte Volu- men. ð Das jetzt ständig angezeigte CAL-Symbol belegt die vor- genommene Justierung. 8.2 Werkseinstellung wiederherstellen Das ständig angezeigte CAL-Symbol im Display weist auf eine vorgenommene Justierung hin. -
Page 30: Desinfektion/Autoklavieren
9 Desinfektion/Autoklavieren 9 Desinfektion/Autoklavieren 9.1 UV-Entkeimung Das Gerät ist gegen die übliche Belastung einer UV-Entkeimungslampe beständig. Infolge der UV-Ein- wirkung ist eine Farbänderung möglich. 9.2 Autoklavieren Der hervorgehoben abgebildete Teil der Transferpette® elec- tronic ist autoklavierbar bei 121 °C (250 °F), 2 bar und einer Haltezeit von mindestens 15 Minuten nach DIN EN 285. -
Page 31: Wartung
Kolben und Dichtung auf Verschmutzung untersuchen. Dichtheit des Geräts prüfen. Wir empfehlen das BRAND Dichtheitsprüfgerät BRAND PLT unit zu verwenden. Alternativ dazu Probe aufsaugen, Gerät ca. 10 s senkrecht halten. Falls sich an der Pipettenspitze ein Tropfen bildet, siehe Störung – Was tun?. -
Page 32: Demontage/Reinigung (250 Μl - 5000 Μl)
Kolben und Dichtung auf Verschmutzung untersuchen. Dichtheit des Geräts prüfen. Wir empfehlen das BRAND Dichtheitsprüfgerät BRAND PLT unit zu verwenden. Alternativ dazu Probe aufsaugen, Gerät ca. 10 s senkrecht halten. Falls sich an der Pipettenspitze ein Tropfen bildet, siehe Störung – Was tun?. -
Page 33: Akku Laden Und Auswechseln
10 Wartung PE-Filter PE-Filter für Transferpette® electronic, 250-5000µl: Der hydrophobe PE-Filter dient als Schutz vor dem Eindringen von Flüssigkeit in die Pipette. Filter wechseln, sobald der Filter benetzt oder verschmutzt ist. Flachen Gegenstand, z. B. Schraubendreher verwenden. Filter vorsichtig herausziehen, ohne den Spitzenkonus zu beschädigen. Vor dem Autoklavieren Filter entfernen! Das Gerät kann auch ohne Filter betrieben werden. -
Page 34: Akku-Regenerationsfunktion
10 Wartung Stecker von neuem Akku in die Steckbuchse stecken und neuen Akku einlegen. Deckel des Akku-Fachs wieder einsetzen und verschlie- ßen. Bei längeren Betriebspausen Akku aus dem Gerät entfernen. Batterieanzeige nach erneutem Einsetzen eines Akkus Nach dem Einsetzen eines Akkus erscheint im Display die vol- le Kapazitätsanzeige mit blinkendem Rahmen (das Gerät er- kennt den Ladezustand zunächst noch nicht). -
Page 35: Störung - Was Tun
11 Störung – Was tun? Untere Pfeiltaste länger als 3 s drücken. Während des Entladens laufen die Kapazitätsbalken der Batteriean- zeige ständig von oben nach unten. 1 x > 3 s Nach dem Entladen (bis 3 h) wird automatisch der Lade- vorgang (3,5 h) gestartet. - Page 36 Eichverordnung gekennzeichnet. Zeichenfolge DE-M (DE für Deutschland), eingerahmt durch ein Rechteck, sowie die beiden letzten Ziffern des Jahres, in dem die Kennzeichnung an- gebracht wurde. www.brand.de/ip Patentinformationen XXZXXXXX Seriennummer Beachten Sie die gegebenen Hinweise am Gerät, den Zubehörteilen und in der Gebrauchsanleitung.
-
Page 37: Bestellinformationen
13 Bestellinformationen 13 Bestellinformationen 13.1 Bestelldaten Transferpette® electronic Volumen 0,5-10 µl 2-20 µl 10-200 µl 50-1000 µl 250-5000 µl mit Netzteil Best.-Nr. Best.-Nr. Best.-Nr. Best.-Nr. Best.-Nr. AC 100-240 V ~50-60 Hz für Europa 705299 705300 705303 705306 705307 für UK/Irland 705309 705310 705313 705316 705317... - Page 38 Ladeständer mit Netzteil (AC 100-240 V ~50-60 Hz) für 3 Transferpette® electronic bis 1000 µl. für Europa 705390 für UK/Irland 705391 für USA/Japan 705392 für Australien 705393 Qualitätspipettenspitzen von BRAND Volumen Material Verp.-Einh. Best.-Nr. lose verpackt 0,1-20 µl 2000 732002 0,5-20 µl...
-
Page 39: Ersatzteile
13 Bestellinformationen 13.2 Ersatzteile 13.2.1 Transferpette® electronic bis 1000 µl Design und Abmessungen der Ersatzteile entsprechen dem jeweiligen Nennvolumen. (Abb. Ersatzteile ® Transferpette electronic 50-1000 µl.) A Abwerferoberteil D Schaft mit Abwerferfeder B Kolbeneinheit E Abwerferunterteil C Feder mit Dichtung S Schaft komplett Volumen 0,5-10 µl... - Page 40 13 Bestellinformationen 13.2.2 Transferpette® electronic 250 - 5000 µl G Abwerferoberteil G' Abwerferunterteil H Kolbeneinheit I Schaftunterteil S Schaft komplett Volumen G + G' 250 - 5000 µl 7299 705526 703247 705549 Gebrauchsanleitung Transferpette® electronic 997209...
-
Page 41: Weiteres Zubehör
13 Bestellinformationen 13.3 Weiteres Zubehör 13.4 Zubehör für Transferpette® electronic 10-200 µl und 50-1000 µl Wechselclips Aufsteckbare Wechselclips (Abstandshalter) und Pipettenschäfte mit flexiblem Spitzenaufnahmeko- nus ermöglichen optimale Passgenauigkeit und geringstmögliche Abwurfkräfte bei den meisten han- delsüblichen Pipettenspitzen. Volumen Verp. Einh. Best. -
Page 42: Reparatur
"Erklärung zur gesundheitlichen Unbedenklichkeit" ausfüllen und gemeinsam mit dem Gerät an Her- steller oder Händler senden. Vordrucke können beim Händler oder Hersteller angefordert werden, bzw. stehen unter www.brand.de zum Download bereit. Innerhalb der USA und Kanada Bitte klären Sie mit BrandTech Scientific, Inc. die Voraussetzungen für die Rücksendung bevor Sie das Gerät zum Service einschicken. -
Page 43: Kalibrierservice
BRAND bietet Ihnen darüber hinaus die Möglichkeit, Ihre Geräte durch unseren Werks-Kalibrierservice oder durch das BRAND-DAkkS-Labor kalibrieren zu lassen. Schicken Sie uns einfach die zu kalibrieren- den Geräte mit der Angabe, welche Art der Kalibrierung Sie wünschen. Sie erhalten die Geräte nach wenigen Tagen zusammen mit einem Prüfbericht (Werkskalibrierung) bzw. -
Page 44: Entsorgung
17 Entsorgung 17 Entsorgung Das nebenstehende Symbol bedeutet, dass Batterien/Akkus und elektronische Geräte am Ende ihrer Lebensdauer vom Hausmüll (unsortierter Siedlungsabfall) getrennt entsorgt werden müssen. Elektronische Geräte müssen gemäß der Richtlinie 2012/19/EU des europäischen Parlaments und des Rates vom 04. Juli 2012 über Elektro- und Elektronik-Altgeräte fachgerecht entsprechend den natio- nalen Entsorgungsvorschriften entsorgt werden. - Page 45 Table of contents 1 Introduction........46 10.4 Rechargeable battery regeneration function..........72 Scope of delivery......46 Terms of use ........46 11 Troubleshooting ........73 2 Safety regulations ....... 47 12 Product markings .........74 General safety regulations....47 Intended use........47 13 Order Information ........75 Limitations of use......
-
Page 46: Introduction
1 Introduction 1.1 Scope of delivery Transferpette® electronic ,a rechargeable battery, the power adapter with battery charging cable, sili- cone grease, this operating manual, and one sample bag of pipette tips. 1.2 Terms of use • Carefully read the operating manual before using the device for the first time. •... -
Page 47: Safety Regulations
2 Safety regulations 2 Safety regulations 2.1 General safety regulations Please read carefully! The instrument Transferpette® electronic can be used in combination with hazardous materials, work processes and equipment. However, the operating manual cannot cover all of the safety issues that may occur in doing so. -
Page 48: Limitations Of Use
2 Safety regulations 2.3 Limitations of use This instrument is intended for pipetting samples, within the following limitations: • Operating temperature of instrument and reagent should be between +15 °C and +40 °C (59 °F to 104 °F) (other temperatures upon request) •... -
Page 49: Functional And Operational Components
3 Functional and operational components 3 Functional and operational components Charging socket Battery compartment Menu selection key Arrow key (+) ‘Enter’ key Input confirmation/Power Arrow key (−) ‘On’*) Finger rest Handle Pipetting shaft Tip cone Tip ejection key Pipetting key Display *) The instrument is switched on by pressing the ‘Enter’... -
Page 50: Commissioning
4 Commissioning 4 Commissioning 4.1 First Steps 1. Insert rechargeable battery Open the cover of the battery compartment. Insert the rechargeable battery into the compartment. Make sure that the plug of the rechargeable battery is firmly inserted into the socket in the instrument. Replace the cover of the battery compartment and close it. -
Page 51: Set Volume
4 Commissioning 4.2 Set volume The volume is factory-set to the respective nominal volume of the Transferpette® electronic and can be easily and quickly changed individually. Pressing one of the arrow keys directly selects a vol- ume. ð ‘VOL’ flashes. Pressing the arrow key (−) decreases the volume. -
Page 52: Set The Aspiration And Dispensing Speed
4 Commissioning 4.3 Set the aspiration and dispensing speed Aspiration and dispensing speed are separately adjustable. When the menu is called up, the last speed set in each case is displayed. Five speed levels are available in each case. Set aspiration speed Pressing the menu key once briefly takes you to the as- piration speed menu. -
Page 53: Pipetting
4 Commissioning Press the arrow keys (+\−) to select the speed level (e.g. level 2). ð ‘Speed’ continues to flash. Press ‘Enter’ key. ð The display returns to the basic state of the respective set mode. Here, for example the display of the standard PIP mode. -
Page 54: Directly Trigger Blow-Out
4 Commissioning Dispense liquid: When the liquid aspiration is finished, the arrow in the display points downwards (dispensing). Place the pipette tip against the vessel wall. Hold the pipette at an angle of 30–45°. By pressing the pipetting key again, the liquid is dispensed completely with auto- matic blow-out. -
Page 55: Pipetting Programs
5 Pipetting programs 5 Pipetting programs Activity Designation Info Normal pipet- PIPmode, see PIP Standard program. ting mode, p. 55 A previously entered volume is aspirated and dispensed again Pipetting for GELmode, see Elec- Program for loading electrophoresis gels. A previously electrophoresis trophoresis (GEL) defined sample volume is aspirated at a high, variable mode, p. 60... - Page 56 5 Pipetting programs Confirm PIP mode: Press ‘Enter’ key. ð The display now shows ‘blo’ for blow-out. Preparing for pipetting: Press the pipetting key once to move the piston to its start position. ð The arrow in the display points upwards (aspiration). Aspirate liquid: Press the pipetting key once to aspirate the liquid.
-
Page 57: Pipmix Mode
5 Pipetting programs 5.2 PIPmix mode Program for mixing liquids. Sample is aspirated and dispensed repeatedly. Volume and speed setting, see Set volume, p. 51 and Set the aspiration and dispensing speed, p. 52. Call up menu selection: Pressing the menu key three times takes you to the program selection. ð... -
Page 58: Revpip Mode
5 Pipetting programs Dispense liquid in PIPmix mode: Pressing and holding the pipetting key causes the liquid to be alternately dis- pensed and aspirated. The display alternately shows the arrow symbol for aspiration or dispensing as well as Hold pressed the number of cycles. - Page 59 5 Pipetting programs Preparing for pipetting: Press the pipetting key once to move the piston to its start position. ð The arrow in the display points upwards (aspiration). Aspirate liquid: Press the pipetting key once to aspirate the liquid. NOTICE When aspirating the liquid, slightly more volume is aspirated than set.
-
Page 60: Electrophoresis (Gel) Mode
5 Pipetting programs 5.4 Electrophoresis (GEL) mode Program for loading electrophoresis gels. A previously defined sample volume is aspirated at a high, variable speed and slowly released again. Volume and speed setting, see Set volume, p. 51 and Set the aspiration and dispensing speed, p. 52. Call up menu selection: Pressing the menu key three times takes you to the program selection. -
Page 61: Disp Mode
5 Pipetting programs In order aspirate more liquid than set (up to max. 110% of the nominal volume), keep the pipetting key pressed during the aspiration process until the desired volume Hold has been aspirated. pressed ð A rhombus appears in the display. Dispense liquid in GEL mode: To dispense, briefly press the pipetting key once. - Page 62 5 Pipetting programs Call up menu selection: Pressing the menu key three times takes you to the program selection. ð ‘Mode’ flashes. Set DISP mode: Use one of the arrow keys to scroll through the modes until ‘DISP’ appears. ð ‘Mode’...
- Page 63 5 Pipetting programs Set the number of steps: Pressing the arrow key (+/-) sets the number of steps. ð ‘Steps’ continues to flash. Confirm number of steps: Press ‘Enter’ key. ð The display shows the set number of steps. Aspirate liquid: Press the pipetting key once to aspirate the liquid.
-
Page 64: Checking The Volume
6 Checking the volume 6 Checking the volume We recommend testing the device every 3 to 12 months, depending on the level of use. However, the testing cycle can be adapted to meet individual requirements. Gravimetric volume testing of the pipette is carried out according to the following steps and complies with DIN EN ISO 8655, Part 6. -
Page 65: Accuracy Table
7 Accuracy table *) = Calculation for accuracy (A%) coefficient of variation (CV%): A% and CV% are calculated using the formulas of statistical quality control. NOTICE Test instructions (SOPs) are available for download at www.brand.de . 7 Accuracy table Volume Partial A* ≤... -
Page 66: Adjustment - Easy Calibration
8 Adjustment – Easy Calibration 8 Adjustment – Easy Calibration 8.1 Adjustment The nominal volume or volume to be tested is set, standard mode Pipetting (PIP), e.g. 200.0 µl (for procedure, see PIP mode, p. 55). Ex: Volume according to volume test 201.3 µl. Bring up CAL mode: Press and hold the MENU key (>... -
Page 67: Restore Factory Setting
8 Adjustment – Easy Calibration Confirm volume: Press the Enter key. ð The display shows the tested and corrected volume. ð The CAL symbol is continuously displayed to confirm that an adjustment has been made. 8.2 Restore factory setting The CAL symbol permanently shown in the display indicates that an adjustment has been made. -
Page 68: Disinfection/Autoclaving
9 Disinfection/autoclaving 9 Disinfection/autoclaving 9.1 UV sterilization The device is resistant to normal exposure to a UV disinfection lamp. The effects of the UV exposure may cause some color change. 9.2 Autoclaving The highlighted part of Transferpette® electronic can be au- toclaved at 121°C (250 °F), 2 bar, and with a holding time of at least 15 minutes according to DIN EN 285. -
Page 69: Maintenance
Check the device for leaks. We recommend using the leak detector of BRAND, the BRAND PLT unit. As an alternative to this, aspi- rate a sample and hold the instrument vertically for approx. 10 s. If a drop forms on the pipette tip, re- fer to Troubleshooting. -
Page 70: Disassembly/Cleaning (250-5000 Μl)
Check the device for leaks. We recommend using the leak detector of BRAND, the BRAND PLT unit. As an alternative to this, aspi- rate a sample and hold the instrument vertically for approx. 10 s. If a drop forms on the pipette tip, re- fer to Troubleshooting. -
Page 71: Charge And Replace Rechargeable Battery
10 Maintenance PE filter PE filter for Transferpette® electronic, 250–5000 µl: A hydrophobic PE filter is used to prevent liquid from entering the pipette. Change the filter if it becomes wet or contaminated. Use a flat object, such as a screwdriver. Remove the filter carefully, without damaging the tip cone. -
Page 72: Rechargeable Battery Regeneration Function
10 Maintenance Replace rechargeable battery Open the cover of the battery compartment, remove the rechargeable battery, and pull the plug out of the socket. Insert the plug of the new rechargeable battery into the socket and insert the new rechargeable battery. Replace the cover of the battery compartment and close it. -
Page 73: Troubleshooting
11 Troubleshooting Carry out refresh function Insert the charging cable plug (connection) of the power adapter into the socket provided for this purpose at the top of the Transferpette® electronic . Press the lower arrow key for longer than 3 s. During discharging, the capacity bars of the battery display run continuously from top to bottom. -
Page 74: Product Markings
Calibration Act as well as the Measurement and Calibration Regula- tion. Character sequence DE-M (DE for Germany), framed by a rectangle, as well as the two last digits of the year the marking was affixed. www.brand.de/ip Patent information XXZXXXXX Serial number Follow the instructions listed on the instrument, the accessory parts and in the operating manual. -
Page 75: Order Information
13 Order Information Symbol or number Meaning The instrument or rechargeable battery should be disposed of properly. China RoHS (EFUP) EFUP defines the time period in years, in which the hazardous materials found in the electrical and electronic equipment should not leak or mu- tate under normal operating conditions. - Page 76 3 Transferpette® electronic up to 1000 µl. for Europe 705390 for the UK/Ireland 705391 for the USA/Japan 705392 for Australia 705393 Quality pipette tips from BRAND Volume Material Packaged unit Order no. Packed in bulk 0.1–20 µl 2000 732002 0.5–20 µl...
-
Page 77: Spares
13 Order Information 13.2 Spares 13.2.1 Transferpette® electronic to 1000 µl The design and dimensions of the spare parts correspond to the respective nominal volume. (Fig. ® Spare parts for Transferpette electronic 50–1000 µl.) A Ejector (upper part) D Shaft with ejector spring B Piston unit E Ejector (bottom part) C Spring with seal... -
Page 78: Additional Accessories
13 Order Information 13.2.2 Transferpette® electronic 250–5000 µl G Ejector (upper part) G′ Ejector (bottom part) H Piston unit I Shaft (bottom part) S Complete shaft Volume G + G′ 250 - 5000 µl 7299 705526 703247 705549 13.3 Additional accessories 13.4 Accessories for Transferpette®... -
Page 79: Repairs
Complete the “Declaration on Absence of Health Hazards” and send the instrument to the manufac- turer or supplier. Ask your supplier or manufacturer for the form. The form can also be downloaded from www.brand.de. Within USA and Canada Please clarify the requirements for the return delivery with BrandTech Scientific, Inc before sending the instrument in for service. -
Page 80: Calibration Service
The detailed testing instructions are available for download on www.brand.de or www.brandtech.com. BRAND also offers the possibility to have your devices calibrated by our factory calibration service or by the BRAND DAkkS laboratory. Simply send us the device to be calibrated, accompanied by details about which type of calibration you would like. -
Page 81: Warranty
16 Warranty 16 Warranty We shall not be liable for the consequences of improper handling, use, servicing, operating or unau- thorized repairs of the device or for the consequences of normal wear and tear, especially of wearing parts such as pistons, seals, valves and the breakage of glass. The same applies for failure to follow the instructions of the operating manual. - Page 82 Sommaire 1 Introduction........83 10.4 Fonction de régénération de l'accu.. 1 10 Étendue de la livraison ....83 11 Dérangement - Que faire ? ..... 111 Conditions d'utilisation ....83 12 Marquage sur le produit ......112 2 Règles de sécurité........ 84 Règles de sécurité...
-
Page 83: Introduction
1 Introduction 1.1 Étendue de la livraison Transferpette® electronic , un accu, l’adaptateur AC avec le câble de chargement de l'accu, de la graisse silicone, ce mode d'emploi ainsi qu'un sachet d'échantillons de pointes de pipette. 1.2 Conditions d'utilisation • Veuillez lire attentivement le mode d'emploi avant la première utilisation. -
Page 84: Règles De Sécurité
2 Règles de sécurité 2 Règles de sécurité 2.1 Règles de sécurité générales À lire attentivement ! L’appareil de laboratoire Transferpette® electronic peut être utilisé avec des matériaux, des procédés et des appareillages dangereux. Le mode d'emploi n'a pas pour but d'exposer tous les problèmes de sécurité... -
Page 85: Utilisation
2 Règles de sécurité 2.2 Utilisation Le Transferpette® electronic est une pipette à piston commandée par microprocesseur et fonction- nant sur accu, selon le principe du coussin d'air, pour le pipetage de solutions aqueuses de densité et de viscosité moyennes. Lorsque l'appareil est correctement utilisé, le liquide à doser entre unique- ment en contact avec la pointe mais pas avec le Transferpette®... - Page 86 3 Éléments fonctionnels et de commande 3 Éléments fonctionnels et de commande Prise de charge Compartiment à batterie Bouton de sélection de menu Touche fléchée (+) Touche Enter : Confirmation de saisie/ Touche fléchée (-) Power 'On'*) Anse de maintien Poignée Corps de la pipette Cône de logement de la pointe...
-
Page 87: Mise En Service
4 Mise en service 4 Mise en service 4.1 Premiers pas 1. Accu défectueux Ouvrir le couvercle du compartiment de l'accu. Insérer l’accu. Veiller à ce que la fiche de l'accu soit bien enfoncée dans la prise de l'appareil. Remettre le couvercle du compartiment de l'accu et le fermer. -
Page 88: Régler Le Volume
4 Mise en service 4.2 Régler le volume Le volume est réglé en usine sur le volume nominal respectif de Transferpette® electronic et peut être modifié individuellement de manière simple et rapide. En appuyant sur l'une des touches fléchées, on sélec- tionne directement un volume. - Page 89 4 Mise en service Régler la vitesse d'aspiration En appuyant une fois brièvement sur la touche Menu, on accède au menu Vitesse d'aspiration. ð « Speed » clignote. En actionnant les touches fléchées (+/-), on sélectionne le niveau de vitesse (par exemple niveau 5). ð...
-
Page 90: Pipetage
4 Mise en service Appuyer sur la touche Enter. ð L'écran revient à l'état initial du mode sélectionné, ici par exemple l'écran du mode PIP standard. 4.4 Pipetage Le volume est réglé en usine sur le volume nominal respectif de Transferpette® electronic et peut être modifié... -
Page 91: Déclencher Directement Le Blow- Out
4 Mise en service Éjecter la pointe : Tenir le corps de la pipette au-dessus d'un collecteur de déchets approprié puis enfoncer la touche d'éjection de la pointe. AVIS La norme ISO 8655 prescrit de prérincer une fois la pointe de la pipette avec le liquide de l’échantillon avant le pipetage proprement dit. -
Page 92: Programmes De Pipetage
5 Programmes de pipetage 5 Programmes de pipetage Activité Désignation Info Pipetage normal Mode PIP, voir Mode Programme standard. PIP, p. 92 Un volume défini auparavant est aspiré puis à nouveau distribué Pipetage pour Mode GEL, voir Mode Programme de chargement des gels d'électrophorèse. l'électrophorèse électrophorèse Un volume d'échantillon défini au préalable est aspiré... - Page 93 5 Programmes de pipetage Confirmer le mode PIP : Appuyer sur la touche Enter. ð L'écran affiche maintenant « blo » pour blow-out (sur- course). Préparation au pipetage : En appuyant une fois sur le bouton de pipetage, le piston se déplace vers sa posi- tion de départ.
-
Page 94: Mode Pipmix
5 Programmes de pipetage 5.2 Mode PIPmix Programme pour mélanger les liquides. L'échantillon est constamment aspiré et distribué à plusieurs reprises Réglage du volume et de la vitesse, voir Régler le volume, p. 88 et Régler la vitesse d'aspiration et de dosage, p. 88. Appeler la sélection de menu : En appuyant trois fois sur la touche Menu, on accède à... -
Page 95: Mode Revpip
5 Programmes de pipetage Distribuer le liquide en mode PIPmix : Une pression continue sur le bouton de pipetage permet d'alterner la distribution et l'aspiration du liquide. L'écran affiche en alternance le symbole de la flèche pour l'enregistre- Maintenir enfoncé ment ou la distribution, ainsi que le nombre de cycles. - Page 96 5 Programmes de pipetage Préparation au pipetage : En appuyant une fois sur le bouton de pipetage, le piston se déplace vers sa posi- tion de départ. ð La flèche de l'écran pointe vers le haut (enregistre- ment). Aspirer le liquide : Pour aspirer le liquide, appuyer une fois sur le bouton de pipetage.
-
Page 97: Mode Électrophorèse (Gel)
5 Programmes de pipetage 5.4 Mode électrophorèse (GEL) Programme de chargement des gels d'électrophorèse. Un volume d'échantillon défini au préalable est aspiré à une vitesse élevée et variable, puis relâché lentement. Réglage du volume et de la vitesse, voir Régler le volume, p. 88 et Régler la vitesse d'aspiration et de dosage, p. 88. -
Page 98: Mode Disp
5 Programmes de pipetage Pour aspirer plus de liquide que ce qui a été réglé (jus- qu'à 110% max. du volume nominal), maintenir la touche de pipetage enfoncée pendant le processus Maintenir d'aspiration jusqu'à ce que le volume souhaité ait été enfoncé... - Page 99 5 Programmes de pipetage Appeler la sélection de menu : En appuyant trois fois sur la touche Menu, on accède à la sélection des pro- grammes. ð « Mode » clignote. Régler le mode DISP : Utiliser une des touches fléchées pour faire défiler les modes jusqu'à ce que « DISP » ap- paraisse.
- Page 100 5 Programmes de pipetage Régler le nombre d'étapes : En appuyant sur la touche fléchée (+/-), on règle le nombre d'étapes. ð « Steps » continue de clignoter. Confirmer le nombre d'étapes : Appuyer sur la touche Enter. ð L'écran affiche le nombre d’étapes défini. Aspirer le liquide : Pour aspirer le liquide, appuyer une fois sur le bouton de pipetage.
-
Page 101: Contrôle Du Volume
6 Contrôle du volume 6 Contrôle du volume Nous conseillons de contrôler l’appareil tous les 3 à 12 mois selon l’utilisation. Le cycle peut cepen- dant être adapté aux exigences individuelles. L'essai volumétrique gravimétrique des pipettes s’effec- tue de la manière suivante et satisfait aux exigences de la norme DIN EN ISO 8655, partie 6. 1. -
Page 102: Tableau Des Précisions
*) = Calcul de l’exactitude (R %) et du coefficient de variation (CV %) : E % et CV % seront calculés selon les formules utilisées pour le contrôle statistique de la qualité. AVIS Des instructions de contrôle (SOP) son disponibles sous www.brand.de pour leur téléchargement. 7 Tableau des précisions Plage de Volume R* ≤... -
Page 103: Ajustage - Easy Calibration
8 Ajustage – Easy Calibration 8 Ajustage – Easy Calibration 8.1 Ajustage Le volume nominal ou le volume à contrôler est réglé, mode standard Pipetage (PIP), par exemple 200,0 µl (pour la procé- dure, voir Mode PIP, p. 92). Ex. : Volume correspondant au test de volume 201,3 µl. -
Page 104: Rétablir Les Paramètres D'usine
8 Ajustage – Easy Calibration 8.2 Rétablir les paramètres d'usine Le symbole CAL affiché en continu à l’écran indique un ajus- tage réalisé. Appel du mode CAL : En appuyant de manière prolon- gée (> 3 s.) sur la touche Menu, on accède au mode CAL. ð... -
Page 105: Désinfection / Autoclavage
9 Désinfection / autoclavage 9 Désinfection / autoclavage 9.1 Désinfection aux UV L'appareil résiste à la sollicitation habituelle que représente une lampe de désinfection aux UV. Un changement de couleur est possible en raison de l'effet produit par les UV. 9.2 Autoclavage La partie du nom de Transferpette®... -
Page 106: Prise De Référence (Ref)
Contrôler l’absence de salissures sur le piston et le joint d’étanchéité. Contrôler l’étanchéité de l’appareil. Nous conseillons d’utiliser le contrôleur d’étanchéité pour pipettes PLT de BRAND. En alternative à ce- la, aspirer l’échantillon, tenir l’appareil à la verticale pendant env. 10 s. Si une goutte se forme à l’ex- trémité... -
Page 107: Démontage / Nettoyage (250 Μl - 5000 Μl)
Contrôler l’absence de salissures sur le piston et le joint d’étanchéité. Contrôler l’étanchéité de l’appareil. Nous conseillons d’utiliser le contrôleur d’étanchéité pour pipettes PLT de BRAND. En alternative à ce- la, aspirer l’échantillon, tenir l’appareil à la verticale pendant env. 10 s. Si une goutte se forme à l’ex- trémité... - Page 108 10 Entretien Nettoyage G Partie supérieure de l’éjecteur H Unité à piston I Partie inférieure de la tige J Fermeture G' Partie inférieure de l’éjecteur S Corps de la pipette Appuyer simultanément sur les fermetures latérales (J) et retirer la partie inférieure de l'éjecteur (G'). Dévisser la tige de la pipette (H+) de la poignée.
-
Page 109: Charger Et Remplacer L'accu
10 Entretien Retirer le filtre avec précaution, sans endommager le cône porte-pointe. Retirer le filtre avant l’autoclavage ! L’appareil peut également être utilisé sans filtre. 10.3 Charger et remplacer l'accu Une accu entièrement chargée permet environ 8 heures de pipetage continu (plus de 4000 cycles de pipetage) d'échantillons de viscosité... - Page 110 10 Entretien Remettre le capuchon du compartiment de l'accu et le fermer. En cas de pauses prolongées, retirer l'accu de l'appareil. Indicateur de batterie après avoir réinséré une accu Après l'insertion d'une accu, l'affichage de la pleine capacité apparaît à l'écran avec un cadre clignotant (l'appareil ne re- connaît pas encore l'état de charge dans un premier temps).
-
Page 111: 11 Dérangement - Que Faire
11 Dérangement - Que faire ? Après la décharge (jusqu'à 3 h), le processus de charge (3,5 h) démarre automatiquement. Pendant la charge, les barres de capacité de l'indicateur d’accu défilent en permanence de bas en haut. Annulation de la fonction Refresh En appuyant sur n'importe quelle touche, le programme se termine. -
Page 112: Marquage Sur Le Produit
Mention DE-M (DE pour Allemagne), encadrée par un rectangle, ainsi que les deux derniers chiffres de l’année au cours de laquelle le marquage a été apposé. www.brand.de/ip Informations relatives aux brevets XXZXXXXX Numéro de série Veuillez tenir compte des indications se trouvant sur l'appareil, les acces- soires et dans le mode d'emploi. -
Page 113: Informations Pour La Commande
13 Informations pour la commande 13 Informations pour la commande 13.1 Données pour la commande Transferpette® electronic Volume 0,5-10 µl 2-20 µl 10-200 µl 50-1000 µl 250-5000 µl avec adaptateur Réf. de com- Réf. de com- Réf. de com- Réf. de com- Réf. - Page 114 3 Transferpette® electronic à 1000 µl. pour l'Europe 705390 pour GB/Irlande 705391 pour les États-Unis/le Japon 705392 pour l'Australie 705393 Pointes de pipettes de qualité de BRAND Volume Matériau Unité d’emb. Réf. de com- mande emballé en vrac 0,1-20 µl 2000 732002 0,5-20 µl...
- Page 115 13 Informations pour la commande A Partie supérieure de l’éjecteur D Tige avec ressort éjecteur B Unité à piston E Partie inférieure de l’éjecteur C Ressort avec joint S Tige complète Volume 0,5-10 µl 705510 705518 – 705538 705548 705528 2-20 µl 705510 705520...
- Page 116 13 Informations pour la commande Volume G + G' 250 - 5000 µl 7299 705526 703247 705549 13.3 Autres accessoires 13.4 Accessoires pour Transferpette® electronic 10-200 µl et 50-1000 µl Clips interchangeables Les clips interchangeables enfichables (entretoises) et les tiges de pipettes avec cône de réception de pointe flexible permettent une précision d'adaptation optimale et des forces d'éjection les plus faibles possibles pour la plupart des pointes de pipettes disponibles dans le commerce.
-
Page 117: 14 Réparation
Le numéro de retour doit être apposé à l’extérieur du colis de façon bien visible. Adresses de contact Allemagne : États-Unis et Canada : ® BRAND GMBH + CO KG BrandTech Scientific, Inc. Otto-Schott-Straße 25 11 Bokum Road 97877 Wertheim (Germany) -
Page 118: Service De Calibrage
Les instructions de contrôle détaillées peuvent être téléchargées sur www.brand.de ou www.brand- tech.com. BRAND vous offre également la possibilité de faire calibrer vos instruments par notre service de cali- bration ou par le laboratoire de calibration BRAND-DAkkS. Envoyez-nous simplement les appareils à... -
Page 119: Évacuation
17 Évacuation 17 Évacuation Le symbole ci-contre signifie que les piles/accus ainsi que les appareils électroniques qui ont atteint la fin de leur durée de vie doivent être éliminés séparément des déchets domes- tiques (déchets d'agglomération non triés). Les appareils électroniques doivent être correctement évacués selon la directive 2012/19/UE du Parle- ment européen et du Conseil du 04 juillet 2012 sur les appareils électriques et électroniques usés conformément aux prescriptions d'évacuation nationales. - Page 120 Índice 1 Introducción ........121 10.2 Desmontaje / limpieza (250 µl – 5000 µl)..........1 46 Contenido de la entrega ....121 10.3 Cargar y cambiar batería....1 47 Información general sobre las ins- trucciones de uso ......121 10.4 Función de regeneración de la ba- tería ............
-
Page 121: Introducción
1 Introducción 1.1 Contenido de la entrega Transferpette® electronic, una batería, fuente de alimentación con cable de carga para batería, grasa de silicona, estas instrucciones de uso y 1 bolsa de muestras de puntas para pipetas. 1.2 Información general sobre las instrucciones de uso •... -
Page 122: Disposiciones De Seguridad
2 Disposiciones de seguridad 2 Disposiciones de seguridad 2.1 Disposiciones generales de seguridad ¡Leer todo el manual con atención por favor! El equipo de laboratorio Transferpette® electronic puede utilizarse en combinación con materiales, procesos de trabajo y aparatos riesgosos. No obstante, el manual de instrucciones no puede hacer re- ferencia a todas las cuestiones que, eventualmente, podrían afectar la seguridad. -
Page 123: Aplicación
2 Disposiciones de seguridad 2.2 Aplicación El producto Transferpette® electronic es una pipeta de émbolo controlada por microprocesador que funciona a batería, basada en el principio de desplazamiento del aire, para pipetear soluciones acuo- sas de densidad y viscosidad media. Al manipular el equipo de manera correcta, la muestra dosificada entra en contacto solo con la punta y no con la Transferpette®... -
Page 124: Elementos De Mando Y Funcionamiento
3 Elementos de mando y funcionamiento 3 Elementos de mando y funcionamiento Conector de carga Compartimiento de la batería Tecla de selección del menú Tecla de flecha (+) Tecla Enter: Confirmación de entrada / Tecla de flecha (-) Power «On»*) Estribo para el dedo Mango Vástago de la pipeta... -
Page 125: Puesta En Marcha
4 Puesta en marcha 4 Puesta en marcha 4.1 Primeros pasos 1. Colocar la batería Abra la tapa del compartimiento de la batería. Inserte la batería. Asegúrese de que el conector de la batería esté firmemente insertado en la toma del equi- Vuelva a colocar la tapa del compartimiento de la bate- ría y ciérrela. -
Page 126: Ajustar El Volumen
4 Puesta en marcha 4.2 Ajustar el volumen El volumen viene configurado de fábrica según el volumen nominal de la Transferpette® electronic y se puede modificar individualmente de forma sencilla y rápida. Presione una de las flechas para seleccionar el volu- men. - Page 127 4 Puesta en marcha Configurar velocidad de absorción Al presionar la tecla de menú una vez, accederá al menú de velocidad de absorción. ð «Speed» parpadea. Podrá elegir el nivel de velocidad (p. ej.: nivel 5) presio- nando las flechas (+/-). ð...
-
Page 128: Pipeteo
4 Puesta en marcha Presione la tecla Enter. ð La pantalla vuelve al estado inicial de la configuración del modo correspondiente, p. ej. aquí se muestra el mo- do PIP predeterminado. 4.4 Pipeteo El volumen viene configurado de fábrica según el volumen nominal de la Transferpette® electronic y se puede modificar individualmente de forma sencilla y rápida, consulte la sección Ajustar el volu- men, p. 126. -
Page 129: Activar El Blow-Out Directamente
4 Puesta en marcha Expulsar la punta: Sujete el vástago de la pipeta sobre un contenedor para desechos adecuado y pulse la tecla de expulsión. AVISO La ISO 8655 estipula que se debe enjuagar la punta para pi- petas una vez con el líquido de muestra antes del pipeteo re- 4.5 Activar el blow-out directamente Si es necesario, en cualquier momento se puede activar la sobrecarrera (blow-out) directamente. -
Page 130: Programas De Pipeteo
5 Programas de pipeteo 5 Programas de pipeteo Tarea Denominación Información Pipeteo normal Modo PIP, véase Modo Programa estándar. PIP, p. 130 El volumen previamente indicado se aspira o se dosifica Pipeteo por Modo GEL, véase Electro- Programa para cargar geles de electroforesis. Un volu- electroforesis foresis Modo (GEL), p. 134 men de muestra predefinido se aspira a una gran veloci-... -
Page 131: Modo Pipmix
5 Programas de pipeteo Confirmar modo PIP: Presione la tecla Enter. ð Ahora la pantalla muestra «blo» para blow-out (sobre- carrera). Prepararse para pipetear: Al presionar la tecla de pipe- teo una vez, el émbolo se mueve a su posición inicial. ð... - Page 132 5 Programas de pipeteo Acceder a la selección del menú: Para acceder al pro- grama de selección, presione la tecla de menú tres ve- ces. ð «Mode» parpadea. Configurar modo PIPmix: Desplácese con las flechas hasta que aparezca el modo «PIPmix» . ð...
-
Page 133: Modo Revpip
5 Programas de pipeteo Terminar pipeteo: Para dosificar el líquido y activar la sobrecarrera (blow-out), presione la tecla de pipeteo una vez. Una vez dosificado el líquido residual (sobreca- rrera), la pantalla volverá al modo configurado (posi- ción de inicio). AVISO La pantalla muestra un máximo de 19 ciclos. -
Page 134: Electroforesis Modo (Gel)
5 Programas de pipeteo Absorber líquido: Para absorber el líquido, presione la tecla de pipeteo una vez. AVISO ¡Al absorber el líquido se aspirará un poco más del volumen configurado! Dosificar líquido en el modo revPIP: Para dosificar, pre- sione la tecla de pipeteo una vez. En la pantalla la flecha apunta hacia abajo (dosificar). - Page 135 5 Programas de pipeteo Acceder a la selección del menú: Para acceder al pro- grama de selección, presione la tecla de menú tres ve- ces. ð «Mode» parpadea. Configurar modo GEL: Desplácese con las flechas hasta que aparezca el modo «GEL». ð...
-
Page 136: Modo Disp
5 Programas de pipeteo Dosificar líquido en el modo GEL: Para dosificar, presio- ne brevemente la tecla de pipeteo una vez. La pantalla muestra un rombo. El volumen aspirado se vuelve a do- sificar lentamente. Puede interrumpir la dosificación de la muestra presio- nando la tecla de pipeteo una vez más. - Page 137 5 Programas de pipeteo Configurar modo DISP: Desplácese con las flechas hasta que aparezca el modo «DISP». ð «Mode» sigue parpadeando. Confirmar modo DISP: Presione la tecla Enter. ð Ahora la pantalla muestra «blo» para blow-out (sobre- carrera). Prepararse para pipetear: Al presionar la tecla de pipe- teo una vez, el émbolo se mueve a su posición inicial.
- Page 138 5 Programas de pipeteo Confirmar número de steps: Presione la tecla Enter. ð La pantalla muestra el número configurado de steps. Absorber líquido: Para absorber el líquido, presione la tecla de pipeteo una vez. Dosificar líquido: Cada vez que presione la tecla de pi- peteo, se lleva a cabo un paso de dosificación.
-
Page 139: Controlar El Volumen
6 Controlar el volumen 6 Controlar el volumen En función del uso, recomendamos comprobar el equipo cada 3-12 meses. El ciclo puede adaptarse a los requisitos individuales. El control de volumen gravimétrico de la pipeta se realiza con los pasos si- guientes y satisface la norma DIN EN ISO 8655, parte 6. -
Page 140: Tabla De Precisión
*) = cálculo de la exactitud (R%) y el coeficiente de variación (VK%): E % y CV % se calculan según las fórmulas del control estadístico de calidad. AVISO Las instrucciones de inspección (SOP) pueden descargarse en www.brand.de. 7 Tabla de precisión Rango de Volumen E* ≤... -
Page 141: Ajuste - Easy Calibration
8 Ajuste – Easy Calibration 8 Ajuste – Easy Calibration 8.1 Ajuste El volumen nominal o de consigna está configurado, modo estándar para pipetear (PIP), p. ej. 200,0 µl (consulte cómo proceder en Modo PIP, p. 130). P. ej.: volumen según control de volumen 201,3 µl. -
Page 142: Restablecer Configuración De Fábrica
8 Ajuste – Easy Calibration 8.2 Restablecer configuración de fábrica El símbolo CAL que aparece constantemente en la pantalla indica que se ha realizado un ajuste. Acceder al modo CAL: Para acceder al modo CAL man- tenga presionada (> 3 s.) la tecla de menú. ð... -
Page 143: Desinfección / Autoclave
9 Desinfección / autoclave 9 Desinfección / autoclave 9.1 Esterilización UV El equipo es resistente al efecto habitual de una lámpara UV germicida. Debido a la influencia de la ra- diación UV, pueden tener lugar cambios de color. 9.2 Autoclave La parte destacada de la Transferpette®... -
Page 144: Operación De Referencia (Ref)
Inspeccione los émbolos y la junta en busca de suciedad. Compruebe la estanqueidad del dispositivo. Le recomendamos utilizar el comprobador de estanqueidad BRAND PLT. De forma alternativa, aspire la muestra, mantenga el dispositivo unos 10 segundos en posición vertical. Si se forma una gota en la punta de la pipeta, consulte Avería - ¿Qué... - Page 145 10 Mantenimiento Limpieza A Pieza superior de expulsión B Unidad del émbolo C Junta con muelle D Vástago E Pieza inferior de expulsión S Vástago de la pipeta Desatornille el vástago de la pipeta (S) del mango. Retire el vástago de la pipeta del mango. El vástago de la pipeta se sostiene al mango por un imán.
-
Page 146: Desmontaje / Limpieza
Inspeccione los émbolos y la junta en busca de suciedad. Compruebe la estanqueidad del dispositivo. Le recomendamos utilizar el comprobador de estanqueidad BRAND PLT. De forma alternativa, aspire la muestra, mantenga el dispositivo unos 10 segundos en posición vertical. Si se forma una gota en la punta de la pipeta, consulte Avería - ¿Qué... -
Page 147: Cargar Y Cambiar Batería
10 Mantenimiento Filtro PE Filtro PE para Transferpette® electronic, 250-5000 µl: El filtro de PE hidrófobo impide que los líquidos entren en la pipeta. Sustituir en cuanto esté humedecido o sucio. Utilice un objeto plano como un destornillador. Saque el filtro con cuidado sin dañar el cono de la punta. ¡Retire el filtro antes de limpiar la pipeta en autoclave! El dispositivo también funciona sin filtro. -
Page 148: Función De Regeneración De La Batería
10 Mantenimiento Conecte el enchufe de la nueva batería en el conector e inserte la batería nueva. Vuelva a colocar la tapa del compartimiento de la bate- ría y ciérrela. Retire la batería del equipo si no lo va a utilizar durante un tiempo prolongado. -
Page 149: Avería - ¿Qué Hacer En Caso De Errores
11 Avería - ¿Qué hacer en caso de errores? Presione la flecha inferior durante más de 3 s. Durante la descarga, las barras de capacidad del indicador de capacidad de la batería van de arriba hacia abajo. 1 x > 3 s Luego de la descarga (hasta 3 h), el proceso de carga co- menzará... -
Page 150: Etiquetado En El Producto
Cuenta con la secuencia de caracteres DE-M («DE» en referencia a Alema- nia) enmarcada en un rectángulo, así como las últimas dos cifras del año en el que se realizó la identificación. www.brand.de/ip Información sobre patentes XXZXXXXX Número de serie Respete las indicaciones contenidas en el equipo, los accesorios y el ma- nual de instrucciones. -
Page 151: Información Para Pedidos
13 Información para pedidos Símbolo o número Significado ductos eléctricos y electrónicos no ocasionarán contaminaciones ambien- tales graves, lesiones graves o daños a los bienes materiales del usuario. El equipo eléctrico no puede desecharse junto con los residuos domésti- cos. 13 Información para pedidos 13.1 Información para pedidos Transferpette®... - Page 152 3 Transferpette® electronic hasta 1000 µl. para Europa 705390 para Reino Unido / Irlanda 705391 para EE. UU. / Japón 705392 para Australia 705393 Puntas para pipetas de calidad de BRAND Volumen Material Unidad de embalaje N.º de pedido embalado suelto 0,1-20 µl 2000 732002 0,5-20 µl...
-
Page 153: Piezas De Repuesto
13 Información para pedidos 13.2 Piezas de repuesto 13.2.1 Transferpette® electronic hasta 1000 µl El diseño y las dimensiones de las piezas de repuesto se corresponden con el volumen nominal co- ® rrespondiente. (Fig. piezas de repuesto Transferpette electronic 50-1000 µl.) A Pieza superior de expulsión D Vástago con muelle de expulsión B Unidad del émbolo... -
Page 154: Otros Accesorios
13 Información para pedidos 13.2.2 Transferpette® electronic 250 - 5000 µl G Pieza superior de expulsión G' Pieza inferior de expulsión H Unidad del émbolo I Unidad del vástago S Vástago completo Volumen G + G' 250 - 5000 µl 7299 705526 703247... -
Page 155: Reparación
Completar la «Declaración sobre la ausencia de riesgos para la salud» y enviarla junto con el equipo al fabricante o al distribuidor. El formulario se puede pedir al proveedor o al fabricante, o bien, se puede descargar en el sitio web www.brand.de/es. Dentro de EE. UU. y Canadá... -
Page 156: Servicio De Calibración
Asimismo, BRAND ofrece la posibilidad de solicitar el calibrado de los equipos al servicio técnico de calibrado en fábrica o al laboratorio de BRAND acreditado por el organismo DAkkS de Alemania. A tal fin, alcanza tan solo con enviar los equipos que se desea calibrar con la indicación de qué tipo de cali- brado se desea realizar. -
Page 157: Responsabilidad Por Defectos
16 Responsabilidad por defectos 16 Responsabilidad por defectos No seremos responsables de las consecuencias derivadas del trato, manejo, mantenimiento, uso in- correcto o reparación no autorizada del aparato, ni de las consecuencias derivadas del desgaste nor- mal, en especial de partes susceptibles de abrasión, tales como émbolos, juntas herméticas, válvulas, ni de la rotura de partes de vidrio o del incumplimiento de las instrucciones de manejo. - Page 158 Indice 1 Introduzione ........159 10.1 Smontaggio/Pulizia (fino a 1000 μl) . 1 82 Contenuto della fornitura....159 10.2 Smontaggio/pulizia (250 µl – 5000 µl)..........1 84 Destinazione d'uso......159 10.3 Ricarica e sostituzione dell'accu- 2 Disposizioni di sicurezza.......160 mulatore (batteria ricaricabile) ..1 85 Disposizioni generali di sicurezza..160 10.4 Funzione di rigenerazione dell'ac-...
-
Page 159: Introduzione
1 Introduzione 1.1 Contenuto della fornitura Transferpette® electronic , una batteria, l'alimentatore con il cavo di carica della batteria, grasso sili- conico, queste istruzioni per l'uso e 1 busta di campioni di puntali per pipette. 1.2 Destinazione d'uso • Leggere attentamente le istruzioni per l'uso prima del primo utilizzo. •... -
Page 160: Disposizioni Di Sicurezza
2 Disposizioni di sicurezza 2 Disposizioni di sicurezza 2.1 Disposizioni generali di sicurezza Leggere attentamente prima dell'uso! Lo strumento da laboratorio Transferpette® electronic può essere utilizzato con materiali, procedure di lavoro e apparecchiature pericolose. Le istruzioni per l'uso non possono però coprire tutte le even- tuali problematiche di sicurezza che possono eventualmente presentarsi. -
Page 161: Scopo
2 Disposizioni di sicurezza 2.2 Scopo La Transferpette® electronic è una pipetta a pistone, che funziona in base al principio del cuscinetto d'aria, controllata da un microprocessore e alimentata a batteria ricaricabile , per il pipettaggio di so- luzioni acquose di media densità e viscosità. L'utilizzo corretto dello strumento prevede che il cam- pione da dosare venga a contatto solo con il puntale e non con laTransferpette®... -
Page 162: Elementi Di Funzionamento E Di Comando
3 Elementi di funzionamento e di comando 3 Elementi di funzionamento e di comando Presa per il connettore di ricarica Vano accumulatore Tasto di selezione menù Tasto freccia (+) Tasto Invio: Conferma inserimento/Po- Tasto freccia (-) wer 'On'*) Staffa di appoggio per le dita Impugnatura Gambo della pipetta Cono per l’inserimento del puntale... -
Page 163: Messa In Funzione
4 Messa in funzione 4 Messa in funzione 4.1 Primi passi 1. Inserire l'accumulatore, cioè la batteria ricaricabile Aprire il coperchio del vano dell'accumulatore. Inserire l'accumulatore. A tal proposito verificare che il connettore dell'accumulatore si innesti saldamente nel- la presa dello strumento. Reinserire il coperchio del vano accumulatore e chiu- derlo. -
Page 164: Impostazione Del Volume
4 Messa in funzione 4.2 Impostazione del volume Il volume è impostato in fabbrica al volume nominale della Transferpette® electronic e può essere mo- dificato autonomamente, in modo semplice e veloce. Premendo uno dei tasti freccia si seleziona direttamen- te un volume. ð... -
Page 165: Impostazione Della Velocità Di Aspi- Razione E Di Erogazione
4 Messa in funzione 4.3 Impostazione della velocità di aspirazione e di eroga- zione La velocità di aspirazione e di erogazione sono impostabili separatamente. Richiamando il menù vie- ne visualizzata l'ultima velocità impostata. Sono disponibili 5 livelli di velocità. Impostazione della velocità di aspirazione Premendo una volta, brevemente, il tasto menù... -
Page 166: Pipettaggio
4 Messa in funzione Azionando i tasti freccia (+/-) si seleziona il livello della velocità (ad es. livello 2). ð 'Speed' (Velocità) continua a lampeggiare. Premere il tasto Invio. ð Il display torna allo stato di base della modalità impo- stata, ad esempio qui il display della modalità... -
Page 167: Attivare Direttamente Lo Scarico (Blow-Out)
4 Messa in funzione Erogare il liquido: Una volta conclusa l'aspirazione di li- quido la freccia nel display è rivolta verso il basso (ero- gazione). Appoggiare il puntale sulla parete del reci- piente. Tenere la pipetta in modo da farle formare un angolo di 30-45°... -
Page 168: Programma Di Pipettaggio
5 Programma di pipettaggio 5 Programma di pipettaggio Attività Denominazione Info Pipettaggio nor- Modalità PIP, vedere Mo- Programma standard. male dalità PIP, p. 168 Un volume previamente inserito viene prima aspirato e poi erogato Pipettaggio per Modalità GEL, vedere Mo- Programma per l'aspirazione dei gel per elettroforesi. elettroforesi dalità... -
Page 169: Modalità Pipmix
5 Programma di pipettaggio Confermare la modalità PIP: Premere il tasto Invio. ð Il display visualizza adesso 'blo' per blow-out (scarico). Preparazione al pipettaggio: Premendo una volta il ta- sto di pipettaggio il pistone viene portato alla propria posizione di partenza. ð... - Page 170 5 Programma di pipettaggio Richiamare la selezione del menù: Premendo tre volte il tasto menù si accede alla selezione del programma. ð 'Mode' lampeggia. Impostare la modalità PIPmix: Scorrere con uno dei ta- sti freccia le modalità fino a quando appare 'PIP'mix . ð...
-
Page 171: Modalità Revpip
5 Programma di pipettaggio Concludere il pipettaggio: Premendo una volta il tasto di pipettaggio, si eroga il liquido e si attiva lo scarico (blow-out). Dopo che il residuo di liquido è stato eroga- to (ciò che viene definito come scarico o blow-out), il di- splay torna alla modalità... -
Page 172: Modalità Elettroforesi (Gel)
5 Programma di pipettaggio Aspirare il liquido: Per aspirare il liquido premere una volta il tasto di pipettaggio. AVVISO! Con l'aspirazione del liquido viene aspirato un volume leg- germente maggiore di quello impostato! Erogare il liquido in modalità revPIP: Per l'erogazione premere una volta il tasto di pipettaggio. - Page 173 5 Programma di pipettaggio Richiamare la selezione del menù: Premendo tre volte il tasto menù si accede alla selezione del programma. ð 'Mode' lampeggia. Impostare la modalità GEL: Scorrere con uno dei tasti freccia le modalità fino a quando appare 'GEL'. ð...
-
Page 174: Modalità Disp
5 Programma di pipettaggio Erogare il liquido in modalità GEL: Per l'erogazione pre- mere brevemente una volta il tasto di pipettaggio. Sul display viene visualizzato un rombo. Il volume aspirato viene lentamente erogato. L'erogazione del campione può essere interrotta pre- mendo nuovamente il tasto di pipettaggio. - Page 175 5 Programma di pipettaggio Impostare la modalità DISP: Scorrere con uno dei tasti freccia le modalità fino a quando appare 'DISP'. ð 'Mode' (Modalità) continua a lampeggiare. Confermare la modalità DISP: Premere il tasto Invio. ð Il display visualizza adesso 'blo' per blow-out (scarico). Preparazione al pipettaggio: Premendo una volta il ta- sto di pipettaggio il pistone viene portato alla propria posizione di partenza.
- Page 176 5 Programma di pipettaggio Confermare il numero di step (passi): Premere il tasto Invio. ð Il display visualizza il numero di step (passi) impostato. Aspirare il liquido: Per aspirare il liquido premere una volta il tasto di pipettaggio. Erogare il liquido: Ad ogni pressione del tasto di pipet- taggio avviene un passo di erogazione.
-
Page 177: Controllo Del Volume
6 Controllo del volume 6 Controllo del volume Si consiglia, in base al tipo di impiego, di controllare il volume dello strumento ogni 3-12 mesi. Il ciclo delle verifiche dovrebbe comunque essere adattato secondo le singole esigenze. Il controllo gravime- trico del volume della pipetta deve essere effettuato come riportato di seguito, in accordo con la nor- ma DIN EN ISO 8655, Parte 6. -
Page 178: Tabella Di Precisione
*) = Calcolo dell'accuratezza (A%) e del coefficiente di variazione (CV%): A% e CV% vengono calcolati secondo le formule del controllo di qualità statistico. AVVISO! Le procedure operative standard (SOPs: Standard Operating Procedures) possono essere scaricate dal sito www.brand.de . 7 Tabella di precisione Range di Volume A* ≤... -
Page 179: Calibrazione - Easy Calibration (Calibrazione Facile)
8 Calibrazione - Easy Calibration (calibrazione facile) 8 Calibrazione - Easy Calibration (calibrazione facile) 8.1 Calibrazione Il volume nominale o uno specifico volume da controllare è impostate, nella modalità standard Pipettaggio (PIP), ad es. 200,0 µl (per la procedura vedere Modalità PIP, p. 168). Esem- pio: Volume corrispondente alla verifica del volume 201,3 µl. -
Page 180: Ripristino Delle Impostazioni Di Fabbrica
8 Calibrazione - Easy Calibration (calibrazione facile) 8.2 Ripristino delle impostazioni di fabbrica Il simbolo CAL visualizzato in modo fisso e non più lampeg- giante sul display indica che è stata effettuata una calibrazio- Richiamare la modalità CAL: Premendo in modo conti- nuo (>... -
Page 181: Disinfezione/Sterilizzazione In Autoclave
9 Disinfezione/sterilizzazione in autoclave 9 Disinfezione/sterilizzazione in autoclave 9.1 Sterilizzazione UV Lo strumento resiste alla normale sollecitazione di una lampada di sterilizzazione a raggi UV. L’azione degli ultravioletti può causare una variazione di colore. 9.2 Sterilizzazione in autoclave La parte raffigurata in evidenze della Transferpette® electro- nic può... -
Page 182: Corsa Di Riferimento (Ref)
Controllare la tenuta del dispositivo. Raccomandiamo di utilizzare lo strumento per prove di tenuta PLT unit di BRAND. In alternativa, aspi- rare del campione e tenere lo strumento in verticale per circa 10 secondi. Se si forma una goccia sul puntale, consultare la sezione Individuazione e risoluzione dei problemi. - Page 183 10 Manutenzione Pulizia A Parte superiore espulsore B Unità pistone C Guarnizione con molla D Gambo E Parte inferiore espulsore S Gambo della pipetta Svitare il gambo della pipetta (S) dall’impugnatura. Estrarre il gambo della pipetta dall’impugnatura. Il gambo della pipetta viene mantenuto sull'impugnatura mediante un magnete.
- Page 184 Controllare la tenuta del dispositivo. Raccomandiamo di utilizzare lo strumento per prove di tenuta PLT unit di BRAND. In alternativa, aspi- rare del campione e tenere lo strumento in verticale per circa 10 secondi. Se si forma una goccia sul puntale, consultare la sezione Individuazione e risoluzione dei problemi.
-
Page 185: Ricarica E Sostituzione Dell'accumulatore (Batteria Ricaricabile)
10 Manutenzione Filtro in PE Filtro in PE per Transferpette® electronic, 250-5000µl: Il filtro idrofobico in PE serve per proteggere la pipetta contro la penetrazione di liquido. Sostituire il filtro non appena risulta bagnato o sporco. Utilizzare un oggetto piatto, ad esempio un cacciavite. Estrarre con cautela il filtro senza danneggiare il cono del puntale. -
Page 186: Funzione Di Rigenerazione Dell'accumulatore
10 Manutenzione Sostituire l'accumulatore Aprire il coperchio del vano dell'accumulatore, rimuo- vere l'accumulatore ed estrarre il connettore dalla pre- Innestare il connettore del nuovo accumulatore nella presa e inserire il nuovo accumulatore. Reinserire il coperchio del vano dell'accumulatore e chiuderlo. In caso di lunghe pause di funzionamento, rimuovere l'accu- mulatore dallo strumento. - Page 187 10 Manutenzione Eseguire la funzione di refresh Innestare il connettore del cavo di ricarica (allacciamen- to) dell'alimentatore nella presa appositamente previ- sta sulla Transferpette® electronic. Premere il tasto freccia inferiore per più di 3 secondi. Durante la procedura di scarica le tacche della capacità dell'indicatore della batteria si muovono costantemen- te dall'alto verso il basso.
-
Page 188: Individuazione E Risoluzione Dei Problemi - Cosa Fare
11 Individuazione e risoluzione dei problemi - cosa fare? 11 Individuazione e risoluzione dei problemi - cosa fare? Problema Visualizzazio- Causa Cosa fare? ne nel display Lo strumento non rea- ERR 1 L'accumulatore è scari- Caricare l'accumulatore almeno 5 gisce co o difettoso minuti senza azionare lo strumen- to, poi continuare a lavorare solo... -
Page 189: Marcatura Sul Prodotto
Sequenza di caratteri DE-M (DE per Germania), incorniciata da un rettan- golo, più le ultime due cifre dell’anno nel quale è stata applicata la marca- tura. www.brand.de/ip Informazioni sul brevetto XXZXXXXX Numero di serie Rispettare le indicazioni fornite sullo strumento, sugli accessori e nelle istruzioni per l'uso. -
Page 190: Informazioni Ordinazione
13 Informazioni ordinazione 13 Informazioni ordinazione 13.1 Dati di ordinazione Transferpette® electronic Volume 0,5-10 µl 2-20 µl 10-200 µl 50-1000 µl 250-5000 µl con alimentato- N° ord. N° ord. N° ord. N° ord. N° ord. CA 100-240 V ~50-60 Hz per l'Europa 705299 705300 705303... - Page 191 3 Transferpette® electronic fino a 1000 µl. per l'Europa 705390 per il Regno Unito/Irlanda 705391 per gli USA/Giappone 705392 per l'Australia 705393 Puntali di qualità di BRAND Volume Materiale Unità di confezio- N° ord. nam. confezionato sfuso 0,1-20 µl 2000 732002 0,5-20 µl...
-
Page 192: Pezzi Di Ricambio
13 Informazioni ordinazione 13.2 Pezzi di ricambio 13.2.1 Transferpette® electronic fino a 1000 µl il design e le dimensioni delle parti di ricambio corrispondono al rispettivo volume nominale. (Fig. ® pezzi di ricambio Transferpette electronic 50-1000 µl.) A Parte superiore espulsore D Gambo con molla espulsore B Unità... -
Page 193: Altri Accessori
13 Informazioni ordinazione 13.2.2 Transferpette® electronic 250 - 5000 µl G Parte superiore espulsore G' Parte inferiore espulsore H Unità pistone I Parte inferiore gambo S Gambo completo Volume G + G' 250 - 5000 µl 7299 705526 703247 705549 13.3 Altri accessori 13.4 Accessori per Transferpette®... -
Page 194: Riparazione
Compilare la 'Dichiarazione di assenza di rischi per la salute' ed inviarla con lo strumento al distributo- re o al produttore. I moduli possono essere richiesti al distributore o al produttore, oppure si possono scaricare dal sito www.brand.de. All'interno degli Stati Uniti e del Canada Si invita a chiarire i prerequisiti per la restituzione con BrandTech Scientific, Inc. -
Page 195: Servizio Calibrazione
Le istruzioni dettagliate per la verifica possono essere scaricate da www.brand.de o www.brandte- ch.com. Inoltre, BRAND vi offre la possibilità di far tarare i vostri strumenti dal nostro Servizio calibrazione in fabbrica o dal Laboratorio DAkkS BRAND. Inviateci semplicemente i vostri strumenti da tarare con l'in- dicazione del tipo di calibrazione richiesta. -
Page 196: Garanzia
16 Garanzia 16 Garanzia Non ci assumiamo alcuna responsabilità per le conseguenze di manipolazione, uso, manutenzione e impiego non corretti, o per riparazioni non autorizzate dello strumento o per le conseguenze del nor- male consumo, in particolare dei componenti soggetti ad usura, come ad esempio pistoni, guarnizioni e valvole, e in caso di rottura del vetro. - Page 197 目录 1 引言 ......198 12 产品上的标识 ....... 225 供货范围 .....198 13 订购信息 ......226 使用规定 .....198 13.1 订购信息 ...... 2 26 2 安全规定 ......199 13.2 备件 ......2 28 一般安全规定 ....199 13.3 其他配件 ...... 2 29 预期用途 .....199 13.4 用于...
-
Page 198: 供货范围
1 引言 1.1 供货范围 Transferpette® electronic,一个蓄电池、带蓄电池充电线的电源、硅脂、本使用说明书和 1 个移 液器吸头样品袋。 1.2 使用规定 • 在第一次使用前请认真阅读本使用说明书。 • 该使用说明书是此设备所包含的部分,必须妥善保存并且易于取阅。 • 如果将本设备交予第三方,须随附本使用说明书。 1.2.1 危险等级 下列信号词提示可能存在的危险: 信号词 含义 危险 将导致重伤或死亡。 警告 可能导致重伤或死亡。 小心 可能导致轻伤或中度伤害。 提示 可能导致损失财物。 1.2.2 图示 图示 含义 图示 含义 表示一项任务。 > 表示一项前提条件。 1.Task a., b., c. -
Page 199: 安全规定
2 安全规定 2 安全规定 2.1 一般安全规定 务必请仔细通读! 实验室设备 Transferpette® electronic 可与危险材料、工作过程和配件结合使用。本使用说明书未 展示可能出现的安全问题。用户有责任确保遵守安全法规和健康法规,并在使用前确定存在的限 制条件。 所有使用者在使用本仪器之前必须阅读和注意本使用说明书。 遵守一般危险提示和安全法规,例如穿戴防护服、护目镜和防护手套。 在使用传染性或危险试样进行工作时,必须遵守标准实验室规定和标准预防规定。 请注意试剂供应商提供的所有说明。 请勿在潜在爆炸性气体环境中使用仪器,请勿对易燃介质进行移液。 仅将仪器用于液体吸移,在规定的使用极限和使用限制范围内使用。注意使用排除范围, 参见使用排除范围, 页 200!如有疑问,请联系制造商或者经销商。 请始终以对使用者及他人均安全的方式使用该仪器。避免飞溅。仅使用合适的容器。 使用腐蚀性介质时,应避免接触吸头开口。 使用该仪器时请不要过度用力。 仅使用原装备件。不得进行任何技术更改。 不得违背使用说明书的说明进一步拆解仪器。 使用前请检查本仪器的状态是否正常。如果仪器在操作时有潜在的故障迹象(如活塞不灵 活、泄漏),请立即停止移液,并遵循故障——如何处理?, 页 224一章中的说明。必要时 请联系制造商。 原装电池不得更换为其他制造商的蓄电池或电池。 只允许使用原装电源为镍氢电池充电。 电源必须防潮,并且只允许和本仪器搭配使用。 根据适用规定废弃处理蓄电池。 警告 因损坏的电池导致的潜在爆炸危险 极端情况下,如果对设备或电池操作不当(短路、机械损坏、过热等)可能导致电 池爆炸。 2.2 预期用途 Transferpette® electronic 是一种基于气垫原理、由微处理器控制、由蓄电池供电的活塞式移液 器,用于中等密度和粘度水性溶液的移液。在正确处理仪器时,待移取的试样仅与尖吸嘴接触,... -
Page 200: 使用限制
2 安全规定 • 蒸汽压力最大 500 mbar 粘度:260 mPa s • 如果是粘性介质,则可能需要调整速度。 2.4 使用限制 粘稠和润湿的液体可能对体积精度产生不良影响。也包括其温度与室温偏差超过 ± 1 °C/± 1.8 °F 的液体。 2.5 使用排除范围 用户必须自行检查仪器是否适合预期用途。不得使用仪器: • 对于会侵蚀聚丙烯或聚偏二氟乙烯、聚碳酸酯/聚丁烯对苯二甲酸酯、聚醚醚酮、FKM 或 EPDM(柔性备用移液器杆)的液体 避免腐蚀性蒸汽(腐蚀风险)! 不可对抓握部位进行高压灭菌。 2.6 蓄电池和电源规格 蓄电池 镍氢蓄电池,带 3 个圆柱形单节电池,AAA 规格,3.6 V,700 mAh 电源 输出电压 6.5 V DC,200 mA Transferpette®... -
Page 201: 功能和操作元件
3 功能和操作元件 3 功能和操作元件 充电插座 电池盒 菜单选择键 箭头键 (+) Enter 键:输入确认 / 电源 箭头键 (-) ‘On’*) 指托 抓握部位 移液器杆 移液器吸头支撑锥体 移液器吸头排放按键 移液按键 显示屏 *) 按下 Enter 键开启仪器!然后按下移液键,仪器移液准备就绪。 最后一次操作 10 分钟之后,Transferpette® electronic自动关闭(自动断电)。 Transferpette® electronic符合人体工学原理,称手且舒适。为了绝对轻松自如地操作各个功能键, 可以使用一个可通过螺栓调节高度的指托进一步优化手部位置。 Transferpette® electronic 997209 操作手册... -
Page 202: 第一步
4 调试 4 调试 4.1 第一步 1.装入蓄电池 打开蓄电池盒的盖子。 放入电池。注意将蓄电池插头牢固插入仪器的插口 中。 重新装入并合上蓄电池盒的盖子。 2.激活仪器 装入蓄电池之后,Transferpette® electronic立即自动请求 基准化运行。按下移液键之后执行基准化运行,仪器移液 准备就绪! 显示屏显示了出厂设置的标准移液模式 (PIP) 和相应额定 吸移 蓄电池容量 体积。 指示器 吸入和放液速度出厂设置为最大值。 以下几页中对简单的体积和速度调节方法进行了介绍。 箭头符号 体积显示 ‘吸入’ Transferpette® electronic 997209 操作手册... -
Page 203: 调节体积
4 调试 4.2 调节体积 体积出厂设置为Transferpette® electronic的相应额定体积,可以快速且个性化改变。 按下其中一个箭头键便可以直接选择体积。 ð ‘VOL’ 闪烁。 通过按下箭头键 (-) 减小体积。长按箭头键可快速 改变体积。 ð ‘VOL’ 继续闪烁。 按下箭头键 (+) 增大体积。长按箭头键可快速改变 体积。 ð ‘VOL’ 继续闪烁。 若要确认体积选择,请按下 Enter 键。 ð 显示屏现在显示新设定的体积,如显示默认设置的 PIP 模式。 注意 按下菜单键,可以取消每个设置过程!然后显示将跳转到下一个设置选项,或返回初始显示界 面。 4.3 调节吸入和放液速度 可调节设置吸入和放液速度。调用菜单时,会显示上一次调节的速度。分别有 5 个速度等级。 Transferpette® electronic 997209 操作手册... - Page 204 4 调试 调节吸入速度 短按一次菜单键,进入吸入速度菜单。 ð ‘Speed’闪烁。 按下箭头键 (+/-) 选择速度等级(例如 5 级)。 ð “Speed” 继续闪烁。 按下 Enter 键。 ð 显示屏返回当前设定模式的基本状态,例如此时会显 示标准 PIP 模式。 调节放液速度 短按两次菜单键,进入放液速度菜单。 ð ‘Speed’闪烁。 按下箭头键 (+/-) 选择速度等级(例如 2 级)。 ð ‘Speed’继续闪烁。 Transferpette® electronic 997209 操作手册...
- Page 205 4 调试 按下 Enter 键。 ð 显示屏返回当前设定模式的基本状态,例如此时会显 示标准 PIP 模式。 4.4 吸移 体积出厂设置为Transferpette® electronic 的相应额定体积,可以快速且个性化改变,参见调节体 积, 页 203。 垂直插上吸头: 根据体积范围或颜色代码使用正确的移液器吸头! 注意吸头是否密封和紧密配合。 如果使用的是柔性移液器杆,必要时请插入备用的可 互换夹子。 移液器吸头为一次性产品! 吸液:垂直稳住仪器,将移液器吸头浸入液体中 2-3 mm。按下移液键吸入液体。显示屏中的箭头朝 上(吸液)。 将移液器吸头再浸入数秒,以完全提取所设体积。如 果是粘性介质和大体积移液器,尤其要注意这一点。 体积范围 浸入深度 等待时间 0,5 – 100 µl 2 – 3 mm 100 µl – 300 µl 2 –...
-
Page 206: 直接触发吹出排液
5 移液程序 4.5 直接触发吹出排液 如有必要,可随时直接触发超行程(吹出排液,即 Blow-out)。 调用吹出排液功能:按下 Enter 键。显示屏显示 的‘blo’表示吹出排液。 触发超行程:按下一次移液键触发超行程,显示屏跳 转回所设定的移液模式(起始位置)。 注意 超行程(吹出排液)时,活塞完全下移。必须确保所有剩余液体的安全放液。长按移液键,活塞 保持在下方,从而防止意外吸入液体。松开之后,活塞返回起始位置。 5 移液程序 操作 名称 信息 标准程序。 PIP 模式,参见 PIP 模 正常移液 将吸取之前输入的体积,并再次放液 式, 页 207 用于装载电泳凝胶的程序。以可变的高速度吸入之前 GEL 模式,参见电泳 电泳移液 定义的试样体积,并再次缓慢放液。 (GEL) 模式, 页 211 用于混合液体的程序。 PIPmix 模式,参见 混合试样 连续重复吸入试样并放液。 PIPmix 模式, 页 208 专用于高粘度、高蒸气压力的液体,或发泡介质移液... -
Page 207: Pip 模式
5 移液程序 5.1 PIP 模式 标准程序——将吸取之前输入的体积,并再次放液。 体积和速度调节,参见调节体积, 页 203和调节吸入和放液速度, 页 203。 调用菜单选择:按下三下菜单键进入程序选择。 ð ‘Mode’闪烁。 设置 PIP 模式:利用其中一个箭头键滚动浏览模 式,直到显示‘PIP’ 。 ð ‘Mode’继续闪烁。 确认 PIP 模式:按下 Enter 键。 ð 显示屏现在显示的‘blo’ 表示吹出排液(超行 程)。 准备移液:按下一次移液键,活塞移入其起始位置。 ð 显示屏中的箭头朝上(吸液)。 吸入液体:按下一次移液键吸入液体。 Transferpette® electronic 997209 操作手册... -
Page 208: Pipmix 模式
5 移液程序 放液:按下一次移液键即可放液。 ð 显示屏中的箭头朝下(放液)。 触发超行程?您无需任何操作!PIP 模式下移液时, 将自动执行超行程(吹出排液)! 5.2 PIPmix 模式 用于混合液体的程序。连续重复吸入试样并放液。 体积和速度调节,参见调节体积, 页 203和调节吸入和放液速度, 页 203。 调用菜单选择:按下三下菜单键进入程序选择。 ð ‘Mode’闪烁。 设置 PIPmix 模式:利用其中一个箭头键滚动浏览模 式,直到显示‘PIPmix’ 。 ð ‘Mode’ 继续闪烁。 确认 PIPmix 模式:按下 Enter 键。 ð 显示屏现在显示的‘blo’表示吹出排液(超行 程)。 Transferpette® electronic 997209 操作手册... -
Page 209: Revpip 模式
5 移液程序 准备移液:按下一次移液键,活塞移入其起始位置。 ð 显示屏中的箭头朝上(吸液)。 吸入液体:按下一次移液键吸入液体。 PIPmix 模式下放液:长按移液键,可交替放液和吸 针对 液。显示屏中交替显示用于吸液和放液的箭头符号以 及循环次数。 长按 结束移液:按下一次移液键即可放液,并触发超行程 (吹出排液)。剩余液体放液(超冲程)之后,显示 屏跳转回已设定的模式(起始位置)。 注意 显示屏最多显示 19 个循环。 5.3 revPIP 模式 专用于高粘度、高蒸气压力的液体,或者发泡介质移液的程序。 体积和速度调节,参见调节体积, 页 203和调节吸入和放液速度, 页 203。 调用菜单选择:按下三下菜单键进入程序选择。 ð ‘Mode’闪烁。 Transferpette® electronic 997209 操作手册... - Page 210 5 移液程序 设置 revPIP 模式:利用其中一个箭头键滚动浏览模 式,直到显示‘revPIP’ 。 ð ‘Mode’继续闪烁。 确认 revPIP 模式:按下 Enter 键。 ð 显示屏现在显示的‘blo’表示吹出排液(超行 程)。 准备移液:按下一次移液键,活塞移入其起始位置。 ð 显示屏中的箭头朝上(吸液)。 吸入液体:按下一次移液键吸入液体。 注意 吸入液体时,吸取的体积会比设定量多一些! revPIP 模式下放液:按下一次移液键进行放液。显 示屏上的箭头朝下(放液)。现在排放了设定的体 积,并且一些液体保留在吸头中。 revPIP 模式下再次吸液:再次按下移液键,现在重 新吸取之前设定的体积。(再次按下移液键,再次排 放该体积等) Transferpette® electronic 997209 操作手册...
-
Page 211: 电泳 (Gel) 模式
5 移液程序 触发超行程:最后一次移液之后,按下 Enter 键。 ð 显示屏现在再次显示‘blo’表示吹出排液(超行 程)。 结束移液:按下一次移液键,触发超行程(吹出排 液),并排放剩余液体。 ð 剩余液体放液(超冲程)之后,显示屏跳转回已设定 的模式(起始位置)。 5.4 电泳 (GEL) 模式 用于装载电泳凝胶的程序。以可变的高速度吸入之前定义的试样体积,并再次缓慢放液。 体积和速度调节,参见调节体积, 页 203和调节吸入和放液速度, 页 203。 调用菜单选择:按下三下菜单键进入程序选择。 ð ‘Mode’闪烁。 设置 GEL 模式:利用其中一个箭头键滚动浏览模 式,直到显示‘GEL’ 。 ð ‘Mode’继续闪烁。 确认 GEL 模式:按下 Enter 键。显示屏现在显示 的‘blo’表示吹出排液(超行程)。 Transferpette® electronic 997209 操作手册... - Page 212 5 移液程序 准备移液:按下一次移液键,活塞移入其起始位置。 ð 显示屏中的箭头朝上(吸液)。 吸入液体:按下一次移液键吸入液体。 为了吸入超过设定量的液体(最多为额定体积的 针对 110%),请在吸入过程中长按移液键,直到已吸入所 需体积。 长按 ð 显示屏中显示一个井号。 GEL 模式下放液:短按一次移液键进行放液。显示屏 中显示一个井号。已吸取的体积再次缓慢放液。 再次按下移液键,可以中断试样放液。 ð 显示屏显示已排放液体量的体积。 触发超行程:最后一次移液之后,按下 Enter 键。 ð 显示屏现在再次显示‘blo’表示吹出排液(超行 程)。 结束移液:按下一次移液键,触发超行程(吹出排 液),并排放剩余液体。 ð 剩余液体放液(超冲程)之后,显示屏跳转回已设定 的模式(起始位置)。 注意 GEL 模式要求非常慢的放液速度,以防止试样出现湍流。为确保理想放液,出厂时已指定了放液 速度。它比可调节的 1 级要慢很多,并且不能个性化选择。 Transferpette® electronic 997209 操作手册...
-
Page 213: Disp 模式
5 移液程序 5.5 DISP 模式 用于分步排放已吸取液体的程序。吸取的液体要超过计算所得的需求量。 体积和速度调节,参见调节体积, 页 203和调节吸入和放液速度, 页 203。 调用菜单选择:按下三下菜单键进入程序选择。 ð ‘Mode’闪烁。 设置 DISP 模式:利用其中一个箭头键滚动浏览模 式,直到显示‘DISP’ 。 ð ‘Mode’继续闪烁。 确认 DISP 模式:按下 Enter 键。 ð 显示屏现在显示的‘blo’表示吹出排液(超行 程)。 准备移液:按下一次移液键,活塞移入其起始位置。 ð 显示屏中的箭头朝上(吸液)。 调节分量体积:按下箭头键 (+/-) 调节体积。长按 箭头键可快速改变体积。 ð ‘VOL’闪烁。 Transferpette® electronic 997209 操作手册... - Page 214 5 移液程序 确认分量体积:按下 Enter 键。显示屏显示新设定 的分量体积。 ð ‘steps'闪烁。显示最大可能的步骤数。 调节步骤数:按箭头键 (+/-) 调节步骤数。 ð ‘steps’继续闪烁。 确认步骤数:按下 Enter 键。 ð 显示屏显示所设定的步骤数。 吸入液体:按下一次移液键吸入液体。 放液:每次按下移液键,都会执行一次分配步骤。显 示屏中的箭头朝下(放液)。步骤数显示器显示了剩 余步骤数。 触发超行程:最后一次分配之后,按下 Enter 键。 ð 显示屏现在再次显示‘blo’表示吹出排液(超行 程)。 结束分配:按下一次移液键,触发超行程(吹出排 液),并排放剩余液体。 剩余液体放液(超冲程)之后,显示屏跳转回已设定 的模式(起始位置)。 Transferpette® electronic 997209 操作手册...
-
Page 215: 检查体积
6 检查体积 6 检查体积 我们建议根据具体使用情况每 3-12 个月检查一次仪器。但具体周期可根据个性化要求进行调 整。通过以下步骤按重量进行移液器体积检测,依据 DIN EN ISO 8655 第 6 部分的要求。 1.调节额定体积 调节注明的最高仪器体积(操作方法参见吸移, 页 205)。 2.对移液器进行温度调节 检测前,使用移液器吸头提取和分配五次检测液 (蒸馏水),对移液器进行温度调节。 3.进行检测 注意 依据 DIN EN ISO 8655-2,建议每次单独测量之后更换移液器吸头。DAkkS 准则 DKD-R8-1 可能 与该规定有偏差。 提取检测液,吸移到称重容器中。 使用分析天平称量吸移量的重量。(注意天平生产商的使用说明书。) 计算吸移体积。这时要考虑检测液的温度。 建议至少在 3 个体积范围内 (100 %, 50 %, 10 %) 进行 10 次吸移和称重。 计算(用于额定体积)... -
Page 216: 精度表
7 精度表 注意 可以前往 www.brand.de 下载测试规范 (SOP)。 7 精度表 体积 R* ≤ ± % VK* ≤ % 分量 子 推荐的移液器吸头型号 范围 体积 步骤 [μl] [μl] [μl] [µl] 0.5 - 10 0.01 0.5 - 20 5 1 2 - 20 0.02 0.5 - 20... -
Page 217: 调整 - Easy Calibration(易校准
8 调整 – Easy Calibration(易校准) 8 调整 – Easy Calibration(易校准) 8.1 调整 已设定额定体积或待测试体积,标准模式移液 (PIP),例 如 200.0 µl(操作方法参见 PIP 模式, 页 207)。例如: 根据体积测试的体积 201.3 µl。 调用 CAL 模式:长按菜单键(> 3 秒)调用 CAL 模 式。 ð 显示器显示‘off’。 > 3 s ð ‘CAL’闪烁。 激活 CAL 模式:按下其中一个箭头键激活 CAL 模 式。... -
Page 218: 恢复出厂设置
8 调整 – Easy Calibration(易校准) 8.2 恢复出厂设置 显示屏中持续显示的 CAL 符号代表已进行调整。 调用 CAL 模式:长按菜单键(> 3 秒)调用 CAL 模 式。 ð 显示屏显示‘on’。 ð ‘CAL’闪烁。 > 3 s 关闭 CAL 模式:按下其中一个箭头键停用 CAL 模 式。 ð 显示从‘on’变为‘off’。 ð ‘CAL’继续闪烁。 建立出厂状态:按下 Enter 键。 ð 持续显示的 CAL 符号消失。 ð... -
Page 219: 消毒/高压消毒处理
9 消毒/高压消毒处理 9 消毒/高压消毒处理 9.1 紫外线消毒 该仪器耐受紫外线杀菌灯的常用功率。照射紫外线后颜色可能会变化。 9.2 高压消毒处理 Transferpette® electronic 的突出显示部分可以在 121 °C (250 °F),2 bar 下高压消毒处理,依据 DIN EN 285, 保持时间至少为 15 分钟。 顶出移液器吸头。 从抓握部位上拧下移液器杆。 在不继续拆卸的情况下,对整个移液器杆进行高压消 毒处理。 让移液器杆完全冷却并干燥。 将移液器杆拧回抓握部位中。 执行基准化运行 (rEF)。 注意 用户应自行对高压消毒处理的有效性进行仔细检查。通过 真空蒸馏实现最高安全性。我们建议使用蒸馏袋。 如果频繁进行高压消毒处理,使用随供的润滑脂涂抹活塞 和密封件,使其更加灵活。 必要时在高压消毒处理之后拧紧抓握部位和移液器杆之间 的螺栓连接。 9.3 基准化运行 (rEF) 每次更换移液器杆后,必须执行手动基准化运行。基准化运行用于活塞的安全对接。... -
Page 220: 拆卸/清洁(最高 1000 Μl
10 维护 10 维护 为保证正常发挥作用,应定期维护并在必要时清洁 Transferpette® electronic。 10.1 拆卸/清洁(最高 1000 μl) 检查移液器支撑锥体是否损坏。 检查活塞和密封件是否脏污。 检查设备的密封性。 我们建议使用 BRAND 密封性检测仪 BRAND PLT unit。为此,抽吸样品,使设备保持垂直约 10 s。如果在移液器吸头上形成液滴,参见故障——如何处理?。 清洁 A 顶出器上部 B 活塞单元 C 带弹簧的密封件 D 移液器杆 E 顶出器下部 S 移液器杆 从抓握部位上拧下移液器杆 (S)。 从抓握部位上取下移液器杆。移液器杆通过磁体固定 在抓握部位上。 从移液器杆中旋出顶出器上部 (A)。... -
Page 221: 拆卸/清洁 (250 Μl - 5000 Μl)
10 维护 10.2 拆卸/清洁 (250 µl – 5000 µl) 检查移液器支撑锥体是否损坏。 检查活塞和密封件是否脏污。 检查设备的密封性。 我们建议使用 BRAND 密封性检测仪 BRAND PLT unit。为此,抽吸样品,使设备保持垂直约 10 s。如果在移液器吸头上形成液滴,参见故障——如何处理?。 清洁 G 顶出器上部 H 活塞单元 I 移液器杆下部 J 闭锁装置 G' 顶出器下部 S 移液器杆 同时按下侧面闭锁装置 (J),并拉出顶出器下部 (G')。 从抓握部位上松开移液器杆 (H+I)。 从抓握部位上取下移液器杆。移液器杆通过磁体固定 在抓握部位上。 通过拉动断开两组件的磁性连接,并卸下顶出器上部 (G)。... -
Page 222: 蓄电池充电和更换
10 维护 一旦过滤器润湿或脏污,则更换过滤器。 使用扁平物件,比如螺丝刀。 小心地拔出过滤器,以免损坏移液器吸头锥体。 高压消毒处理之前移除过滤器! 仪器也可以在没有过滤器情况下运行。 10.3 蓄电池充电和更换 如果是粘度和密度类似水的试样,则完全充满电的蓄电池可连续移液大约 8 小时(超过 4000 次 移液循环)。 注意 > 充电前必须确保电源适合实验室中的可用电压。 > 本仪器不得在潜在爆炸性环境中充电。 > 只能在Transferpette® electronic中为蓄电池充电! 蓄电池充电 将电源的充电线插头插入Transferpette® electronic顶 部的指定插口。 ð 充电过程自动开始。 ð 充电过程中,蓄电池容量显示器上的指示条不断从下 往上涨。 ð 如果显示屏上的指示条停住不动,则蓄电池已充满 电。 在充电过程中移液? 您可以在充电时继续使用Transferpette® electronic 工作。如果蓄电池已完全放电,则需要数分钟 的时间才能达到指定的最小充电容量,这对于仪器的安全运行而言是必需的。最后执行的设置在 仪器的... -
Page 223: 蓄电池再生功能
10 维护 重新装入并锁上蓄电池盒的盖子。 如果长时间暂停使用,请从仪器中取出蓄电池。 重新装入蓄电池后的电池显示器 在装入蓄电池之后,显示屏中显示完整的容量显示器,且 边框闪烁(仪器目前尚未识别充电状态)。在充电 3.5 小 时后 - 蓄电池的安全且完全充电 - 边框停止闪烁。 注意 在装入蓄电池之后,务必充电 3.5 小时!经过多个充电/ 放电循环之后,达到完整的充电容量! 10.4 蓄电池再生功能 Refresh 功能 Transferpette® electronic 具备再生功能(Refresh 功能),可延长蓄电池使用寿命,并提高电池 的性能。通过该功能,蓄电池在程序控制下完全放电并再次充电。应当时不时利用 Refresh 功能 优化蓄电池性能。 执行 Refresh 功能 将电源的充电线插头(接头)插入Transferpette® electronic顶部的指定插口。 按下向下箭头键 3 秒以上。在放电期间,电池显示 器上的容量指示条不断从上往下降。 1 x >... -
Page 224: 故障--如何处理
11 故障——如何处理? 放电(最多 3 小时)之后,自动开始充电过程(3.5 小时)。在充电期间,电池显示器上的容量指示条不 断从下到上涨。 取消 Refresh 功能 按下任意键退出该程序。仪器自动切换到标准移液模式 (PIP),返回额定容量,并自动开始正常 充电过程,参见蓄电池充电和更换, 页 222。拔下电源插头,同样会退出该程序。不得在放电循环 结束时取消 Refresh 功能。 11 故障——如何处理? 故障 显示屏中的显 原因 如何处理? 示 仪器无响应 ERR 1 蓄电池电量已耗尽或 在无操作的情况下为蓄电池充电 有缺陷 至少 5 分钟,然后仅在连着充电 线的情况下继续工作,直到蓄电 池完成补充充电,必要时更换蓄 电池 电子元件有缺陷 仪器送修 仪器无响应 ERR 2 电子元件有缺陷... -
Page 225: 产品上的标识
标志或编号 含义 我方通过此标志确认产品符合 EC 指令的要求,并且已采用指定的检 查方法。 UKCA: 英国合规性评估 我方通过此标志确认产品符合 UK Designated Standards 中指定的要 求。 本仪器依照德国《测量和校准法》以及《测量和校准条例》进行标 DE-M 21 识。 带一个矩形框的字符串 DE-M(DE 表示德国),以及年份的后两个数 字。 www.brand.de/ip 版权信息 XXZXXXXX 序列号 请遵守仪器、附件和使用说明书中的提示。 必须专业地处理废弃仪器或蓄电池。 中国 RoHS (EFUP) EFUP 确定了电气设备或电子设备中所含有的危险材料在正常运行条件 下不会泄露或者变异的年份时间范围。在用户正常使用时,此类电气 和电子产品不会导致严重的环境污染、不会对用户造成严重的人身伤 害或者财物损失。 不得将电气仪器与生活垃圾一起清理。 Transferpette® electronic 997209... -
Page 226: 订购信息
13 订购信息 13 订购信息 13.1 订购信息 Transferpette® electronic 体积 0.5-10 µl 2-20 µl 10-200 µl 50-1000 µl 250-5000 µl 带电源 订购号 订购号 订购号 订购号 订购号 AC 100-240 V ~50-60 Hz 面向欧洲 705299 705300 705303 705306 705307 面向英国/爱尔 705309 705310 705313 705316 705317 兰... - Page 227 带电源的充电座 产品描述 订购号 带电源的充电座 (AC 100-240 V ~50-60 Hz),用于 3 件最高 1000 µl 的Transferpette® electronic。 面向欧洲 705390 面向英国/爱尔兰 705391 面向美国/日本 705392 面向澳大利亚 705393 BRAND 优质移液器吸头 体积 材料 包装单位 订购号 散装 0.1-20 µl 2000 732002 0.5-20 µl 2000 732004 1-50 µl...
- Page 228 13 订购信息 13.2 备件 13.2.1 最高 1000 µl 的Transferpette® electronic 备件的设计和尺寸符合相应的额定体积。(Transferpette ® electronic 50-1000 µl 备件插 图。) A 顶出器上部 D 带顶出器弹簧的移液器杆 B 活塞单元 E 顶出器下部 C 带密封件的弹簧 S 完整移液器杆 体积 0.5-10 µl 705510 705518 – 705538 705548 705528 2-20 µl 705510 705520 705530...
-
Page 229: 其他配件
13 订购信息 13.2.2 Transferpette® electronic 250 - 5000 µl G 顶出器上部 G' 顶出器下部 H 活塞单元 I 移液器杆下部 S 完整移液器杆 体积 G + G' 250-5000 µl 7299 705526 703247 705549 13.3 其他配件 13.4 用于 Transferpette® electronic 10-200 µl 和 50-1000 µl 的附件 可互换夹子... - Page 230 10-200 µl 705543 50-1000 µl 705545 14 维修 14.1 送修 注意 法律明确禁止在未经许可的情况下运输有害材料。 彻底清洁仪器并清除污染物! • 寄回产品时,原则上须附上故障类型与所使用介质的准确描述。如果缺失所使用介质的相关 信息,仪器将不能得到维修。 • 仅发送不含蓄电池的仪器。 • 寄回仪器的风险和费用由寄件人承担。 在美国和加拿大之外 将“无健康危害声明”填写完整,并和仪器一同发送给您的经销商或制造商。可以向经销商或制 造商索要表格,也可以从 www.brand.de 主页下载。 在美国和加拿大以内 在返修仪器之前,请联系 BrandTech Scientific, Inc. 确认寄回仪器需满足的各项前提。 只接受已清洁并已去除污染物的仪器,将和返修授权码一同告知您地址。将返修授权码标在包装 外侧的显眼位置。 联系地址 德国: 美国和加拿大: Transferpette® electronic 997209 操作手册...
-
Page 231: 校准服务
15 校准服务 BRAND GMBH + CO KG BrandTech ® Scientific, Inc. Otto-Schott-Straße 25 11 Bokum Road 97877 Wertheim (Germany) Essex, CT 06426-1506 (USA) 电话 +49 9342 808 0 电话 +1-860-767 2562 传真 +49 9342 808 98000 传真 +1-860-767 2563 info@brand.de info@brandtech.com... -
Page 232: 缺陷责任
16 缺陷责任 16 缺陷责任 我们不承担由于不当拿取,使用,服务,操作或未授权的仪器维修产生的 结果,我们同样不承担 由于正常易损件如活塞,密封垫圈,阀门的磨损或 者玻璃破损而产生的结果。我们也不承担由于 不按照操作手册/使用说明指 导的操作而产生的结果。我们不承担由于进行任何操作手册未描述 的拆卸 或由于非原装配件的使用而产生的结果。 美国和加拿大: 有关保修责任的 信息 请参见 www.brandtech.com。 17 废弃处理 相邻图标表示,必须在电池 / 蓄电池和电子设备使用寿命 结束时将其与生活垃圾(未分类的城市垃圾)分开清理。 根据欧洲议会和理事会 2012.7.04 关于废弃电气和电子设备的 2012/19/EC 指令,必须按照国家 废物处理法规专业处理废弃电子设备。 蓄电池含有可能对环境和人类健康造成危害的物质。根据欧洲议会和理事会 2006.9.6 关于电池 和蓄电池的 2006/66/EC 指令,必须根据国家废弃处理法专业处理废弃电池和蓄电池。废弃处理 时必须将电池和蓄电池完全放电。 Transferpette® electronic 997209 操作手册... - Page 233 997209 | Printed in Germany | 5-0122-1...
Need help?
Do you have a question about the Transferpette electronic and is the answer not in the manual?
Questions and answers