Table of Contents
Advertisement
Advertisement
Table of Contents
Troubleshooting

Related Manuals for Respironics DreamStation


Summary of Contents for Respironics DreamStation
- Page 1 DreamStation Service & Technical Reference Manual...
-
Page 2: Table Of Contents
1117539, V . 07 1: I HAPTER NTRODUCTION 1.0 CPAP/B PAP S ................. 1-2 YSTEM VERVIEW 1.1 H ..................1-4 UMIDIFIER YSTEM VERVIEW 1.2 S ......................1-5 ERVICE OTICE 1.3 S ......................1-5 ERVICE RAINING 1.4 P ..................1-5 RODUCT UPPORT TATEMENT 2: W... - Page 3 1117539, V . 07 4.13.3 Link Module........................4-30 5: T HAPTER ROUBLESHOOTING AND RROR ODES 5.0 I ........................5-1 NTRODUCTION 5.1 B ......................5-1 ENCH HECKOUT 5.1.1 PAP Device:........................... 5-1 5.1.2 Humidifier:..........................5-1 5.2 V .....................5-2 ERIFYING RESSURE 5.3 S ..................5-3 ERVICE ENTER OOLS UITE...
- Page 4 1117539, V . 07 6.4 C ................. 6-28 LEANING FOR ULTIPLE SERS 6.5 C ................ 6-29 LEANING OR EPLACING THE ILTERS 6.6 C ....................6-30 LEANING THE UBING 6.7 P ..................6-30 REVENTIVE AINTENANCE 7: H HAPTER UMIDIFIER EPAIR AND EPLACEMENT 7.0 H (RP) K...
-
Page 5: 1117539, Ver
1117539, V . 07 This page intentionally blank. - Page 6 1117539, V . 07 © 2016 Koninklijke Philips N.V. All rights reserved.
-
Page 7: Chapter 1: Introduction
IPAP (Inspiratory Positive Airway Pressure) and EPAP (Expiratory Positive Airway Pressure). The DreamStation BiPAP Auto can also be set up as an Auto Bi-level device. Both BiPAP systems can also be set up as a CPAP (Continuous Positive Airway Pressure) device. - Page 8 1117539, V . 07 The devices provide several special features to help make therapy more comfortable. The ramp function allows the user to lower the pressure when they are trying to fall asleep. The air pressure will gradually increase until their prescription pressure is reached. Also, the Flex comfort feature provides the user with pressure relief when they exhale during therapy.
-
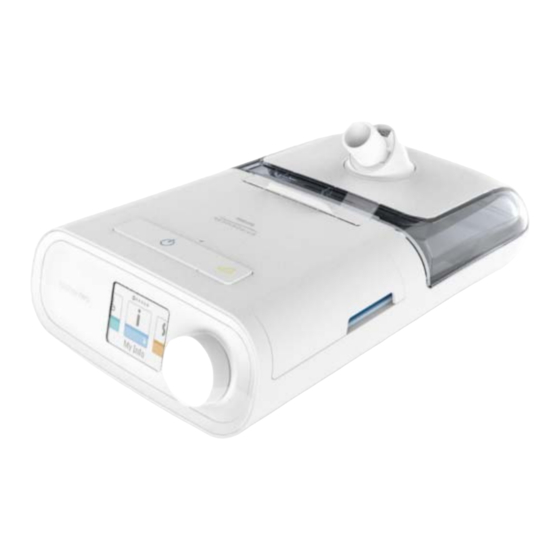
Page 9: Humidifier System Overview
YSTEM VERVIEW The DreamStation Heated Humidifier attaches to the therapy device and provides an air outlet port to connect a breathing circuit. The breathing circuit is comprised of patient tubing, a mask, and in some instances a separate exhalation device. The patient tubing can be Respironics heated tubing, 22 mm (non-heated) performance tubing or 15 mm (non-heated) performance tubing. -
Page 10: Service Notice
By using the most current version of the service manual (found on my.respironics.com) and the latest testing software, all repairs and testing can be performed. If service training is desired, contact the Philips Respironics service location in your area to schedule training. - Page 11 1117539, V . 07 This page intentionally blank.
-
Page 12: Chapter 2: Warnings , Cautions , & Notes
Refer to the devices’ User and Provider Manuals for warnings, cautions and notes. 2-1: U & P ABLE ROVIDER ANUALS ESCRIPTION UMBER DreamStation CPAP, User Manual, EN-INTL CE 1121981 DreamStation BiPAP, User Manual, EN-INTL CE 1121982 DreamStation Humid, User Manual, EN-INTL CE 1121984 DreamStation, Provider Guide, EN-INTL CE 1121983... - Page 13 1117539, V . 07 This page intentionally blank.
-
Page 14: Chapter 3: Specifications & Classifications
Refer to the devices’ User and Provider Manuals for specifications and classifications. 3-1: U & P ABLE ROVIDER ANUALS ESCRIPTION UMBER DreamStation CPAP, User Manual, EN-INTL CE 1121981 DreamStation BiPAP, User Manual, EN-INTL CE 1121982 DreamStation Humid, User Manual, EN-INTL CE 1121984 DreamStation, Provider Guide, EN-INTL CE 1121983... - Page 15 1117539, V . 07 This page intentionally blank.
-
Page 16: Chapter 4: Setup
A Philips Respironics DC power cord can be used to operate this device in a stationary recreational vehicle, boat, or motor home. In addition, a Philips Respironics DC battery adapter cable, when used with a DC power cord, allows the device to be operated from a 12 VDC free-standing battery. -
Page 17: Device
1117539, V . 07 4.1 S AC P UPPLYING OWER TO THE EVICE Complete the following steps to operate the device using AC power: 1. Plug the socket end of the AC power cord (included) into the power supply (also included). 2. -
Page 18: Ubing To The Pap Device
1117539, V . 07 4.2 C PAP D ONNECTING THE UBING TO THE EVICE To connect the Tubing to the device, complete the following steps: 1. Connect the flexible tubing to the air outlet on the back of the therapy device. Line up the connec- tor (1) at the top of the heated tube to the top of the air outlet port on the back of the device. -
Page 19: Connecting The Humidifier To The Pap Device
1117539, V . 07 WARNINGS • Do not pull or stretch the tubing. This could result in circuit leaks. • Inspect the tubing for damage or wear. Discard and replace the tubing as necessary. • If the device is used by multiple persons (such as rental devices), a low- resistance, main flow bacteria filter should be installed in-line between the device and the circuit tubing to prevent contamination. -
Page 20: Onnecting The Ubing To The Umidifier
1117539, V . 07 4.4 C ONNECTING THE UBING TO THE UMIDIFIER 1. To attach the heated tube to the heated humidifier, line up the connector (1) at the top of the heated tube to the top of the air outlet port (2) on the humidifier. 4-7: C IGURE ONNECTING THE... -
Page 21: Disconnecting The Tubing
1117539, V . 07 4.5 D ISCONNECTING THE UBING 1. To remove the heated tubing, press in the tabs (1) on the side of the tubing connector and pull the tubing away from the outlet port. 4-9: D IGURE ISCONNECTING THE UBING 2. -
Page 22: Checking The Humidifier Lid Seal
1117539, V . 07 4.7 C HECKING THE UMIDIFIER Under normal use, the humidifier lid seal should not require any maintenance or replacement. The seal may be cleaned as needed by wiping it with a damp cloth. If necessary, the humidifier lid seal may be removed for further cleaning. -
Page 23: Filters
NSTALLING EPLACING THE ILTERS CAUTION A properly installed, undamaged Philips Respironics blue pollen filter is required for proper operation. The device uses a blue pollen filter that is washable and reusable, and a light-blue ultra-fine filter that is disposable. The reusable blue filter screens out normal household dust and pollens, while the light-blue ultra-fine filter provides more complete filtration of very fine particles. -
Page 24: Tarting The Evice
ILTER 4.9 S TARTING THE EVICE 1. Ensure power is supplied to the device. The first screen to display will be the Philips Respironics logo, followed by the device model screen, and then the Home screen. 4-16: H IGURE CREEN The first time the device is powered on, a pop-up will prompt you to set the time on the device. -
Page 25: Navigating The Device Screens
4-10 1117539, V . 07 2. Press the Therapy button on top of the device to turn on airflow and begin therapy. The current delivered pressure will display on the screen. 3. Make sure that no air is leaking from the system. 4. -
Page 26: User Menu Navigation (Therapy On) And Optional Humidification Settings
1117539, V . 07 4-11 4.10.1 U AVIGATION HERAPY PTIONAL UMIDIFICATION ETTINGS While the device is delivering therapy, you can adjust Tube Temperature or Humidifier Settings. Rotate the control dial to choose either setting. Press and rotate the dial to change the setting. Note: If you are using the Humidifier without the Heated Tube, simply just rotate the control dial to change the Humidifier setting. - Page 27 4-12 1117539, V . 07 4.10.2 U AVIGATION HERAPY From the Home screen, you can scroll between the following four options: 4-19: U IGURE HERAPY • My Info: This menu provides summary statistics of your therapy use. • Preheat: This function lets you warm up your humidifier for 30 minutes before starting a therapy session.
- Page 28 1117539, V . 07 4-13 ESCRIPTION Mask Fit Displays the value “100% minus Large Leak”. Large Leak is the percentage of time that the mask leak was so high that it is no longer possible for the device to identify respiratory events with statistical accuracy.
- Page 29 4-14 1117539, V . 07 ESCRIPTION Provider Contact This screen will display the contact information for your Info provider if it has been uploaded to your device. Phone-In This screen displays the total therapy hours for the device, the total blower hours, the total number of days used when the sessions were greater than 4 hours, and a compliance check number used by your home care provider to validate that the data provided by you is the data taken from this...
- Page 30 1117539, V . 07 4-15 ESCRIPTION Performance Your device is equipped with a self-diagnostic tool called Check “Performance Check.” This tool can evaluate your device for certain errors. It also allows you to share key device settings with your home care provider. Use Performance Check when directed to by your home care provider.
- Page 31 This setting allows you to select the correct size diameter tubing that you are using with the device. You can choose either (22) for the Philips Respironics 22 mm tubing, or (15) for the Philips Respironics 15 mm tubing. When using Heated Tubing, the device will automatically change this setting to the appropriate tubing type (15H) and you will not be able to change it.
- Page 32 1117539, V . 07 4-17 Check Mask Fit The optional check mask fit feature can be enabled or disabled by the home care provider. This feature allows you to check the fit of your mask prior to starting therapy. This is done by measuring the amount of leak. Put on your mask assembly.
-
Page 33: Accessing Provider Mode Screens
4-18 1117539, V . 07 4.10.3 A CCESSING ROVIDER CREENS Accessing provider mode unlocks settings that cannot be modified by the user. To access provider mode: 1. Supply power to the device. First, plug the socket end of the AC power cord into the power supply. Then plug the pronged end of the AC power cord into an electrical outlet that is not controlled by a wall switch. - Page 34 1117539, V . 07 4-19 ESCRIPTION Mode This screen displays the therapy mode setting. Depending on CPAP the therapy device model, you can select CPAP mode, CPAP- C-Check Check (C-Check) mode, Auto-CPAP (Auto) mode, Bi-Level Auto mode, or Auto Bi-Level (AutoB) mode. Bi-Level Note: CPAP-Check mode (C-Check) delivers CPAP therapy AutoB...
- Page 35 4-20 1117539, V . 07 ESCRIPTION Auto Max This screen allows you to modify the Auto maximum pressure setting. You can adjust this setting from the Auto minimum pressure setting to 20 cm H2O. This screen only displays if Auto-CPAP mode is enabled or if the Auto-Trial feature is available and enabled.
- Page 36 1117539, V . 07 4-21 Comfort Settings: Choosing this screen will take you to a sub-menu where you can adjust the humidification and pressure comfort settings. These settings are described here. 4-22: S IGURE AMPLE OMFORT Note: Not all settings shown here will display on the device. The display will vary based on therapy device model and device settings.
- Page 37 4-22 1117539, V . 07 ESCRIPTION SmartRamp When SmartRamp mode is enabled, the therapy device’s ramp function utilizes an Auto titrating algorithm during the ramp period. It allows patients the ability to stay at lower pressures during the ramp period, to improve their acclimation to therapy.
- Page 38 This setting allows you to select the correct size diameter tubing that you are using with the device. You can choose either (22) for the Philips Respironics 22 mm tubing, or (15) for the Philips Respironics 15 mm tubing. When using Heated Tubing, the device will automatically change this setting to the appropriate tubing type (15H).
- Page 39 This setting allows you to select the appropriate Mask Type resistance setting (also known as System One Resistance Control) for your Philips Respironics mask. This feature allows the device to adjust the level of pressure compensation to match your mask. Refer to the packaging of your mask to identify the resistance setting for your mask.
- Page 40 1117539, V . 07 4-25 ESCRIPTION Show You can select whether or not the Apnea/Hypopnea index, AHI/Fit/PB Mask Fit averages, and Periodic Breathing averages are displayed on the Patient Info screens. Pressure Units If enabled on the device, you will have the option to choose the units of pressure that are displayed.
- Page 41 4-26 1117539, V . 07 Info Screens: Choosing this screen will take you to a sub-menu where you can view information on patient usage. These info screens are described here. Note: Not all the screens shown here will display on the device. The display will vary based on therapy device model and device settings.
- Page 42 1117539, V . 07 4-27 ESCRIPTION Mask Fit Displays the value “100 - % Large Leak”. % Large Leak is the percentage of time that the mask leak was so high that it is no longer possible for the device to identify respiratory events with statistical accuracy.
-
Page 43: Performance Check Device Screening Tool
4-28 1117539, V . 07 Return to Patient Mode: Choosing this screen will exit Provider mode and the device will return to the Patient mode. Provider mode will also time out after 5 minutes of inactivity and automatically return to the Patient mode. 4.11 P ERFORMANCE HECK... -
Page 44: Accessories
4.13 A CCESSORIES There are several accessories available for the DreamStation system such as a Humidifier, Cellular Modem, Wi-Fi Accessory or a Link Module. When using optional accessories, always follow the instructions enclosed with the accessories. -
Page 45: Humidifier With Or Without Heated Tubing
The humidifier must be level for proper operation. 4.13.2 SD C The DreamStation system comes with an SD card inserted in the SD card slot on the side of the device to record information for the home care provider. -
Page 46: Chapter 5: Troubleshooting And Error Codes
1117539, V . 07 5: T HAPTER ROUBLESHOOTING AND RROR ODES 5.0 I NTRODUCTION This section provides an overview of device troubleshooting, along with corrective actions to take based on the outcome. You will also find bench checkout procedures, along with tables that include error codes and descriptions. -
Page 47: Verifying Pressure
ERIFYING RESSURE WARNING • If the device fails to perform within the stated specifications, have the system serviced by a qualified Philips Respironics-approved service facility. • You will need the following equipment to verify the pressure: • Philips Respironics Pressure Calibration Kit Kit Includes: •... -
Page 48: Service
The Service Center Tools Suite will provide you the necessary tools to view the device’s error/event log, along with additional functions necessary to service the device. To download the software you must log onto my.respironics.com. If you do not have an account, click on the “Sign Up” link to register for an account. http://my.respironics.com... -
Page 49: Ervice Center Tools Uite
1117539, V . 07 5.3.1 S ERVICE ENTER OOLS UITE NSTALLATION AND EVICE ONNECTION ROCESS 1. Once you have opened the Service and Software Documentation page, click on the Utility Tools link on the left side or drop down menu of the page. 2. - Page 50 Read Time Meters This function allows you to read the therapy and blower hours on the device. DS Logs (DreamStation This function allows you the retrieve certain data from the Logs) device, including device error codes (if any are logged).
-
Page 51: Clearing The Error And Device Logs
1117539, V . 07 5.3.2 C LEARING THE RROR AND EVICE • There should be no errors on the device after repairs are made. If there are any errors logged on the device that do not affect device functionality, the error(s) must be cleared. Refer to section 5.3 for a list of error codes, descriptions and corrective actions. - Page 52 1117539, V . 07 5-5: S IGURE ESSION WITH XAMPLE 4. The following screen should appear indicating the Session ID has been set. 5-6: S ID S IGURE ESSION 5. Select the OK button. 6. Select the New Device button if you are setting sessions on multiple devices, otherwise, select the Close button to exit the tool.
-
Page 53: Device Error Codes
CONTINUE The error information is recorded in NVRAM and the unit continues to operate without noticeable alteration. The following table should be used to aid in troubleshooting device error codes for the DreamStation devices. RROR AILED RROR... - Page 54 1117539, V . 07 RROR AILED RROR CTIONS EVEL OMPONENT ERR_STATE_MACHINE REBOOT 1. If error was NOT Last Stop Error, clear error log and test. 2. If error was Last Stop Error, replace PCA and test. ERR_SOFTWARE REBOOT 1. If error was NOT Last Stop Error, clear error log and test.
- Page 55 5-10 1117539, V . 07 RROR AILED RROR CTIONS EVEL OMPONENT E-21 ERR_MOTOR_VBUS_HIG STOP Replace PCA and retest E-22 ERR_MOTOR_FLUX_MA REBOOT 1. Reseat motor connector, 1. Motor GNITUDE clear error log and test. connection 2. Blower Box error still occurs, 3.
- Page 56 1117539, V . 07 5-11 RROR AILED RROR CTIONS EVEL OMPONENT E-30 ERR_MOTOR_SPINUP_F REBOOT 1. Reseat motor connector, 1. Motor LUX_HIGH clear error log and test. connection 2. Blower Box error still occurs, 3. PCA replace blower and retest. 3. If 2nd retest fails, replace PCA.
- Page 57 5-12 1117539, V . 07 RROR AILED RROR CTIONS EVEL OMPONENT E-53 ERR_COMP_LOG_SEM_ CONTINUE 1. If there are multiple E53s TIMEOUT in the error log, replace PCA and test. 2. Otherwise: a. Clear error log and test. E-55 ERR_THERAPY_QUEUE_ CONTINUE 1.
- Page 58 1117539, V . 07 5-13 RROR AILED RROR CTIONS EVEL OMPONENT E-85 ERR_FLOW_SENSOR_O CONTINUE 1.Clear error log and test. CCLUDED 2. If the test fails or the error reoccurs, replace the PCA and retest. E-87 ERR_FLOW_SENSOR_B CONTINUE 1. Clear error log and test. 2.
- Page 59 5-14 1117539, V . 07 RROR AILED RROR CTIONS EVEL OMPONENT E-132 ERR_WIN_WDOG_TEST REBOOT 1. If error was NOT Last Stop Error, clear error log and test. 2. If error was Last Stop Error, replace PCA and test. E-133 ERR_WIN_WDOG_TEST_ REBOOT 1.
- Page 60 1117539, V . 07 5-15 RROR AILED RROR CTIONS EVEL OMPONENT E-181 ERR_NVRAM_MUTEX_N REBOOT 1. If error was NOT Last OT_AVAILABLE Stop Error, clear error log and test. 2. If error was Last Stop Error, replace PCA and test. E-182 ERR_NVRAM_WRITE_FA REBOOT 1.
- Page 61 5-16 1117539, V . 07 RROR AILED RROR CTIONS EVEL OMPONENT E-201 ERR_RTOS_TIMEOUT REBOOT 1. If error was NOT Last Stop Error, clear error log and test. 2. If error was Last Stop Error, replace PCA and test. E-202 ERR_RTOS_ONE_SHOT_ REBOOT 1.
-
Page 62: Failure Mode Troubleshooting
1117539, V . 07 5-17 RROR AILED RROR CTIONS EVEL OMPONENT E-260 ERR_CIRCUIT_COMP_M CONTINUE 1. Clear error log and test. ODEL_DIV_ZERO_1 E-261 ERR_CIRCUIT_COMP_M CONTINUE 1. Clear error log and test. ODEL_DIV_ZERO_2 E-262 ERR_CIRCUIT_COMP_D CONTINUE 1. Clear error log and test. RIFT_DIV_ZERO E-270 ERR_SDC_UPG_FAILED... - Page 63 5-18 1117539, V . 07 ROBLEM AILURE OSSIBLE AUSE TEPS TO General Noise • • Humidifier Seals are Make sure all Seals are damaged or not seated seated. • • Humidifier Back Panel not Make sure PCA is aligned on secure seals.
- Page 64 1117539, V . 07 5-19 ROBLEM AILURE OSSIBLE AUSE TEPS TO Airflow is Warm • • The air filters may be dirty Make sure the filters are clean. • • The device may be Make sure the device is operating in direct properly ventilated.
- Page 65 5-20 1117539, V . 07 ROBLEM AILURE OSSIBLE AUSE TEPS TO The Display is Erratic • • The device has been Unplug the device and reapply dropped or mishandled power. • • The device is in an area Relocate the device to an area with high Electromagnetic with lower EMI emissions Interference (EMI)
- Page 66 1117539, V . 07 5-21 ROBLEM AILURE OSSIBLE AUSE TEPS TO Heated Tube Not Warming • • Tube setting is 0 Ensure tube setting is anything but 0 and verify the Tube is • Not enough time elapsed warming. to warm tube •...
- Page 67 5-22 1117539, V . 07 ROBLEM AILURE OSSIBLE AUSE TEPS TO SD Card Error • • SD Card corrupted Eject and reinsert the SD Card. • Problem with PCA • If error still occurs, check to see if you get an error with a test SD Card that works properly.
-
Page 68: Device Alerts
1117539, V . 07 5-23 5.6 D EVICE LERTS Device alerts are pop-ups that show up on the UI screen. There are 5 types of alerts described here: • Status: These alerts are just the pop-up screen. • Notification: These alerts consist of the pop-up screen in addition to a blinking Power LED on top of the device. - Page 69 5-24 1117539, V . 07 OSSIBLE LERT ESCRIPTION CTION AUSE Oximetry: Good Status Displays on the No action Connection therapy screen needed. (icon only) when the blower is on and 3 seconds of good connection is detected. Appears at the beginning of therapy.This screen will not display again if the finger...
- Page 70 1117539, V . 07 5-25 OSSIBLE LERT ESCRIPTION CTION AUSE Remove SD card Notification SD Card SD card error Device cannot and reinsert. Error: detected. read the SD alert continues to Remove and card. A occur, replace with Reinsert problem may another card.
- Page 71 Incorrect power Switch to a power supply attached power supply. Philips does not supply is not Respironics support capable of DreamStation humidification. supporting power supply humidification or that is capable heated tube. of supporting humidification. Or operate therapy device without humidifier.
- Page 72 Supply not fully inserted device’s power into device’s inlet. Confirm a power inlet. compatible Philips Respironics power supply is attached. Switch to compatible power supply if needed. Low Voltage Notification Low voltage. Incompatible...
- Page 73 5-28 1117539, V . 07 OSSIBLE LERT ESCRIPTION CTION AUSE Check Mask Status Displayed when This alert can be Check Mask Fit cleared by function is pressing the enabled from Control Dial. Patient Menu. Otherwise it will time out after 60 seconds.
-
Page 74: Chapter 6: Repair & Replacement
HAPTER EPAIR EPLACEMENT This Chapter illustrates the names and locations of the replaceable components in the DreamStation devices. Prior to executing the repair and replacement procedures, the troubleshooting procedures must first be executed. Refer to Chapter 5 for troubleshooting procedures. -
Page 75: Replacement Part (Rp) Kits
1117539, V . 07 6.0 R (RP) K EPLACEMENT DESCRIPTION RP KIT NUMBER Accessory Module Flip Door 1115485 SD Cover Flip Door 1115542 Upper Enclosure 1115486 (Includes Keypad) UI Panel Assembly 1115538 PCA, CPAP 1121520 PCA, CPAP Pro 1121522 PCA, Auto CPAP 1121523 PCA, BiPAP Pro 1121525... - Page 76 1117539, V . 07 DESCRIPTION RP KIT NUMBER Travel Power Supply, JP, 65W 1127196 Travel Power Supply, AU, 65W 1127197 Travel Power Supply, GB, 65W 1127238 Power Cord 1038928 Standard Tubing, 15mm PR15 Torx Driver Kit (T8, T10, T15) 1040889...
-
Page 77: Replacing The Accessory Module And Sd Flip Doors
1117539, V . 07 6.1 R EPLACEMENT NSTRUCTIONS Prior to executing repair and replacement procedures, device troubleshooting must be performed. Refer to Chapter 5 for troubleshooting procedures. 6.1.1 R SD F EPLACING THE CCESSORY ODULE AND OORS Included in Kit Tools Required Accessory Module Flip Door •... -
Page 78: Replacing The Sd Card
1117539, V . 07 6.1.2 R SD C EPLACING THE SD C O REMOVE THE 1. Press the SD Card in to release. 2. Pull the SD Card out of the device. 6-2: SD C IGURE EPLACEMENT SD C NSTALL THE 1. - Page 79 1117539, V . 07 Torque screws to 6 IN-LB when installing Upper Enclosure 6-3: U IGURE PPER NCLOSURE WITH EYPAD NSTALLED O INSTALL THE PPER NCLOSURE EYPAD 1. Align and snap the Upper Enclosure into place (refer to Figure 6-4). 2.
- Page 80 1117539, V . 07 6.1.4 R UI P EPLACING THE ANEL Included in Kit Tools Required UI Panel Assembly • • UI Panel Torx Screwdriver (T10 is recommended) UI P O REMOVE THE ANEL 1. Remove all components as instructed in the previous sections. 2.
- Page 81 1117539, V . 07 4. Seat the UI Panel into Bottom Enclosure grooves. 5. Assemble the remainder of the device as instructed in the previous sections. GOOD GOOD 6-7: UI P IGURE ANEL LIGNMENT...
- Page 82 1117539, V . 07 6.1.5 R EPLACING THE Included in Kit Tools Required • • Torx Screwdriver (T10 is recommended) • # 4 x 1/2” screws (qty 2) PCA: O REMOVE TH 1. Remove all components as instructed in the previous sections. 2.
- Page 83 6-10 1117539, V . 07 PCA: O INSTALL THE 1. Connect the DC and Blower Connectors to the PCA Connectors. 2. Seat the PCA onto the Blower Cap standoff and screw bosses, ensuring to position the Humidifier Connector located on the PCA into the groove of the Rear Panel (refer to Figure 6-9), and position- ing the Flow and Pressure Sensors into the Seals (refer to Figure 6-10).
-
Page 84: Replacing The Flow And Pressure Sensor Seals
1117539, V . 07 6-11 6.1.6 R EPLACING THE LOW AND RESSURE ENSOR EALS Included in Kit Tools Required Flower Sensor Seal • • Flower Sensor Seal Torx Screwdriver (T10 is recommended) Pressure Sensor Seal • Pressure Sensor Sea O INSTALL THE EALS 1. -
Page 85: Replacing The Blower Upper Cap
6-12 1117539, V . 07 6.1.7 R EPLACING THE LOWER PPER Included in Kit Tools Required Blower Upper Cap • • Blower Upper Cap Torx Screwdriver (T10 is recommended) • # 4 x 1/2” screws (qty 4) • Flathead Screwdriver O REMOVE THE LOWER PPER... - Page 86 1117539, V . 07 6-13 O INSTALL THE LOWER PPER 1. Align the Blower Cap with the screw holes on the Blower Box Assembly, verifying the Blower Cap is fully seated. 2. Secure the Blower Cap to the Blower Box Assembly using the four # 4 x 1/2” screws (torque to 2.5 IN-LB).
-
Page 87: Replacing The Blower, Blower Box Assembly, And Rear Panel
6-14 1117539, V . 07 6.1.8 R EPLACING THE LOWER LOWER SSEMBLY ANEL Included in Kit Tools Required Blower Assembly, SK • • Blower Torx Screwdriver (T10 is recommended) Blower Assembly, Moog Blower Box Assembly • Blower Box Assembly Rear Panel Assembly •... - Page 88 1117539, V . 07 6-15 O REMOVE THE LOWER LOWER SSEMBLY AND ANEL 1. Remove all components as instructed in the previous sections. 2. Remove the two # 4 x 1/2” screws holding the Blower Box Assembly to the Bottom Enclosure. Torque screws to 6 IN-LB when installing the Blower Box Assembly.
- Page 89 6-16 1117539, V . 07 8. Pull the wire grommet out of the Blower Box Assembly groove. Push Ferrite down Grommet 6-17: B IGURE LOWER ERRITE AND LOWER ROMMET 9. Carefully lift the Blower straight out of the Blower Box Assembly. 10.
- Page 90 1117539, V . 07 6-17 2. Insert Grommet into slot. 3. Set Blower wire length to approximately 9.5 in from the outside of the Blower Box Assembly. Ensure wire is routed just as shown (SK Blower) Grommet Wire length approx. 9.5 in.
- Page 91 6-18 1117539, V . 07 4. Verify the Blower Outlet Seal is properly seated. Seat in groove GOOD - Seated BAD - Not Seated 6-21: B IGURE LOWER UTLET LIGNMENT 5. Route the Blower wires as shown below. 6-22: B IGURE LOWER OUTING...
- Page 92 1117539, V . 07 6-19 6-23: B IGURE LOWER OUTING LOWER NDERSIDE Slide Ferrite up to the top of the groove 6-24: B IGURE LOWER OUTING ERRITE NSERTION...
- Page 93 6-20 1117539, V . 07 6. Snap DC Cable ferrite into groove on Rear Panel. Snap Ferrite into groove 6-25: F IGURE ERRITE ON ANEL 7. Attach Rear Panel onto Blower Box Assembly. Ensure O-Ring is properly seated. 6-26: R IGURE ANEL EATING...
- Page 94 1117539, V . 07 6-21 Rear Panel GOOD GOOD 6-27: R IGURE ANEL LIGNMENT 8. Place the Blower Box Assembly with the Real Panel attached into the Bottom Enclosure. 9. Secure the Blower Box Assembly with the two # 4 x 1/2” screws (torque to 6 IN-LB). 10.
- Page 95 6-22 1117539, V . 07 6.1.9 R EPLACING THE LOWER UTLET EAL AND LOWER SOLATORS Included in Kit Tools Required Blower Outlet Seal • • Blower Outlet Seal Torx Screwdriver (T10 is recommended) Blower Isolators, SK • Blower Isolators Blower Isolators, Moog O REMOVE THE LOWER UTLET...
- Page 96 1117539, V . 07 6-23 , SK - SOLATORS SOLATORS 6-31: I IGURE SOLATORS EATED ON LOWER , SK - SOLATORS SOLATORS 6-32: I IGURE SOLATORS LOWER NSTALLED IN EVICE...
- Page 97 6-24 1117539, V . 07 6.1.10 R DC P DC J EPLACING THE OWER ABLE AND OLOR NSERT Included in Kit Tools Required DC Power Cable • • DC Power Cable Torx Screwdriver (T10 is recommended). DC Jack Color Insert •...
-
Page 98: Replacing The Bottom Enclosure
1117539, V . 07 6-25 6.1.11 R EPLACING THE OTTOM NCLOSURE Included in Kit Tools Required Bottom Enclosure • • Bottom Enclosure Torx Screwdriver (T10 is recommended). Warning Label • Warning Label O REMOVE THE OTTOM NCLOSURE 1. Remove all components as instructed in the previous sections (it is not required to remove the Blower Upper Cap, Blower or Blower Isolators –... -
Page 99: Reating The Serial /Model Number Label
6-26 1117539, V . 07 6.2 C REATING THE ERIAL ODEL UMBER ABEL In the case that the Bottom Enclosure of the PAP device or Bottom Cover of the Humidifier is replaced during service, or if there is damage to the labels, all information on the serial/model number labels is required to be duplicated in order to maintain proper traceability. -
Page 100: Label Printing Options
1117539, V . 07 6-27 6.2.3 L ABEL RINTING PTIONS There are three different options available for reprinting the serial number label. One of these three options must be used. If option 3 cannot be duplicated to match the original label, options 1 and 2 may be used in its place. -
Page 101: Cleaning The Therapy Device For One User
6-28 1117539, V . 07 6.3 C LEANING THE HERAPY EVICE WARNING To avoid electrical shock, always unplug the power cord from the wall outlet before cleaning the device. CAUTION Do not immerse the device in liquid or allow any liquid to enter the enclosure, inlet filter, or any opening. -
Page 102: Leaning Or
Allow the filter to air dry completely before reinstall- ing it. If the reusable blue pollen filter is torn, replace it. (Only Philips Respironics-supplied filters should be used as replacement filters.) 5. -
Page 103: Cleaning The Tubing
6-30 1117539, V . 07 6.6 C LEANING THE UBING 1. Clean the reusable tubing before first use and daily. 2. Disconnect the flexible tubing from the device. 3. For the 15 or 22 mm flexible tubing, gently wash the tubing in a solution of warm water and a mild detergent. -
Page 104: Epair And 7.0 Humidifier Replacement Part (Rp) Kits
EPAIR AND EPLACEMENT This Chapter illustrates the names and locations of the replaceable components in the DreamStation Humidifiers. Prior to executing these procedures, troubleshooting procedures must first be executed (refer to Chapter 5 for troubleshooting procedures. If repair or replacement procedures are performed, the device must be tested to verify its proper operation. -
Page 105: Replacing The Water Tank Assembly
1117539, V . 07 7.1 R EPLACEMENT NSTRUCTIONS Prior to executing repair and replacement procedures, device troubleshooting must be performed. Refer to Chapter 5 for troubleshooting procedures. 7.1.1 R EPLACING THE ATER SSEMBLY Included in Kit Tools Required Tank Assembly •... -
Page 106: Replacing The Flip Lid And Dry Box Inlet Seals
1117539, V . 07 7.1.2 R EPLACING THE ID AND NLET EALS Included in Kit Tools Required Flip Lid Seal • • Flip Lid Seal None Dry Box Seal • Dry Box Seal Flip Lid Seal GOOD 7-2: F IGURE Dry Box Seal 7-3: D IGURE... -
Page 107: Replacing The Dry Box Assembly
1117539, V . 07 NSTALL THE EALS 1. Press the Seals into the place as shown in Figures 7-2 and 7-3. 2. Press the Tank Top Seal onto the Patient Outlet Swivel Clip. Note: The Seal only aligns one way. Be sure to press the Seal the whole way around to ensure it is seated properly. - Page 108 1117539, V . 07 7.1.4 R EPLACING THE UARD Included in Kit Tools Required Wire Guard • • Wire Guard Flathead Screwdriver O REMOVE THE UARD 1. Remove the Water Tank and Flip Lid Seal (refer to previous corresponding sections). 2.
- Page 109 1117539, V . 07 NSTALL THE UARD 1. Position the top of the Wire Guard into the Flip Lid groove and then position the bottom of the Wire Guard into place, but do not fully seat Wire Guard. 7-6: W IGURE UARD NSTALLATION...
- Page 110 1117539, V . 07 3. Complete installation of the Wire Guard. 4. Assemble the remainder of the device as instructed in the previous sections. : Ensure the wires are not pinched when installing the Wire Guard, and verify it is fully seated/secure (refer to illustrations below).
-
Page 111: Replacing The Back Panel Assembly
1117539, V . 07 7.1.5 R EPLACING THE ANEL SSEMBLY Included in Kit Tools Required Back Panel Assembly • • Back Panel Assembly Torx Screwdriver (T10 is recommended) • # 4 x 1/2” screws (qty 5) O REMOVE THE ANEL SSEMBLY 1. -
Page 112: Replacing The Flip Lid Latch
1117539, V . 07 7.1.6 R EPLACING THE ATCH Included in Kit Tools Required Flip Lid Latch • • Flip Lid Latch Torx Screwdriver (T10 is recommended) O REMOVE THE ATCH 1. Remove the Back Panel Assembly and open the Flip Lid (refer to previous corresponding section). Push up on the 2 Latch tabs and pull the Latch out of the Humidifier Assembly. -
Page 113: Replacing The Lifting Tray
7-10 1117539, V . 07 7.1.7 R EPLACING THE IFTING Included in Kit Tools Required Lifting Tray • • Lifting Tray None 7-13: L IGURE IFTING O REMOVE THE IFTING 1. Push out one side of the Lifting Tray out of the groove, and then repeat on the other side. 7-14: L IGURE IFTING... - Page 114 1117539, V . 07 7-11 2. Lift up the Lifting Tray and push one side inward out of the groove, and then repeat on the other side. 7-15: L IGURE IFTING EMOVAL O INSTALL THE IFTING 1. Place one end of the Lifting Tray back into the cut-out groove, and then repeat on other side. The Tray will only fit one way into the groove.
- Page 115 7-12 1117539, V . 07 2. Once both ends of the Lifting Tray are placed into the cut-out holes, turn the Tray downward. 3. Pull back one of the other ends of the Lifting Tray and align into the groove (refer to illustration below.).
- Page 116 1117539, V . 07 7-13 7.1.8 R EPLACING THE OTTOM OVER Included in Kit Tools Required Bottom Cover • • Bottom Cover Torx Screwdriver (T15 is recommended) • # 6 x 1/4” screws (qty 4) O REMOVE THE OTTOM OVER 1.
- Page 117 7-14 1117539, V . 07 7.1.9 R EPLACING THE HIELD Included in Kit Included in Kit Tools Required Heat Shield • • Heat Shield Torx Screwdriver (T15 is recommended) 7-21: H IGURE HIELD TO REMOVE THE HIELD 1. Remove the Bottom Cover as instructed in the previous section. 2.
- Page 118 1117539, V . 07 7-15 7.1.10 R EPLACING THE EATER LATE Included in Kit Included in Kit Tools Required Heater Plate O-Ring • • Heater Plate O-Ring Torx Screwdriver (T15 is recommended) Heater Plate O-Ring 7-22: H IGURE EATER LATE O REMOVE THE EATER LATE...
-
Page 119: Replacing The Bottom Cover
7-16 1117539, V . 07 7.1.11 R EPLACING THE OTTOM SSEMBLY Included in Kit Included in Kit Tools Required Bottom/Flip Lid Assembly • • Bottom/Flip Lid Assembly Torx Screwdriver (T10 and T15 is recommended) • Dry Box • Heater Plate •... - Page 120 1117539, V . 07 7-17 EMOVING INSTALLING THE OTTOM SSEMBLY 1. Remove the Tank Assembly, Flip Lid Seal, Dry Box Seal, and the Back Panel Assembly (refer to previous corresponding sections). 2. Install Back Panel Assembly, Flip Lid Seal, Dry Box Seal and Tank Assembly onto the new Bot- tom/Flip Lid Assembly as instructed in the previous sections.
- Page 121 7-18 1117539, V . 07 Install ISO Port Cover over heated tube wire harness. 7-27: ISO P IGURE OVER 6. Install heated tube wire connector into ISO Port, and verify it is connected the whole way as shown below. 7-28: C IGURE ONNECTING THE ARNESS...
- Page 122 1117539, V . 07 7-19 8. Verify the ISO Port is installed properly and flush with the ISO Port Cover. GOOD 7-30: ISO P IGURE NSTALLATION ERIFICATION 9. Verify correct orientation of ISO Port assembly as shown below (port facing toward front of unit) and fully install ISO Port assembly into Flip Lid.
- Page 123 7-20 1117539, V . 07 10. Open the Flip Lid and ensure there are no pinched wires. 7-33: V IGURE ERIFY INCHED IRES 11. Route the wires flat as shown, and ensure they are in the middle within the grooves. 7-34: W IGURE OUTING...
-
Page 124: Tank
1117539, V . 07 7-21 7.2 C LEANING THE ATER Hand washing can be performed daily. Dishwashing can be performed once a week. 1. Turn the humidifier setting off, turn the therapy device off, and allow the heater plate and water to cool. -
Page 125: Tubing
CAUTION Only the hospital and institution cleaning and disinfection procedures listed in this manual are recommended by Respironics. Use of other cleaning and disinfecting processes, not specified by Respironics, may affect the performance of the product. 7.5.1 C... -
Page 126: Disinfection
1117539, V . 07 7-23 7.5.2 D ISINFECTION The recommended disinfection methods are identified below. • Thermal Disinfection: Immersion in a (tap) water bath at 75° C ± 2° C for 30 minutes • Cidex • Cidex OPA CAUTION • Follow all instructions from the manufacturer of the treatment products. -
Page 127: Chapter 8: Testing And Calibration
• DreamStation Power Supply, 80W, (PN 1118499), Qty 1 ea. • DreamStation Serial Accessory Module (PN 1123881 or PN 1126240 (includes serial and micro- USB cables listed below)), Qty 1 ea. • Serial RS232 Cable DB9F-DB9M, 6 ft (PN 1037268), Qty 1 ea. -
Page 128: Testing Prerequisites
1. The device error log must be cleared. 2. The device real time clock must be accurate. 3. The DreamStation base unit and Humidifier must both be at room temperature. Refer to Section 8.3 for testing environmental specifications. Refer to Chapter 5 on using the Service Center Tools software to clear the device error log and to reset the real time clock. - Page 129 1117539, V . 07 6. A window will popup asking for a user name and password. These are not required, select OK to proceed. 7. Select the “Open” file button. 8-1: T IGURE XECUTIVE AUNCHED...
- Page 130 1117539, V . 07 8. Select the DreamStation Service Test.seq file, then select OK to load it into the test executive. 8-2: L IGURE OADING THE EQUENCE 9. You will see the test files loaded into the software. 10. Connect the Serial Communication Cable to COM 1 of your PC.
- Page 131 1117539, V . 07 11. Select “Test UUT” 12. Follow the prompts and enter in the device identification information (serial/model number, etc). 13. Follow the next prompt by connecting all hardware items listed and as shown below, and then select OK. The Serial-USB Cable must be connected to COM 1. The Micro-USB Cable can be connected to any other USB COM port.
- Page 132 1117539, V . 07 14. Continue to follow all prompts. 15. Once the pressure and flow testing is complete, the following prompt will be displayed. 8-4: C IGURE ONNECT UMIDIFIER...
- Page 133 1117539, V . 07 16. Connect the Humidifier and Heated Tube as shown below, then selects OK. 17. Continue to follow all prompts until the test is complete. 18. If the test fails, evaluate for possible causes and make any necessary adjustments or repairs, and then retest the device.
- Page 134 1117539, V . 07 This page intentionally blank.
- Page 135 . 1117539, V . 07 EMH 06/04/2016...
Need help?
Do you have a question about the DreamStation and is the answer not in the manual?
Questions and answers
My DSX500S11F unit beeps. Reservoir doesn’t heat. MSG states power source can’t power humidification
The Respironics DreamStation DSX500S11F beeps and displays a message about the power source not being able to power humidification because the attached power supply is incompatible or not capable of supporting humidification or a heated tube. To fix this, confirm that the power supply is the correct one capable of supporting these features.
This answer is automatically generated
@Mr. Anderson everything was connected as it should be, but I still received the beeps & the msg. Seems to me if the cpap was operating but I received the msg, tells me there is a problem with the humidifier unit & not the power supply.