Samsung Galaxy S III mini User Manual
4g lte smartphone
Hide thumbs
Also See for Galaxy S III mini:
- User manual (224 pages) ,
- Manual del usuario (222 pages) ,
- User manual (222 pages)

Related Manuals for Samsung Galaxy S III mini


Summary of Contents for Samsung Galaxy S III mini
-
Page 1: User Manual
L T E S M A R T P H O N E User Manual Please read this manual before operating your phone, and keep it for future reference. -
Page 2: Intellectual Property
Intellectual Property All Intellectual Property, as defined below, owned by or which is otherwise the property of Samsung or its respective suppliers relating to the SAMSUNG Phone, including but not limited to, accessories, parts, or software relating there to (the “Phone System”), is proprietary to Samsung and protected under federal laws, state laws, and international treaty provisions. - Page 3 Samsung device. During the testing, the device is tested with the security solutions to see if the solutions work with the device as...
- Page 4 Samsung device. For more information about Samsung's SAFE™ program, please refer to www.samsung.com/us/safe. Disclaimer of Warranties: EXCEPT AS OTHERWISE PROVIDED IN THEIR STANDARD END USER LICENSE AND WARRANTY, TO THE FULL EXTENT PERMITTED BY LAW SAMSUNG ELECTRONICS CO., LTD., SAMSUNG TELECOMMUNICATIONS AMERICA, LLC, AND...
- Page 5 Internet Address: www.samsung.com ©2014 Samsung Telecommunications America, LLC. Samsung is a registered trademark of Samsung Electronics Co., Ltd. Do you have questions about your Samsung Mobile Phone? For 24 hour information and assistance, we offer a new FAQ/ARS System (Automated Response System) at: www.samsung.com/us/support...
- Page 6 ® ® , DivX , DivX Certified and associated logos are trademarks of Rovi Corporation or its subsidiaries and are used under license. ® ® DivX Certified to play DivX video up to HD 720p, including premium content. ® ABOUT DIVX VIDEO: DivX is a digital video format created by DivX, LLC, a subsidiary of Rovi Corporation.
- Page 7 Online Legal Information The online version of the Health/Safety and Warranty guide for your device can be found at: English: www.samsung.com/us/Legal/Phone-HSGuide Spanish: www.samsung.com/us/Legal/Phone-HSGuide-SP The online version of the End User Licensing Agreement for your device can be found: Online at: www.samsung.com/us/Legal/SamsungLegal-EULA1.
-
Page 8: Table Of Contents
Table of Contents Section 1: Getting Started .......5 Memory Card ......29 Text Entry ....... 30 Set Up Your Device . - Page 9 Address Book Options ..... . 54 Email Options ......88 Groups .
- Page 10 Blocking Mode ......108 Section 8: Connections ......133 Hands-Free Mode ......108 Wi-Fi .
- Page 11 Google Settings ......162 Samsung Apps ......168 Google+ .
-
Page 12: Section 1: Getting Started
Section 1: Getting Started This section explains how to start using your device by first Caution! Do not bend or twist the back cover excessively. configuring your hardware, activating your service, and then Doing so may damage the cover. setting up your voice mail. Set Up Your Device Install the SIM Card When you subscribe to a cellular network, you are provided... -
Page 13: Install The Battery
Install the Battery Carefully slide the SIM card into the SIM card socket (as shown) until the card locks into place. Important! The battery provided with your device contains a • Make sure that the card’s gold contacts face into the Near Field Communication (NFC) antenna. -
Page 14: Install The Memory Card
Install the Memory Card Install the Back Cover 1. Place the battery cover onto the back of the device (1) You can use a microSD or microSDHC memory card to and press down (2). expand available memory space if you desire. This secure digital card enables you to exchange images, music, and data between SD compatible devices. -
Page 15: Charge A Battery
Your device is powered by a rechargeable Li-ion battery. A battery charger is included with your device. Use only Samsung approved batteries and chargers. Important! You must fully charge the battery before using your device for the first time. A discharged battery recharges fully in approximately 4 hours. -
Page 16: Switch The Device On Or Off
Low Battery Indicator Switch the Device On or Off 1. Press and hold until the device switches on. When the battery is weak and only a few minutes of talk time remain, the battery icon ( ) blinks and the device sounds a warning tone at regular intervals. -
Page 17: Lock And Unlock The Touch Screen
Lock and Unlock the Touch Screen Set Up Your Voice Mail 1. Press to lock the touch screen. 1. From the Home screen, touch , and then press and hold 2. Press again to display the lock screen then swipe your finger across the screen to unlock. 2. Follow the tutorial to create a password, record a greeting, and record your name. -
Page 18: Section 2: Your Device
Android v 4.2.2, KitKat • Download apps from the Google Play Store and • Brilliant 4.0" WVGA sAMOLED display Samsung Apps • Touch screen provides quick response to a variety of • Full Integration of Google Mobile Services (Gmail, YouTube,... -
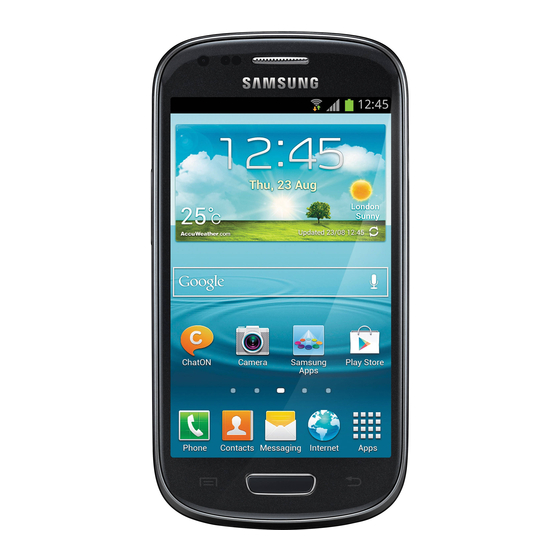
Page 19: Front View Of Your Device
Front View of Your Device 1. Front facing camera: Take pictures and videos of yourself. 2. Proximity sensor: When holding the device close to your ear, the touch screen will turn off. 3. External speaker: Allows you to hear the caller. 4. Application icons: You can place shortcuts to your favorite applications on the Home screen. -
Page 20: Side Views Of Your Device
Side Views of Your Device 9. Home screen indicator: Indicates which Home screen is presently displayed. 10. Weather widget: Displays Time, Day, Date, Temperature and weather conditions for your area. 11. Indicator icons: Shows the information needed to operate your device, such as the received signal strength, battery level, time, unread Emails, missed calls, etc. -
Page 21: Rear View Of Your Device
Rear View of Your Device 1. Microphone: Used for noise cancellation and stereo recording. 2. Volume keys: Adjusts the ringer volume while in standby mode or adjust the voice volume during a call. When receiving an incoming call, briefly press down either volume key to mute the ring tone. -
Page 22: Display Layout
Display Layout Displays to indicate a security warning. You are prompted to set a screen lock password. Your display screen provides a wealth of information about the device’s status and options, as well as providing access Displays when a call is in progress. to application icons. - Page 23 Device Power Low – Shows your current battery Displays when your device is downloading or has only has between 15 and 28 percent power downloaded a file. It will blink green when it is remaining. installing. Device Power Very Low – Shows your current Displays when the an outbound file transfer is in battery only has between 5 and 15 percent power progress.
- Page 24 Displays when the time and date for a Calendar Event Displays when there is a Wi-Fi access point has arrived. For more information, refer to available but you are not connected to it. May also “Calendar” on page 155. display if there is a communication issue with the target Wireless Access Point (WAP).
-
Page 25: Motions And Gestures
Digital Living Network Alliance (DLNA) certified Lightly touch items to select or launch them. For example: device using the Samsung Link application. • Touch the on screen keyboard to enter characters or text. -
Page 26: Tilt
Tilt Menu Navigation To activate the tilt feature, press and hold two points on the You can tailor the device’s range of functions to fit your needs screen then tilt the device back and forth to reduce or using both menus and widgets. Menus, submenus, and enlarge the screen. -
Page 27: Home Screen Overview
Home Screen Overview Application Menu Navigation The main home screen is the starting point for many Your device initially has three Application Menus available. applications and functions, and it allows you to add items Follow these steps to navigate through the Application like application icons, shortcuts, folders, or Google widgets Menus: to give you instant access to information and applications. -
Page 28: Customize Your Home Screen
Submenu Navigation Customize Your Home Screen Submenus are available when you are at any Home screen or You can customize your Home screen by doing the following: have selected a feature or application such as Phone, • Creating Shortcuts Contacts, Messaging, or Internet. •... -
Page 29: Delete A Shortcut
Add a Shortcut from the Apps Menu Add a Shortcut via the Add to Home Screen 1. Press to activate the main Home screen. 1. Press to activate the main Home screen. 2. Navigate to the desired Home Page. 2. Navigate to the desired Home Page. 3. Touch to display your current applications. -
Page 30: Add And Remove Primary Shortcuts
Add and Remove Primary Shortcuts Add and Remove Widgets You can change any of your primary shortcuts with the Widgets are self contained applications that reside in either exception of the Apps shortcut. your Widgets tab or on the main or extended Home screens. Unlike a shortcut, the Widget appears as an onscreen 1. Press to activate the main Home screen. - Page 31 Moving Icons in the Apps Menu Create Application Folders 1. Press to activate the main Home screen. You can create application folders to hold similar applications if you wish. 2. Touch to display your current applications. 1. Press to activate the main Home screen. 3. Touch the Apps tab at the top of the screen if it is not already selected.
-
Page 32: Change The Wallpaper
Add a New Page to the Application Menu Change the Wallpaper You can add a new page to your application menu by You can change the Wallpaper (background) of your home following these steps: screens by following these steps: 1. Press to activate the main Home screen. - Page 33 Add and Delete Home Screens To delete a Home screen: 1. Press to activate the main Home screen. You can add and delete Home screens. You can have up to seven Home screens. 2. Press and touch Edit page. To add a new Home screen: 3.
-
Page 34: Notification Bar
Arrange Home Screens Notification Bar You can arrange your Home screens in any order that you The Notification Bar includes a pull down list to show want. information about processes that are running, recent notifications, and alerts. To display the Status indicator: 1. Press to activate the main Home screen. - Page 35 Clear Notifications Access Additional Panel Functions To clear all notifications from the Notification panel: In addition to notifications, the Notification panel also provides quick and ready access to separate device 1. From the Home screen, touch and hold the Notification functions.
-
Page 36: Memory Card
Memory Card Unmount the SD Card Unmounting the SD card prevents corruption and damage to Your device lets you use a microSD (SD) or microSDHC the SD card while removing it from the slot. card to expand available memory space. This secure digital card enables you to exchange images, music, and data 1. -
Page 37: Text Entry
SD card. • Google Voice typing: allows you to enter text by speaking. • Samsung keyboard (default): Samsung’s onscreen 5. Touch Delete all to format or press to cancel. QWERTY keypad that can be used in both portrait and landscape orientation. - Page 38 Text Entry with the Samsung Keyboard Keyboard Text Input Mode From a screen where you can enter text, rotate your device There are two main keyboard layout keys that will change counterclockwise to a Landscape orientation. The onscreen the onscreen keys within the QWERTY keypad.
-
Page 39: Abc Mode
ABC Mode 3. Touch the button to access additional symbols. 1. If desired, rotate your device counterclockwise to a 4. Touch to return to Abc mode. Landscape orientation. Predictive Text 2. When you touch the Enter message field, the QWERTY By using the Predictive Text option, you can have next letter keyboard displays. -
Page 40: Samsung Keyboard Settings
Samsung Keyboard Settings Text Entry with Swype For information on how you can configure your Samsung Swype is a text input method that allows you to enter a word keyboard settings, see “Samsung Keyboard” on page 113. by sliding your finger or stylus from letter to letter, lifting your finger between words. -
Page 41: Swype Text Entry Tips
Enable and Configure Swype Swype Text Entry Tips The Samsung keyboard is the default text input method, so You can access the SwypeTips application and watch a video to use Swype, you must first change the default keyboard or tutorial on using Swype. You can also use the following setting. -
Page 42: Section 3: Call Functions
Section 3: Call Functions Make an International Call This section describes how to make or answer a call. It also includes the features and functionality associated with 1. From the Home screen, touch Phone, then touch making or answering a call. and hold . -
Page 43: Manual Pause Dialing
Manual Pause Dialing Correct an Entered Number To manually call a number with pause(s) without storing it in Use the following steps to correct a mistyped entry when your Contacts list: dialing. 1. From the Home screen, touch Phone and use the If you make a mistake after entering a number using onscreen keypad to enter the phone number. -
Page 44: Emergency Calls
Emergency Calls Make a Call Using Speed Dial You can make emergency calls with or without a SIM card. You can assign a short cut number to a phone number in your Contacts List for speed dialing. Make an Emergency Call without a SIM Card 1. -
Page 45: Calls From The Address Book
Calls from the Address Book Note: You can answer a call while using the Address Book or You can store phone numbers that you use regularly on the another feature. After ending the call, the phone returns SIM card or in the device’s memory. to the previously active function screen. -
Page 46: Call Log
Call Log Call Back a Missed Call To call back a missed call number: The phone stores the numbers of the calls you’ve dialed, received, or missed in the Call log. The Call log displays the 1. From the Home screen, touch Phone details of the call. - Page 47 Save a Recent Call to Your Address Book 4. Enter information into the various fields using the keypad. Add as new 5. Touch Save to save when you are finished. contact For further details about the Address Book feature, see “Add Update an existing contact a New Contact”...
-
Page 48: Options During A Call
Delete a Call from the Call Log Options During a Call 1. From the Home screen, touch Phone Your phone provides a number of control functions that you Logs. A list of recent calls is displayed. can use during a call. Adjust the Call Volume 2. Touch and hold the call you want... -
Page 49: Call Options
Call Options • Mute/Unmute: Turn the onboard microphone either on or off. During an active call there are several functions available by – Touch Mute during a call to mute the microphone. A touching a corresponding onscreen button. green line will appear under the Mute button. •... -
Page 50: Place A Call On Hold
Personalize the Call Sound Setting Place a Call on Hold During a call it may be necessary to adjust the sound of the You can place the current call on hold at any point during a incoming call by selecting an audio equalizer setting for the conversation. -
Page 51: Switch Between Calls
Switch Between Calls To Answer a Call While You Have a Call in Progress When you have an active call and a call on hold, you may You can answer another call while you have a call in progress switch between the two calls, changing the one on hold to if you have activated your Call waiting feature. -
Page 52: Active Call
3 Way Calling (Multi Party Calling) 5. To temporarily leave the conference call, touch Hold. Hold The 3 Way or Multi Party feature allows you to answer a series of incoming calls and place them on hold. If this To rejoin the conference call touch Unhold. -
Page 53: Call Waiting
Switch Off the Microphone (Mute) Search for a Number in Address Book 1. During the active call, press then touch Contacts. You can temporarily switch your phone’s microphone off, so that the other person cannot hear you. 2. Touch the Address Book entry. For further details about the Address Book feature, see Example: You wish to say something to person in the “Find an Address Book Entry”... -
Page 54: Call Settings
Call Forwarding Call Settings 1. From the Home screen, touch To access the Call settings menu: Call settings Additional settings From the Home screen, touch Call forwarding. Call settings. 2. Touch one of the following options: – or – • Always forward: Forward all voice calls. From the Home screen, touch Settings •... -
Page 55: Section 4: Contacts And Your Address Book
Section 4: Contacts and Your Address Book This section allows you to manage your daily contacts by 3. Follow the onscreen instructions. storing their name and number in your Address Book. Your AT&T Address Book is Ready to Use. You can now make Address Book entries can be sorted by name, entry, or group. -
Page 56: Add A New Contact
• Take picture: Use the camera to take a new picture Note: You must first copy any contacts that exist on your SIM and assign it to this entry, then touch Done. card to your device. For more information, refer to •... - Page 57 7. Touch the Email address field. The Home button • Add another field: Touch this button to add another initially displays next to the Email address field. field such as Phonetic name, Organization, IM, Home If you want to add another email address, touch the Address, Notes, Nickname, Website, Internet call, Home button and select from Home, Work, Other, or Events, or Relationship.
-
Page 58: Edit An Existing Contact
Using Contacts 5. Touch Pause to add a two second pause or touch Wait to add a wait, and use the keypad to enter the Dial or Message from Address Book additional numbers. A pause will be displayed as a Once you have stored phone numbers in the Address Book, comma (,) and a wait will be displayed as a you can dial them easily and quickly by either using their SIM... -
Page 59: Link Contacts
4. Touch the phone icon to make a phone call or touch the name, as well as a Yahoo! chat account, when you merge these accounts into your Contacts list you can link all of her message icon to send a message. entries and view the information in one record. - Page 60 Mark a Contact as Default Note: The information is still maintained in both entries, but When you use messaging type applications, the application displays in one record for easier viewing. needs to know which information is primary (default) in a contact entry list.
-
Page 61: Synchronize Accounts
Bluetooth, Email, Gmail, Messaging, or Wi-Fi Direct. 6. Press to return to the Contacts list. • Accounts: Add and manage your Samsung, ChatON, Google, LDAP (Lightweight Directory Access Protocol), Note: You can also synchronize your accounts using the and Microsoft Exchange ActiveSync accounts. Touch Settings menu. - Page 62 Options at Selected Contact Screen • Speed dial setting: Set up speed dialing. For more information, refer to “Make a Call Using Speed Dial” on 1. From the Home screen, touch Contacts. page 37. 2. Touch a contact and at the contact’s display screen, •...
-
Page 63: Groups
4. Touch all of the contacts you want to remove from this • Print contact info: Print the contact’s namecard to a group. A green checkmark will appear next to their Samsung printer using Wi-Fi. name. • Add shortcut to home: Place a shortcut for this contact on your Home screen. -
Page 64: Address Book Favorites
4. Touch Message alert to choose an alert tone for 4. Make modifications to the Group name, Group assignment to this new group, then touch OK. ringtone, Message alert, or Vibration pattern fields. 5. Touch Vibration pattern to choose a vibration audio 5. Touch Add member to add more contacts to this file for assignment to this new group, then touch OK. -
Page 65: Manage Address Book Contacts
Remove Favorites from Your 1. From the Home screen, touch Contacts Address Book SIM Management. 1. From the Home screen, touch Contacts. 2. Touch Copy Contacts to SIM. 2. Within the Contacts list, touch and hold a contact that The device then displays a list of your current phone you want to remove from your favorites list. - Page 66 Copy Contacts to the Device Delete Contacts from the SIM Card 1. From the Home screen, touch Contacts 1. From the Home screen, touch Contacts SIM Management. SIM Management. 2. Touch Copy Contacts from SIM. 2. Touch Delete Contacts from SIM. The device then displays a list of your current 3. At the Create contact under account prompt, touch SIM contacts.
-
Page 67: Service Dialing Numbers
Delete Address Book Entries from Service Dialing Numbers the Device You can view the list of Service Dialing Numbers (SDN) assigned by your service provider. These numbers may You can delete Phone or SIM entries from your device’s include emergency numbers, customer service numbers, and memory. -
Page 68: Section 5: Multimedia
Section 5: Multimedia This section explains how to use the multimedia features of your device, including Music, Google Play Music, Mobile TV, Touch and hold to rewind the song. Touch to go to Video, Play Movies & TV, Gallery, Camera, and Camcorder. previous song. - Page 69 • Delete: Deletes the music file. Songs play in order and are not shuffled. • Search: Search your device for a certain song. • Scan for nearby devices: Scan for nearby devices Assign the current song as a Favorite. with which your device can communicate. Compatible devices appear under the Nearby devices tab.
-
Page 70: Playlists
Music Settings • Music auto off: Music will automatically turn off after a set interval. The Music Settings menu allows you to set preferences for • Lyrics: Displays lyrics when available. the Music app such as whether you want the music to play in the background, sound effects, and how the music menu •... -
Page 71: Play Music
Add Music to a Playlist Edit a Playlist To add files to the playlist: Besides adding and removing music files in a playlist, you can also rename the playlist. 1. From the Home screen, touch Music. 1. From the Home screen, touch Music. -
Page 72: Mobile Tv
Mobile TV Play Movies & TV Mobile TV is a subscription service that allows you to watch Watch movies and TV shows purchased from Google Play. your favorite TV shows using your device. You can stream them instantly, or download them for viewing when you’re not connected to the Internet. -
Page 73: Video
Video Volume control showing volume muted. The Video application plays video files stored on your device Full screen in ratio view. The video is enlarged as or memory card. much as possible without becoming distorted. 1. From the Home screen, touch Video. - Page 74 Options • Video audio off: Turn off playback audio. 1. From the main screen, press Menu and then • Subtitles (CC): View subtitles (if available) tap an option: • Settings: Configure the Video Player app. • Details: View details about this video file. •...
-
Page 75: Gallery
Gallery View Pictures 1. Touch a thumbnail to view a single picture. The Gallery is where you view photos and play back videos. For photos, you can also perform basic editing tasks, view a Note: If no control icons are displayed on the screen in slideshow, set photos as wallpaper or contact image, and addition to the picture, touch anywhere on the screen to share as a picture message. - Page 76 Share Pictures with S Beam 6. From the Touch to beam screen, touch the image preview to begin the transfer (2). This feature (when activated via NFC) allows you to beam large files directly to another compatible device that is in Place devices back to back direct contact.
-
Page 77: View Videos
View Videos 7. When prompted, separate the two devices. After a few seconds (depending on file size) the recipient with then Note: If no control icons are displayed on the screen in see the transferred file displayed on their screen. addition to the picture, touch anywhere on the screen to display them. -
Page 78: Camera
Camera • Scan for nearby devices: Discover and connect directly to nearby devices. This section explains how to use the camera on your device. • Settings: Touch to access various Gallery settings. You can take photographs and shoot video by using the built –... -
Page 79: Camera Modes
1. From the main Home screen, touch 4. If desired, before taking the photo, you can touch Camera to activate the camera mode. onscreen icons to access various camera options and settings. Camera Mode Front Quick Settings 5. You can also touch the screen to move the focus to the Facing Camera area you touch. -
Page 80: Quick Settings
Quick Settings From the camera viewfinder, touch the Mode button to change the mode to one of the following: MODE MODE Touch at the top of the display to quickly change – Auto: Automatically adjusts your camera to optimize Camera settings. Not all of the following options are available color and brightness. -
Page 81: Camera And Camcorder Settings
Camera and Camcorder Settings • ISO: Determines how sensitive the light meter is on your digital camera. Choose from Auto, 100, 200, or This section describes the different settings that you can 400. Use a lower ISO number to make your camera less configure on your camera. -
Page 82: Edit A Photo
• Volume key: Assigns a function to the volume key. • Storage: Select the memory location for storage. Choose from the zoom key, the camera key, or the • Shutter sound: Turn the shutter sound on or off. record key. •... - Page 83 Crop: Crop (cut out) an area of a photo. Note: To select the picture area, touch and hold the current picture. Color: Auto adjust color, Brightness, Contrast, Saturation, Adjust RGB, Temperature, 4. Select an image area by touching and holding the Exposure, and Hue of a photo.
-
Page 84: Using The Camcorder
Using the Camcorder 6. Touch Menu to access the following options: • Save as: Rename your current image and save it to In addition to taking photos, the camera also doubles as a your gallery. camcorder that allows you to record, view, and send videos. •... - Page 85 4. Touch the Video key to begin shooting video. The red light will blink while recording. 5. You can touch the screen to move the focus to the area you touch. 6. Touch the Pause key to stop the recording and save the video file to your Camera folder.
-
Page 86: Section 6: Messaging
Section 6: Messaging This section describes how to send and receive different The Multimedia Messaging Service (MMS) lets you send and types of messages. It also includes the features and receive multimedia messages (such as picture, video, and functionality associated with messaging. audio messages) to and from other mobile devices or email addresses. -
Page 87: At&T Messages App
AT&T Messages App Note: For the Group option, if the number of recipients is less AT&T Messages brings your texts, calls, and voicemail than 10, all members in the group will be added. You messages together into a single conversation thread and is will need to delete any unnecessary members in the list accessible by phone or computer. - Page 88 Options Before Composing a Message Options While Composing a Message 1. From the Home screen, touch Messaging While composing a message, press for options. 2. Before composing a message, press for options: • Insert smiley: Add emoticons, such as a happy face to your message.
- Page 89 Add Attachments to a Message Add Additional Text To add an attachment to your message, touch and select You can copy text such as names, phone numbers, and one of the following options: events from your Contacts, Calendar or a Memo. •...
-
Page 90: Message Threads
View Newly Received Messages To access message thread options: 1. When you receive a new message, the new message From the main Messaging screen, touch and hold the icon appears at the top of your screen. message to display the following options: •... -
Page 91: Delete Messages
Delete Messages To access additional Bubble options: Delete a Single Message Thread Touch and hold the message bubble within an active message conversation to display the following options: 1. From the Home screen, touch Messaging • Delete: Delete any currently selected message bubble 2. Touch and hold a message thread, and then touch from the thread. -
Page 92: Message Search
Message Search Emergency Alerts You can search through your messages by using the This device is designed to receive wireless emergency alerts Message Search feature. from the Commercial Mobile Alerting System (CMAS) which may also be known as the Personal Localized Alerting 1. -
Page 93: Using Email
Customers may choose not to receive Imminent Threats • Touch Next. (Extreme and Severe) and AMBER Alerts. Alerts issued by the • Enter a name for this email account (optional). President can not be disabled. To disable Imminent Threats 2. Touch Done. and AMBER Alerts, follow the instructions below: Create Additional Email Accounts 1. -
Page 94: Compose And Send Email
Switch Between Email Accounts • Touch to set Tracking options and Security options. (Available options depend on the type of email 1. From the Home screen, touch Email. account.) Your Email screen displays showing your emails from 5. Touch the body of the email to enter the text of your the active account. -
Page 95: Email Options
• Record audio: Temporarily exit the email, record audio • Font size: Set the font size for your emails. with the device’s microphone, and then attach it to your • Settings: Access Messaging settings. For more email. information, refer to “Messaging Settings” on page 85. •... -
Page 96: Email Settings
Email Settings Sign into Your Gmail Configure settings and options for your email accounts. Note: You must sign in to your Gmail account in order to 1. From the Home screen, touch Email access Gmail. Settings. 1. From the Home screen, touch Gmail. - Page 97 View a Gmail Message • Report phishing: Report a message that you feel is trying to improperly get information from you. 1. From the Gmail Inbox, touch a message to view it. • Settings: Displays Email settings that you can modify. 2. The following options are available at the top of the •...
-
Page 98: Hangouts
Hangouts Google+ Google Hangouts is an online place to meet friends and Stay connected and share life as it happens with Google+. family, share photos, and host video calls. Chat with friends and family, post photos, or see what others are sharing while you’re on the go. -
Page 99: Section 7: Settings
From any screen, touch the top of the screen and This tab provides both the ability to create and swipe downward, to display the Notification Panel, and modify your accounts (example; Samsung account, then touch Settings. Email, Google account, etc.) and access Backup The Settings screen displays. -
Page 100: Connections
Connections 5. Touch the Data usage cycle drop down menu and select a date. Control your device’s wireless connections in this section. The data usage displays as a visual (chart) and also Wi-Fi displays a list of each application with a breakdown of For more information about using your device’s Wi-Fi how much data was used per application. -
Page 101: More Networks
More Networks From a Home screen, touch the top of the screen and swipe downward to display the Notification Panel. This tab displays additional wireless and network Touch to display additional options and then touch information. Airplane mode. From the Settings screen, touch Connections tab –... -
Page 102: Mobile Networks
Printing • Access Point Names: To use Wi-Fi you need access to a wireless access point (hotspot). Touch to display a To manage your printers: list of the Access Point names. The active access point 1. From the Settings screen, touch Connections tab displays a green, filled circle to the right of the name. -
Page 103: Nfc
Tethering and Wi-Fi Hotspot S Beam Use Mobile Hotspot to share your device’s Internet When S Beam is activated, you can beam files to another connection via Wi-Fi with up to 10 other devices. For more NFC capable device by holding the devices close together. information, refer to “Mobile Hotspot”... -
Page 104: My Device
My Device • PIN: Select a PIN to use for unlocking the screen. • Password: Create a password for unlocking the This section of the Settings screen contains general settings screen. and input controls for your device. • None: No pattern, PIN, or password is required. The Lock Screen screen will never lock. - Page 105 Pattern Options • Help text: Show help information on the Lock screen. • Wake up in lock screen: Requires you to say a command These options are available when Screen lock is set to to wake up your device. Pattern: •...
-
Page 106: Display
Display • Screen timeout: Adjust the delay time before the screen automatically turns off. Selections are: In this menu, you can change various settings for the display. 15 seconds, 30 seconds, 1 minute, 3 minutes, 5 From the Settings screen, touch My device tab minutes, and 10 minutes. -
Page 107: Led Indicator
Sound • Auto adjust screen tone: Save power by adjusting the screen tone according to an analysis of the images. From this menu you can control the sounds on the device. LED Indicator From the Settings screen, touch My device tab Sound. -
Page 108: Home Screen Mode
Home screen mode allows you to set your display to the conventional layout of Standard mode or provide an easier Samsung applications user experience for the first time smartphone users using • Call: Access call settings. -
Page 109: Call Settings
Call Settings Set Up Call Rejection Messages 1. From the Settings screen, touch My device tab To access the Call settings menu: Call Set up call rejection messages. From the Settings screen, touch My device tab 2. Touch to manually add a reject message. Call. -
Page 110: Turn Off Screen During Calls
Turn Off Screen During Calls Call Accessories 1. From the Settings screen, touch My device tab This option turns on the proximity sensor during calls so that Call Call accessories. your device will know to turn the screen off to save power. From the Settings screen, touch My device tab 2. The following options are available: Call... -
Page 111: Additional Settings
Additional Settings 3. At the prompt, enter your PIN2 code and touch OK. 1. From the Settings screen, touch My device tab FDN is enabled. Call Additional settings. 4. To enable FDN after it has been disabled, touch Turn 2. Touch one of the following options: off FDN, enter your PIN2 code and touch OK. -
Page 112: Ringtones And Keypad Tones
Ringtones and Keypad Tones FDN List 1. From the Settings screen, touch My device tab When this feature is enabled, you can make calls only to phone numbers stored in the FDN list on the SIM card. Call Ringtones and keypad tones. 2. Touch Ringtones, select a ringtone, and touch OK. -
Page 113: Personalize Call Sound
Personalize Call Sound Voicemail Service 1. From the Settings screen, touch My device tab This option allows you to personalize the sounds you hear Call Voicemail Service. during a call with and without earphones. 1. From the Settings screen, touch My device tab Voicemail service provided by your carrier is the Call Personalize call sound. -
Page 114: Hearing Aids
Sound Your device is compatible with select TTY devices. Please check with the manufacturer of your TTY device to ensure You can select a unique ringtone for Voicemail alerts. that it is compatible with digital cell phones. 1. From the Settings screen, touch My device tab Your device and TTY device will connect via a special cable Call Sound. -
Page 115: Blocking Mode
Blocking Mode Hands-Free Mode When Blocking mode is enabled, notifications for selected When Hands-free mode is enabled, incoming calls and features are disabled. You only receive notifications of notifications are read out automatically. incoming calls from people on your allowed list. 1. From the Settings screen, touch My device tab 1. From the Settings screen, touch My device tab Hands-free mode. -
Page 116: Power Saving Mode
Power Saving Mode Accessories Use Power saving mode to manage your device to This menu allows you to select the Audio output mode when conserve power. using a car or desk dock. 1. From the Settings screen, touch My device tab From the Settings screen, touch My device tab Power saving mode. -
Page 117: Accessibility
Accessibility • Speak passwords: Read out password information. • Answering/ending calls: Accept incoming calls by Accessibility services are special features to make using the pressing the Home key or end calls using the device easier for those with certain physical disabilities. Use power key. - Page 118 • Text to speech options: Adjust your text to speech options. settings. For more information, refer to “Speech” on • Samsung subtitles (CC): Use Samsung subtitles with page 116. multimedia files when available. Touch ON/OFF to enable the feature. Touch Samsung subtitles (CC) for options.
-
Page 119: Browser Bar
Dexterity 1. From the Settings screen, touch My device tab • Assistant menu: Turn on functions to improve device Browser Bar. accessibility for users with reduced dexterity. Touch 2. Configure the following options: ON/OFF to enable the feature. General • Press and hold delay: Select a time interval for this •... -
Page 120: Language And Input
Samsung Keyboard on your device. You can also set onscreen keyboard options. From the Settings screen, touch My device tab To configure the Samsung keyboard: Language and input. The following options display. From the Language and input screen, touch next... - Page 121 (standard English style). • Tutorial: Display more information about using the Samsung keyboard. • Auto spacing: Automatically insert spaces between words. • Reset settings: Reset the keyboard settings back to their original configuration.
-
Page 122: Google Voice Typing
Swype Google Voice Typing To configure Swype settings: To configure Google voice typing: From the Language and input screen, touch next From the Language and input screen, touch next to Swype to display the following options: to Google voice typing. •... -
Page 123: Voice Search
From the Language and input screen, touch Text-to-speech options and select the preferred TTS Voice search to configure the following: engine, Samsung text to speech engine or Pico TTS. • Language: Choose a language for your voice input. 2. Touch next to the preferred TTS engine and •... -
Page 124: Motions And Gestures
Pointer Speed 3. The following options are available. Touch ON/OFF to active each feature. Touch each feature for details. This option sets your Pointer speed for your mouse or trackpad when you are using a keyboard dock accessory. • Direct call: Dial the currently displayed onscreen Contact entry as soon as you place the device to 1. From the Language and input screen, touch your ear. -
Page 125: Smart Screen
Smart Screen 3. Touch the following options to activate the feature. The Smart screen options allow you to customize your • Incoming calls: Answer or reject calls by saying screen settings to make the screen more responsive and “Answer” or “Reject”. A call answered with voice easier to use. -
Page 126: Accounts
Google and email accounts. Add an Account 1. From the Settings screen, under the Accounts tab, touch an account type (such as Samsung account). 1. From the Settings screen, touch Accounts tab Add account. 2. On the account type page, touch the account name. -
Page 127: Backup And Reset
1. From the Settings screen, under the Accounts tab, Back up and reset. The following options display: touch an account type such as Samsung account. • Back up my data: The Google server backs up all of 2. Touch the account name. -
Page 128: More
Factory Data Reset Location From this menu you can reset your device and sound settings You must enable location services on your device for apps to the factory default settings. (such as Google Maps) to use your location. 1. From the Settings screen, touch Accounts tab Note: Some apps may require one or more location services Back up and reset. - Page 129 Location Reporting My Places Google uses Location Reporting to store and use your You can save your favorite locations for use with services device’s most recent location data. Google apps, such as that require location information. This information can Google Maps, can use this data to improve your search improve your search results and other location related results based on places that you have visited.
-
Page 130: Security
Security Set Up or Change Password Use this option to set up your password when one is first The Security settings allow you to determine the security required or change your current password. level for your device. Encryption 1. From the Settings screen, touch More tab Security Set up/change password. -
Page 131: Make Passwords Visible
3. When you receive the new PUK code from your Note: You must activate Lock SIM card before you can AT&T Customer Service Representative, enter it in change your SIM PIN code. the PUK code field. To change your SIM PIN code 4. Enter a new PIN code in the Enter a new PIN field and 1. Touch Change SIM PIN. -
Page 132: Device Administration
Device Administration 3. Touch Unknown sources to download and install applications that do not come from Play Store. Use the Device Administration feature to select one or more administration applications that control your device for Warning! Enabling this option causes your device and security purposes (for example, if your device is lost of personal data to be more vulnerable to attack by stolen). -
Page 133: Application Manager
Application Manager 4. Touch a CA certificate to examine its details. A scrolling screen displays the details. You can download and install applications from Play Store or create applications using the Android SDK and install them Scroll to the bottom of the details screen and touch on your device. - Page 134 Downloaded SD Card Displays apps you have downloaded onto your device. Displays apps you have downloaded onto your SD card. 1. From the Settings screen, touch More tab 1. From the Settings screen, touch More tab Application manager. Application manager. 2. Touch the DOWNLOADED tab to view a list of all the 2. Touch the SD CARD tab to view a list of all the downloaded applications on your device.
-
Page 135: Default Applications
Default Applications Running Services View and control services running on your device. Set and manage your default applications. 1. From the Settings screen, touch More tab 1. From the Settings screen, touch More tab Application manager. Default applications. 2. Touch the RUNNING tab. All the applications that are 2. Touch an app to set it as the default application. -
Page 136: Storage
4. Touch Show battery percentage to see the battery 2. From the Settings screen, touch More tab Storage. charge percentage next to the battery charge icon at 3. Touch Mount SD card. the top of the display. Unmount the SD Card Storage 1. From the Settings screen, touch More tab Storage. -
Page 137: Date And Time
Date and Time Format the SD Card When formatting an SD card you will want to backup your To change the current time and date displayed: music and photo files that are stored on the card because From the Settings screen, touch More tab formatting the SD card deletes all the stored data. -
Page 138: About Device
About Device • Device name: Change the name for your device. The default is the model number: SAMSUNG-SM-G730A. View information about your device, including status, legal • Model number: Display your device’s model number. information, hardware and software versions, and battery use. -
Page 139: Software Update
Software Update The AT&T Software Update feature enables you to use your device to connect to the network and download any new software directly to your device. The device automatically updates with the latest available software when you access this option. Software Update Options 1. From the Settings screen, touch More tab About device... -
Page 140: Section 8: Connections
Section 8: Connections Turn Wi-Fi On This section describes the various connections your device can make including Wi-Fi, Bluetooth, and Connecting By default, your device’s Wi-Fi feature is turned on. Turning your PC. Wi-Fi on makes your device able to discover and connect to Wi-Fi compatible in-range WAPs. - Page 141 Connect to a Wi-Fi Network Manually Add a New Network Connection 1. From a Home screen, touch Apps Settings Wi-Fi. 1. From a Home screen, touch Apps Settings Connections tab Wi-Fi. 2. Touch ON/OFF button to turn Wi-Fi on. 2. Touch ON/OFF button to turn Wi-Fi on. The network names and security settings (Open network or Secured with WEP) of detected Wi-Fi 3. Touch Add Wi-Fi network.
- Page 142 Wi-Fi Status Indicators Advanced Wi-Fi Settings The following icons show your Wi-Fi connection status at The advanced Wi-Fi settings allow you to set up and manage a glance: wireless access points. 1. From a Home screen, touch Apps Settings Displays when Wi-Fi is connected, active, and communicating with a Wireless Access Point Connections tab Wi-Fi.
-
Page 143: Wi-Fi Direct
– Install certificates: Install authentication 1. From a Home screen, touch Apps Settings certificates. Connections tab Wi-Fi. – MAC address: View your device’s MAC address, 2. Touch ON/OFF to turn Wi-Fi on. required when connecting to some secured networks 3. Touch Wi-Fi Direct. (not configurable). -
Page 144: Bluetooth
Bluetooth Share Information with Connected Device About Bluetooth To share Videos, Photos, or other information with the connected device, follow these steps: Bluetooth is a short-range communications technology that 1. View the information that you want to share. For is used to connect wirelessly to a number of Bluetooth example, if you want to share a photo, find the photo in devices, such as headsets and hands-free car kits, and your camera viewer or My Files folder, then touch the... -
Page 145: Bluetooth Status Indicators
Displays when Bluetooth is active. 2. Touch ON/OFF button to turn Bluetooth on. Displays when Bluetooth is communicating with 3. Touch the check box next to SAMSUNG-SM-G730A a device. (your device name) if you want your device to be visible Bluetooth Settings to other Bluetooth devices. -
Page 146: Pair Bluetooth Devices
Pair Bluetooth Devices Show Received Files To show received files: Use the Bluetooth pairing process to establish a trusted connection between your device and another Bluetooth 1. From a Home screen, touch Apps Settings device. When you pair devices, they share a passkey, Connections tab Bluetooth. - Page 147 Rename or Unpair a Paired Device Note: Due to different specifications and features of other Unpair a paired device to break the connection between the Bluetooth compatible devices, display and operations device and your device, but retain the knowledge of the may be different, and functions such as transfer or pairing.
-
Page 148: Tethering And Wi-Fi Hotspot
Send Contacts with Bluetooth Tethering and Wi-Fi Hotspot Depending on your paired devices’ settings and capabilities, Use Mobile Hotspot to share your device’s Internet you may be able to send photos, Contact information, or connection via Wi-Fi with up to 10 other devices. other items using a Bluetooth connection. - Page 149 Configure Mobile Hotspot Settings Important! Using your device as a mobile hotspot consumes Configure your device’s Mobile Hotspot settings, including battery power and uses data service. While your device’s name and password, and set the visibility of Mobile Hotspot is active, your device’s your device’s Wi-Fi hotspot.
- Page 150 • Password: If you choose a security level that uses a Caution! By default, your device’s mobile hotspot has no password, enter the password. By default, the security applied, and any device can connect. For password is your mobile phone number. more information about configuring your mobile •...
-
Page 151: Vpn
USB Tethering Share your device’s Internet connection with a computer The VPN settings menu can be used to set up and manage connected to your device with a USB cable. Virtual Private Networks (VPNs). Before using VPN, you must first set up a screen unlock PIN Note: To enable USB tethering on your device, dial 611 or go or password. -
Page 152: Nfc
4. Touch Add. • Enter any other required information. • Touch Show advanced options to display additional • Enter a name for the VPN network in the Name field. VPN options. • Select a VPN type from the Type drop down menu. 5. -
Page 153: S Beam
Android Beam 3. Touch Tap and Pay to set up and access your payment apps. When Android Beam is activated, you can beam app content S Beam to another NFC capable device by holding the devices close together. You can beam browser pages, YouTube videos, When S Beam is activated, you can beam files to another contacts, and more. -
Page 154: Nearby Devices
Nearby Devices 4. In the Advanced section, set the following options: Share your media files with nearby devices using DLNA • Shared contents: Select the content to share. Choices (Digital Living Network Alliance) standards, over Wi-Fi. are: Videos, Photos, and Music. 1. Connect to a Wi-Fi network. -
Page 155: Pc Connections
Note: If you are a Windows XP user, ensure that you have Windows XP Service Pack 3 or higher installed on your computer. Also, ensure that you have Samsung Kies 2.0 or Windows Media Player 10 or higher installed on your... -
Page 156: Section 9: Applications
AT&T Code Scanner allows you to scan two dimensional (QR otherwise should be obtained from the application and datamatrix codes) and one dimensional (UPC and EAN) provider directly and not from Samsung. barcodes found in magazines, stores, and online. From the Home screen, touch AT&T Code Scanner. -
Page 157: At&T Familymap
AT&T FamilyMap AT&T Navigator AT&T FamilyMap provides peace of mind by being able to AT&T Navigator provides you with access to real time GPS conveniently locate a family member from your wireless driven applications. These programs not only allow you to device or PC and know that your family's location information achieve turn by turn navigation, but also access local is secure and private. -
Page 158: At&T Smart Wi-Fi
AT&T Smart Wi-Fi Browser With AT&T Smart Wi-Fi, you can maximize your battery The Browser is your access to the mobile web. This section performance, maximize your data, simplify access to explains how to navigate the Browser and introduces you to AT&T Hot Spots and Wi-Fi networks, automate your Wi-Fi the basic features. -
Page 159: Enter A Url
Enter a URL Add and Delete Windows You can access a website quickly by entering the URL. You can have up to eight Internet windows open at one time. Websites are optimized for viewing on your device. To add a new window, follow these steps: To enter a URL and go to a particular website, follow these 1. -
Page 160: Using Bookmarks
Using Bookmarks To add a new incognito window: 1. From your browser window, touch Windows. While navigating a website, you can bookmark a site to quickly and easily access it at a future time. The URLs 2. Touch the incognito icon in the upper right corner (website addresses) of the bookmarked sites are displayed in of the screen. -
Page 161: Add Bookmarks
Add Bookmarks Using Your History 1. From any webpage, touch The History list provides you with a list of the most recently visited websites. These entries can be used to return to 2. Use the onscreen keypad to enter the Name, Address, previously unmarked web pages. -
Page 162: Calculator
Calculator Calendar With this feature, you can use the device as a calculator. The With the Calendar feature, you can consult the calendar by calculator provides the basic arithmetic functions; addition, day, week, or month, create events, and set an alarm to act subtraction, multiplication, and division. -
Page 163: Camera
Chrome 5. Press and select one of the following options: • Go to: Displays a specific date. Use the Google Chrome web browser on your device. • Delete: Delete All events, All events before today, or an From the Home screen, touch Chrome. -
Page 164: Turn Off An Alarm
• Alarm type: Set the way in which the alarm sounds when • Name: Use a specific name for the alarm. The name activated. Choose either Melody, Vibration, Vibration and will appear on the display when the alarm activates. melody, or Briefing. 2. Touch Save to store the alarm details. -
Page 165: World Clock
World Clock Delete a World Clock Entry 1. From the Home screen, touch Clock World Clock allows you to view the time of day or night in World Clock Delete. other parts of the world. World Clock displays time in hundreds of different cities around the world. -
Page 166: Contacts
Timer Desk Clock You can use this option to set a countdown timer. Use a timer You can use the Desk clock when you have a desk dock and to count down to an event based on a preset time length you want your device to display the time, day, date, location, (hours, minutes, and seconds). -
Page 167: Device Help
Device Help DriveMode Provides onscreen assistance for this device. With the AT&T DriveMode application, you can set your device to auto reply when you are driving and don’t want to From the Home screen, touch Device help answer the phone. You can set auto reply to Messages, Downloads Emails, and Phone Calls. -
Page 168: Gmail
Gmail Google Now Google Now recognizes repeated actions performed on the For more information, refer to “Gmail” on page 89. device (including accessing locations, repeated calendar From the Home screen, touch Gmail. appointments, search queries, and more). Google Now uses Google these actions to automatically send updates for user specific information in the form of “cards.”... -
Page 169: Google Settings
You may incur additional charges when downloading Note: This app requires a Google Account. this application via the mobile network. To avoid additional charges, contact your service provider From the Home screen, touch Google+. Visit content.samsung.com/us/contents/aboutn/groupPlay.do for more information. -
Page 170: Hangouts
Hangouts Memo Google Hangouts is an online place to meet friends and This feature allows you to create a memo and send it via family, share photos, and host video calls. Bluetooth, Email, Gmail, Google, Google+, Messaging, or Wi-Fi Direct. Visit google.com/+/learnmore/hangouts to learn more. -
Page 171: Messaging
Messaging Music You can send and receive text and multimedia messages For more information, refer to “Music” on page 61. using the Messaging app. From the Home screen, touch Music. For more information, refer to “Messaging” on page 79. My Files From the Home screen, touch Messaging My Files allows you to manage your sounds, images, videos,... -
Page 172: Myat&T
myAT&T • Notifications: Contains all of the notifications you have received. The myAT&T application allows you to manage your own • Ringtones: Contains ringtones you have purchased. AT&T account. You can review and pay your bill, check • Android: Contains files that are used in Android minutes and data usage, upgrade to a new device, or change your rate plan. -
Page 173: Play Books
Play Books Play Movies & TV Discover more than 3 million free ebooks and hundreds of Watch movies and TV shows purchased from Google Play. thousands more to buy in the eBookstore. You can stream them instantly, or download them for viewing when you’re not connected to the Internet. -
Page 174: Play Newsstand
Visit play.google.com/store/newsstand to learn more. 1. Sign in to your Samsung Account. 2. From the Home screen, touch S Translator. Note: This app requires a Google Account. 3. At the S Translator screen, touch the top language bar From the Home screen, touch and enter your language. -
Page 175: S Voice
Samsung Apps With the S Voice application you can use your voice to Note: Samsung App has been updated to GALAXY Apps. perform operations that you would normally have to do by hand such as dialing a phone number, texting a message, With Samsung Apps, you can download hundred of playing music, etc. -
Page 176: Usage Manager
Usage Manager 2. To start recording, touch Record and speak into the microphone. This app is a shortcut to your Data usage settings so you can manage your data. 3. During the recording process you can either touch Stop to stop and save the recording or Pause For more information, refer to “Data Usage”... -
Page 177: Voice Search
Voice Search 4. The following options are available at the bottom of your screen: The Google Voice Search application allows you to search the • Web: Touch Web to return to the original web using only your voice. search results. 1. -
Page 178: Wallet
Wallet YouTube Isis Mobile Wallet uses NFC technology to let you pay for YouTube is a video sharing website on which users can purchases with just a tap. The Wallet holds credit, debit, and upload and share videos. The site is used to display a wide loyalty cards while organizing offers, deals, and promotions. -
Page 179: Section 10: Samsung Product Registration
Section 10: Samsung Product Registration... -
Page 180: Index
Index Managing address book AT&T Navigator 150 contacts 58 AT&T Ready2Go 10 Abc mode 32 Service dialing numbers 60 AT&T Smart Wi-Fi 151 Accessibility 131 Using contacts list 51 Accessories 109 Address Book Options 54 Adding a New Contact Back Key 19 Airplane Mode 94 Idle screen 49 Backing Up Your Data 120... - Page 181 Searching for a number in address book 46 Calculator 155 Data Usage 93 Using the speakerphone 45 Calendar 155 Dialing Options 38 Call rejection 102 Call Functions 35 Display Call Sound 3-way calling (multi-party Icons 15 Adding more volume 41 calling) 45 Using negative colors 111 Personalize 43...
- Page 182 Emergency Calls Google Making 37 Drive 160 Hands-Free Mode 108 With SIM 37 Google Now 161 Hangouts 91 Without SIM 37 Google+ 91 Home Key 19 Entering Text 30 Hangouts 91 Home screen mode 101 Using Abc mode 32 Photos 165 Hotspot 93 Using Swype 33 Play Books 166...
- Page 183 Messaging Motion 117 Creating and sending text Overview 18 Landscape 31 messages 80 Multimedia 61 Language and Input Deleting a message 84 Music 61 Keyboards and input Draft 81 Music Options 62 methods 113 Gmail 89 Music Player 61 Select language 113 Locked 81 Adding music 64 Linking Contacts 52...
- Page 184 Sharing multiple pictures 70 Swype Sharing 69 S Translator 167 Keyboard settings 115 Play Books 166 S Voice 168 Swype Settings 34 Play Movies & TV 65 Set wake-up command 98 Synchronizing Accounts 119 Play Music 166 Samsung Link 150 Play Newsstand 167...
- Page 185 Using Favorites Adding favorites 154 Text Input YouTube 171 Deleting a favorite 154 Abc mode 32 YP (Yellowpages) 171 Editing favorites 154 Methods 30 Timer 159 Automatic answering 103 Video 66 Touch Screen 10 Video Player 66 Transferring Large Files 69 Voice Control 118 Translator 167 Voice Mail...
Need help?
Do you have a question about the Galaxy S III mini and is the answer not in the manual?
Questions and answers