Intermec CN3 User Manual
Hide thumbs
Also See for CN3:
- User manual (158 pages) ,
- Instructions manual (32 pages) ,
- Quick start manual (20 pages)
Table of Contents
Advertisement
Quick Links
Advertisement
Table of Contents

Subscribe to Our Youtube Channel
Related Manuals for Intermec CN3


Summary of Contents for Intermec CN3
- Page 1 User's Manual CN3 Mobile Computer...
- Page 2 The information contained herein is provided solely for the purpose of allowing customers to operate and service Intermec-manufactured equipment and is not to be released, reproduced, or used for any other purpose without written permission of Intermec Technologies Corporation.
- Page 3 Added information about the InstallSelect application, the clean boot method, the color camera, and CDMA radios. 04/2007 • Added information about GPS on the CN3. • Added information about using the FTP server. • Created an appendix and for specifications and accessories information.
- Page 4 CN3 Mobile Computer User’s Manual...
-
Page 5: Table Of Contents
Coming Out of the Idle Mode ....... . 18 Managing Power on the CN3 ....... . . 18 Using the Screen . - Page 6 Using the GPSID Installed on the CN3 ....... . 26...
- Page 7 Favorite Links........... . 74 CN3 Mobile Computer User’s Manual...
- Page 8 Reprogramming the CN3 Keypad ........
- Page 9 Connecting to a Bluetooth Headset......124 Configuring Bluetooth Using Intermec Settings ......125 Connecting with Bluetooth .
- Page 10 ............... . 193 CN3 Mobile Computer User’s Manual...
-
Page 11: Before You Begin
Global Services and Support Warranty Information To understand the warranty for your Intermec product, visit the Intermec web site at www.intermec.com and click Service & Support. The Intermec Global Sales & Service page appears. From the Service & Support menu, move your pointer over Support, and then click Warranty. -
Page 12: Who Should Read This Manual
This document provides you with information about the features of the CN3, and how to install, configure, operate, maintain, and troubleshoot it. Before you work with the CN3, you should be familiar with your network and general networking terms, such as IP address. -
Page 13: Patent Information
2 Click Service & Support > Manuals. 3 In the Select a Product field, choose the product whose documentation you want to download. To order printed versions of the Intermec manuals, contact your local Intermec representative or distributor. Patent Information 4882476;... - Page 14 Before You Begin CN3 Mobile Computer User’s Manual...
-
Page 15: Using The Computer
Using the Computer This chapter introduces the CN3 Mobile Computer, developed by Intermec to enhance wireless connectivity needs. It contains hardware and software configuration information to assist you in making the most out of your CN3. Note: Desktop icons and applet icons are shown to the left. Any place that Start is mentioned, tap the following icon in the upper left corner of the CN3 desktop. -
Page 16: Introducing The Cn3 Mobile Computer
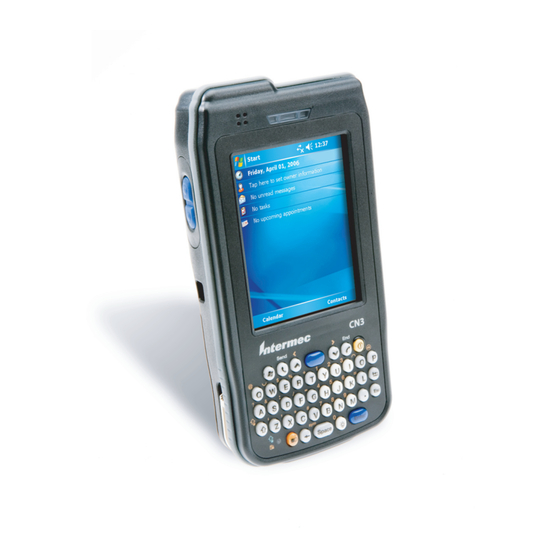
Chapter 1 — Using the Computer Introducing the CN3 Mobile Computer The Intermec CN3 Mobile Computer is a small, ergonomically designed mobile computer built on the Microsoft® Windows® Mobile 5.0 operating system. It is lightweight, easy-to-use, and runs most software developed for the Windows Mobile platform, including standalone, client-server, and browser-based applications. - Page 17 Remappable scan buttons Stylus in holder Connector Microphone Battery With miniSD/SIM card door open Rear view: The scanner and the color camera are mutually exclusive. You can only have one of these options on a CN3. CN3 Mobile Computer User’s Manual...
-
Page 18: Features
802.11b/g wireless LAN devices. Learning Software Build Versions To check to see if your CN3 has the latest SSPB or operating system build • Select Start > Internet Explorer > the Intermec logo, then note the information beneath the CN3 Version Information title. -
Page 19: Scanning Bar Codes
The CN3 has an area imager that can scan 1D and 2D bar code symbologies. It also supports omni-directional (360°) scanning where you can position the CN3 in any orientation to scan a bar code label. Using the 2D imager is like taking a picture with a digital camera. -
Page 20: Improving The Performance Of The Area Imager
If you have problems scanning a bar code with the 2D imager, try following some of these tips to improve the performance of your imager: • Tap Start > Settings > the System tab > the Intermec Settings icon to access the applet. -
Page 21: Reading Distances
Contact your Intermec representative for more information. The minimum standard reading distances for CN3s built with integrated scan engines are shown below. When correctly mounted, an exit window (like the one the CN3 has) reduces reading distances by about 4%. EA11 Standard Minimum Reading Distances Symbology... -
Page 22: Using The Batteries
If you fail to replace the battery immediately, you may lose important data or applications. Note: If the CN3 is not on external power and the battery pack is removed, it will suspend when the battery pack is removed. When the battery reaches the end of its useful life, the spent battery should be disposed of by a qualified recycler or hazardous materials handler. -
Page 23: Maximizing Battery Life
Press the power button to turn off the CN3. Store the CN3 for more than a If you are storing the CN3 for a few days, like over the weekend, install the charged day. battery or attach the CN3 to a power source. -
Page 24: Checking The Battery Status
Battery is on charge. Steady Amber Either the CN3 is in a dock but is missing its battery; or the temperature of the battery pack is too hot or too cold for it to charge. You can check battery status by using the Power applet. -
Page 25: Understanding The Low Battery Warnings
Chapter 1 — Using the Computer Note: The Backup battery setting shown in the Battery tab refers to the power remaining for the super capacitor that the CN3 uses for backup power. Understanding the Low Battery Warnings When the battery charge is getting low (approximately 6.4 to 6.5V), you will receive an audible alert and an initial pop-up “Main Battery Low”... - Page 26 4 Tap the Volume icon at the top of the screen, tap On, then move the slider bar to your desired level. If your CN3 comes with a phone, then be sure to use the left slider bar for the volume for the rear speaker and the right slider bar for the phone via the front speaker.
-
Page 27: Using The Color Camera
Using the Color Camera The 1.3 megapixel color camera with flash is an optional feature that is factory-installed into the upper back of the CN3, as shown in the following illustration. You can take photos in either high-resolution or a compressed formats, with resolutions up to 1200x1024 pixels. -
Page 28: Using The Intermec Settings Applet
Reference Manual available online at www.intermec.com. To access the Intermec Settings applet 1 Tap Start > Settings > the System tab > the Intermec Settings icon to access the applet. 2 Tap (+) to expand any of the settings, then select any of the subsequent settings to make changes via drop-down lists or fields. -
Page 29: Using The Keypad
Chapter 1 — Using the Computer Using the Keypad Your CN3 has either the numeric keypad or the QWERTY keypad. Numeric Keypad QWERTY Keypad QWERTY Keypad The full alphabetic QWERTY keypad is for applications that require input of both alphabetic and numeric data. -
Page 30: Using The Color-Coded Keys
• On the numeric keypad, press C, then the [1] key. The Caps Lock LED lights up green to show that the CN3 is in the Caps Lock mode. The keypad stays in this mode until you press a color key again. -
Page 31: Entering Characters On The Numeric Keypad
C [1] [7] [7] [7] [7] C [8] C [1] [8] C [8] [8] C [1] [8] [8] C [8] [8] [8] C [1] [8] [8] [8] C [9] C [1] [9] C [9] [9] C [1] [9] [9] CN3 Mobile Computer User’s Manual... -
Page 32: Using The Power Button
C [1] [9] [9] [9] [9] Using the Power Button When you press the Power button, you a put the CN3 into a lower power mode. This mode is Suspend mode. In Suspend mode, the CN3 continues to supply power to all memory, but turns off power to most hardware such as the display. - Page 33 Profiler. Power Profiler also provides advanced settings that allow you to fine-tune the power usage of the CN3. You can also choose to have the Power button turn off the screen or turn off the device. CN3 Mobile Computer User’s Manual...
-
Page 34: Using The Screen
Chapter 2, “Windows Mobile”. Toolbar Desktop Taskbar The CN3 has a stylus you can use to select items and enter information. Touch Screen Navigation Action Description Touch the screen once with the stylus to select options, close applications, launch applications, or launch menus from the taskbar. -
Page 35: Smartsystems Platform Bundles
Intermec Developer Library (IDL) runtime, and other software. The SSPB is stored in the “\Flash File Store” folder off the root of your CN3 and automatically installed on the device when it is initially started up. Updated bundles are available as software downloads from the Intermec web site at www.intermec.com/SmartSystems. -
Page 36: Adjusting The Volume
2 Tap On, then move the system volume slider to the desired volume level. Up is louder, down is quieter. If your CN3 comes with a phone, be sure to use the left slider bar for the volume for the rear speaker, and to use the right slider bar for the phone (front speaker). -
Page 37: Understanding The Status Leds
The blue light may stay on for up to 30 seconds, but will usually turn off after less than 10 seconds. During this time, do not toggle the CN3 on or off and do not remove the battery, or you may corrupt the CN3. -
Page 38: Using The Storage Card
Using the Storage Card The CN3 uses a miniSD card to increase file storage and install software. The miniSD card slot is located under a door that is beneath the battery pack. Remove the two screws holding the door to reach the miniSD card. -
Page 39: Setting Vibrate Mode
To set your CN3 to vibrate • Tap the Volume icon at the top of the screen, then tap Vibrate. If your CN3 has a built-in phone, this sets both the volume and the phone to vibrate. Note the icon change. -
Page 40: Setting Up Gps On Your Cn3
• Provides access to GPS data without requiring applications to recognize and parse NMEA syntax. Using the GPSID Installed on the CN3 To use the GPSID installed on your CN3, you need to configure the GPSID settings. To configure your GPSID settings 1 Tap Start >... - Page 41 2 Tap GPS. The GPS Settings screen appears. 3 On the Programs tab, select the COM port that you want your programs to use to get GPS data from your CN3. Note: COM1 and COM3 are reserved. 4 Tap the Hardware tab, and select these settings.
-
Page 42: Learning About Additional Gps Options For The Cn3
Preferred Reset Method The recommended method for resetting the CN3 is to press and hold the power button on the front of the CN3 for about 10 seconds. This performs a graceful system shutdown and no data is lost in the process. -
Page 43: Clean Boot Process
2 Remove the battery pack from the back of the CN3. 3 With a stylus, press the reset button in the battery cavity in the back. 4 Press and hold the power button as you put the battery back in the CN3. Reset button Do not use force or a sharp object when pressing the reset button. - Page 44 Chapter 1 — Using the Computer CN3 Mobile Computer User’s Manual...
-
Page 45: Windows Mobile
Pop-up menus give you quick and easy access to the most common actions. Below is a list of Windows Mobile components described in this chapter. Tap Start > Help, then select a topic on your CN3 to find additional information on Windows Mobile components. Windows Mobile 5.0 Components... -
Page 46: Software Builds
CN3. Today Screen When you turn on your CN3 for the first time each day (or after four hours of inactivity), you see the Today screen. You can also display it by tapping the Start flag at the top left of your display and then Today. On the Today screen, you can see important information for the day. -
Page 47: Programs
Start > Programs, and then the program name. You can also switch to some programs by pressing a program icon. Your CN3 has one or more program icons located on the front or side of the computer. The icons identify the programs to which they switch. -
Page 48: Navigation Bar And Command Bar
Chapter 2 — Windows Mobile Play digital audio and video files that are stored on your CN3 or on a network. Navigation Bar and Command Bar The navigation bar is located at the top of the screen. It displays the active program and current time, switch to programs, and close screens. -
Page 49: Entering Information
Using Microsoft ActiveSync, synchronize or copy information between your desktop and CN3. For more information on ActiveSync, see ActiveSync Help on your desktop. Typing Using the input panel, enter typed text into the CN3. Do this by tapping keys on the onscreen keyboard or by using handwriting recognition software. Writing Using the stylus, write directly on the screen. -
Page 50: Typing With The Onscreen Keyboard
• To insert a carriage return, tap and hold the stylus anywhere on the keyboard and drag down. To use larger keys, tap the input panel arrow, tap Options, select Keyboard from the Input method drop-down list, then select Large keys. CN3 Mobile Computer User’s Manual... -
Page 51: Using Block Recognizer
Using Block Recognizer Character recognition software gives you a fast and easy method for entering information in any program on your CN3. Letters, numbers, and punctuation you write are translated into typed text. Tap the input panel arrow, then tap Block Recognizer. Write a letter in the box. -
Page 52: Writing On The Screen
Menu > Tools > Recognize. If a word is not recognized, it stays in its original form. If you want to convert only certain words, tap Pen to disable the writing function, tap twice over the word or phrase to highlight, then tap Menu > Tools > Recognize. CN3 Mobile Computer User’s Manual... - Page 53 Menu > Zoom. Recognition is not good under a 150% zoom. • Write the letters of a word closely and leave big gaps between words so that the CN3 can easily tell where words begin and end. • Hyphenated words, foreign words that use special characters such as accents, and some punctuation cannot be converted.
-
Page 54: Drawing On The Screen
In the Messaging program, you can add a recording to an e-mail message. In Calendar, Tasks, and Contacts, you can include a recording in the Notes tab. In the Notes program, you can create a stand-alone recording or add a recording to an open note. CN3 Mobile Computer User’s Manual... - Page 55 1 Tap Menu > View Recording Toolbar to add the recording toolbar to the bottom of the screen. 2 Hold the CN3’s microphone near your mouth or source of sound. 3 Tap the red circle to start your recording. 4 Tap the black box when finished. If you are recording in an open note, an icon appears in the note, like in the following sample.
-
Page 56: Using My Text
Finding and Organizing Information You can use the File Explorer to find files on the CN3, and organize these files into folders, and move files using the cut or copy-and-paste methods. Tap Start > Programs > the File Explorer icon. -
Page 57: Customizing Your Computer
Computer” on page 80 for more information about the Object Store. You can install any program created for the CN3, as long as there is enough memory. A popular place to find software for your CN3 is on the Windows Mobile web site (www.microsoft.com/windowsmobile/resources/... - Page 58 You may see a single .xip, .exe, or .zip file, a SETUP.EXE file, or several versions of files for different CN3 types and processors. Be sure to select the program designed for the Windows Mobile and your CN3 processor type.
- Page 59 My Documents by default, then My Device to see a list of all folders on the CN3). Tap and hold the program and tap Cut on the pop-up menu. Open the Start Menu folder located in the Windows folder, tap and hold a blank area of the window, and tap Paste on the pop-up menu for the program to appear on the Start menu.
-
Page 60: Microsoft Activesync
Chapter 2 — Windows Mobile Using ActiveSync on the desktop Use the Explorer in ActiveSync to explore your CN3 files and locate the program. Right-click the program, and then click Create Shortcut. Move the shortcut to the Start Menu folder in the Windows folder. The shortcut now appears on the Start menu. -
Page 61: Microsoft Outlook Mobile
CN3. Notice that information you have stored in Microsoft Outlook on your desktop was copied to your CN3, and you did not have to type a word. Disconnect the CN3 from your computer and you are ready to go! Once you have set up ActiveSync and completed the first synchronization process, you can initiate synchronization from your CN3. -
Page 62: Calendar: Scheduling Appointments And Meetings
Chapter 2 — Windows Mobile Using ActiveSync, you can synchronize information in Microsoft Outlook or Microsoft Exchange on your desktop with your CN3. You can also synchronize this information directly with a Microsoft Exchange server. Each time you synchronize, ActiveSync compares the changes you made on your CN3 and desktop or server and updates both computers with the latest information. -
Page 63: What Is An All Day Event
Calendar; they appear in banners at the top of the calendar. Note: You cannot modify or create all-day events with attendees on the CN3. If you create all day events with attendees on your desktop, use ActiveSync to copy such events to the CN3, then view them in Calendar. -
Page 64: What Is A Recurrence Pattern
To create an appointment, tap Menu > New Appointment. To select a new date from a pop-up calendar, tap the display date. To enter or select a new time, tap the display time. Enter the appointment details, and when finished, tap ok to return to the calendar. CN3 Mobile Computer User’s Manual... -
Page 65: Creating An All-Day Event
Tap to select “Yes” or “No” for the all-day event You cannot modify or create all day events with attendees on the CN3. If you create all-day events with attendees on your desktop, use ActiveSync to copy such events to the CN3. -
Page 66: Setting A Reminder For An Appointment
Settings > the Personal tab > the Sounds & Notifications icon. Adding a Note to an Appointment You can add written or typed notes and even recordings (if your CN3 supports recordings) to an appointment. This is a good place for maps, drawings, and other detailed information. -
Page 67: Making An Appointment Recurring
2 Check the categories to which you want to assign the appointment. 3 To create a new category, tap New, enter the category name, then tap Done. The new category is automatically checked in the list. CN3 Mobile Computer User’s Manual... -
Page 68: Sending A Meeting Request
3 Repeat this procedure until you have everyone you want to invite to the meeting, then tap ok. 4 Messaging automatically creates a meeting request and sends it to the attendees the next time you synchronize with your desktop. CN3 Mobile Computer User’s Manual... -
Page 69: Finding An Appointment
Tap to see details Deleting an Appointment 1 In the calendar, tap and hold the appointment. 2 On the pop-up menu, tap Delete Appointment. The next time you synchronize, the appointment is also deleted from the desktop. CN3 Mobile Computer User’s Manual... -
Page 70: Changing Calendar Options
Selected icons are in black. Contacts: Tracking Friends and Colleagues To switch to Contacts on the CN3, tap Start > Contacts. Contacts maintains a list of your friends and colleagues so that you can easily find the information you are looking for, whether you are at home or on the road. -
Page 71: Creating A Contact
Use Notes to include maps and directions Synchronizing Contacts Contacts stored on your CN3 can be synchronized with Outlook contacts stored on your desktop or with Mobile Information Server 2002 or later. New items entered in one location are copied to the other during synchronization. -
Page 72: Viewing Contacts
• To see a list of contacts employed by a specific company, tap Menu > View By > Company. Then, tap the desired company name. Indicates the default number Tap to edit the default number CN3 Mobile Computer User’s Manual... -
Page 73: Changing A Contact
Tap outside the box to close and return to details Adding a Note to a Contact You can add written or typed notes and even recordings (if your CN3 supports recordings) to a contact. Notes are handy for maps and drawings. -
Page 74: Copying A Contact
• To find a contact assigned to a category, tap Menu > Filter, then select the type of contact to display. To show all contacts again, tap Menu > Filter > All Contacts to clear all categories. CN3 Mobile Computer User’s Manual... -
Page 75: Deleting A Contact
Contacts list. Tasks: Keeping a To Do List To switch to Tasks on your CN3, tap Start > Tasks. Use Tasks to keep track of what you have to do. A variety of task information can display on the Today screen. If you use Microsoft Outlook on your desktop, you can synchronize tasks between your CN3 and desktop. -
Page 76: Creating A Task
When finished, tap ok to return to the task list. Synchronizing Tasks Tasks stored on the CN3 can synchronize with Microsoft Outlook on your desktop. Task synchronization is automatic in ActiveSync. CN3 Mobile Computer User’s Manual... -
Page 77: Notes: Capturing Thoughts And Ideas
(pictures). For information, see ActiveSync Help on the desktop. Notes: Capturing Thoughts and Ideas To switch to Notes on your CN3, tap Start > Programs > the Notes icon. Notes helps you quickly capture your ideas, notes, and thoughts. You can create a note using written and typed text, drawings, and recordings. -
Page 78: Synchronizing Notes
ActiveSync Help on the desktop. Note: When you delete or change an item on either your desktop or the CN3, the item is changed or deleted in the other location the next time you synchronize. -
Page 79: Synchronizing E-Mail Messages
Outlook and then sent from those programs. • The messages on the two computers are linked. When you delete a message on your CN3, it is deleted from your desktop the next time you synchronize. • Messages in subfolders in other e-mail folders in Outlook are synchronized only if they were selected for synchronization in ActiveSync. -
Page 80: Connecting To A Mail Server
• If you use POP3 and you move e-mail messages to a folder you created, the link is broken between the messages on the CN3 and their copies on the mail server. The next time you connect, the mail server sees that the messages are missing from the CN3 Inbox and deletes them from the server. -
Page 81: Composing And Sending Messages
1 Tap Menu > Switch Accounts and ensure that the account you want to use is selected (marked by a bullet.) 2 The messages on your CN3 and e-mail server are synchronized. Tap a message in the message list to open it. -
Page 82: Companion Programs
Companion programs include Word Mobile, Excel Mobile, and PowerPoint Mobile, and Windows Media Player. To switch to a companion program on your CN3, tap Start > Programs > the program name. Word Mobile Word Mobile works with Microsoft Word on your desktop to give you access to copies of your documents. -
Page 83: Typing Mode
Chapter 2 — Windows Mobile Word Mobile contains a list of files stored on your CN3. Tap a file in the list to open it. To delete, make copies of, and send files, tap and hold a file in the list, then, select the action on the pop-up menu. -
Page 84: Writing Mode
To synchronize files, first select the Files information type for synchronization in ActiveSync. When you select Files, the My Documents folder for the CN3 is created on your desktop. Place all files you want to synchronize with the CN3 in this folder. Password-protected files cannot be synchronized. -
Page 85: Excel Mobile
“\Templates” folder. Excel Mobile contains a list of the files stored on your CN3. Tap a file in the list to open it. To delete, make copies of, send files, tap and hold a file in the list, then select the appropriate action from the menu. -
Page 86: Tips For Working In Excel Mobile
For more information on using Excel Mobile, tap Start > Help. PowerPoint Mobile With PowerPoint Mobile on your CN3, you can open and view slide show presentations created on your PC. Whether the presentation is opened from an e-mail message, downloaded from a file share or the Internet, copied to the CN3 via a storage card, or obtained by synchronizing with your PC, slide shows created in .PPT and .PPS format with PowerPoint 97 and later... - Page 87 5 Tap Show Options > the Orientation tab, then select an orientation. 6 Tap Default to view the presentation in the orientation that best fits the size and shape of the screen. CN3 Mobile Computer User’s Manual...
-
Page 88: Windows Media Player For Windows Mobile
Media, tap Start > Help, then select a topic. Use Microsoft Windows Media Player on your desktop to copy digital audio and video files to your CN3. You can play Windows Media and MP3 files on your Windows Mobile. Indicates the current track progress... -
Page 89: Mobile Favorites
If you are using Microsoft Internet Explorer 5.0 or later on your desktop, you can download mobile favorites to your CN3. Synchronizing mobile favorites downloads web content to your CN3 so that you can view pages while you are disconnected from your ISP and desktop. -
Page 90: Using Internet Explorer Mobile
Tap to add or remove a folder or link 3 The page that was downloaded the last time you synchronized with your desktop opens. If the page is not on your CN3, the favorite is dimmed. CN3 Mobile Computer User’s Manual... -
Page 91: Browsing The Internet
Enter, and tap the arrow to choose from previously entered addresses; or while using the CN3, go to the page you want to add, tap and hold on the page, and tap Add to Favorites to add favorites. - Page 92 Chapter 2 — Windows Mobile CN3 Mobile Computer User’s Manual...
-
Page 93: Configuring The Computer
Configuring the Computer There are multiple ways to get an application to your CN3 Mobile Computer like there are multiple ways to package the application for delivery. Note: Desktop icons and settings icons are shown to the left. Any place that Start is mentioned, tap the following Windows icon in the top, left corner of your CN3 desktop. -
Page 94: Developing Applications For The Computer
Consider any of these when choosing a storage location for applications: • In the basic CN3, there are two built-in storage options: the Object Store and the Flash File Store. The Object Store, or User Store, is a Disk on Chip (DOC) Flash that looks like a disk. -
Page 95: Installing Applications On The Computer
URL from which to download the latest application. To connect your CN3 to your desktop 1 Connect your CN3 to your desktop using a USB cable. You may have to detach, then reattach the cable to “wake” the connection. -
Page 96: Using The Ftp Server
“iConnect” on page 150. Using a Storage Card If you have a miniSD storage card for your CN3, this is the best place for you to installation applications. To install applications using a storage card 1 If you are using a Secure Digital card reader, suspend the CN3, remove its miniSD storage card, insert it in a miniSD adapter card, then place it in the reader. -
Page 97: Using The Smartsystems Console
Intermec web site. To use SmartSystems Console to install an application file 1 Download the file from the Intermec web site, unzip it on your desktop. 2 From the SmartSystems Console, drag-and-drop the application onto each CN3 discovered in your network. -
Page 98: Using Installselect
Note: This application should only be used by administrators, developers, integrators, or Intermec representatives. InstallSelect manages the installation of value-added software features of the CN3. Removal of software features may result in loss of device functionality, or the ability to manage device settings. See “Understanding Software Feature Descriptions”... -
Page 99: Understanding Software Feature Descriptions
Click Cancel to disregard any selections you made and close the InstallSelect application. 5 If you clicked Apply, then click Yes to continue with the clean boot. After the CN3 has finished with its clean boot, you should find all of the checked components installed. Understanding Software Feature Descriptions The following table shows the friendly name that you may see in InstallSelect and its underlying filename. - Page 100 Intermec Settings because the executable file is not extracted from the CAB file. We used the ampersand symbol (&) to keep the names shorter. The CN3 display in this application can show about 40 characters without scrolling.
-
Page 101: Launching Your Application Automatically
Chapter 3 — Configuring the Computer Launching Your Application Automatically Note: This describes the system component startup for Intermec provided components only. It does not describe the bootstrap loader process. It only describes the component installation process provided by Windows Mobile. -
Page 102: Autoexec
AutoExec is reserved for Intermec use to configure Intermec-specific applications. It launches the CAB installer, AutoCab (AutoCab.exe), to install platform cab files to the system, such as Intermec Data Collection. When the AutoExec is complete, RunAutorun then checks for the existence of AutoRun (AutoRun.exe) and executes this program from the first media... -
Page 103: Autorun
; Suspend processing any commands until event called MyEventName is signaled. WAITFOR "MyEventName" AutoRun AutoRun (AutoRun.exe) automates operations such as launching other processes and is configured through the AutoRun data file (AutoRun.dat). This file must be in the same directory as the program itself. CN3 Mobile Computer User’s Manual... -
Page 104: Autocopy
Note: If you need to add steps at boot time, add them to AutoUser.dat, not to AutoRun.dat. AutoRun.dat is provided by Intermec and is subject to change. AutoUser.dat is the designated place for the end user to add steps to the boot time process. -
Page 105: Autocab
Forces the specified cab files to extract regardless of whether it was previously extracted. -Log= Set to 1 to create a log file in the same folder that AutoCab is running. Useful for debugging cab installation. Default is 0 (disabled). CN3 Mobile Computer User’s Manual... -
Page 106: Customizing How Applications Load On The Computer
Set to 0 to prevent showing any installation progress interfaces. Also prevents user from canceling installation. Set to 1 to show normal installation. Set to 2 to show Intermec installation progress interface (user can see what is installing but cannot cancel it). Default is 1 (show normal). -
Page 107: Configuring Parameters
You can access Intermec Settings while running any application. To access Intermec Settings • From the CN3 desktop, select Start > Settings > the System tab > the Intermec Settings icon. For detailed information on most of the commands available in Intermec Settings, see the Intermec Computer Command Reference Manual (P/N 073529) via the Intermec web site. -
Page 108: Configuring The Computer Through The Network
The default reference time server is the USNO (tock.usno.navy.mil). To synchronize the time on your CN3 with this time server, you must have a valid connection to the Internet. You can also synchronize the CN3 system time with a corporate network server within your firewall that is SNTP- capable. -
Page 109: Configuring The Computer In A Udp Plus Network
Configuring the Computer in a UDP Plus Network Use the host computer to configure a CN3 in your wireless network. To send and receive configuration data or files, write a host application that can communicate with an Intermec Application Server (IAS), formerly Gateway or DCS 30X. -
Page 110: Reprogramming The Cn3 Keypad
Using the Pictures & Videos application, you can take, view, edit pictures, and record and launch video clips stored on your CN3 or on a storage card. You can also send pictures and video clips to others, or save an image as the background on the Today screen. - Page 111 • Use the Camera tab, you can set the default location where pictures are saved. If you select main memory, pictures are saved to permanent storage on your CN3, which may mean you need to consider the storage needs of other programs.
-
Page 112: Configuring The Sf51 Cordless Scanner
Configuring the SF51 Cordless Scanner The following information pertains to configuring the SF51 Cordless Scanner to work with your CN3. These instructions assume you have EasySet version 5.4 or later installed on your desktop or laptop. EasySet is available at no charge from the Intermec web site at www.intermec.com. -
Page 113: Enabling Bluetooth
Chapter 3 — Configuring the Computer Enabling Bluetooth Bluetooth is required for the SF51. On the CN3, use Intermec Settings to enable Bluetooth communications before you configure the SF51. To enable Bluetooth 1 Select Start > Settings > the System tab > the Intermec Settings icon. -
Page 114: Viewing Sf51 Scanner Information From Your Computer
6 When connected, the blue Intermec Ready-to-Work indicator turns on and stays on. Viewing SF51 Scanner Information from Your Computer Note that in the CN3, Intermec Settings can display up to seven separate SF51 connections. The following illustration shows such connections under the Data Collection option. -
Page 115: Using Configuration Parameters
Chapter 3 — Configuring the Computer Using Configuration Parameters A configuration parameter changes the way the CN3 operates. Use either of these methods to execute configuration parameters: Scan EasySet bar code labels: Use the EasySet application from Intermec Technologies Corporation to print configuration labels. - Page 116 Chapter 3 — Configuring the Computer CN3 Mobile Computer User’s Manual...
-
Page 117: Maintaining The Computer
Maintaining the Computer Use this chapter to solve problems you may encounter and perform routine maintenance on your CN3 Mobile Computer. CN3 Mobile Computer User’s Manual... -
Page 118: Upgrading The Operating System On Your Computer
There are two ways to upgrade the CN3: • You can use a miniSD card to upgrade the CN3. For help, see the next page. • You can use the SmartSystems Console to upgrade the CN3. For help, “Using the SmartSystems Console to Upgrade the Computer”... -
Page 119: Using A Storage Card To Upgrade The Computer
Ignore the SSPB files at that point. 3 Insert the miniSD card in the CN3. 4 Remove the battery pack from the CN3 and place the CN3 in a dock connected to external power. With a stylus, press the reset button in the battery cavity in the back. -
Page 120: Upgrading The Sspb Files
Upgrading the SSPB Files 1 Extract the SSPB upgrade files to a miniSD card. 2 Insert the miniSD card in the CN3, then press the reset button in the battery cavity in the back to wipe the current SSPB and load the new SSPB over the old in the persistent storage. -
Page 121: Troubleshooting Your Computer
If the battery status LED is a steady red, the main battery is on charge. The CN3 appears to be locked up Press the Power button to turn off the CN3, then press the Power button again and you cannot enter data. - Page 122 The No Network Connection The CN3 is not connected to access point. Ensure access point is turned on and icon appears on the toolbar. The operating. Move closer to access point to reestablish communications. Ensure the CN3 is not communicating with CN3 is configured correctly for network.
- Page 123 802.1x security enabled. The CN3 indicates it is not User Name and Password parameters on the CN3 must match the user name and authenticated. password on authentication server. You may need to reenter the password on both the CN3, authentication server.
-
Page 124: Cleaning The Scanner And Camera Windows And Screen
(scanner, virtual wedge) to check and enable symbologies, then scan the bar code label again. Ensure the CN3 application is expecting input from a bar code. You may need to type this information instead. The scanner does not read the bar The scanner window may be dirty. - Page 125 Chapter 4 — Maintaining the Computer 4 Wipe dry. CN3 with EA11 Scanner CN3 with Color Camera CN3 Mobile Computer User’s Manual...
- Page 126 Chapter 4 — Maintaining the Computer CN3 Mobile Computer User’s Manual...
-
Page 127: Network Support
Network Support This chapter includes information about the different networks supported by the CN3 Mobile Computer, and ways to configure and manage those networks. Note that the CN3 automatically installs the appropriate software for radio or phone use when the CN3 is turned on. -
Page 128: Wireless Network Support
Wireless Network Support Radios are installed at the factory and cannot be installed by a user. The CN3 must be serviced to install or replace radios. Contact your Intermec representative for more information. Note: Changes or modifications not expressly approved by Intermec could void the user’s authority to operate the equipment. -
Page 129: Enabling Bluetooth After A Clean Boot
• Select Start > Settings > the Connections tab > the Bluetooth icon > the Mode tab, then check Turn on Bluetooth. • If the CN3 is to be found by other Bluetooth devices that require such visibility, then check Make this device visible to other devices. - Page 130 Chapter 5 — Network Support In most cases, the CN3 will find other Bluetooth devices, such as a printer, GPS receiver, headset, or hands-free device. To scan for other Bluetooth devices 1 Tap the Devices tab, then tap Add new device... to search for (or scan) remote Bluetooth devices.
- Page 131 Bluetooth device being searched. Tap Yes if prompted to let the other device connect with your CN3. 5 Select what services you want from this remote device, then click Finish to return to the Devices tab.
- Page 132 Finish to return to the COM Ports page. 4 Tap New Incoming Port to allow other Bluetooth devices to connect with your CN3. Select on which port to secure this connection, then click Finish to return to the COM Ports page.
-
Page 133: Using The Wireless Printing Applet
Bluetooth management items not relevant to this task. Wireless Printing has a concept of the “current wireless printer.” This printer is the one to which the CN3 makes a connection when the wireless printing COM port is opened. If there is no current wireless printer, there is no wireless printing COM port. - Page 134 5 If you do not see your preferred device, make sure this device is powered on and set to search, then tap Search again. 6 Tap Cancel to return to the first screen without making changes. CN3 Mobile Computer User’s Manual...
- Page 135 2 Tap Set Different Printer to return to the device search screen. 3 Tap either Search or Manual, tap OK, then do the applicable steps. 4 Tap Cancel to return to the current wireless printer settings without making changes, then tap Exit to close the applet. CN3 Mobile Computer User’s Manual...
-
Page 136: Connecting To Bluetooth Audio Devices
Bluetooth audio device (if the connected device has these capabilities). To access the Bluetooth Audio applet 1 From the CN3 desktop, select Start > Settings. 2 Tap the System tab, then tap the Bluetooth Audio icon. Searching for Bluetooth Headsets To search for a Bluetooth headset with either a “headset”... -
Page 137: Audio Device Icons
This table lists their meanings: Bluetooth Audio Device Status Icons Icon Description Your CN3 and your Bluetooth audio device are not connected. Note the red diagonal bar. Your CN3 and your Bluetooth audio device are connected. -
Page 138: Connecting To A Bluetooth Headset
Delete to remove a device from the list. 3 If the activated device has a “hands-free” profile, press a button on the device to establish an audio connection between the CN3 and the activated device. See the user manual for the Bluetooth device for information on what button to press. -
Page 139: Configuring Bluetooth Using Intermec Settings
You can also configure your Bluetooth communications using Intermec Settings. To configure Bluetooth using Intermec Settings 1 From the CN3 desktop, select Start > Settings > the System tab > the Intermec Settings icon. 2 Tap (+) to expand Communications, then Bluetooth to configure its settings. - Page 140 Once connected, you should be able to browse Internet websites and use other online resources. To establish a Bluetooth connection between your CN3 and your mobile phone, then establish a dial-up networking session with your wireless network 1 Tap Start > Settings > the Connections tab > the Connections icon, then tap Add a new modem connection.
- Page 141 4 When the search for devices is complete, select your Bluetooth device, then tap Next to continue. 5 Enter the correct Passkey on both the Bluetooth device and the CN3, then tap Next to continue. CN3 Mobile Computer User’s Manual...
- Page 142 7 Select the Bluetooth device to use to connect to the network, then tap Next to continue. 8 Enter the appropriate number as it should be dialed for your Bluetooth connection, then tap Next to continue. CN3 Mobile Computer User’s Manual...
-
Page 143: Local Area Networks (Lans)
Disconnect. Local Area Networks (LANs) The CN3 is a versatile mobile computer that you can add to your wired or wireless LAN. It has an internal 802.11b/g radio to transfer data using wireless communications. This section of the manual assumes that you have already set up your wireless communications network including access points. -
Page 144: Using The Wireless Manager To Turn On The Phone
The CDMA phone is activated using the Activation Wizard in the Phone application. Contact your Intermec representative for more information. With the WAN radio module installed in your CN3, you can send and receive telephone calls. Use the speaker on the back of the computer as your... - Page 145 3 Have your activation code, phone number (MDN), and MSID information ready before you tap Next to continue. You can get this information from your network provider. 4 Enter your 6-digit activation code (hidden by asterisks), then tap Next to continue. CN3 Mobile Computer User’s Manual...
- Page 146 Note: Voice service is available immediately. Data service takes up to four hours of activation before you can use the service. If after four hours, a “Updating Your PCS Vision data connection is not established, go to Profile” on page 135 to manually launch data provisioning. CN3 Mobile Computer User’s Manual...
-
Page 147: Using The Cdma Phone
CN3. To configure your phone settings • Either select Menu > Options from the Phone application, or • Select Start > Settings > the Personal tab > the Phone icon to access the applet. CN3 Mobile Computer User’s Manual... - Page 148 911 emergencies. To get detected • Tap Location ON. To remain private • Tap 911 Only. This ensures that no service may use your location without you giving permission. CN3 Mobile Computer User’s Manual...
- Page 149 Repair Connectoid to assure that the connection entry used by the CDMA device is correct. • For Sprint networks, if your CN3 is unable to make a data connection and it has been more than four hours since activation, tap Provision, then follow the prompts to launch data provisioning from this screen.
- Page 150 To alert the caller when roaming is enabled • Tap Automatic. To roam the network through the Sprint server • Tap Sprint. To be notified when devices are located • Check Enable Call Guard alert when roaming. CN3 Mobile Computer User’s Manual...
-
Page 151: Using The Gsm/Edge Radio Phone Application
Using the GSM/EDGE Radio Phone Application With the WAN radio module installed in your CN3, you can send and receive telephone calls as well as transmit data via wide-area cellular networks. The CN3 provides a phone speaker, microphone, and speakerphone, and supports the use of a Bluetooth headset or hands-free kit. -
Page 152: Activating The Phone
CN3. Contact your Intermec representative for more information. To insert the SIM card 1 Press the Power button to suspend the CN3, then remove the battery pack from the back of the CN3. 2 Remove the two screws on the miniSD/SIM card slot door. Note the screws to this door are to be torqued to 1.5 in-lbs. -
Page 153: Using The Gsm/Edge Phone
Tap this to access the Contacts application Tap this to view previous calls To use the Speed Dial feature • Tap Speed Dial to select a telephone number with which the CN3 is to dial automatically. CN3 Mobile Computer User’s Manual... - Page 154 Customizing the Phone Tap the Phone tab to customize your phone settings such as the ring type and ring tone to use for incoming calls, and the keypad tone to use when entering phone numbers. CN3 Mobile Computer User’s Manual...
- Page 155 1 Tap the Services tab to access settings for any of the provided services. Tap any of the settings, then tap Get Settings. 2 Make your changes, then tap ok to return to the Settings screen. Below is a sample Settings screen. CN3 Mobile Computer User’s Manual...
-
Page 156: Remote Access (Modems)
Internet or intranet, send and receive e-mail, and synchronize information using ActiveSync. Connections are made via wireless networks. Your CN3 has two groups of connection settings: My ISP and My Work Network. Use My ISP settings to connect to the Internet. Use My Work Network settings to connect to any private network. -
Page 157: Connecting To An Internet Service Provider
2 In My ISP, tap Add a new modem connection. 3 Enter a name for the connection, such as “ISP Connection.” 4 If using an external modem connected to your CN3 with a cable, select “Hayes Compatible on COM1” from the Select a modem list drop- down list, then tap Next to continue. - Page 158 8 Tap Use dialing rules, tap ok, then tap Edit to continue. 9 Specify your current phone type. If your phone type is pulse dialing, check Pulse dialing. If your type is tone dialing (as most phone lines CN3 Mobile Computer User’s Manual...
-
Page 159: Connecting To Work
Connecting to Work If you have access to a network at work, you can send e-mail messages, view intranet pages, synchronize your CN3, and possibly access the Internet. Create a modem connection via a RAS (Remote Access Server) account. Before you can create this modem connection, your network administrator needs to set up a RAS account for you. - Page 160 If your modem type does not appear, try reinserting your CN3 into your modem dock. • If using an external modem connected to your CN3 with a cable, select “Hayes Compatible on COM1.” • If using any type of external modem, select the modem by name. If a listing does not exist for your external modem, select “Hayes...
-
Page 161: Creating A Vpn Server Connection To Work
TCP/IP settings, and host name or IP address of the VPN server To view additional information for any screen in the wizard or while changing settings, tap the Help icon. CN3 Mobile Computer User’s Manual... - Page 162 In Host name/ IP, enter the VPN server name or IP address. Next to VPN type, select the type of authentication to use with your device: “IPSec/L2TP” or “PPTP.” If you are not sure which option to choose, ask your network administrator. Tap Next to continue. CN3 Mobile Computer User’s Manual...
-
Page 163: Ending A Connection
ISP or network administrator, then tap Finish. If a domain name was not provided, try the connection without entering a domain name. Insert necessary equipment, such as a network card, into the CN3, and use a desired program to begin connecting. -
Page 164: Iconnect
Network Interfaces The default network adapter or radio is dependent on what radios are installed in your CN3. With the iConnect menu, using the Enable feature, you can specify “Wireless” or “No Networking” to load onto your CN3 when a cold-boot is performed. -
Page 165: No Networking
• Select Exit iConnect to exit the application. To access the iConnect application after you have exited it • Perform a warm-boot on the CN3. The iConnect icon then reappears above the command bar. No Networking To disable the networking interface •... -
Page 166: Ping Test
Try Again to check the status after you make changes to the connection. Ping Test To test the connection of your CN3 against your network • Select Tools > Ping Test from the iConnect menu. To ping your gateway or DHCP server •... -
Page 167: Ispywifi
Starting the Utility The ISpyWiFi utility is installed in your CN3 as an executable. You can either start the utility using File Explorer or create a shortcut with which to start the utility from the CN3 desktop. - Page 168 A WLAN adapter and its associated driver version The client radio MAC address IP(DHCP) The IP address of the client radio, if using DHCP IP (Static) The IP address of the client radio, if using a static IP address CN3 Mobile Computer User’s Manual...
- Page 169 Tap Scan, then wait for the table to fill with information. Tap any of the columns to sort by ascending or descending order. Tap the slider bar on the bottom to scroll left and right to view all of the information. CN3 Mobile Computer User’s Manual...
- Page 170 Authentication Server rejects submitted credentials unknown: No authentication used or in the process of authentication Supplicant Events Displays output from the supplicant detailing its status. Intermec Supplicant Version Version of Intermec Funk Security in the CN3 CN3 Mobile Computer User’s Manual...
-
Page 171: Pinging
Select Clear List to remove all the IP addresses from the drop-down list. 2 From the Repetitions drop-down list, select the number of times to ping the selected host. These repetitions are done once per second. 3 Tap Ping to initiate contact with the selected host. CN3 Mobile Computer User’s Manual... -
Page 172: Logging Supplicants
RTT (Round Trip Time). Logging Supplicants If you reach a situation where you need to send in debug information to Intermec Product Support or Intermec Engineering, you can use the Intermec Funk Security logging feature. To enable the logging feature 1 Tap the Supplicant tab, then tap Configure Profile to access the Profile Wizard. -
Page 173: Configuring Security
(P/N 073529) available online at www.intermec.com. Choosing Between Microsoft and Funk Security Before you can implement a security solution on the CN3, you need to choose between Microsoft and Funk security: • By default, Funk security is enabled. It provides everything you get with Microsoft security plus Cisco Compatible Extensions features. - Page 174 Chapter 5 — Network Support To configure Funk Security 1 Select Start > Settings > the System tab > the Intermec Settings icon. 2 Tap (+) to expand Communications > 802.11 Radio > Funk Security. 3 Select an active profile, then configure its security settings.
- Page 175 Select User Password, type a user password, then press Enter. c For Validate Server Certificate, select “Yes,” then press Enter. Note that you must have the date on the CN3 set correctly when you enable Validate Server Certificate. d You must enter a User Name and Subject Name. You can also enter a Server 1 Common name or Server 2 Common name if you want to increase your level of security.
- Page 176 66 characters. The value must match the key value on the access point. The passphrase must be from 8 to 63 chtomaracters. After you enter a passphrase, the CN3 internally converts it to a pre-shared key. This value must match the passphrase on the authenticator.
- Page 177 Select User Password, type a user password, then press Enter. c For Validate Server Certificate, select “Yes,” then press Enter. Note that you must have the date on the CN3 set correctly when you enable Validate Server Certificate. d Enter a User Name and Subject Name. You can also enter a Server 1 Common name or Server 2 Common name to increase security.
- Page 178 0x and make sure the keys use 5 or 13 hex pairs. Using the Profile Wizard To start 802.11b/g communications on the CN3, tap Start > Settings > the System tab > the Wireless Network icon to access the Profile Wizard for the 802.11b/g radio module.
- Page 179 802.11b/g radio. • Tap the Profile drop-down list to choose between four different profiles assigned to this CN3, then tap Edit Select Profile, make the changes needed for this profile (starting on the next page), then tap ok to return to the Profiles page.
- Page 180 “Open” is the recommended choice as “Shared” key authentication has security weaknesses. 2 Set Encryption to “WEP.” 3 Select a data transmission key from the Data TX Key drop-down list near the bottom of this screen. CN3 Mobile Computer User’s Manual...
- Page 181 3 Enter the passphrase as ASCII (12345) in the Pre-Shared Key field. To enable WPA2 encryption using a preshared key 1 Set 8021x Security as “None.” 2 Set Association to “WPA2.” 3 Set Encryption to either “TKIP” or “AES.” CN3 Mobile Computer User’s Manual...
- Page 182 • Set Association to “WPA2” and Encryption to “TKIP” or “AES.” • Set Association to “Network EAP” and Encryption to either “WEP” or “CKIP.” 2 Enter your unique Username and password to use this protocol. CN3 Mobile Computer User’s Manual...
- Page 183 Use following password as selected and enter your unique password to use the protocol without entering a password each time you use your CN3. 4 Tap Get Certificates to obtain or import server certificates (page 173).
- Page 184 • Set Association to “Network EAP” and Encryption to either “WEP” or “CKIP.” 2 Enter your unique Subject Name and User Name of the corresponding certificate installed on your CN3 to use this protocol. 3 Tap Get Certificates to obtain or import server certificates (page 173).
- Page 185 • Set Association to “Open.” (default configuration) • Set Association to “WPA.” • Set Association to “WPA2” and Encryption to “TKIP” or “AES.” • Set Association to “Network EAP” and Encryption to either “WEP” or “CKIP.” CN3 Mobile Computer User’s Manual...
- Page 186 Use following password as selected and enter your unique password to use the protocol without entering a password each time you use your CN3. 4 Tap Get Certificates to obtain or import server certificates (page 173).
- Page 187 “\Temp\Root” folder on the CN3 into the Microsoft Root certificate store. The certificates should be DER-coded and have a .cer file extension. The certificate files are deleted from the CN3 after they import to the store. If there are no certificate files to import, this action fails.
- Page 188 Both files must have the same name for the appropriate private key to associate with the correct certificate, such as admin.cer and admin.pvk. The certificate files are deleted from the CN3 after they import to the store. If there are no certificates to import, this action fails.
- Page 189 Use following password as selected and enter your unique password to use the protocol without entering a password each time you use your CN3. EAP-FAST (EAP-Flexible Authentication via Secured Tunnel) The EAP-FAST protocol is a client-server security architecture that encrypts EAP transactions with a TLS tunnel.
- Page 190 1 Tap PAC Manager to view the PAC files currently installed on your CN3. Tap ok to return to the Additional Settings screen. 2 If you already have a PAC on your CN3, clear Allow Automatic PAC provisioning to avoid receiving more PACs from the server.
- Page 191 Check Detect Rogue APs to detect and report client behavior suspected of being rogue APs. Once a rouge AP is detected, your CN3 no longer associates with that AP until you perform a clean boot.
-
Page 192: Configuring Microsoft Security
For more information, see the Intermec Computer Command Reference Manual. To enable Microsoft Security 1 Select Start > Settings > the System tab > the Intermec Settings icon. 2 Tap (+) to expand Communications > 802.11 Radio > Security Choice. - Page 193 Chapter 5 — Network Support To configure Microsoft Security using Intermec Settings 1 Tap (+) to expand Communications > 802.11 Radio > Microsoft Security. 2 Select Network name (SSID) and enter the SSID. To connect to an ad-hoc connection • Set Infrastructure Mode to “Ad hoc”.
-
Page 194: Configuring Preferred Networks
“Work,” you can do a VPN connection or use proxy servers. If you select “The Internet,” you can connect directly to the internet. 4 Select This is a device-to-device (ad-hoc) connection to connect to an ad-hoc connection. CN3 Mobile Computer User’s Manual... - Page 195 “Shared” when WEP keys are required for association. • Set Data Encryption to “WEP.” • Clear The key is automatically provided, then enter the new Network key and select the appropriate Key index to change the network key. CN3 Mobile Computer User’s Manual...
- Page 196 • Set Data Encryption to either “AES” or “TKIP.” • Enter the new Network key. To enable WPA authentication using a preshared key • Set Authentication to “WPA-PSK.” • Set Data Encryption to either “AES” or “TKIP.” • Enter the new Network key. CN3 Mobile Computer User’s Manual...
- Page 197 • Set Data Encryption to either “AES” or “TKIP.” • Enter the new Network key. 6 Tap Next, select either “PEAP” or “Smart Card or Certificate” for the EAP type, then tap Properties to adjust its settings. CN3 Mobile Computer User’s Manual...
- Page 198 “Only access points,” or “Only computer-to-computer” depending on the type of networks to which you connect. Tap ok to close this screen. Note: If you select to connect to non-preferred networks, your CN3 detects any new networks and provides configuration opportunities.
-
Page 199: Loading Certificates
Loading Certificates If you choose to use Transport Layer Security (TLS) with WPA or 802.1x security, you need to have a unique client certificate on the CN3 and a trusted root certificate authority (CA) certificate. If you choose to use PEAP, you need to load a root CA certificate. - Page 200 WEP keys also authenticate the CN3 to the access point - unless the CN3 can prove it knows the WEP key, it is not allowed onto the network. WEP keys are only needed if they are expected by your clients. There are two types available: 64-bit (5-character strings, 12345) (default) and 128-bit (13-character strings, 1234567890123).
-
Page 201: Smartsystems™ Foundation
Additional TTLS Settings. SmartSystems™ Foundation Use the SmartSystems Foundation (www.intermec.com/SmartSystems) to configure and manage your network. You can also contact your Intermec representative for support. This tool, available as a free download from Intermec, includes a management console that provides a default method to configure and manage Intermec devices “out-of-the-box,”... - Page 202 SmartSystems Console application. Select SmartSystems > Help in the console to access the manual. Tap Start > Settings > the System tab > the Intermec Settings icon, then tap to expand the SmartSystems Information option. CN3 Mobile Computer User’s Manual...
-
Page 203: Specifications
Specifications CN3 Mobile Computer User’s Manual... -
Page 204: Physical And Environmental Specifications
128, Interleaved 2 of 5, Macro 2 of 5, Matrix 2 of 5, Maxicode, Micro PDF417, MSI, PDF417, Planet, Plessey, Postnet, QR Code, RSS 14, RSS Expanded, RSS Limited, Telepen, TLC39, UCC-EAN Composite Code, UPC/EAN Standard Communications USB host, USB client, Bluetooth, 802.11b/g, GPRS, CDMA, GPS CN3 Mobile Computer User’s Manual... - Page 205 SmartSystems™ Support: Centralized remote support capability; configures, updates, and maintains single devices or entire populations; real-time or batch, wired or wireless. Based on Wavelink Avalanche™ with Intermec value added utilities. Power Specifications Operating: Removable, rechargeable LiIon batteries; AB8 standard pack, 3.7 VDC, 2.2 AHr, (8 W-hr - 4 hr charge time);...
-
Page 206: Accessories For The Computer
Use the quad battery charger to charge up to four CN3 battery packs. AD10 Single Dock (P/N 871-025-001) Use the single dock to hold a CN3 with its battery installed, charge a spare battery pack, charge the main battery, and provide power to the CN3. The dock has USB host and client connectors. -
Page 207: Index
Index CN3 Mobile Computer User’s Manual... - Page 208 Calendar searching for headsets, overview, wireless manager, creating, Wireless Printing applet, applets Bluetooth applet, address assigned to CN3, backlight, Bluetooth Audio applet, Bluetooth Audio, browser, Internet Explorer Mobile, Intermec Settings, 98, area imager, Calendar beeper volume,...
- Page 209 Excel Mobile an ISP, about, mail server via Messaging, creating a workbook, work, connection labels, SF51 scanners, tips, connections extended ephemeris ending, benefits, to an ISP, enabling, Extensible Authentication Protocol, CN3 Mobile Computer User’s Manual...
- Page 210 Bluetooth, 114, scanning for access point information, device resource kit, scoping the network, smartsystems, shortcut in Start Menu, URL, starting the utility, iGPS settings, supplicant, imager supplicant logging, beeper volume, turning it on, configuration parameters, CN3 Mobile Computer User’s Manual...
- Page 211 TTLS, audio, mixed cell, enable via Microsoft security, compression, Mobile Favorites folder, Internet Explorer Mobile, configuring the camera, modems, creating a connection to an ISP, pixel size, MP3 files, Windows Media Player, rotating the image, CN3 Mobile Computer User’s Manual...
- Page 212 Microsoft security, email messages, rotating the image, favorite links, mobile favorites, scanning bar codes, troubleshooting, notes, scheduling appointments and meetings, system time, screen saver, tasks, Secure Digital (SD) cards Word Mobile, installing applications, system software updates, CN3 Mobile Computer User’s Manual...
- Page 213 802.11 radio module, Zero Configuration, Windows Media files, Windows Media Player, with pre-shared key, Zero Configuration, Windows Media Player Mobile, Start menu icon, Writing mode, Word Mobile, Windows Mobile writing on the screen, Word Mobile, ActiveSync, www.intermec.com/idl/, basic usage, CN3 Mobile Computer User’s Manual...
- Page 214 Index CN3 Mobile Computer User’s Manual...
- Page 216 Worldwide Headquarters 6001 36th Avenue West Everett, Washington 98203 U.S.A. tel 425.348.2600 fax 425.355.9551 www.intermec.com CN3 Mobile Computer User’s Manual *935-003-004* P/N 935-003-004...
Need help?
Do you have a question about the CN3 and is the answer not in the manual?
Questions and answers