Sign In
Upload
Manuals
Brands
Sharp Manuals
All in One Printer
MX-M1100
Sharp MX-M1100 Manuals
Manuals and User Guides for Sharp MX-M1100. We have
10
Sharp MX-M1100 manuals available for free PDF download: User Manual, Software Manual, Manual, Quick Start Manual, Printer Manual, Maintenance Manual, Software Setup Manual, Safety Manual
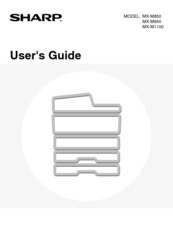
Sharp MX-M1100 User Manual (655 pages)
Sharp User's Guide Copier MX-M850, MX-M950, MX-M1100
Brand:
Sharp
| Category:
All in One Printer
| Size: 15.1 MB
Table of Contents
Model: MX-M850 MX-M950 MX-M1100 User's Guide
2
Table of Contents
2
About this Manual
4
Manuals Provided with the Machine
4
1 Before Using the Machine
6
Part Names and Functions
6
Exterior
6
Inside and Connector
8
Automatic Document Feeder and Document Glass
9
Operation Panel
10
Touch Panel
12
Using the Touch Panel
12
Settings)
13
USING the TOUCH PANEL (System
13
System Bar
15
Print/Send Status (Job Status)
16
Status Indicators
17
Turning the Power on and off
18
Energy Save Functions
19
[Power Save] Key
19
User Authentication
20
Authentication by User Number
20
Authentication by Login Name
20
Authentication by Login Name / Password
22
Home Screen
25
2 Loading Paper
26
Important Points about Paper
26
Names and Locations of Trays
26
The Meaning of "R" in Paper Sizes
26
Useable Paper
27
Tray Settings for Tray 1 and Tray 2
29
Loading Paper
29
Changing the Paper Size
30
Tray Settings for Tray 3 and Tray 4
32
Loading Paper and Changing the Paper Size
32
Loading Tab Paper
33
Peripheral Device Trays
35
Tray Locations and Names
35
Paper that Can be Used in the Peripheral Device Trays
36
Tray Settings for the Large Capacity Trays (MX-Lcx4)
37
Paper Size
38
Tray Settings for the Large Capacity Trays (MX-Lcx5)
40
Tray Settings for the Large Capacity Tray (MX-Lcx6)
43
Tray Settings for the Large Capacity Tray (MX-Lcx3N)
44
Paper Table
45
Loading Paper in the Bypass Tray
48
Bypass Tray
50
Set the Paper Size
51
Important Points When Using the Bypass Tray
52
3 Originals
53
Placing the Original
53
Placing Originals in the Automatic Document Feeder
53
Placing the Original on the Document Glass
55
Placing a Thick Book
56
4 Peripheral Devices
57
Names and Functions of the Parts of the Peripheral Device
59
Finisher
59
Saddle Unit
60
Finisher (for the MX-M850) / Saddle Stitch Finisher
60
Folding Unit
61
Inserter
62
Paper Loading Orientation
64
Manual Finishing Mode
65
Using Manual Finishing
66
Function
67
Paper Loading Orientation (for the Staple and Punch Functions)
69
Punch Function
69
Folding)
70
Paper Folding Function
70
Paper Loading Orientation
70
5 System Settings
71
Accessing the System Settings
71
System Settings List
72
User Control
73
Total Count
74
Job Count
74
Device Count
74
Default Settings
75
Clock Adjust
75
Keyboard Select
76
List Print (User)
76
Paper Tray Settings
77
Tray Settings
77
Paper Type Registration
81
Auto Tray Switching
81
Usb-Device Check
81
User Control
82
Modify User Information
82
6 Troubleshooting
83
Problems Related to Machine
83
Problems Related to Machine Operation
84
Specified Machine Functions Cannot be Used
84
The Operation Panel Cannot be Used
84
Printing Is Not Possible or Stops During a Job
85
The Displayed Bypass Tray Paper Size Is Not Correct
86
The Original Size Is Not Automatically Selected or the Wrong Size Is Selected
86
Problems Related to Paper Feeding and Output
87
The Original Misfeeds (Automatic Document Feeder)
87
The Paper Misfeeds
87
Paper Does Not Feed from the Paper Tray
88
The Automatic Document Feeder Does Not Operate
88
Results
89
The Image on Paper Is Skewed
88
Problems Related to Quality / Print Results
89
Lines Appear in the Scanned Image
89
Smudges Appear on Printed Output
89
Toner Does Not Adhere Well or Creases Appear in the Paper
89
Print Quality Is Poor
89
Devices
90
Part of the Image Is Cut off
90
Printing Takes Place on the Wrong Side of the Paper
90
Problems Related to Peripheral Devices
90
The Connected USB Device Cannot be Used
90
The Finisher / Saddle Unit / Saddle Stitch Finisher / Inserter / Folding Unit Does Not Operate
90
Stapling Does Not Take Place (Including Saddle Stitch)
91
Punching Does Not Take Place
92
The Stapling Position or Punch Position Is Not Correct
92
Other Problems
93
The Touch Panel Screen Is Difficult to View
93
You Were Logged out Without Having Performed Logout Yourself
93
You Forgot the Administrator Password
93
Functions of the Main Keys
94
Keyboard
95
7 Entering Text
94
Model: MX-M850 MX-M950 MX-M1100 Copier Guide
98
About this Manual
100
Manuals Provided with the Machine
101
Printed Manuals
101
Before Using the Machine as Acopier
102
Base Screen of Copy Mode
102
Copying Sequence
105
Basic Copy Settings
105
Output Settings
106
Start Copying
107
Originals
108
Checking the Original Size
108
Standard Original Placement Orientations
109
Paper Trays
110
Making Copies
111
Using the Automatic Document Feeder to Make Copies
111
Making a Copy Using the Document Glass
113
2 Basic Procedure for Making Copies
111
Automatic 2-Sided Copying
115
Using the Automatic Document Feeder to Make 2-Sided Copies
115
Using the [Binding Change] Key
116
Automatic 2-Sided Copying Using the Document Glass
117
Changing the Exposure and Original
120
Image Type
120
Automatic Adjustment of the Exposure and Original Type
120
Selecting the Original Type and Manually Adjusting the Exposure
120
How to Select the Resolution
121
Reduction/Enlargement/Zoom
122
Automatic Ratio Selection
122
Image)
122
Manually Selecting the Ratio
123
Ratios/Zoom)
123
ENLARGING/REDUCING the LENGTH and WIDTH SEPARATELY (XY Zoom)
125
Original Sizes
126
Specifying the Original Size
126
Storing Frequently Used Original Sizes
127
Storing Original Sizes (Editing/Clearing)
127
Retrieving a Stored Original Size
129
Output
130
Sort Mode
131
Group Mode
131
Offset Function
131
Staple Sort Function / Saddle Stitch Function
132
Punch Function
134
Original Placement Orientation (for the Staple Sort and Punch Functions)
134
Paper Folding Function
135
Making Copies Using the Bypass Tray
136
3 Special Modes
139
ADDING MARGINS (Margin Shift)
141
ERASING PERIPHERAL SHADOWS (Erase)
143
COPYING each FACING PAGE of ABOUND DOCUMENT (Dual
145
Pamphlet Copy
146
AT ONCE (Job Build)
150
Copying a Large Number of Originals
150
USING TWO MACHINES to MAKE a LARGE NUMBER of COPIES (Tandem Copy)
152
USING a DIFFERENT PAPER TYPE for COVERS (Covers/Inserts)
155
Inserting Covers in Copies
156
Document Feeder Tray
156
Settings)
158
INSERTING INSERT SHEETS in COPIES (Insert Settings)
159
Changing Cover/Insert Settings
163
ADDING INSERTS WHEN COPYING on TRANSPARENCY FILM (Transparency Inserts)
166
SHEET (Multi Shot)
168
Copying Multiple Originals Onto One
168
COPYING a PAMPHLET (Book Copy)
170
Copying Captions Onto Tab Paper
174
Copy)
174
Relation between the Originals and the Tab Paper
174
Tab Copy
174
Tab Copying with a Right Binding
175
COPYING both SIDES of a CARD on ONE SHEET of PAPER (Card Shot)
177
COPIES (Stamp)
179
General Procedure for Using Stamp
180
Select the Print Position
180
Select Stamp
181
Stamp
181
ADDING the DATE to COPIES (Date)
183
STAMPING COPIES (Stamp)
185
Page Numbering
187
Printing Page Numbers on Copies
187
Printing the Date and a Stamp on
179
PRINTING TEXT on COPIES (Text)
191
CHECKING the STAMP LAYOUT (Layout)
195
Appendix
191
[Image Edit] KEY
197
Repeating Photos on a Copy
198
CREATING a LARGE POSTER (Multi
200
REVERSING the IMAGE (Mirror Image)
203
COPYING WITHOUT CUTTING off the ORIGINAL (Full Bleed Copy)
204
Copying in the Center of the Paper
206
Centering
206
REVERSING WHITE and BLACK in a COPY (B/W Reverse)
208
Checking the Number of Scanned Original Sheets before Copying
209
(Original Count)
209
COPYING in REVERSE ORDER (Reverse Order)
211
Copying Originals of Different Sizes
212
(Mixed Size Original)
212
COPYING THIN ORIGINALS (Slow Scan Mode)
215
Checking Copies before Printing
217
Proof Copy
217
4 Convenient Copy Functions
217
INTERRUPTING a COPY RUN (Interrupt Copy)
220
Job Status Screen
221
Job Queue Screen and Completed Job Screen
222
Canceling a Job that Is Waiting in the Queue
223
Giving Priority to a Job in the Queue
224
Checking Information on a Copy Job Waiting in the Queue
224
STORING COPY OPERATIONS (Job Programs)
225
Storing (Editing/Deleting) a Job
226
Problems Related to Copying Operation
229
Problems Related to Copy Results
230
Model: MX-M850 MX-M950 MX-M1100 Printer Guide
239
About this Manual
241
Manuals Provided with the Machine
242
Printer Function of the Machine
243
Basic Printing Procedure
244
Selecting the Paper
246
1 Printing from Windows
244
Printing When the User Authentication Function Is Enabled
247
Start Printing
248
Viewing Printer Driver Help
249
Saving Frequently Used Print Settings
250
Saving Settings at the Time of Printing
250
Using Saved Settings
252
Deleting Saved Settings
252
Changing the Printer Driver Default
253
Basic Printing Procedure
255
Selecting Paper Settings
255
Select Paper Settings
256
Printing
257
Mac os X
257
Selecting the Paper
260
2 Printing from a Macintosh
255
Printing When the User Authentication Function Is Enabled
261
Two-Sided Printing
264
3 Frequently Used Functions
264
Fitting the Print Image to the Paper
266
Printing Multiple Pages on One Page
267
Stapling Output/Punching Holes in Output
269
Staple Function
269
Convenient Printing Functions
271
Convenient Functions for Creating Pamphlets and Posters
271
CREATING a PAMPHLET (Pamphlet/Pamphlet Staple)
271
INCREASING the MARGIN (Margin Shift)
273
CREATING a LARGE POSTER (Poster Printing)
274
Functions to Adjust the Size and Orientation of the Image
275
ROTATING the PRINT IMAGE 180 DEGREES (Rotate 180 Degrees)
275
ENLARGING/REDUCING the PRINT IMAGE (Zoom/Xy-Zoom)
276
REVERSING the IMAGE (Mirror Image)
278
Image Adjustment Function
279
ADJUSTING the BRIGHTNESS and CONTRAST of the IMAGE (Image Adjustment)
279
PRINTING FAINT TEXT and LINES in BLACK (Text to Black/Vector to Black)
280
Functions that Combine Text and Images
281
ADDING a WATERMARK to PRINTED PAGES (Watermark)
281
PRINTING an IMAGE over the PRINT DATA (Image Stamp)
282
Printing with an Overlay File
283
Print Functions for Special Purposes
284
PRINTING SPECIFIED PAGES on DIFFERENT PAPER (Different Paper)
284
ADDING INSERTS WHEN PRINTING on TRANSPARENCY FILM (Transparency Inserts)
286
PRINTING a CARBON COPY (Carbon Copy)
287
PRINTING TEXT on TABS of TAB PAPER (Tab Printing)
288
TWO-SIDED PRINTING with SPECIFIC PAGES PRINTED on the FRONT SIDE (Chapter Inserts Printing)
290
FOLDING SPECIFIED PAPER in HALF before PRINTING (Paper Fold Print)
291
PRINTING the PAGES in REVERSE ORDER (Reverse Order Print)
292
Convenient Printer Functions
294
USING TWO MACHINES to PRINT a LARGE PRINT JOB (Tandem Print)
294
SAVING and USING PRINT FILES (Retention/Document Filing)
295
Performing Printing at the Machine
298
Directly Printing from the Machine
298
Directly Printing a File on an Ftp Server
299
Directly Printing a File in Usb Memory
300
Print Settings Screen
302
Directly Printing from a Computer
303
Submit Print Job
303
Ftp Print
303
E-Mail Print
304
Printing an Encrypted Pdf File
305
Print Job
306
Giving a Print Job Priority
306
Canceling a Print Job
307
Changing to Another Paper Size and Printing When Paper Runs out
308
Accessing the System Settings
309
6 System Settings
309
System Settings List
310
Printer Condition Settings
311
Printer Default Settings
311
Pcl Settings
312
Postscript Setting
312
7 Troubleshooting
313
Printing Does Not Take Place
314
Problems Related to Printing Operation
314
Two-Sided Printing Does Not Take Place
315
Part of the Image Is Cut off
316
Problems Related to Print Results
316
Text and Lines Are Faint and Difficult to See
316
The Image Is Grainy
316
The Image Is too Light or too Dark
316
Many Nonsense Characters Are Printed
317
The Image Is Upside down
317
Printer Driver Specification List
318
8 Printer Driver Specifications
318
Model: MX-M850 MX-M950 MX-M1100 Image Send Guide
322
About this Manual
325
Manuals Provided with the Machine
326
Before Using the Image Send Function
327
Image Send Function of the Machine
327
Usb Memory Scan
328
System Settings
329
Preparations for Using the Image Send
329
Make Sure the Main Power Switch Is in the "On" Position
329
Checking the Date and Time
329
Storing Sender Information
330
Settings Required in the Web Pages
330
Storing Destination Addresses for each Scan Mode in the Address Book
331
Storing a Destination for Scan to Desktop
332
Preparations for Fax
333
Setting the Telephone Line Type
334
Base Screen
335
Address Book Screen
339
Changing the Display of One-Touch Keys in the Address Book Screen
340
Image Send Sequence
342
Begin Transmission
343
Original Sizes
344
Transmittable Original Sizes
344
The Size of the Placed Original
344
Retrieving a Destination from the Address Book
345
Retrieving a Destination
346
Checking and Deleting the Selected Destinations
347
2 Entering Destinations
345
Using a Search Number to Retrieve a
348
Destination
348
Entering an Address Manually
349
Global Address Book
350
Retrieving a Destination from a
350
Using the Resend Function
353
Entering Fax Numbers
354
Entering a Fax Number with the Numeric Keys
354
Chain Dialing
355
Sending an Image in Scan Mode
356
Specify the Destination
357
Changing the Subject, File Name, Reply-To, and Body Text
360
3 Transmitting an Image
356
Sending an Image in Usb Memory Mode
363
Entering a File Name
367
Sending a Fax in Internet Fax Mode
368
Changing the Subject, File Name, and Body Text
371
Sending an Image in Fax Mode
374
Memory Transmission Mode
374
Direct Transmission Mode
377
Transmission Using the Speaker
379
Fax Destination Confirmation Mode
381
When the Line Is Busy
382
When a Communication Error
382
Automatic Reduction of the Transmitted Image
382
SENDING the same IMAGE to MULTIPLE DESTINATIONS (Broadcast Transmission)
383
Broadcast Transmissions that Include Internet Fax or Fax Destinations
386
Image Settings
388
AUTOMATICALLY SCANNING both SIDES of an ORIGINAL (2-Sided Original)
389
SPECIFYING the ORIGINAL SCAN SIZE and SEND SIZE (Enlarge/Reduce)
390
Specifying the Send Size of the Image
394
Changing the Exposure and Exposure Mode (Original Image Type)
396
Changing the Resolution
398
Fax Mode
400
Changing the File Format
401
Changing the Color Mode
405
Sending a Computer File
406
4 Special Modes
407
Scan Mode, Usb Memory Mode, Data Entry Mode
407
STORING FAX OPERATIONS (Program)
410
ERASING PERIPHERAL SHADOWS on the IMAGE (Erase)
412
SENDING an ORIGINAL as TWO SEPARATE PAGES (Dual
415
SENDING a FAX at a SPECIFIED TIME (Timer)
418
WHITENING FAINT COLORS in the IMAGE (Suppress Background)
420
SENDING both SIDES of a CARD as ASINGLE PAGE (Card Shot)
422
Job Build
425
Sending a Large Number of Pages
425
Build
426
TRANSMITTING ORIGINALS of DIFFERENT SIZES (Mixed Size Original)
427
SCANNING THIN ORIGINALS (Slow Scan Mode)
429
Checking the Number of Scanned Original Sheets before Transmission
431
(Original Count)
431
Stamping Scanned Originals
433
Stamp
434
(2In1)
435
Sending Two Pages as a Single Page
435
CHANGING the PRINT SETTINGS for the TRANSACTION REPORT (Transaction Report)
438
ADDING YOUR SENDER INFORMATION to FAXES (Own Number Sending)
440
TEMPORARILY CHANGING the FAX SENDER INFORMATION (Own Name Select)
441
CALLING a FAX MACHINE and INITIATING RECEPTION (Polling)
442
Initiating Polling Reception Manually
444
Receive the Fax
444
5 Special Fax Functions
442
SENDING a FAX WHEN ANOTHER MACHINE POLLS YOUR MACHINE (Polling Memory)
445
Restricting Polling Access
445
Memory
445
Security
445
Scanning a Document into Polling Memory
446
Printing a Document Stored in the Public Box
448
Deleting a Document from the Public Box
449
F-Code Communication
450
How F-Codes Work
450
Creating Memory Boxes in the Machine for F-Code Communication
451
F-Code Dialing
451
F-Codes
452
F-Code Confidential Transmission
453
Printing a Fax Received by F-Code Confidential Reception
454
Confidential Communication Using
452
Polling Reception Using F-Codes
456
F-Codes
458
Scanning a Document into a Memory Box for F-Code Polling Transmission
458
F-Code Polling Transmission
458
Polling Box
459
Deleting a Document Stored for F-Code Polling Transmission
462
Polling Memory Transmission Using
458
F-Codes
463
Relay Request Transmission Using
463
Relay Broadcast Transmission Using
465
Using an Extension Phone
466
CONNECTING and USING an EXISTING PHONE (Extension Phone Connection)
466
RECEIVING a FAX after ANSWERING ACALL on the EXTENSION PHONE (Remote Reception)
467
Making and Receiving Phone Calls
467
Receiving an Internet Fax
468
Receiving Internet Faxes Manually
469
6 Reception Functions
468
Receiving Faxes
470
Fax Reception Modes
471
Receiving a Fax Manually
471
PRINTING a PASSWORD-PROTECTED FAX (Hold Setting for Received Data Print)
472
FORWARDING RECEIVED FAXES to an E-MAIL ADDRESS (Inbound Routing Settings)
473
Settings
473
Configuring Inbound Routing Settings
473
METADATA DELIVERY (Data Entry)
476
7 Metadata Delivery
476
Preparations for Metadata
477
Transmission
477
Settings Required in the Web Pages
477
Metadata Transmission for Scan to Desktop
477
Transmitting Metadata
478
Metadata Fields
480
Checking the Status of Transmission/Reception Jobs
481
Job Status Screen
481
Job Queue Screen and Completed Job Screen
482
Operation When a Job in the Job Queue Is Completed
485
Checking a Reserved Job or the Job in Progress (Fax Mode)
486
Checking Completed Jobs
487
Canceling a Job in Progress or a
488
Reserved Job
488
Select the Job that You Wish to Stop
488
Giving Priority to a Reserved Job
489
Checking the Activity Log
490
Activity Report)
490
Image Sending Activity Report
490
Column
490
Information Appearing in the Result
490
Accessing the System Settings
492
9 System Settings
492
System Settings List
493
Address Control
494
Address Book
494
Editing and Deleting Programs
497
Storing a Program
497
Custom Index
497
Editing and Deleting a Memory Box
499
F-Code Memory Box
499
Fax Data Receive/Forward
501
I-Fax Settings
501
Fax Settings
502
Advertisement
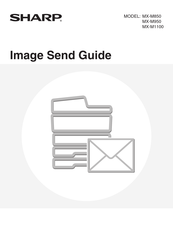
Sharp MX-M1100 Software Manual (194 pages)
Image Send Guide
Brand:
Sharp
| Category:
All in One Printer
| Size: 4.25 MB
Table of Contents
Model: MX-M850 MX-M950 MX-M1100 Image Send Guide
2
Table of Contents
2
About this Manual
5
Manuals Provided with the Machine
6
Before Using the Image Send Function
7
Image Send Function of the Machine
7
Preparations for Using the Image Send
9
Function
9
Make Sure the Main Power Switch Is in the "On" Position
9
Checking the Date and Time
9
Storing Sender Information
10
Settings Required in the Web Pages
10
Storing Destination Addresses for each Scan Mode in the Address Book
11
Storing a Destination for Scan to Desktop
12
Preparations for Fax
13
Setting the Telephone Line Type
14
Base Screen
15
Base Screen
16
Address Book Screen
19
Changing the Display of One-Touch Keys in the Address Book Screen
20
Image Send Sequence
22
Original Sizes
24
Transmittable Original Sizes
24
The Size of the Placed Original
24
2 Entering Destinations
25
Retrieving a Destination from the Address Book
25
Retrieving a Destination
26
Checking and Deleting the Selected Destinations
27
Using a Search Number to Retrieve a
28
Destination
28
Entering an Address Manually
29
Retrieving a Destination from Aglobal Address Book
30
Using the Resend Function
33
Entering Fax Numbers
34
Entering a Fax Number with the Numeric Keys
34
Chain Dialing
35
3 Transmitting an Image
36
Sending an Image in Scan Mode
36
Changing the Subject, File Name, Reply-To, and Body Text
40
Sending an Image in Usb Memory Mode
43
Entering a File Name
47
Sending a Fax in Internet Fax Mode
48
Changing the Subject, File Name, and Body Text
51
Sending an Image in Fax Mode
54
Memory Transmission Mode
54
Direct Transmission Mode
57
Transmission Using the Speaker
59
Fax Destination Confirmation Mode
61
When the Line Is Busy
62
Occurs
62
Automatic Reduction of the Transmitted Image
62
SENDING the same IMAGE to MULTIPLE DESTINATIONS (Broadcast Transmission)
63
Broadcast Transmissions that
65
Broadcast Transmissions that Include Internet Fax or Fax Destinations
66
Image Settings
68
AUTOMATICALLY SCANNING both SIDES of an ORIGINAL (2-Sided Original)
69
SPECIFYING the ORIGINAL SCAN SIZE and SEND SIZE (Enlarge/Reduce)
70
Changing the Exposure and Exposure Mode (Original Image Type)
76
Changing the Resolution
78
How to Select the Resolution
79
Changing the File Format
81
Changing the Color Mode
85
Sending a Computer File
86
4 Special Modes
87
STORING FAX OPERATIONS (Program)
90
ERASING PERIPHERAL SHADOWS on the IMAGE (Erase)
92
SENDING an ORIGINAL as TWO SEPARATE PAGES (Dual
95
SENDING a FAX at a SPECIFIED TIME (Timer)
98
WHITENING FAINT COLORS in the IMAGE (Suppress Background)
100
SENDING both SIDES of a CARD as ASINGLE PAGE (Card Shot)
102
Sending a Large Number of Pages
105
Job Build
105
Build
106
TRANSMITTING ORIGINALS of DIFFERENT SIZES (Mixed Size Original)
107
SCANNING THIN ORIGINALS (Slow Scan Mode)
109
Checking the Number of Scanned Original Sheets before Transmission
111
(Original Count)
111
Stamping Scanned Originals
113
Stamp)
113
Sending Two Pages as a Single Page
115
(2In1)
115
CHANGING the PRINT SETTINGS for the TRANSACTION REPORT (Transaction Report)
118
ADDING YOUR SENDER INFORMATION to FAXES (Own Number Sending)
120
TEMPORARILY CHANGING the FAX SENDER INFORMATION (Own Name Select)
121
5 Special Fax Functions
122
CALLING a FAX MACHINE and INITIATING RECEPTION (Polling)
122
Initiating Polling Reception Manually
124
SENDING a FAX WHEN ANOTHER MACHINE POLLS YOUR MACHINE (Polling Memory)
125
Restricting Polling Access
125
Security
125
Memory
126
Printing a Document Stored in the Public Box
128
Deleting a Document from the Public Box
129
F-Code Communication
130
How F-Codes Work
130
Creating Memory Boxes in the Machine for F-Code Communication
131
F-Code Dialing
131
Confidential Communication Using
132
F-Codes
132
F-Code Confidential Transmission
133
Printing a Fax Received by F-Code Confidential Reception
134
Polling Reception Using F-Codes
136
Polling Memory Transmission Using
138
F-Codes
138
Scanning a Document into a Memory Box for F-Code Polling Transmission
138
Polling Box
139
Printing a Document Stored for F-Code Polling Transmission
141
Deleting a Document Stored for F-Code Polling Transmission
142
Relay Request Transmission Using
143
F-Codes
143
Relay Broadcast Transmission Using
145
F-Codes
145
Using an Extension Phone
146
CONNECTING and USING an EXISTING PHONE (Extension Phone Connection)
146
RECEIVING a FAX after ANSWERING ACALL on the EXTENSION PHONE (Remote Reception)
147
Making and Receiving Phone Calls
147
6 Reception Functions
148
Receiving an Internet Fax
148
Receiving Internet Faxes Manually
149
Receiving Faxes
150
Fax Reception Modes
151
Receiving a Fax Manually
151
PRINTING a PASSWORD-PROTECTED FAX (Hold Setting for Received Data Print)
152
FORWARDING RECEIVED FAXES to an E-MAIL ADDRESS (Inbound Routing Settings)
153
Configuring Inbound Routing
153
Settings
153
7 Metadata Delivery
156
METADATA DELIVERY (Data Entry)
156
Preparations for Metadata
157
Transmission
157
Settings Required in the Web Pages
157
Metadata Transmission for Scan to Desktop
157
Transmitting Metadata
158
Metadata Fields
160
Checking the Status of Transmission/Reception Jobs
161
Job Status Screen
161
Job Queue Screen and Completed Job Screen
162
Operation When a Job in the Job Queue Is Completed
165
Checking a Reserved Job or the Job in Progress (Fax Mode)
166
Checking Completed Jobs
167
Canceling a Job in Progress or a
168
Reserved Job
168
Giving Priority to a Reserved Job
169
Checking the Activity Log
170
Activity Report)
170
Image Sending Activity Report
170
Information Appearing in the Result
170
Column
170
9 System Settings
172
Accessing the System Settings
172
System Settings List
173
Address Control
174
Address Book
174
Custom Index
177
Program
177
Storing a Program
177
Editing and Deleting Programs
177
F-Code Memory Box
179
Editing and Deleting a Memory Box
179
Fax Data Receive/Forward
181
I-Fax Settings
181
Fax Settings
182
Sharp MX-M1100 Manual (141 pages)
Brand:
Sharp
| Category:
Copier
| Size: 3.31 MB
Table of Contents
Table of Contents
2
About this Manual
4
Manuals Provided with the Machine
5
Before Using the Machine as Acopier
6
Base Screen of Copy Mode
6
Copying Sequence
9
Originals
12
Checking the Original Size
12
Paper Trays
14
2 Basic Procedure for Making Copies
15
Making Copies
15
Using the Automatic Document Feeder to Make Copies
15
Glass
17
Automatic 2-Sided Copying
19
Using the Automatic Document Feeder to Make 2-Sided Copies
19
Automatic 2-Sided Copying Using the Document Glass
21
Changing the Exposure and Original
24
Image Type
24
Automatic Adjustment of the Exposure and Original Type
24
Selecting the Original Type and Manually Adjusting the Exposure
24
Reduction/Enlargement/Zoom
26
Automatic Ratio Selection
26
Image)
26
Manually Selecting the Ratio
27
Ratios/Zoom)
27
ENLARGING/REDUCING the LENGTH and WIDTH SEPARATELY (XY Zoom)
29
Original Sizes
30
Specifying the Original Size
30
Sizes
31
Output
34
Sort Mode
35
Group Mode
35
Offset Function
35
Staple Sort Function / Saddle Stitch Function
36
Punch Function
38
Original Placement Orientation (for the Staple Sort and Punch Functions)
38
Paper Folding Function
39
Making Copies Using the Bypass Tray
40
3 Special Modes
43
ADDING MARGINS (Margin Shift)
45
ERASING PERIPHERAL SHADOWS (Erase)
47
COPYING each FACING PAGE of ABOUND DOCUMENT (Dual
49
(Pamphlet Copy)
51
Copying a Large Number of Originals
54
AT ONCE (Job Build)
54
USING TWO MACHINES to MAKE a LARGE NUMBER of COPIES (Tandem Copy)
56
USING a DIFFERENT PAPER TYPE for COVERS (Covers/Inserts)
59
Inserting Covers in Copies
60
Settings
60
Inserting Insert Sheets in Copies
62
INSERTING INSERT SHEETS in COPIES (Insert Settings)
63
Changing Cover/Insert Settings
67
ADDING INSERTS WHEN COPYING on TRANSPARENCY FILM (Transparency Inserts)
70
Copying Multiple Originals Onto One
72
Advertisement
Sharp MX-M1100 User Manual (99 pages)
Brand:
Sharp
| Category:
All in One Printer
| Size: 2.37 MB
Table of Contents
Model: MX-M850 MX-M950 MX-M1100 User's Guide
2
Table of Contents
2
About this Manual
4
Manuals Provided with the Machine
4
1 Before Using the Machine
6
Part Names and Functions
6
Exterior
6
Inside and Connector
8
Automatic Document Feeder and Document Glass
9
Operation Panel
10
Touch Panel
12
Using the Touch Panel
12
Settings)
13
System Bar
15
Print/Send Status (Job Status)
16
Status Indicators
17
Turning the Power on and off
18
Energy Save Functions
19
[Power Save] Key
19
User Authentication
20
Authentication by User Number
20
Authentication by Login Name / Password
22
Home Screen
25
2 Loading Paper
26
Important Points about Paper
26
Names and Locations of Trays
26
The Meaning of "R" in Paper Sizes
26
Useable Paper
27
Tray Settings for Tray 1 and Tray 2
29
Loading Paper
29
Changing the Paper Size
30
Tray Settings for Tray 3 and Tray 4
32
Loading Paper and Changing the Paper Size
32
Peripheral Device Trays
35
Tray Locations and Names
35
Paper that Can be Used in the Peripheral Device Trays
36
Tray Settings for the Large Capacity Trays (MX-Lcx4)
37
Tray Settings for the Large Capacity Trays (MX-Lcx5)
40
Tray Settings for the Large Capacity Tray (MX-Lcx6)
43
Tray Settings for the Large Capacity Tray (MX-Lcx3N)
44
Paper Table
45
Loading Paper in the Bypass Tray
48
Set the Paper Size
51
Important Points When Using the Bypass Tray
52
3 Originals
53
Placing the Original
53
Placing Originals in the Automatic Document Feeder
53
Placing the Original on the Document Glass
55
4 Peripheral Devices
57
Names and Functions of the Parts of the Peripheral Device
59
Finisher
59
Saddle Unit
60
Finisher (for the MX-M850) / Saddle Stitch Finisher
60
Folding Unit
61
Inserter
62
Manual Finishing Mode
65
Using Manual Finishing
66
Function
67
Paper Loading Orientation (for the Staple and Punch Functions)
69
Punch Function
69
Folding)
70
Paper Folding Function
70
Paper Loading Orientation
70
Sharp Osa
71
Application Communication Module
71
(MX-Amx2)
71
External Account Module (MX-Amx3)
72
5 System Settings
74
Accessing the System Settings
74
System Settings List
75
Total Count
77
Job Count
77
Device Count
77
Default Settings
78
Clock Adjust
78
Keyboard Select
79
List Print (User)
79
Paper Tray Settings
80
Tray Settings
80
Paper Type Registration
84
Auto Tray Switching
84
Usb-Device Check
84
User Control
85
Modify User Information
85
Sharp MX-M1100 Quick Start Manual (108 pages)
DIGITAL MULTIFUNCTIONAL SYSTEM
Brand:
Sharp
| Category:
All in One Printer
| Size: 7.07 MB
Table of Contents
Manuals Provided with the Machine
2
Printed Manuals
2
Safety Guide
2
Accessing the Web Server in the Machine
4
Checking the Ip Address
4
Table of Contents
6
Part Names and Functions
10
Operation Panel
12
Using the Touch Panel
14
Logging out
15
How to Log in to the Machine (User Authentication)
15
Home Screen
16
Using the Automatic Document Feeder
17
Using the Document Glass
17
Placing Originals
17
Names of the Trays
18
Print Side Face up or Face down
18
Changing Paper in a Tray
18
Loading Paper in a Tray
19
Changing the Tray Settings
20
Loading Paper in Other Trays
21
Tray 1 and Tray
21
Large Capacity Tray
23
Offset Function
27
Finishing
27
Punch Function
28
Copying
29
Base Screen of Copy Mode
30
Making Copies
31
2-SIDED COPYING (Automatic Document Feeder)
32
COPYING on SPECIAL PAPER (Bypass Copy)
33
Selecting a Tray
34
Selecting the Exposure and Image Type
35
FITTING the COPY IMAGE to the PAPER (Automatic Ratio Selection)
36
ENLARGEMENT/REDUCTION (Preset Ratios / Zoom)
38
CHECKING COPIES before PRINTING (Proof Copy)
40
Finishing
42
INTERRUPTING a COPY RUN (Interrupt Copy)
43
Storing a Job Program
44
STORING COPY OPERATIONS (Job Programs)
44
Deleting a Job Program
45
Special Modes
46
Selecting a Special Mode
47
Dual Page Copy
48
Convenient Copy Functions
48
Multi Shot
50
Printing
51
Printing
56
Using Printer Driver Help
58
Setting the Paper Size
59
Printing a File
61
Cancelling Printing (at the Machine)
63
Selecting Print Settings
64
Convenient Printer Functions
66
Image Send Function
70
Scan Mode
70
Fax Mode
70
Base Screen of Image Send Mode
71
Scanning an Original
72
Sending a Fax
73
Convenient Transmission Methods
74
Storing a Destination
76
SENDING the same IMAGE to MULTIPLE DESTINATIONS (Broadcast Transmission)
78
Changing the Exposure and Original Image Type
79
Changing the Exposure and Original Image
79
Type
79
Changing the Resolution
80
Sending an Image in Scan Mode
80
Sending an Image in Fax Mode
81
Changing the File Format
82
Special Image Send Modes
83
Selecting a Special Mode
84
Convenient Image Send Functions
85
Dual Page Scan
85
Suppress Background
85
Card Shot
85
Sharp MX-M1100 Quick Start Manual (108 pages)
DIGITAL MULTIFUNCTIONAL SYSTEM
Brand:
Sharp
| Category:
All in One Printer
| Size: 3.15 MB
Table of Contents
Manuals Provided with the Machine
2
Printed Manuals
2
Accessing the Web Server in the Machine
4
Checking the Ip Address
4
Table of Contents
6
General Information
6
Image Sending
7
Part Names and Functions
10
Operation Panel
12
Using the Touch Panel
14
How to Log in to the Machine (User Authentication)
15
Home Screen
16
Placing Originals
17
Changing Paper in a Tray
18
Loading Paper in a Tray
19
Changing the Tray Settings
20
Loading Paper in Other Trays
21
Large Capacity Tray
23
Finishing
27
Punch Function
28
Base Screen of Copy Mode
30
Making Copies
31
2-SIDED COPYING (Automatic Document Feeder)
32
COPYING on SPECIAL PAPER (Bypass Copy)
33
Selecting the Exposure and Image Type
35
FITTING the COPY IMAGE to the PAPER (Automatic Ratio Selection)
36
ENLARGEMENT/REDUCTION (Preset Ratios / Zoom)
38
CHECKING COPIES before PRINTING (Proof Copy)
40
Finishing
42
INTERRUPTING a COPY RUN (Interrupt Copy)
43
STORING COPY OPERATIONS (Job Programs)
44
Deleting a Job Program
45
Special Modes
46
Selecting a Special Mode
47
Convenient Copy Functions
48
Multi Shot
50
Printing
56
Using Printer Driver Help
58
Setting the Paper Size
59
Printing a File
61
Cancelling Printing (at the Machine)
63
Selecting Print Settings
64
Mac os X
65
Convenient Printer Functions
66
Image Send Function
70
Base Screen of Image Send Mode
71
Scanning an Original
72
Sending a Fax
73
Convenient Transmission Methods
74
Storing a Destination
76
Sharp MX-M1100 Printer Manual (72 pages)
Brand:
Sharp
| Category:
All in One Printer
| Size: 6.93 MB
Table of Contents
Table of Contents
2
About this Manual
4
Manuals Provided with the Machine
5
Printer Function of the Machine
6
1 Printing from Windows
7
Basic Printing Procedure
7
Selecting the Paper
9
Printing When the User Authentication Function Is Enabled
10
Start Printing
11
Viewing Printer Driver Help
12
Saving Frequently Used Print Settings
13
Saving Settings at the Time of Printing
13
Using Saved Settings
15
Changing the Printer Driver Default
16
Settings
16
2 Printing from a Macintosh
18
Basic Printing Procedure
18
Selecting Paper Settings
18
Select Paper Settings
19
Printing
20
Selecting the Paper
23
Printing When the User Authentication Function Is Enabled
24
3 Frequently Used Functions
27
Selecting the Colour Mode
27
Black and White Printing
28
Two-Sided Printing
29
Fitting the Print Image to the Paper
31
Printing Multiple Pages on One Page
32
Stapling Output/Punching Holes in
34
Output
34
Convenient Printing Functions
36
Convenient Functions for Creating Pamphlets and Posters
36
CREATING a PAMPHLET (Pamphlet/Pamphlet Staple)
36
INCREASING the MARGIN (Margin Shift)
38
Creating a Large Poster
39
Printing)
39
Functions to Adjust the Size and Orientation of the Image
40
ROTATING the PRINT IMAGE 180 DEGREES (Rotate 180 Degrees)
40
ENLARGING/REDUCING the PRINT IMAGE (Zoom/Xy-Zoom)
41
REVERSING the IMAGE (Mirror Image)
43
Colour Mode Adjustment Function
44
ADJUSTING the BRIGHTNESS and CONTRAST of the IMAGE (Colour Adjustment)
44
PRINTING FAINT TEXT and LINES in BLACK (Text to Black/Vector to Black)
45
SELECTING COLOUR SETTINGS to MATCH the IMAGE TYPE (Advanced Colour)
46
Functions that Combine Text and Images
48
ADDING a WATERMARK to PRINTED PAGES (Watermark)
48
PRINTING an IMAGE over the PRINT DATA (Image Stamp)
49
(Overlays)
50
Printing with an Overlay File
50
Sharp MX-M1100 Maintenance Manual (52 pages)
DIGITAL MULTIFUNCTIONAL SYSTEM
Brand:
Sharp
| Category:
All in One Printer
| Size: 2.04 MB
Table of Contents
Table of Contents
3
1 Regular Maintenance
4
Cleaning the Document Glass and
4
Automatic Document Feeder
4
Document Glass
4
Document Backplate Sheet
4
Scanning Area
4
Cleaning the Bypass Feed Roller
6
Discarding Punch Waste
7
Discarding Staple Waste (Finisher)
8
Replacing the Toner Collection
9
Container
9
2 Replacing Supplies
10
Replacing the Toner Cartridge
10
Replacing the Staple Cartridge
12
Finisher
12
Saddle Unit
13
Finisher (for MX-M850) / Saddle Stitch Finisher
15
Replacing the Stamp Cartridge
17
When a Paper Misfeed Occurs
18
Paper Misfeed Message and Information
18
Using the Information Screen
18
Removing Misfeeds
19
Misfeed Locations
19
Finisher
20
Saddle Unit
23
Finisher (for MX-M850) / Saddle Stitch Finisher
26
Folding Unit
30
Inserter
32
The Machine
35
Transport Unit
36
Bypass Tray (MX-Mfx2) / Large Capacity Trays
41
Bypass Tray (MX-Mfx1) / Large Capacity Tray
45
Finisher
47
Saddle Stitch Finisher
48
Sharp MX-M1100 Safety Manual (32 pages)
DIGITAL MULTIFUNCTIONAL SYSTEM
Brand:
Sharp
| Category:
All in One Printer
| Size: 0.55 MB
Table of Contents
For the Users of the Fax Function
3
Table of Contents
4
Cautions
5
Laser Information
6
Installation Requirements
7
Supplies
8
Storage of Supplies
8
Supply of Spare Parts and Consumables
8
Specifications
9
Machine Specifications / Copier Specifications
9
Continuous Copying Speeds
11
Ambient Environment
11
Acoustic Noise Emission
12
Iso7779)
12
Emission Concentration (Measurement According to RAL-UZ62: Edition Jan. 2002)
12
Automatic Document Feeder Specifications
12
Large Capacity Trays (MX-LCX4) Specifications
13
Large Capacity Trays (MX-LCX5) Specifications
13
Bypass Tray (for Large Capacity Trays) Specifications
14
Large Capacity Tray (MX-LCX6) Specifications
14
Large Capacity Tray (MX-LCX3N) Specifications
15
Bypass Tray Specifications
15
Inserter Specifications
15
Finisher Specifications
16
Finisher (for MX-M850) Specifications
17
Saddle Stitch Finisher Specifications
18
Punch Module (for MX-FNX5) Specifications
19
Punch Module (for MX-FNX6 or MX-FNX7) Specifications
19
Saddle Unit Specifications
20
Folding Unit Specifications
20
Printer Specifications
21
Network Scanner / Internet Fax Specifications
22
Facsimile Specifications
23
Information on Disposal
24
Information on Disposal for Users
24
Households)
24
Information on Disposal for Business Users
24
To the Administrator of the Machine
26
Factory Default Passwords
26
Forwarding All Transmitted and Received Data to the Administrator (Document Administration Function)
26
For the Users of the Fax Function
27
Notice for Users in Australia and New Zealand
28
Important Safety Information
28
Trademark Acknowledgments
29
Sharp MX-M1100 Software Setup Manual (44 pages)
DIGITAL MULTIFUNCTIONAL SYSTEM
Brand:
Sharp
| Category:
All in One Printer
| Size: 1.18 MB
Table of Contents
Software License
2
Table of Contents
3
1 Before Installing the Software
4
CD-Roms and Software
4
Software CD-Rom that Accompanies the Printer Expansion Kit
4
Other CD-Roms
6
Verifying System Requirements
7
System Requirements
7
Software Requirements
8
Connecting the Machine
9
Connecting to a Network
9
CONNECTING the MACHINE with a USB CABLE (Windows)
9
2 Setup in a Windows Environment
10
Driver
10
When the Machine Is Connected to Anetwork
10
When the Machine will be Connected with Ausb Cable
17
Using the Machine as a Shared
19
Printer
22
USING the STANDARD WINDOWS PS PRINTER DRIVER (Windows 98/Me/Nt 4.0)
24
The Options Installed on the
24
Configuring the Printer Driver for the Options Installed on the Machine
25
Installing the Printer Driver / Pc-Fax
10
Installing the Printer Status Monitor
28
Installing the Ps Display Fonts
30
Setup in a Macintosh Environment
31
Mac os X
31
Mac os 9.0 - 9.2.2
36
Troubleshooting and Useful Information
38
Troubleshooting
38
Changing the Port
41
Removing the Software
43
Advertisement
Related Products
Sharp MX-M160D
Sharp MX-M1204
Sharp MX-M1054
Sharp MX-M182
Sharp MX-M160DK
Sharp MX-M160
Sharp MX-M1056
Sharp MX-M1206
Sharp MX-M753U
Sharp MX-M265N
Sharp Categories
Microwave Oven
LCD TV
TV
Stereo System
All in One Printer
More Sharp Manuals
Login
Sign In
OR
Sign in with Facebook
Sign in with Google
Upload manual
Upload from disk
Upload from URL