Sign In
Upload
Manuals
Brands
Konica Minolta Manuals
Network Card
bizhub 181
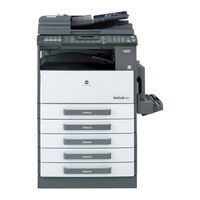
Konica Minolta bizhub 181 Manuals
Manuals and User Guides for Konica Minolta bizhub 181. We have
8
Konica Minolta bizhub 181 manuals available for free PDF download: User Manual, Quick Manual
Konica Minolta bizhub 181 User Manual (362 pages)
Image Controller
Brand:
Konica Minolta
| Category:
Printer
| Size: 9.68 MB
Table of Contents
About Pagescope Web Connection
9
Copyright
9
Software End User License Agreement
10
Table of Contents
13
Explanation of Manual Conventions
21
1 Getting Ready
22
Overview
22
Names of Control Panel Parts and Their Functions
23
Entering Text
28
Changing the Input Mode
28
Key Operation
28
Text Input Example
29
Correcting Text and Input Precautions
32
Connecting to a Local Area Network (LAN)
33
Connecting the Network Cable
33
Network Port Leds
33
2 Installing the Printer Driver
34
System Requirements
34
Making Connections and Installing the Driver
35
Connecting to a Computer
35
Procedures for Making Connections and Installing the Driver
36
General Operation for Driver Installation
38
Installation Using Plug and Play
38
Installation Using the Add Printer Wizard
39
Installing the Printer Driver by Using Plug and Play
40
Connecting to the Computer's USB Port
40
Installing Using Plug and Play on Windows Xp/Server 2003
41
Installing Using Plug and Play on Windows Vista
43
Installing Using Plug and Play on Windows 2000
45
Installing Using Plug and Play on Windows Me
46
Reinstalling the Printer Driver by Using Plug and Play
47
Installing the Printer Driver by Using the Add Printer Wizard
48
Connecting to a Computer through a Network
48
Installing Using the Add Printer Wizard on Windows Xp/Server 2003
49
Installing Using the Add Printer Wizard on Windows Vista
53
Installing Using the Add Printer Wizard on Windows 2000
56
Installing Using the Add Printer Wizard on Windows Me/98 SE
59
Reinstalling the Printer Driver by Using the Add Printer Wizard
61
Uninstalling the Printer Driver
62
Delete the Printer
62
Deleting Related Files
64
3 Network Printing
66
Selecting the Network Printing Method
66
When Using a Windows Operating System
66
When Using a Netware Environment (Netware Server and Windows Client)
69
Checking the Setup
70
Peer-To-Peer Printing
70
LPR/PORT9100 Printing
71
IPP Printing
72
Netware Server/Client (Except NDPS)
73
Netware Server/Client (NDPS)
73
Specifying an IP Address
74
Printing the Settings Information
78
Connecting the Computer and this Machine over a Network
80
Peer-To-Peer Printing
80
LPR Printing
81
PORT9100 Printing
82
IPP Printing
83
Checking IPP-Related Settings from Pagescope Web Connection
84
IPP Printing Connections
85
Connecting the IPP Printing Netware Server and this Machine
86
4 Specifying Printer Driver Settings
90
Printer Driver Settings Dialog Box
90
Displaying the Settings Dialog Box
90
Printing Preferences Dialog Box
92
Properties Dialog Box
95
Device Options Tab
96
Device Options
97
Memory
97
Common Operations
98
Common Items
98
Easy Set
99
Setup Tab
101
Orientation
101
Original Size
102
Edit Custom
103
Output Size
105
Zoom
106
Copy
106
Collate
107
Paper Source
108
Paper Type
108
Output Method
109
Using Secure Printing
109
Specifying Secure Printing from the Printer Driver
110
Printing from the Machine
110
Layout Tab
113
Combination
114
Combination Details
115
Double-Sided Printing
116
Per Page Setting Tab
117
Front Cover Page/Back Cover Page
117
Front Cover Paper Source/Back Cover Paper Source
117
Media Type
117
Watermark Tab
118
Watermark Select
118
Creating a New Watermark
119
Editing a Watermark
121
Quality Tab
123
Resolution
123
Adjustment
124
Font Settings
125
Toner Save
127
5 Control Panel Operations for Printing Functions
128
Printing Operations
128
Printer Indicator
128
Starting the Print Operation
129
Canceling a Print Job
130
Using the Manual Bypass Tray
133
Power Save Mode
135
6 Network Scanning
136
Scan to E-Mail
137
Scan to Server (FTP)
138
Environments for Network Scan Transmissions
139
7 Network Settings
140
List of Network Settings
140
List of LDAP Settings
144
Specifying Settings from the Control Panel
146
Network Setting
148
Specifying the IP Address, Subnet Mask and Default Gateway
148
Specifying the DNS Settings
152
Specifying the Gateway Transmission Setting
153
Specifying the WEB Setting
154
Specifying the LPD Setting
155
Specifying the SLP Setting
156
Specifying the SNMP Setting
157
E-Mail Setting 1
158
Programming the Sender's Name
158
Specifying the E-Mail Address of the Sender
161
Specifying the SMTP Server Address
162
Specifying the SMTP Port Number
163
Specifying the SMTP Server Connection Timeout
163
Specifying the Text Input Setting
164
Specifying the Subject of E-Mail Messages
165
Specifying the POP before SMTP Setting
166
Specifying the E-MAIL MODE Settings
166
E-Mail Setting 2
168
Specifying the POP3 Server Address
168
Specifying the POP3 Port Number
170
Specifying the POP3 Server Connection Timeout
171
Specifying the POP3 Account
172
Specifying the POP3 Password
173
Ldap Setting
174
Specifying the LDAP Server Address
174
Specifying the LDAP Port Number
176
Selecting the SSL Setting
177
Specifying the Search Base
178
Specifying the Attribute Setting
178
Selecting the Search Method
179
Specifying the LDAP Search Timeout
180
Specifying the Maximum Number of Search Items
180
Selecting the Authentication Method
181
Specifying the LDAP Account Name
182
Specifying the LDAP Password
183
Specifying the Domain Name
183
User Setting
185
Specifying the NTP Server
185
Specifying the Time Zone
187
8 Registering Destinations
190
Registering One-Touch Dial Destinations
191
Registering Speed Dial Destinations
197
Registering Speed Dial Destinations (FTP Servers)
203
Registering Group Dial Destinations
203
Editing or Deleting Registered Information
207
Editing or Deleting a One-Touch Dial Destination
207
Editing or Deleting a Speed Dial Destination
209
Editing or Deleting a Group Dial Destination
212
9 Performing a Scan to E-Mail Operation
216
Basic Transmission
216
Using the Automatic Document Feeder
216
Positioning Documents on the Original Glass
219
Changing the Transmission Settings
225
Specifying the Subject
225
Specifying a CC Address
226
Selecting the File Format
230
Selecting the Compression Encoding Method
232
Changing the Scanning Quality Settings
234
Selecting the Resolution
234
Selecting the Document Quality
236
Changing the Document Scanning Density
238
When "TEXT/PHOTO" or "TEXT" was Selected
238
When "PHOTO" was Selected
241
Specifying the Default Scanning Settings
243
Selecting the Resolution
243
Selecting the File Format
244
Selecting the Compression Encoding Method
245
If the Memory Becomes Full While Scanning Documents
246
Specifying a One-Touch Dial Destination
248
Specifying a Speed Dial Destination
250
Specifying a Recipient from a Group Dial Destination
252
Selecting a Destination from the Phone Book
254
Searching the Phone Book
256
Searching the LDAP Server
259
Checking the Communication Results
263
10 Performing a Scan to Server (FTP) Operation
266
Basic Transmission
266
Using the Automatic Document Feeder
266
Positioning Documents on the Original Glass
270
If the Memory Becomes Full While Scanning Documents
276
Advertisement
Konica Minolta bizhub 181 User Manual (322 pages)
bizhub 181 User Manual
Brand:
Konica Minolta
| Category:
All in One Printer
| Size: 10.78 MB
Table of Contents
Energy Star
2
Energy Star® Partner
2
What Is an Energy Star® Product
2
Trademarks and Registered Trademarks
3
Table of Contents
4
Available Copy Features
12
Copying
12
Finishing
13
For Details, Refer to
13
Zoom
13
Special Features
14
Documents
15
Bizhub 181 X
16
Explanation of Manual Conventions
16
Descriptions and Symbols of Documents and Paper
18
Output Side and Feed Direction
18
Width" and "Length
19
Legal Restrictions on Copying
20
1 Installation and Operation Precautions
22
Safety Information
23
Warning and Precaution Symbols
23
Meaning of Symbols
23
Regulation Notices
30
CE Marking (Declaration of Conformity) for Users of the European Union (EU)
30
For Users in Countries Subject to Class B Regulations
30
For Users in Countries Not Subject to Class B Regulations
30
Laser Safety
31
Internal Laser Radiation
31
CDRH Regulation
32
For European Users
32
For Denmark Users
33
For Finland, Sweden Users
33
For Norway Users
34
Laser Safety Label
35
Ozone Release
35
Acoustic Noise
36
Notification for California Customers
36
For EU Member States Only
36
Installation Precautions
37
Installation Site
37
Power Source
37
Space Requirements
38
Operation Precautions
39
Operating Environment
39
Proper Use
39
Transporting the Machine
40
Care of Machine Supplies
40
Storage of Copies
41
2 Precaution
42
Components and Their Functions
43
Part Names and Their Functions
45
Main Unit
45
Inside of Machine
47
Automatic Document Feeder/Multi Bypass Tray (Optional)
48
Automatic Duplex Unit
49
Paper Feed Unit (Optional)
50
Job Separator (Optional)
51
Control Panel Parts and Their Functions
52
Names of Control Panel Parts and Their Functions
52
Adjusting the Angle of the Display
55
Display Indications
56
Power Supply
58
Turning on the Machine
58
Turning off the Machine
58
Default Settings
59
Automatically Clearing Settings (Auto Panel Reset)
59
Automatically Conserving Energy (Power Save Mode)
60
Automatically Turning off the Machine (Auto Shut-Off)
60
Queued Copy Jobs
60
Reducing Electricity Usage
61
Specifying Settings for Entering Power Save Mode
61
Specifying Settings for the Auto Shut-Off Operation
63
3 Before Making Copies
66
Paper
67
Paper Types
67
Paper Sizes
68
Number of Sets
69
Paper Unsuitable for Copies/Printouts
70
Copy/Print Area
71
Paper Storage
72
Loading Paper
73
Loading Paper into the 1St Paper Drawer
74
Loading Paper into the 2Nd, 3Rd, 4Th or 5Th Paper Drawer
77
Original Documents
80
Using the Document Feeder
80
Document Types
80
Documents of Uniform Sizes
81
Mixed Width Document Sizes (DF-605)
81
Precautions Concerning Documents
82
Loading the Document
83
Loading the Document into the Document Feeder
83
Placing the Document on the Original Glass
85
Placing Highly Translucent or Transparent Documents on the Original Glass
86
Placing a Book on the Original Glass
88
Copying Documents of Mixed Sizes ("Mixed Original" Setting)
90
4 Making Copies
94
Copying
95
Basic Copy Operation
95
Enlarging/Reducing a Standard-Sized Document to a Different Standard Size
97
Selecting the Image Quality Setting Appropriate for the Document
100
Selecting the Print Density
102
Stopping/Restarting/Canceling a Copy Job
104
Selecting the Paper Source
105
Automatic Tray Switching Feature
106
Order for Automatically Switching Paper Drawers
107
Making Copies on Manually Fed Paper
108
Paper that Can be Fed Manually
108
Adjusting the Multi Bypass Tray
109
Loading Plain Paper into the Bypass Tray
110
Loading Overhead Projector Transparencies into the Bypass Tray
113
Loading Label Sheets into the Bypass Tray
115
Loading Envelopes into the Bypass Tray
117
Copying Onto Manually Fed Paper (Manual Bypass Tray)
120
Copying Onto Manually Fed Paper (Multi Bypass Tray)
123
Copying Onto Various Types of Media
126
Copying Onto Overhead Projector Transparencies
126
Copying Onto Label Sheets
130
Copying Onto Non-Standard-Sized Paper
135
Copying Onto Envelopes
139
Specifying a Zoom Setting
144
Zoom Ratio Settings
144
Making Copies Using an Auto Zoom Ratio
145
Making Copies Using a Preset Zoom Setting
146
Making Copies Using a Manual Zoom Ratio
148
Making Copies Using Separate Horizontal and Vertical Zoom Ratios
150
Selecting a Density Setting
152
Making Copies after Specifying a Copy Density
153
Interrupting a Copy Job
155
To Interrupt a Copy Job
155
Checking Machine Counters
157
Machine Counters that Can be Checked
157
5 Advanced Copy Operations
160
Finishing Settings (SORT/GROUP)
161
Finishing Methods
161
Making Copies Using a Finishing Setting (with the Document Loaded into the Document Feeder)
164
Making Copies Using a Finishing Setting (with the Document Placed on the Original Glass)
166
Making 2In1 or 4In1 Copies
168
Using the Original Glass
168
Using the Document Feeder
171
Making Double-Sided Copies
173
Types of Double-Sided Copying
173
Precautions on Double-Sided Copying
174
Using the Original Glass
175
Using the Document Feeder
176
Making Copies Using the "BOOK SEPARATION" Function
178
Frame/Center Erasing Methods
181
Erasing Sections of Copies ("ERASE" Function)
182
Precautions on the Erased Margin Location
182
Making Copies Using the "ERASE" Function
183
Negative/Positive-Reversed Copying ("NEG. <-> POS." Function)
185
Making Copies Using the "NEG. <-> POS." Function
185
Making Copies for Filing ("PAGE MARGIN" Function)
187
Precautions on the Binding Margin Location
187
Making Copies Using the "PAGE MARGIN" Function
187
Registering Copy Settings
190
To Register Copy Settings
190
Copying with a Recalled Copy Program
192
Copying Using an Account Number
193
Entering the Account Number
193
6 Utility Mode/Copy Mode Parameters
196
Utility Mode
197
Utility Mode/Copy Mode Parameters
197
Machine Setting
200
Displaying the "MACHINE SETTING" Menu
201
Changing Settings for the Auto Panel Reset Operation ("AUTO PANEL RESET" Parameter)
202
Specifying Energy-Saving (Power Save Mode) Settings ("ENERGY SAVE MODE" Parameter)
203
Changing Settings for the Auto Shut-Off Operation ("AUTO SHUT OFF" Parameter)
204
Changing the Image Quality Level When the Document Feeder Is Used ("DENSITY (ADF)" Parameter)
206
Changing the Image Quality Level When the Original Glass Is Used ("DENSITY (BOOK)" Parameter)
207
Changing the Print Density ("PRINT DENSITY" Parameter)
208
Changing the Display Contrast ("LCD CONTRAST" Parameter)
209
Changing the Key Repeating Settings ("KEY SPEED SETTING" Parameter)
210
Changing the Display Language ("LANGUAGE" Parameter)
212
Paper Source Setup
213
Displaying the "PAPER SOURCE SETUP" Menu
214
Selecting the Paper Size Unit Measurement System ("INCH/METRIC" Parameter)
215
Specifying Settings for the Paper Loaded into the 1St Paper Drawer ("TRAY1 PAPER" Parameter)
217
Specifying Special Paper Settings for Paper Drawers ("PAPER TYPE" Parameter)
220
Custom Size Memory
222
Registering a Custom Paper Size
222
User Management
225
Drying (Dehumidifying) the Drum ("DRUM DEHUMIDIFY" Function)
225
Replenishing Toner ("TONER REPLENISHER" Function)
227
Admin. Management
229
Displaying the "ADMIN. MANAGEMENT" Menu
230
Changing the Administrator Access Code ("ADMINISTRATOR NO." Parameter)
232
Enabling the "AUTO SHUT OFF" Parameter to be Set to "OFF" ("AUTO SHUT OFF" Parameter)
234
Enabling/Disabling Account Number Management
236
Registering Account Numbers
238
Changing/Deleting Account Numbers
240
Displaying/Clearing Total Counters for each Account
243
Clearing All Total Counters
245
Copy Setting 1
247
Displaying the "COPY SETTING 1" Menu
248
Selecting the Default Paper Drawer ("PAPER PRIORITY" Parameter)
249
Selecting the Default Image Quality ("QUALITY PRIORITY" Parameter)
251
Selecting the Default Density ("DENSITY PRIORITY" Parameter)
252
Selecting the Default "AUTO" Density Level ("DENSITY LEVEL (A)" Parameter)
253
Selecting the Default "MANUAL" Density Level ("DENSITY LEVEL (M)" Parameter)
255
Selecting the Book Binding Position ("BINDING POSITION" Parameter)
257
Adjusting the Margin Width ("MARGIN SETTING" Parameter)
258
Adjusting the Width of the Erased Area ("ERASE SETTING" Parameter)
259
Selecting the Setting for Small-Sized Documents ("SMALL ORIGINAL" Parameter)
261
Copy Setting 2
262
Displaying the "COPY SETTING 2" Menu
263
Selecting the Default Copy Settings ("COPY PRIORITY" Parameter)
264
Selecting the Default Finishing Setting ("OUTPUT PRIORITY" Parameter)
265
Selecting the 4In1 Page Order ("4IN1 COPY ORDER" Parameter)
266
Selecting the Default "MIXED ORIGINAL" Setting ("MIXED ORIGINAL" Parameter)
268
Selecting the Setting for Double-Sided Copying ("DUPLEX COPY" Parameter)
269
Selecting the Setting for Crisscross Feeding ("CRISSCROSS MODE" Parameter)
270
Konica Minolta bizhub 181 User Manual (278 pages)
Brand:
Konica Minolta
| Category:
All in One Printer
| Size: 13.36 MB
Table of Contents
Trademarks and Copyrights
2
Table of Contents
3
Available Fax Features
9
Sending
9
Receiving
10
Explanation of Manual Conventions
12
Safety Information
14
Meaning of Symbols
14
Warning and Precaution Symbols
14
For Canada
21
Special Notice to User
21
For U.S.A
22
For New Zealand
24
For Europe
25
1 Precaution
26
Part Names and Their Functions
27
Main Unit
27
Control Panel Parts and Their Functions
29
Names of Control Panel Parts and Their Functions
29
Display Indications
34
Power Supply
36
Default Settings
36
Entering Text
37
Changing the Input Mode
37
Key Operation
37
Text Input Example
39
Correcting Text and Input Precautions
42
Selecting and Checking Initial Settings
43
Required Settings
43
Checking the Initial Settings
43
Setting the Current Date and Time ("DATE&TIME" Parameter)
43
Specifying the Machine's Fax Number ("USER FAX NO." Parameter)
46
Programming the Transmission Source Name ("USER NAME" Parameter)
48
Selecting the Telephone Dialing System ("TONE/PULSE" Parameter)
50
Selecting the Telephone Wiring System ("PSTN/PBX" Parameter)
52
2 Faxing
56
General Transmission Operation
57
Positioning the Document
61
Loading the Document into the Document Feeder
61
Placing the Document on the Original Glass
63
Selecting the Fax Quality
65
Selecting a Quality Setting
65
Specifying a Recipient
67
Specifying a Single Recipient
67
Manual Dialing
67
One-Touch Dialing
67
Speed Dialing
69
Group Dialing
71
Program Dialing
72
Phone Book Dialing
73
Chain Dialing
76
Specifying Multiple Destinations (Broadcast Transmission)
77
Manual Redialing
80
Operations While Scanning Documents
82
If the Memory Becomes Full
82
If the Fax Cannot be Sent
83
Faxing after Completing a Telephone Call (Manual Faxing)
84
Stopping the Transmission
86
Canceling (Deleting) a Queued Transmission
86
Checking Machine Counters
88
Machine Counters that Can be Checked
88
Checking Communication Results (Reports/Lists)
90
Checking Communication Results
90
Printing Reports/Lists
91
Types of Reports/Lists
93
Memory Transmission and Real-Time Transmission
96
Memory Transmission
96
Real-Time Transmission
96
Sending a Fax at a Specified Time
98
Batch Transmission
100
Receiving
101
Memory Reception
101
Paper Sizes for Received Faxes
101
Automatic Reception (Dedicated Fax Mode)
101
Manual Reception
102
Making a Telephone Call
103
Receiving a Telephone Call
104
3 Useful Transmission and Reception Functions
106
Using F-Codes
107
Specifying F-Codes When Sending Faxes
108
Specifying F-Codes When Registering Destinations
109
Mailbox Communication
111
Registering Mailboxes
111
Mailbox Transmission
112
Printing Documents Received in Mailboxes
114
Polling Transmission
116
Deleting a Polling Transmission Document
119
Polling Reception
121
Relay Initiating Transmission
124
Relay Broadcast Transmissions
128
Relay Station
128
Forwarding
130
Faxing from a Computer (Direct Faxing)
131
4 Internet Faxing
134
Sending Internet Faxes
135
General Transmission Operation
135
Specifying Transmission Settings
139
Specifying the Transmission Time
139
Selecting BASIC/ADVANCED Settings
140
Selecting the Setting for "MAX TX SIZE
142
Selecting the Setting for "MAX QUALITY
143
Selecting the Setting for "CODING METHOD
144
Specifying the Image Quality and Density When Scanning
145
Quality Settings
145
Density Settings
146
X-4 Fax Kit
146
Specifying Additional Settings
147
Specifying a Subject ("DEFAULT SUBJECT" Parameter)
147
Specifying the Reply Address ("REPLY ADDRESS" Parameter)
149
Specifying Header Printing ("HEADER PRINT" Parameter)
151
Receiving Internet Faxes
153
Data that Can be Received
153
Automatically Receiving Internet Faxes
154
Manually Receiving Internet Faxes
156
5 Utility Mode/Fax Mode Parameters
158
UTILITY MODE" Menu
159
Machine Setting
161
Displaying the "MACHINE SETTING" Menu
163
Selecting the Buzzer Volume ("BUZZER VOLUME" Parameter)
164
Changing the Initial Mode ("INITIAL MODE" Parameter)
165
Changing the Scanning Threshold ("SCAN THRESHOLD" Parameter)
166
Admin. Management
167
Displaying the "ADMIN. MANAGEMENT" Menu
169
Specifying Remote Monitoring ("REMOTE MONITOR" Parameter)
170
Selecting the Line Monitoring Volume ("LINE MONITOR" Parameter)
172
Dial Registration
174
Displaying the "DIAL REGISTRATION" Menu
175
Registering One-Touch Dial Destinations
176
Changing/Canceling a Programmed One-Touch Dial Key
179
Registering Speed Dial Destinations
181
Changing/Canceling a Programmed Speed Dial Number
185
Registering a Group of Fax Numbers
187
Changing/Deleting a Registered Group of Fax Numbers
189
Registering a Dialing Program
192
Changing/Deleting a Broadcast Transmission Program
194
Changing/Deleting a Timer Transmission Program
197
Changing/Deleting a Mailbox Transmission Program
199
Changing/Deleting a Polling Reception Program
201
Changing/Deleting a Relay Initiating Transmission Program
203
Fax Registration
205
Displaying the "FAX REGISTRATION" Menu
205
Registering Mailboxes
206
Deleting Mailbox Settings
208
Registering a Relay Box
209
Deleting Relay Box Settings
214
Fax Tx Operation
216
Displaying the "FAX TX OPERATION" Menu
217
Selecting the Default Scanning Density ("DENSITY LEVEL" Parameter)
218
Selecting the Default Image Quality ("QUALITY PRIORITY" Parameter)
219
Selecting the Default Transmission Mode ("DEFAULT TX" Parameter)
220
Selecting Header Printing ("HEADER" Parameter)
221
Fax Rx Operation
222
Displaying the "FAX RX OPERATION" Menu
223
Selecting the Memory Reception Mode ("MEMORY RX MODE" Parameter)
224
Canceling Memory Reception
226
Specifying the Number of Rings ("NO. of RINGS" Parameter)
228
Selecting the Reduced Printing Setting ("REDUCTION RX" Parameter)
229
Selecting Printing of the Received Document ("RX PRINT" Parameter)
230
Selecting the Reception Mode ("RX MODE" Parameter)
231
Specifying the Forwarding Settings ("FORWARD" Parameter)
232
Selecting Footer Printing ("FOOTER" Parameter)
233
Selecting the Paper Drawer ("SELECT TRAY" Parameter)
234
Selecting a Closed Reception Setting ("CLOSED NETWORK" Parameter)
236
Reporting
237
Displaying the "REPORTING" Menu
238
Selecting Automatic Printing of the Activity Report ("ACTIVITY REPORT" Parameter)
239
Selecting Automatic Printing of the Queued Jobs Report ("RESERVATION REPORT" Parameter)
240
Selecting Automatic Printing of the Transmission Results Report ("TX RESULT REPORT" Parameter)
241
Selecting Automatic Printing of the Reception Results Report ("RX RESULT REPORT" Parameter)
242
Advertisement
Konica Minolta bizhub 181 User Manual (244 pages)
Network Interface Card
Brand:
Konica Minolta
| Category:
Network Card
| Size: 7.04 MB
Table of Contents
About Pagescope Web Connection
2
Copyright
3
Table of Contents
4
Explanation of Manual Conventions
10
1 Getting Ready
12
Overview
12
Names of Control Panel Parts and Their Functions
13
Entering Text
18
Changing the Input Mode
18
Key Operation
18
Text Input Example
19
Correcting Text and Input Precautions
22
Connecting to a Local Area Network (LAN)
23
Connecting the Network Cable
23
Network Port Leds
23
2 Network Printing
24
Selecting the Network Printing Method
24
When Using a Windows Operating System
24
When Using a Netware Environment (Netware Server and Windows Client)
27
Checking the Setup
28
Peer-To-Peer Printing
28
LPR/PORT9100 Printing
29
IPP Printing
30
Netware Server/Client (Except NDPS)
31
Netware Server/Client (NDPS)
31
Specifying an IP Address
32
Printing the Settings Information
36
Connecting the Computer and this Machine over a Network
38
Peer-To-Peer Printing
38
LPR Printing
39
PORT9100 Printing
40
IPP Printing
41
Checking IPP-Related Settings from Pagescope Web Connection
42
IPP Printing Connections
43
Connecting the IPP Printing Netware Server and this Machine
44
3 Network Scanning
48
Scan to E-Mail
49
Scan to Server (FTP)
50
Environments for Network Scan Transmissions
51
4 Network Settings
52
List of Network Settings
52
Specifying Settings from the Control Panel
57
Network Setting
58
Specifying the IP Address, Subnet Mask and Default Gateway
58
Specifying the DNS Settings
62
Specifying the Gateway Transmission Setting
64
Specifying the WEB Setting
65
Specifying the LPD Setting
66
Specifying the SLP Setting
67
Specifying the SNMP Setting
68
E-Mail Setting 1
69
Programming the Sender's Name
69
Specifying the E-Mail Address of the Sender
72
Specifying the SMTP Server Address
73
Specifying the SMTP Port Number
74
Specifying the SMTP Server Connection Timeout
74
Specifying the Text Input Setting
75
Specifying the Subject of E-Mail Messages
76
Specifying the POP before SMTP Setting
77
E-Mail Setting 2
78
Specifying the POP3 Server Address
78
Specifying the POP3 Port Number
80
Specifying the POP3 Server Connection Timeout
81
Specifying the POP3 Account
82
Specifying the POP3 Password
83
User Setting
84
Specifying the NTP Server
84
Specifying the Time Zone
86
5 Registering Destinations
90
Registering One-Touch Dial Destinations
91
Registering Speed Dial Destinations
93
Registering Speed Dial Destinations (FTP Servers)
96
Registering Group Dial Destinations
96
Editing or Deleting Registered Information
100
Editing or Deleting a One-Touch Dial Destination
100
Editing or Deleting a Speed Dial Destination
103
Editing or Deleting a Group Dial Destination
105
6 Performing a Scan to E-Mail Operation
108
Basic Transmission
108
Using the Automatic Document Feeder
108
Positioning Documents on the Original Glass
110
Changing the Transmission Settings
117
Specifying the Subject
117
Specifying a CC Address
118
Selecting the File Format
122
Selecting the Compression Encoding Method
124
Changing the Scanning Quality Settings
126
Selecting the Resolution
126
Selecting the Document Quality
128
Changing the Document Scanning Density
130
When "TEXT/PHOTO" or "TEXT" was Selected
130
When "PHOTO" was Selected
133
Specifying the Default Scanning Settings
135
Selecting the Resolution
135
Selecting the File Format
136
Selecting the Compression Encoding Method
137
If the Memory Becomes Full While Scanning Documents
138
Specifying a One-Touch Dial Destination
140
Specifying a Speed Dial Destination
142
Specifying a Recipient from a Group Dial Destination
144
Selecting a Destination from the Phone Book
146
Searching the Phone Book
148
Checking the Communication Results
151
7 Performing a Scan to Server (FTP) Operation
154
Basic Transmission
154
Using the Automatic Document Feeder
154
Positioning Documents on the Original Glass
158
If the Memory Becomes Full While Scanning Documents
164
8 Using Pagescope Web Connection
166
When Using Pagescope Web Connection
166
About Pagescope Web Connection
166
System Requirements
168
Accessing Pagescope Web Connection
169
Structure of
170
Description of the Pages
170
Operation
171
Web Browser Cache
171
With Internet Explorer
172
With Netscape Navigator
172
Logging on to Administrator Mode
173
To Log on to Administrator Mode
173
User Mode
175
User Mode Tabs
175
System Tab - Summary
176
System Tab - Details - Input Tray
177
System Tab - Details - Output Tray
178
System Tab - Details - ROM Version
179
System Tab - Details - Interface Information
180
System Tab - Details - Consumable
181
System Tab - Maintenance - Counter
182
System Tab - Online Assistance
183
Job Tab - Print Job Management
184
Job Tab - File Download
185
Print Tab - Settings - Paper Handling
186
Print Tab - Settings - Page Layout
187
Print Tab - Settings - Printer Setting
188
Print Tab - Test Print
189
Print Tab - Font Information
190
Scan Tab - One-Touch Dial Setting
191
Scan Tab - Speed Dial Setting
192
Scan Tab - Group Dial Setting
193
Network Tab - Summary
194
Administrator Mode
195
Administrator Mode Tabs
195
System Tab - Summary
196
System Tab - Details
197
System Tab - Preference
198
System Tab - Save Setting
199
System Tab - Maintenance - NIC and Printer Controller Reset
201
System Tab - Maintenance - Initialize
202
System Tab - Maintenance - Counter
203
System Tab - Online Assistance
204
Job Tab - Print Job Management
205
Print Tab - Settings - Paper Handling
206
Print Tab - Settings - Page Layout
207
Print Tab - Settings - Printer Setting
208
Print Tab - Test Print
209
Print Tab - Font Information
210
Scan Tab - One-Touch Dial Setting
211
Sample Page: for a Fax Destination
213
When "Fax" Is Selected
213
When "E-Mail" Is Selected
214
When "Group Dial" Is Selected
214
Scan Tab - Speed Dial Setting
215
Sample Page: for an E-Mail Destination
217
When "Fax" Is Selected
217
When "E-Mail" Is Selected
218
When "FTP Server Address" Is Selected
219
Scan Tab - Group Dial Setting
220
Scan Tab - Fax Configuration
223
Scan Tab - Downloading/Uploading Destination List
225
Upload
226
Network Tab - Summary
226
Network Tab - TCP/IP Configuration
227
Network Tab - Netware Configuration - Netware Setting
228
Network Tab - Netware Configuration - Netware Status
230
Network Tab - IPP Configuration
231
Network Tab - SMTP & POP3 Configuration
233
Network Tab - FTP & DNS Configuration
235
Main Error Messages and Their Remedies
238
Konica Minolta bizhub 181 Quick Manual (144 pages)
bizhub 181Copy/Fax/Print/Scan Operation User Manual
Brand:
Konica Minolta
| Category:
All in One Printer
| Size: 5.95 MB
Table of Contents
Table of Contents
3
Introduction to the User's Guide
6
Available Features
8
Copy Operations
9
Fax Operations
9
Network Operations
9
Scan Operations
9
Print Operations
9
Control Panel
10
Bizhub 181 X
12
Performing Operations from the Control Panel
14
Example: Selecting a Zoom Ratio
14
Document Feeding Methods
16
Placing the Document on the Original Glass
16
Loading the Document into the Document Feeder
17
Documents of Uniform Sizes
18
Placing a Book on the Original Glass
19
Copying Documents of Different Sizes
20
Loading Paper
21
Loading the 1St Paper Drawer
21
Loading the 2Nd, 3Rd, 4Th or 5Th Paper Drawer
23
Loading the Bypass Tray
26
Clearing Paper Misfeeds
29
When the Message "OPEN 1St SIDE COVER" Appears
30
When the Messages "OPEN 2Nd SIDE COVER" through "OPEN 5Th SIDE COVER" Appear
32
Replacing the Toner Bottle
33
To Replace the Toner Bottle
33
Turning On/Off the Machine
35
Turning on the Machine
35
Turning off the Machine
35
Options
37
1 Using the Machine as a Copier
40
Making Copies
41
Enlarging/Reducing the Copy Size
44
Specifying an Exact Zoom Ratio
46
Reducing Paper Use While Copying
47
When Placing the Document on the Original Glass
49
Copying Onto Non-Standard-Sized Paper
50
With the Bypass Tray
50
With the 1St Paper Drawer
53
Copying Onto Envelopes
57
With the Bypass Tray
57
With the 1St Paper Drawer
61
Canceling While Copying
65
2 Using the Machine as a Fax Machine
68
Sending a Fax
69
When the Document Is Placed on the Original Glass
71
Transmitting to Multiple Recipients at the same Time
72
Checking Fax Communication Results
75
Registering Frequently Used Fax Destinations
77
Entering Text
80
Characters that Can be Entered
80
Entering Two or more Characters
81
Canceling While Transmitting
82
Checking the Details of Registered Destinations
83
Transmission Errors and Remedies
85
Faxes Cannot be Sent
85
Faxes Cannot be Received
86
Calls Cannot be Made
87
Konica Minolta bizhub 181 User Manual (92 pages)
bizhub 181 GDI Print Controler User Manual
Brand:
Konica Minolta
| Category:
All in One Printer
| Size: 2.67 MB
Table of Contents
Copyright
3
Software End User License Agreement
4
Table of Contents
7
Explanation of Manual Conventions
10
1 Getting Ready
12
Operating Environment
12
System Requirements
12
Recommended Operating Environment
12
2 Installing the Printer Driver
14
Making Connections and Installing the Driver
14
Connecting to a Computer
14
Procedures for Making Connections and Installing the Driver
15
General Operation for Driver Installation
17
Installation Using Plug and Play
17
Installation Using the Add Printer Wizard
18
Installing the Printer Driver by Using Plug and Play
19
Connecting to the Computer's USB Port
19
Installing Using Plug and Play on Windows Xp/Server 2003
20
Installing Using Plug and Play on Windows Vista
21
Installing Using Plug and Play on Windows 2000
23
Installing Using Plug and Play on Windows Me
24
Reinstalling the Printer Driver by Using Plug and Play
25
Installing the Printer Driver by Using the Add Printer Wizard
26
Connecting to a Computer through a Network
26
Installing Using the Add Printer Wizard on Windows Xp/Server 2003
27
Installing Using the Add Printer Wizard on Windows Vista
30
Installing Using the Add Printer Wizard on Windows 2000
34
Installing Using the Add Printer Wizard on Windows Me/98 SE
37
Reinstalling the Printer Driver by Using the Add Printer Wizard
39
Uninstalling the Printer Driver
40
Delete the Printer
40
Deleting Related Files
41
3 Specifying Printer Driver Settings
44
Printer Driver Settings Dialog Box
44
Displaying the Settings Dialog Box
44
Printing Preferences Dialog Box
46
Properties Dialog Box
48
Device Options Tab
49
Device Options
50
Memory
50
Common Operations
51
Common Items
51
Easy Set
52
Setup Tab
54
Orientation
54
Original Size
55
Edit Custom
56
Output Size
58
Zoom
59
Copy
59
Collate
60
Paper Source
61
Paper Type
61
Output Method
62
Using Secure Printing
62
Specifying Secure Printing from the Printer Driver
63
Printing from the Machine
63
Layout Tab
66
Combination
67
Combination Details
68
Double-Sided Printing
69
Per Page Setting Tab
70
Front Cover Page
70
Front Cover Paper Source
70
Media Type
70
Watermark Tab
71
Watermark Select
71
Creating a New Watermark
72
Editing a Watermark
74
Quality Tab
76
Resolution
76
Adjustment
77
Konica Minolta bizhub 181 User Manual (50 pages)
For MFP
Brand:
Konica Minolta
| Category:
Software
| Size: 1.61 MB
Table of Contents
Copyright
3
Software End User License Agreement
4
Table of Contents
7
Explanation of Manual Conventions
9
1 Setting up for Scanning
10
2 Installing the TWAIN Driver
12
Making Connections and Installing the Driver
12
Connecting to a Computer
12
Procedures for Making Connections and Installing the Driver
13
General Operation for Driver Installation
15
Installation Using Plug and Play
15
Installation Using the TWAIN Driver Installer
15
Installing the TWAIN Driver by Using Plug and Play
16
Connecting to the Computer's USB Port
16
Installing Using Plug and Play on Windows Xp/Server 2003
17
Installing Using Plug and Play on Windows Vista
18
Installing Using Plug and Play on Windows 2000
20
Installing Using Plug and Play on Windows Me
21
Installing the TWAIN Driver by Using the Installer
23
Connecting to a Computer through a Network
23
Reinstalling the TWAIN Driver by Using the Installer
26
Uninstalling the TWAIN Driver
28
Deleting the TWAIN Driver by Using Control Panel
28
Deleting the TWAIN Driver by Using the Installer
29
3 Scanning a Document
32
Using the Automatic Document Feeder
32
Using the Original Glass
34
4 Driver Settings
36
TWAIN Scanner Driver
36
Document Size
37
Scan Mode
38
Resolution
38
Scan Type
39
Duplex Scanning
39
Brightness
40
I/O Type
40
Help
41
About
41
Scan
41
Cancel
41
5 Error Messages
42
Paper Misfeeds
42
Clearing a Misfeed in the Automatic Document Feeder
43
Transmission Error
46
Scanning
46
Scanning Error
47
Automatic Document Feed no Paper
47
Other Machine Errors
48
Konica Minolta bizhub 181 User Manual (12 pages)
FTP Utility User Manual
Brand:
Konica Minolta
| Category:
Software
| Size: 0.77 MB
Table of Contents
About this Product
2
Trademarks and Registered Trademarks
2
System Requirements
3
Manual Structure
3
Advertisement
Related Products
Konica Minolta 1800767-001A
Konica Minolta bizhub 180
KONICA MINOLTA Minoltafax 1800
Konica Minolta bizhub 185
Konica Minolta PAGEPRO 1480MF
Konica Minolta bizhub 163
Konica Minolta PagePro 1100
Konica Minolta magicolor 1690MF
Konica Minolta bizhub PRESS 1250/1250P
KONICA MINOLTA Minoltafax 1400
Konica Minolta Categories
All in One Printer
Printer
Digital Camera
Measuring Instruments
Copier
More Konica Minolta Manuals
Login
Sign In
OR
Sign in with Facebook
Sign in with Google
Upload manual
Upload from disk
Upload from URL