Sign In
Upload
Manuals
Brands
Eaton Manuals
UPS
93PR Series
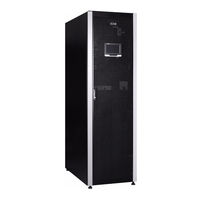
User Manuals: Eaton 93PR Series Power Supply
Manuals and User Guides for Eaton 93PR Series Power Supply. We have
4
Eaton 93PR Series Power Supply manuals available for free PDF download: Installation And Operation Manual, User And Installation Manual
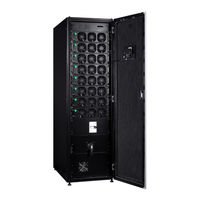
Eaton 93PR Series Installation And Operation Manual (143 pages)
Brand:
Eaton
| Category:
UPS
| Size: 11 MB
Table of Contents
Table of Contents
5
Chapter 1 SAFETY INSTRUCTIONS TIONS
12
CE Marking
14
User Precautions
14
Conventions Used in this Manual
15
Table 1-1: Acronyms and Abbreviations
16
Environment
17
For more Information
17
Chapter 2 INTRODUCTION
18
Figure 2-1: Eaton 93PR UPS
19
Figure 2-2: Components Layout (300 Kw)
20
Figure 2-3: Components Layout (600 Kw)
21
Figure 2-4: Components Layout (1200 Kw)
22
Figure 2-5: Components Layout (UPM)
23
Looking Inside the UPS System
24
Figure 2-6: 93PR 300Kw UPS Wiring Diagram
25
Figure 2-7: 93PR 600Kw UPS Wiring Diagram
26
Figure 2-8: 93PR 1200 Kw UPS Wiring Diagram
27
UPS Operating Modes
28
Normal Operating Modes
28
Figure 2-9: Path of Current through the UPS in Double Conversion Mode
29
Figure 2-10: Path of Current through the UPS in Energy Saver System
30
Stored Energy and Battery Mode
31
Figure 2-11: Path of Current through the UPS in Battery Mode
31
Bypass Mode
32
Figure 2-12: Path of Current through the UPS in Bypass Mode
32
UPS Features
33
Advanced Battery Management
33
Hot Sync
33
Module Hot Swap Feature
34
Variable Module Management System (VMMS)
34
Options and Accessories
34
Field Installed UPM
34
External Battery Cabinet (EBC)
35
Eaton Sync Control (Sync Control)
35
Top Exhaust Accessory
35
Software and Connectivity Features
34
Customer Interface
34
Power Management Software
34
Battery System
35
Basic System Configurations
36
Table 2-1: Standard and Optional UPS Options
36
Chapter 3 UPS INSTALLATION PLAN and UNPACKING
37
Creating an Installation Plan
37
Site Preparations
37
Environmental and Installation Considerations
37
Table 3-1: Dimensions and Weights
38
Figure 3-1: UPS Cabinet Clearances. See Table
39
Table 3-2: UPS Cabinet Minimum Clearances
39
Table 3-3: Air Conditioning or Ventilation Requirements During Full Load Operation
40
Figure 3-2: UPS Dimensions (300Kw-Rear Exhaust)
41
Figure 3-3: UPS Dimensions (300Kw-Top Exhaust)
42
Figure 3-4: UPS Dimensions (600Kw-Rear Exhaust)
43
Figure 3-5: UPS Dimensions (600Kw-Top Exhaust )
44
Figure 3-6: UPS Dimensions (1200Kw-Rear Exhaust)
45
Figure 3-7: UPS Dimensions (1200Kw-Top Exhaust )
46
Figure 3-8: UPM Dimensions
47
UPS System Power Wiring Preparation
48
Table 3-5: Maximum Recommended Multi-Core Cable Sizes (Unit:MM 2 )
49
Table 3-6: Minimum Recommended Multi-Core Cable Sizes (Unit:MM 2 )
50
Table 3-7: Rated and Maximum Currents for Rated Power and Voltage (Unit:a)
51
Table 3-8: UPS Power Cable Terminations
52
UPS System Interface Wiring Preparation
53
Chapter 4 UPS SYSTEM INSTALLATION
54
Preliminary Installation Information
54
Inspecting and Unpacking the UPS Cabinets
54
Figure 4-1: Straighten the Securing Tabs
56
Figure 4-5: Fork into Position
56
Figure 4-4: Remove the Shipping Bracket
56
Figure 4-2: Remove Wooden Box
56
Figure 4-3: Remove Cushioning
56
Instruction for Removing the UPM Module Packaging
57
Figure 4-6: Instruction for Removing the UPM Module Packaging
57
Instruction for Removing the Top Exhaust Accessory Packaging
58
Figure 4-7: Instruction for Removing the Top Exhaust Accessory Packaging
58
UPS System Installation (300 Kw)
59
Mechanically Joining the Cabinet Sections
59
Figure 4-8: Lifting Diagram Schematic
59
Routing Cables
60
Figure 4-9: Gland Plate and Connector Locations (Rear Exhaust)
61
Figure 4-10: Gland Plate and Connector Locations (Top Exhaust )
62
UPS System Installation (600 Kw)
63
Mechanically Joining the Cabinet Sections
63
Routing Cables
64
Figure 4-11: Gland Plate and Connector Locations (Rear Exhaust)
65
Figure 4-12: Gland Plate and Connector Locations (Top Exhaust )
66
UPS System Installation (1200 Kw)
67
Mechanically Joining the Cabinet Sections
67
Mechanical Connection between Primary Cabinet and Secondary Cabinet
67
Install Top Exhaust Accessory
69
Table 4-1: Signal Cables Connection between the Primary Cabinet and the Secondary Cabinet
69
Table 4-2: Signal Cables Connection of Top Exhaust Accessories
70
Connect the Signal Cables of Sync
71
Table 4-3: Signal Cables Connection of Sync
71
Figure 4-13: Mechanical Installation Instructions
72
Routing Cables
73
Figure 4-14: Gland Plate and Connector Locations (Rear Exhaust)
74
Figure 4-15: Gland Plate and Connector Locations (Top Exhaust)
75
Battery System Installation
76
Supported Battery Configuration
77
Figure 4-16: Separate Battery Configurations and Common Battery Configurations (300/600 Kw)
78
Figure 4-17: Separate Battery Configurations (1200 Kw)
79
Installing a Remote EPO Switch
80
Figure 4-18: Normally-Open REPO Switch Wiring
80
Table 4-4: Normally-Open REPO Connections and Wire Terminations
80
Figure 4-19: Normally-Closed REPO Switch Wiring
81
Table 4-5: Normally-Closed REPO Connections and Wire Terminations
81
Installing Interface Connections
82
Installing Customer Input Signals Interface
82
External Battery Breaker Wiring Interface
82
Relay Output Interface Connections
83
Mini-Slot Interface Connections
83
Installing Signal Interface Connections in Parallel System
83
Table 4-6: Dry Contact Output Terminal
83
Wiring Parallel 93PR UPS Systems
84
Power Wiring Overview
84
Figure 4-20: Principle of Paralleled UPS Systems (300/600 Kw)
86
Figure 4-21: Principle of Paralleled UPS Systems (1200 Kw)
87
Control Signals Overview
88
Installing Bypass Control Wiring
88
Figure 4-22: Simplified CAN and Pull-Chain Wiring for Parallel UPS System
88
Figure 4-23: CAN and Pull-Chain Wiring for Parallel UPS
89
Installing Eaton Sync Control
90
Figure 4-24: Sync Control TB1 Terminal Location
90
Chapter 5 COMMUNICATION INTERFACES
91
Figure 5-1: Communication Interfaces
91
Mini-Slots
92
Figure 5-2: Gigabit Network Card
92
Figure 5-3: Environmental Monitoring Probe Generation 2 (EMPG2)
92
Figure 5-4: Industrial Gateway Card
93
Figure 5-5: Powerxpert UPS Minislot Card (PXGMS UPS)
93
Figure 5-6: Relay Card-MS
94
Figure 5-7: Industrial Relay Card
94
Intelligent Power Software
95
Signal Input Monitoring
95
General Purpose Relay Contact
95
Chapter 6 UPS OPERATING INSTRUCTIONS
96
Ups Controls and Indicators
96
Control Panel
96
Lps
96
Figure 6-1: UPS Controls and Indicators
97
Table 6-1: Status Indicator
97
Control Panel
98
Figure 6-2: UPS Color Touch Screen Control Panel (Typical)
98
Signing in
99
Status Indicators
99
Table 6-2: Status Indicator
99
Figure 6-3: Parts of the Touch Screen
100
Figure 6-4: Sign in or Password Request Screen
100
Home Screen(Online)
101
Table 6-3: Security Levels and Functions
101
Table 6-4: UPS Menu Structure
101
Figure 6-5: Home Screen
102
Figure 6-6: Output Kva Screen from Home Screen
102
Figure 6-7: Average Efficiency Screen from Home Screen
103
Figure 6-8: Consumption Screen from Home Screen
103
Figure 6-10: Input Meters Screen
104
Figure 6-9: Meters Summary Screen
104
Meters
104
Figure 6-11: Bypass Meters Screen
105
Figure 6-12: Output Meters Screen
105
Figure 6-13: Input Meters Detail Screen
106
Figure 6-14: Online Mode Metering Method Option Screen
106
Figure 6-15: Select Source Screen
106
Figure 6-16: Battery Meters Screens
107
Figure 6-17: Battery Voltage Screens
107
Figure 6-18: Battery Current Screens
107
Controls
108
Figure 6-19: System Controls Screen
108
Figure 6-20: UPS Controls Screen
108
Figure 6-21: Module Controls Screen
109
Figure 6-22: Module Control Detail Screen
109
Figure 6-23: Turn on Charger Confirmscreen
109
Figure 6-24: Energy Advantage Architecture (EAA) Screen
110
Figure 6-25: Enable ESS Confirmscreen
110
Figure 6-26: Enable VMMS Confirmscreen
110
Figure 6-27: Enable ABM Confirmscreen
111
Figure 6-28: Clear Alarms Confirmscreen
111
Figure 6-29: UPS MIMIC Screen
111
Mimics
111
Figure 6-30: UPS Module Map Screen
112
Figure 6-31: System Overview Screen
112
Figure 6-32: ESS Screen
112
Figure 6-33: System Events Screen
113
Logs
113
Figure 6-34: System Log Screen
114
Figure 6-35: Active Event Detail Screen
114
Figure 6-36: Service Log Screen
115
Figure 6-37: Change Log Screen
115
Figure 6-38: Statistics Data Detail Screen
116
Figure 6-39: User Screen Screen
116
Settings
116
Statistics
116
Figure 6-40: Configuration Options Screen
117
Figure 6-41: Prompt for Level 3 Password Screen
117
System Control Instructions
118
Starting the UPS System in Double Conversion Mode
118
Starting the UPS System in Bypass Mode
118
Transfer from Double Conversion Mode to Bypass Mode
119
Transfer from Bypass to Double Conversion Mode
119
Transfer from Double Conversion Mode to Energy Saver System Mode
120
Transfer from Energy Saver System Mode to Double Conversion Mode
120
UPS System and Critical Load Shutdown
120
Energizing the Critical Load
121
UPS Control Instructions
122
Starting a Single UPS
122
UPS Shutdown
122
Enabling and Disabling the Battery Charger
123
UPM Control Instructions
123
Adding/Reducing/Replacing Modules Online
123
Figure 6-42: UPM Module Location
125
Starting the Upms
126
UPM Shutdown
126
Using the Remote Emergency Power-Off Switch
127
Transfer the UPS from Double Conversion Mode to Maintenance Bypass Mode
128
Figure 6-43: Double Conversion Mode
128
Figure 6-44: Maintenance Bypass Mode
128
Transfer UPS from Maintenance Bypass to Double Conversion Mode
129
Figure 6-45: Maintenance Bypass Mode
129
Figure 6-46: Double Conversion Mode
129
Chapter 7 UPS MAINTENANCE
130
Important Safety Instructions
130
Performing Preventive Maintenance
131
DAILY Maintenance
131
MONTHLY Maintenance
131
PERIODIC Maintenance
131
ANNUAL M Aintenance
132
BATTERY Maintenance
132
Recycling the Used UPS or Batteries
132
Maintenance Training
132
Figure 7-1: WEEE Symbol
132
Figure 7-2: Recycling Batteries Symbol
132
Chapter 8 TECHNICAL DATA
133
Standards
133
Table 8-1: Standards
133
UPS System Input
134
Table 8-2: UPS System Input
134
UPS System Output
135
Table 8-3: UPS System Output
135
Battery Specification
136
Table 8-4: Battery Specification
136
UPS Environmental Specifications
137
Table 8-5: UPS Environmental Specifications
137
Chapter 9 WARRANTY
138
Chapter 10 INSTALLATION CHECKLIST
139
Chapter 11 APPENDIX A: USER SETTINGS
141
Table 11-1: User Settings
141
Table 11-2: Config Settings
141
Advertisement
Eaton 93PR Series Installation And Operation Manual (122 pages)
Brand:
Eaton
| Category:
UPS
| Size: 8 MB
Table of Contents
Table of Contents
27
Chapter 1 SAFETY INSTRUCTIONS TIONS
33
Certification
35
User Precautions
35
Conventions Used in this Manual
36
Table 1-1: Acronyms and Abbreviations
37
Environment
38
Getting Help
38
Chapter 2 INTRODUCTION
39
Figure 2-1: Eaton 93PR UPS
39
Figure 2-2: Structure of 15-40K Product
40
Figure 2-3: Structure of 60-80K Product
41
Internal Structure of UPS System
42
Figure 2-4: 93PR UPS Wiring Diagram
42
Operation Modes of the UPS
43
AC Power Online Operation Mode
43
Figure 2-5: Route of the Electric Energy Running through the UPS in Online Mode
44
Figure 2-6: Route of the Electric Energy Running through the UPS in ESS Mode
45
Battery Mode
46
Figure 2-7: Route of the Electric Energy Running through the UPS in Battery Mode
46
Bypass Mode
47
Figure 2-8: Route of the Electric Energy Running through the UPS in Bypass Mode
47
Features of the UPS
48
Advanced Battery Management(ABM)
48
Eaton Hotsync Wireless Parallel Technology (Hotsync)
48
Software and Communication Features
48
User Interface
48
Power Supply Management Software
49
Battery System
49
Basic System Configuration
49
Table 2-1: Standards and Optional UPS Accessories
49
Chapter 3 UPS INSTALLATION PLAN
50
Creating an Installation Plan
50
Site Preparations
51
Environmental and Installation Precautions
51
Table 3-1: Dimensions and Weights
52
Figure 3-1: Clearance for the UPS Cabinet
53
Table 3-2: Space Reservation for the UPS Cabinet
53
Figure 3-2: UPS Dimensions (15-40K)
54
Figure 3-3: UPS Dimensions (60-80K)
55
Power Supply and Wiring Preparation of the UPS System
56
Table 3-4: Requirements on 15-20K Connecting Terminals and Torque
58
Table 3-5: Requirements on 30-40K Connecting Terminals and Torques
59
Table 3-6: Requirements on 60-80K Connecting Terminals and Torques
60
Preparation for UPS Interface Wiring
61
Chapter 4 UPS SYSTEM INSTALLATION
62
Preliminary Installation Information
62
UPS Cabinet Inspection and Unpacking
62
Figure 4-1: 15-40K Unpacking Diagram
64
Figure 4-2: 60-80K Unpacking Diagram
65
System Installation
66
Mechanical Installation
66
Cable Installation
66
Figure 4-3: Gland Plate and Connector Locations
67
Figure 4-4: Locations of Cover Plate and Connecting Terminals (60-80K)
68
Installation of External Battery Cabinet
69
Supported Battery Configurations
70
Wiring of the UPS Parallel System
70
Overview of Power Cables
70
Control Signal Overview
72
Figure 4-5: Schematic Diagram of the Parallel UPS System
72
Installation of the Parallel Control Wiring
73
Figure 4-6: Simplified Wiring of CAN and Pull-Chain of the Parallel UPS System
73
Chapter 5 COMMUNICATION INTERFACES
74
Figure 5-1: Communication Interfaces
74
Mini-Slots
76
Figure 5-2: Gigabit Network Card
76
Figure 5-3: Second-Generation Environmental Monitoring Probe
76
Figure 5-4: Industrial Gateway Card
77
Figure 5-5: Standard AS400/RS232 Card
77
Intelligent Power Manager (IPM) Software
78
Signal Input Monitoring
78
Chapter 6 UPS OPERATING INSTRUCTIONS
79
UPS Control Panel and Indicator Lamps
79
Control Panel
79
Figure 6-1: UPS Controls and Indicators
80
Use of LCD Control Panel
81
Status Indicator Lamps
81
System Logs
81
Table 6-1: Status Indicator Lamps
81
Use of Touch Screen
82
Use Menu
82
Figure 6-2: Components of the Touch Screen (Home Interface)
82
Meters
83
Figure 6-3: Menu Interface
83
Table 6-2: Options Displayed on the Menu
83
Table 6-3: Menu of Meters Functions
83
Figure 6-4: Input Interface
84
Figure 6-5: Output Interface
84
Figure 6-6: Bypass Interface
84
System Control Instructions
85
Figure 6-7: Battery Interface
85
Figure 6-8: Password Verification Interface
85
Table 6-4: Structure of Control Menu
85
Figure 6-9: System Interface
86
Figure 6-10: Switch to Bypass Interface
86
Figure 6-11: Confirmation Interface
87
Figure 6-12: UPS Interface
87
Use of Log Menu
88
Figure 6-13: UPM Interface
88
Figure 6-14: UPM Shutdown Interface
88
Table 6-5: Structure of Log Menu
88
Figure 6-15: Active Log Interface
89
Figure 6-16: History Log Interface
89
Figure 6-17: Clear Log Interface
89
Use of Info. Menu
90
Use of Setting Menu
90
Figure 6-18: Info. Interface 1
90
Figure 6-19: Info. Interface 2
90
Figure 6-20: Password Verification Setting Interface
91
Figure 6-21: Setting Interface
91
Table 6-6: Structure of Setting Menu
91
Figure 6-22: Setting - General Interface
92
Figure 6-23: Setting - General - Time Interface
92
Figure 6-24: Setting - Output Interface
93
Figure 6-25: Setting - Meters Interface
93
Figure 6-26: Setting - Password Interface
93
Figure 6-27: Control Password Modification Interface
94
Figure 6-28: Control Password Modification Interface
94
Figure 6-29: Control Password Modification Interface
95
Figure 6-30: Control Password Modification Interface
95
Use of Service Reminder Function
96
Figure 6-31: Setting Password Modification Interface
96
Figure 6-32: Service Maintenance Reminder Interface
96
Figure 6-33: Service Maintenance Reminder Setting Interface
97
Figure 6-34: Location of Service Reminder Function
97
Figure 6-35: Service Reminder Settings Page
98
Figure 6-36: Fan Replacement Reminder Settings
98
System Operation
99
Start the UPS in "Online" Mode (Default Mode)
99
Start the UPS in "Bypass" Mode
99
Switch from "Online" Mode to "Bypass" Mode
100
Switch from "Bypass" Mode to "Online" Mode
100
Switch from "Online" Mode to "ESS" Mode
101
Switch from "ESS" Mode to "Online" Mode
101
System Shutdown
101
Single-UPS Operation
102
Single-UPS Startup
102
UPS Shutdown
103
Use of Remote Emergency Power off (REPO) Switch
104
Transfer the UPS from Double Conversion Mode to Maintenance Bypass Mode
105
Figure 6-37: Switch Status in Online Mode
105
Figure 6-38: Switch Status in Maintenance Bypass Mode
105
Switch from "Maintenance Bypass" Mode to "Online" Mode
106
Figure 6-39: Switch Status in Maintenance Bypass Mode
106
Figure 6-40: Switch Status in Online Mode
106
Chapter 7 UPS MAINTENANCE
107
Important Safety Instructions
107
Carry out Preventive Maintenance
108
Daily Maintenance
108
Monthly Maintenance
108
Figure 7-1: Location of 15-40K Air Filter Screen
109
Figure 7-2: Location of 60-80K Air Filter Screen
109
Regular Maintenance
110
Annual Maintenance
110
Battery Maintenance
110
Installation of Battery
110
Maintenance Training
111
Chapter 8 Technical Indicators of Product
112
Models
112
Technical Indicators
112
Standard
112
UPS Input
113
UPS Output
113
Battery Specifications
114
Environment
114
Table 8-2: Requirements on the Environment for Transportation and Storage Within 1 Year
115
Chapter 9 WARRANTY
116
Chapter 10 INSTALLATION CHECKLIST
117
Table 10-1: User Settings
119
Table 10-2: Configuration Settings
119
Eaton 93PR Series User And Installation Manual (98 pages)
Brand:
Eaton
| Category:
UPS
| Size: 11 MB
Table of Contents
Table of Contents
5
1 Introduction
10
1.1 Audience
11
CE Marking
11
User Precautions
12
Environment
12
Symbols on the UPS and Accessories
13
Conventions Used in this Manual
13
For more Information
14
2 Introduction to EATON UPS
15
Looking Inside the UPS System
16
Figure 2-1. Eaton 93PR UPS
16
Figure 2-2. 93PR 25-75 Kw UPS Wiring Diagram (Without Internal Battery Version)
17
Figure 2-3. 93PR 25-75 Kw UPS Wiring Diagram (with Internal Battery Version)
18
UPS Operating Modes
19
Normal Operating Modes
19
Figure 2-4. Path of Current through the UPS in Double Conversion Mode
20
Figure 2-5. Path of Current through the UPS in Energy Saver System
21
Stored Energy and Battery Mode
22
Figure 2-6. Path of Current through the UPS in Battery Mode
22
Bypass Mode
23
Figure 2-7 . Path of Current through the UPS in Bypass Mode
23
UPS Features
24
Advanced Battery Management
24
Eaton Hot Sync
24
Module Hot Swap Feature
24
Variable Module Management System (VMMS)
25
2.4 Software And Connectivity Features
25
Customer Interface
25
Power Management Software
25
Options and Accessories
25
Figure 2-8. Two-Switch MBS Electrical Connection Drawing
26
Figure 2-9. Three-Switch MBS Electrical Connection Erawing
27
Eaton Sync Control
28
External Battery Cabinet (EBC)
28
External Switch Cabinet (ESC)
28
Field Installed UPM
28
Parallel Tie Cabinet (PTC)
28
Precise Power-Distribution Module (PPM)
28
Battery System
29
Basic System Configurations
29
Table 2-1. UPS Configurations
29
Table 2-2. Standard and Optional UPS Options
30
3 UPS Installation Plan and Unpacking
31
Creating an Installation Plan
31
Site Preparations
31
Environmental and Installation Considerations
31
Table 3-1. Dimensions
32
Table 3-2. UPS Cabinet Weights
32
Figure 3-1. UPS Cabinet Clearances. See Table
33
Table 3-3. UPS Cabinet Minimum Clearances
33
Table 3-4. Air Conditioning or Ventilation Requirements During Full Load Operation
34
Figure 3-2. 93PR 25-75 Kw UPS Dimensions
35
UPS System Power Wiring Preparation
36
Figure 3-3. UPM Dimensions
36
Table 3-5. Maximum Recommended Multi-Core Cable Sizes
37
Table 3-6. Minimum Recommended Multi-Core Cable and Fuse Sizes
37
Table 3-7: Rated And Maximum Currents For Rated Power And Voltage
37
Table 3-8. UPS Power Cable Terminations
38
UPS System Interface Wiring Preparation
39
Unpacking and Unloading the UPS
40
Figure 3-4. Remove All Fixed Shipping Brackets and Screw Fixed on the Pallet
42
Figure 3-5. Attaching the Ramp to the Pallet
42
Figure 3-6. Rolling the Cabinet down the Ramp
42
Instruction for Removing the Module Packaging
43
Figure 3-7 . Instruction for Removing the Module Packaging
43
Instruction for Removing the Battery Module Packaging
44
Figure 3-8. Instruction for Femoving the Battery Module Packaging
44
4 UPS SYSTEM Installation
45
Steps to Install the UPS
45
Figure 4-1. 93PR 25-75 Kw Gland Plate and Connector Locations (with Internal Battery Version)
46
Figure 4-2. 93PR 25-75 Kw Gland Plate and Connector Locations (Without Internal Battery Version)
47
Battery System Installation
48
Figure 4-3. Take out the Battery Modules from the Package
48
Figure 4-4. Open the Battery Terminal Cover
48
Figure 4-5. Install the Battery Module
49
4.3 Installing A Remote Epo Switch
51
Figure 4-6. Connections of the EPO Switch
51
Table 4-1. Remote EPO Wire Terminations
51
Installing Interface Connections
52
Installing Customer Input Signals Interface
52
External Battery Breaker Wiring Interface
52
Relay Output Interface Connections
52
Mini-Slot Interface Connections
53
Installing Signal Interface Connections in Parallel System
53
Table 4-2. Dry Contact Output Terminal
53
4.5 Wiring Parallel 93PR UPS Systems
54
Power Wiring Overview
54
Figure 4-7 . Principle of Paralleled UPS Systems
55
Control Signals Overview
56
Installing Bypass Control Wiring
56
Figure 4-9. Pimplified CAN and Pull-Chain Wiring for Parallel UPP System
57
Figure 4-10. CAN and Pull-Chain Wiring for Parallel UPP with Mobs
57
Figure 4-11. CAN and Pull-Chain Wiring for Parallel UPP Without Mobs
58
Installing Eaton Sync Control
59
Figure 4-12. Sync Control TB1 Terminal Location
59
5 Communication Interfaces
60
Figure 4-8. Communication Interfaces
60
Figure 5-1. Communication Interfaces
60
Figure 5-2. Network Card-MS
61
Figure 5-3. PX Gateway Card
61
Mini-Slots
61
Figure 5-4. Relay Card-MS
62
Figure 5-5. Network and MODBUS Card - MS
62
5.2 Intelligent Power Software
63
Figure 5-6. Industrial Relay Card-MS
63
General Purpose Relay Contact
63
Signal Input Monitoring
63
6 Ups Operating Instructions
64
Figure 6-1. UPS Switch Position
65
UPS Controls and Indicators
66
Control
66
Figure 6-2. Parts of the Display
66
Status Indicators
67
Figure 6-3. Green Symbol
67
Figure 6-4. Yellow Symbol -Battery Mode
67
Figure 6-5. Green Symbol
67
Figure 6-6. Yellow Symbol-Battery Mode
67
UPS Status Lights
68
System Events
68
Figure 6-7: UPS Status Lights
68
Steps to Operate the UPS
69
Table 6-1. UPS Menu Structure
69
Signing in (Display Password)
70
System Control Instructions
71
Starting the UPS System in Double Conversion Mode
71
Starting the UPS System in Bypass Mode
72
6.4.3 Transfer from Double Conversion Mode to Bypass Mode
72
6.4.4 Transfer from Bypass to Double Conversion Mode
73
6.4.5 Transfer from Double Conversion Mode to Energy Saver System Mode
73
6.4.6 Transfer from Energy Saver System Mode to Double Conversionmode
73
UPS System and Critical Load Shutdown
73
De-Energizing the Critical Load
74
UPS Control Instructions
75
Starting a Single UPS
75
UPS Shutdown
76
Enabling and Disabling the Battery Charger
76
UPM Control Instructions
76
Adding/Reducing/Replacing Modules Online
76
Figure 6-8. UPM Module Location
78
Starting the Upms
79
UPM Shutdown
79
6.7 Using The Remote Emergency Power-Off Switch
80
Transfer UPS from Double Conversion Mode to Maintenance Bypass
80
Figure 6-9. the Normal Positions of the MBS Switches and Rectifier Disconnect Switch
81
Figure 6-10 Maintenance Bypass Mode
81
6.9 Transfer UPS from Maintenance Bypass to Double Conversion Mode
82
Figure 6-11. Maintenance Bypass Mode
82
Figure 6-12. Double Conversion Mode
82
STS Module
83
Figure 6-13. STS Module
83
7 Ups Maintenance
84
Important Safety Instructions
84
Performing Preventive Maintenance
85
DAILY Maintenance
85
MONTHLY Maintenance
85
PERIODIC Maintenance
85
ANNUAL Maintenance
86
BATTERY Maintenance
86
Recycling the Used UPS or Batteries
86
Figure 7-1. WEEE Symbol
86
Maintenance Training
87
Figure 7-2. Recycling Batteries Symbol
87
8 Technical Data
88
Standards
88
Table 8-1. Standards
88
UPS System Input
89
Table 8-2. UPS System Input
89
UPS System Output
90
Table 8-3. UPS System Output
90
Battery Specification
91
Table 8-4. Battery Specification
91
UPS Environmental Specifications
92
Table 8-5. UPS Environmental Specifications
92
9 Warranty
93
10 Installation Checklist
94
11 Appendix A: USER SETTINGS
95
Table 11-1. User Settings
95
Table 11-2. Config Settings
95
Advertisement
Eaton 93PR Series User And Installation Manual (92 pages)
500 kW
Brand:
Eaton
| Category:
UPS
| Size: 26 MB
Table of Contents
Table of Contents
5
Chapter 1 SAFETY INSTRUCTIONS
11
Audience
12
CE Marking
12
User Precautions
13
Environment
13
Conventions Used in this Manual
14
Symbols on the UPS and Accessories
15
For more Information
15
Chapter 2 INTRODUCTION
16
Figure 2-1: Eaton 93PR UPS
17
Figure 2-2: Position Indication
18
Looking Inside the UPS System
19
Figure 2-3: 93PR 500Kw UPS Wiring Diagram
20
UPS Operating Modes
21
Normal Operating Modes
21
Figure 2-4: Path of Current through the UPS in Double Conversion Mode
22
Figure 2-5: Path of Current through the UPS in Energy Saver System
23
Stored Energy and Battery Mode
24
Figure 2-6: Path of Current through the UPS in Battery Mode
24
Bypass Mode
25
Figure 2-7: Path of Current through the UPS in Bypass Mode
25
UPS Features
26
Advanced Battery Management
26
Hot Sync
26
Module Hot Swap Feature
26
Top / Bottom Cable Entry Compatible
27
Variable Module Management System (VMMS)
27
Options and Accessories
27
Field Installed UPM
27
External Battery Cabinet (EBC)
27
Software and Connectivity Features
27
Customer Interface
27
Power Management Software
27
Basic System Configurations
28
Battery System
28
Table 2-1: Standard and Optional UPS Options
28
Chapter 3 UPS INSTALLATION PLAN and UNPACKING
29
Creating an Installation Plan
29
Site Preparations
29
Environmental and Installation Considerations
29
Table 3-1: Dimensions
30
Table 3-2: UPS Cabinet Weights
30
Figure 3-1: UPS Cabinet Clearances. See Table
31
Table 3-3: UPS Cabinet Minimum Clearances
31
Table 3-4: Air Conditioning or Ventilation Requirements During Full Load Operation
32
Figure 3-2: UPS Dimensions
33
Figure 3-3: UPM Dimensions
34
UPS System Power Wiring Preparation
35
Table 3-5: Rated and Maximum Currents for Rated Power and Voltage
36
Table 3-6: Maximum Support Multi-Core Cable Sizes
37
Table 3-7: Minimum Recommended Multi-Core Cable and Fuse Sizes
37
Table 3-8: UPS Power Cable Terminations
38
UPS System Interface Wiring Preparation
39
Inspecting and Unpacking the UPS Cabinets
40
Figure 3-4: Straighten the Securing Tabs
41
Figure 3-6: Remove Cushioning
41
Figure 3-5: Remove Wooden Box
41
Figure 3-7: Remove the Shipping Bracket
42
Figure 3-8: Fork into Position
42
Instruction for Removing the UPM Module Packaging
43
Figure 3-9: Instruction for Removing the UPM Module Packaging
43
Chapter 4 UPS SYSTEM INSTALLATION
44
Steps to Install the UPS
44
Figure 4-1: Gland Plate and Connector Locations
45
Battery System Installation
46
Support Common Battery
47
Figure 4-2: Separate Battery Configurations
47
Figure 4-3: Common Battery Configurations
48
Installing a Remote EPO Switch
49
Installing Interface Connections
49
Figure 4-4: Connections of the EPO Switch
49
Table 4-1: Remote EPO Wire Terminations
49
External Battery Breaker Wiring Interface
50
Installing Customer Input Signals Interface
50
Mini-Slot Interface Connections
50
Relay Output Interface Connections
50
Table 4-2: Dry Contact Output Terminal
50
Installing Signal Interface Connections in Parallel System
51
Wiring Parallel 93PR UPS Systems
51
Power Wiring Overview
51
Figure 4-5: Principle of Paralleled UPS Systems
53
Control Signals Overview
54
Installing Bypass Control Wiring
54
Figure 4-6: Communication Interfaces
54
Figure 4-7: Simplified CAN and Pull-Chain Wiring for Parallel UPP System
55
Figure 4-8: CAN and Pull-Chain Wiring for Parallel UPS
55
Chapter 5 COMMUNICATION INTERFACES
56
Figure 5-1: Communication Interfaces
56
Mini-Slots
57
Figure 5-2: Gigabit Network Card
57
Figure 5-3: Environmental Monitoring Probe Generation 2 (EMPG2)
57
Figure 5-4: Industrial Gateway Card
58
Figure 5-5: Powerxpert UPS Minislot Card (PXGMS UPS)
58
Intelligent Power Software
59
Figure 5-6: Relay Card-MS
59
Figure 5-7: Industrial Relay Card
59
Signal Input Monitoring
60
General Purpose Relay Contact
60
Chapter 6 UPS OPERATING INSTRUCTIONS
61
Figure 6-1: UPS Controls and Indicators
61
Lps
62
Control Panel
62
Figure 6-2: UPS Color Touch Screen Control Panel (Typical)
62
Table 6-1: Status Indicator
62
Signing in
63
Status Indicators
63
Table 6-2: Status Indicator
63
Figure 6-3: Parts of the Touch Screen
64
Figure 6-4: Sign in or Password Request Screen
64
Table 6-3: Security Levels and Functions
65
Table 6-4: UPS Menu Structure
65
Using the Main Menu Buttons
65
System Events
66
System Control Instructions
66
Starting the UPS System in Double Conversion Mode
66
Starting the UPS System in Bypass Mode
67
Transfer from Double Conversion Mode to Bypass Mode
67
Transfer from Bypass to Double Conversion Mode
68
Transfer from Double Conversion Mode to Energy Saver System Mode
68
Transfer from Energy Saver System Mode to Double Conversion Mode
68
UPS System and Critical Load Shutdown
68
Energizing the Critical Load
69
UPS Control Instructions
70
Starting a Single UPS
70
UPS Shutdown
70
Enabling and Disabling the Battery Charger
71
UPM Control Instructions
71
Adding/Reducing/Replacing Modules Online
71
Figure 6-7: UPM Module Location
73
Starting the Upms
74
UPM Shutdown
74
Using the Remote Emergency Power-Off Switch
75
Transfer the UPS from Double Conversion Mode to Maintenance Bypass Mode
76
Figure 6-8: Double Conversion Mode
76
Figure 6-9: Maintenance Bypass Mode
77
Transfer UPS from Maintenance Bypass to Double Conversion Mode
78
Figure 6-10: Maintenance Bypass Mode
78
Figure 6-11: Double Conversion Mode
79
Chapter 7 UPS MAINTENANCE
80
Important Safety Instructions
80
Performing Preventive Maintenance
81
DAILY Maintenance
81
MONTHLY Maintenance
81
PERIODIC Maintenance
81
ANNUAL M Aintenance
82
BATTERY Maintenance
82
Recycling the Used UPS or Batteries
82
Maintenance Training
82
Figure 7-1: WEEE Symbol
82
Figure 7-2: Recycling Batteries Symbol
82
Chapter 8 TECHNICAL DATA
83
Standards
83
Table 8-1: Standards
83
UPS System Input
84
Table 8-2: UPS System Input
84
UPS System Output
85
Table 8-3: UPS System Output
85
Battery Specification
86
Table 8-4: Battery Specification
86
UPS Environmental Specifications
87
Table 8-5: UPS Environmental Specifications
87
Chapter 9 WARRANTY
88
Chapter 10 INSTALLATION CHECKLIST
89
Chapter 11 APPENDIX A: USER SETTINGS
90
Table 11-1: User Settings
90
Table 11-2: Config Settings
90
Advertisement
Related Products
Eaton 93PR 25(75)
Eaton 93PR 50(75)
Eaton 93PR 75(75)
Eaton 93PR-300
Eaton 93PR-600
Eaton 93PR-1200
Eaton 93PR-15kVA
Eaton 93PR-20kVA
Eaton 93PR-30kVA
Eaton 93PR-40kVA
Eaton Categories
UPS
Circuit breakers
Switch
Industrial Equipment
Industrial Electrical
More Eaton Manuals
Login
Sign In
OR
Sign in with Facebook
Sign in with Google
Upload manual
Upload from disk
Upload from URL