Eaton 93PR Series User And Installation Manual
Hide thumbs
Also See for 93PR Series:
- User and installation manual (92 pages) ,
- Installation and operation manual (143 pages) ,
- Installation and operation manual (122 pages)
Table of Contents
Advertisement
Quick Links
Advertisement
Table of Contents

Related Manuals for Eaton 93PR Series


Summary of Contents for Eaton 93PR Series
- Page 1 Eaton 93PR UPS 25-75 kW User's and Installation Guide...
- Page 3 Eaton 93PR UPS 25-75 kW User's and Installation Guide...
- Page 4 The contents of this manual are the copyright of the publisher and may not be reproduced (even extracts) without the written approval of Eaton Corporation. Every care has been taken to ensure the accuracy of the information contained in this manual, but no liability can be accepted for any errors or omission. The right to make design...
-
Page 5: Table Of Contents
INTROdUCTION TO EATON UPS ........ - Page 6 Installing Eaton Sync Control ........
- Page 7 6.4.7 UPS system and Critical Load Shutdown ..........6.4.8 De-energizing the Critical Load .
- Page 8 Eaton 93PR UPS ........
- Page 9 list of Tables Table 2-1. UPS Configurations ..............Table 2-2.
-
Page 10: Introduction
SAFETY INSTRUCTIONS IMPORTANT SAFETY INSTRUCTIONS SAVE THESE INSTRUCTIONS This manual contains important instructions that should be followed during installation and maintenance of the UPS and batteries. Please read all instructions before operating the equipment and save this manual for future reference. The UPS operates with mains, battery or bypass power. It contains components that carry high currents and voltages. -
Page 11: 1.1 Audience
• LV Directive (Safety) 2006/95/EC • EMC Directive 2004/108/EC Declaration of conformity with UPS harmonised standards and directives EN 62040-1 (Safety) and EN 62040-2 (EMC) are available at http://powerquality.eaton.com or by contacting your nearest Eaton office or authorized partner. 25-75 kW User's and Installation Guide... -
Page 12: User Precautions
User Precautions The only user operations permitted are: • Start up and shut down of the UPS, excluding the commissioning start up. • Add or replace the hot-swappable UPM(s). • Use of the LCD control panel and Maintenance Bypass Switch (MBS). • Use of optional connectivity modules and their software. The user must follow the precautions and only perform the described operations. Any deviation from the instructions could be dangerous to the user or cause accidental load loss. WARNING The user is not permitted to open any screws excluding connectivity plates and the MBS locking plate. Failure to recognise the electrical hazards could prove fatal. -
Page 13: Symbols On The Ups And Accessories
Symbols on the UPS and Accessories The following are examples of symbols used on the UPS or accessories to alert you to important information: RISk OF ElECTRIC SHOCk - Indicates that a risk of electric shock is present and the associated warning should be observed. -
Page 14: For More Information
For More Information Address any inquiries about the UPS and battery cabinet to the local office or agent authorized by the manufacturer. Please quote the type code and the serial number of the equipment. Call your local service representative if help is needed with any of the following: •... -
Page 15: Introduction To Eaton Ups
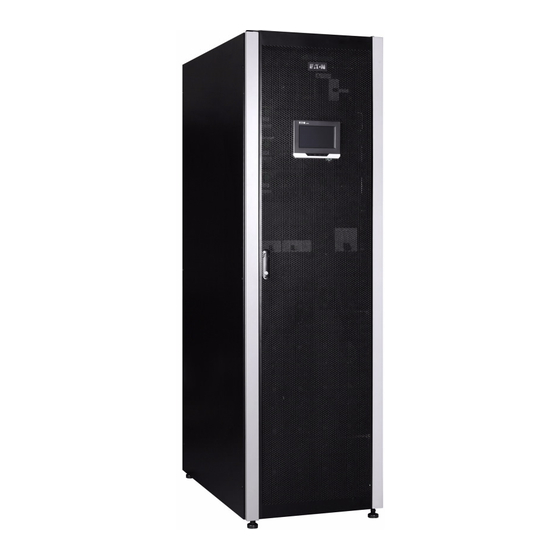
AC power to critical load and protects it from power failures. Eaton 93PR has flexible power scalability from 25 kW to 300 kW, hot swappable modular and standard design, high flexibility and applicability, market leading efficiency, availability and performance, very suitable to applications of micro data center (MDC), small-middle-large data center, automation, medical etc. -
Page 16: Looking Inside The Ups System
Figure 2-1: Eaton 93PR UPS looking Inside the UPS System The system level static bypass in the Eaton 93PR UPS cabinet determines the attainable output power of the UPS. The static bypass line consists of static switch and a backfeed protection isolation device connected in series. -
Page 17: Figure 2-2. 93Pr 25-75 Kw Ups Wiring Diagram (Without Internal Battery Version)
The 25-75kW UPS includes a 75 kW rated static bypass section, max. 8 internal paralleled UPM modules, It's including internal battery version and without Internal Battery Version. Figure 2-2: 93PR 25-75 kW UPS Wiring Diagram (Without Internal Battery Version) 25-75 kW User's and Installation Guide... -
Page 18: Figure 2-3. 93Pr 25-75 Kw Ups Wiring Diagram (With Internal Battery Version)
Figure 2-3: 93PR 25-75 kW UPS Wiring Diagram (With Internal Battery Version) 25-75 kW User's and Installation Guide... -
Page 19: Ups Operating Modes
The UPS is including rectifier input switch, output switch, bypass switch and MBS switch, N as default. And for internal battery version, battery breaker will be as standard units. If utility power is interrupted or falls outside the parameters specified in Chapter 8 Technical data, the UPS uses a backup battery supply to maintain power to the critical load for a specified period of time or until the utility power returns. -
Page 20: Figure 2-4. Path Of Current Through The Ups In Double Conversion Mode
Internal relay contacts Figure 2-4: Path of current through the UPS in double Conversion Mode Three-phase AC input power is converted to DC using a multilevel converter with IGBT devices to produce a regulated DC voltage to the inverter. The UPS status indicated on the display is “Unit Online” and the UPM status is “Active”... -
Page 21: Figure 2-5. Path Of Current Through The Ups In Energy Saver System
2.2.1.2 Energy Saver System Mode In ESS mode the UPS safely provides mains current directly to the load when the input is within the acceptable limits by its voltage and frequency. The UPS status indicated on the display is “Unit Online ESS” , and the UPM status is “Active”... -
Page 22: Stored Energy And Battery Mode
2.2.2 Stored Energy and Battery Mode When running normally in double conversion or ESS mode, the UPS automatically transfers to supply the load from batteries or other stored energy source if a utility power outage occurs, or if the utility power does not conform to specified parameters. -
Page 23: Bypass Mode
2.3 UPS features 25-75 kW The Eaton UPS has many features that provide cost-effective and consistently reliable power User's and Installation Guide protection. The feature descriptions provide a brief overview of the UPS standard features. -
Page 24: Ups Features
2.3.2 Eaton Hot Sync Eaton Hot Sync technology is an algorithm that eliminates the single point of failure in a parallel system and therefore enhances the system reliability. The Hot Sync technology is incorporated in all Eaton 93PR UPSs, and it is utilised in both multi-module internal parallel and external parallel systems. -
Page 25: Variable Module Management System (Vmms)
2..3.4 Variable Module Management System (VMMS) Eaton Variable Management Module System (VMMS) is a key component of Eaton EAA. Eaton VMMS technology maximizes UPS efficiencies at low load levels while supporting the load with continuous double- conversion power but increase the system efficiency by dynamic adjusting the UPM active and idle. -
Page 26: Figure 2-8. Two-Switch Mbs Electrical Connection Drawing
1. Maintenance Bypass Switch (MBP) 2. Maintenance Isolation Switch (MIS) Figure 2-8: Two-Switch MBS Electrical Connection Drawing 25-75 kW User's and Installation Guide... -
Page 27: Figure 2-9. Three-Switch Mbs Electrical Connection Erawing
1. Bypass Input Breaker (BIB) 2. Maintenance Isolation Switch (MIS) 3. Maintenance Bypass Switch (MBP) Figure 2-9: Three-Switch MBS Electrical Connection Drawing For external MBS installation instructions, see a separate manual. 25-75 kW User's and Installation Guide... -
Page 28: External Switch Cabinet (Esc)
Load Sync Enable pushbutton on the front of the panel. When enabled, the Load Sync Enable pushbutton illuminates. The Eaton Sync Control panel provides a three phase synchronization reference to each system. Each system uses this reference to regulate the inverter phase relationship so that the two system outputs can maintain synchronization with each other. -
Page 29: Battery System
93PR 25-75 kW units The Eaton 93PR25-75kW UPS is including internal battery version and external battery version. The external battery version UPS supports external batteries. For detailed battery specifications, see Chapter 8 Technical data. -
Page 30: Table 2-2. Standard And Optional Ups Options
UPS Internal Options The following table shows different standard and optional UPS options and the models where they apply. Table 2-2: Standard and Optional UPS Options 25-75 kW 25-75 kW Without Internal Battery With Internal Battery Version Version Smart touch screen display for system Standard Standard control and monitoring... -
Page 31: Ups Installation Plan And Unpacking
4. Unload and install the UPS cabinet, and wire the system 5. Complete the installation checklist (Chapter 10 Installation checklist) 6. Have authorized service personnel perform preliminary operational checks and startup. NOTE Startup and operational checks must be performed by an authorized Eaton Customer Service Engineer, or the warranty terms specified in Warranty become void. This service is offered as part of the sales contract for the UPS. Contact service in advance (usually a two-week notice is required) to reserve a preferred startup date. Creating an Installation Plan Before installing the UPS system, read and understand how these instructions apply to the system being installed. -
Page 32: Table 3-1. Dimensions
The UPS equipment operating environment must meet the weight requirements shown in Table in Table 3-1: Dimensions and 3-2: 93PR 25-75kW UPS. Table 3-1: dimensions 25-75kW Shipping dimensions (WxDxH) 900x1300x2200 mm Cabinet dimensions (WxDxH) 600x1100x2020 mm Shipping dimensions (WxDxH) 790*590*270mm UPM dimensions (WxDxH) 439*595*130mm BATTERY MOdUlE... -
Page 33: Figure 3-1. Ups Cabinet Clearances. See Table
The UPS cabinets use forced air cooling to regulate internal component temperature. By standard, air inlets are in the front of the cabinet and outlets are in the back. You must allow clearance in front of and behind each cabinet for proper air circulation. The clearances required around the UPS cabinet in both of these situations are shown in Table 3-3: UPS cabinet minimum clearances. -
Page 34: Table 3-4. Air Conditioning Or Ventilation Requirements During Full Load Operation
The basic environmental requirements for operation of the UPS system are: • Ambient Temperature Range: from +5 to +40 °C • Recommended Operating Range: from +20 to +25 °C • Maximum Relative Humidity: 95 %, noncondensing It is required to arrange ventilation of the UPS room. Sufficient amount of air cooling is needed to keep the maximum room temperature rise at desired level: • Temperature rise of max. +5 °C requires the airflow of 600 m³ per 1 kW of losses • Temperature rise of max. +10 °C requires the airflow of 300 m³ per 1 kW of losses An ambient temperature from +20 to +25 °C is recommended to achieve a long life of the UPS and batteries. -
Page 35: Figure 3-2. 93Pr 25-75 Kw Ups Dimensions
Top view Left view Front view Right view Back view Bottom view Figure 3-2: 93PR 25-75 kW UPS dimensions 25-75 kW User's and Installation Guide... -
Page 36: Ups System Power Wiring Preparation
Left View Front View Right View Right view Front view Left view Top View Top view Figure 3-3: UPM dimensions 3.2.2 UPS System Power Wiring Preparation NOTE If installing a maintenance bypass, a minimum of two separate feeds with upstream feeder breakers, or a single feed with two upstream feeder breakers, must be provided: one for the UPS or rectifier input breaker (if installed) and one for the maintenance bypass input. DO NOT use a single feed or a single feeder breaker to supply both the UPS or rectifier input breaker and the maintenance bypass. If a bypass input breaker is installed in the maintenance bypass and a single-feed UPS is being installed, a single feed to the maintenance bypass is acceptable for supplying both the UPS and the bypass. -
Page 37: Table 3-5. Maximum Recommended Multi-Core Cable Sizes
• Specification is for copper wire with a 90 °C rating. • The bypass feed into this equipment uses four wires. The rectifier feed into this equipment uses three or four wires. The phases must be symmetrical about ground (from a Wye source) for proper equipment operation. • If the load requires a neutral, a bypass source neutral must be provided. If the load does not require a neutral and there is no neutral conductor connected at the bypass input, a neutral must be installed to source star point. • A readily accessible disconnect device must be incorporated in all fixed input wiring. -
Page 38: Table 3-8. Ups Power Cable Terminations
See the following table for power cable terminations. Table 3-8: UPS Power Cable Terminations Terminalfunction Terminal Function TighteningtorqueNm Check the tightening torque AC input to UPS rectifier MAINS INPUT L1,L2,L3,N from the connector label. BYPASS Check the tightening torque AC input to bypass L1,L2,L3,N from the connector label. INPUT Check the tightening torque UPS output... -
Page 39: Ups System Interface Wiring Preparation
3.2.3 UPS System Interface Wiring Preparation Control wiring for features and options should be connected at the customer interface terminal blocks located on top front of the UPS, behind the door. dANGER Do not directly connect relay contacts to the mains related circuits. Reinforced insulation to the mains is required. Read and understand the following notes while planning and performing the installation: •... -
Page 40: Unpacking And Unloading The Ups
Unpacking and Unloading the UPS If the equipment has been transported in the upright position the outside ’Tip&Tell’ indicator on the package surface should be intact. If the arrow has turned all blue, contact the appropriate parties for reporting inappropriate transportation. NOTE •... - Page 41 8. Secure the UPS cabinet in position by lowering the leveling feet until the cabinet is not resting on the casters and the cabinet is level. 9. If permanently mounting the system, proceed to Step 11; 10. Using the retained hardware, reinstall the shipping brackets removed in Step 2 and Step 5 to the front and rear of the UPS cabinet with the angle facing outward (see Figure 3-4 and Figure3-5).
-
Page 42: Figure 3-4. Remove All Fixed Shipping Brackets And Screw Fixed On The Pallet
Front Door Leveling Feet Leveling Feet Rear Shipping Front Shipping Bracket Bracket Left Shipping Bracket Leveling Feet Right Shipping Bracket Leveling Feet Figure 3-4: Remove all Fixed Shipping Brackets and Screw Fixed on the Pallet UPS Cabinet Pallet Ramp (side panel from wood container) Figure 3-5: Attaching the Ramp to the Pallet Figure 3-6: Rolling the Cabinet Down the Ramp 25-75 kW User's and Installation Guide... -
Page 43: Instruction For Removing The Module Packaging
Instruction for Femoving the UPM Module Packaging 1. Cut off the packing strap and open the carton (see Figure 3-7); 2. Lift the foam on the UPM module upward to remove them (see Figure 3-7); 3. Take out the UPM module (see Figure 3-7). NOTE The UPS is heavy. It requires two people for transportation due to its weight. -
Page 44: Instruction For Removing The Battery Module Packaging
Instruction for Removing the Battery Module Packaging 1. Cut off the packing strap and open the carton (see Figure 3-8); 2. Lift the foam on the Battery module upward to remove them (see Figure 3-8); 3. Take out the Battery module (see Figure 3-8). NOTE Heavy unit. It must be carried by two people at the same time to avoid injury. -
Page 45: Ups System Installation
UPS SYSTEM INSTAllATION The customer has to supply the wiring to connect the UPS to the local power source. The electrical installation procedure is described in the following section. The installation inspection and the initial start-up of the UPS and installing an extra battery cabinet must be carried out by qualified service personnel such as a licensed service engineer from the manufacturer or from an agent authorized by the manufacturer. -
Page 46: Figure 4-1. 93Pr 25-75 Kw Gland Plate And Connector Locations (With Internal Battery Version)
BAT + DC input BAT – UPS output Mains input to Rectifier Mains input to Bypass Top view Control signal line entrance Control signal junction Power line entrance Power terminal block Front view Back view Figure 4-1: 93PR 25-75 kW Gland Plate and Connector Locations (With Internal Battery Version) 25-75 kW User's and Installation Guide... -
Page 47: Figure 4-2. 93Pr 25-75 Kw Gland Plate And Connector Locations (Without Internal Battery Version)
BAT + DC input BAT – UPS output Mains input to Rectifier Mains input to Bypass Top view Control signal line entrance Control signal junction Power line entrance Power terminal block Front view Back view Figure 4-2: 93PR 25-75 kW Gland Plate and Connector Locations (Without Internal Battery Version) 25-75 kW User's and Installation Guide... -
Page 48: Battery System Installation
Battery System Installation Internal Battery Installation Connection of these batteries is to be left to the responsibility of the commissioning personnel in order to avoid damages to the equipment or personal injuries in case of an incorrect connection. The batteries are designed to deliver a large amount of energy and an incorrect connection may lead to short circuit and cause serious injuries to the personnel or damages to the equipment. -
Page 49: Figure 4-5. Install The Battery Module
NOTE • Lock the knob to the locked state, when the battery modules are pushed into the battery box. • Install the battery modules from the bottom to the top. Install all the battery modules Install one battery module Figure 4-5: Install the Battery Module 25-75 kW User's and Installation Guide... - Page 50 The default battery settings of the UPS are for 12 VDC VRLA batteries. If requested to use other battery types, contact your Eaton representative. For the battery specification, see Chapter 8.4 Battery specification. Connect the battery cabinet as follows: 1.
-
Page 51: 4.3 Installing A Remote Epo Switch
4.3 Installing a Remote EPO Switch A remote EPO switch can be used in an emergency to shut down the UPS and remove power to the critical load from a location away from where the UPS is installed. EPO is to be connected to the UPS’s top front panel, on connector EPO. Below are the NO and NC connections of the EPO switch. -
Page 52: Installing Interface Connections
External Battery Breaker Wiring Interface When using the original battery cabinet from the EATON, the battery breaker interface wiring is provided with the cabinet. Connecting it requires only routing the wires from the cabinet to the bottom section of the UPS. -
Page 53: Mini-Slot Interface Connections
Mini-slot Interface Connections For Mini-slot accessories and communication devices selection see Chapter 5 Communication interfaces. For installation and setup of a Mini-slot card, please contact your Eaton representative. To install wiring to connections: 1. If not already installed, install the LAN and telephone drops. -
Page 54: 4.5 Wiring Parallel 93Pr Ups Systems
4.5 Wiring Parallel 93PR UPS Systems The outputs of multiple 93PR UPS systems can be connected in parallel. Up to four (4) units can be paralleled. The UPS static bypass power rating needs to be identical among all paralleled units. However, paralleled UPS cabinets can be housed with different number of UPM power modules. -
Page 55: Figure 4-7 . Principle Of Paralleled Ups Systems
MOB’s Module Output Breakers (MOBs) allow the output of the UPS to be disconnected from the other UPSs and system load for maintenance and service. Design considerations assume that each UPS has a Module Output Breaker (MOB). The breaker shall not disconnect neutral. The MOB must have a “N.C”... -
Page 56: Control Signals Overview
4.5.2 Control Signals Overview Two controls signals (External CAN Network, Bypass Pull-Chain) are required for external paralleling. Both of these control signals are fault tolerant and alarmed when disconnected. External CAN (ECAN) ECAN provides means for communications between the UPS’s in a parallel system. The system will continue to share load and protect the load when this network fails. -
Page 57: Figure 4-9. Pimplified Can And Pull-Chain Wiring For Parallel Upp System
Figure 4-9: Pimplified CAN and Pull-Chain Wiring for Parallel UPP System NOTE This drawing is for distributed bypass wiring purposes and is not a floor layout plan. UPPs can be placed in any physical order. NOTE External CAN connections between UPPs require shielded twisted pair wire. NOTE Use twisted pair wiring between the UPP and MOB AUX contacts. Figure 4-10: CAN and Pull-Chain Wiring for Parallel UPP With MOBs 25-75 kW User's and Installation Guide... -
Page 58: Figure 4-11. Can And Pull-Chain Wiring For Parallel Upp Without Mobs
Figure 4-11: CAN and Pull-Chain Wiring for Parallel UPP Without MOBs NOTE NC and NO designations on MOB AUX contacts are defined with breaker in OFF (open) position. If MOB contacts have pigtail leads, use the same wire gauge to connect to the UPP and use the correct crimp connections for the wire gauge. External CAN connections between UPP cabinets require shielded twisted pair wire. Use twisted pair wiring between the UPP and MOB AUX contacts. Always confirm contact operation prior to wiring. 25-75 kW User's and Installation Guide... -
Page 59: Installing Eaton Sync Control
4.5.4 Installing Eaton Sync Control Eaton Refer to the operating instructions provided with the Sync Control. On Bypass Common UPS System−A – On Bypass NO UPS System−B – On Bypass NO UPS System−A – Bypass Voltage Phase A UPS System−A – Bypass Voltage Phase B UPS System−A –... -
Page 60: Communication Interfaces
COMMUNICATION INTERFACES This section describes the communication features of the Eaton 93PR UPS. The UPS has the following communication interfaces: Mini-slot 1 Mini-slot 2 Mini-slot 3 USB device (connection to computer) Emergency Power Off (EPO) Relay output USB host (connection to accessories) -
Page 61: Mini-Slots
Mini-slots The Eaton 93PR UPS has three Mini-slot communication bays. The UPS is compatible with the following Mini-slot cards: • Network Card-MS Provides remote monitoring through a Web browser interface, e-mail, and a network management system (NMS) using SNMP and connects to a twisted-pair Ethernet (10/100BaseT) network. -
Page 62: Figure 5-4. Relay Card-Ms
• Relay Card-MS Two types of interfaces via a DB9 connector are available with this card. Dry contact mode provides a simple way to transmit UPS information to an alarm system, PLC, or computer system via dry relay contacts. By default the transmitted information is load powered, load on bypass, load on battery, load on utility, battery fault, and low battery. -
Page 63: 5.2 Intelligent Power Software
(IPP) application provides automatic, graceful shutdown of computers and virtual machines or servers powered by an Eaton UPS during a power outage that lasts longer than your available battery runtime. Intelligent Power Protector can be remotely supervised and managed by the Intelligent Power Manager (IPM) application. -
Page 64: Ups Operating Instructions
Read these instructions and have a thorough understanding of UPS operation before attempting to operate any of the controls. • The UPS is configured to operate with one of following nominal voltages: 380, 400, or 415 VAC. • Before operating the UPS, confirm the UPS nominal voltage and frequency from display by selecting Settings -> Info. • If the UPS need to be operated with another voltage or frequency, contact your closest Eaton office or Eaton authorized partner. NOTE The UPS in not a measuring device. All displayed measurements are only approximate values. 25-75 kW User's and Installation Guide... -
Page 65: Figure 6-1. Ups Switch Position
Input switch Input switch Output switch Neutral switch Output switch Battery switch Maintenance bypass switch Maintenance bypass switch Neutral switch Without Internal Battery Version Figure 6-1: UPS Switch Position 25-75 kW User's and Installation Guide... -
Page 66: Ups Controls And Indicators
UPS Controls and Indicators 6.1.1 Control Panel The control panel, located on the UPS front door, contains a color touch screen display. It is used to display the status of the UPS system and control the operation of the UPS. Figure 6-2: Parts of the display The display consists of the following parts: • A: Status bar... -
Page 67: Status Indicators
6.1.2 Status Indicators The four symbols below the display are status indicators. They are colored light emitting diode (LED) lamps, and they work in conjunction with the alarm horn to let you know the operating status of the UPS. Indicator Status description The UPS is operating normally and... -
Page 68: Ups Status Lights
Normal indicator also remains illuminated. Figure 6-3: Yellow symbol — battery mode 6.1.3 UPS Status Lights The LED Power Show (LPS) consists of two rows of LEDs located on the left and right sides of the UPS cab- 6.1.2 Status indicators net door. -
Page 69: Steps To Operate The Ups
Steps to Operate the UPS Table 6-1: UPS Menu Structure Main menu Submenu Functions An overview of UPS operation, including information on load, Home efficiency and consumption. Meters summary A summary of the UPS or sys-tem meters. Input meters Detailed information on UPS or system input meters. Meters Bypass meters Detailed information on UPS or system bypass meters. -
Page 70: Signing In (Display Password)
Signing In If the level 1 password is enabled, you need to sign in. 1. Press the lock button in the upper right corner of the screen. 2. Type your passcode and press Ok. 3. You are signed in. Press Continue to return to the previous screen. There are three attempts to input the password. -
Page 71: System Control Instructions
System Control Instructions 6.4.1 Starting the UPS System in Double Conversion Mode The UPS system can consist of a single UPS or several parallel UPSs. UPSs with their MOB open are not considered as part of the system. To start the UPS system: 1. -
Page 72: Starting The Ups System In Bypass Mode
6.4.2 Starting the UPS System in Bypass Mode If the inverter output of the UPS is not available and the critical load needs to be energized, peform the following procedure: CAUTION In Bypass Mode, the critical load is not protected from commercial power interruptions and abnormalities. 1. Unfasten the front door latch and swing the door open. 2. -
Page 73: 6.4.4 Transfer From Bypass To Double Conversion Mode
6.4.5 Transfer from Double Conversion Mode to Energy Saver System Mode Note that the Energy Saver System mode commands are displayed only if enabled at the factory or by an Eaton Customer Service Engineer. To transfer the critical load to Energy Saver System mode: 1. -
Page 74: De-Energizing The Critical Load
2. Perform the LOAD OFF procedure (see Chapter 6.4.8 De-energizing the Critical Load. The input, output, and bypass backfeed contactors open, the battery breaker or disconnect is tripped, and the power module is turned off. dANGER Power is present inside the UPS cabinet until the upstream input feeder circuit breaker is opened. 3. Unfasten the front door latch and swing the door open. 4. -
Page 75: Ups Control Instructions
UPS Control Instructions 6.5.1 Starting a Single UPS Ensure that load level does not exceed single UPS capacity. To start the UPS 1. Unfasten the front door latch and swing the door open. 2. Verify that rectifier input switches, bypass input switch, neutral switch are closed if included inside the UPS system, and verify that battery breaker is closed. -
Page 76: Ups Shutdown
6.5.2 UPS Shutdown A single UPS in the system can be shut down only if it is redundant. In practice that means a UPS is not allowed to be shut down if doing so would lead to an overload condition in the remaining UPSs in the system. To shut down a single UPS: 1. - Page 77 Note: • The “Permitted Maximum Power” does not mean that the UPS will be overloaded if this power value is exceeded. For example, when selecting the 2+2 configuration, the rated UPS apparent power is 100kVA and active power is 100kW, therefore, if load exceeds the permitted maximum power 50kW (permitted maximum power), the UPS will not be overloaded and only the N+X (X=2) structure will be changed.
-
Page 78: Figure 6-8. Upm Module Location
B B C C ... -
Page 79: Starting The Upms
6.6.2 Starting the UPMs Make sure that load level does not exceed single UPM capacity. To start an individual power module in Double Conversion Mode: 1. Unfasten the front door latch and swing the door open. 2. Verify that rectifier input switches and bypass input switch are closed if included inside the UPS system, and verify that battery breaker is closed, and close the front door. -
Page 80: 6.7 Using The Remote Emergency Power-Off Switch
UPS output. The EPO switch de-energizes the critical load and powers down the UPS immediately, without asking for verification. The UPS, including Bypass, remains off until restarted. CAUTION All power to the critical load is lost when the EPO switch is activated in the following step. You should use this feature only when you want to de-energize the critical load. NOTE The following instructions are for the Eaton Corporation-supplied EPO switch. If a customersupplied EPO switch is used, it may not activate in the same manner; refer to the operating instructions provided with the switch. dANGER Do not attempt to restart the system after Load Off until the cause of the shutdown has been identified and cleared. -
Page 81: Figure 6-9. The Normal Positions Of The Mbs Switches And Rectifier Disconnect Switch
Transfer the UPS to Maintenance Bypass Mode: 1. The normal start position should be following: Maintenance bypass switch (MBS) Maintenance bypass input Static bypass input Bypass switch Rectifier input Input switch Output switch Figure 6-9: The Normal Positions of the MBS Switches and Rectifier Disconnect Switch (Must be Located in the Site Wiring) 2. Refer the chapter 6.4.3, and transfer Normal Mode to Bypass Mode. 3. -
Page 82: 6.9 Transfer Ups From Maintenance Bypass To Double Conversion Mode
6.9 Transfer UPS from Maintenance Bypass to double Conversion Mode To transfer the UPS back to double Conversion Mode: 1.The normal start position should be the following: Maintenance bypass switch (MBS) Maintenance bypass input Static bypass input Bypass switch Rectifier input Input switch Output switch Figure 6-11: Maintenance Bypass Mode... -
Page 83: Sts Module
6.10 STS Module The STS module mainly supports the static bypass function, which includes SCR and SCR input contactors, and cooling fan. Support hot swap. NOTE Cannot disconnect and remove the STS module while the UPS is in Bypass Mode. NOTE STS module all repairs and service should be performed by AUTHORISEd SERVICE PERSONNEl ONlY. Figure 6-13: STS Module 25-75 kW User's and Installation Guide... -
Page 84: Ups Maintenance
UPS MAINTENANCE The components inside the UPS cabinet are secured to a sturdy metal frame. All repairable parts and assemblies are located for easy removal, with very little disassembly. This design allows authorized service personnel to perform routine maintenance and servicing quickly. You must schedule periodic performance checks of your UPS system to keep it running properly. -
Page 85: Performing Preventive Maintenance
Majority of the work must be performed by Eaton authorized service personnel. Only the actions described in Chapter 7 .2.1 DAILY maintenance and Chapter 7 .2.2 MONTHLY maintenance are allowed for the user. -
Page 86: Annual Maintenance
7 .2.4 ANNUAL M aintenance Annual preventive maintenance should be performed only by authorized service personnel familiar with maintenance and servicing of the UPS system. Contact your service representative for more information about service offerings. 7 .2.5 BATTERY Maintenance Contact your service representative for battery maintenance. Battery replacement and maintenance should be performed only by authorized service personnel. -
Page 87: Maintenance Training
HAZARDOUS MATERIALS. Batteries may contain HIGH VOLTAGES, and CAUSTIC, TOXIC and FLAMMABLE substances. Batteries can injure or kill people and damage equipment if used improperly. DO NOT DISCARD unwanted batteries or battery material in the public waste disposal system. Follow ALL applicable, local regultions for storage, handling and disposal of batteries and battery materials. Figure 7-2: Recycling Batteries Symbol Maintenance Training For more information about training and other services, contact your Eaton representative. 25-75 kW User's and Installation Guide... -
Page 88: Technical Data
TECHNICAl dATA For complete technical specification, contact your Eaton representative. Due to continuous product improvement programs, specifications are subject to change without notice. Standards Table 8-1: Standards Safety: IEC 62040-1, IEC 60950-1 EMC, Emissions: IEC 62040-2 2005 IEC 61000-2-2 (Low-frequency conducted) -
Page 89: Ups System Input
UPS System Input Table 8-2: UPS System Input Rated Input Voltage 220/380 V; 230/400 V; 240/415 V Rated input voltage -15 % / +20 % Voltage Tolerance, (Rectifier Input) Voltage Tolerance, (Bypass Input) Rated input voltage -10 % / +10 % Rated Input Frequency 50 or 60 Hz, user configurable Frequency Tolerance 40 to 72 Hz Number of Input Phases, (Rectifier Input) -
Page 90: Ups System Output
UPS System Output Table 8-3: UPS System Output Number of Output Phases 3 phases + N Rated Output Voltage 220/380 V; 230/400 V; 240/415 V, configurable Total Voltage Harmonic distortion < 1 % 100 % Linear Load < 5 % 100 % Non-Linear Load Rated Output Frequency 50 or 60 Hz, configurable ±... -
Page 91: Battery Specification
Battery Specification Table 8-4: Battery Specification Battery Type VRLA, 12 Vdc 40-42 blocks, 240-252 cells per battery string, default 40 blocks per battery string. Battery Quantity Note! Battery strings with different battery quantity and voltage may not be connected in parallel! 480 V (40 blocks) to 504V (42 blocks) Battery Voltage ABM or float charge... -
Page 92: Ups Environmental Specifications
UPS Environmental Specifications Table 8-5: UPS environmental specifications < 65 dBA in double conversion Acoustic Noise at 1 m < 55 dBA in ESS Ambient UPS Storage Temperature Range From -25 °C to +55 °C in the protective package* From +5 °C to +40 °C*, Ambient Service Temperature Range, (UPS) No output power derating required. 5 to 95 %, no condensation allowed Relative Humidity Range 5 to 95 %, no condensation allowed Maximum Service Altitude... -
Page 93: Warranty
The warranty is only valid if the installation inspection and initial start up of the UPS unit is carried out by a service engineer approved by Eaton. Service and maintenance of the UPS shall also be performed only by a service engineer approved by Eaton. -
Page 94: Installation Checklist
A remote battery disconnect control is mounted in its installed location and its wiring is terminated inside the UPS and battery cabinet. (OPTIONAL) Accessories are mounted in installed locations and wiring is terminated inside the UPS cabinet. (OPTIONAL) Startup and operational checks are performed by an authorized Eaton Customer Service Engineer. 25-75 kW User's and Installation Guide... -
Page 95: Appendix A: User Settings
APPENdIX A: USER SETTINGS The UPS has the following settings that are user modifiable. In the Home screen, select Settings. User settings: Table 11-1: User Settings To modify the Config settings, you need to sign in. Setting description Information on the UPS model, including part number Info and serial number. - Page 98 614-02087-00...
Need help?
Do you have a question about the 93PR Series and is the answer not in the manual?
Questions and answers