Table of Contents
Advertisement
Quick Links
Advertisement
Table of Contents

Related Manuals for iRobot Ava 500

Summary of Contents for iRobot Ava 500
- Page 1 IT Administrator’s Guide Version 1.2 January 24, 2015...
- Page 2 © 2014, 2015 iRobot Corporation. All Rights Reserved. iRobot and Ava are registered trademarks of iRobot Corporation. iPad and iPhone are registered trademarks of Apple, Inc.
-
Page 3: Table Of Contents
Configuring and Managing the Cisco EX60 ....................24 Configuring the Ava 500 App ......................... 25 First Time Installation ..........................25 Updating the Ava 500 App from 1.0 to 1.1 or Higher................26 Software Upgrades ............................... 27 Ava 500 Robot ..............................27 Ava 500 Cloud Service ............................ - Page 4 Ava 500 is not available ..........................52 Local Symptoms ..............................53 The Ava 500 display reads “Connection Issues: Not connected to management server” ......53 The LEDs are flashing red, and the display says “Assistance Required: Disabled due to Hardware Fault” ............................54 The Ava 500 display reads “Assistance required: Not localized on map”...
-
Page 5: Introduction
Ava 500 caretaker • is someone located at the same site as the Ava 500, who can roll the Ava 500 back to its charging station if necessary, and perform some basic maintenance functions. The Ava 500 Caretaker’s Appendix A: Support Materials. -
Page 6: Comments And Suggestions
User email addresses are maintained when the record is edited. • Ava 500 operation has been improved: • The Ava 500 returns to the charging station after it has been disconnected from the Cloud Service for 30 minutes. • Navigation through doorways has been improved. - Page 7 Introduction • Administrators no longer need to have a separate account to use for logging in to the Ava 500 Control App. Instead, a checkbox on the User Details interface determines whether the Administrator account is also used to log in to the Control App.
-
Page 9: Ava 500 Overview
Ava 500 IT Administrator’s Guide Ava 500 Overview Version 1.2 – 012415 Page 5 iRobot Proprietary... -
Page 11: About The Ava 500
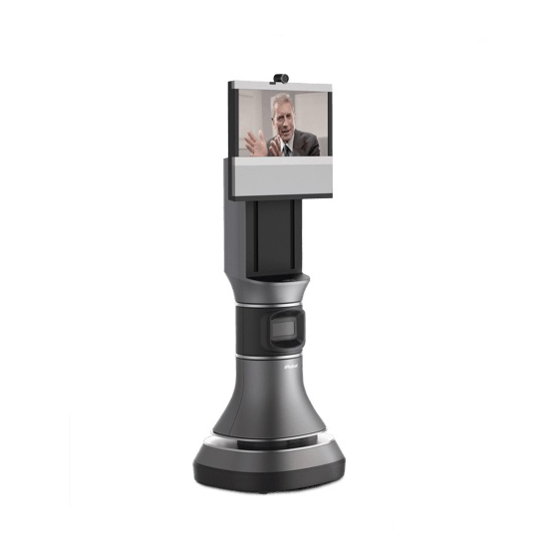
About the Ava 500 About the Ava 500 The iRobot Ava 500 Video Collaboration Robot (Ava 500) complements an existing fixed telepresence solution - such as room-based systems, executive and personal desktop units, and soft clients for PCs, smartphone and... -
Page 12: Ava 500 System Infrastructure
Figure 1. Ava 500 System Infrastructure Each Ava 500 is made up of a Cisco EX60 video conferencing “head” and a robot body. The Ava 500 communicates through a wireless connection from a Cisco AP1600e access point in the robot body to the customer’s wireless network. -
Page 13: How The Ava 500 Works
Ava 500 using a touchpad interface in the Ava 500 App. Through the Ava 500 App, the user can also look up and down, turn to see what is on either side or behind the Ava 500, move to one side or the other, and stand by raising the height of the Cisco EX60 (Figure 2a) or sit by lowering it (Figure 2b). -
Page 14: The Ava 500 Cloud Service
Service. For example, the Ava 500 encounters an obstacle and communicates that fact to the Ava 500 Cloud Service. The Ava 500 Cloud Service sends a notification to the remote user’s Ava 500 App. The remote user can then choose to begin a video conference session immediately so that he or she can see what the problem is and perhaps ask someone nearby to help. -
Page 15: Components And Terminology
Panning sensor module: Consists of 3D imagers and sonar detectors. Normally the sensor module is facing front. The array pans (rotates) if the Ava 500 is trying to sense a path around an obstacle or otherwise orient itself to objects close to the robot. - Page 16 The Ava 500 body refers to the robot without the EX60 installed. The body consists of a torso and a base. The back includes a stop button and handle on the torso, and the service compartment and charging station connector plate on the base (Figure 4).
-
Page 17: Internal Components
Ava 500 IT Administrator’s Guide Components and Terminology • Handle: Use to pull or push the Ava 500. A label with the robot’s serial number is underneath the handle (Figure 5). Figure 5. Ava 500 Label When moving the Ava 500, be careful not to put your foot on the charging plate. - Page 18 The slow brightening/fading cycle is often referred to as “breathing.” The Ava 500 CPU in the upper base is the brains of the robot. The base CPU is like a computer. It contains the internal operating system software, and stores logs, maps, and other information. During installation, a field service engineer will connect directly to the CPU through the access port in the service compartment.
-
Page 19: Configuration And Maintenance
Ava 500 IT Administrator’s Guide Configuration and Maintenance Version 1.2 – 012415 Page 15 iRobot Proprietary... -
Page 21: Data Communications And Security
Figure 7. Ava 500 Communications Inside the Ava 500, the Cisco EX60 is connected to the base CPU in an internal LAN configuration. The CPU connects to the internal Cisco AP1600e access point, configured as a workgroup bridge (WGB), in an internal Version 1.2 –... - Page 22 All SSL communications between the Ava 500 Cloud Service and both the Ava 500 robot and the Ava 500 App employs 2048-bit key cipher. DigiCert is the Certificate Authority for the Ava 500 Cloud Solution. When a session is ready to begin, the Ava 500 Cloud Service requests the Ava 500 to initiate an outbound video call.
-
Page 23: Wireless Configuration
In order to achieve the best user experience during an Ava 500 video conference, some wireless network settings may need to be optimized to support VoIP. For a Cisco network, Cisco recommends the Enable Session Timeout setting should either be turned off or the timeout period extended, for example to 24 hours. -
Page 24: Wireless Encryption
Wireless Encryption Over the years, wireless has become more established in the enterprise. This has led to various standards being created around wireless security. The Ava 500 is designed to work with as many of these encryption types as possible, including: •... -
Page 25: Wireless Authentication
RADIUS server software, or an authentication method must be used that does not require RADIUS server verification. A number of EAP standards are in use today. The Ava 500 has been tested and confirmed to work with the following EAP types: EAP-PEAP (Often referred to as MS-PEAP) •... -
Page 26: Proxy Support
“Phase 0 anonymous DH” session, which means no verification of the authentication server will be performed before connecting. Proxy Support If a proxy server is part of the security configuration, the Ava 500 can be configured as a proxy client using the following methods: •... -
Page 27: System Configuration
Before the Ava 500 is installed at a customer site, iRobot configures the Ava 500 Cloud Service for that customer. A specific server instance is assigned to the customer, which will be referenced on the Ava 500, on the iPad, and in the link to the Administrator Console software. -
Page 28: Configuring And Managing The Cisco Ex60
The installer also configures the customer-specific Ava 500 Cloud Service instance on the base CPU. • The Ava 500 body arrives with the Ava 500’s Cisco WGB already paired to the base CPU. The WGB must be configured with the information (passkeys, passwords, certificates) required to authenticate with the customer’s wireless authentication server, and then the Ava 500 must be assigned an IP address. -
Page 29: Configuring The Ava 500 App
First Time Installation To configure the Ava 500 App on the iPad or iPhone for the first time, first download the Ava 500 App from the App Store, and then include a reference to the Ava 500 Cloud Service server in the iPad settings. -
Page 30: Updating The Ava 500 App From 1.0 To 1.1 Or Higher
1. Link the external calendar to the device calendar using standard corporate procedures. 2. Go to the device Settings app (not the Ava 500 App Settings) > Privacy > Calendars and set Ava 500 to On. Beginning with iOS 8 you can also set this in device Settings > Ava 500. -
Page 31: Software Upgrades
Ava 500 Robot Upgrades to the Ava 500 robot software are “pushed” to the Ava 500. During the upgrade process, the Ava 500 may be unavailable for use for a time, and may need to be rebooted. Upgrades are coordinated between the customer and Technical Support to ensure that interruptions are minimized. -
Page 32: Cisco Ex60
Software Upgrades Cisco EX60 The Ava 500 base software and the Cisco EX60 software version must be compatible. During the implementation process any compatibility issues will be discussed, and on installation the EX60 software may need to be downgraded to a compatible version. Compatible versions as of this release are: •... -
Page 33: Site Changes After Installation
Installation During installation, the installer guides the Ava 500 around the site so that it can create an internal map of the site. This internal map is then paired to the map graphic that forms part of the Ava 500 App interface. Finally, destinations and preset locations/orientations within destination spaces are created. -
Page 34: Layout Changes
If layout changes to the Ava 500’s site are planned, the customer must provide a PDF of the revised floor plan. This will serve as the basis for planning discussions. An iRobot engineer evaluates the change and determines what is required to accommodate it. -
Page 35: If You Are Moving
Ava 500 ready for transport. -
Page 36: The Administrator Console
The Ava 500 IT Administrator Console is compatible with Internet Explorer 10 and higher. It is not compatible with Safari. A username and password are required to access the application, and are provided when the Ava 500 has been installed. -
Page 37: Robots
The operating area of the robot. Battery: Battery charge percent over all functional batteries. The Ava 500 contains four batteries. In general the battery charge will be roughly the same in all four. However, the charge percent is based on the average. For example, if two batteries are 80% charged and two are 70% charged, the charge percent reports as 75%. - Page 38 If one battery is not charging, the battery charge percent will report 100% when the remaining three batteries are fully charged. If iRobot has scheduled a maintenance period, it will be reflected on the Robots page up to seven days in advance (Figure 12). A robot cannot be scheduled for use during a maintenance period.
- Page 39 Check for the addition of or change to an administrator password on the EX60. Disconnected Connection issues: Not connected to The Ava 500 Cloud Service is no longer in management server, LEDs generally contact with the robot. The status clears solid or breathing white. May when the robot is again in contact.
- Page 40 Technical Support. The robot’s map can be annotated to address this. Not localized on Assistance required: Not localized on The robot is connected to the Ava 500 map (without a connection issue Cloud Service but its location is unknown. message)
- Page 41 Ava 500 IT Administrator’s Guide The Administrator Console Click anywhere in a row to display a Details page (Figure 14). The Details page shows all device warnings, software and firmware versions, and mapping database information. Use the browser back button on click ROBOTS to return to the Robots screen.
-
Page 42: Sessions
RESERVED: The Ava 500 Cloud Service is managing a reservation for this session. • DISPATCHED: The Ava 500 Cloud Service has dispatched a robot to this reservation’s destination. • ARRIVED: The robot has arrived at the reservation destination and is waiting for the user to check in. -
Page 43: Users
Ava 500 IT Administrator’s Guide The Administrator Console Users The Users screen is shown in Figure 16. Click to add a new user Click to view and change the details for that user Figure 16. The Users Screen Version 1.2 – 012415... - Page 44 The username, which is assigned when the user is created, is displayed on the Ava 500 when, for example, the robot is waiting for a session with the user, and is used to sign in to the Ava 500 App. Usernames must be 3-80 characters and can contain the numbers, letters, and symbols in the printable ASCII set.
- Page 45 If you have multiple Ava 500 sites, or operating areas, users can be restricted to certain sites. A user must be authorized for at least one site in order to use the Ava 500 App. The user cannot be authorized to access a site until the map for that site is completed.
- Page 46 Ava 500 IT Administrator’s Guide The Administrator Console The same information is required after you click ADD USER to add a new user (Figure 18). Figure 18. The Add User Dialog Click in the Video Endpoints box to add a new endpoint, after which the Address and Label fields are displayed.
-
Page 47: Troubleshooting
Ava 500 IT Administrator’s Guide Troubleshooting Version 1.2 – 012415 Page 43 iRobot Proprietary... -
Page 49: Rebooting The Ava 500
Configuration Interface. Rebooting the Ava 500 Some problems in the field can be resolved by rebooting the Ava 500. Only reboot the Ava 500 when instructed to do so by Technical Support. Always reboot the Ava 500 on its charging station. - Page 50 Ava 500 off. The power button is in the service compartment on the back of the robot; the rocker switch is under the top plate beneath the service compartment (Figure 19).
- Page 51 EX60. Once the system has finished booting, if the Ava 500 is fully connected with all systems and is not experiencing any internal problems, the display is the generic Ava 500 banner, and the LEDs are cycling in their ‘breathing white’...
-
Page 52: Understanding Ava 500 Availability
An Ava 500 is committed to a scheduled session 10 minutes before the session is due to begin. At that time it is removed from the resource pool and cannot be used for an immediate session. In this 10 minute period the Ava 500 leaves for the session destination and the remote user can check in to the session. - Page 53 Ava 500 IT Administrator’s Guide Understanding Ava 500 Availability The Ava 500 App keeps the display on at all times, but the user can turn the display off by closing the device cover or pressing the power button. If no session is scheduled for at least 15 minutes after the current session is due to end, the following scenarios can occur.
-
Page 54: Remote User Symptoms
No: Have the user correct the issue with the video endpoint, and then click “Reconnect Video” on the Ava 500 App. Verify the video conference begins. 2. Have the user click Reconnect Video and verify that the address the Ava 500 is attempting to dial is correct. Yes: Go to step 3. -
Page 55: No Video At The Remote User's Video Endpoint
No: Contact Technical Support. No video at the remote user’s video endpoint 1. Have someone in the meeting check to make sure that the privacy cover on the Ava 500’s camera is not closed or otherwise obstructed. Yes: Open the cover or remove the obstruction. -
Page 56: Ava 500 Is Not Available
Ava 500 IT Administrator’s Guide Remote User Symptoms Ava 500 is not available 1. Use the Administrator Console to verify that the Ava 500 is scheduled for all or part of the requested time. Yes: Explain availability. No: Go to step 2. -
Page 57: Local Symptoms
2. Verify that nothing in the wireless handshaking/authentication chain has changed. Has a password or a certificate expired? 3. Verify that the iRobot Ava 500 Cloud Service is available by trying to connect through the IT Administrator Console. 4. If the robot is connected at its charging station, but loses connectivity elsewhere, determine if the problem happens reproducibly at the same location. -
Page 58: The Leds Are Flashing Red, And The Display Says "Assistance Required: Disabled Due To Hardware Fault
The Ava 500 appears to be without power Diagnosing this problem requires determining if the Ava 500’s batteries are failing to charge, and if so, if that problem is internal to the Ava 500, with the charging station, or with the facility. -
Page 59: Volume And Mute Behavior
Ava 500 IT Administrator’s Guide Local Symptoms Yes: If the Ava 500 appears to have power, after an hour, verify that the Ava 500 drives to a destination and returns. Yes: The Ava 500 had run out of power. Problem solved. -
Page 60: The Ava 500 Configuration Interface
Interface Beginning with version 1.2, a Configuration interface allows you to provide operational details to Technical Support if needed, as well as to address the effect on the Ava 500 of some common infrastructure changes: • A change in the robot’s network, such as a changed pre-shared key. -
Page 61: Connecting And Configuring Your Laptop
Connecting and Configuring Your Laptop The following procedure is illustrated using Windows 7. 1. Using an Ethernet cable, connect your laptop to the access port in the Ava 500’s service compartment Figure 20). Figure 20. Connection to the Access Port 2. - Page 62 Ava 500 IT Administrator’s Guide The Ava 500 Configuration Interface 4. In the resulting window, double-click Local Area Connection (Figure 22). You will probably have more than one Local Area Connection. Open the first one in the list. Figure 22. Network Connections Window 5.
- Page 63 Ava 500 IT Administrator’s Guide The Ava 500 Configuration Interface 6. In the Properties window click Internet Protocol Version 4 (TCP/IPv4) and then click Properties (Figure 24). Figure 24. Local Area Connection Window 7. In the Properties window (Figure 25), click Use the following IP address: and enter 172.18.0.2. Click on the subnet mask field.
-
Page 64: Accessing The Configuration Interface
Enter username: aware, Password: aware. The Ava 500 Configuration Menu is displayed (Figure 26). Most of these functions, if misused, can seriously affect the operation of the Ava 500. Only Battery, Installed Packages, and Version are reports with no effect on operation. Use only those functions included in the following procedures, unless you are familiar with their effect or are directed to by Technical Support. -
Page 65: Reporting On Or Changing The Wgb Configuration
4. Click WiFi. The Monitoring tab is displayed. The Monitoring tab shows the current status (Figure 28). The status refreshes every 5 seconds. If the Ava 500 is disconnected from the Ava 500 Cloud Service, Technical Support may ask for screen captures of the Monitoring and Troubleshooting tabs. - Page 66 (Figure 30). The fields on the tab change as you make selections. If the Ava 500 was configured in software version 1.1, the current configuration information does not display on the Configuration tab. If you are uncertain about the current configuration, contact Technical Support.
- Page 67 Do not change any of the settings under unless directed to do so by Technical Support. 7. Click the blue Home link in the title bar to return to the Ava 500 Configuration interface main menu. 8. Select Auto Bridge Reset. 9. Click Enable.
-
Page 68: Changing The Ex60 Administrative Password
Do not delete the username and attempt to configure with a blank user name. You will have a problem on reboot. 3. Click the blue Home link in the title bar to return to the Ava 500 Configuration interface main menu. Version 1.2 – 012415... - Page 69 Ava 500 IT Administrator’s Guide The Ava 500 Configuration Interface 4. Select Restarter to see the Restarter functions (Figure 33). Figure 33. Restarter Functions 5. Click Software Restart so that the network uses the submitted change. The robot’s LEDs will briefly turn off, then change to flashing green.
-
Page 70: Appendix A: Support Materials
Ava 500 IT Administrator’s Guide Appendix A: Support Materials Version 1.2 – 012415 Page 66 iRobot Proprietary... - Page 71 Ava 500 IT Administrator’s Guide Appendix A The information provided in this appendix is designed to be provided to remote users, new Ava 500 Caretakers, and people working at the Ava 500 site during initial mapping and configuration. The sheets include: •...
- Page 72 Ava 500 is on its charging People in the meeting station. with the Ava 500 can use the volume/mute Always use the handle buttons to change the to push or pull the Ava...
-
Page 73: Solving Problems
If you have to move the Ava 500 for anything other than a system problem (indicated by flashing red LEDs), push the stop button. Then use the Ava 500’s handle to push or pull it. Do not ever push the Ava 500 on its black sensor band or with your foot against its charging plate. - Page 74 In both cases, you will know that your Ava 500 App has been upgraded when you see a blue dot next to the Ava 500 name under the icon. The dot remains until you use the new version.
Need help?
Do you have a question about the Ava 500 and is the answer not in the manual?
Questions and answers