Table of Contents
Advertisement
Advertisement
Chapters
Table of Contents

Related Manuals for SDMO R 340 U


Summary of Contents for SDMO R 340 U
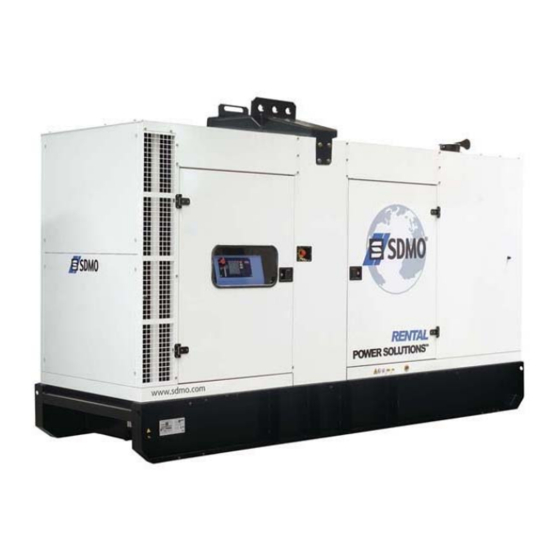
- Page 1 User and maintenance manual for generating sets R340U 33504081101NE_0_1...
- Page 2 CALIFORNIA Proposition 65 Warning Diesel engine exhaust and some of its constituents are known to the State of California to cause cancer, birth defects, and other reproductive harm. If this product contains a gasoline engine WARNING The engine from this product contains chemicals known to the State of California to cause cancer, birth defects or other reproductive harm...
-
Page 3: Table Of Contents
1. Preface ......................................3 1.1. General recommendations ..............................3 1.2. Pictograms and their meanings ............................4 1.3. Instructions and safety regulations ............................. 8 1.3.1 General advice ................................... 8 1.3.2 Risks related to exhaust gases and fuels ........................... 9 1.3.3 Risks related to toxic products ............................10 1.3.4 Risk of fire, burns and explosion ............................ - Page 4 6.3. Generator set with KERYS control panel .......................... 53 6.3.1 Presentation of the KERYS............................... 53 6.3.1.1. Operating conditions ............................53 6.3.1.2. Conformity to legal and regulatory requirements ....................54 6.3.2 Description of the KERYS ..............................55 6.3.2.1. Identification of the hardware components ......................55 6.3.2.2.
-
Page 5: Preface
1. Preface 1.1. General recommendations Thank you for choosing an electrical generating set from our company. This manual has been designed to help you operate and maintain your electrical generating set correctly. The information contained in this manual is taken from technical data available at the time of print. In line with our policy of continually improving the quality of our products, this information may be amended without warning. -
Page 6: Pictograms And Their Meanings
1.2. Pictograms and their meanings Safety notices are clearly mounted on the equipment to draw the operator's or maintenance technician's attention to the potential dangers and explain the action to be taken in the interest of safety. These notices are reproduced in this publication for ease of identification by the operator. - Page 7 WARNING: DANGER This symbol warns of a safety hazard. The presence of this symbol indicates a risk of injury. Observe the safety instructions and precautions for use. Important: Carefully read the instructions supplied with the generating set before using or servicing the equipment.
- Page 8 WARNING: DANGER Hot coolant can cause serious burns. Switch off the engine. Do not remove the filler cap until it is completely cold. Do not open the radiator when it is hot. DANGER Rotating parts can cause serious injury. Do not operate the generating set with the doors open. Do not remove the enclosures.
- Page 9 WARNING: DANGER A poor earth connection can lead to serious injuries or death. Always connect the earth terminal of the generating set to an external earth terminal. WARNING Voltage selector This function should be used by qualified persons only. WARNING Adjust the output voltage correctly before connecting a load.
-
Page 10: Instructions And Safety Regulations
1.3. Instructions and safety regulations THESE SAFETY GUIDELINES ARE IMPORTANT If you do not understand or have any questions about any point in this manual, contact your dealer who will explain it to you or give you a demonstration. A list of risks and precautionary measures to take follows. You should also refer to any local and national regulations that apply in accordance with your own jurisdiction. -
Page 11: Risks Related To Exhaust Gases And Fuels
Environment The operator must take the necessary measures to comply with the aesthetics of the site of use. The whole site must be maintained in a good state of cleanliness. The premises must be kept clean, and be regularly cleaned so as to avoid accumulation of dangerous materials or pollutants and dust, which could ignite or cause an explosion. -
Page 12: Risks Related To Toxic Products
1.3.3 Risks related to toxic products Glycol is a toxic product and dangerous if absorbed. The corrosion inhibitor contains alkali. Avoid all contact with the skin and eyes. Read the Do not swallow it. instructions on the packaging. This substance should not come into contact with the eyes. -
Page 13: Risks Related To Electrical Networks
1.3.5 Risks related to electrical networks The electrical equipment supplied with the generating set complies with standard NF C15.100 (France), or with the standards of the countries in question. The earth connection must be installed in accordance with the standards in force in each country in question, and with the neutral system sold. -
Page 14: Identifying Sets
1.4. Identifying sets Generating sets and their components are identified by means of identification plates. The precise rules for identifying each major component (engine, alternator etc.) are set out in each manufacturer's documents contained in this manual. Examples of identification plates Generating set Engines Figure 1.2 : Examples of identification plates... - Page 15 Alternator Cabinet Figure 1.3 : Examples of identification plates 13/285...
-
Page 16: General Description
2. General description 2.1. Description Overview Control unit Protective grilles External emergency stop Chassis Expansion bottle Circuit breakers Figure 2.1 : General description of the generating set 14/285... - Page 17 Battery charge alternator Starter batteries Figure 2.1 (continued): General description of the generating set Coolant filter External fuel supply combined tap (optional) Filling with fuel Circuit breaker Oil filters Interchangeable fuel pre-filters Figure 2.1 (continued) : General description of the generating set 15/285...
- Page 18 Sockets ( voltage 208/120V ) 16/285...
-
Page 19: Technical Specifications
2.2. Technical specifications RENTAL POWER / R340U Range / Generating set type Weights and Dimensions Dimensions with standard tank Dimensions l x w x h: 4475 mm x 1410 mm x 2690 mm Weight: 3830 kg dry weight 4300 kg in operating configuration Hood: M228C Noise level:... - Page 20 Fuel Fuel type Diesel Standard fuel tank 470 L High autonomy fuel tank 1368 L Lubrication Oil capacity with filter 35 L Min. Oil pressure 0.7 bar Nominal oil pressure 6 bar Oil consumption (100 % load) 0,06 L/h Oil sump capacity 28 L Type of lubricant Genlub...
-
Page 21: Fuel And Consumables
2.3. Fuel and consumables All specifications (product features) are given in the motor and alternator maintenance manuals attached to this manual. In addition, we recommend the consumables to be used in the "specifications" section. 2.3.1 Specifications 2.3.1.1. Oil grades Engine Make Type Make... -
Page 22: Specifications Of Coolants
2.3.1.2. Specifications of coolants Engine Coolants Make Type Make Type John Deere GenPARTS GENCOOL PC -26°C Mitsubishi MITSUBISHI GenPARTS GENCOOL PC -26°C Volvo GenPARTS GENCOOL PC -26°C GenCOOL PC -26 High-protection coolant, approved by manufacturers. GenCOOL PC -26 is a ready-to-use, highly protective coolant which is produced from an antifreeze recommended by the majority of European manufacturers. -
Page 23: Installation
RECOMMENDATIONS FOR USE: Compatible with the original fluid. It is recommended that the cooling system is completely drained when replacing the fluid. TRIAL SPECIFICATIONS UNITS SPECIFIED VALUES METHODS kg/m 3 R 15-602-1 Density at 20°C 1,059 +/- 3 NF T 78-103 7.5 to 8.5 NF T 78-101 Alkalinity reserve... -
Page 24: Fork Lift Truck
3.1.2.2. Fork lift truck Position the forklift arms under the base frame (except with generating sets fitted with "forklift pockets", in which case position the forklift arms in these pockets), making sure that only its cross-members are resting on the arms. Lift the equipment, handling it gently. - Page 25 Figure 3.3: Offset fluid retention container underneath the generating set chassis. Figure 3.4: Offset fluid retention container integrated into the chassis and tank. Generating sets fitted with the offset tank option (DW) above also have a high level indicator in the retention container. In all cases, the retention containers must be regularly checked to ensure they contain no fluid (fuel, oil and coolant, or rainwater or condensation).
-
Page 26: Choice Of Location
3.3. Choice of location It should be determined on the basis of use. There are no specific rules governing the choice of location, other than proximity to the electric distribution panel and disturbances caused by the noise. However, fuel supply, burnt gas evacuation, and the direction of these gases and the noises emitted should be taken into account. -
Page 27: Electricity
3.4. Electricity a) Connections - general information As with low voltage electrical installations, use and maintenance is governed by standard NFC 15.100 (France) or by the standards in the relevant country, based on international standard IEC 60364-6-61. They must also adhere to the regulations in the NFC 15.401 application guide (France) or to the regulations and standards in the relevant country. -
Page 28: Special Arrangements
d) Safety guidelines References: NFC 15-100:2002 (France) - IEC: 60364-5-54 In order to protect personnel against electric shocks, this generating set is equipped with a differential residual current protector "factory" set to trigger instantly, with a sensitivity of 30 mA. Any modification to this setting could endanger personnel. -
Page 29: Trailer
4. Trailer 4.1. Trailer linkage Before attaching the trailer, check the trailer hook on the tow vehicle; it should fit the trailer ring perfectly. Trying to tow a trailer with a non-matching device (bar, wires, cords, etc.) could lead to serious accidents. -
Page 30: Operation
4.3. Operation "On-site" trailer These trailers are not fitted with a main brake, and so cannot be braked in motion; the tyres allow for a maximum speed of 27 km/h. So it is absolutely prohibited to exceed this speed. Nor are these trailers fitted with signalling lights. On-road use is prohibited. "On-road"... -
Page 31: Implementation For Installation
4.5. Implementation for installation Operations to be carried out: Ensure that the ground is strong enough for the assembly not to sink into it. Unhitch the trailer. Immobilise the trailer by placing chocks under the wheels. Fully engage the parking brake (if fitted). Using the front wheel, position the generating set as close to horizontal as possible. - Page 32 Figure 4.3: Braking transmission Figure 4.4: Cross bar fitting Figure 4.5: Tandem bearing fitting 30/285...
-
Page 33: Faults And Repairs
4.7. Faults and repairs Fault observed Origin Solutions Erratic braking of trailer - Faulty shock absorber Replace the shock absorber - Jaws worn Replace the jaws - Jaws not run in Fault will disappear only after running in - Incorrect linkage setting Adjust the setting Braking too weak - Significant friction on the slide... -
Page 34: Electrical Connection Diagram
4.8. Electrical connection diagram Figure 4.6 : Electrical connection diagram 4.9. Complete wheels technical information COMPLETE TYRES WHEELS Cross section Radius under Load Pressure Dimensions Indices Diameter (mm) (mm) load (mm) (Kg) (bar) 135 R 13 70 T 145 R 13 75 T 155 R 13 79 T... -
Page 35: Preparation Before Operating The Set
5. Preparation before operating the set The inspections referred to in this section enable the electrical generator set to operate. Specific skills are required to carry out these operations. They must only be entrusted to personnel with the necessary skills. Failure to follow these instructions in any way could result in malfunction or very serious accidents. - Page 36 • Coolant level, check Do not open the filler cap when the engine is hot, except in an emergency. Boiling liquid or vapour may be ejected. Warning The system must be filled up with liquid which has identical proportions to that already contained in the cooling system.
-
Page 37: Generator Set With Telys Control Panel
6.2. Generator set with TELYS control panel 6.2.1 Control panel presentation 6.2.1.1. View of the front panel Figure 6.4 : View of the front panel Emergency stop button (AU) for switching off the generating set in the event of a fault which could endanger personnel or damage equipment. - Page 38 Figure 6.5 : Description of the LEDs A lit LED indicates: Alarm activated (flashing yellow). Fault found (flashing red). Module on (green, on continuously). Figure 6.6: Close-up of USB ports USB key connection (HOST): file transfer between USB key and TELYS and vice versa. Connection for microcomputer (DEVICE): file transfer between PC and TELYS and vice versa, main module power supply.
-
Page 39: Description Of The Screen
6.2.1.2. Description of the screen The screen is backlit and requires no contrast adjustments. This screen is divided into 4 zones. SERIAL No.: 08030010000 SOFTWARE: 5.3.5 NOMINAL VOLTAGE: 400V FREQUENCY: 50Hz NOMINAL KW: 320kW EARTH SYSTEM: TNS Figure 6.7: Description of the screen (example) Zone 1: in this zone, the status of the generating set is displayed Zone 2:... -
Page 40: Description Of The Pictograms In Zone 1
6.2.1.3. Description of the pictograms in zone 1 Pictograms in zone 1 Pictograms Display Activation conditions Fixed TELYS in manual mode (MANU) For 5 seconds when switching from AUTO Flashing mode to MANU mode "MANU" Mode Fixed TELYS in automatic mode (AUTO) For 5 seconds when switching from MANU Flashing mode to AUTO mode... -
Page 41: Description Of The Pictograms In Zone 3
6.2.1.4. Description of the pictograms in zone 2 Alarm and fault pictograms in zone 2 All the pictograms in this zone are activated when TELYS is initialised. Data displayed Fuel level indicator Alarm / Fault Alarm / Fault low fuel level high fuel level Coolant level / temperature indicator Alarm... -
Page 42: Description Of The Pictograms In Zone 3
6.2.1.5. Description of the pictograms in zone 3 Pictograms in zone 3 All the pictograms in these zones are activated when TELYS is initialised. The pictograms below are given as examples. Generating set stopped Screen no. Pictograms Data displayed Fuel Level Indicator Indication of Temperature of High Temperature coolant (HT) (units according to settings menu) Indication of Battery Voltage... - Page 43 Generating set started Screen no. Pictograms Data displayed Fuel Level Indicator Alternator composite Voltage Indicator Default screen in Total Active Power Indicator operation Alternator Frequency Indicator U12 Alternator composite Voltage Indicator U23 Alternator composite Voltage Indicator U31 Alternator composite Voltage Indicator Alternator Frequency Indicator V1 Alternator single Voltage Indicator V2 Alternator single Voltage Indicator...
- Page 44 Screen no. Pictograms Data displayed Single phase Alternator current indicator Two phase Alternator current indicator Three phase Alternator current indicator Neutral Alternator current indicator Total Active Power Indicator Total Reactive Power Indicator Total Effective Power Indicator Total Power Factor Indicator (lagging or leading) Fuel Level Indicator Indication of Battery Voltage Indication of Battery Amps...
-
Page 45: Display Of Messages In Zone 4
6.2.1.6. Display of messages in zone 4 The display (zone 4), among other things, displays messages relating to the operation of the generating set. The messages are as follows: Initialisation of TELYS Screen no. Screen Data displayed Initialisation of TELYS when the power is switched on and/or when loading a configuration Generating set serial no. - Page 46 Generating set stopped Screen no. Screen Data displayed OPERATION MANUAL Operating mode - generating set in Manual Mode ready to Press START start to start Date and time (depending on settings) 24/08/2005 13:12 OPERATION AUTO Operating mode - generating set in Auto Mode ready to WARNING start START-UP POSSIBLE...
- Page 47 Generating set started Screen no. Screen Data displayed AVAILABLE POWER Operating phase – generating set in operation – stable voltage and frequency Default Available power screen Date and time (depending on settings) 24/08/2005 13:12 AUTOMATIC STOP Operating mode - operation in Auto Mode IN PROGRESS Opening of power supply device (motorised circuit breaker or source changeover switch controlled by TELYS)
- Page 48 Operating mode changeover (switching from Manual Mode to Auto Mode following auto start demand) Screen no. Screen Data displayed Start Demand AUTO Do you wish to change to Auto Mode? Operating mode - operation in Manual Mode G 12 WARNING AUTOMATIC start demand Immediate start Generating set stop request due to fault or by pressing STOP in Auto Mode...
-
Page 49: Starting
6.2.2 Starting Check that the generating set circuit breaker has triggered. Danger Connect the generating set battery Turn the key switch to the ON position (without forcing it to the ON position), the ON lamp will light up (if the lamp does not light up, check and replace the fuse if necessary) Test the Alarm and Fault LEDs (menu 15 –... -
Page 50: Switching Off
6.2.3 Switching off Open the circuit breaker manually by selecting menu 12 "CONTROL LOAD" The following display will disappear (supply stopped) Press the STOP button The following screen is displayed and the generating set will stop IN PROGRESS 24/08/2005 13:12 Switch TELYS off by turning the key to "OFF"... -
Page 51: Activation Of An Alarm Or Fault
In conjunction with this LED: a flashing pictogram appears on the LCD screen message on graphic display (example) representing the circuit affected by the fault and the FAULT associated indicator, if present (example) FAULT Oil Pressure 25/12/05 15:30 OK=HELP Faults have priority over alarms. Faults are displayed in the descending order of their appearance (from the most recent to the oldest). -
Page 52: Activation Of An Alarm And A Fault
6.2.4.3. Activation of an alarm and a fault The appearance of an alarm and a fault causes: The yellow and red LEDs to flash the related screen to be displayed (example below) FAULTS 1/2 FAULT Emergency Stop If several faults are present, the number of faults is displayed at 25/12/05 15:30 the top of the screen. -
Page 53: Engine Fault Codes Display
6.2.4.4. Engine fault codes display Certain alarms and engine faults generate specific fault codes. These codes are standardised according to the J1939 and/or J1587 standards, except for MTU engines that have a specific transmission protocol (see appendix, if applicable). Terminology used by the SAE CAN J1939 standard SPN: Suspect Parameter This represents the system or component at fault, for example: SPN 100, indicates an oil Number... -
Page 54: Horn Reset
In the event of a fault, the screen will display the following message: FAULT Engine fault code. ALARM Pressing OK will display fault finding information. In addition, appendix D indicate the meaning of the code. The ENGINE GENERAL 110 18 checking and maintenance operations to carry out in order to 25/12/2005 15:30... -
Page 55: Generator Set With Kerys Control Panel
6.3. Generator set with KERYS control panel 6.3.1 Presentation of the KERYS The MICS Kerys system consists of a set of electronic modules in which each module performs a specific function.. These modules are interconnected according to a very precise architecture and exchange data to allow the following: the command, control, regulation and protection of one or more generating sets according to multiple configurations. -
Page 56: Conformity To Legal And Regulatory Requirements
6.3.1.2. Conformity to legal and regulatory requirements The various components of the system comply with the following standards: Requirements specific to programmable controllers: (Functional characteristics, immunity, robustness, safety, etc.) EN 61131-1/2/3 (IEC 1131-2, IEC 664), EN61326, CSA 22-2, UL508. Compliance with European directives (low voltage, electromagnetic compatibility, machinery). CE marking in application of the safety requirements of standard EN 61131-2 –... -
Page 57: Description Of The Kerys
6.3.2 Description of the KERYS 6.3.2.1. Identification of the hardware components KERYS Tactil MMI module MMI Module Module item reference P/N: 31613391001 D346000: manufacturer product reference D346000/B1 B1: module hardware upgrade index 1800: serial number “not related” with a batch number S/N: 1800 (1800 = the 1800 module manufactured since the start) - Page 58 Regulation module Regulation module Module item reference 31613391501 A44Z1: manufacturer product reference A44Z1-G G: “main” module hardware upgrade index 04: week of manufacture (week 4) 08: year of manufacture (year 2008) A: “secondary” module hardware upgrade index 0408A519 519: serial number “related” with a batch number (*) (519 = the 519 module manufactured in week 04 of the year 2008)
- Page 59 Logical inputs and outputs module Logical inputs and outputs module (ESTOR – Binary inputs and outputs) P/N : Module item reference 31613391201 D341000: manufacturer product reference D341000/B1 B1: module hardware upgrade index 0250: serial number “not related” with a batch number S/N: 0250 (0250 = le 250 module manufactured since the start)
-
Page 60: Identification Of The Software Components
6.3.2.2. Identification of the software components Only the components base module, MMI module, regulation module and protection module have embedded software. ”Software version” is referred to in order to identify a program implemented in one of the components. V: as software version 1.05 : is the revision, which is a combination of 3 digits V1.05c1 c : main revision index... -
Page 61: Description Of The Man Machine Interface (Ihm/Mmi)
6.3.3 Description of the Man Machine Interface (IHM/MMI) 6.3.3.1. The Man Machine Interface Signalling control Operating buttons of the keys generating set Navigation keys Alphanumeric keypad Backlit display with touch-sensitive keypad M.M.I. operation LED (flashing) Display The display has the following specifications: 7-inch colour TFT display, 16/9, 65536 colours dimensions: 154 mm x 86 mm neon backlighting... - Page 62 The generating set operational keys Manual mode selection. The illuminated led indicates that the mode is active Selecting stop mode. The illuminated led indicates that the mode is active Automatic mode selection. The illuminated led indicates that the mode is active Test in progress LED.
- Page 63 The navigation keys It is also possible to navigate through the menus using the keypad. Return to upper level or escape for the dialogue boxes Move up Move to the right Move to the left Confirm function of selected key Move down It is possible to gain direct access to a menu by pressing the numerical key corresponding to its name.
-
Page 64: Navigation In The Screens
6.3.3.2. Navigation in the screens There are three types: the home screen, the navigation screens, the operation and configuration screens. Home screen This screen is the entry point to the system. It enables the main functions of the navigation to be accessed. 15/10/03 19:10 :00 GS 1... - Page 65 The operating and configuration screens These screens bring up the information and commands relating to the active menu. They are divided into three zones: an upper band common to all types of screens. the central section in which the specific information on the selected menu appears. a lower band.
- Page 66 Controls Access to the “Alarms and Faults” screen Access to the regional parameters screen Access to the “Alarms and Faults” screen Access to the “Drive” or “TOR variables” screen Access to the regional parameters screen 15/07/09 19:10 :00 GS 1 Welcome Auto Faults...
- Page 67 Entry of a text Text to be modified or created Name of the modified function Inserts a space to the left of the cursor Title configuration CDE AERO Insert Copy Paste Valid Delete title Delete a character Esc. Deletes the letter shown by the cursor Deletes the entire text Closes the menu without saving the changes Saves the changes and closes the dialogue box...
- Page 68 Selecting from a list The box heading indicates the parameter which will be assigned from your selection. Arrows for moving the cursor List indicating possible selections Type of fault (6000) Whithout General Alarm Valid Esc. Active selection Arrows only visible if the number of choices does not fit on the screen (enables you to go to the next page on the list or return to the previous page on the list)
-
Page 69: Configurations
During saving, the following screen indicates that the operation in is progress: Saving in flash… 6.3.4 Configurations 6.3.4.1. Operating principle The operational modes are as follows: - Operation of a single genset without coupling. Without Without N/E - Normal/emergency switch (NES) not controlled by Kerys. coupling to switch grid... -
Page 70: Legends
6.3.4.2. Legends Electrically controlled circuit breaker Exchange of information from A to B and from B to A Transmission of information from A to B only 3 PH ”Current” information, 3 PH = 3 phases 3 PH + N ”Voltage” information, 3 PH + N = 3 Phases + Neutral 6.3.4.3. - Page 71 FORCED OPERATION (Kerys in “AUTO” mode) Start of FORCED OPERATION • Generating set start request (dry contact, switch, clock, etc.). • The speed and voltage of the generating set increase. • Generating set power unit switched off after voltage and frequency stabilisation. The installation is supplied by the generating set End of FORCED OPERATION •...
- Page 72 Automatic operation (Kerys in “AUTO” mode) (temporary “grid return” coupling) Loss of grid voltage • Adjustable grid loss acquisition delay (controlled by the Kerys or by a mains detection module). • Generating set start request. • The speed and voltage of the generating set increase. •...
-
Page 73: Power Plant Configuration (Several Generating Sets In Parallel)
6.3.4.4. Power plant configuration (Several generating sets in parallel) Without common part and without Normal/Emergency inverter (A632) This configuration is designed to provide: Emergency electricity supply to an installation following a grid loss (The grid loss is not controlled by Kerys). Return to the grid will be achieved by Normal / Emergency switchover by means of a self-driven inverter (not controlled by Kerys). - Page 74 Principle of coupling in normal operation Coupling in normal operation enables all the generating sets to be coupled (in voltage and frequency) to a busbar supplied by a generating set designed as master at the output. A number (1 to 15) is assigned to each Kerys. This number serves solely to establish the IP address of each Kerys for communication by Ethernet and loading the programs.
- Page 75 The second GS thus coupled initiates its power on ramp (adjustable delay) and the distribution of power among the two generating sets takes place. Each generating set will then take 50% of the required power, i.e. 225 kW. When the power required for the application reaches 75% of the power of the two generating sets in operation (GSs at priority 01 and 02), i.e.
- Page 76 FORCED OPERATION Start of FORCED OPERATION • Generating set power units switched off. • Generating set start request. • The generating sets increase in speed. • Speed stabilisation delay. • Order of excitation for each generating set at nominal speed; the voltage is then quickly established on the busbar. •...
- Page 77 Principle of coupling when stopped all the generating set power units are switched off, starting of all the generating sets, when the speed reaches 1450 rpm, activated excitation command on all the generating sets, the voltage generated by each generating set increases gradually and the voltage is therefore the same in all generating sets, the generating sets therefore reach 1500 rpm at 400 V 50 Hz.
- Page 78 Wattmetric control The wattmetric control is used when two generating sets are coupled. It provides optimum management of the number of generating sets operating by constantly analysing the power required by the user. Let us take the example of a power plant of 4 x 600 kW generating sets. The threshold setting screen (1-7-3-3) supplies the following data: Threshold 1 GS =>...
- Page 79 Wattmetric control This wattmetric control will be activated after a global operation delay. This global operation enables the application to be resumed after power is restored to the different outputs, and ensures stability of the load before the wattmetric control is started. Depending on the power for the application, the number of generating sets in production may vary in order to optimise the production to consumption.
-
Page 80: Connections Of The Generating Sets
6.3.5 Connections of the generating sets 6.3.5.1. Recommendations before the connections Disconnect the battery cables before carrying out any work on the generating set. To disconnect the battery disconnect the negative cable (-) first. Warning 6.3.5.2. Connections according to the configurations Ground connection Ground connection box Facility power outlet... -
Page 81: Earthing System (Standard Only)
6.3.5.3. Earthing system (Standard only) • The ground of the generating set must be connected to earth. To do so, use a copper cable (Green / Yellow), 25 mm² minimum for a bare cable and 16 mm² for an insulated cable, connected to the earth of the generating set, and to a ground rod of galvanised steel pushed vertically into the ground. - Page 82 Earthing system: TNS Neutral connected to grounds Interconnection bar between genset grounds CIRCUIT DISJONCTEUR Current BREAKER transformer Ground Ground rod Earthing system: TT Active differential circuit breaker Interconnection Neutral bar between genset grounds CIRCUIT DISJONCTEUR BREAKER Current transformer Ground Ground rod Type of earthing system: EDF application (On rental generating set only) Active differential circuit breaker Interconnection...
- Page 83 Power plant Connection of the generating sets to the box Genset 1 Genset 2 Genset x Neutral 1 current transformer per GS Earth junction Ground rod Genset 1 Genset 2 Genset x One ground rod for one generating set power plant Important 81/285...
- Page 84 Earthing system: IT Isolated neutral CIRCUIT DISJONCTEUR Current BREAKER transformer Ground Ground rod Earthing system: TNS Neutral connected to grounds CIRCUIT Current DISJONCTEUR BREAKER transformer Ground Ground rod Earthing system: TT Neutral CIRCUIT Current DISJONCTEUR BREAKER transformer Ground If equipped Ground rod Junction box 82/285...
-
Page 85: Facility Power Outlet
Connection of generating sets to client terminal boards Junction box Remove shunts terminals 45-48 and 46-47 Reinsert the shunts of terminals 45 and 46 after having disconnected the current transformer from the junction box. Important 6.3.5.4. Facility power outlet The facility power outlet (if fitted) provides the emergency supply to the generating set from an external electrical source. It enables the different units (preheating, desk, etc.) to be powered without using their batteries. -
Page 86: Connecting Cable Between The Generating Sets (Power Plant)
6.3.5.5. Connecting cable between the generating sets (power plant) 2 generating sets Generating set 1 Generating set 2 019x04 019x12 019x04 019x12 3 or more generating sets Generating set 1 Generating set 3 Generating set 2 Generating set x 019x04 019x12 019x04 019x12... -
Page 87: Power
6.3.5.6. Power 1. Pass the power cables through the access hatch to the power box of the generating set (AIPR or console, depending on the generating set). 2. Connect the power cables to the busbars. 3. Connect the power cables to the application. GENERATING SET APPLICATION Check that the direction of rotation of the phases between the generating set and the application is the... -
Page 88: Operation And Setting Menus
6.3.6 Operation and setting menus 6.3.6.1. Layout of the menus The diagram below shows the layout of the main menus. - 0 - Home - 3 - - 1 - - 2 - - 4 - - 5 - - 6 - Archiving Operation Fault finding... -
Page 89: Setting Of Regional Parameters
6.3.6.2. Setting of regional parameters Without an input access code this screen allows: input of the display language setting of date and time Navigation reference: 6.1 15/07/09 19 :10 :00 GS 1 Regional parameters Stop Faults Alarms Language Français English Espanol Deutsch Portugues... - Page 90 In this case the transmission of a signal to the bus, enabling the different real time clocks to be reset, is defined by the synchronisation time. Pressing the “KOHLER home logo” key alters the appearance of the home screen by replacing the KOHLER logo with the SDMO logo as default. The home screen then looks like this:...
-
Page 91: Information On The Kerys
Information on the KERYS Indication of the application Navigation reference: 6.2 This screen enables SDMO to identify the project. This information is required for queries sent to SDMO’s customer service, so that the associated file can be consulted. Identification 15/07/09 19 :10 :00... - Page 92 Software version Navigation reference: 6.3 The information relating to the software versions installed in the different modules is accessible from this menu. Only the lines corresponding to the installed equipment appear 15/07/09 19 :10 :00 GS 1 Software versions Stop Faults Alarms Module...
-
Page 93: Operating Menus
6.3.6.4. Operating menus Operation This main screen displays all the main electrical parameters of the generating set. It is the general operating and monitoring screen for the generating set. This screen can also be displayed by pressing the indicator displaying the operation mode of the generating set. The frequency, U23 voltage, active and reactive power indicators, can be displayed in analog or digital form. - Page 94 Navigation reference: 1.6 15/07/09 19 :10 :00 GS 1 Alarms & Faults Stop Faults Alarms Date Time Status Title 26/11/03 11:11:12’55 6131 HT LOW COOLANT LEVEL FAULT 26/11/03 10:35:16’28 6017 INSULATION 1 ALARM CIRCUIT BREAKER FAULT ON GENERATING SET 26/11/03 10:10:10’10 60C3 OUTPUT...
-
Page 95: Rental Configurations
6.3.7 Rental configurations 6.3.7.1. Choice of application configuration Solo generating set Without inverter (A612) 1. Turn off the battery isolator switch. 2. Check that the emergency stop buttons are activated. 3. Press the “STOP” button on the KERYS. 4. Turn the changeover switch to position 1. 1: SOLO GENERATING SET WITHOUT GRID COUPLING APPLICATION: A612 2: PRODUCTION POWER PLANT WITHOUT GRID COUPLING... - Page 96 5. Select the configuration of the mains detection of the generating set by clicking directly on the touch screen. For a mains detection by means of the regulation card you must select the configuration “Mains supply detection using the adjustment card” and connect the voltage reference to the terminals Xcbc1 - 1-2-3 . For mains detection by an external switch you must select the configuration “Mains supply detection using an external contact”...
- Page 97 Back-up to perform GS 1 Rental application Stop Faults Alarms A612: Single Genset without N/E Mains supply detection using the adjustment card Saving in flash … Validation Mains supply detection using an external contact 7. The KERYS saves your new configuration. 8.
- Page 98 After changeover, the screen below appears. 15/07/09 19:10 :00 GS 1 Rental application Stop Faults Alarms A651: Temporary power grid single Genset coupling Validation Grid CT ratio 20.0 5. To enter the value of the grid current transformer ratio: press the “GRID CT RATIO” button on the touch screen. Using the alphanumeric keys of the MICS KERYS: enter the value of the CT ratio in tenths.
- Page 99 15/07/09 19:10 :00 GS 1 Rental application Stop Faults Alarms A651: Temporary power grid single Genset coupling Validation Grid CT ratio 20.0 7. Press the “Validation” button on the touch screen. 15/07/09 19:10 :00 GS 1 Rental application Stop Faults Alarms A651: Temporary power grid single Genset coupling...
- Page 100 9. After return to the KERYS home screen, The configuration will only be taken into account if the following operations are carried out: Turn on the battery isolator switch. Wait 5 seconds. Turn off the battery isolator switch. Important Power plant Without common part and without inverter (A632-A633) 1.
- Page 101 Back-up to perform GS 1 Rental application Stop Faults Alarms A633: Power plant without shared switching unit without Normal/Emergency Digital Bus Number of gen sets in power plant Genset number Validation 6. Press the generating set number on the touch screen. Back-up to perform GS 1 Rental application...
- Page 102 Back-up to perform GS 1 Rental application Stop Faults Alarms A633: Power plant without shared switching unit without Normal/Emergency Digital Bus Number of gen sets in power plant Genset number Validation 9. Press the generating set number on the touch screen. Back-up to perform GS 1 Rental application...
- Page 103 Back-up to perform GS 1 Rental application Stop Faults Alarms A633: Power plant without shared switching unit without Normal/Emergency Digital Bus Number of gen sets in power plant Genset number Validation 12. Press “Validation" on the touch screen. Back-up to perform GS 1 Rental application Stop...
-
Page 104: Use
14. After returning to the Kerys home screen, The configuration will only be taken into account if the following operations are carried out: Turn on the battery isolator switch. Wait 5 seconds. Turn off the battery isolator switch. Important Operations to be carried out on each generating set of the power plant. Important 6.3.8 Use 6.3.8.1. - Page 105 15/07/09 19:10 :00 GS 1 Welcome Stop Faults Alarms - 0 - Welcome - 1 - Operation - 2 - - 7 - Function keys User adjustments - 3 - - 6 - Synchro. column Alarms & Faults - 4 - - 5 - Central unit measure.
- Page 106 User parameters 15/07/09 19:10 :00 GS 1 Stop Faults Alarms (1/2) Power return No load test time delay Without Confirmation request (sec) : Power 1 Power loss time delay (sec) : Power return time delay (sec) : Inversion in non-coupl. Whithout In emergency mode Inversion in non-coupl.
- Page 107 Generating set 15/07/09 19:10 :00 GS 1 Stop Faults Alarms priority Modification Priority GS select. select Return to the previous Valid priorities Display General parameters Thresholds Press the selection arrows on the touch screen to select the priority of the generating set selected. Generating set 15/07/09 19:10 :00...
- Page 108 Generating set Back-up to perform GS 1 Stop Faults Alarms priority Modification Priority GS select. select Return to the previous Valid priorities Display General parameters Thresholds Press “Save" on the touch screen. Generating set Back-up to perform GS 1 Stop Faults Alarms priority...
- Page 109 Generating set Back-up to perform GS 1 Stop Faults Alarms priority Modification Priority GS select. select Return to the previous Valid priorities Saving in flash … Display General parameters Thresholds 10. The Kerys saves your new configuration. Generating set 15/07/09 19:10 :00 GS 1 Stop...
-
Page 110: Starting, Tests And Stop
6.3.8.2. Starting, tests and stop In manual mode Starting Check there are no faults: grey: no fault. red: fault present. grey: no alarm. orange: alarm present. If faults are present, the fault management screen can be accessed by pressing Reset . Refer to the section “Alarms and Faults”... - Page 111 The manual start-up phase will begin once key 1 in the test keypad is pressed. The start-up request is maintained until the generating set starts (it is not necessary to keep key 1 pressed). This method may not, under any circumstances, be used to turn the engine over manually.
- Page 112 Pressing 1 on the test keypad brings up the following window for selecting the test type. 15/07/09 19 : 10 :00 GS 1 Operation Manu Faults Alarms I1(A) 2701 0,9 L Test selected Select the test to be carried out Under load No load test...
- Page 113 At any time the generating set may be stopped by pressing Stop or by pressing 0 on the test keypad. Pressing Stop may interrupt the power supply, depending on its status when the key is pressed (e.g. isolated grid operation). The generating set will stop after a cooling delay (180 seconds by default).
- Page 114 In automatic mode Starting Check there are no faults: grey: no fault. red: fault present. grey: no alarm. orange: alarm present. If faults are present, the fault management screen can be accessed by pressing Reset. Refer to the section “Alarms and Faults” in the Operating menus” to eliminate the faults.
- Page 115 The installation is then controlled via the automatic systems in accordance with the configuration of the application: inversion of normal/emergency source grid coupling etc. Tests If no faults are present, automatic mode can be activated by pressing Auto. The test starting phase is then initiated after pressing 1 on the test keypad. Pressing 1 on the test keypad brings up the following window for selecting the test type.
- Page 116 After validation of the test, the orange LED on the test keypad lights up steady. During the start-up phase, and until the alternator voltage and generating set speed stabilise, the green LED underneath the symbol for the generating set flashes and becomes steady at the end of this phase.
-
Page 117: Rental Options
Switching off The generating set may be stopped at any time by pressing 0 on the test keypad. Pressing Stop may cause an interruption in the power supply depending on its status when the button is pressed (e.g. isolated grid operation). The generating set will stop after the cooling delay (180 seconds by default). - Page 118 Air preheating (Optional) Turn the switch to “ON” to initiate preheating of the generating set. AIR PREHEATING In the case of a power plant, the position of the air preheating switches must NECESSARILY be the same on all the switches of the generating sets in the power plant. Important Bi-frequency (Optional) Turn the switch to the desired frequency and voltage.
-
Page 119: Maintenance Schedule
7. Maintenance schedule 7.1. Reminder of use The maintenance interval frequency and the operations to be carried out are outlined in the maintenance schedule, given as a guideline. N.B. the environment in which the generating set is operating determines this schedule. If the generating set is used in extreme conditions, shorter intervals between maintenance procedures should be observed These maintenance intervals only apply to generating sets running on fuel, oil and coolant which conform to the specifications given in this manual. -
Page 120: Alternator
At least every Every 4 000 hours (month) Belt tensioner Drive belt Coolant (green) At least every Every 8 000 hours (month) Coolant VCS (yellow) 7.3. Alternator After 20 hours in operation, check the tightness of all the mounting bolts, the general condition of the machine and the various electrical connections of the installation. -
Page 121: Battery
8. Battery Fit the battery so that it is properly ventilated. Maintenance should only be carried out by qualified personnel. If replacing the batteries, use the same type of batteries. Do not throw the old battery in the fire. Only use insulated tools (the operator should not be wearing a watch, chain or any metal object). Never use sulphuric acid or acid water to top up the electrolyte level. -
Page 122: Battery Setting Into Service
8.2. Battery setting into service Batteries filled with acid have a density of 1.28 g/ml and are charged. In the case of dry batteries, fill each battery cell with acid up to the maximum level mark or to 15 mm above the plates. Let the battery rest for 20 minutes. -
Page 123: Load Preconization
8.4. Load preconization Highly discharged or sulphated batteries (formation of whitish lead sulphate deposit on the plates, which becomes hard and insoluble to acid; this deposit reduce the active surface of the plates, and increases their internal resistance) can no longer regenerate or be charged in a generating set. -
Page 124: Faults And Remedies
8.5. Faults and remedies Fault observed Probable origin Measures or observations The acid heats up when a new battery is - Incorrect composition - Cool filled - Incorrect storage - Charge - Prolonged storage in a damp place - Check the acid density The acid escapes through the filler holes - Battery overflow during filling - Reduce the battery fluid level... -
Page 125: Appendix
9. Appendix 9.1. Appendix A – Engine user and maintenance manual 123/285... - Page 126 124/285...
- Page 127 User guide and maintenance manual 47702660 33522062701_2_1 01/01/2012 125/285...
- Page 128 126/285...
- Page 129 127/285...
- Page 130 128/285...
- Page 131 129/285...
- Page 132 130/285...
- Page 133 131/285...
- Page 134 132/285...
- Page 135 133/285...
- Page 136 134/285...
- Page 137 135/285...
- Page 138 136/285...
- Page 139 137/285...
- Page 140 138/285...
- Page 141 139/285...
- Page 142 140/285...
- Page 143 141/285...
- Page 144 142/285...
- Page 145 143/285...
- Page 146 144/285...
- Page 147 145/285...
- Page 148 146/285...
- Page 149 147/285...
- Page 150 148/285...
- Page 151 149/285...
- Page 152 150/285...
- Page 153 151/285...
- Page 154 152/285...
- Page 155 153/285...
- Page 156 154/285...
- Page 157 155/285...
- Page 158 156/285...
- Page 159 157/285...
- Page 160 158/285...
- Page 161 159/285...
- Page 162 160/285...
- Page 163 161/285...
- Page 164 162/285...
- Page 165 163/285...
- Page 166 164/285...
- Page 167 165/285...
- Page 168 166/285...
- Page 169 167/285...
- Page 170 168/285...
- Page 171 169/285...
- Page 172 170/285...
- Page 173 171/285...
- Page 174 172/285...
- Page 175 173/285...
- Page 176 174/285...
- Page 177 175/285...
- Page 178 176/285...
- Page 179 177/285...
- Page 180 178/285...
- Page 181 179/285...
- Page 182 180/285...
- Page 183 181/285...
- Page 184 182/285...
- Page 185 183/285...
- Page 186 184/285...
- Page 187 185/285...
- Page 188 186/285...
- Page 189 187/285...
- Page 190 188/285...
- Page 191 189/285...
- Page 192 190/285...
- Page 193 191/285...
- Page 194 192/285...
- Page 195 193/285...
- Page 196 194/285...
- Page 197 195/285...
- Page 198 196/285...
- Page 199 197/285...
- Page 200 198/285...
- Page 201 199/285...
- Page 202 200/285...
- Page 203 201/285...
- Page 204 202/285...
- Page 205 203/285...
- Page 206 204/285...
- Page 207 205/285...
- Page 208 206/285...
- Page 209 207/285...
- Page 210 208/285...
-
Page 211: Appendix B - Alternator User And Maintenance Manual
9.2. Appendix B - Alternator user and maintenance manual 209/285... - Page 212 210/285...
- Page 213 User guide and maintenance manual & & & & 3856 h 33522061001_8_1 01/03/2012 211/285...
- Page 214 212/285...
- Page 215 3856 en - 2011.01 / h LSA 46.2 - 4 POLES ALTERNATORS Installation and maintenance 213/285...
- Page 216 Installation and maintenance LEROY-SOMER 3856 en - 2011.01/ h LSA 46.2 - 4 POLES ALTERNATORS This manual concerns the alternator which you have just purchased. We wish to draw your attention to the contents of this maintenance manual. SAFETY MEASURES WARNING SYMBOLS Before using your machine for the first time, We wish to draw your attention to the...
- Page 217 Installation and maintenance LEROY-SOMER 3856 en - 2011.01/ h LSA 46.2 - 4 POLES ALTERNATORS CONTENTS 1 - RECEIPT ..........................4 1.1 - Standards and safety measures ...................4 1.2 - Inspection ........................4 1.3 - Identification ......................... 4 1.4 - Storage ........................4 1.5 - Applications ........................
-
Page 218: Receipt
Installation and maintenance LEROY-SOMER 3856 en - 2011.01/ h LSA 46.2 - 4 POLES ALTERNATORS 1 - RECEIPT • C : excitation system (C : AREP / J : SHUNT or PMG / E : 1.1 - Standards and safety COMPOUND) measures •... -
Page 219: Technical Characteristics
Installation and maintenance LEROY-SOMER 3856 en - 2011.01/ h LSA 46.2 - 4 POLES ALTERNATORS 2 - TECHNICAL CHARACTERISTICS 2.2 - Mechanical characteristics - Steel frame 1.1 - Electrical characteristics - Cast iron end shields The LSA 46.2 alternator is a machine - Protected ball bearings, greased for life without sliprings or revolving armature - Mounting arrangements:... -
Page 220: Installation
Installation and maintenance LEROY-SOMER 3856 en - 2011.01/ h LSA 46.2 - 4 POLES ALTERNATORS 3 - INSTALLATION 3.1.2 - Coupling Personnel undertaking various 3.1.2.1 - Single-bearing alternator operations indicated in this section must Before coupling the machines, check that wear personal protective equipment they are compatible by: appropriate for mechanical and electri-... -
Page 221: Terminal Connection Diagrams
Installation and maintenance LEROY-SOMER 3856 en - 2011.01/ h LSA 46.2 - 4 POLES ALTERNATORS There are 2 possible methods for restoring - the standard direction of rotation is clock- the above minimum values. wise as seen from the shaft end (phase a) Dry out the machine for 24 hours in a rotation in order 1 - 2 - 3). - Page 222 Installation and maintenance LEROY-SOMER 3856 en - 2011.01/ h LSA 46.2 - 4 POLES ALTERNATORS Connection codes Voltage L.L Factory connection 50 Hz 60 Hz Winding 220 - 240 220 - 240 1 phase 240 - 254 220 - 240 R 250 voltage detection : L1(U) 0 =>...
- Page 223 Installation and maintenance LEROY-SOMER 3856 en - 2011.01/ h LSA 46.2 - 4 POLES ALTERNATORS 3.3.2 - Terminal connection: 6 wire (not possible with the R 250) Connection codes Voltage L.L Factory connection 50 Hz 60 Hz L1(U) Winding L3(W) 380 - 480 380 - 415 3-phase...
-
Page 224: Commissioning
Installation and maintenance LEROY-SOMER 3856 en - 2011.01/ h LSA 46.2 - 4 POLES ALTERNATORS 3.4 - Commissioning 3.3.4 - Connection checks Electrical installations must comply with The machine can only be started up and the current legislation in force in the used if the installation is in accordance country of use. -
Page 225: Servicing - Maintenance
Installation and maintenance LEROY-SOMER 3856 en - 2011.01/ h LSA 46.2 - 4 POLES ALTERNATORS 4 - SERVICING - MAINTENANCE 4.2.3 - Electrical servicing 4.1 - Safety measures Commercially-available volatile degreasing Servicing or troubleshooting must be agents can be used. carried out strictly in accordance with WARNING instructions so as to avoid the risk of... -
Page 226: Mechanical Defects
Installation and maintenance LEROY-SOMER 3856 en - 2011.01/ h LSA 46.2 - 4 POLES ALTERNATORS 4.4 - Mechanical defects Fault Action Excessive temperature rise in one or - If the bearing has turned blue or if the grease has turned black, change the bearing both bearings (bearing temperature more - Bearing not fully locked (abnormal play in the bearing cage) Bearing... - Page 227 Installation and maintenance LEROY-SOMER 3856 en - 2011.01/ h LSA 46.2 - 4 POLES ALTERNATORS 4.5.1 - Checking the winding Assembly A: Connect a 12 V battery in series with a rheostat of approximately You can check the winding insulation by 50 ohms - 300 W and a diode on both exciter performing a high voltage test.
-
Page 228: Dismantling, Reassembly
Installation and maintenance LEROY-SOMER 3856 en - 2011.01/ h LSA 46.2 - 4 POLES ALTERNATORS 4.6 - Dismantling, reassembly 4.6.4 - Access to connections and the (see sections 5.4.1. & 5.4.2.) regulation system Access directly by removing the top of the WARNING cover (48) or the AVR access door (466). - Page 229 Installation and maintenance LEROY-SOMER 3856 en - 2011.01/ h LSA 46.2 - 4 POLES ALTERNATORS - Slide the threaded rod into the shield hole - Slide the threaded rod into the shield hole to make it easier to assemble (see basic to make it easier to assemble (see basic diagram).
-
Page 230: Installation And Maintenance Of The Pmg
Installation and maintenance LEROY-SOMER 3856 en - 2011.01/ h LSA 46.2 - 4 POLES ALTERNATORS If using a single-bearing or double-bearing To replace, follow the instructions in reverse machine with the regreasable bearing order. option: - Mount the new preloading (wavy) washer (79) + the new “O”... -
Page 231: Table Of Characteristics
Installation and maintenance LEROY-SOMER 3856 en - 2011.01/ h LSA 46.2 - 4 POLES ALTERNATORS 4.8 - Table of characteristics 4.8.2 - Voltage of auxiliary windings at no load Table of average values Alternator - 4 poles - 50 Hz - Standard winding No. -
Page 232: Spare Parts
Installation and maintenance LEROY-SOMER 3856 en - 2011.01/ h LSA 46.2 - 4 POLES ALTERNATORS 5 - SPARE PARTS In the event of failure to comply with this advice, the manufacturer cannot be held 5.1 - First maintenance parts responsible for any damage. Emergency repair kits are available as an option. -
Page 233: Exploded Views, Parts List And Tightening Torque
Installation and maintenance LEROY-SOMER 3856 en - 2011.01/ h LSA 46.2 - 4 POLES ALTERNATORS 5.4 - Exploded view, parts list and tightening torque 5.4.1 - LSA 46.2 single-bearing 231/285... - Page 234 Installation and maintenance LEROY-SOMER 3856 en - 2011.01/ h LSA 46.2 - 4 POLES ALTERNATORS 5.4.2 - LSA 46.2 double-bearing 232/285...
- Page 235 Installation and maintenance LEROY-SOMER 3856 en - 2011.01/ h LSA 46.2 - 4 POLES ALTERNATORS Screw Torque Screw Torque Ref. Qty Description Ref. Qty Description Ø Ø Stator assembly Exciter field Rotor assembly Fixing screws Exciter armature Lifting ring Terminal plate support Shaft extension key Plate support Earth terminal...
- Page 236 Installation and maintenance LEROY-SOMER 3856 en - 2011.01/ h LSA 46.2 - 4 POLES ALTERNATORS Electric Power Generation Division Declaration of CE compliance and incorporation This Declaration applies to the generators designed to be incorporated into machines complying with the Machinery Directive Nr 2006/42/CE dated 17 May 2006.
- Page 237 Installation and maintenance LEROY-SOMER 3856 en - 2011.01/ h LSA 46.2 - 4 POLES ALTERNATORS 235/285...
- Page 238 LEROY-SOMER 16015 ANGOULÊME CEDEX - FRANCE 338 567 258 RCS ANGOULÊME www.leroy-somer.com 236/285...
- Page 239 4067 en - 2009.05 / b STATOR : 12 wires (marking T1 to T12) MAIN FIELD SHUNT SYSTEM Induced Field 75 mm R 250 110 0V 4 x holes Ø 5.8 x 50 x 115 mm Slow fuse 250V 8 A Voltage 50Hz KNEE...
- Page 240 LEROY-SOMER Installation and maintenance 4067 en - 2009.05 / b R250 A.V.R. This manual concerns the alternator A.V.R. which you have just purchased. We wish to draw your attention to the contents of this maintenance manual. By following certain important points during installation, use and servicing of your A.V.R., you can look forward to many years of trouble-free operation.
- Page 241 LEROY-SOMER Installation and maintenance 4067 en - 2009.05 / b R250 A.V.R. SUMMARY 1 - SUPPLY ..........................4 1.1 - SHUNT excitation system ....................4 2 - R250 A.V.R.........................5 2.1 - Characteristics ......................5 2.2 - U/F fonction and LAM ....................5 2.3 - R250 A.V.R.
-
Page 242: Supply
LEROY-SOMER Installation and maintenance 4067 en - 2009.05 / b R250 A.V.R. 1 - SUPPLY The regulator controls the excitation current according to the alternator’s output voltage. 1.1 - SHUNT excitation system With a very simple conception, the SHUNT The SHUNT excitation alternator is auto- excitation alternator does not have a short excited with a R 250 voltage regulator. -
Page 243: R250 A.v.r
LEROY-SOMER Installation and maintenance 4067 en - 2009.05 / b R250 A.V.R. 2 - R250 A.V.R. The threshhold position and LAM fonction settings are done with the jumper. 2.1 - Characteristics - Storage: -55°C; +85°C Operating at 50 Hz: (U/F gradient) - Operation: -40°C;... -
Page 244: R250 A.v.r. Option
LEROY-SOMER Installation and maintenance 4067 en - 2009.05 / b R250 A.V.R. 2.3 - R250 A.V.R. option It is advised to use the “LAM” at 25% for load impacts > at 70% of the genset rated power. Potentiometer for voltage setting, 1000 W / 0,5 W min: setting range ±... -
Page 245: Typical Effects Of The Lam
LEROY-SOMER Installation and maintenance 4067 en - 2009.05 / b R250 A.V.R. 2.5 - Typical effects of the LAM with a diesel engine or without a LAM (U/F only) 2.5.1 - Voltage Transient voltage drop (U/f) without LAM with Time 2.5.2 - Frequency Max speed drop with... -
Page 246: Installation - Commisioning
LEROY-SOMER Installation and maintenance 4067 en - 2009.05 / b R250 A.V.R. 3 - INSTALLATION - 3.2.2 - Special type of use COMMISSIONING 3.1 - Electrical checks on the AVR WARNING - Check that all connections have been Excitation circuit E+, E- must not be left made properly as shown in the attached open when the machine is running: wiring diagram. -
Page 247: Electrical Faults
LEROY-SOMER Installation and maintenance 4067 en - 2009.05 / b R250 A.V.R. 3.3 - Electrical faults Fault Action Effect Check/cause The alternator starts up and its voltage is still correct when the - Lack of residual magnetism battery is removed. Connect a new battery The alternator starts up but its - Check the connection of the voltage... -
Page 248: Spare Parts
LEROY-SOMER Installation and maintenance 4067 en - 2009.05 / b R250 A.V.R. 4 - SPARE PARTS 4.1 - Designation Description Type Code A.V.R. R 250 AEM 110 RE 019 4.2 - Technical support service Our technical support service will be pleased to help you with any information needed. - Page 249 LEROY-SOMER Installation and maintenance 4067 en - 2009.05 / b R250 A.V.R. 247/285...
- Page 250 MOTEURS LEROY-SOMER 16015 ANGOULÊME CEDEX - FRANCE 338 567 258 RCS ANGOULÊME S.A. au capital de 62 779 000 ¤ www.leroy-somer.com 248/285...
- Page 251 4531 en - 2012.03 / e R 450 50 Hz EXT FREQ 60 Hz SETTING 380V 220 110 0V E- E+ Z2 X1 Z1 X2 R 450 AVRs Installation and maintenance 249/285...
- Page 252 LEROY-SOMER Installation and maintenance 4531 en - 2012.03 / e R 450 AVRs This manual concerns the alternator AVR which you have just purchased. We wish to draw your attention to the contents of this maintenance manual. By following certain important points during installation, use and servicing of your AVR, you can look forward to many years of trouble-free operation.
- Page 253 LEROY-SOMER Installation and maintenance 4531 en - 2012.03 / e R 450 AVRs CONTENTS 1 - GENERAL INFORMATION ....................4 1.1 - Description ........................4 1.2 - Characteristic ....................... 4 2 - POWER SUPPLY ....................... 5 2.1 - AREP excitation system ....................5 2.2 - PMG excitation system ....................6 2.3 - SHUNT or separate excitation system ................7 3 - TECHNICAL CHARACTERISTICS ..................8...
-
Page 254: General Information
LEROY-SOMER Installation and maintenance 4531 en - 2012.03 / e R 450 AVRs 1 - GENERAL INFORMATION 1.2 - Characteristic The connection is realised by “Faston” 1.1 - Description connectors and the voltage sensing is The R450 AVR is supplied in a casing single - phase. -
Page 255: Power Supply
LEROY-SOMER Installation and maintenance 4531 en - 2012.03 / e R 450 AVRs 2 - POWER SUPPLY characteristic), the second one has a voltage proportional to the stator current Both the SHUNT/AREP & PMG excitation (compound characteristic : Booster effect). systems are controlled by the AVR. -
Page 256: Pmg Excitation System
LEROY-SOMER Installation and maintenance 4531 en - 2012.03 / e R 450 AVRs 2.2 - PMG excitation system The AVR monitors the alternator output voltage by adjusting the excitation current. With PMG excitation, a permanent magnet The rotating switch should be in the PMG generator (PMG) added to the alternator position (see 3.2.3). -
Page 257: Shunt Or Separate Excitation System
LEROY-SOMER Installation and maintenance 4531 en - 2012.03 / e R 450 AVRs 2.3 - SHUNT or separate excitation system With SHUNT excitation, the AVR is powered by the main winding (100V to 140V - 50/60 Hz ) by using X1, X2 on the AVR. The rotating switch should be in the SHUNT/ AREP position (see 3.2.3). -
Page 258: Technical Characteristics
LEROY-SOMER Installation and maintenance 4531 en - 2012.03 / e R 450 AVRs 3 - TECHNICAL CHARACTERISTICS 3.2.1.2 - Quadrature droop: Quadrature droop adjustment 3.1 - Electrical characteristics potentiometer P4 within a range : - maximum power supply: 150V - 50/60 Hz - from 0 to 8% with a PF=0.8 for 400V - Rated overload current: 10 A - 10 s applications. - Page 259 LEROY-SOMER Installation and maintenance 4531 en - 2012.03 / e R 450 AVRs excitation current must be limited to WARNING 9 A ± 0.5 A. Overrun indications: limitation threshold must adjustable between 1 and 5.5 A. The One green LED: genset breaker must be open during the - Lights up when the excitation current is short circuit.
- Page 260 LEROY-SOMER Installation and maintenance 4531 en - 2012.03 / e R 450 AVRs I exc(A) Diagram 2 2.9x I (Maximum current I exc) threshold (max. 9.5 A) threshold (1...5.5A) t(s) Shutdown Activation of 90 s. tempo elapsed : application 0.5 ~ 0.7 90 s.
- Page 261 LEROY-SOMER Installation and maintenance 4531 en - 2012.03 / e R 450 AVRs 3.2.2 - Rotating switch selection: LAM 3.2.3 Rotating switch: excitation type and U/F and time response 50Hz EXT.FREQ. AREP SET. MODE 1 RAPIDE NORMAL FAST NORMAL MODE 2 ONLY FOR SPECIAL CONFIG.
-
Page 262: U/F And Lam Functions
LEROY-SOMER Installation and maintenance 4531 en - 2012.03 / e R 450 AVRs 3.3 - U/F and LAM function 3.3.2.2 - Soft voltage recovery function During load impacts, the function helps the 3.3.1 - Frequency variation compared genset to return to its rated speed faster with with voltage (without LAM) a gradual increase in voltage according to the principle:... -
Page 263: Avr Options
LEROY-SOMER Installation and maintenance 4531 en - 2012.03 / e R 450 AVRs 3.4.3 - Power • Equalization voltages before paralleling (3 F). • Possibility of coupling to the mains of alternators already running in parallel (4F). - R729 module: same as R726 with Variation in the load additional functions. -
Page 264: Installation - Commissioning
LEROY-SOMER Installation and maintenance 4531 en - 2012.03 / e R 450 AVRs 4 - INSTALLATION - COMMISSIONING Action Factory setting Pot. 4.1 - Electrical checks on the AVR Voltage - Check that all connections have been minimum fully 400 V - 50 Hz anti-clockwise made properly as shown in the attached wiring diagram. - Page 265 LEROY-SOMER Installation and maintenance 4531 en - 2012.03 / e R 450 AVRs i) Vary the frequency (speed) around 48 or However, for applications requiring an 58 Hz according to the operating frequency, overload protection (see 3.2.1.4), the and check the change in voltage from that excitation ceiling must be adjusted by using observed previously (~ 15%).
- Page 266 LEROY-SOMER Installation and maintenance 4531 en - 2012.03 / e R 450 AVRs The exciter is switched off by disconnecting the AVR power supply (1 wire on each auxiliary winding) - contact rating 16 A - 250 V A.C. When the excitation current is set to the Connection is identical for resetting the AVR rated value, a voltage dip is observed in internal protection.
-
Page 267: Electrical Faults
LEROY-SOMER Installation and maintenance 4531 en - 2012.03 / e R 450 AVRs 4.3 - Electrical faults Fault Action Measurements Check/Cause The alternator builds up and its - Lack of residual magnetism voltage is still correct when the battery is removed No voltage at Connect a new battery The alternator builds up but its... -
Page 268: Spare Parts
LEROY-SOMER Installation and maintenance 4531 en - 2012.03 / e R 450 AVRs 5 - SPARE PARTS 5.1 - Designation Description Type Code Voltage regulator R 450 AEM 110 RE 031 (AVR) 5.2 - Technical support service Our technical support service will be pleased to provide any additional information you may require. - Page 269 LEROY-SOMER Installation and maintenance 4531 en - 2012.03 / e R 450 AVRs 267/285...
- Page 270 www.leroy-somer.com 268/285...
-
Page 271: Appendix C - Common Spare Parts
9.3. Appendix C - Common spare parts R340U Rental Power VOLVO TAD941GE Radiator filler cap 330051142 Radiator pressure cap 330052078 Thermostat 330051467 Thermostat seal 330051539 Fan belt 330051419 Rocker cover seal 330051468 Water temperature sensor 330051466 Oil pressure sensor 330051465 Alternator belt 330051418 x 25 L... - Page 272 330560243 330570109 + 330570110 330510015 + 330560617 330560551 330560634 LEROY-SOMER LSA462VL12 Diode bridge 330410126 Varistor 330410109 Note For all technical assistance or spare part requests, contact your nearest SDMO agent. 270/285...
-
Page 273: Appendix D - List Of John Deere - Volvo And Perkins Fault Codes
9.4. Appendix D - List of John Deere - Volvo and Perkins fault codes PPID Description Comment Throttle #3 Position Throttle Voltage high, short to V+ Short to V+ Throttle Voltage low, short to V- Short to V- Throttle #2 Position Throttle Voltage high, short to V+ Short to V+ Throttle Voltage low, short to V-... - Page 274 PPID Description Comment Oil pressure sensor Engine oil pressure extremely low Oil pressure sensor input voltage high Short to V+ Oil pressure sensor input voltage low Short to V- Oil pressure sensor open circuit Engine oil pressure low Engine oil pressure moderately low Oil pressure detected, motor stopped Manifold air pressure sensor Manifold air pressure above normal...
- Page 275 PPID Description Comment Not use with EDC III and Barometric pressure sensor EMS2 Air pressure invalid High barometric pressure sensor short to high High barometric pressure sensor short to ECM option, sensor not High barometric pressure connected Coolant temperature sensor Coolant temperature extremely high Coolant temperature sensor input voltage high...
- Page 276 PPID Description Comment Inlet temperature Ambient air temperature sensor sensor for PERKINS Ambient air temperature sensor input Inlet air temperature sensor voltage high input voltage high Ambient air temperature sensor input Inlet air temperature sensor voltage low input voltage low Ambient air temperature sensor open circuit High Inlet air temperature...
- Page 277 PPID Description Comment Overspeed output status Overspeed output open/short to B+ Overspeed output short to ground Coolant temperature output status Coolant temperature lamp open/short to Coolant temperature lamp short ground Oil pressure output status Oil pressure output open/short to B+ Oil pressure output short to ground Oil pressure output open circuit Shutdown output status...
- Page 278 PPID Description Comment Start enable device (intake heater and ether) Start enable device output short to B+ Not used, the control panel Start enable device output short to is in charge of managing the ground start enable device Start enable device output open circuit Power supply Injector supply voltage problem For 6125HF070 only...
- Page 279 PPID Description Comment Communication status Bus Off error Passive bus error Data registers read back failure Loss of message error Bus CAN error Engine shutdown vehicle status Engine shutdown vehicle request invalid Engine shutdown vehicle request Status of the Turbo with variable geometry Supply voltage of the Turbo actuator low Error in communication between the ECU...
- Page 280 PPID Description Comment Cylinder #3 injector status Recalibration of the injectors Injector outside the specifications required Recalibration of the injectors Injector outside the specifications required Short circuit high side to B+ Short circuit high side to low side or low side to B+ Short circuit high or low side to ground Cylinder #3 circuit open...
- Page 281 PPID Description Comment Cylinder #6 injector status Recalibration of the injectors Injector outside the specifications required Recalibration of the injectors Injector outside the specifications required Short circuit high side to B+ Short circuit high side to low side or low side to B+ Short circuit high or low side to ground Cylinder #6 circuit open...
- Page 282 PPID Description Comment 1069 Tire size status Tire size error Not possible with Genset Tire size invalid application Tire size error 1075 Feed pump of the fuel circuit High impedance at the terminals of the pump or open circuit Pump coil short to ground Pump defective 1076 Fuel Injection pump status...
- Page 283 PPID Description Comment Input temperature 1172 compressor Input voltage of the temperature sensor Short to V+ high Input voltage of the temperature sensor Short to V- 1180 Input temperature of the TGV turbine Turbine temperature extremely high Short to V+ Turbine temperature moderately high Short to V- 1184...
- Page 284 PPID Description Comment 2630 Air temperature at the air cooler outlet Air temperature extremely high Sensor input voltage high Short to V+ Sensor input voltage low Short to V- Air temperature high Air temperature moderately high 2659 Flow level of the EGR valve Calculated EGR flow not valid Calculated EGR flow rather high Calculated EGR flow rather low...
- Page 285 SAE J1939-73 : March 2004 FMI and Description FMI=0—DATA VALID BUT ABOVE NORMAL OPERATIONAL RANGE - MOST SEVERE LEVEL The signal communicating information is within a defined acceptable and valid range, but the real world condition is above what would be considered normal as determined by the predefined most severe level limits for that particular measure of the real world condition ( Region e of the signal range definition) Broadcast of data values is continued as normal.
- Page 286 FMI=11—ROOT CAUSE NOT KNOWN It has been detected that a failure has occurred in a particular subsystem but the exact nature of the fault is not known. Broadcast of data value is substituted with the “error indicator” value. FMI=12—BAD INTELLIGENT DEVICE OR COMPONENT Internal diagnostic procedures have determined that the failure is one which requires the replacement of the ECU, used here to mean the packaged unit that includes some microprocessor and its associated components and circuits.
- Page 287 FMI=20-30—RESERVED FOR SAE ASSIGNMENT FMI=31—CONDITION EXISTS Used to indicate that the condition that is identified by the SPN exists when no more applicable FMI exists or in cases when the reported SPN name spells out the component and a non-standard failure mode. This type of fault may or may be directly associated with the value of general broadcast information.
Need help?
Do you have a question about the R 340 U and is the answer not in the manual?
Questions and answers