Table of Contents
Advertisement
Advertisement
Table of Contents

Related Manuals for Cisco RV110W


Summary of Contents for Cisco RV110W
- Page 1 ADMINISTRATION GUIDE Cisco Small Business RV110W Wireless-N VPN Firewall...
- Page 2 Revised March 2012 Cisco and the Cisco logo are trademarks or registered trademarks of Cisco and/or its affiliates in the U.S. and other countries. To view a list of Cisco trademarks, go to this URL: www.cisco.com/go/trademarks. Third-party trademarks mentioned are the property of their respective owners. The use of the word partner does not imply a partnership relationship between Cisco and any other company.
-
Page 3: Table Of Contents
Configuring Automatic Configuration (DHCP) Configuring Static IP Configuring PPPoE Configuring PPTP Configuring L2TP Configuring Optional Settings Configuring the LAN Settings Changing the Default Cisco RV110W IP Address Configuring DHCP Configuring VLANs Configuring Static DHCP Viewing DHCP Leased Clients Cisco RV110W Administration Guide... - Page 4 Configuring Advertisement Prefixes Chapter 3: Configuring the Wireless Network Wireless Security Wireless Security Tips General Network Security Guidelines Cisco RV110W Wireless Networks Configuring Basic Wireless Settings Editing the Wireless Network Settings Configuring the Security Mode Configuring MAC Filtering Cisco RV110W Administration Guide...
- Page 5 Configuring the Wireless Guest Network Configuring Advanced Wireless Settings Configuring WDS Configuring WPS Chapter 4: Configuring the Firewall Cisco RV110W Firewall Features Configuring Basic Firewall Settings Configuring Remote Management Configuring Universal Plug and Play Managing Firewall Schedules Adding or Editing a Firewall Schedule...
- Page 6 Configuring Bandwidth Configuring Bandwidth Priority Configuring QoS Port-Based Settings Configuring CoS Settings Configuring DSCP Settings Chapter 7: Administering Your Cisco RV110W Setting Password Complexity Configuring User Accounts Setting the Session Timeout Value Configuring Simple Network Management (SNMP) Configuring SNMP System Information...
- Page 7 Upgrading Firmware or Change the Language Restarting the Cisco RV110W Restoring the Factory Defaults Running the Setup Wizard Chapter 8: Viewing the Cisco RV110W Status Viewing the Dashboard Viewing the System Summary Viewing the Wireless Statistics Viewing the VPN Status...
-
Page 8: Chapter 1: Introduction
• Connecting to Your Wireless Network Product Overview Thank you for choosing the Cisco Small Business RV110W Wireless-N VPN Firewall. The Cisco RV110W is an advanced Internet-sharing network solution for your small business needs. It allows multiple computers in your office to share an Internet connection through both wired and wireless connections. - Page 9 LAN Ethernet Interfaces The Cisco RV110W provides four full-duplex 10/100 Fast Ethernet LAN interfaces that can connect up to four devices. You can connect a Cisco Small Business switch to one of the available ports to expand your network as needed.
-
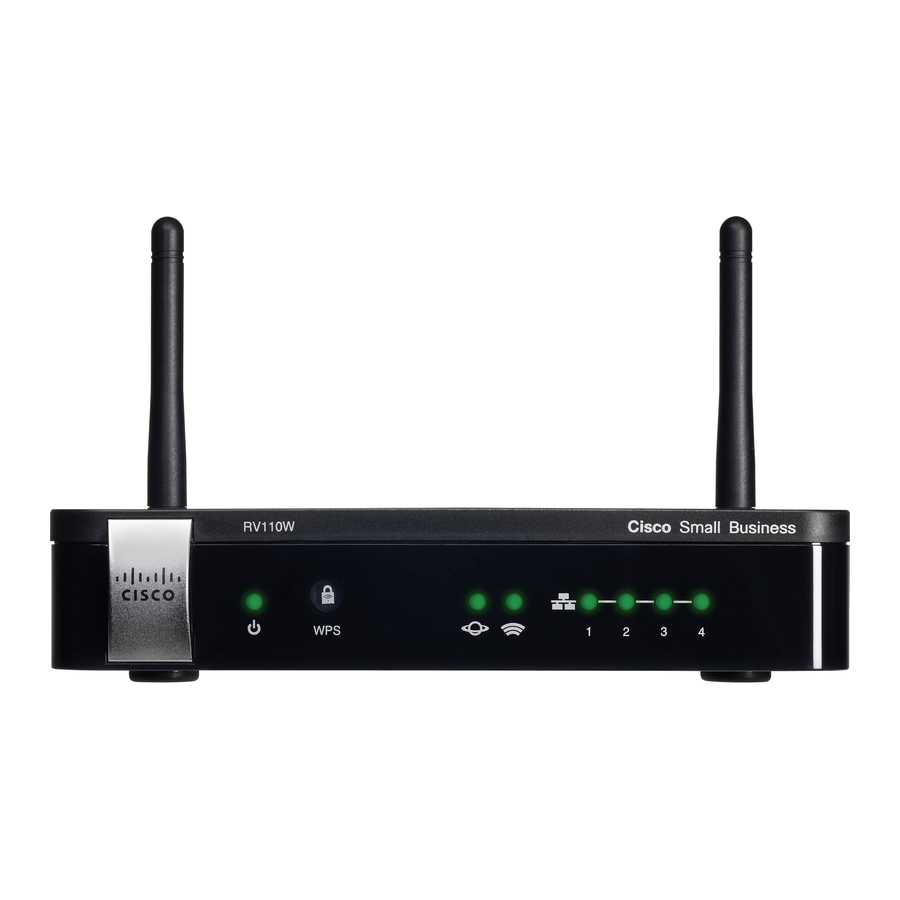
Page 10: Getting To Know The Cisco Rv110W
Cisco RV110W settings using the browser-based Device Manager. The Cisco RV110W supports Internet Explorer, Firefox, and Safari web browsers. The Cisco RV110W also provides a Setup Wizard that allows you to easily and quickly configure the Cisco RV110W basic settings. - Page 11 The WAN (Internet) light is green when the Cisco RV110W is connected to the Internet through your cable or DSL modem. The light is off when the Cisco RV110W is not connected to the Internet. The light flashes green when it is sending or receiving data Wireless The Wireless light is green when the wireless module is enabled.
-
Page 12: Back Panel
The WAN (Internet) port is connected to your Internet device, such as a cable or DSL modem. POWER Press to turn the Cisco RV110W on or off. 12VDC Connect the provided 12V AC power adapter to the 12VDC port. -
Page 13: Installing The Cisco Rv110W
• Mechanical Loading—Be sure that the firewall is level and stable to avoid any hazardous conditions. Place the Cisco RV110W horizontally on a flat surface so that it sits on its rubber feet. Connecting the Equipment You must connect a PC with an Ethernet cable for the purpose of the initial configuration. - Page 14 Power on the cable or DSL modem and wait until the connection is active. STEP 4 Connect the power adapter to the Cisco RV110W power port (12VDC). STEP 5 Use only the power adapter that is supplied with the unit. Using a different power CAUTION adapter could damage the unit.
-
Page 15: Using The Setup Wizard
Plug the other end of the adapter into an electrical outlet. You may need to attach a STEP 6 specific plug (supplied) for your country. On the Cisco RV110W, push the POWER button in to turn on the firewall. STEP 7 The power light on the front panel is green when the power adapter is connected properly and the unit is turned on. -
Page 16: Using The Getting Started Page
You may need to contact your ISP to obtain this information. NOTE: When using the Setup Wizard, you can only set up one wireless network, or SSID. The Cisco RV110W supports up to four wireless networks. If you want to configure additional wireless networks, use the web-based Device Manager. See Configuring the Wireless Network. - Page 17 Click to open the System Summary page. See Viewing the System Summary. Wireless Status Click to open the Wireless Statistics page. See Viewing the Wireless Statistics. VPN Status Click to open the VPN Status page. See Viewing the VPN Status. Cisco RV110W Administration Guide...
-
Page 18: Navigating Through The Pages
Introduction Using the Getting Started Page Other Resources Support Click to open the Cisco support page. Forums Click to visit Cisco online support forums. Navigating through the Pages Use the navigation tree in the left pane to open the configuration pages. -
Page 19: Saving Changes
When you finish making changes on a configuration page, click Save to save the changes, or click Cancel to undo your changes. Viewing the Help Files To view more information about a configuration page, click the Help link near the top right corner of the page. Cisco RV110W Administration Guide... -
Page 20: Configuration Next Steps
Setting the Session Timeout Value. 2. (Optional) If you already have a DHCP server on your network, and you do not want the Cisco RV110W to act as a DHCP server, see Configuring the LAN Settings. 3. Configure your wireless network, especially wireless security. See Chapter 3, “Configuring the Wireless Network.”... -
Page 21: Connecting To Your Wireless Network
To connect a device (such as a computer) to your wireless network, configure the wireless connection on the device with the wireless security information you configured for the Cisco RV110W by using the Setup Wizard. The following steps are provided as an example; you may need to configure your device differently. -
Page 22: Chapter 2: Configuring Networking
Configuring Networking This chapter describes how to configure the Cisco RV110W network settings. • Configuring the WAN Settings • Configuring the LAN Settings • Cloning the MAC Address • Configuring Routing • Port Management • Configuring Dynamic DNS • Configuring the IP Mode •... -
Page 23: Configuring Static Ip
Choose Networking > WAN. STEP 1 From the Internet Connection Type drop-down menu, choose PPPoE. STEP 2 Enter the following information (you may need to contact your ISP to obtain your STEP 3 PPPoE login information): Cisco RV110W Administration Guide... - Page 24 Choose the authentication type: Auto-negotiation—The server sends a configuration request specifying the security algorithm set on it. Then, the Cisco RV110W sends back authentication credentials with the security type sent earlier by the server. PAP—The Cisco RV110W uses the Password Authentication Protocol (PAP) to connect to the ISP.
-
Page 25: Configuring Pptp
If the connection is idle— that is, no traffic is flowing—the connection is closed. If you click Connect on Demand, enter the number of minutes after which the connection shuts off in the Max Idle Time field. Cisco RV110W Administration Guide... -
Page 26: Configuring L2Tp
Choose the authentication type: Auto-negotiation—The server sends a configuration request specifying the security algorithm set on it. Then, the Cisco RV110W sends back authentication credentials with the security type sent earlier by the server. PAP—The Cisco RV110W uses the Password Authentication Protocol (PAP) to connect to the ISP. - Page 27 If the connection is idle— that is, no traffic is flowing—the connection is closed. If you click Connect on Demand, enter the number of minutes after which the connection shuts off in the Max Idle Time field. Cisco RV110W Administration Guide...
-
Page 28: Configuring Optional Settings
Choose the authentication type: Auto-negotiation—The server sends a configuration request specifying the security algorithm set on it. Then, the Cisco RV110W sends back authentication credentials with the security type sent earlier by the server. PAP—The Cisco RV110W uses the Password Authentication Protocol (PAP) to connect to the ISP. -
Page 29: Configuring The Lan Settings
IP address of the WINS server in the DHCP configuration the Cisco RV110W sends to DHCP clients. If the Cisco RV110W is connected to a modem or device that has a configured NOTE network on the same subnet (192. 1 68. 1 .x), the Cisco RV110W automatically changes the LAN subnet to a random subnet based on 10.x.x.x, so there is no... -
Page 30: Changing The Default Cisco Rv110W Ip Address
Cisco RV110W. For example, if you change the Cisco RV110W IP address to 10.0.0. 1 , assign your PC an IP address in the range of 10.0.0.2 to 10.0.0.255. Open a new browser window and enter the new IP address of the Cisco RV110W STEP 5 to reconnect. -
Page 31: Configuring Dhcp
LAN. By default the Cisco RV110W assigns an IP address to each host on the LAN from the default IP address pool (192. 1 68. 1 . 1 00 to 192. 1 68. 1 . 1 49). If you need to set any host with a static IP address, use an IP address from the 192. -
Page 32: Configuring Vlans
VLANs can group endpoints without regard to the physical location of the equipment or users. The Cisco RV110W has a default VLAN (VLAN 1), which cannot be edited or changed. You can create four other VLANs on the Cisco RV110W. - Page 33 Description Enter a description to identify the VLAN. Port 1 You can associate VLANS on the Cisco RV110W to the LAN ports on the device. By default, all 4 ports Port 2 belong to VLAN1. You can edit these ports to associate them with other VLANS.
-
Page 34: Configuring Static Dhcp
Configuring Networking Configuring the LAN Settings Configuring Static DHCP You can configure the Cisco RV110W to assign a specific IP address to a device with a specific MAC address. To configure static DHCP: Choose Networking > LAN > Static DHCP. -
Page 35: Viewing Dhcp Leased Clients
DHCP server. The VLAN of the endpoints is also displayed. To view the DHCP clients, choose Networking > LAN > DHCP Leased Clients. For every VLAN defined on the Cisco RV110W, a table displays a list of the clients associated with the VLAN. -
Page 36: Configuring Rstp
28672, 32768, 40960, 45056, 49152, 53248, 57344, and 61440. The lower the system priority, the more likely the Cisco RV110W is to become the root in the spanning tree. The default is 327688. Hello Time The hello time is the time period that the root of the spanning tree waits before sending hello messages. -
Page 37: Port Management
2 to 200000000. Click Save. STEP 4 Port Management You can configure the speed and flow control settings of the Cisco RV110W LAN ports. To configure port speeds and flow control: Choose Networking > Port Management. - Page 38 Down. Mode Choose from the drop-down menu one of the following port speeds: • Auto Negotiation—The Cisco RV110W and the connected device choose a common speed. • 10Mbps Half—10 Mbps in both directions, but only one direction at a time.
-
Page 39: Cloning The Mac Address
STEP 1 In the MAC Address Clone field, check Enable to enable MAC address cloning. STEP 2 To set the MAC address of the Cisco RV110W WAN port, do one of the following: STEP 3 • To set the MAC address of the WAN port to your PC MAC address, click Clone My PC’s MAC. -
Page 40: Configuring Routing
Dynamic Routing (RIP) enables the Cisco RV110W to automatically adjust to physical changes in the network layout and exchange routing tables with the other routers. -
Page 41: Configuring Static Routing
Configuring Routing The router determines the network packets’ route based on the fewest number of hops between the source and the destination. RIP is disabled by default. RIP is disabled by default on the Cisco RV110W. NOTE To configure dynamic routing: Choose Networking >... -
Page 42: Configuring Inter-Vlan Routing
LAN and wireless network. • Internet (WAN)—Click this button to direct packets to the Internet (WAN). Click Save. STEP 4 Configuring Inter-VLAN Routing Check the Inter-VLAN Routing box to enable routing between the separate VLANs on the Cisco RV110W. Cisco RV110W Administration Guide... -
Page 43: Viewing The Routing Table
DDNS service's website so that you can create an account. Configure this information: STEP 4 E-mail Address (TZO.com and noip.com) Enter the email address you used to create the DDNS account. Username (DynDNS.com and 3322.org) Enter the username of the DDNS account. Cisco RV110W Administration Guide... -
Page 44: Configuring The Ip Mode
From the IP Mode drop-down menu, choose one of the following options: STEP 2 LAN:IPv4, WAN:IPv4 Choose this option to use IPv4 in the LAN and WAN ports. LAN:IPv6, WAN:IPv4 Choose this option to use IPv6 in the LAN ports and IPv4 in the WAN ports. Cisco RV110W Administration Guide... -
Page 45: Configuring Ipv6
IPv6 network depends on the type of internet connection that you have. Configuring the WAN for an IPv6 Network You can configure the Cisco RV110W to be a DHCPv6 client of the ISP for this WAN or to use a static IPv6 address provided by the ISP. - Page 46 If your ISP assigns you a fixed address to access the Internet, configure the Cisco RV110W to use a static IPv6 address. To configure the Cisco RV110W to use a static IPv6 address: Choose Networking > IPv6 > IPv6 WAN Configuration.
- Page 47 If you choose this option, your IPv6 WAN PPPoE settings must match your IPv4 WAN PPPoE settings. See Configuring PPPoE. To configure the Cisco RV110W PPPoE IPv6 settings: Choose Networking > IPv6 > IPv6 WAN Configuration. STEP 1 In the WAN Connection Type field, choose PPPoE IPv6.
- Page 48 Choose the authentication type: Auto-negotiation—The server sends a configuration request specifying the security algorithm set on it. Then, the Cisco RV110W sends back authentication credentials with the security type sent earlier by the server. PAP—The Cisco RV110W uses the Password Authentication Protocol (PAP) to connect to the ISP.
-
Page 49: Configuring Ipv6 Lan Settings
The DHCPv6 server assigns IPv6 addresses from configured address pools that use the IPv6 prefix length assigned to the LAN. Setting the IP Mode To configure IPv6 LAN settings on your Cisco RV110W, you must first set the IP mode to one of the following modes: •... - Page 50 Enter the following information to configure the IPv6 LAN address: STEP 2 IPv6 Address Enter the IPv6 address of the Cisco RV110W. The default IPv6 address for the gateway is fec0::1 (or FEC0:0000:0000:0000:0000:0000:0000:0001). You can change this 128-bit IPv6 address based on your network requirements.
- Page 51 Configuring IPv6 Address Pools You can define the IPv6 delegation prefix for a range of IPv6 addresses to be served by the Cisco RV110W DHCPv6 server. Using a delegation prefix, you can automate the process of informing other networking equipment on the LAN of DHCP information specific for the assigned prefix.
-
Page 52: Configuring Ipv6 Static Routing
Static routes can be used together with dynamic routes. Be careful not to introduce routing loops in your network. To create a static route: Choose Networking > IPv6 > IPv6 Static Routing. STEP 1 In the list of static routes, click Add Row. STEP 2 Cisco RV110W Administration Guide... - Page 53 When you add a route in an inactive state, it gets listed in the routing table, but is not used by the Cisco RV110W. You can always activate the route later. This feature is useful if the network that the route connects to is not available when you added the route.
-
Page 54: Configuring Routing (Ripng)
After another 240 seconds, if no routing update is received, the router removes these routes from the routing table. On the Cisco RV110W, RIPng is disabled by default. To configure RIPng: Choose Networking > IPv6 > Routing (RIPng). -
Page 55: Viewing Ipv6 Tunnel Status
STEP 1 In the 4 to 6 Tunneling field, check Enable. STEP 2 Enter the local WAN IPv6 address on the Cisco RV110W. STEP 3 Enter the Remote IPv6 address, or the IP address of the remote endpoint. STEP 4 Click Save. -
Page 56: Configuring Router Advertisement
Configuring Networking Configuring IPv6 Configuring Router Advertisement The Router Advertisement Daemon (RADVD) on the Cisco RV110W listens for router solicitations in the IPv6 LAN and responds with router advertisements as required. This is stateless IPv6 auto configuration, and the Cisco RV110W distributes IPv6 prefixes to all nodes on the network. -
Page 57: Configuring Advertisement Prefixes
The default is 3600 seconds. Click Save. STEP 3 Configuring Advertisement Prefixes To configure the RADVD available prefixes: Choose Networking > IPv6 > Advertisement Prefixes. STEP 1 Click Add Row. STEP 2 Cisco RV110W Administration Guide... - Page 58 Prefix Lifetime Enter the prefix lifetime, or the length of time over which the requesting router is allowed to use the prefix. Click Save. STEP 4 Cisco RV110W Administration Guide...
- Page 59 Configuring Networking Configuring IPv6 Cisco RV110W Administration Guide...
-
Page 60: Chapter 3: Configuring The Wireless Network
Configuring the Wireless Network This chapter describes how to configure the Cisco RV110W wireless network. • Wireless Security • Cisco RV110W Wireless Networks • Configuring Basic Wireless Settings • Configuring Advanced Wireless Settings • Configuring WDS • Configuring WPS Wireless Security Wireless networks are convenient and easy to install, so small businesses and homes with high-speed Internet access are adopting them at a rapid pace. - Page 61 • Enable MAC address filtering. Cisco routers and gateways give you the ability to enable MAC address filtering. The MAC address is a unique series of numbers and letters assigned to every networking device.
-
Page 62: General Network Security Guidelines
Combine letters and numbers to avoid using standard words that can be found in the dictionary. General Network Security Guidelines Wireless network security is useless if the underlying network is not secure. Cisco recommends that you take the following precautions: •... -
Page 63: Configuring Basic Wireless Settings
Choose this option if you have only Wireless-B devices in your network. G Only Choose this option if you have only Wireless-G devices in your network. N Only Choose this option if you have only Wireless-N devices in your network. Cisco RV110W Administration Guide... - Page 64 This is done for security purposes. You might need to change the management VLAN to limit access to the Cisco RV110W Device Manager. (Optional) In the U-APSD (WMM Power Save) field, check Enable to enable the...
-
Page 65: Editing The Wireless Network Settings
Editing the Wireless Network Settings The Wireless Table in the Basic Settings page (Wireless > Basic Settings) lists the settings of the four wireless networks supported on the Cisco RV110W. To configure wireless network settings: Check the box for the networks you want to configure. -
Page 66: Configuring The Security Mode
In the Encryption field, choose the encryption type: STEP 6 • 10/64-bit(10 hex digits)—Provides a 40-bit key. • 26/128-bit(26 hex digits)—Provides a a 104-bit key, which offers stronger encryption, making the key more difficult to crack. We recommend 128-bit encryption. Cisco RV110W Administration Guide... - Page 67 To configure the WPA Personal security mode: In the Wireless Table (Wireless > Basic Settings), check the box for the network STEP 1 you want to configure. Click Edit Security Mode. The Security Settings page appears. STEP 2 Cisco RV110W Administration Guide...
- Page 68 RADIUS authentication. To configure the WPA Enterprise security mode: In the Wireless Table (Wireless > Basic Settings), check the box for the network STEP 1 you want to configure. Click Edit Security Mode. STEP 2 Cisco RV110W Administration Guide...
-
Page 69: Configuring Mac Filtering
STEP 1 you want to configure. Click Edit MAC Filtering. The Wireless MAC Filter page appears. STEP 2 In the Edit MAC Filtering field, check the Enable box to enable MAC Filtering for STEP 3 this SSID. Cisco RV110W Administration Guide... -
Page 70: Configuring Time Of Day Access
In the Active Time field, check Enable to enable Time of Day Access. STEP 3 In the Start Time and Stop Time fields, specify the time of day period when STEP 4 access to the network is allowed. Click Save. STEP 5 Cisco RV110W Administration Guide... -
Page 71: Configuring The Wireless Guest Network
Configuring Basic Wireless Settings Configuring the Wireless Guest Network The Cisco RV110W supports a wireless “guest” network that is separated from the other wireless SSIDs, or networks, on the router. This router provides secure guest access that is isolated from the rest of the network, and can be configured to restrict access time and bandwidth used. - Page 72 Click Save. The system notifies you that the physical Ethernet ports on the STEP 7 Cisco RV110W are excluded from the VLAN that you have assigned to the guest network. In addition, Wireless Isolation with SSID and WMM are automatically enabled.
-
Page 73: Configuring Advanced Wireless Settings
All, when the Cisco RV110W can transmit at all wireless rates. The Basic Rate is not the actual rate of data transmission. If you want to specify the Cisco RV110W rate of data transmission, configure the Transmission Rate setting. Cisco RV110W Administration Guide... - Page 74 Send) Protection Mode when your Wireless-N and Wireless-G devices are experiencing severe problems and are not able to transmit to the Cisco RV110W in an environment with heavy 802. 1 1b traffic. This function boosts the Cisco RV110W ability to catch all Wireless-N and Wireless-G transmissions but will severely decrease performance.
- Page 75 When the Cisco RV110W has buffered broadcast or multicast messages for associated clients, it sends the next DTIM with a DTIM Interval value. Its clients hear the beacons and awaken to receive the broadcast and multicast messages.
-
Page 76: Configuring Wds
To establish a WDS link, the Cisco RV110W and other remote WDS peers must be configured in the same wireless network mode, wireless channel, wireless band selection, and encryption types (None and WEP). -
Page 77: Configuring Wps
Configuring the Wireless Network Configuring WPS Configuring WPS You can configure WPS on the Cisco RV110W to allow WPS-enabled devices to more easily connect to the wireless network. To configure WPS on client devices: Choose Wireless > WPS. The Wi-Fi Protected Setup page appears... - Page 78 Refer to your client device or its documentation for further instructions on setting up your client device. WPS Method 3 If the client device requires a PIN number from the router, use the number listed in item 3 on the WPS page. Cisco RV110W Administration Guide...
-
Page 79: Chapter 4: Configuring The Firewall
Configuring the Firewall This chapter describes how to configure the firewall properties of the RV110W. • Cisco RV110W Firewall Features • Configuring Basic Firewall Settings • Managing Firewall Schedules • Configuring Services Management • Configuring Access Rules • Creating an Internet Access Policy •... - Page 80 WAN ports are configured; for the Cisco RV110W, you may use the IP address if a static address is assigned to the WAN port, or if your WAN address is dynamic, a DDNS (Dynamic DNS) name can be used.
-
Page 81: Configuring Basic Firewall Settings
DoS Protection Check Enable to enable Denial of Service protection. Block WAN Request Blocks ping requests to the Cisco RV110W from the WAN. Web Access Choose the type of web access that can be used to connect to the firewall: HTTP or HTTPS (secure HTTP). - Page 82 A malicious ActiveX control can be used to compromise or infect computers. Enabling this setting blocks ActiveX applets from being downloaded. Click Auto to automatically block ActiveX, or click Manual and enter a specific port on which to block ActiveX. Cisco RV110W Administration Guide...
-
Page 83: Configuring Remote Management
Click Save. STEP 3 Configuring Remote Management You can enable remote management so you can access the Cisco RV110W from a remote WAN network. To configure remote management, configure these settings on the Basic Settings page: Remote Management Check Enable to enable remote management. -
Page 84: Configuring Universal Plug And Play
When remote management is enabled, the router is accessible to anyone who CAUTION knows its IP address. Because a malicious WAN user can reconfigure the Cisco RV110W and misuse it, it is highly recommended that you change the administrator and any guest passwords before continuing. Configuring Universal Plug and Play Universal Plug and Play (UPnP) allows automatic discovery of devices that can communicate with the Cisco RV110W. -
Page 85: Managing Firewall Schedules
Common types of services are available for selection, and you can create your own custom services. The Services Management page allows you to create custom services against which firewall rules can be defined. Once defined, the new service appears in the List of Available Custom Services table. Cisco RV110W Administration Guide... -
Page 86: Configuring Access Rules
(LAN) to the non-secure network (dedicated WAN/optional). The default inbound policy for traffic flowing from the non-secure zone to the secure zone is always blocked and cannot be changed. Cisco RV110W Administration Guide... -
Page 87: Adding Access Rules
To configure the default outbound policy: Choose Firewall > Access Rules. STEP 1 Choose Allow or Deny. STEP 2 Note: Ensure that IPv6 support is enabled on the Cisco RV110W to configure an IPv6 firewall. See Configuring IPv6. Click Save. - Page 88 Network News Transport Protocol (NNTP) • Post Office Protocol (POP3) • Simple Network Management Protocol (SNMP) • Simple Mail Transfer Protocol (SMTP) • Telnet • STRMWORKS • Terminal Access Controller Access-Control System (TACACS) • Telnet (command) Cisco RV110W Administration Guide...
- Page 89 In the QoS Priority field, assign a priority to IP packets of this service. The priorities STEP 9 are defined by QoS Level: (1 (lowest), 2, 3, 4 (highest)). In the Rule Status field, check the box to enable the new access rule. STEP 10 Click Save. STEP 11 Cisco RV110W Administration Guide...
-
Page 90: Creating An Internet Access Policy
Creating an Internet Access Policy Creating an Internet Access Policy The Cisco RV110W supports several options for blocking Internet access. You can block all Internet traffic, block Internet traffic to certain PCs or endpoints, or block access to Internet sites by specifying keywords to block. If these keywords are found in the site's name (for example, web site URL or newsgroup name), the site is blocked. -
Page 91: Configuring Port Forwarding
The Single Port Forwarding Rules and Port Range Forwarding Rules pages list all the available port forwarding rules for this device and allow you to configure port forwarding rules. Cisco RV110W Administration Guide... -
Page 92: Configuring Single Port Forwarding
IP traffic will be forwarded. For example, you can forward http traffic to port 80 of the IP address of a web server on the LAN side. In the Enable field, check the Enable box to enable the rule. STEP 7 Click Save. STEP 8 Cisco RV110W Administration Guide... -
Page 93: Configuring Port Range Forwarding
Port triggering is not appropriate for servers on the LAN, since there is a NOTE dependency on the LAN device making an outgoing connection before incoming ports are opened. Cisco RV110W Administration Guide... - Page 94 If the incoming connection uses only one port, then specify the same port number in both fields. In the Enable field, check the Enable box to enable the rule. STEP 5 Click Save. STEP 6 Cisco RV110W Administration Guide...
-
Page 95: Chapter 5: Configuring Vpn
Configuring VPN This chapter describes how to configure VPN and security for the Cisco RV110W. • VPN Tunnel Types, page 95 • VPN Clients, page 96 • Configuring Certificate Management, page 108 • Configuring VPN Passthrough, page 109 VPN Tunnel Types A VPN provides a secure communication channel (“tunnel”) between two gateway... -
Page 96: Vpn Clients
The Cisco RV110W supports Site-to-Site VPN for a single gateway-to-gateway VPN tunnel. For example, you can configure the Cisco RV110W at a branch site to connect to the router at the corporate site, so that the branch site can securely access the corporate network. -
Page 97: Configuring Netbios Over Vpn
MPPE Encryption Check the Enable box to enable MPPE encryption. Microsoft Point-to-Point Encryption (MPPE) is used when users set up and use a PPTP VPN client to connect to the Cisco RV110W. Click Save. STEP 3 Configuring NetBIOS Over VPN... -
Page 98: Creating And Managing Quickvpn Users
Check to allow the user to change the password. Password Protocol Choose QuickVPN from the drop-down menu. Click Save. STEP 3 To edit the settings of a QuickVPN user, check its box and click Edit. When you are done making changes, click Save. Cisco RV110W Administration Guide... -
Page 99: Importing Vpn Client Settings
Click Browse to locate the file. STEP 1 Click Import to load the file. STEP 2 When prompted, to delete existing VPN user settings and import the settings in STEP 3 the CSV file, click Yes. Cisco RV110W Administration Guide... -
Page 100: Configuring Basic Vpn Settings (Site-To-Site Vpn)
STEP 4 • Remote Endpoint—Choose the way the remote endpoint, or the router to which the Cisco RV110W will connect, is identified (by IP address - for 192. 1 68. 1 . 1 example, - or fully-qualified domain name - for example, cisco.com... -
Page 101: Viewing Default Values
The default values used in the basic VPN settings are those proposed by the VPN consortium and they assume you are using a pre-shared key, or password, that is known to both the Cisco RV110W and the router on the other end (for example, a Cisco RV220W). To view the default values: Choose VPN >... -
Page 102: Configuring Advanced Vpn Parameters
The Advanced VPN Setup page allows you to configure advanced VPN parameters, such as IKE and other VPN policies. These policies control how the Cisco RV110W initiates and receives VPN connections with other endpoints. Managing IKE Policies The Internet Key Exchange (IKE) protocol dynamically exchanges keys between two IPsec hosts. -
Page 103: Managing Vpn Policies
Policy Name—Enter a unique name for the policy for identification and management purposes. • Exchange Mode—Choose one of the following options: Main—This mode negotiates the tunnel with higher security, but is slower. Aggressive—This mode establishes a faster connection, but with lowered security. Cisco RV110W Administration Guide... - Page 104 SHA-1 SHA2-256 Ensure that the authentication algorithm is configured identically on both sides of the VPN tunnel (for example, the Cisco RV110W and the router to which it is connecting). • Pre-Shared Key—Enter the key in the space provided. Note that the double-quote character (“) is not supported in the pre-shared key.
- Page 105 Configuring VPN Configuring Advanced VPN Parameters DPD Timeout—Enter the maximum time that the Cisco RV110W should wait to receive a response to the DPD message before considering the peer to be dead. Adding or Editing VPN Policies To create an Auto VPN Policy, you need to first create an IKE policy and then add the corresponding Auto Policy for that IKE Policy.
- Page 106 DES—8 characters 3DES—24 characters AES-128—16 characters AES-192—24 characters AES-256—32 characters • Key-Out—Enter the encryption key of the outbound policy. The length of the key depends on the encryption algorithm chosen, as shown above. Cisco RV110W Administration Guide...
- Page 107 • Select IKE Policy—Choose the IKE policy that will define the characteristics of phase 1 of the negotiation. Click View to view or edit the existing IKE policy that is configured on the Cisco RV110W. Cisco RV110W Administration Guide...
-
Page 108: Configuring Certificate Management
Configuring VPN Configuring Certificate Management Configuring Certificate Management The Cisco RV110W uses digital certificates for IPsec VPN authentication and SSL validation (for HTTPS). You can generate and sign your own certificates using functionality available on the Cisco RV110W. Generating a New Certificate You can generate a new certificate to replace the existing certificate on the Cisco RV110W. -
Page 109: Configuring Vpn Passthrough
The certificate for administrator contains the private key and should be stored in a safe place as a backup. If the Cisco RV110W configuration is reset to the factory default settings, this certificate can be imported and restored on the router. - Page 110 Cisco RV110W. PPTP Check Enable to allow PPTP tunnels to pass through the Cisco RV110W. L2TP Check Enable to allow Layer 2 Tunneling Protocol (L2TP) tunnels to pass through the Cisco RV110W. Click Save. STEP 3 Cisco RV110W Administration Guide...
-
Page 111: Chapter 6: Configuring Quality Of Service (Qos)
(WAN). Configuring Bandwidth You can limit the bandwidth to reduce the rate at which the Cisco RV110W transmits data. You can also use a bandwidth profile to limit the outbound traffic, thus preventing the LAN users from consuming all of the bandwidth of the Internet link. -
Page 112: Configuring Bandwidth Priority
Choose the priority of the service (low, normal, medium, or high). Click Save. STEP 5 To edit the settings of an entry in the table, check the relevant box and click Edit. When you are done making changes, click Save. Cisco RV110W Administration Guide... -
Page 113: Configuring Qos Port-Based Settings
Services Management. Configuring QoS Port-Based Settings You can configure QoS settings for every LAN port on the Cisco RV110W. The Cisco RV110W supports 4 priority queues that allow for traffic prioritization per physical switch port. To configure QoS settings for the Cisco RV110W LAN ports: Choose QoS >... -
Page 114: Configuring Cos Settings
Choose whether to only list RFC values or to list all DSCP values in the DSCP STEP 2 Settings Table by clicking the relevant button. For each DSCP value in the DSCP Settings Table, choose a priority level from the STEP 3 Queue drop-down menu. Cisco RV110W Administration Guide... - Page 115 Configuring Quality of Service (QoS) Configuring DSCP Settings This maps the DSCP value to the selected QoS queue. Click Save. STEP 4 To restore the default DSCP settings, click Restore Default. Then, click Save. Cisco RV110W Administration Guide...
-
Page 116: Chapter 7: Administering Your Cisco Rv110W
Administering Your Cisco RV110W This chapter describes the administration features of the Cisco RV110W, including user creation, network management, system diagnostics and logs, date and time, and other settings. • Setting Password Complexity, page 117 • Configuring User Accounts, page 118 •... -
Page 117: Setting Password Complexity
Administering Your Cisco RV110W Setting Password Complexity Setting Password Complexity The Cisco RV110W can enforce minimum password complexity requirement for password changes. To configure password complexity settings: Choose Administration > Password Strength. STEP 1 In the Password Complexity Settings field, check Enable. -
Page 118: Configuring User Accounts
Administering Your Cisco RV110W Configuring User Accounts Configuring User Accounts The Cisco RV110W supports two user accounts for administering and viewing settings: an administrative user (default user name and password: “cisco”) and a “guest” user (default user name: “guest”). The guest account has read-only access. You can set and change the username and password for both the administrator and guest accounts. -
Page 119: Setting The Session Timeout Value
In the SNMP System Information section of the SNMP page, you can enable SNMP. Before you can use SNMP, install SNMP software on your computer. The Cisco RV110W supports only SNMPv3 for SNMP management. The Cisco RV110W supports SNNPv1/2/3 for SNMP trap messages. Cisco RV110W Administration Guide... -
Page 120: Editing Snmpv3 Users
Enter a name for easy identification of the firewall. Click Save. STEP 4 Editing SNMPv3 Users You can configure SNMPv3 parameters for the two default Cisco RV110W user accounts (Admin and Guest). To configure SNMPv3 settings: Choose Administration > SNMP. -
Page 121: Configuring The Snmp Traps
Administering Your Cisco RV110W Configuring Simple Network Management (SNMP) Security Level Choose the SNMPv3 security level: No Authentication and No Privilege—Doesn't require any Authentication and Privacy. Authentication and No Privilege—Submit only Authentication algorithm and password. Authentication and Privilege—Submit Authentication/privacy algorithm and password. -
Page 122: Using Diagnostic Tools
Public community. SNMP Version Select the SNMP version: v1, v2c, or v3. Click Save. STEP 3 Using Diagnostic Tools The Cisco RV110W provides several diagnostic tools to help you troubleshoot network problems. • Network Tools • Configuring Port Mirroring Network Tools Use network tools to troubleshoot the network. - Page 123 Administering Your Cisco RV110W Using Diagnostic Tools Using Traceroute The Traceroute utility displays all the routers present between the destination IP address and this router. The router displays up to 30 hops (intermediate routers) between this router and the destination.
-
Page 124: Configuring Port Mirroring
STEP 3 mirroring, do not use it for any other traffic. Click Save. STEP 4 Configuring Logging The Cisco RV110W allows you to configure logging options. Configuring Logging Settings To configure logging: Choose Administration > Logging > Log Settings. STEP 1 In the Log Mode field, check Enable. - Page 125 Administering Your Cisco RV110W Configuring Logging Configure the following settings: STEP 4 Remote Log Server Enter the IP address of the log server that will collect logs. Log Severity for Local Click to choose the severity of logs you want to Log and Email configure.
-
Page 126: Configuring The E-Mailing Of Logs
Configuring Logging Configuring the E-Mailing of Logs You can configure the Cisco RV110W to send logs by email. We recommend that you set up a separate email account for sending and receiving logs. You must first set up the severity of logs you want to capture; see... - Page 127 Administering Your Cisco RV110W Configuring Logging Authentication with If the SMTP (mail) server requires authentication SMTP Server before accepting connections, choose the type of authentication from the drop-down menu: None, LOGIN, PLAIN, and CRAM-MD5. E-mail Authentication Enter the email authentication username (example, Username logging@companyname.com).
-
Page 128: Configuring Bonjour
Administering Your Cisco RV110W Configuring Bonjour Configuring Bonjour Bonjour is a service advertisement and discovery protocol. On the Cisco RV110W, Bonjour only advertises the default services configured on the device when Bonjour is enabled. To enable Bonjour: Choose Administration > Bonjour. -
Page 129: Backing Up And Restoring The System
Administering Your Cisco RV110W Backing Up and Restoring the System Configure this information: STEP 2 Time Zone Select your time zone, relative to Greenwich Mean Time (GMT). Adjust for Daylight If supported for your region, check the Adjust for Savings Time Daylight Savings Time box. -
Page 130: Backing Up The Configuration Settings
You can download the Startup Configuration to other Cisco RV110Ws for easy deployment. Mirror configuration Select this option to instruct the Cisco RV110W to back up the Startup Configuration after 24 hours of operation without any change in the startup configuration. -
Page 131: Restoring The Configuration Settings
STEP 4 Click Start to Upload. STEP 5 The Cisco RV110W uploads the configuration file and uses the settings it contains to update the Startup Configuration. Then the Cisco RV110W restarts and uses the new configuration. Copying the Configuration Settings... -
Page 132: Generating An Encryption Key
Administering Your Cisco RV110W Upgrading Firmware or Change the Language To copy a configuration (for example, to copy a startup configuration to the backup configuration): Choose Administration > Backup/Restore Settings. STEP 1 In the Copy field, choose the source and destination configurations from the drop- STEP 2 down menus. - Page 133 STEP 3 Click Browse to locate and select the downloaded firmware. STEP 4 (Optional) To reset the Cisco RV110W to default factory settings after the firmware STEP 5 is upgraded, check Reset all configurations/settings to factory defaults. Resetting the Cisco RV110W to default factory settings erases all of your custom CAUTION settings.
-
Page 134: Restarting The Cisco Rv110W
Administering Your Cisco RV110W Restarting the Cisco RV110W Restarting the Cisco RV110W To restart the router: Choose Administration > Reboot. STEP 1 Click Reboot. STEP 2 Restoring the Factory Defaults During a restore operation, do not try to go online, turn off the router, shut down the CAUTION PC, or use the router until the operation is complete. - Page 135 Administering Your Cisco RV110W Running the Setup Wizard Cisco RV110W Administration Guide...
-
Page 136: Chapter 8: Viewing The Cisco Rv110W Status
Viewing the Cisco RV110W Status This chapter describes how to view real-time statistics and other information about the Cisco RV110W. • Viewing the Dashboard, page 137 • Viewing the System Summary, page 139 • Viewing the Wireless Statistics, page 141 •... -
Page 137: Viewing The Dashboard
Viewing the Cisco RV110W Status Viewing the Dashboard Viewing the Dashboard The Dashboard page provides you with a bird's-eye view of important router information. To view the Dashboard: Choose Status > Dashboard. STEP 1 To display an interactive view of the router back panel, click Show Panel View. - Page 138 Viewing the Cisco RV110W Status Viewing the Dashboard • Critical • Error • Warning To view the logs, click details. For more information see Viewing Logs. To manage logs, click manage logging. For more information see Configuring Logging Settings. LAN (Local Network) Interface •...
-
Page 139: Viewing The System Summary
Viewing the Cisco RV110W Status Viewing the System Summary • QuickVPN Users—The number of QuickVPN users. • PPTP Users—The number of Point-to-Point Tunneling Protocol (PPTP) users. Viewing the System Summary The System Summary page displays a summary of the router settings. - Page 140 WAN IP—WAN Address of the device. You can release the current IP address and obtain a new one by clicking Release or Renew. • Gateway—The IP address of the gateway to which the Cisco RV110W is connected (for example, the cable modem). •...
-
Page 141: Viewing The Wireless Statistics
Block WAN Request—Whether WAN request blocking is on or off. • Remote Management—Whether remote management is on or off (for example, if the Cisco RV110W Device Manager can be accessed remotely). VPN Setting Status • QuickVPN Connections Available—The number of available QuickVPN connections. -
Page 142: Viewing The Vpn Status
Viewing the Cisco RV110W Status Viewing the VPN Status The Wireless Statistics page displays this information: SSID Name The name of the wireless network. Packet The number of received/sent wireless packets reported to the radio over all configured and active SSIDs. -
Page 143: Viewing The Ipsec Connection Status
Viewing the IPSec Connection Status The IPSec Connection status shows the status of active VPN policies on the Cisco RV110W. (These policies are configured on the VPN > Advanced VPN Setup page.) To view the IPSec connection status: Choose Status > IPSec Connection Status. -
Page 144: Viewing Logs
If you made any changes, click Save. STEP 3 Viewing Logs The View Logs page allows you to view the Cisco RV110W logs. To view the logs: Choose Status > View Logs. STEP 1 Click Refresh Logs to display the latest log entries. -
Page 145: Viewing Connected Devices
Cisco RV110W. The IPv4 ARP Table displays information from devices that have responded to the Cisco RV110W address resolution protocol (ARP) request. If a device does not respond to the request, it is removed from the list. -
Page 146: Viewing Port Statistics
Viewing the Cisco RV110W Status Viewing Port Statistics Wired Displays a list of all devices connected through the Ethernet ports on the router. Displays a list of all Wireless Distribution System (WDS) device connected to the router. Viewing Port Statistics The Port Statistics page displays port statistics. -
Page 147: Viewing The Guestnet Status
Viewing the GuestNet Status The guest network statistics displays information about the wireless guest network configured on the Cisco RV110W. To view the guest network status, choose Status > GuestNet Status. The following information is displayed: •... -
Page 148: Appendix A: Using Cisco Quickvpn
Using Cisco QuickVPN Overview This appendix explains how to install and use the Cisco QuickVPN software that can be downloaded from Cisco.com. QuickVPN works with computers running Windows 7, Windows XP, Windows Vista, or Windows 2000. (Computers using other operating systems will have to use third-party VPN software.) This appendix includes the following sections: •... -
Page 149: Installing The Cisco Quickvpn Software
Installing the Cisco QuickVPN Software Installing the Cisco QuickVPN Software Installing from the CD-ROM Insert the Cisco RV110W CD-ROM into your CD-ROM drive. After the Setup STEP 1 Wizard begins, click the Install QuickVPN link. The License Agreement window appears. - Page 150 Using Cisco QuickVPN Installing the Cisco QuickVPN Software Click Next. STEP 4 The Setup Wizard copies the files to the chosen location. Copying Files Finished Installing Files Click Finish to complete the installation. Proceed to “Using the Cisco QuickVPN STEP 5 Software,”...
-
Page 151: Downloading And Installing From The Internet
Appendix B, “Where to Go From Here,” go to the Software Downloads link. STEP 1 Enter Cisco RV110W in the search box and find the QuickVPN software. STEP 2 Save the zip file to your PC, and extract the .exe file. - Page 152 Using Cisco QuickVPN Using the Cisco QuickVPN Software In the User Name and Password fields, enter the User Name and Password that STEP 3 were created in Creating and Managing QuickVPN Users. In the Server Address field, enter the IP address or domain name of the STEP 4 Cisco RV110W.
- Page 153 Using Cisco QuickVPN Using the Cisco QuickVPN Software Enter your password in the Old Password field. Enter your new password in the STEP 10 New Password field. Then enter the new password again in the Confirm New Password field. Click OK to save your new password.
-
Page 154: Appendix B: Where To Go From Here
Where to Go From Here Cisco provides a wide range of resources to help you obtain the full benefits of the Cisco RV110W. Product Resources Support Cisco Small Business www.cisco.com/go/smallbizsupport Support Community Online Technical Support www.cisco.com/support and Documentation (Login Required) Phone Support Contacts www.cisco.com/en/US/support/...
Need help?
Do you have a question about the RV110W and is the answer not in the manual?
Questions and answers