Visonic POWERMASTER-10 User Manual
Fully supervised wireless alarm control system
Hide thumbs
Also See for POWERMASTER-10:
- Installer's manual (106 pages) ,
- Manual (86 pages) ,
- User manual (76 pages)
Table of Contents
Advertisement
Advertisement
Table of Contents

Subscribe to Our Youtube Channel
Related Manuals for Visonic POWERMASTER-10


Summary of Contents for Visonic POWERMASTER-10
- Page 1 User Guide PowerMaster-10 Fully supervised wireless alarm control system...
-
Page 2: Table Of Contents
C.9 Setting the Auto-Arming Time....25 Users and Codes..........5 C.10 Programming Private Phone and SMS Reporting ............26 2. Operating the PowerMaster-10 System..6 C.11 Enabling / Disabling the Squawk Option Basic Arming and Disarming ......6 ................29 Preparing to Arm ..........6 C.12 Programming the Scheduler .... -
Page 3: Introduction
Obtain this information from your installer and write it. Overview The PowerMaster-10 is a wireless alarm system for In the armed state, the system will initiate an alarm detecting and alerting in case of burglary, fire and a upon detection of disturbance in any one of the variety of other security and safety hazards. -
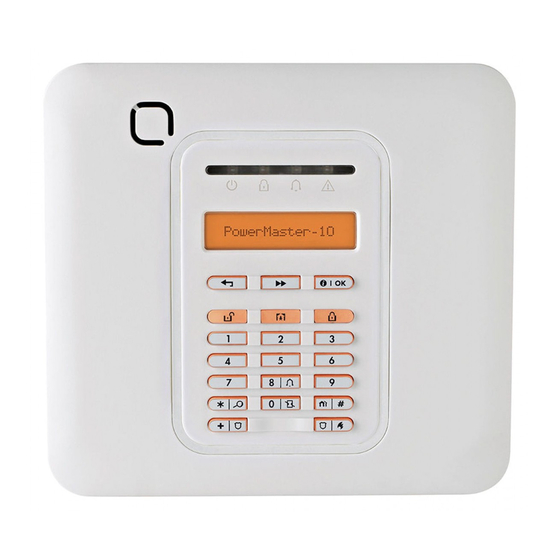
Page 4: Panel Indicator And Controls
If such a message is You can access this log and review the past overdue, the PowerMaster-10 displays a 'missing' events in case of need such as after a burglary. trouble message. Your installer can disable this (See Chapter 8). -
Page 5: Control Keys
INTRODUCTION Control Keys Indication Function NEXT: Advance from item to item within a given menu. BACK: Move one step back within a given menu. OK: Review status messages one by one and also select a displayed option. Arming Keys Indication Function AWAY: Arming when nobody is at home... -
Page 6: Audible Indicators
If configured by the installer for additional security, the more than 30 seconds, the display will read system will ask you to enter your user code as well “PowerMaster-10” and the LEDs will stop indicating before resuming the normal display. Users and Codes As a master User (User No.1) you will need a 4-digit... -
Page 7: Operating The Powermaster-10 System
ARM indicator extinguishes during the disarmed enabled by the installer. If quick arming is disabled, state. the PowerMaster-10 will prompt you to enter your security code before arming as follows: Disarming the system also stops the siren alarm, irrespective of whether the alarm was initiated during... -
Page 8: Disarming After An Alarm Or Trouble
Since this operation reduces the security level, the If forced arming is enabled and you wish to arm the PowerMaster-10 will ask you to key in your master system when NOT READY is displayed, proceed as user code or user code, thus making sure that you shown: are an authorized user. -
Page 9: Arming In The Latchkey Mode
OPERATING THE POWERMASTER-10 SYSTEM Forced arming “HOME” is performed in a similar Using Keyfob Transmitters manner, as follows: Using portable keyfobs (KF-234 PG2) you can also PRESS RESULTANT DISPLAY conveniently arm and disarm the system from outside the premises, initiate "panic alarms" and... -
Page 10: Initiating Alarms
OPERATING THE POWERMASTER-10 SYSTEM Initiating Alarms To stop the alarm, press and then key in Following are various methods that may be used for your valid user code. initiating alarms. Initiating Emergency Alarm Initiating Panic Alarm with Keyfobs You can generate a silent emergency alarm... -
Page 11: Reviewing Troubles And Alarm Memory
3. Reviewing Troubles and Alarm memory Troubles Alarm & Tamper Memory A. Indication of Trouble condition The PowerMaster-10 retains in it's memory alarm and “tamper” events that occurred during the last arming If the system detected a trouble condition in any of the period. -
Page 12: Correcting Trouble Situations
REVIEWING TROUBLES AND ALARM MEMORY Correcting Trouble Situations IMPORTANT! If the trouble beeps bother you, disarm the system again (even though it is already disarmed). trouble indications (illuminated TROUBLE This will cancel the trouble beeps for 4 hours. indicator and flashing TRBL message) are cleared once you eliminate the cause of trouble. -
Page 13: Menus And Functions
MENUS AND FUNCTIONS 4. Menus and Functions This chapter explains the user programming features of your PowerMaster-10 system and allows you to tailor the PowerMaster-10 system according to your specific needs. The chapter is divided into three sections, as follows: Part A –... -
Page 14: Entering The User Settings Menu & Selecting A Setting Option
MENUS AND FUNCTIONS B.1 Entering the User Settings Menu & Selecting a Setting Option The following procedure describes how to enter and move within the User Settings menu. Detailed descriptions of the User Setting options are provided at the end of the procedure. To exit the User Settings menu –... - Page 15 MENUS AND FUNCTIONS B. User Setting Options Menu Click the button until the display reads the desired setting option and then press the button. Use to set the Zone Bypass Scheme i.e. to bypass (exclude) faulty or SET ZONE BYPASS unsecured ("disturbed") zones, or to clear a bypassed zone (unbypass).
-
Page 16: Returning To The Previous Step Or Exiting The User Settings Menu
MENUS AND FUNCTIONS B.2 Returning to the Previous Step or Exiting the USER SETTINGS Menu During the setting process it is frequently necessary to return to the previous setting step or option (i.e. "to go one level up") or to exit the User Settings menu. A. -
Page 17: Setting The Zone Bypass Scheme
♦ Here you can set the Zone Bypass Scheme i.e. to scroll through the list of registered (enrolled) sensors to your PowerMaster-10 system and to Bypass (deactivate) faulty or disturbed sensors (either READY or NOT-READY) or to Clear (reactivate) BYPASSED zones (sensors). -
Page 18: Reviewing The Zone Bypass Scheme
MENUS AND FUNCTIONS B. To Clear a Bypassed Zone Repeat steps 1 to 2 above. Z04: BYPASSED When the zone you wish to clear bypass appears on the display (for Kitchen example, "Z04"), press to confirm. You can also identify the device by looking for the "it's me"... - Page 19 MENUS AND FUNCTIONS Additional Information (section C.1 – C.3) For detailed instructions on how to select the Setting Options – refer to section B.1 and section B.2. a. The STATUS to the right of the zone number indicates whether the zone is READY, NOT-READY or BYPASSED.
-
Page 20: Programming User Codes
C.4 Programming User Codes The PowerMaster-10 system allows you to authorize up to 8 people to arm and disarm the system by providing each with a unique 4 digit personal security code, and assigning them with different security levels and functionalities. - Page 21 MENUS AND FUNCTIONS To Program a User Code Enter the USER SETTINGS menu, select the [USER CODES] option and USER CODES press the button to confirm. The first user code "user code 1" is displayed. user code 1 Click the button until the display reads the User Code you wish to program, for example, "user code 4".
-
Page 22: Add / Delete Keyfob Transmitters
MENUS AND FUNCTIONS C.5 Add / Delete Keyfob Transmitters Each of the 8 PowerMaster-10 users may be provided with a portable keyfob transmitter to exercise better, quicker and safer arming/disarming and other control functions. Each keyfob should be assigned with a serial No. - Page 23 MENUS AND FUNCTIONS B. To Delete a Keyfob Enter the USER SETTINGS menu, select the [KEYFOBS] option and press KEYFOBS button to confirm. The display will read [ADD NEW KEYFOB]. ADD NEW KEYFOB Click the button until the display reads [DELETE KEYFOB]. Press to confirm.
-
Page 24: Setting The Time & Time Format
MENUS AND FUNCTIONS C.6 Setting the Time & Time Format ♦ Here you can program or adjust the built-in-clock to show the correct time in the desired time format. ♦ You can select between a 24 hour and a 12 hour (AM/PM) time format. Carefully read the section titled "Additional Information"... -
Page 25: Setting The Date & Date Format
MENUS AND FUNCTIONS C.7 Setting the Date & Date Format ♦ Here you can program or adjust the built-in-calendar to show the correct date in the desired date format. ♦ You can select between a "mm/dd/yyyy" and a "dd/mm/yyyy" date format. Carefully read the section titled "Additional Information"... -
Page 26: Enabling / Disabling Auto-Arming
C.8 Enabling / Disabling Auto-Arming The PowerMaster-10 system can be programmed to automatically arm itself on a daily basis at a predetermined time. This feature is useful especially in commercial applications, such as in stores, to ensure that the system is always armed and without having to assign security codes to employees. -
Page 27: Programming Private Phone And Sms Reporting
C.10 Programming Private Phone and SMS Reporting The PowerMaster-10 system can be programmed to send various event notification messages such as alarm, arming or trouble events, to 4 private telephone subscribers by audible signal and if a GSM option is installed, also to 4 SMS telephone numbers. - Page 28 MENUS AND FUNCTIONS To program or edit the phone number, use the numerical keypad to enter the 032759641 SMS phone number (for example, 8032759333) at the position of the blinking cursor. When done, press to confirm. ☺ A "Happy Tune" sounds, the display confirms the saved SMS phone 8032759333 7 10...
- Page 29 MENUS AND FUNCTIONS click the button until the display reads [Tel. acknowledge] and press to confirm. Tel. acknowledge The display shows the currently selected option single ack Click the button until the display reads the desired acknowledge method, for example, "all ack". all ack ☺...
-
Page 30: Enabling / Disabling The Squawk Option
The PowerMaster-10 system (and its wireless sirens) can be set to produce a short "Squawk" of audible feedback to assist you when you use your keyfob to arm (1 beep) and disarm (2 beeps) the PowerMaster-10 system (operates in a similar manner to a car alarm). -
Page 31: Programming The Scheduler
MENUS AND FUNCTIONS C.12 Programming the Scheduler The PowerMaster-10 system includes a PGM output that can be used to open and close an electrically-controlled gate, or to control a preferred electrical device via keyfobs (see Chapter "Using keyfob transmitters") or according to a programmable weekly time schedule. - Page 32 MENUS AND FUNCTIONS The display shows the current setting of the start time. Start-07:30A Use the numerical keypad to set or change the operation ON (start) time, for example, “00:30P”. When you are satisfied with the setting, press to confirm. Start-00:30P ☺...
- Page 33 MENUS AND FUNCTIONS Device Device Operation 1 Operation 2 Operation 3 Operation 4 Description _ _: _ _ _ _: _ _ _ _: _ _ _ _: _ _ Monday OFF: _ _: _ _ OFF: _ _: _ _ OFF: _ _: _ _ OFF:...
-
Page 34: Event Reporting And Control By Telephone And Sms
- See Notes: Chapter – 4C.10. (1) Alternative to steps 2 – 4: The PowerMaster-10 responds in a similar way if you just dial once Event notifications by SMS and wait until you hear telephone rings (in USA, for example, 11 rings). -
Page 35: Remote Control By Sms
<house ID>” “HN <code> <house ID>” Notes: 1) The PowerMaster-10 may react with a delay to received SMS messages if a GPRS session is in progress at the same time. 2) House ID includes up to 16 characters, for example, JOHN'S HOUSE... -
Page 36: Special Applications And Functions
Keyfobs In addition to acting as an alarm system, the PowerMaster-10 can also be used to monitor the Some regulations and institutions require the user to movement of people at home when the system is in acknowledge when the keyfob enters the “low the disarmed state (or even when armed “HOME”... -
Page 37: Testing The System
SIREN N sirens in the control panel that have not been tested. First the panel siren sounds for 3 seconds after which the PowerMaster-10 system will automatically repeat the procedure for the next siren enrolled in the system until all sirens are tested. - Page 38 If the INSTALLER CODE is used to enter the Periodic Test instead of the USER CODE, the devices LED will also provide the link quality indication – see PowerMaster-10 Installer Manual. To skip the SIRENS TEST and select the other devices TEST, press The Periodic test can be performed on a maximum of three sirens including one internal siren.
-
Page 39: Maintenance
MAINTENCANCE 8. Maintenance Replacing the Backup Battery Gaining access to 24-hour zones The PowerMaster-10 uses regular electrical supply, If you wish to access a sensor defined as a 24-hour but incorporates rechargeable backup 4.8V battery zone without causing an alarm: pack to ensure its proper operation during a power •... -
Page 40: Event Log
ENTER CODE: _ When the PowerMaster-10 display reads [ENTER CODE: _], enter the CODE current master user code. The "Happy Tune" will sound and the PowerMaster-10 display will read LIST OF EVENTS [LIST OF EVENTS]. (see Important Note!) Click the button. -
Page 41: Appendix A. Glossary
APPENDICES APPENDIX A. GLOSSARY Although one zone or more are designated as chime This list of terms is arranged in alphabetical order. zones, you can still enable or disable the chime function Any term indicated by cursive (italic) letters within the explanatory text can be looked up separately. - Page 42 “restored”. It's me: The PowerMaster-10 system includes a A motion detector restores automatically after powerful device locator that helps you to identify the detection of movement, and becomes ready to detect actual device displayed on the LCD, as follows: again.
-
Page 43: Appendix B. Home Fire Escape Planning
APPENDICES APPENDIX B. HOME FIRE ESCAPE PLANNING • Agree on an outside meeting place where Fire can spread rapidly through your home, leaving everyone can meet after they’ve escaped. you a short time to escape safely. Your ability to get Remember to get out first, and then call for help. -
Page 44: Fcc Statement
Class B digital sensor, pursuant to Part 15 of the FCC Rules. These If the “PowerMaster-10” causes harm to the limits are designed to provide reasonable protection telephone network, the telephone company will notify... - Page 45 (0211) 60069619 Email: info-dach@visonic.com VISONIC IBERICA: ISLA DE PALMA, 32 NAVE 7, POLÍGONO INDUSTRIAL NORTE, 28700 SAN SEBASTIÁN DE LOS REYES, (MADRID), ESPAÑA. TEL (34) 91659-3120, FAX (34) 91663-8468. www.visonic-iberica.es www.visonic.com INTERNET ©VISONIC LTD. 2010 POWERMASTER-10 USER GUIDE D-302757 Rev 2 (1/11)
- Page 46 Fully supervised wireless alarm control system Fully supervised reless alarm control system Fully supervised wireless alarm control system Fully pervised wireless alarm control system Fully supervised wireless alarm control system lly supervised wireless alarm control system Fully supervised wireless alarm control www.visonic.com...
Need help?
Do you have a question about the POWERMASTER-10 and is the answer not in the manual?
Questions and answers