Table of Contents
Advertisement
Quick Links
1. INTRODUCTION ................................................... 2
1.1 System Features ............................................ 2
3. POWERMASTER-33 G2 INSTALLATION ........... 7
3.1 PowerMaster-33 G2 Wiring Diagram............ 7
3.2 Opening the PowerMaster-33 G2 Control
Panel and Bracket Mounting ............................ 98
"K" in Figure 3.1) ............................................... 98
"B" in Figure 3.1) ............................................. 109
"L" in Figure 3.1) ............................................ 1110
3.6 PGM-5 Installation (located in place of
detail "E" in Figure 3.1) ................................. 1211
3.7 Installing the PowerLink3 ....................... 1312
3.8 Optional Expander Module (detail "I" in
Figure 3.1) ....................................................... 1413
3.9.1 Battery Insertion .............................. 1716
3.9.2 Connect AC Power to the Unit ........ 1716
Panel ............................................................... 1817
D-304267
PowerMaster-33 G2 Installer's Guide
PowerMaster-33 G2
Version 18
Installer's Guide
Table of Contents
4.
ENROLLMENT AND USING PROX TAG ......... 1918
5. MAINTENANCE ............................................. 2019
APPENDIX A. Specifications ........................... 2120
APPENDIX B. Compliance with Standards ...... 2322
Operations by KP-250 PG2 Keypad ................ 2423
4.1 PowerMaster-33 LED Indications .......... 1918
........................................................................ 1918
4.3 Using the Prox Tag ................................. 2019
5.1 Dismounting the Control Panel ............. 2019
5.2 Replacing the Backup Battery ............... 2019
5.3 Fuse Replacement .................................. 2019
5.4 Replacing/Relocating Detectors ............ 2019
5.5 Annual System Check ............................ 2019
A1. Functional ............................................... 2120
A2. Wireless ................................................... 2120
A3. Electrical.................................................. 2120
A4. Communication ...................................... 2221
A5. Physical Properties ................................ 2221
A6. Peripherals and Accessory Devices .... 2221
1
Advertisement
Table of Contents

Subscribe to Our Youtube Channel
Related Manuals for Visonic PMASTER20G2


Summary of Contents for Visonic PMASTER20G2
-
Page 1: Table Of Contents
PowerMaster-33 G2 Version 18 Installer’s Guide Table of Contents 1. INTRODUCTION ........... 2 VISUAL INDICATIONS, FIRST KEYPAD ENROLLMENT AND USING PROX TAG ..1918 1.1 System Features ..........2 4.1 PowerMaster-33 LED Indications ..1918 2. -
Page 2: Introduction
PowerMaster is a PowerG-enabled professional all-in-one wireless security, fire and safety system supporting advanced applications and Visonic's PowerG™ Two-Way, Time Division Multiple Access (TDMA) and Frequency Hopping Spread Spectrum (FHSS) wireless technology. This offers unmatched wireless robustness, superior range and long battery life; a perfect and user friendly solution for both monitoring service providers and professional installers. - Page 3 To configure devices from the KP-250 Device Configuration Device parameters and related system PG2: see KP-250 PG2 Installer’s Guide, behavior can be configured from the KP-250 Chapter 3 Programming and also the PG2 keypad or from a remote location. individual device's Installation Instructions. Each PowerG device has its own settings To configure devices from a remote which can be configured through the KP-250...
- Page 4 Integrated Siren built The control panel has a high-powered built-in To define whether or not the control into the panel siren that sounds in case of alarm, enabled by panel's siren will sound upon alarms: see default. KP-250 PG2 Installer’s Guide, section 3.5.5 Configuring Sirens Functionality Wired Siren outputs The control panel can operate a wired siren...
- Page 5 System Architecture: Security Detectors and Transmitters Control Panel and Display Keyfobs, Keypad and Keypad Keyprox KF-234 PG2 KP-140 PG2 Next CAM Next PG2 MC-302 PG2 TOWER-30AM PG2 Motion Motion Two-way KF-235 PG2 Magnetic Detector Detector Keypad Two-way Contact Mirror Detector with Camera Keyfobs Safety Detectors...
-
Page 6: Choosing The Installation Location
2. CHOOSING THE INSTALLATION LOCATION To ensure the best possible mounting location of the PowerMaster control panel, the following points should be observed: The selected location should be approximately in the center of the installation site between all the transmitters, preferably in a hidden location. -
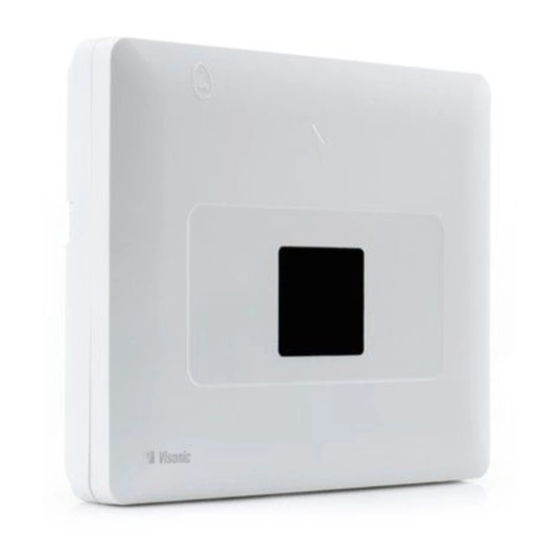
Page 7: Powermaster-33 G2 Installation
3. POWERMASTER-33 G2 INSTALLATION Required tool: Philips screwdriver #2. PowerMaster-33 G2 mounting process is shown in Figures 3.1 - 3.10. 3.1 PowerMaster-33 G2 Wiring Diagram D-304267 PowerMaster-33 G2 Installer's Guide... - Page 8 A. Expander Module Flat B. Wired Zone / Special C. Battery Connector D. Front UnitEnroll 1st Cable Siren Terminal Block Keypad button E. PGM-5 ModuleFront Unit F. Expander Module Wiring G. Back Unit Expander H. Power SupplyBack Unit Terminal BlocksPGM-5 Module Wiring Terminal Module Blocks...
-
Page 9: Panel And Bracket Mounting
*** or Terminal Block in North American Panels Figure 3.1 – PowerMaster-33 G2 Wiring Diagram 3.2 Opening the PowerMaster-33 G2 Control Panel and Bracket Mounting A. Mounting surface To Mount the Unit: 1. Release the screws B. Back unit 2. Remove the front cover C. -
Page 10: Connecting Wired Zone And Siren
PHONE WIRING IN NORTH AMERICA A. LINE D. 8-position RJ-31X plug G. Green J. Line from street B. SET E. Brown H. Gray K. House phones F. Red RJ-31X jack C. RJ-31X cord Figure 3.3b – Phone Wiring in North America Phone wiring in the UK: Line terminals must be connected to pins 2 and 5 of the wall jack. -
Page 11: Gsm Module And Sim Installation
3.5 GSM Module and SIM Installation (detail "L" in Figure 3.1) Plug in the GSM module and fasten it as shown in the above Insert the SIM card into the GSM module as shown in drawing making sure that the two leading slots on both sides of the above drawing. -
Page 12: Pgm-5 Installation
3.6 PGM-5 Installation (located in place of detail "E" in Figure 3.1) PGM-5 is an output interface module designed to provide alarm, trouble events and status signals to external devices such as long range wireless monitoring transmitters, CCTV systems, home-automation systems and LED annunciation panels (for further details see the PGM-5 Installation Instructions). -
Page 13: Installing The Powerlink3
3.7 Installing the PowerLink3 The PowerLink3 is used to view and control the PowerMaster system over the Internet. Perform the following instructions for the PowerLink3 installation. Note: PowerLink3 operation is not backed up by the control panel’s battery and it is shut down during AC failure. -
Page 14: Optional Expander Module
3.8 Optional Expander Module (detail "I" in Figure 3.1) The Expander module is an optional module. If this optional module is used, the wired zone or special siren on the front panel should not be used. Mount the Expander module as shown in Figure 3.8a. 1. - Page 15 OPTIONAL EXPANDER MODULE, ZONES, SIRENS, AUDIO BOX AND WIRED DETECTORS WIRING A. Back Unit Regarding the two wired zones, the control panel B. Expander classifies the events according to the resistance it measures as shown in the table below. C. Internal siren or strobe 6-12 VDC, 150 mA Max.
-
Page 16: Connecting Power To The Control Panel 1615
3.9 Connecting Power to the Control Panel Note: This equipment should be installed in accordance with Chapter 2 of the National Fire Alarm Code, ANSI/NFPA 72. Connect the power cable and close the control panel as shown in Figures 3.9a –3.10. POWER CABLE CLAMP EXTRACTION AND POWER CONNECTION FOR INTERNAL POWER SUPPLY A. -
Page 17: Battery Insertion
EXTERNAL POWER CONNECTION Connect the power adaptor to the front panel power connector. Figure 3.9b – External Power Connection 3.9.1 Battery Insertion Open battery compartment cover. Insert one 6-battery pack or 8-battery pack and connect its connector as shown in Figure 3.8c. A. -
Page 18: Closing The Powermaster-33 G2 Control Panel
3.10 Closing the PowerMaster-33 G2 Control Panel Control panel final closure is shown below. To Close the Control Panel: 1. Connect the flat cables, between front and back units, in their respective connectors (up to 3, according to options). 2. Make sure that the "Power" indicator on the control panel lights green. -
Page 19: Visual Indications, First Keypad
4. VISUAL INDICATIONS, FIRST KEYPAD ENROLLMENT AND USING PROX TAG 4.1 PowerMaster-33 LED Indications The following table provides a detailed description of the LED indications on the PowerMaster-33 panel. Color Definition LED Operation Green Local Power indication STEADY: Indicates that system has mains power BLINKING: Low battery state NO LIGHT: AC failure Green... -
Page 20: Using The Prox Tag
Lights steadily for 5 sec. Wrong device type Upon completion of the enrolling procedure, the keypad is ready for immediate use even if the system is currently in the Armed state. Note: If the keypad was previously enrolled at a different keypad no., it will be automatically relocated automatically to Keypad no. -
Page 21: Appendix A. Specifications
APPENDIX A. Specifications A1. Functional Up to 64 wireless zones, (including 2 hard-wired inputs). Zones Number 2.2 kE.O.L. resistance (max. resistance of wires 220 Hard-wired Zone Requirements 1.5 mA Maximum Loop Current 3.3 V Maximum Loop Voltage 0 – 1.47 V (0 – 1.770 Ω) Loop Shorted 1.47 –... -
Page 22: A4. Communication
Via RS232 serial port Data Transfer to Local Computer 2 Monitoring Stations, 4 private telephones Report Destinations SIA, Contact ID, Scancom, SIA IP, Visonic PowerNet. Reporting Format Options 10, 20, 33 and 40 pps - programmable Pulse Rate Tone or voice... -
Page 23: Appendix B. Compliance With Standards
APPENDIX B. Compliance with Standards Hereby, Visonic Group declares that the PowerG series of central units and accessories are designed to comply with: Compliance with European CE Standards Standards The PowerMaster complies with the RTTE requirements - Directive 1999/5/EC of the European Parliament and of the Council of 9 March 1999. -
Page 24: Quick User Guide To Main Alarm Control
Quick User Guide to Main Alarm Control Operations by KP-250 PG2 Keypad The Quick Start Guide is intended for the user of the system. Please remove this detachable sheet and hand it to the user. Arming and Disarming the System Step Operation User Actions... - Page 25 Preparing to Arm Before arming, make sure that READY is displayed. HH:MM READY This indicates that all zones are secured and you may arm the system as desired. If at least one zone is open (disturbed) the display will read: HH:MM NOT READY This indicates that the system is not ready for arming and in most cases that one or more zones are not secured.
Need help?
Do you have a question about the PMASTER20G2 and is the answer not in the manual?
Questions and answers