Table of Contents
Advertisement
Table of Contents
1. Introduction .................................................... 3
Preface ......................................................... 3
Overview ....................................................... 3
System features ............................................ 3
..................................................................... 4
Keypad display ............................................. 6
Screen saver mode ....................................... 6
Proximity tags ............................................... 6
Users and codes ........................................... 6
Preparing to arm ........................................... 7
Arming 'AWAY' or 'HOME' ............................ 7
Disarming and preventing the alarm ............. 7
Disarming under duress ................................ 8
Partition selection process ............................ 8
Switching from 'HOME' to 'AWAY' ................ 8
Switching from 'AWAY' to 'HOME' ................ 8
Arming AWAY or HOME 'Instant' .................. 9
Forced arming AWAY or HOME ................... 9
Arming in latchkey mode ............................. 10
Initiating panic alarm ................................... 10
Initiating fire alarm or emergency alarm ...... 11
Chime ON or Chime OFF ........................... 11
4. Electrical Appliance Control ....................... 12
Control Options and Pushbuttons ............... 12
Automatic ON/OFF Control ......................... 12
3. Reviewing events and alarm memory ........ 13
Alarm and tamper memory history .............. 13
Clearing the memory history ....................... 13
Problems with enrolled devices ................... 13
General indications ..................................... 14
Correcting trouble conditions ...................... 15
4. Menus and functions ................................... 16
an option ..................................................... 16
USER SETTINGS menu ............................. 18
B.1 Setting the zone bypass option ............. 18
B.2 Reviewing the zone bypass scheme ..... 20
PowerMaster-360R
User's Guide
B.3 Recalling the zone bypass scheme ....... 20
B.4 Programming user codes ...................... 22
B.5 Programming the duress code .............. 24
B.6 Add and delete proximity tags ............... 24
B.7 Add or delete keyfob transmitters .......... 26
B.8 Setting the time and format ................... 28
B.9 Setting the date & format ...................... 29
B.11 Setting the auto-arming time ............... 30
reporting ...................................................... 31
.................................................................... 37
B.14 Programming the Scheduler ................ 37
B.15 Volume Control ................................... 39
B.16 Serial number ...................................... 42
B.17 PowerLink parameters ........................ 43
5. Event reporting and control by SMS ........... 44
Event notifications by SMS .......................... 44
Remote control by SMS ............................... 45
6. Special applications and functions ............. 46
Looking after people at home ...................... 46
Keyfobs ....................................................... 46
7. Testing the system ....................................... 47
Periodic test ................................................ 47
Periodic test per partition ............................. 49
8. Maintenance .................................................. 51
Replacing the backup battery ...................... 51
Replacing wireless devices batteries ........... 51
Accessing 24-hour zones ............................ 51
Cleaning the control panel ........................... 51
Event log ..................................................... 51
Exiting the event log .................................... 52
Appendix A. Controlling device functions ...... 53
A1. KP-160 PG2 .......................................... 53
A2. KP-140/141 PG2 ................................... 54
A3. KF-234 PG2 .......................................... 55
Appendix B. Partitioning .................................. 56
B1. Selecting a partition ............................... 56
B2. Arming and disarming the system ......... 56
Advertisement
Table of Contents

Related Manuals for Visonic PowerMaster-360R


Summary of Contents for Visonic PowerMaster-360R
-
Page 1: Table Of Contents
B.11 Setting the auto-arming time ....30 Users and codes ........... 6 B.12 Programming Email, MMS and SMS reporting ............31 2. Operating the PowerMaster-360R system ..7 B.13 Enabling and disabling the squawk option Preparing to arm ........... 7 ..............37 Arming ‘AWAY' or ‘HOME' ...... - Page 2 B3. The Show Function ....... 56 E2. Wireless ............63 B4. Siren ............. 57 E3. Electrical ............. 64 B5. Partition status display ......57 E4. Communication .......... 64 B6. Common areas ........57 E5. Physical Properties ........64 Appendix C. Glossary ........59 E6.
-
Page 3: Introduction
Overview The PowerMaster-360R is a wireless alarm system for detecting and alerting in case of burglary, fire and a variety of other security and safety hazards. In addition, it can be used to monitor the activity of disabled or elderly people at home. -
Page 4: Powermaster-360R Panel Indicators And Keys
If such a message is overdue, the Keypad displays a 'missing' TRBL message. Your installer can disable this feature if not required. Battery supervision: The PowerMaster-360R continuously monitors the battery condition of the sensors and devices in the system and the Keypad displays a ‘Low Battery’ message whenever a battery needs to be replaced within a maximum of 30 days. - Page 5 Indicates normal operating mode is restored after a timeout. Three short beeps Indicates a trouble condition (TRBL) is detected with an enrolled device. Success tune Indicates a successful operation. Failure tune Indicates that an input or action is incorrect. D-307084 PowerMaster-360R User's Guide...
-
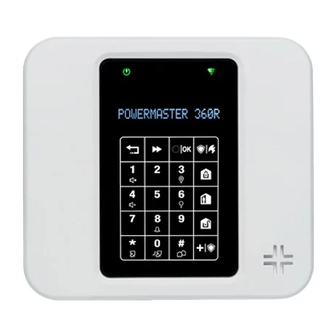
Page 6: Keypad Display
If the Screen Saver option is enabled by the installer, then if no key is pressed for more than 30 seconds, the Keypad display shows “PowerMaster-360R” and the LEDs stops indicating any status. Pressing any key resumes the normal status display. Pressing the Fire or Emergency keys will also initiate the Fire or Emergency alarm. -
Page 7: Operating The Powermaster-360R System
Note: To quit at any stage and to revert to the "READY" display, click Device Locator: The PowerMaster-360R system has a powerful device locator that helps you to identify open or troubled devices indicated on the screen display. While the screen displays an open or faulty device, the LED on the respective device flashes indicating "it's me". -
Page 8: Disarming Under Duress
You do not have to disarm the system - just press . Since this operation reduces the security level, PowerMaster-360R prompts you to key in your master user code or user code, to ensure that you are an authorized user. -
Page 9: Arming Away Or Home 'Instant
[Enter code] / Code / Present tag [Present tag] ARMING AWAY PLEASE EXIT NOW (Exit delay) (to mute the buzzer) AWAY Vacate the premises ARM indicator lights during the armed state. Remember: Forced arming compromises security!! D-307084 PowerMaster-360R User's Guide... -
Page 10: Arming In Latchkey Mode
You can generate a panic alarm manually in the disarmed and armed states, as follows: PRESS RESULTING DISPLAY PANIC ALARM simultaneously READY HH:MM To stop the alarm, press the button and then key in your valid user code. D-307084 PowerMaster-360R User's Guide... -
Page 11: Initiating Fire Alarm Or Emergency Alarm
Appendix C for details. PRESS RESULTING DISPLAY CHIME ON CHIME OFF READY HH:MM CHIME indicator lights steadily when “chime on” is selected. This function is disabled in ACPO compliant version D-307084 PowerMaster-360R User's Guide... -
Page 12: Electrical Appliance Control
If not satisfied - press BY TIMER OFF If satisfied - press BY TIMER OFF BY SENSOR ON BY SENSOR OFF If not satisfied - Press BY SENSOR OFF If satisfied - BY SENSOR OFF READY HH:MM D-307084 PowerMaster-360R User's Guide... -
Page 13: Reviewing Events And Alarm Memory
3. Reviewing events and alarm memory Alarm and tamper memory history The PowerMaster-360R retains in its memory alarm and “tamper” events that occurred during the last arming period. Note: Alarm events are memorized only after the “abort period” (see Appendix C). This means that if you disarm the system immediately - before the abort period expires - there is no memory indication A. -
Page 14: General Indications
Fair Wi-Fi signal strength is displayed as – WiFi level: █ █ -- Poor Wi-Fi signal strength is displayed as – WiFi level: █ --- No Wi-Fi signal is displayed as – WiFi level: ---- D-307084 PowerMaster-360R User's Guide... -
Page 15: Correcting Trouble Conditions
The GSM communicator has detected that GSM network signal is weak SIREN AC FAILURE There is no power to the siren TAMPER OPEN The sensor has an open tamper TROUBLE The sensor reports trouble SOAK TEST FAIL Detector alarms when in Soak Test mode D-307084 PowerMaster-360R User's Guide... -
Page 16: Menus And Functions
Menus and functions 4. Menus and functions This chapter explains the user programming features of your PowerMaster-360R system and allows you to tailor the PowerMaster-360R system to your specific needs. All menu operations are performed using the Keypad which alarm system’s control keys, numerical keypad and display. - Page 17 Use to read the current IP address of the PowerLink and similar data see section PLNK curr.params B.17. Use to exit from the “USER SETTINGS” menu back to Main Menu. For further <OK> TO EXIT details see section A.2. Returns to first option D-307084 PowerMaster-360R User's Guide...
-
Page 18: Returning To The Previous Step Or Exiting The User Settings Menu
Emergency alarm Configure an emergency alarm. 0 – 9 Enter numerical data, where applicable. B.1 Setting the zone bypass option Bypassing permits arming only part of the system while allowing free movement of people within certain zones D-307084 PowerMaster-360R User's Guide... - Page 19 Here you can set the Zone Bypass Scheme i.e. to scroll through the list of registered (enrolled) sensors to your PowerMaster-360R system and to Bypass (deactivate) faulty or disturbed sensors (either READY or NOT-READY) or to Clear (reactivate) BYPASSED zones (sensors).
-
Page 20: Reviewing The Zone Bypass Scheme
To recall the last used bypass scheme press ☺ Bypass RECALLED Bypass RECALLED A "Success Tune" sounds. The display reads [ ] and USER SETTINGS then returns to “ ☺ " step 1. Return to step 1 D-307084 PowerMaster-360R User's Guide... - Page 21 You can now repeat steps 2 - 5 to bypass or clear another zone. To end this session and to select other menu options or to quit programming - follow the instructions in section A.2. You can now select another option in the User Settings menu (see section A.1), or quit programming (see section A.2). D-307084 PowerMaster-360R User's Guide...
-
Page 22: Programming User Codes
Menus and functions B.4 Programming user codes PowerMaster-360R system allows you to authorize up to 48 people to arm and disarm the system by providing each with a unique 4 digit personal security code, and assigning them with different security levels and functionalities. - Page 23 This setting can be performed only after completing steps 1 - 5 of section B.4A. symbol now appears next to the newly selected Partitions. You can now repeat steps 3 - 7 to program or edit another user code. When PARTITIONING is enabled. D-307084 PowerMaster-360R User's Guide...
-
Page 24: Programming The Duress Code
[DEVICE ENROLLED] for a short duration and then ☺ Go to step 5 changes to read the tag's details. The display shows the allocated tag serial No (user No.), which is always the T01:Tag (Prox) first free number, for example: [T01:Tag (Prox)]. D-307084 PowerMaster-360R User's Guide... - Page 25 If the tag was previously enrolled in the system, the Keypad display reads [ ] and then switches to the name of the tag alternating with its ID number. If Partition is enabled, continue to step 6. When PARTITIONING is enabled. D-307084 PowerMaster-360R User's Guide...
-
Page 26: Add Or Delete Keyfob Transmitters
Continue to step 5. The display shows the allocated keyfob serial No (user No.), which is always F01:keyfob the first free number, and the keyfob's ID number; for example: [F01:Keyfob] alternating with [ID No. 300-5786]. ID No. 300-5786 D-307084 PowerMaster-360R User's Guide... - Page 27 To delete the keyfob press the button. ☺ Go to step 3 ☺ DELETE KEYFOB A "Success Tune" sounds and the display reads [ DELETE KEYFOB and returns to step 3. When PARTITIONING is enabled. D-307084 PowerMaster-360R User's Guide...
-
Page 28: Setting The Time And Format
TIME & FORMAT and press EU FORMAT-24H The display shows the currently selected time format. Click the button until the display shows the required time format, for example, "US FORMAT-12H" and press to confirm . US FORMAT-12H D-307084 PowerMaster-360R User's Guide... -
Page 29: Setting The Date & Format
When you are satisfied with the setting, press to confirm. ☺ A "Success Tune" sounds, the display shows the set date and returns to DATE 04/20/2014 step 2 and shows the selected date format. ☺ Return to step 2 D-307084 PowerMaster-360R User's Guide... -
Page 30: Enabling And Disabling Auto-Arming
This setting can be performed only after completing steps 1 – 3 of section B.9A. B.10 Enabling and disabling auto-arming The PowerMaster-360R system can be programmed to automatically arm itself on a daily basis at a predetermined time. This feature is useful especially in commercial applications, such as in stores, to ensure that the system is always armed and without having to assign security codes to employees. -
Page 31: Programming Email, Mms And Sms Reporting
B.12 Programming Email, MMS and SMS reporting The PowerMaster-360R system can be programmed to send various event notification messages such as alarm, arming or trouble events, to 4 SMS telephone numbers (if a GSM option is installed). In addition, for users who are connected to the PowerManage server, event notification messages can be sent to 4 private emails as well as to 4 private MMS and SMS telephone numbers through the server. - Page 32 1st E-MAIL wish to program (out of 4 emails), for example, [2nd E-MAIL] and then press 2nd E-MAIL The display reads [Address]. Address button. The display reads [E-MAIL Events]. Click the E-MAIL Events Press the button. D-307084 PowerMaster-360R User's Guide...
- Page 33 2nd E-MAIL When the display reads [Address], press Address info@visonic.com To program or edit the email, at the blinking cursor position enter the email, for example, “info@visonic.com”, using the alphanumerical keypad. 5, 6 When done, press to confirm. ☺ info@visonic.com A "Success Tune"...
- Page 34 (out of 4 SMS/MMS numbers), for example, "2nd SMS/MMS", and press 2nd SMS/MMS Telephone num. When the display reads [Telephone num.], press 895283584 To program or edit the MMS/SMS number, at the blinking cursor position D-307084 PowerMaster-360R User's Guide...
- Page 35 MMS/SMS telephone number, for example, “895283584”, using the 5, 6 alphanumerical keypad. When done, press to confirm. ☺ 895283584 A "Success Tune" sounds, the display confirms the MMS/SMS telephone number and returns to step 19. ☺ Return to step 19 D-307084 PowerMaster-360R User's Guide...
- Page 36 Alarm and alert messages alarm Alarm messages alert Alert messages disable report No message will be reported You can now, select other options, end this session – (see section A.1 and section A.2), or quit programming (see section A.3). D-307084 PowerMaster-360R User's Guide...
-
Page 37: Enabling And Disabling The Squawk Option
B.13 Enabling and disabling the squawk option The PowerMaster-360R system (and its wireless sirens) can be set to produce a short "Squawk" of audible feedback to assist you when you use a keyfob to arm (1 beep) and disarm (2 beeps) the PowerMaster-360R system. - Page 38 The display shows the current start or stop time setting of the selected activation with the cursor blinking on the first hour digit. If no time is programmed, the time display will be blank (- -:- - - ). D-307084 PowerMaster-360R User's Guide...
-
Page 39: Volume Control
The system allows you to adjust the volume level of the various system beeps and chime signals. Here you can enable / disable the Voice option and change the volume level of the following: Keypad beeps Chime signal Exit / Entry beeps Confirmation beeps Trouble beeps D-307084 PowerMaster-360R User's Guide... - Page 40 [MAX]. When you are satisfied with the setting, press to confirm. A "Success Tune" ☺ sounds. The display confirms the saved setting, 4, 8 then returns to step 6. ☺ Return to step 6 D-307084 PowerMaster-360R User's Guide...
- Page 41 A "Success Tune" ☺ sounds. The display confirms the saved setting, 4, 8 then returns to step 18. ☺ Return to step 18 Additional Information (section B.15) For detailed instructions on how to select the Setting Options – refer to sections A.1 and A.2. D-307084 PowerMaster-360R User's Guide...
-
Page 42: Serial Number
To end this session and return to previous menu options, press the button. You can now select another option in the User Settings menu (see section A.1 and section A.2), or quit programming (see section A.3). D-307084 PowerMaster-360R User's Guide... -
Page 43: Powerlink Parameters
You can now select another option in the User Settings menu (see section A.1 and section A.2), or quit programming (see section A.3). If the Broadband Module is not registered to the PowerMaster, this menu is not displayed. D-307084 PowerMaster-360R User's Guide... -
Page 44: Event Reporting And Control By Sms
5. Event reporting and control by SMS Event notifications by SMS The PowerMaster-360R system when equipped with a GSM unit can be programmed to send SMS event notification messages to 4 pre-selected telephone numbers - see Chapter 4, B.12. The messages can be tagged with a "House ID"... -
Page 45: Remote Control By Sms
“P# PGM <code>” Turn PGM off Note: The PowerMaster-360R may react with a delay to received SMS messages if a GPRS session is in progress at the same time. House ID includes up to 15 characters, for example, JOHN'S HOUSE... -
Page 46: Special Applications And Functions
Looking after people at home In addition to acting as an alarm system, the PowerMaster-360R can also be used to monitor the movement of people at home when the system is in the disarmed state (or even when armed “HOME” with perimeter protection only). -
Page 47: Testing The System
The first siren enrolled in the panel sounds for 3 seconds after which the PowerMaster-360R system will automatically repeat the procedure for the next siren enrolled in the system until all sirens are tested. - Page 48 Display shown in disarm state when all zones are secured (00:00 or other digits show present time). If you have not already changed your personal code number, use the default setting – 1111. If the INSTALLER CODE is used to enter the Periodic Test instead of the USER CODE, the device’s LED D-307084 PowerMaster-360R User's Guide...
-
Page 49: Periodic Test Per Partition
Testing the system also provides the link quality indication – see PowerMaster-360R Installer's Guide. To skip the SIRENS TEST and select the other devices TEST, press The Periodic test can be performed on a maximum of two wireless sirens and the sirens of enrolled smoke sensors. - Page 50 Periodic test per partition will be interrupted (the panel returns to selected partition display) upon occurrence of one of the following: 1) Disarm event by keyfob, keypad or pendant assigned to a selected partition; 2) PANIC, FIRE or EMERGENCY event. D-307084 PowerMaster-360R User's Guide...
-
Page 51: Maintenance
AC power and this trouble state continues for more than a few hours, the battery may need to be replaced. An original Visonic battery must be used of which there are a number of types. For assistance in battery replacement, contact Technical Support. -
Page 52: Exiting The Event Log
Exiting the event log Click the button from anywhere within the event log. The Keypad display will read [<OK> TO EXIT]. <OK> TO EXIT Click the button. READY 00:00 The system reverts to the normal operating mode. D-307084 PowerMaster-360R User's Guide... -
Page 53: Appendix A. Controlling Device Functions
Zone status when working with partitions Alarms Response Notes Upon each press of the key, the next zone number For NOT READY ( ) / assigned to the pressed Partition number appears on the BYPASSED ( zone # display, D-307084 PowerMaster-360R User's Guide... -
Page 54: A2. Kp-140/141 Pg2
See section Response to indication 3.6 of KP-140 Fire alarm Keypad ( 2 sec.) PG2 User's Commands” Guide. section 3.5 Note: For the AUX button configuration, see the Panic alarm KP-140 PG2 Installation Instructions. ( 2 sec.) D-307084 PowerMaster-360R User's Guide... -
Page 55: A3. Kf-234 Pg2
"not ready", the red LED lights steadily and a "failure , see KF-234 PG2 User's Guide, tune" is heard “Panel Response to Keyfob Commands” section Panic alarm 3.2. ( 2 sec.) See section 2.2 of KF-234 PG2 User's Guide. D-307084 PowerMaster-360R User's Guide... -
Page 56: Appendix B. Partitioning
The display will show information relevant to the selected partition. Press repeatedly to view memory / status content. Note: After 5 seconds of no button press there will be a timeout and the display will revert to the all partition display. D-307084 PowerMaster-360R User's Guide... -
Page 57: B4. Siren
/ disarmed directly. Common areas are created when you assign a zone or zones to 2 or 3 partitions. Table A1 summarizes the behavior of the different zone types in a common area. D-307084 PowerMaster-360R User's Guide... - Page 58 Acts as a Delay type when at least one of the assigned partitions is armed HOME. Will be ignored when at least one of the assigned partitions is disarmed. Always armed. Emergency; Fire; Flood; Gas; Temperature; 24- hour silent; 24-hour audible; Non-alarm D-307084 PowerMaster-360R User's Guide...
-
Page 59: Appendix C. Glossary
Disturbed Zone: A zone in a state of alarm (this may be caused by an open window or door or by motion in the field of view of a motion detector). A disturbed zone is considered “not secured”. D-307084 PowerMaster-360R User's Guide... - Page 60 To disarm the system without causing an alarm, use your control keypad (which is normally accessible without disturbing a perimeter zone) or use a keyfob transmitter. It's me: The PowerMaster-360R system includes a powerful device locator that helps you to identify the actual device displayed on the Keypad display, as follows: While the Keypad displays a zone (device), the LED on the respective device flashes indicating "it's me".
- Page 61 Status: AC fail, low battery, trouble, system state etc. User Codes: The PowerMaster-360R is designed to obey your commands, provided that they are preceded by a valid security access code. Unauthorized people do not know this code, so any attempt on their part to disarm or defeat the system is bound to fail.
-
Page 62: Appendix D. Home Fire Escape Planning
It is important to be aware of the escape plan when children are permitted to attend “sleepovers” at friends' homes. If they don’t have a plan in place, offer to help them make one. D-307084 PowerMaster-360R User's Guide... -
Page 63: Appendix E. Specifications
850, 900, 1800, 1900 , 900 , 1900 , 2100 Z-Wave (MHz) (optional) 868.4, 908.4, 921.4 WiFi (optional) 2.4 GHz. Access Point is for IP camera support only. Bands are determined by the cellular modem type D-307084 PowerMaster-360R User's Guide... -
Page 64: E3. Electrical
• Up to 64 zones • Up to 15 PIR cameras, 32 keypads, 32 keyfobs, 8 sirens, 4 repeaters Wireless devices and Pendants: PB-101 PG2, PB-102 PG2 peripherals Magnetic Contact: MC-302 PG2, MC-302E PG2, MC-302EL PG2, MC-302V D-307084 PowerMaster-360R User's Guide... - Page 65 PIR Camera Detectors: Next CAM PG2; Next CAM-K9 PG2 Note: A maximum of 15 PIR cameras are supported, but the panel will communicate to the Visonic PowerManage server only the first 10 clips received from the cameras. Smoke Detector: SMD-426 PG2, SMD-427 PG2...
-
Page 66: Appendix F. Compliance With Standards
EN 50130-4, EN 50131-10, EN 50136-1, EN 50136-2 Applica T&C has certified only the 868 MHz variant of this product. UK: The PowerMaster-360R is suitable for use in systems installed to conform to PD6662:2010 at Grade 2 and environmental CLASS II. DD243 and BS8243 Hereby, Visonic Ltd. - Page 67 This product is not to be thrown away with everyday waste. Directive 2002/96/EC Waste Electrical and Electronic Equipment. EMAIL: info@visonic.com www.visonic.com INTERNET: VISONIC LTD. 2017 PowerMaster-360R User's Guide D-307084 Rev 0 (10/17) D-307084 PowerMaster-360R User's Guide...
Need help?
Do you have a question about the PowerMaster-360R and is the answer not in the manual?
Questions and answers