
Subscribe to Our Youtube Channel
Related Manuals for Nokia IP560 - Hard Disk Drive Based


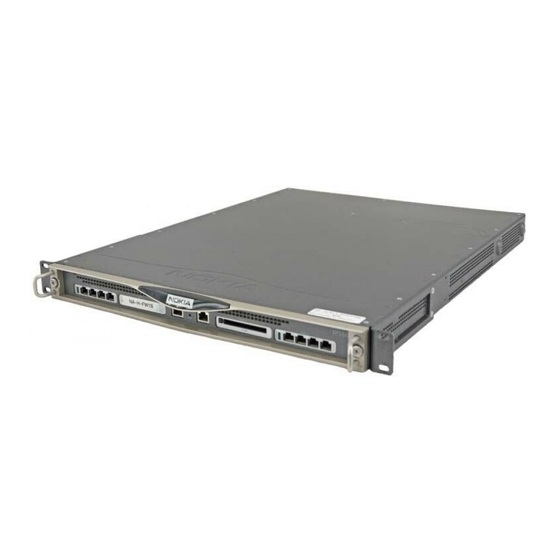
Summary of Contents for Nokia IP560 - Hard Disk Drive Based
-
Page 1: Installation Guide
IP560 Security Platform Installation Guide Part No. N450000382 Rev 001 Published August 2008... - Page 2 IMPORTANT NOTE TO USERS This software and hardware is provided by Nokia Inc. as is and any express or implied warranties, including, but not limited to, implied warranties of merchantability and fitness for a particular purpose are disclaimed. In no event shall Nokia, or its affiliates, subsidiaries or suppliers be liable for any direct, indirect, incidental, special, exemplary, or consequential damages (including, but not limited to, procurement of substitute goods or services;...
- Page 3 313 Fairchild Drive Outside USA and Canada: +1 512-437-7089 Mountain View, CA 94043-2215 email: info.ipnetworking_americas@nokia.com Europe, Mid- Nokia House, Summit Avenue Tel: UK: +44 161 601 8908 dle East, and Southwood, Farnborough Tel: France: +33 170 708 166 Africa Hampshire GU14 ONG UK email: info.ipnetworking_emea@nokia.com...
- Page 4 IP560 Security Platform Installation Guide...
-
Page 5: Table Of Contents
About the Nokia IP560 Security Platform ....... . . 19... - Page 6 Using Nokia Network Voyager ........
- Page 7 Before You Begin ..........96 Replacing a Nokia Encryption Accelerator Card ......99 Before You Begin .
- Page 8 IP560 Security Platform Installation Guide...
- Page 9 Figure 4 Pin Assignments for Auxiliary and Modem Cables ....25 Figure 5 Nokia IP560 Security Platform System Status LEDs ....26 Figure 6 Power Supply and Fan Unit Locations .
- Page 10 IP560 Security Platform Installation Guide...
- Page 11 Table 2 Text Conventions ......... . . 16 Table 3 Nokia IP560 Security Platform Specifics ......19 Table 4 System Status LEDs .
- Page 12 IP560 Security Platform Installation Guide...
-
Page 13: About This Guide
Chapter 3, “Performing the Initial Configuration” describes how to physically connect the Nokia IP560 security platform to a network and to a power source and how to make the security platform available on the network. Chapter 4, “Installing and Replacing Network Interface Cards”... -
Page 14: Conventions This Guide Uses
Notes provide information of special interest or recommendations. Command-Line Conventions This section defines the elements of commands that are available in Nokia Network Security Solutions products. You might encounter one or more of the following elements on a command-line path. -
Page 15: Table 1 Command-Line Conventions
This required element is usually the product name or other short word that invokes the product or calls the compiler or preprocessor script for a compiled Nokia product. It might appear alone or precede one or more options. You must spell a command exactly as shown and use lowercase letters. -
Page 16: Text Conventions
CLI Reference Guide for the version of Nokia IPSO you are using Getting Started Guide and Release Notes for the version of Nokia IPSO you are using Nokia IPSO Boot Manager Reference Guide, which describes how to use the Nokia IPSO... - Page 17 Related Documentation the Nokia Network Voyager Reference Guide, and the CLI Reference Guide from Nokia Network Voyager. Check Point documentation is available from the Check Point Web site at: http:// www.checkpoint.com/ 060306 IP560 Security Platform Installation Guide...
- Page 18 IP560 Security Platform Installation Guide...
-
Page 19: Overview
Overview This chapter provides an overview of the Nokia IP560 security platform and the requirements for its use. The following topics are covered: About the Nokia IP560 Security Platform Managing the Nokia IP560 Security Platform Nokia IP560 Security Platform Overview... -
Page 20: Managing The Nokia Ip560 Security Platform
Note Any slot can be used for an Ethernet NIC. The PCMCIA PC card carrier that comes preinstalled in slot 3 is removable; slot 3 can accept a Nokia-approved NIC. For Accelerated Data Path (ADP) services modules usage information, see Chapter 6, “Installing, Using, and... -
Page 21: Nokia Ip560 Security Platform Overview
Network Voyager—manage, monitor, and configure the IP560 security platform—you can also do with the CLI. For information about how to access the CLI, see the Nokia CLI Reference Guide for IPSO v3.6 or later. Nokia Horizon Manager—a secure GUI-based software image management application. -
Page 22: Pmc Expansion Slots
Nokia products only support NICS and ADP modules purchased from Nokia or Nokia-approved resellers. The Nokia Global Support Services group can only provide support for Nokia products that use Nokia-approved accessories. For sales or reseller information, contact a Nokia service provider listed in the “Nokia Contact Information”... - Page 23 Nokia IP560 Security Platform Overview Note To use the cable for modem connections from the auxiliary port, you need to order a modem cable kit. For information about contacting Nokia to order the kit, see “Nokia Contact Information” on page 3.
-
Page 24: Console Port
Overview appliance auxiliary port and the DB-25 male adaptor). The DB-9 adapter is provided with the cable. The DB-25 adaptor is provided with Nokia modem cable kits for the IP560. 00552 DB-9 female adapter DB-25 male adapter Console Port The default configuration of the serial ports are: 9600 baud, 8 bits, no parity, and 1 stop. -
Page 25: Auxiliary Port
Nokia IP560 Security Platform Overview Auxiliary Port Use the built-in serial (AUX) port, shown in Figure 1, to establish a modem connection for managing the appliance remotely or out-of-Band. The default configuration of the serial ports are: 9600 baud, 8 bits, no parity, and 1 stop. -
Page 26: Figure 5 Nokia Ip560 Security Platform System Status Leds
Overview Figure 5 Nokia IP560 Security Platform System Status LEDs Warning (yellow) Power indicator System OK Fault (red) (blue) (green) SLOT 2 SLOT 3 SLOT 4 00351 Table 4 shows the system status LEDs and describes their meaning. Table 4 System Status LEDs... -
Page 27: Logging Options
Logging Options Logging Options The IP560 supports an option for storing local system log files, as described in “Configuring a Hard-Disk Drive for Logging” on page 93. Power Supply and Fan Unit The power supply and fan unit are located at the rear of the IP560 appliance, as shown in Figure Figure 6 Power Supply and Fan Unit Locations Fan unit... -
Page 28: Fan Unit
Overview Table 5 Power Supply Status LEDs LED status Meaning Fault Power supply has a voltage problem and power was turned off. One power supply in a redundant system is not turned on. Over Temp Yellow Power supply has an internal temperature problem. -
Page 29: Site Requirements, Warnings, And Cautions
Site Requirements, Warnings, and Cautions Site Requirements, Warnings, and Cautions Before you install a Nokia IP560 security platform, ensure that your computer room or wiring closet conforms to the environmental specifications listed in Appendix A, “Technical Specifications.” Warning Excessive electromagnetic interference (EMI) can occur if you use controls, make performance adjustments, or follow procedures that are not described in this document. -
Page 30: Product Disposal
These devices contain materials and components that must be disposed of properly. Therefore, to help prevent damage to the environment, Nokia encourages you to dispose of these devices in an environmentally-friendly manner. -
Page 31: Installing The Nokia Ip560 Appliance
Rack-Mounting the Appliance The Nokia IP560 security platform mounts in a standard 19-inch equipment rack with four mounting screws, as Figure 9 shows. -
Page 32: Figure 9 Rack-Mounting Screw Locations
Installing the Nokia IP560 Appliance Figure 9 Rack-Mounting Screw Locations IP560 SLOT 1 SLOT 2 SLOT 3 SLOT 4 00354 Rack-mounting screw locations Two rack-mounting positions allow you to mount the appliance either flush with the rack, or two inches forward of the equipment rack. If the space behind the rack is insufficient, the rack- mounting brackets can be attached further back on the side of the appliance. - Page 33 Rack-Mounting the Appliance c. Slowly pull the fan unit out of the chassis toward the rear. 00363 3. Optionally, remove the power supply from the rear of the appliance to lighten it, as shown in the illustration above. a. Locate the power supply on the back of the IP560 and the two screws that secure it. 00353 00353 Power supply...
- Page 34 Installing the Nokia IP560 Appliance 4. Optionally, remove the chassis tray assembly from the appliance. a. Loosen the two chassis tray assembly retaining screws from the front panel of the appliance. IP560 SLOT 1 SLOT 2 SLOT 3 SLOT 4...
- Page 35 Rack-Mounting the Appliance 6. Mount the appliance into a standard 19-inch rack by using the mounting screws located on the mounting brackets. You can also install the rear brackets for additional chassis support, as shown in the following figure. 00554 7.
- Page 36 Installing the Nokia IP560 Appliance IP560 Security Platform Installation Guide...
-
Page 37: Performing The Initial Configuration
Performing the Initial Configuration The first time you turn on power to a Nokia IP560 security platform, the initial configuration process begins. This process enables you to configure the network settings and provides access to the admin account. You can perform the initial configuration in two ways: Configure a DHCP server to provide the initial configuration information the first time the appliance is started. -
Page 38: Using A Console Connection
Performing the Initial Configuration Using a Console Connection If you do not use DHCP to perform the initial configuration of your Nokia IP560 security platform, you must use a serial console connection (cable included). After you perform the initial configuration, you no longer need the console connection. -
Page 39: Connecting Power And Turning The Power On
(115 VAC or 220 VAC [85 to 264]) and configures itself appropriately. 4. Check the power LED (the Nokia logo) on the front panel of the appliance to ensure that the power supply is operating correctly. -
Page 40: Performing The Initial Configuration
That power is turned on to the power strip or wall receptacle into which you plugged the appliance. If the fans are still not running, or if the power LED does not illuminate, contact your Nokia service provider or Nokia Support as listed in “Nokia Contact Information”... - Page 41 BOOTMGR> or Hostname? prompts, verify that the terminal or terminal emulator program settings are correct. If the settings are correct, contact your Nokia service provider as listed in “Nokia Contact Information”...
-
Page 42: Connecting Network Interfaces
After you complete the initial configuration, you can use Nokia Network Voyager to configure the remaining network ports. Connecting Network Interfaces Connect at least one network interface to the network to use as the Nokia Network Voyager system-management interface. This interface is configured during the initial configuration process, which is described in Chapter 3, “Performing the Initial Configuration.”... -
Page 43: Viewing Nokia Ipso Documentation By Using
Network Voyager interface, as shown in Figure Nokia Network Voyager Reference Guide—This guide is the comprehensive reference source for Nokia Network Voyager. To access this source, look at the list in the navigation tree on the left side of the window (as shown in Figure 11).You can also access the Nokia... -
Page 44: Using The Command-Line Interface
Link to inline help (context sensitive help) Using the Command-Line Interface You can also use the IPSO command-line interface (CLI) to manage and configure Nokia IP security platforms from the command line. Everything that you can accomplish with Network Voyager you can also do with the CLI. -
Page 45: Using Nokia Horizon Manager
The argument must be the name of a regular file. For more information about how to access and use the CLI, see the Nokia CLI Reference Guide for the version of IPSO you are using. Using Nokia Horizon Manager Nokia Horizon Manager is an extension of the Network Voyager management functionality. - Page 46 Performing the Initial Configuration IP560 Security Platform Installation Guide...
-
Page 47: Installing And Replacing Network Interface Cards
Deactivating Configured Interfaces If you are removing or replacing an installed NIC, use Nokia Network Voyager to deactivate any configured ports on the NIC before removing it. Deactivate all of the logical interfaces on the NIC. -
Page 48: Installing Nics
To install a network interface card 1. Use Nokia Network Voyager or command-line interface (CLI) to perform an orderly shutdown of the IP560 appliance. For information about how to access Network Voyager and the related reference materials, “Using Nokia Network Voyager”... - Page 49 Installing NICs 3. Loosen the two front panel retaining screws. IP560 SLOT 1 SLOT 2 SLOT 3 SLOT 4 00354 Chassis tray assembly retaining screws 4. Slide the chassis tray assembly forward, pressing the release tab on the right side of the assembly, and completely remove the chassis to expose the motherboard components.
- Page 50 Installing and Replacing Network Interface Cards 6. From underneath the chassis tray assembly, remove the bezel retaining screws. S L O S L O 00440 If you are installing a NIC in an unoccupied slot, remove the blank bezel that occupies the space in the appliance front panel and retain it for future use.
- Page 51 10. Insert and close the chassis tray assembly until it clicks into place. SL OT SL OT SL OT SL OT 00519 The Nokia IPSO operating system automatically recognizes the NIC and applies the original configuration to the new NIC. IP560 Security Platform Installation Guide...
-
Page 52: Configuring And Activating Interfaces
The IP560 appliance automatically detects any new NIC when the appliance is restarted. Use Nokia Network Voyager to configure and activate the logical and physical interfaces on the NIC. For information about how to access Network Voyager and the related reference materials, see “Using Nokia Network Voyager”... -
Page 53: About Ip560 Appliance Network Interface Cards
For instructions about how to add or replace NICs, see Chapter 4, “Installing and Replacing Network Interface Cards.” The NICs supported in the Nokia IP560 security platform operate at the peripheral component interconnect (PCI) frequency listed in Table Table 6 NIC PCI Frequency... -
Page 54: Four-Port 10/100 Ethernet Nic
Chapter 4, “Installing and Replacing Network Interface Cards.” 10/100 Ethernet NIC Features The four-port 10/100 Ethernet NIC supports PCI operation at 133 MHz and runs on Nokia IPSO v4.0.1 or higher. In the IP560, the four-port Ethernet NIC supports the following features:... -
Page 55: Ethernet Nic Connectors And Cables
Four-Port 10/100 Ethernet NIC Ethernet NIC Connectors and Cables The Ethernet connectors on the four-port 10/100 Ethernet NICs are RJ-45 connectors. Use a straight-through cable to connect the NIC to a 10-Mbps or 100-Mbps hub or switch, or a crossover cable to connect directly to a host. Use ANSI TIA/EIA-568-A/B compliant (Cat 5 or Cat 5e) unshielded twisted pair cable. -
Page 56: Four-Port And Two-Port Copper Gigabit Ethernet
00020 Four-Port and Two-Port Copper Gigabit Ethernet NIC (10/100/1000) The Nokia IP560 security platform supports Nokia-approved, four-port and two-port copper Gigabit Ethernet NICs installed on a PMC expansion slot. The IP560 can accommodate up to four Gigabit Ethernet NICs. When you purchase a copper Gigabit Ethernet NIC with your IP560, the NIC is installed before the appliance is delivered to you. -
Page 57: Figure 16 Four-Port Copper Gigabit Ethernet Nic Front Panel Details
Note The two-port copper Gigabit Ethernet NIC you use in IP560 appliance must be the Version 2 type, as indicated on the right end of the NIC faceplate. These NICs are sold by Nokia under the order code NIF4425. IP560 Security Platform Installation Guide... - Page 58 About IP560 Appliance Network Interface Cards After you turn on the appliance, the Ethernet link LEDs on both the appliance and on the remote equipment illuminate to indicate the connection. As data is transmitted or received, the activity LEDs on the appliance illuminate. Note The Link LED on the NIC is bicolored.
-
Page 59: Copper Gigabit Ethernet Nic Connectors And Cables
Four-Port and Two-Port Copper Gigabit Ethernet NIC (10/100/1000) Copper Gigabit Ethernet NIC Connectors and Cables The copper Gigabit Ethernet NIC receptacles are for RJ-45 connectors. Caution Cables that connect to the Gigabit Ethernet card must be ANSI TIA/EIA-568-A/B compliant (Cat 5 or Cat 5e) to prevent potential data loss. To connect to a 1-Gbps hub, switch, or router, use a straight-through RJ-45 cable (Cat 5 or Cat 5e type cable, or as required by your network configuration). -
Page 60: Two-Port Fiber-Optic Gigabit Ethernet Nics
The long-range single-mode fiber (SMF) fiber-optic Gigabit Ethernet NICs in the IP560 run on Nokia IPSO v4.2 or higher. You can configure and monitor Gigabit Ethernet NIC interfaces with Nokia Network Voyager. Specifically, you set the port speed and full-duplex mode with Network Voyager. -
Page 61: Fiber-Optic Gigabit Ethernet Nic Connectors And Cables
Two-Port Fiber-Optic Gigabit Ethernet NICs Figure 20 shows the front panel details for the two-port short-range (1000 BASE-SX) fiber-optic Gigabit Ethernet NIC you can use in IP560 appliance. Figure 20 PMC Two-Port Short-Range Gigabit Ethernet NIC Link LEDs (solid green) Activity LEDs (blinking amber) 00206 Ports... - Page 62 About IP560 Appliance Network Interface Cards Caution Depending on the product you order, one or more LC-to-SC cables are included with fiber-optic Gigabit Ethernet NICs. You can order additional cables from a cable vendor of your choice. Cables that connect to the Gigabit Ethernet NIC must be IEEE 802.3z compliant to prevent potential data loss.
-
Page 63: Installing, Using, And Replacing Adp Services Modules
Installing, Using, and Replacing ADP Services Modules This chapter describes the Accelerated Data Path (ADP) services modules available for the Nokia IP560 appliance and how to connect those modules to your network. It includes the following sections: Installing and Replacing ADP Modules... -
Page 64: Installing And Replacing Adp Modules
Before you begin this procedure, you should review all ADP module information in the Nokia Getting Started Guide and Release Notes for the version of Nokia IPSO you are using and refer to both of these documents as needed as you complete the installation and configuration process. - Page 65 Installing and Replacing ADP Modules For information about how to use Network Voyager or the CLI, see the Nokia Network Voyager Reference Guide or Nokia CLI Reference Guide for the version of Nokia IPSO you are using. 4. Turn off the power to the IP560 appliance.
- Page 66 Installing, Using, and Replacing ADP Services Modules 8. From underneath the chassis tray assembly, remove the four bezel retaining screws. S L O S L O Remove the four bezel screws, and filler panels, installed PMC NICs, or ADP modules 00440a If the slots you are using for the ADP module are unoccupied, remove the filler panels that occupy the spaces in the appliance front panel and retain them for future use.
- Page 67 Installing and Replacing ADP Modules Note It is important that you reinstall the two baffle screws for proper motherboard operation. Remove the two baffle screws and baffle, and reinstall the two screws S L O S L O 00648 IP560 Security Platform Installation Guide...
- Page 68 Installing, Using, and Replacing ADP Services Modules 10. If a FIPS screen is installed, note the position of the screen, as it must be reinstalled the same way. Remove the two screws that secure the screen, and remove the screen. Remove the two FIPS screen screws and the screen S L O...
- Page 69 Installing and Replacing ADP Modules the back of the module down, you should detect little or no resistance; if you do, check to ensure that the EMI gaskets have not rolled back. Push down only at these two points and ensure that both connectors are completely seated Memory card location S L O...
- Page 70 20. Use either Network Voyager or the CLI to delete the old interfaces and configure the new ADP interfaces as described in “Configuring Nokia IPSO with IP560 ADP Interfaces” page 73. Note the interface naming conventions in “Nokia ADP Module Interface Names for IP560 Appliances”...
- Page 71 00660 Link and Activity LEDs To install or remove transceivers in a Nokia ADP module For ADP modules that require transceivers, refer to the following figure, which shows how to install or remove the transceivers. Transceivers are hot swappable as are the interface cables you use with them.
-
Page 72: Nokia Adp Module Led Reference Information
Release the transceiver by rotating the latch lever. Pull out the transceiver. Note that if you install any ADP transceivers that are not supported by Nokia, they are not recognized by Nokia IPSO; the system rejects the transceivers and includes them in a list of rejected interfaces on the Interface Configuration page in Nokia Network Voyager, as shown in the following figure. -
Page 73: Configuring Nokia Ipso With Ip560 Adp Interfaces
Configuring Nokia IPSO with IP560 ADP Interfaces Configuring Nokia IPSO with IP560 ADP Interfaces This section includes information about configuring Nokia IPSO to use the interfaces on a Nokia ADP module. To help you understand the implications of installing an ADP module, it provides an example of the steps you might perform to install an ADP module in an IP560 appliance running the Virtual Router Redundancy Protocol (VRRP). -
Page 74: Nokia Adp Module Interface Names For Ip560 Appliances
IP560 appliance that are also relevant to the interaction of ADP interfaces and NIC interfaces. When you install an ADP module in an IP560 appliance, Nokia recommends that you configure your network so that your appliance does not forward traffic between ADP interfaces and PMC NIC interfaces even if the NIC interfaces are Gigabit Ethernet. -
Page 75: Configuration Example With Vrrp
Configuring Nokia IPSO with IP560 ADP Interfaces Configuration Example with VRRP This example describes the steps required to install an ADP module in an IP560 appliance with VRRP configured. The following figure shows the Interface Configuration page of the appliance before an ADP module is installed. -
Page 76: Deleting Vrrp Configurations
Installing, Using, and Replacing ADP Services Modules The following figure shows the VRRP configuration: The rest of this section describes how to reconfigure the interfaces and VRRP to accommodate the ADP interfaces. Deleting VRRP Configurations After you physically remove PMC NICs that you are replacing with ADP modules, you need to delete the configuration information for those interfaces. -
Page 77: Reconfiguring Interfaces
After you install the ADP module, you need to reconfigure interface information as described below. To reconfigure interfaces for ADP modules 1. Log into the appliance using Nokia Network Voyager. 2. Navigate to the Interface Configuration page. Notice that the names of the interfaces in slot 1 have not changed. Any configuration information for these interfaces is unchanged as well. - Page 78 Installing, Using, and Replacing ADP Services Modules The interfaces you removed from slot 2 are still listed on this page, and you see a blue indicator next to each of them in the Up column. 3. Delete the interface names and configuration information for the interfaces you removed from slot 2 by following the remaining steps in this procedure.
- Page 79 Configuring Nokia IPSO with IP560 ADP Interfaces Note To delete an interface used by VRRP or IP clustering, you must first disable the feature that uses the interface. This is why you deleted the VRRP configuration before you installed the ADP module.
-
Page 80: Reconfiguring Vrrp
Installing, Using, and Replacing ADP Services Modules The following figure shows the example system after the configuration information for all of the removed interfaces has been deleted: 9. If appropriate, configure the ADP interfaces to use the IP addresses previously assigned to the removed interfaces. - Page 81 Configuring Nokia IPSO with IP560 ADP Interfaces In this example, you need to recreate the VRRP configuration using the new interfaces eth-s1p5c0 and eth-s1p6c0. The following figure shows the example system after you recreate the VRRP configuration using the new interfaces:...
- Page 82 Installing, Using, and Replacing ADP Services Modules IP560 Security Platform Installation Guide...
-
Page 83: Installing And Replacing Components Other Than Network Interface Cards (Nics) And Accelerated Data Path (Adp) Services Modules
This chapter provides information about how to install or replace orderable parts other than network interface cards (NICs) and Accelerated Data Path (ADP) services modules in your Nokia IP560 appliance. The following topics are covered: Replacing the Compact Flash Memory Card... -
Page 84: Replacing The Compact Flash Memory Card
Use the internal compact flash to boot the system and install the Nokia IPSO operating system on the disk. The compact flash card is located on the motherboard in a slot in front of the two hard-disk drive locations. - Page 85 You risk damage to the appliance or loss of data if you do not use the following procedure when you replace the compact flash memory. 1. Use Nokia Network Voyager or the command-line interface (CLI) to perform an orderly shutdown of the IP560 appliance.
-
Page 86: Installing A Pc Card
After you install a single-slot PCMCIA carrier card, which you can purchase from Nokia, the IP560 supports a PC card with 1-GB flash memory that Nokia offers with or without system software included. The supported slot is labeled Slot 3 and is located on the front panel of the... -
Page 87: Figure 23 External Pc Card Location
Drive for Logging” on page 93 for information about configure the PC card for logging. Nokia supports only PC cards purchased from Nokia or Nokia-approved resellers. For more information, contact the appropriate Nokia customer support site listed in “Nokia Contact Information”... -
Page 88: Installing Or Replacing A Hard-Disk Drive
The flash-based IP560 also supports one optional hard-disk drive that you can use for logging. Note Starting with Nokia IPSO 4.1, one or two hard drives are supported. However, you can use only one disk for logging in flash-based IP560 appliances. - Page 89 <1 | 2> off where the number 1 or 2 indicates the hard-disk drive slot. 2. Use Nokia Network Voyager or the command-line interface (CLI) to perform an orderly shutdown of the IP560 appliance. For information about how to access Network Voyager and the related reference materials, “Using Nokia Network Voyager”...
-
Page 90: Figure 24 Location Of Hard-Disk Drive On The Chassis Tray Assembly
Installing and Replacing Components Other than Network Interface Cards (NICs) and Accelerated Data Path 4. Loosen the two front panel retaining screws. IP560 SLOT 1 SLOT 2 SLOT 3 SLOT 4 00354 Chassis tray assembly retaining screws 5. Slide the chassis tray assembly forward, pressing the release tab on the right side of the assembly, and completely remove the chassis to expose the motherboard components. - Page 91 Installing or Replacing a Hard-Disk Drive Note In single hard-drive configurations, install the hard-disk in Slot 1 first. 7. Remove the four screws from the base of the hard-disk drive and remove the hard-disk drive. 00445 IP560 Security Platform Installation Guide...
- Page 92 Installing and Replacing Components Other than Network Interface Cards (NICs) and Accelerated Data Path To install or a hard-disk drive 1. Slide the new hard-disk drive onto the mounting locations. 00355 2. Replace the four screws. 00445 IP560 Security Platform Installation Guide...
-
Page 93: Configuring A Hard-Disk Drive For Logging
On the flash-based IP560, you can save log files locally by installing and configuring an optional hard-disk drive. The Nokia Network Voyager Reference Guide and the CLI Reference Guide for Nokia IPSO contain instructions for configuring a Nokia appliance to store Nokia IPSO log messages on the disk. -
Page 94: Replacing Or Upgrading Memory
If you are using Nokia IPSO 4.1 or later, and you add a second optional disk, you have the option to choose between the two optional disks. -
Page 95: Figure 25 Dimm Socket Locations
Replacing or Upgrading Memory Figure 25 DIMM Socket Locations DIMM sockets SL O SL O SL O SL O 00418 Note You must install DIMMs in pairs starting from the left. Insert a pair of DIMMS into adjacent slots J1/J2 and/or J3/J4, otherwise the DIMMS do not work. You can also use all four slots at one time. -
Page 96: Before You Begin
To replace DIMMs 1. Use Nokia Network Voyager or the command-line interface (CLI) to perform an orderly shutdown of the appliance. For information about how to access Network Voyager and the related reference materials, “Using Nokia Network Voyager”... - Page 97 Replacing or Upgrading Memory 4. Slide the chassis tray assembly forward, pressing the release tab on the right side of the assembly, and completely remove the chassis to expose the motherboard components. SL OT SL OT SL OT SL OT 00520 5.
- Page 98 8. Resecure the two chassis tray assembly retaining screws. 9. Turn on the power. The IP560 appliance automatically recognizes the new memory configuration. You can verify the configuration by using Nokia Network Voyager or the CLI. IP560 Security Platform Installation Guide...
-
Page 99: Replacing A Nokia Encryption Accelerator Card
Replacing a Nokia Encryption Accelerator Card Replacing a Nokia Encryption Accelerator Card The IP1560 comes with the Nokia encryption accelerator card preinstalled as part of its base bundle to further enhance VPN performance. The accelerator card provides high-speed cryptographic processing that enhances VPN performance. - Page 100 Installing and Replacing Components Other than Network Interface Cards (NICs) and Accelerated Data Path 3. Loosen the two chassis tray assembly retaining screws. IP560 SLOT 1 SLOT 2 SLOT 3 SLOT 4 00354 Chassis tray assembly retaining screws 4. Slide the chassis tray assembly forward, pressing the release tab on the right side of the assembly, and completely remove the chassis to expose the motherboard components.
- Page 101 Replacing a Nokia Encryption Accelerator Card 6. Loosen the four retaining screws and remove the card. 00517 Caution Do not use the PMC connectors located at the front of the motherboard for the acceleration card. Those connectors are for NICs and ADP modules.
-
Page 102: Configuring Software To Use Hardware Acceleration
The Nokia encryption accelerator software package is part of the Nokia IPSO operating system, so the appliance automatically detects and configures the Nokia encryption accelerator card. For the Nokia IP560 appliances, SecureXL is on by default. After you install the Nokia encryption accelerator card and reboot the appliance, SecureXL automatically uses the Nokia encryption accelerator card for encryption acceleration. -
Page 103: Replacing A Fan Unit
The PKCS#11 token that enables IKE acceleration is registered with the Check Point software on your appliance. After you register the module, you must install the Check Point security policy on the firewall for the Nokia encryption accelerator card to perform IKE acceleration. Replacing a Fan Unit The appliance fan unit is a single unit made up of four individual fans to provide the air flow required to maintain a proper operating temperature. -
Page 104: Replacing A Power Supply
Installing and Replacing Components Other than Network Interface Cards (NICs) and Accelerated Data Path 3. Locate the fan unit on the back of the IP560 appliance and the two retaining screws that secure it. 00353 Retaining screws 4. Loosen the retaining screws by turning them counterclockwise. 5. -
Page 105: Figure 26 Power Supply Location
To replace a power supply 1. Use Nokia Network Voyager or command-line interface (CLI) to perform an orderly shutdown of the IP560 appliance. For information about how to access Network Voyager, see Using Nokia Network Voyager on page 42. -
Page 106: Monitoring The Ip560 Appliance Power Supply
11. Turn on the power. Monitoring the IP560 Appliance Power Supply You can monitor the status of the IP560 appliance power supply with Nokia Network Voyager. Similarly, you can also use the command-line interface (CLI). For information about the CLI, see the CLI Reference Guide. -
Page 107: Replacing The Battery
To install the battery, perform the following tasks: 1. Use Nokia Network Voyager or the command-line interface (CLI) to perform an orderly shutdown of the IP560. For information about how to access Network Voyager and the related reference materials, “Using Nokia Network Voyager”... - Page 108 Installing and Replacing Components Other than Network Interface Cards (NICs) and Accelerated Data Path 4. Slide the chassis tray assembly forward, pressing the release tab on the right side of the assembly, and completely remove the chassis to expose the motherboard components. SL OT SL OT SL OT...
- Page 109 Nokia service provider. For more information, see “Nokia Contact Information” on page 3. 12. Reset the appliance date and time information by using Nokia Network Voyager or the command-line interface. The battery is required to maintain the date and time whenever you shut down the appliance.
- Page 110 Installing and Replacing Components Other than Network Interface Cards (NICs) and Accelerated Data Path IP560 Security Platform Installation Guide...
-
Page 111: Troubleshooting
Problem Terminal set for flow control. Solution The IP560 does not use flow control. The terminal should be set for no flow control. Problem Defective IP560 or file system. Solution Contact the Nokia customer support site listed in “Nokia Contact Information” page 3. - Page 112 Troubleshooting Problem Database is corrupt. Solution Return to default settings according to the instructions included in the instructions for resetting the default password, or contact the Nokia customer support site listed in “Nokia Contact Information” on page 3. Login Prompt Appears, But Password Not Accepted Problem Entered wrong password.
- Page 113 1. Log in to the IP560 as admin by using Network Voyager. For information about how to access Network Voyager and the related reference materials, “Using Nokia Network Voyager” on page 42. 2. Under Configuration Database Management (Config > System Configuration > Manage Configuration Sets), choose the option to create a new factory default configuration.
- Page 114 For information about how to complete the full installation procedure, see the current release notes. The release notes are located on the Nokia customer support Web site as listed in the “Nokia Contact Information”...
- Page 115 General Troubleshooting Information Common Ethernet Problems—Connectivity with Attached Device Problem No link light. Solution You might have used the wrong cable. Use a crossover cable between an IP560 and a host, and a straight-through cable between an appliance and a hub. Problem Solid data and activity LED.
- Page 116 . For more information about how to use the -i interface proto igmp tcpdump command, see the Nokia Network Voyager Reference Guide. Under Routing Options in the Routing Configuration section in Network Voyager, you can also enable several types of trace options for DVMRP. These traces are logged into /var/tmp/ ipsrd.log...
- Page 117 Solution Repeat memory installation procedures. Make sure DIMMs are fully seated in sockets. Be sure DIMMs click into place. Appliance locks up after you upgrade Nokia IPSO with a console connection. No error messages appear, but the appliance stops responding to console and network.
-
Page 118: Troubleshooting Routing Problems
An example use of the ICLID command is shown below. For information about the ICLID command, see the Nokia Network Voyager Reference Guide. For information about how to access Network Voyager and the related reference materials, see “Using Nokia Network Voyager”... - Page 119 -i interface proto ospf For more information about how to use the tcpdump command, see the Nokia Network Voyager Reference Guide. Under routing options in Network Voyager, you can also enable several types of trace options for OSPF.
- Page 120 -i interface proto rip For more information about how to use the tcpdump command, see the Nokia Network Voyager Reference Guide. Under routing options in Network Voyager, you can also enable several types of trace options for routing information protocol (RIP).
- Page 121 Problem Exchanging routes are not configured correctly. Solution Exchanging routes involves several configuration steps. Follow the tasks in the Nokia Network Voyager Reference Guide (online documentation) to ensure that you follow all steps. For information about how to access Network Voyager and the related reference materials, see “Using Nokia Network Voyager”...
- Page 122 Troubleshooting IP560 Security Platform Installation Guide...
-
Page 123: A Technical Specifications
Technical Specifications Dimensions Height: 3.5 in. (8.89 cm) Width: 17 in. (44 cm) 19 in. (48 cm) rack-mountable Depth: 26 in. (53.34 cm) Operational 0° C to +40° C (32° F to 104° F) Temperature Humidity 5% to 85% IP560 Security Platform Installation Guide... -
Page 124: Space Requirements
Technical Specifications Space Requirements The Nokia IP560 security platform is designed for front-screw mounting in a 19-inch rack. Each IP560 requires the following space in a rack: 3.5 inches (8.89 centimeters) of vertical space 28 inches (71 centimeters) behind the front-panel of the rack... -
Page 125: B Compliance Information
Compliance Information This appendix contains declaration of conformity, compliance, and related regulatory information. Declaration of Conformity According to ISO/IEC 17050: Manufacturer’s Name: Nokia, Inc. Manufacturer’s Address: 313 Fairchild Drive Mountain View, CA 94043-2215 declares that the product: Product Name: IP560... - Page 126 Compliance Information Christopher Saleem Compliance & Reliability Engineering Manager Security & Mobile Connectivity, Enterprise Solutions Mountain View, California Novemeber 2005 IP560 Security Platform Installation Guide...
-
Page 127: Compliance Statements
Compliance Statements Compliance Statements This hardware complies with the standards listed in this section. Emissions Standards FCC Part 15 Subpart B Class A US/Canada EN55022 (CISPR 22 Class A) European Community (CE) Immunity Standards EN55024 European Community (CE) EN61000-4-2 European Community (CE) EN61000-4-3 European Community (CE) EN61000-4-4... - Page 128 Compliance Information interference in which case the user will be required to correct the interference at his own expense. Caution Any changes or modifications not expressly approved by the grantee of this device could void the user’s authority to operate the equipment. 060425 IP560 Security Platform Installation Guide...
-
Page 129: Index
Index compliance statements 127 Numerics component locations 21 10/100 Ethernet NIC features 54 configuring appliance 38 configuring interfaces 52 connecting network interfaces 42 connecting to the auxiliary port 22 AC power receptacle 27 connecting to the console port 22 AC power supply 20 connections accelerator card copper Gigabit Ethernet NIC 59... - Page 130 Gigabit Ethernet 60 replacing 92 network interfaces, connecting 42 storing log files 88 Network Voyager 20 harmonics 127 Nokia Horizon Manager 21 height 123 Nokia IPSO requirements 29 host terminal 24 Nokia Network Voyager opening 42 null-modem cable 38...
- Page 131 41 slot numbering 41 opening Nokia Network Voyager 42 space requirements 124 operational temperature 123 specifications, technical 123 output connector, Ethernet cable 55 standoffs, motherboard 102 output voltage 27 system logging with hard-disk drive 93 system status LEDs 25...
- Page 132 Index - 132 IP560 Security Platform Installation Guide...
- Page 133 We Welcome Your Comments Nokia is interested in improving our documentation to better serve our customers. Please feel free to send comments and suggestions to docfeedback@nokia.com. If you are using Adobe Acrobat Reader 6.0 or later, we invite you to provide feedback to us by using the following form.
Need help?
Do you have a question about the IP560 - Hard Disk Drive Based and is the answer not in the manual?
Questions and answers