Table of Contents
Advertisement
Quick Links
Advertisement
Table of Contents

Subscribe to Our Youtube Channel
Related Manuals for Shining 3D Transcan C


Summary of Contents for Shining 3D Transcan C
- Page 1 Transcan C User Manual V1.4.1 Shining 3D Transcan C_User Manual_V1.4.1...
-
Page 2: Table Of Contents
8.2. Mesh Editing ............................42 8.3. Texture Adjustment..........................43 8.4. Simplification ............................44 8.5. Mesh Optimization ..........................44 8.6. Smooth ..............................45 8.7. Remove Small Floating Parts ........................46 8.8. Auto Hole Filling ............................. 46 Shining 3D Transcan C_User Manual_V1.4.1... - Page 3 Scale Data ............................... 51 9.3. Measurement ............................51 Share Data ........................... 57 Third-party Software ......................58 Preview Model ........................59 Others ..........................60 13.1. FAQ ................................. 60 13.2. Safety Precautions ..........................60 Contact Us..........................61 Shining 3D Transcan C_User Manual_V1.4.1...
-
Page 4: Specification And System Requirements
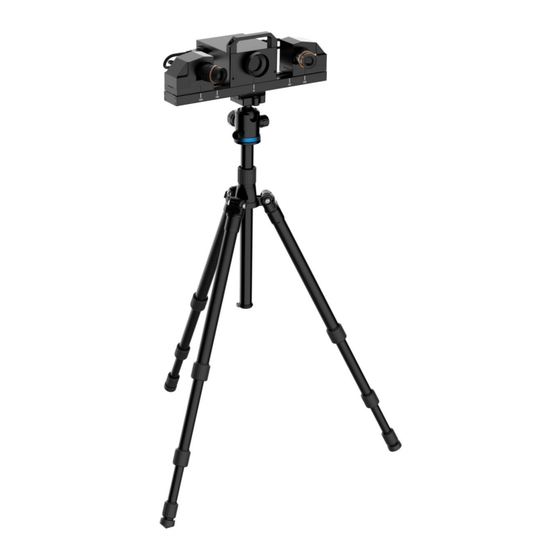
Insert the scan head assembly into the top groove of the tripod, tighten the screws. See ① to see if the scanner is placed horizontally. Based on the need, shake the rocker to adjust the device height. Then tighten the latch. Shining 3D Transcan C_User Manual_V1.4.1... - Page 5 Insert the power cord triangular plug into the plug or socket. Connect the computer USB 3.0 port and device socket ② with the device connection cable. If using a light box, plug the light box connection cable into port ①. Shining 3D Transcan C_User Manual_V1.4.1...
- Page 6 Turntable connection Insert the turntable connection cable ⑤ into the turntable port ①. Insert turntable connection cable ④ into computer USB port. Insert the turntable power cable ③ into the turntable port ②. Shining 3D Transcan C_User Manual_V1.4.1...
- Page 7 2) Press power button again to turn off the device, and the switch light turns off. After installing the software, connect the device to the computer and start it up, the following devices are displayed in the Device Manager. Shining 3D Transcan C_User Manual_V1.4.1...
- Page 8 Check if USB 3.0 is connected (if a device with a question mark or exclamation point is found in the Device Manager). Install the camera driver manually. After the device is powered off, unplug the USB cable; then re-power and plug in the USB cable. Shining 3D Transcan C_User Manual_V1.4.1...
-
Page 9: Set Software
Click Upgrade and follow the instruction to update the device firmware. Firmware updating will take around 3 mins. Power off the device after upgrading successfully. Reconnect the device, and open the software again, the device is running under the latest firmware. Shining 3D Transcan C_User Manual_V1.4.1... -
Page 10: Update The Software
When a new version is available, a pop-up will show when you start the software to remind you update your software to the latest version. Note: After clicking Download Now, the software will be downloaded (do not close the software). Click Yes to update. Update Reminder Shining 3D Transcan C_User Manual_V1.4.1... -
Page 11: Activate The Scanner
(.ple file can be found in the USB drive.) Note: If the activation fails, send a request for activation file to technical support staff with your serial number. Local activation Shining 3D Transcan C_User Manual_V1.4.1... -
Page 12: Interface And Parameters
When the device is offline, meaning the scanner is not connected to PC. Check the connection and click the refresh icon to reconnect. If this still doesn’t work, restart the software. Device offline or connection loose 2.6.3. Settings Click the settings logo from the upper right to open the drop-down menu. Shining 3D Transcan C_User Manual_V1.4.1... - Page 13 All settings modifications will go back to the original settings. The software will restart automatically. Language Select the language for the interface, click apply to change, restarting the software is not needed. About For version information and support, email einscan_support@shining3d.com. Shining 3D Transcan C_User Manual_V1.4.1...
- Page 14 2.6.5. Help Mode Open Help Mode Click the question mark in the upper right bar, and open the help mode from the drop-down menu. Drop down menu Display the help tool related to the current interface. Shining 3D Transcan C_User Manual_V1.4.1...
- Page 15 Share the Your ID and password to allow access 2.6.6. Alerts A pop-up alert will notify the user of a hardware or configuration issue. Check and restart the software. If the error persists, please contact support by emailing einscan_support@shining3d.com. Shining 3D Transcan C_User Manual_V1.4.1...
- Page 16 If the computer has multiple graphic cards, access to the NVIDIA Control Panel (right click on the desktop). In Manage 3D Settings > Program Settings, Add Transcan C software. Then change the preferred graphic processor for this program. Select NVIDIA processor. Click Apply to save the settings.
-
Page 17: Equipment Regulation
Change graphic card preferences for Transcan C 3. Equipment Regulation Before adjusting the scanner, place the calibration pad, calibration board and calibration bracket at the appropriate position to be scanned. 3.1. Position Adjustment Open the software and click the device adjustment button in the navigation bar to enter the device adjustment interface. - Page 18 After the adjustment, tighten the screw. Shining 3D Transcan C_User Manual_V1.4.1...
- Page 19 Turn the outer ring of the optical machine to adjust the black cross to a clear and optimal state, as shown in the picture. Use the hexagonal screwdriver under the guide rail (see first image in chapter 3.1.1) to loosen screws at the cameras rear. Then tighten the screws. Shining 3D Transcan C_User Manual_V1.4.1...
- Page 20 Double-click the left and right camera windows to zoom in and view clarity. After the adjustment is completed, tighten the screw to prevent loosening to limit the scanning effect. Note: Use a piece of paper with text to help cameras get clear image. Shining 3D Transcan C_User Manual_V1.4.1...
- Page 21 3.1.2. Scanner Adjustment 300mm The scanner adjustment method for the scanning range of 300mm is the same as 150mm. Refer to "3.1.1 " and follow the interface prompt to implement Scanner Adjustment 150 mm scanner adjustment (300mm). Shining 3D Transcan C_User Manual_V1.4.1...
-
Page 22: Calibrate The Scanner
The calibration board needs to be placed in ten positions during camera calibration, and the positions are operated according to the software wizard. Click on the camera brightness scale and adjust until the camera windows turn slightly red. Shining 3D Transcan C_User Manual_V1.4.1... - Page 23 As shown in the figure below, remove the calibration board from the calibration board bracket, rotate the calibration board 90° clockwise, and put it on the calibration board bracket. Click Previous Step to go back to the previous step to capture again. Shining 3D Transcan C_User Manual_V1.4.1...
- Page 24 White balance calibration environment: Use light box (power: 60W; input voltage: 110V-240V) for dark environment. White illumination environment suggested. Yellow light might cause large color deviation. No direct strong light Even illumination Shining 3D Transcan C_User Manual_V1.4.1...
- Page 25 If it is not the same, you need to disable View real-time color effect, re-adjust the brightness and click White balance test; if it is the same, you can click Complete to exit the calibration interface. Click Complete on the calibration interface to enter the scan new project. Shining 3D Transcan C_User Manual_V1.4.1...
-
Page 26: Before Scanning
Markers should be stuck on the flat surface area and keep the marker surface flat. Use the markers provided with the device only. Other markers can result bad accuracy or not to be seen. Shining 3D Transcan C_User Manual_V1.4.1... - Page 27 Object with markers Before scanning transparent, highly reflective and black objects, you should spray white powder on the surface. Shining 3D Transcan C_User Manual_V1.4.1...
-
Page 28: Scan
Make sure the scanner will not move during the scanning. Shining 3D Transcan C_User Manual_V1.4.1... - Page 29 Drag to adjust the brightness setting To scan an object with high contrast texture, such as something white and black, use HDR. Each single scan will take longer to capture. Shining 3D Transcan C_User Manual_V1.4.1...
-
Page 30: Turntable
6.2.1. With/Without Turntable Create or import a project. Check "With Turntable" on the left side of the scan settings, and check the box to cancel the use of turntable after each scan. Use turntable 6.2.2. Turntable Steps Shining 3D Transcan C_User Manual_V1.4.1... - Page 31 Working principle: With feature alignment, after starting scanning, software will capture four data to calibrate. The scans are matched by knowing the center and angle of rotation between successive captures. Shining 3D Transcan C_User Manual_V1.4.1...
-
Page 32: Scan
When the scan is completed, the data is automatically saved in the project file. Make sure the relative position does not change during the scan. When auto scan mode is scanning, you can click the button to stop the current scan. The current data will be deleted directly. Shining 3D Transcan C_User Manual_V1.4.1... - Page 33 You can only undo the most recent deleted data. Click the button or press Space key to save data and exit editing. The edited data is saved in the project file. Cancel editions on the data. Shining 3D Transcan C_User Manual_V1.4.1...
- Page 34 After setting cut plane, there will be no more data scanned below the cut plane during the scanning process, preventing irrelevant data getting scanned. Create Cut Plane Cut Plane Click this button to enter the cut plane mode. Shining 3D Transcan C_User Manual_V1.4.1...
- Page 35 Hide/Show cut plane: After creating the cut plane, hide or show the cut plane by right click. Notes: Editing markers is not available for cutting plane. When cutting plane is present, the data below the normal direction of the cutting plane cannot be scanned, except for the markers. Shining 3D Transcan C_User Manual_V1.4.1...
-
Page 36: Project Group
Click Delete or right click and delete to delete the selected data, group(s) or project(s) from the project tree and the work folder. If you delete the current project the last project will reload and become the new current project. Shining 3D Transcan C_User Manual_V1.4.1... -
Page 37: Create/Split A Group
7.5. Edit Data Double click on a project, group or a scan, to enter the edition mode. The edition is applied to the selected data only. Modifications will not affect the rest of the data. Shining 3D Transcan C_User Manual_V1.4.1... -
Page 38: Global Optimization
SHIFT + click left mouse button to select at least 3 non-collinear corresponding points in the fixed or floating windows for Manual Alignment, as shown below. Ctrl + Z: Cancel last point picked. Fixed Floating Shining 3D Transcan C_User Manual_V1.4.1... - Page 39 Click “Apply” to align. Click “Next”, the aligned projects will merge to a group, you could continue further alignment. Click “Cancel” to recall the alignment. Click “Exit” to exit project alignment interface. Shining 3D Transcan C_User Manual_V1.4.1...
-
Page 40: Mesh
The texture capture is separate from the 3d data capture. If the texture has been captured, it will still be displayed on areas where holes are filled in the mesh processing. If the texture is missing, the corresponding mesh data will be in black. Shining 3D Transcan C_User Manual_V1.4.1... - Page 41 For objects with holes (smaller than 10 mm), you are not recommended to use the function or you can set the function parameter value to a smaller one. Shining 3D Transcan C_User Manual_V1.4.1...
-
Page 42: Mesh Editing
SHIFT + Left mouse: Select unwanted data, the selected section will be displayed in red, as shown below. CTRL+ Left mouse: Deselect a selected region. Edit buttons: ①Multi view ②Select visible ③Select through ④Rectangular ⑤Polygon ⑥Lasso ⑦Paint brush ⑧Select all ⑨Connected domain Shining 3D Transcan C_User Manual_V1.4.1... -
Page 43: Texture Adjustment
: Click Reset to return to 0. Modify texture This modification is not saved in the project file. Export the data to save the texture editing. Shining 3D Transcan C_User Manual_V1.4.1... -
Page 44: Simplification
After simplification 8.5. Mesh Optimization Mesh optimization can optimize the quality of the data. There are 3 ratio options of mesh optimization. Processing time will be different. Below shows the result of 3 different ratios. Shining 3D Transcan C_User Manual_V1.4.1... -
Page 45: Smooth
It might remove some small details or smooth some sharp edges at the same time. The example of before and after smoothing is shown below. Run 2 times, data will be smoothed twice. Original Shining 3D Transcan C_User Manual_V1.4.1... -
Page 46: Remove Small Floating Parts
8.8. Auto Hole Filling Input the perimeter of the biggest hole to be filled. Less than 100mm is recommended. This function will fill every hole with a smaller perimeter than the number input. Shining 3D Transcan C_User Manual_V1.4.1... -
Page 47: Manual Hole Filling
The hole edges are displayed green, and get red after picking. The number of the holes and the number of holes filled will be displayed on the interface. Choose Curvature, Tangent or Flat before picking a hole. Manual hole filling Click the edge of the hole to fill it. Shining 3D Transcan C_User Manual_V1.4.1... -
Page 48: Texture Remapping
Choose “Texture Layout Optimization” (TLO) to create an optimized arrangement for the texture file. It will make the texture manual editing much more convenient if you are going to process the texture in a 3rd party software. This option has no effect on the texture itself. Shining 3D Transcan C_User Manual_V1.4.1... -
Page 49: Return To Scanning Mode
Scan on the navigation bar to return to the scanning mode interface, and the mesh data in the post-processing interface will be cleared. Note: Mesh data in the post-processing interface will not be automatically saved. Shining 3D Transcan C_User Manual_V1.4.1... -
Page 50: Export Data
Mesh scan.ply Low storage ◆ Easy texture editing Mesh scan.3mf ◆ Low storage ◆ Compatibility with Microsoft paint3d Marker scan.p3 Global Marker File ◆ position ◆ EXScan C software ◆ Measurement of the marker position Shining 3D Transcan C_User Manual_V1.4.1... -
Page 51: Scale Data
Open file. Click Open file, a STL or OBJ file can be imported to edit. 9.3.1. Create Feature Enter/Exit the Feature menu. Click the Feature button to display the menu, click again to close the menu. Shining 3D Transcan C_User Manual_V1.4.1... - Page 52 Click on the data to select one point or click 3 Points Fit on a previous created feature point. In the Choice list select one of the points to reselect it Feature creation failed! Error code 6= the points Shining 3D Transcan C_User Manual_V1.4.1...
- Page 53 Enter the value in mm and degrees, click Apply to match the data origin to the input coordinate and orientation The arrows represent the global coordinate system, Red=X+, Green=Y+, Blue=Z+ Click Reset to cancel the transformation to original position Shining 3D Transcan C_User Manual_V1.4.1...
- Page 54 Select a Point in the drop-down menu. The data will be translated to match the point with the origin point (coordinate 0,0,0) Click Align to perform the transformation. Shining 3D Transcan C_User Manual_V1.4.1...
- Page 55 Click on the data to pick the first and second point, select one of the two points to redo it. Distance menu Total is the 3D distance, X, Y and Z are the projection of the segment to the respective planes. SURFACE AREA Shining 3D Transcan C_User Manual_V1.4.1...
- Page 56 It returns the volume in mm^3 and the coordinates of the smallest box, parallel to the global coordinates, containing all the data. Volume menu Prior to the calculation make sure the file is watertight (no holes). File not watertight alert Shining 3D Transcan C_User Manual_V1.4.1...
-
Page 57: Share Data
Notes: Sketchfab basic plan accounts can only upload data less than 50M, while Pro plan account can share with a maximum of 200M. Data is saved as .STL does NOT contain texture Shining 3D Transcan C_User Manual_V1.4.1... -
Page 58: Third-Party Software
Install a third-party software— Geomagic Control X (V2020.0.3), Verisurf (Verisurf 2020, V20.1.11), Einsense Q (V1.3.2.3), Geomagic Design X (V2020.0.3), Geomagic Essentials (V1.0.0.34) and Solid Edge SHINING 3D Edition (2021 version) first. Get a license to activate it. Then after meshing data, click to export data to the third-party software. -
Page 59: Preview Model
Meshlab, a free mesh software editor, or upload to sketchfab. Notes: To load a OBJ textured file make sure to have the MTL and JPG files with the same name and in the same folder than the OBJ Shining 3D Transcan C_User Manual_V1.4.1... -
Page 60: Others
The device shall be repaired by professional technicians or under their instruction. You should send the device to facilities with qualification for recycling it instead of dropping into the household garbage when it is scrapped. Shining 3D Transcan C_User Manual_V1.4.1... -
Page 61: Contact Us
Skype: Einscan_support Facebook Group: EinScanexpert SHINING 3D Offices: APAC Region & Headquarters SHINING 3D Tech. Co., Ltd. Hangzhou, China Phone: +86 571 82999050 Add: No. 1398, Xiangbin Road, Wenyan, Xiaoshan, Hangzhou, Zhejiang, China, 311258 EMEA Region SHINING 3D Technology GmbH.
Need help?
Do you have a question about the Transcan C and is the answer not in the manual?
Questions and answers