Table of Contents
Advertisement
Quick Links
Advertisement
Table of Contents

Subscribe to Our Youtube Channel
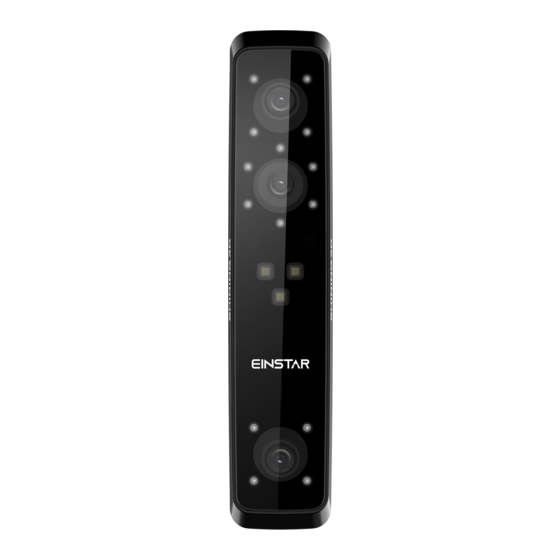
Summary of Contents for Shining 3D EINSTAR
- Page 2 Welcome! Thank you for purchasing the Einstar 3D scanner. We hope you enjoy scanning with your new scanner. This quick start guide will help you get started. For more detailed information, please visit our support center support.einstar.com...
- Page 3 Unpacking WHAT’ S IN THE BOX Einstar scanner USB cable Power adapter Power cable Calibration board Quick start guide Markers Recommended System Requirements Intel Core i7 -11800H and above Graphics card NVIDIA GTX1060 and above Graphics memory 6GB and above 32GB and above 2.0 and above...
-
Page 4: Connect Your Scanner
STEP 3 STEP 2 Connect Your Scanner STEP 1 Align the plug of the cable into the bottom jack of the Einstar. The red dot should be consistent with the front side of the scanner. Note: When unplugging, make sure... - Page 5 Connect Your Scanner STEP 2 Connect adapter - Power on STEP 3 Open protective cover - Connect cables - Connect PC port LED light shows blue Distance indicator Note: Status indicator If the lower LED light is red, check whether the connections are correct.
-
Page 6: Before Scanning
Scanning requirements Before scanning Check if the objects meet the requirements below: 1.Rich geometry or texture features 2.No transparent, mirror like or reflective surfaces 3.Rigid object If the objects don’t meet ALL requirements, some preparations need to be done before scanning. Please refer to the P5 PREPARATIONS page. - Page 7 Preparations How to deal with it? Surface type: Transparent/Mirror like/Reflective surfaces Dust with anti-glare spray How to deal with it? Surface type: Thin/Flat/Repetitive features Apply markers Apply the markers at random. Apply the markers with proper spacing.
-
Page 8: Activate The Device
Activate Einstar Activate the device 1.Go to passport.shining3d.com to register a free user account and binding your Einstar to obtain the latest software, or go to support.einstar.com 2.Click and follow the installation wizard of EXStar. 3.Follow the on-screen instructions to create a Shining 3D user account. -
Page 9: How To Calibrate
Scanning How to hold the scanner Put on and tighten the wrist strap. Hold the scanner securely as shown in the picture. How to calibrate Follow the steps of the calibration wizard in the software. 1.Calibration 2.White blance... -
Page 10: Scanner Button Controls
Scanning Scanner button controls Increase Zoom in Zoom Zoom out Decrease Preview Start Pause Click to zoom in (increase brightness) . Double click to switch between Zoom and Brightness adjustment. Click to zoom out (decrease brightness). Click to switch scanning status. Object mode scanning 1.Create a New project group (or Open project group) - Page 11 Scanning 3.Adjust the brightness until the camera window pattern is clear and the object is slightly reddish. Scan Setting Camera Windows You can adjust the brightness by clicking and moving the slider left and right to set a value. You can also adjust the brightness with the scanner button.
- Page 12 Scanning/Portrait mode Portrait mode scanning Create a New project group(or open existing project group). Select Scan mode Portrait. New project Texture Flashing Scan Mode Hair mode Turn on Texture Flashing and Hair mode Portrait Object Scan 1.Straight During scanning, keep the scanner cameras facing straight to the object.
- Page 13 Movement Please move the scanner gently to continue scan and build an object surface. Camera Windows Scanned region with sufficient data Avoid fast movement When you lost tracking, direct Einstar at a region you’ve already scanned to resume scanning .
- Page 14 Point Cloud and Mesh Generate Point Cloud Editing the data after completing or pausing the scan. Generate point cloud after scanning and editing data. Generate directly (fast and takes small memory usage) Optimize and Generate Mandatory for Portrait mode (Select when there is layering problems. It takes more time and memory usage to optimize.) Mesh...
-
Page 15: Operating Condition
Safe Handling and operating conditions Safe Handing Avoid dropping, hanging or applying force to the scanner. Avoid placing the scanner camera down. Place the scanner on a soft blanket when not in use. Please store all the items in the original case after each use. - Page 16 Register at support.einstar.com to submit a support ticket and track your ticket status. User manual: https://www.einstar.com/pages/manual www.einstar.com www.shining3d.com...


Need help?
Do you have a question about the EINSTAR and is the answer not in the manual?
Questions and answers