Sign In
Upload
Download
Table of Contents
Contents
Add to my manuals
Delete from my manuals
Share
URL of this page:
HTML Link:
Bookmark this page
Add
Manual will be automatically added to "My Manuals"
Print this page
×
Bookmark added
×
Added to my manuals
Manuals
Brands
Durst Manuals
Printer
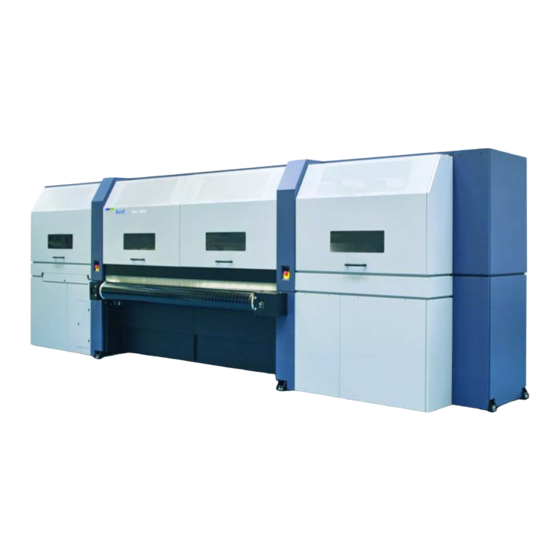
Rho 1012
Operating instructions manual
Durst Rho 1012 Operating Instructions Manual
Hide thumbs
1
2
3
Table Of Contents
4
5
6
7
8
9
10
11
12
13
14
15
16
17
18
19
20
21
22
23
24
25
26
27
28
29
30
31
32
33
34
35
36
37
38
39
40
41
42
43
44
45
46
47
48
49
50
51
52
53
54
55
56
57
58
59
60
61
62
63
64
65
66
67
68
69
70
71
72
73
74
75
76
77
78
79
80
81
82
83
84
85
86
87
88
89
90
91
92
93
94
95
96
97
98
99
100
101
102
103
104
105
106
107
108
109
110
111
112
113
114
115
116
117
118
119
120
121
122
123
124
125
126
127
128
129
130
131
132
133
134
135
136
137
138
139
140
141
142
143
144
145
146
147
148
page
of
148
Go
/
148
Contents
Table of Contents
Bookmarks
Table of Contents
Table of Contents
A about These Operating Instructions
Using These Operating Instructions
Symbols and Markings
Structure of Warnings
B Safety
Intended Use
Impermissible Use
Duties of the Owner
Safety Measures
Safety and Monitoring Equipment
Housing Covers
Protective Switches on Printer
Limit Switches at the Stacking Unit
Signs on Printer
Ambient Conditions
Modifications, Attachments and Changes in Location
Connection of External Devices
Electromagnetic Compatibility
Specific Types of Danger
UV Light
High Temperatures
Electrical Energy
Moving Parts
Contact with Ink
Sharp Edges
Ozone Buildup
Pneumatic System
Danger of Falling
Weights
Protective Clothing
Safety Goggles and Protective Gloves
Safety Shoes
Maintenance and Cleaning
Disposal
Emergencies
Emergency-Stop Switch
What to Do in Case of an Emergency
Switching on the Printer Again after an Emergency
Stop
Faults
Handling Faults
Avoiding Damage to Property
UV Lamps
Print Head Maintenance
Careful Handling of the Encoder Ruler
Media
Purge
Careful Handling of the Conveyor Belt
C Description
Printer
Heavy Roll Tool 30 (Optional)
Heavy Roll Tool 60 (Optional)
Stacking Unit (Optional)
Workstation
Ink Supply Unit
Cleaning System
Workflow
D Transport, Installation and Commissioning
E Operation
Overview of Daily Operation
Carrying out the Daily Work
Printer
Main Operating Elements and Displays
Workstation
Automatic Feed Table
Operating Modes
Operating Elements
Operating the Automatic Feed Table
Adjusting the Front Stop
Automatic Removal Table
Operating Elements
Docking the Automatic Removal Table
Setting the Ejection Equipment
Registering Table (Optional)
Operating Elements
Docking the Registration Table
Adjusting the Press Rolls
Adjusting the Stops
Heavy Roll Tool 30 (Optional)
Docking Heavy Roll Tool 30
Operating Drives of the Unwinding and Winding Units
Heavy Roll Tool 60 (Optional)
Docking Heavy Roll Tool 60
Operating Drives of the Unwinding and Winding Units
XY Cutter (Optional)
Operating Elements
Docking the XY Cutter
Bypass Mode
Adjusting the Cutting Unit (Longitudinal Cut)
Stacking Unit
Operating Elements
Docking and Connecting the Stacking Unit
Adjusting the Straight Impacter
Adjusting the Limiting Plates
Adjusting the Light Barrier for Vertical Tracking
Loading Medium
Loading a Plate Medium with an Automatic Feed Table
Loading the Plate Medium with the Registration Table
Loading the Roll Medium (Heavy Roll Tool 30)
Loading the Roll Medium (Heavy Roll Tool 60)
Laying a Medium through the XY Cutter
Setting the Suction Power
F Software
Basic Functions
Installation
The Menu Bar
The Status Bar
Basic Operation
Setting up Printer
Switching-On Time
Input Queue
General Basic Settings
Media Families
Operating Printer Functions
Basic Functions
Cleaning Functions
Maintenance
Ink Batch Tracking
UV Lamp Tracking
Managing Media Channels
Buttons on the Right Edge of the Dialog Window
Medium Type
Media Specification
Print Options
Image Border and Alignment
Creating, Editing and Deleting Media Channels
Printing
Input Queue
Printing Queue
G Service
Inspection and Cleaning Intervals
Important Information
Initialization after Closing the Flip Doors
Emptying Catch Tank
Refilling Ink
Clean Catch Tray of Scraping Blade
Changing Filter of the Ink Separator
Checking and Replacing Air Filter
Cleaning Housing
Checking Fuses
Changing Main Ink Filters
Print Head Maintenance
Required Tools/Accessories
Daily Print Head Maintenance
Weekly Print Head Maintenance
Preparatory Work at the Cleaning Access Point
Purge Cycle
Wiping Print Heads
Vacuuming out Soiled Nozzles
Cleaning the Printing Plate
Documentation of the Print Head State
Disposal
Disposing of Ink, Cleaning Cloths and Cubitainers
H Decommissioning and Disassembly
Appendix
Technical Data
General Specifications
Print Specifications
Media Specifications
Workstation
Requirements for Installation Site
Accessories and Spare Parts
Advertisement
Quick Links
Download this manual
Rho 1012/1030
Operating Instructions
Issued 07/2013
Keep for future reference!
Original instructions
Table of
Contents
Previous
Page
Next
Page
1
2
3
4
5
Advertisement
Table of Contents
Need help?
Do you have a question about the Rho 1012 and is the answer not in the manual?
Ask a question
Questions and answers
Related Manuals for Durst Rho 1012
Printer Durst Rho 161 TS Brochure & Specs
Roll to roll uv inkjet-printer (4 pages)
Printer Durst Rho 320R Specifications
Industrial roll-to-roll printer (2 pages)
Printer Durst Rho 700 Specifications
Modular uv flatbed printer (2 pages)
Printer Durst Rho 800 Presto Specification Sheet
Continuous board printer (2 pages)
Printer Durst Rho 351R Brochure & Specs
Roll-to-roll uv-inkjet printer (4 pages)
Printer Durst Rho 160R Technical Data
Roll-to-roll uv inkjet-printer (2 pages)
Printer Durst Rho 600 Pictor Specifications
Flatbed uv inkjet printer (2 pages)
Printer Durst Rho 1030 Operating Instructions Manual
(148 pages)
Printer Durst Rho P10 200 Service Manual
(71 pages)
Printer Durst Rho 512R Service Manual
Uv system (18 pages)
Printer Durst Rho 1000 Operating Instructions Manual
(105 pages)
Printer Durst Theta 76 Brochure & Specs
Durst multi format lab system brochure (10 pages)
Printer Durst Lambda 131 HS Brochure & Specs
Large format digital laser imager (8 pages)
Printer Durst Theta 76R Brochure & Specs
Medium format photoprinter (10 pages)
Printer Durst Theta 76 User Manual
(20 pages)
Printer Durst Omega 2 Operating Instructions Manual
(92 pages)
This manual is also suitable for:
Rho 1030
Table of Contents
Print
Rename the bookmark
Delete bookmark?
Delete from my manuals?
Login
Sign In
OR
Sign in with Facebook
Sign in with Google
Upload manual
Upload from disk
Upload from URL


Need help?
Do you have a question about the Rho 1012 and is the answer not in the manual?
Questions and answers