Danfoss iSave 40 Series Operation Manual
Hide thumbs
Also See for iSave 40 Series:
- Service manual (42 pages) ,
- User manual (106 pages) ,
- Service manual (26 pages)
Chapters
Table of Contents

Related Manuals for Danfoss iSave 40 Series


Summary of Contents for Danfoss iSave 40 Series
- Page 1 Frontpage Operation guide User manual Installation, Operation and Energy recovery device Maintenance Manual iSave 40 series 04 and newer Installation, Operation and iSave 40 Maintenance Manual isave.danfoss.com hpp.danfoss.com...
-
Page 2: Document Information And Copyright
Danfoss’ express written consent. Danfoss reserves the right to alter its products without notice. This also applies to products already on order provided that such alterations can be made without subsequential changes being necessary in specifications already agreed. -
Page 3: Table Of Contents
Operation guide | iSave 40 Table of Contents Document information and copyright ............. . 2 Validity. - Page 4 Exploded view vane pump iSave 40 series 04 and newer .......
-
Page 5: Introduction
Operation guide | iSave 40 Introduction 2.1 General 2.3 Symbols iSave is manufactured by Danfoss A/S, and is sold and marketed by a net of authorised distributors Indicates something to be noted by the worldwide. reader This manual contains the necessary instructions... -
Page 6: Safety Instruction
Operation guide | iSave 40 Safety instruction 3.1 General The iSave must not be used for other purposes • Improper installation can cause fatal than those described in 3.2 “Intended use” injuries. without first consulting your local iSave distribu- • The iSave must not operate outside the tor. -
Page 7: Application Range
Operation guide | iSave 40 3.3 Application range The iSave should only be used within the following limits: iSave size iSave 40 Code number 180F7011 Geometric displacement cm³/rev in³/rev 38.2 Pressure Differential pressure HP in - HP out max. 72.5 barg HP min. -
Page 8: Preferred System Design
3.4 Preferred system design equipment is essential. Danfoss recommends building systems with a high degree of safety. The P&ID in chapter 5.16 shows the Danfoss preferred system design. 180R9239 | AQ299555093252en-001601 | iSave 40 | 09.2022... -
Page 9: Arrival Inspection, Handling And Storage
Pack the iSave into a suitable con- tainer and make sure that it is suitably fastened to the container. Please contact your local authorised distributor Danfoss A/S High Pressure Pumps DK-6430 Nordborg, Denmark Telephone: +45 7488 2222 Never lift the iSave unit with only one... -
Page 10: How To Assemble The Isave And Electric Motor
Operation guide | iSave 40 4.3.1 How to assemble the iSave and electric motor 1) The driver coupling is pre-mounted from factory. Do not move the coupling. 2) Insert the coupling element into the coupling in the bell housing. 3) Position the electric motor on the bell housing. -
Page 11: Centre Of Mass
Frost protection is required if the iSave is not the iSave at the time of installation. completely drained of fluid and at temperatures below 1°C. Danfoss recommends using 4.5 Outdoor Storage DOWFROST from DOW Chemical Company or Chillsafe mono propylene glycol from Arco Chemical Company. -
Page 12: Technical Data And Design Review
• The speed of the iSave. High speed creates more noise than low speed. 1. iSave and electric motor mounted on Danfoss • Rigid mounting of the iSave base plate base plate. generates more noise than flexible mounting. -
Page 13: Temperature And Corrosion
Operation guide | iSave 40 5.4 Temperature and corrosion Depending on the NaCl concentration, the fluid The chart below illustrates the corrosive temperature must be between: resistance of different types of stainless steel related to NaCl concentration and temperature. +2°C to +50°C (+35.6°F to 122°F). 80 º... -
Page 14: Pressure Exchanger Function
The required rpm can be calculated based on the connect the concentrate side with the “rated flow” of the particular iSave. Use Danfoss seawater side. Selection tool which is availbable on: www.isave. -
Page 15: How Does The Isave Work In An Ro System
Operation guide | iSave 40 5.7.5 How does the iSave work in an RO The figure below illustrates a typical flowpath of system? an SWRO or BWRO with an iSave. The high-pressure (HP) concentrate (7) flows to This means that changing the LP feed flow (2) will the low-pressure (LP) concentrate outlet (3). -
Page 16: Seawater Quality
5.8 high efficiency, in which fibres are blown continuously onto a central support core. Danfoss High Pressure Pumps does not Also see “Instruction for start and stop of the recommend cartridges requiring any type SWRO with iSave unit” in appendix 10.1. -
Page 17: Flushing
Operation guide | iSave 40 To prevent such over-pressurisation, The flush water coming out of the appropriate relief valves should be used membranes may consist of a large and procedures should be implemented amount of suspended inorganic particles. to safeguard the HP and LP sides of the It is important to assure that these iSave and/or the RO system. -
Page 18: Preferred System Design And P&Id
Operation guide | iSave 40 5.16 Preferred system design and P&ID Media filter Filter Filter Filter 5 micron 3 micron 10 micron nominel nominel absolut Permeate Flowmeter Full flow cleaning LP in HP out iSave Fresh water permeate flush HP in Drain second stage filter, see box below... -
Page 19: On-Site Installation
Both the iSave and motor must be supported without applying stress/load to the bell housing. Danfoss provides the iSave with a base plate and support brackets. Although the base plate is of a sturdy design, it can flex or bend when it is bolted to the foundation. -
Page 20: Orientation
Pipe connections must be aligned as shown in the figures below. 6.4 Piping and joints Danfoss recommends installing hose whip Piping material and schedule is of high impor- restraints whenever your pressurized hose tance. The strength of the Victaulic® connections... -
Page 21: Accessibility
VFD must be able to deliver 140% start torque. 6.8.2 Speed control The Danfoss VFD type FC301 and FC302 The rotation speed on the electric motor can be can be used. controlled by a VFD. The VFD must be able to operate at constant torque over the whole range of speed. -
Page 22: Commissioning, Start-Up And Shutdown
• “Startand stop procedure” instructions 7.2 Support in appendix. 10.1 Danfoss A/S offers commissioning and service at system manufacturer’s location. Rated quotes are offered upon request. 7.3 Commissioning Before starting up the iSave and the high-... -
Page 23: Service/Maintnance
2. Re-check alignment of iSave base plate 8.2 Support and iSave. Danfoss A/S offers commissioning and service at 3. Visually inspect all pipe connections / the system manufacturer’s location. Rated couplings for external leakage. quotes are offered upon request. -
Page 24: Trouble-Shooting
Operation guide | iSave 40 Trouble-shooting Safety regulations The operator ensures that all inspection Before intervening in the iSave/system; and installation work is performed by • The power must be shut off and the authorised, qualified specialist personnel starting device be locked. who are thoroughly familiar with the •... -
Page 25: Appendix
(recovery rate). The speed is normally start-up and shut-down functions of SWRO- controlled by a VFD. systems with the Danfoss iSave energy recovery 8. Start the high-pressure pump (4), and the device. system pressure (5) will rise until the permeate... - Page 26 Operation guide | iSave 40 P&ID Media filter Filter Filter Filter 5 micron 3 micron 10 micron nominel nominel absolut Permeate Flowmeter Full flow cleaning LP in HP out iSave Fresh water permeate flush HP in Drain Second stage filter: If recommended housing design and cartridges are not used, a second stage filter is required Mixing curve Under ushing Over ushing...
-
Page 27: Daily System Shutdown
(5) at the membranes is membrane cleaning of SWRO-systems with the reached and the TDS in the high-pressure line Danfoss iSave. Procedure details may differ is equal to the TDS in the low-pressure line. depending on the system design. - Page 28 Operation guide | iSave 40 Below procedure is according P&ID no 1. 6. Turn of the pump and allow the elements to soak. Stop the high-pressure pump (4), and stop Feed the cleaning solution at high flow into the iSave (11). the “full flow cleaning”...
-
Page 29: P&Id No. 2
Operation guide | iSave 40 8. Turn of the pump and allow the elements to 11. Remove plug (9). Water will flow out of the soak. iSave and the iSave may start to rotate 9. Feed the cleaning solution at high flow into backward –... -
Page 30: Dimensional Drawings
Operation guide | iSave 40 iSave 40 - vertical 10.4 Dimensional drawings (Code no.: 180F7003) 11 kW, 6 pole, IEC motor 180R9239 | AQ299555093252en-001601 | iSave 40 | 09.2022... - Page 31 Operation guide | iSave 40 iSave 40 - vertical (Code no.: 180F7005) 15 kW, 6 pole, IEC motor 180R9239 | AQ299555093252en-001601 | iSave 40 | 09.2022...
- Page 32 Operation guide | iSave 40 iSave 40 - horizontal (Code no.: 180F7001) 11 kW, 6 pole, IEC motor 180R9239 | AQ299555093252en-001601 | iSave 40 | 09.2022...
- Page 33 Operation guide | iSave 40 iSave 40 - horizontal (Code no.: 180F7004) 15 kW, 6 pole, IEC motor 180R9239 | AQ299555093252en-001601 | iSave 40 | 09.2022...
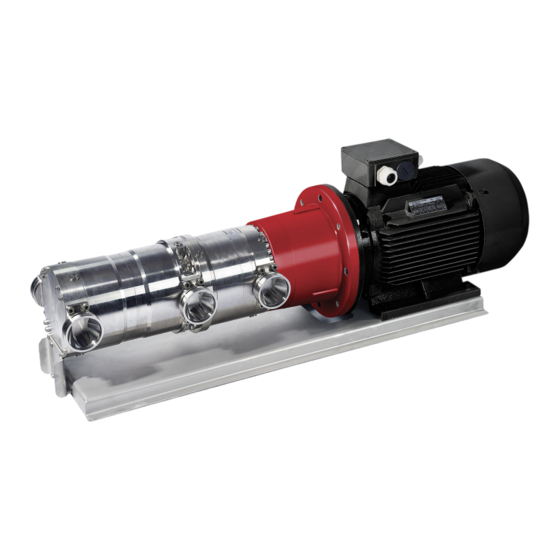
- Page 34 Operation guide | iSave 40 iSave 40 (Code no.: 180F7011) 180R9239 | AQ299555093252en-001601 | iSave 40 | 09.2022...
-
Page 35: Isave Parts List
Bolt, M10x20 / CS A4-109 AISI 316 Bolt, M8x60 / CS A4-109 AISI 316 Bolt, M8x20 / CS A4-109 AISI 316 Note: Danfoss reccommends always to use seals and screw kit for inspection and repair. 180R9239 | AQ299555093252en-001601 | iSave 40 | 09.2022... -
Page 36: Booster Pump (Vane Pump), Partslist
Bolt, M10x20 / CS A4-80 AISI 316 Bolt, M8x20 / CS A4-80 AISI 316 Bolt, M10x65 / CS A4-80 AISI 316 Note: Danfoss reccommends always to use seals and screw kit for inspection and repair. 180R9239 | AQ299555093252en-001601 | iSave 40 | 09.2022... -
Page 37: Isave 180F7011
Operation guide | iSave 40 10.5.3 iSave, 180F7011 Exploded view, see section 10.5.9. Pos. Qnt. Designation Material 180F4125 Coupling kit O-ring, Ø126 x 3 O-ring, Ø89 x 3 Pressure exchanger Booster pump Coupling VP Super Duplex Spider Hytrel 6356 Bolt, M8 x 20 1.4410 Super Duplex Bolt, M10 x 20 A4-80 AISI 316 Coupling PE... -
Page 38: Isave On Foot, Vertical, 180F7003 And 180F7005
Washer AISI 316 Bolt, M16 x 40 AISI 316 Washer AISI 316 Plug Polymer Note: Danfoss reccommends always to use seals and screw kit for inspection and repair. 10.5.6 Tool kit Qnt. Designation 180F4112 Tool kit Press bush shaft seal... -
Page 39: Exploded View Vane Pump Isave 40 Series 04 And Newer
Operation guide | iSave 40 10.5.7 Exploded view vane pump iSave 40 series 04 and newer 180R9239 | AQ299555093252en-001601 | iSave 40 | 09.2022... -
Page 40: Exploded View Pressure Exchanger Series 04 And Newer
Operation guide | iSave 40 10.5.8 Exploded view pressure exchanger series 04 and newer 180R9239 | AQ299555093252en-001601 | iSave 40 | 09.2022... -
Page 41: Exploded View Isave Series 04 And Newer
Operation guide | iSave 40 10.5.9 Exploded view iSave series 04 and newer 180R9239 | AQ299555093252en-001601 | iSave 40 | 09.2022... -
Page 42: Exploded View Isave On Base Plate, Horizontal
Operation guide | iSave 40 10.5.10 Exploded view iSave on base plate, horizontal 180R9239 | AQ299555093252en-001601 | iSave 40 | 09.2022... -
Page 43: Exploded View Isave On Foot, Vertical
Operation guide | iSave 40 10.5.11 Exploded view iSave on foot, vertical 180R9239 | AQ299555093252en-001601 | iSave 40 | 09.2022... -
Page 44: Isave Overload Protection And Vfd Settings
VFD can be used for each iSave. See electrical schematic diagram on next page. The Danfoss FC 300 Series can provide the speed control and overall protection of both the electric motor and the mechanical parts in the iSave. -
Page 45: Danfoss Fc 300 Series With One Isave
Operation guide | iSave 40 10.6.1 Danfoss FC 300 Series with one iSave Electrical schematic diagrams according to EN60204-1. Danfoss FC 302 180R9239 | AQ299555093252en-001601 | iSave 40 | 09.2022... -
Page 46: Danfoss Soft Starter Mcd 500 Electrical Schematic Diagram
Operation guide | iSave 40 10.6.2 Danfoss Soft Starter MCD 500 1/L1 2/T1 Electrical schematic diagram 3/L2 4/T2 5/L3 6/T3 Control supply (model dependent) Outputs Remote control inputs Motor thermistor input (PTC only) Relay outputs 180R9239 | AQ299555093252en-001601 | iSave 40 | 09.2022... -
Page 47: Protection By Current Monitoring Relays
Operation guide | iSave 40 10.6.3 Protection by current monitoring 10.6.4 Danfoss FC 302 with two iSaves relays The current monitoring relay constantly Electrical schematic diagrams measures the current in an electrical wire. The according to EN60204-1. current is indirectly reflecting the torque on the electric motor. -
Page 48: Hose Assembly And Installation
Correct hose installation is essential for safe and Hose routing tips: Hose assembly routing tips satisfactory performance. The size of the hoses Danfoss recommends installing hose whip impacts the installation recommendations. This restraints whenever your pressurized hose manual has therefore been split in recommenda- assemblies are in proximity to personnel or tion for hoses up to 2”... - Page 49 Operation guide | iSave 40 Instruction | Right and wrong - Hose assembly routing tips WRONG RIGHT WRONG RIGHT To prevent hose collapse and flow restriction, hose bend radii should be kept as large as possible. Tight bends can also compromise the hose reinforcement and cause premature hose failure.
- Page 50 Instruction | Right and wrong - Hose assembly routing tips Hoses larger than 2” Whenever possible, high pressure hoses should Danfoss 3” HP hoses are nylon reinforced; when always be connected directly to Danfoss pro- using hoses that are not steel reinforced the vided adapters and check valves.
- Page 51 Operation guide | iSave 40 Instruction | Right and wrong - Hose assembly routing tips MAX. BENDING ANGLE The use of pipe or fittings between pump and iSave connectors and hoses should be avoided. Such configurations can apply excessive loads on the connectors and can cause connector and/or connector bolt failure.
- Page 52 Operation guide | iSave 40 Instruction | Right and wrong - Hose assembly routing tips Hose specification table High pressure hoses Pipe Hose size Hose length Code Pipe connection connection Inner ISO 1436 Bending radius number material diameter 1.5" Vic. OGS Super duplex 180Z0228 25.4 mm (1.0") 0.66 m (26")
-
Page 53: Appendices
Operating guide Energy recovery device iSave 40 Appendices hpp.danfoss.com. -
Page 54: Service Guide - Disassembling And Assembling (180R9242)
Operation guide | iSave 40 Appendices Service guide - Disassembling and assembling (180R9242) ......54 Operating- and maintenance instruction, electric motor . - Page 55 Operation guide Instruction Disassembling and assembling Energy recovery device iSave 40 series 04 and newer iSave 40 Installation, Operation and Maintenance Manual ro-solutions.com hpp.danfoss.com...
- Page 56 Exploded view vane pump iSave 40 series 04 and newer .......
- Page 57 Tools needed to disassemble the iSave: • Torque wrench 10 - 60 Nm Parts included in tool set (180F4112): To prevent cold welding, Danfoss recommend to • 5 mm Hex socket use thread lubricant for all screw threads for •...
- Page 58 Operation guide | iSave 40 To disconnect the bell housing, unscrew Carefully pull and lift the booster pump the 4 bolts on the electric motor. from the electric motor. It is also possible to disconnect the Disassemble the bell housing from the complete unit from the motor first.
- Page 59 Operation guide | iSave 40 Disassembling the M8x20 bolts marked A4 booster pump series 01 - 03 If flange cannot be removed easily, use two Disassemble the flange for shaft seal. M8 bolts. If coupling has to be changed, follow the next two steps.
- Page 60 Operation guide | iSave 40 Loosen all the bolts in the adapter Carefully disassemble adapter flange flange. and port plate from the stator ring. Remove the sealing plate. Remove the 8 vanes. Carefully guide the rotor out of the Remove the sealing plate and pin. stator.
- Page 61 Operation guide | iSave 40 Remove the O-ring from the sealing Unscrew the bolts in the outlet flange. plate. Remove the HP outlet flange. Remove the port flange. 180R9239 | AQ299555093252en-001601 | iSave 40 | 09.2022...
-
Page 62: Disassembling The Booster Pump Series 01-03
Operation guide | iSave 40 3. 1 Disassembling the booster pump series 04 and newer Install the locking tool to prevent the Remove the coupling by unscrewing shaft from rotating. the four special M8 x 20 bolts marked with 1.4410 Place the vanepump on a clean surface in the vertical position with the shaft Remove the four screws in the shaft... - Page 63 Operation guide | iSave 40 Carefully move the motorflange. The rotor stop may drop out of its sleeve Remove all bolts from the motorflange. when lifting the flange, but can easily be installed again. Carefully remove the rotor by lifting it Put the motorflange assembly and out of the housing.
- Page 64 Operation guide | iSave 40 Rotate the vanepump housing and remove all bolts. The rotor stop may drop out but can easily be installed Lift the adapter flange off the housing. again. The vanepump is now fully disassembled 180R9239 | AQ299555093252en-001601 | iSave 40 | 09.2022...
-
Page 65: Basic Inspection
You don’t have to remove the side plate grooves with a visible edge it should be if no visible cracks are found. changed. Call Danfoss for further support. Inspect the shaft seal. The rubber should not have any wear marks. -
Page 66: General Inspection
Operation guide | iSave 40 General inspection The side plate in the adapterflange and rotor flange should only be inspected if there is reason to believe they are broken or if the seals behind them needs to be changed. Carefully pull the side Once the side plate is removed the two plate out, do not use pliers ore metal tools O-rings - one in the side groove and one... -
Page 67: Assembling The Booster Pump Series 01-03
Assembling the Lubrication: booster pump series WARNING: • To prevent cold welding, Danfoss 01 - 03 Do not use silicone when assembling the recommend to use thread lubricant for iSave. Do not reuse disassembled O-rings; all screw threads for installing the iSave they might be damaged. - Page 68 Operation guide | iSave 40 Tilt the flange and stator; assemble and Tighten the bolts by using an allen key. screw in the rest of the bolts in the flange. Tighten bolts to a torque of 60 ±6 Nm. Mount the O-ring in the sealing plate and guide pin in flange.
- Page 69 Operation guide | iSave 40 By using the handle tool provided, Fit the 8 vanes into each slot. carefully lever the rotor into Notice vane position. Place the the stator. straight site of the vane onto the pin with the mark down ward. No mark on this side Orient the vanes with correct...
- Page 70 Operation guide | iSave 40 Assemble the new O-ring on the correct Position the guide pin in the adapter sealing plate. flange. It is important to lubricate to ensure the O-ring does not drop out. Position the sealing plate over the guide pin.
- Page 71 Operation guide | iSave 40 Using the shaft tool provided, Turn the pump with shaft upwards. carefully press down the shaft Lubricate the shaft and shaft seal with seal to the shoulder of the shaft. clean filtered water. Mount the shaft seal with the carbon ring upwards.
- Page 72 6.1 Assembling the Lubrication: booster pump series WARNING: • To prevent cold welding, Danfoss 04 and newer Do not use silicone when assembling the recomend to use thread lubricant for all iSave. Do not reuse disassembled O-rings; screw threads for installing the iSave they might be damaged.
- Page 73 Operation guide | iSave 40 Carefully by hand press down the sideplate. The outer surface of the side Lubricate the O-rings in the plate should be flush with the flange portflange with water and install when pushed down. Ones the push is sideplate.
- Page 74 Operation guide | iSave 40 Carefully press the rotor element in Check O-ring is in place. place. Place the rotor with the shaft pointing Install the O-ring on the rotor element. upwards and lubricate the groves with water. Place the rotor element with the O-ring Check that the O-ring is not pinched in installed in the groove and press down.
- Page 75 Operation guide | iSave 40 Spray the inside of the housing with Install the 8 pins inside the rotor. clean filtered water before installing Two pins per hole. the rotor. Carefully lower the rotor assembly into Install the vanes. Use a screwdriver to the housing.
- Page 76 Operation guide | iSave 40 Lubricate the O-rings, side plate and Mount the second new O-ring flange with clean filtered water. (pos. 137) in the bottom on the flange. Mount the first O-ring (pos. 139) in the cut out in the flange. The outer surface of the side plate It is important that the inside groove in should be flush with the flange when...
- Page 77 Operation guide | iSave 40 Lubricate the surfaces with water and The pins ensures correct orientation carefully lower the flange on the of the housing. stator. Cross tighten the screws (max. 10 Nm) to ensure the motor flanges are tightened evenly onto the stator, then Install the small O-ring seal for the cross tighten with torque setting shaftseal cover.
- Page 78 Operation guide | iSave 40 Lubricate the stationary part of the shaft seal with clean filtered water and press the ring into the shaft seal cover using the plastic press bush tool. When it is placed in the center it can Warning: be pushed in place with the press Ensure that the face with rubber seal is...
-
Page 79: Disassembling The Pressure Exchanger
Operation guide | iSave 40 Disassembling the 3 x special M8x20 bolts pressure exchanger marked 1.4410 Unscrew the 3 special M8x20 bolts marked Remove coupling and the 3 pins. 1.4410. Unscrew all the bolts. Carefully lever the flange and port plate from the casing. - Page 80 Operation guide | iSave 40 Carefully take the cylinder barrel assem- bly out of the casing. Remove port plate and the two pins. Carefully lever the 2 valve plate assembly free with help from 2 screwdrivers. If the plates are hard to remove it is recommended to install the 3 M8x50 bolt from the tool kit..
-
Page 81: Assembling The Pressure Exchanger
Assembling the Lubrication: pressure exchanger WARNING: • To prevent cold welding, Danfoss reco Do not use silicone when assembling the mend to use thread lubricant for all screw iSave. Do not reuse disassembled O-rings; threads for installing the iSave they might be damaged. Always use new and first tighten the screws by hand. - Page 82 Operation guide | iSave 40 Position the port plate on the flange Mount the provided M6 threaded rod into using the two guide pins as guide. Only the shaft of the cylinder barrel. one port plate fits. Carefully guide the cylinder barrel into Assemble the O-ring on the HP/LP flange the flange bearing.
- Page 83 Operation guide | iSave 40 Carefully assemble a bolt into the casing Carefully position the flange assembly to ensure that flange assembly stays in onto the guide pin in the casing. place. Lubricate and install the bolts. Cross tighten with torque according to the Mount the 3 pins in shaft and place the setting specified in the exploded view.
-
Page 84: Assembling The Cylinder Barrol In Pressure Exchanger
Back-up ring The shaft is normally not a wear part Lubricate the O-rings and back-up rings and can only be changed by Danfoss. with clean filtered water and position the Assemble new back-up rings and two valve plates into the rotor ends. -
Page 85: Changing Springs In The Pressure Exchange Rotor
Operation guide | iSave 40 Small shaft diameter: No distance. Large shaft diameter: Distance 4-5 mm. 10. Changing springs in the pressure exchange rotor It is basically not necessary to change the springs in the rotor. If needed, follow the guidelines below: Disassembling Using the tool provided, press down the... - Page 86 Operation guide | iSave 40 Assemble the retainer over the springs. Assemble the O-ring over the retainer. Using the tool provided, press down the retainer by tightening the nut until the Carefully remove the tool assembly and O-ring is placed in the recess. check the O-ring assembly.
-
Page 87: Exploded View Vane Pump Isave 40 Series 01-03
Operation guide | iSave 40 Exploded view vane pump iSave 40 series 01-03 180R9239 | AQ299555093252en-001601 | iSave 40 | 09.2022... - Page 88 Operation guide | iSave 40 12. Exploded view vane pump iSave 40 series 04 and newer 180R9239 | AQ299555093252en-001601 | iSave 40 | 09.2022...
- Page 89 Operation guide | iSave 40 13. Exploded view pressure exchanger series 01-03 180R9239 | AQ299555093252en-001601 | iSave 40 | 09.2022...
-
Page 90: Exploded View Pressure Exchanger Series 04 And Newer
Operation guide | iSave 40 14. Exploded view pressure exchanger series 04 and newer 180R9239 | AQ299555093252en-001601 | iSave 40 | 09.2022... - Page 91 Operation guide | iSave 40 15. Exploded view iSave series 01-03 180R9239 | AQ299555093252en-001601 | iSave 40 | 09.2022...
-
Page 92: Exploded View Isave Series 04 And Newer
Operation guide | iSave 40 16. Exploded view iSave series 04 and newer 180R9239 | AQ299555093252en-001601 | iSave 40 | 09.2022... -
Page 93: Exploded View Isave On Base Plate, Horizontal
Operation guide | iSave 40 Exploded view iSave on base plate, horizontal 180R9239 | AQ299555093252en-001601 | iSave 40 | 09.2022... -
Page 94: Exploded View Isave On Foot, Vertical
Operation guide | iSave 40 18. Exploded view iSave on foot, vertical 180R9239 | AQ299555093252en-001601 | iSave 40 | 09.2022... - Page 95 Danfoss A/S High Pressure Pumps Nordborgvej 81 DK-6430 Nordborg Denmark 180R9239 | AQ299555093252en-000901 | 95 © Danfoss | DCS (im | 2019.03...
- Page 96 Electric Motors Motor Manual hoyermotors.com M a n u a l...
- Page 97 Motor Manual General etc.) using suitable tools, never hit the drive components with a hammer as this will cause damage to the bearing. This manual concerns the following types of standard The motor are balancing with half key, ensure that the drive induction motors from Hoyer: components are also the same.
- Page 98 Motor Manual connections must be checked and tightened if necessary. The table values are based on an ambient temperature of Bearing size and type are specified on the rating plate. Motor 25°C. The values must be halved for every 15K increase in types HMA3 and HMC3 is as standard with lifetime greased bearing temperature.
- Page 99 Connection diagram Anschlußdiagram Anslutningdiagramm Forbindelsesdiagram Aansluitdiagram Connection Conexión Collegamento Schemat polacsen 180R9379 | AQ188686503004en-000801 | PAH 2-12.5 } 07.2022...
- Page 100 180R9379 | AQ188686503004en-000801 | PAH 2-12.5 } 07.2022...
- Page 101 Hoyer Motors, Motor Manual, April 2019 Head Offices Branch Offices Denmark Germany Benelux Over Hadstenvej 42 · DK-8370 Hadsten Landsberger Straße 155 · 80687 München Vasteland 78 · 3011 BN, Rotterdam T +45 86 98 21 11 · F +45 86 98 17 79 T +49 89 700 88 235 ·...
Need help?
Do you have a question about the iSave 40 Series and is the answer not in the manual?
Questions and answers