
Subscribe to Our Youtube Channel
Related Manuals for Physipro NeoX DYNAMIC


Summary of Contents for Physipro NeoX DYNAMIC
- Page 1 Owner's Manual This booklet contains important information about this product. Please give to the owner upon delivery.
- Page 2 DYNAMIC Dynamic Tilt Wheelchair Physipro Inc. is proud to count you among its customers and would like to thank you for the confidence you have shown by purchasing our product. This owner’s manual was created to provide you with all the information needed to allow you to use our product in a safe and optimal way.
-
Page 3: Table Of Contents
Owner’s Manual ENGLISH Table of content 1. Device Plan ...................... 7 Standard Components ......................8 Optional Components ......................9 2. Technical Specifications ................11 3. Recommendations ..................16 Safety Inspection Checks ....................16 Safety Guidelines ........................17 General Warnings ........................18 Getting to know your wheelchair ................... - Page 4 NEOX Dynamic wheelchair ENGLISH Propulsion Wheels ......................... 31 Installing the propulsion wheels -Threaded axle ............31 Removing propulsion wheels -Threaded axle ............31 Installing propulsion wheels – Quick-Release axle ..........32 Removing propulsion wheels -Quick-Release axle ........... 32 Adjusting the Quick-Release axle ..................32 Using the Quick-Release axle ....................
- Page 5 Owner’s Manual ENGLISH Armrest ............................57 '' U '' type armrest........................57 '' T '' type armrest ........................58 Footrest ............................59 Installing the footrest ......................59 Removing the footrest......................59 Adjusting footrest length ....................59 Folding the flip-up footplate ..................... 60 Adjusting footplate depth ....................
- Page 6 NEOX Dynamic wheelchair ENGLISH Maintenance ..........................80 Maintenance Checklist ..................... 80 Replacement Parts ......................83 Repair Services ........................83 7. Storage and Shipping ................... 84 Storage ............................84 Shipping ............................84 8. Warranty ......................85...
-
Page 7: Device Plan
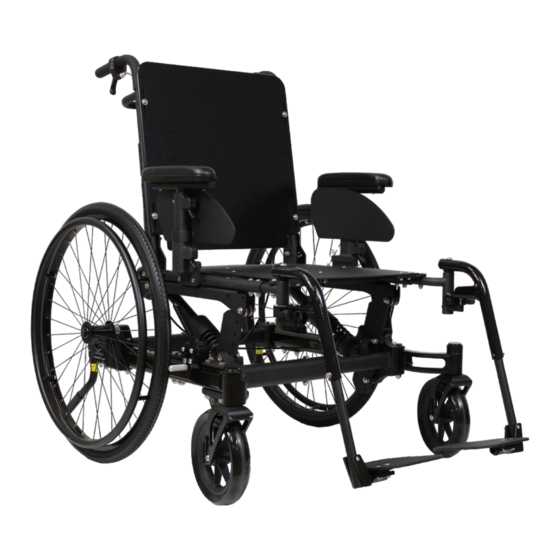
Owner’s Manual ENGLISH 1. Device Plan NEOX Dynamic The Neox Dynamic wheelchair with aluminum frame provides remarkable versatility and adaptability. The numerous adjustments ensure a personalized postural support throughout the occupant’s changing needs and clinical conditions. The 30º tilt system allows the occupant to change the angle of the seat and backrest during the day to prevent the formation of pressure sores, optimize comfort and enable the occupant to be placed in a resting position. -
Page 8: Standard Components
NEOX Dynamic wheelchair ENGLISH Standard Components – NEOX DYNAMIC The standard components provided with the Neox Dynamic wheelchair are shown in the picture below. NEOX DYNAMIC - Standard Components Rigid seat plate, with depth adjustment Rigid backrest Straight back post, with angle and height adjustments Push handles with grip covers, with height and orientation adjustments Armrest, desk length, flip-back or removable Armrest foam pad, desk length, flat... -
Page 9: Optional Components
Optional Components – NEOX DYNAMIC Physipro Inc. offers a vast selection of accessories and options to ensure that each wheelchair can be customized to the specific needs of the occupant. For more information, please contact Physipro Inc. or consult the order form. - Page 10 NEOX Dynamic wheelchair ENGLISH NEOX DYNAMIC - Add-on Components Dynamic or Reclining gas spring backrest Clothing guard Calf support with flat or profiled padding, with angle, depth, and height adjustments Calf strap with padding, single Calf strap with padding, double Heel support strap, adjustable Wheel lock handle extension, telescopic or fixed Spoke-guard...
-
Page 11: Technical Specifications
Owner’s Manual ENGLISH 2. Technical Specifications NEOX DYNAMIC TECHNICAL SPECIFICATIONS Manufacturer Physipro Inc. Model Neox Dynamic Tilt wheelchair Maximum load capacity 265 lbs (120 kg) MEASUREMENT OF SEATING AND WHEEL DIMENSIONS Seat Plane angle 0° to 30° Method of measurement: Part 1: ISO 7176-7, section 7.3.2... - Page 12 NEOX Dynamic wheelchair ENGLISH Wheel: 20'' (508 mm) : Handrim: 17 ⅞'' (432 mm) Handrim diameter Wheel: 22'' (559 mm) : Handrim: 19 ⅛'' (483 mm) Method of measurement: Part 23: ISO 7176-7, section 7.3.24 Wheel: 24'' (610 mm) : Handrim: 21 ¼'' (533 mm) Horizontal displacement of Adjustment range: 3'' (76 mm), wheel axle...
- Page 13 Owner’s Manual ENGLISH WHEELCHAIR MASS Wheelchair total mass 71,6 lbs (32,55 kg) Method of measurement: BNQ 6645-001, table 10, line 10 DETERMINATION OF FORWARD STATIC STABILITY Tipping angle of wheelchair in the least stable configuration, with caster wheels unlocked 18,1° Method of measurement: ISO 7176-1, section 8.2 Tipping angle of wheelchair in the least stable configuration, with caster wheels locked...
- Page 14 NEOX Dynamic wheelchair ENGLISH DETERMINATION OF EFFECTIVENESS OF WHEEL LOCKS Maximum slope angle, uphill 14,1° Method of measurement: ISO 7176-3, section 7.2 Maximum slope angle, downhill 10,1° Method of measurement: ISO 7176-3, section 7.2 REQUIREMENTS AND TEST METHODS FOR STATIC, IMPACT AND FATIGUE STRENGHTS The Neox Dynamic wheelchair has successfully passed all ISO certifications and test...
- Page 15 Owner’s Manual ENGLISH Rating of the ease of use of the motor vehicle’s three-point seat belt Excellent as required by ISO 7176-19, section 5.5.a. Rating to the degree to which the use of the motor vehicle’s three- Excellent point seat belt adequately secures the occupant as required by ISO 7176-19, section 5.5.b Never remove the tie-down strap securement points that secure your wheelchair to a motor vehicle.
-
Page 16: Recommendations
NEOX Dynamic wheelchair ENGLISH 3. Recommendations WARNING Do not use this equipment without having read and understood this owner’s manual in its entirety. This booklet contains essential information and instructions to ensure the safety of the occupant and any other individual who is near the wheelchair. Safety Inspection Checks A thorough inspection of the wheelchair should be completed upon delivery, as well as, at the intervals indicated in the Maintenance Checklist, to ensure the... -
Page 17: Safety Guidelines
When attempting a new manoeuvre, if you are uncertain about the safest way to proceed, it is important to ask for assistance to ensure your safety. Physipro Inc. strongly recommends the use of anti-tips. Anti-tips improve safety by helping to prevent the wheelchair from accidentally tipping over, therefore reducing the risk of falling and sustaining injuries. -
Page 18: General Warnings
NEOX Dynamic wheelchair ENGLISH General Warnings Getting to know your wheelchair • Each wheelchair is unique and thereby requires an initial period of adaptation. To ensure the safe use of your wheelchair, we recommend that you follow the instructions provided by your occupational therapist and allow yourself the necessary time to become familiar with the different features and characteristics of your wheelchair. -
Page 19: Sports And Weight Training
Street use Physipro Inc. wheelchairs are designed primarily for residential use. Use on public roads is strongly discouraged. If you must use your wheelchair on a public road, the following warnings and precautions must be observed. -
Page 20: Warnings: Falls And Tips
NEOX Dynamic wheelchair ENGLISH Warnings: Falls and Tips This section contains essential information to prevent the risk of falling and/or tipping. It is important to observe all the precautions and follow the instructions listed. We strongly recommend that you always fasten your pelvic positioning belt for added protection. -
Page 21: Transfers
Owner’s Manual ENGLISH Transfers To safely transfer from one surface to another, the following procedure should be followed. 1. Position the wheelchair as close as possible to the transfer surface, with the front caster wheels pointed forward. 2. Immobilize the wheelchair by engaging wheel locks. -
Page 22: Going Up A Sidewalk Or Step
NEOX Dynamic wheelchair ENGLISH Going up a sidewalk or step To safely go up a sidewalk or step, the help of an attendant is required, and the following procedure should be followed. 1. The attendant must disengage and rotate the anti-tips inwards, to ensure enough clearance is between the anti- tips and the raised platform. -
Page 23: Going Up Or Down Stairs
Owner’s Manual ENGLISH 2. The occupant must ensure that their belt is securely fastened, then lean back into the backrest and hold the armrests. 3. The attendant must go down the step first and then gently roll the wheelchair down the step, towards themselves, until the propulsion wheels are on lower ground. -
Page 24: Escalators
NEOX Dynamic wheelchair ENGLISH Escalators Never attempt to use your wheelchair on an escalator, not even with an attendant. There is a high probability that doing so will result in the loss control of your wheelchair, increasing the risk of tipping over and/or falling and may result in serious injury to the occupant or other individuals. -
Page 25: Going Up Or Down A Slope Or A Ramp
Owner’s Manual ENGLISH Going up or down a slope or a ramp Certain precautions must be followed to safely go up or down a slope or a ramp. • Do not descent or move up a slope that is steeper than 10 % (a 10% slope equals one foot in elevation for every 10 feet of horizontal distance). -
Page 26: Going Down A Slope Or A Ramp
NEOX Dynamic wheelchair ENGLISH Going down a slope or a ramp 1. Lean your back into the backrest, this will help counter the shift in the center of balance caused by an inclined surface. 2. To efficiently control the speed of descent, always apply a steady pressure to the handrims by letting them slowly slip through your hands. -
Page 27: Instructions
Owner’s Manual ENGLISH 4. Instructions Required tools Our wheelchairs are designed to be easily adjusted and maintained with standard hand tools. The following tools are required: • Metric wrenches: 4 mm, 8 mm, two 10 mm wrenches, two 13mm wrenches and a 19 mm wrench •... -
Page 28: Seat-To-Floor Height
ENGLISH Seat-to-Floor Height It is important to note that the seat-to-floor height of the Neox Dynamic wheelchair varies depending on the position and diameters of the caster and propulsion wheels. Adjustments to the frame can also modify the seat-to-floor height. -
Page 29: Modifying The Position Of The Axle Mounting Block
24" (610 mm) (380 to 480 mm) Note - The desired seat-to-floor height of the 6-Wheel Neox Dynamic wheelchair will be determined by the size of the propulsion wheels only. The caster wheels are supplied and pre-assembled to dynamic forks with a diameter of 5" (127 mm) or 6"... -
Page 30: Modifying The Position Of The Caster Wheels
NEOX Dynamic wheelchair ENGLISH WARNING After modifying the position of the propulsion wheels on the axle • mounting blocks, you may need to readjust the position of caster wheels on the fork or change caster wheel diameter. Always position the propulsion wheels as far back as possible, this will •... -
Page 31: Propulsion Wheels
Owner’s Manual ENGLISH Propulsion Wheels The Neox Dynamic wheelchair can be equipped with propulsion wheels of different sizes, ranging from 12" to 24" (310 mm to 610 mm) and can be positioned at four different heights. Note – To ensure ease-of-installation and adjustment, we recommend that you place your wheelchair on a flat surface, such as a table or workbench. -
Page 32: Installing Propulsion Wheels - Quick-Release Axle
NEOX Dynamic wheelchair ENGLISH Installing propulsion wheels – Quick-Release axle sure the mounting block F Make is properly positioned, if not, please refer to section Modifying the position of the axle mounting block. 2. Insert the axle bushing E in the desired height-adjustment hole of mounting block F. -
Page 33: Using The Quick-Release Axle
ENGLISH Using the Quick-Release axle Available as an option with the Neox Dynamic wheelchair, the Quick-Release Axle can be installed to facilitate the removal and installation of the propulsion wheels. Removal of the wheels can be done in three easy steps. -
Page 34: Propulsion Wheel Lateral Positioning
NEOX Dynamic wheelchair ENGLISH Follow these steps to adjust the horizontal position of the propulsion wheel: 1. Remove the propulsion wheel. Depending on the type of axle installed, refer to section Removing Propulsion Wheels – Threaded Axle or Removing Propulsion Wheels –... -
Page 35: Pneumatic Tires (Option)
Owner’s Manual ENGLISH Pneumatic Tires (option) If your wheelchair is equipped with pneumatic tires the following steps should be followed to install the inner tube and inflate the tires securely. Installing the inner tube 1. Before installing an inner tube, make sure the rim and the inside of the tire are clean. -
Page 36: Rear Caster Tilt Mechnism (6-Wheel Option)
NEOX Dynamic wheelchair ENGLISH Rear Caster Tilt Mechnism (6-wheel option) The Rear Caster Tilt Mechanism makes it easier for the attendant to move the occupant around on a daily basis. With a simple foot movement, the rear caster will tilt, creating an angle that facilitates surmounting obstacles. Installing the rear cater tilt mechanism 1. - Page 37 Owner’s Manual ENGLISH Gently press foot down on the strap B to activate tilt mechanism. WARNING Front caster wheels should no longer touch the ground. Once the rear caster tilt mechanism is activated, the front caster wheels will lift upwards. Keep foot pressed down on strap and move the wheelchair forward to surmount obstacle.
-
Page 38: Front Casters
ENGLISH Front Casters The Neox Dynamic wheelchair can be equipped with polyurethane caster wheels and are available in diameters of 5'' (127 mm), 6'' (152 mm), 7'' (178 mm) or 8'' (203 mm) with a width of 1" (25 mm), 1¼’’ (32 mm) or 1 ½’’ (38 mm). Pneumatic caster wheels are also available in diameters of 6’’or 8’’... -
Page 39: Installing Caster Wheels
Owner’s Manual ENGLISH Installing caster wheels 1. Determine the correct position of the caster wheel (see section Seat-to-Floor Height). 2. Insert screw A in the appropriate adjustment with spacers B placed in between the hole caster wheel and the fork. Install nut C onto screw A and tighten with two 13mm wrenches. -
Page 40: Seat
NEOX Dynamic wheelchair ENGLISH Seat Modifying seat depth The seat depth of the Neox Dynamic wheelchair can be changed by moving the inner seat rails. The following steps explain how to adjust seat depth: 1. With a 5mm Allen key and a 10mm wrench, unfasten bolts A. -
Page 41: Modifying Seat Width (Option)
Owner’s Manual ENGLISH Modifying seat width (option) The seat width of Neox Dynamic wheelchair can be modified. Three types and offer of frames are available the following seat width adjustment ranges in increments of 1": Standard frame: 14” to 22” (356 to 559 mm) Extended frame: 19”... -
Page 42: Pelvic Positioning Belt
NEOX Dynamic wheelchair ENGLISH Pelvic Positioning Belt The primary function of the pelvic positioning belt is to help the occupant maintain a proper posture and to secure the occupant in the wheelchair. Installing the pelvic positioning belt Position the belt end A on the seat rail and tighten screw B with a 4mm Allen key. -
Page 43: Backrest
Owner’s Manual ENGLISH Backrest Adjustable back posts are available for each type of backrest: Standard, Dynamic, or Reclining gas spring. The back posts are adjustable in 1" increments, the following table indicates the range of height adjustment of the back post, depending on the type of backrest installed. -
Page 44: Standard Backrest
NEOX Dynamic wheelchair ENGLISH Standard Backrest Modifying the backrest angle The angle of the backrest can be adjusted to accommodate the needs of the occupant. 1. With a 4mm Allen key and a 10mm wrench, remove bolts B. 2. Once the bolts are removed, reposition the back post at the desired angle. -
Page 45: Dynamic Backrest
Owner’s Manual ENGLISH Dynamic Backrest Installing the dynamic backrest Remove the standard backrest (see section Removing standard backrest). Insert alignment sleeves A. Install dynamic backrest’s positioning plates and the lower back post at the desired angle. Note – To adjust the backrest angle, you must decrease the tension of the dynamic backrest by turning the handle... - Page 46 NEOX Dynamic wheelchair ENGLISH Modifying the dynamic backrest angle The angle of the backrest can be adjusted to accommodate the needs of the occupant. 1. Turn tension handle counterclockwise, to decrease the backrest tension. 2. With a 4mm Allen key and a 10mm wrench, remove bolts F.
-
Page 47: Reclining Gas Spring Backrest
Owner’s Manual ENGLISH Reclining Gas Spring Backrest The reclining gas spring backrest is pre-assembled in our factory. When replacing a standard backrest with a reclining gas spring backrest, you must follow the steps in the order indicated. Note - The reclining gas spring mechanism cannot be installed with dynamic back posts. - Page 48 NEOX Dynamic wheelchair ENGLISH 7. Insert bolts E with washers through the positioning plates and the lower back post. Make sure all the assembly hardware is installed as illustrated and that the pivoting plate F is properly positioned. Tighten bolts E with a 5mm Allen key.
-
Page 49: Installing The Tension Bar
Owner’s Manual ENGLISH Installing the tension bar 1. With a 3mm Allen key, remove screws A. 2. Install the tension bar tubes B onto central tube C. Insert screws D in the pre-drilled holes of the back posts and through the ends of the tension bar tubes. 4. -
Page 50: Installing The Stroller Bar (Option)
NEOX Dynamic wheelchair ENGLISH Installing the stroller bar (option) The Neox Tilt-in-Space wheelchair must be equipped with specifically designed back posts for the installation of the angle adjustable stroller bar. If your wheelchair is currently equipped with standard back posts, you must replace them before beginning the installation of the stroller bar. -
Page 51: Adjusting The Stroller Bar Angle
Owner’s Manual ENGLISH Adjusting the stroller bar angle: To adjust the stroller bar angle, simply press both push buttons A simultaneously. This will allow the stroller bar to move freely. Once the desired angle is obtained, release both push buttons A and the stroller bar will automatically lock into place. WARNING Never lift or pull your wheelchair with the stroller bar. -
Page 52: Tilt Mechanism
NEOX Dynamic wheelchair ENGLISH Tilt Mechanism Self-blocking The Neox Dynamic wheelchair cylinder can be equipped with a tilt mechanism allow occupant to change position during the day to prevent the formation of pressure sores and improves comfort. Coil Seat Depth... -
Page 53: Limiting The Tilt Angle
Owner’s Manual ENGLISH Limiting the tilt angle 1. With a 7/64'' Allen key, loosen screws A, located on locking collars B. 2. Position the locking collars B at the desired location on both cylinder rods C to limit tilt. 3. Tighten screws A firmly. Replacing the self-blocking cylinder The following steps explain how to replace the self-blocking cylinder. -
Page 54: Adjusting The Tilt Angle
NEOX Dynamic wheelchair ENGLISH Adjusting the tilt angle The Neox Dynamic wheelchair can be tilted backwards. Follow these instructions to safely tilt the wheelchair. 1. Before tilting the wheelchair, engage wheel locks A. 2. Activate tilt mechanism pressing holding both... -
Page 55: Power Tilt (Option)
Owner’s Manual ENGLISH Power Tilt Mechanism (option) The power tilt mechanism was designed to allow the occupant to tilt their wheelchair without assistance. The power tilt mechanism is always pre-installed at our factory. Operating the power tilt mechanism 1. To tilt your wheelchair backwards, press the controller lever upwards. - Page 56 NEOX Dynamic wheelchair ENGLISH Battery charging process • The charging instructions for the battery are included in the battery package box. • It is possible to charge the battery while still using the power tilt mechanism. • When the battery needs to be recharged it will emit a low battery warning sound. Simply plug the charger into a power outlet and the warning sound will cease.
-
Page 57: Armrest
Owner’s Manual ENGLISH Armrest '' U '' type armrest The « U » type armrest is made with a foam padding to improve comfort and can be flipped back to facilitate transfers. The « U » type armrest offers a height adjustment range between 6 ¾'' and 16 ½'' (152 mm and 406 mm). -
Page 58: T '' Type Armrest
NEOX Dynamic wheelchair ENGLISH '' T '' type armrest The ''T'' type armrest is made with a foam padding to improve comfort and can be removed to facilitate transfers. The ''T'' type armrest offers a height adjustment range between 8'' and 15 ½'' (200 mm and 381 mm). -
Page 59: Footrest
Owner’s Manual ENGLISH Footrest The footrest is removable and can swivel inwards or outwards and can be equipped with a standard flip-up footplate or a flip-up footplate with angle and depth adjustments. Three models of footrest are available: 60º, 70º et 90º. Each model features an extensive range of adjustments to ensure optimal support of the lower limbs. -
Page 60: Folding The Flip-Up Footplate
NEOX Dynamic wheelchair ENGLISH Folding the flip-up footplate To fold the footplate, simply flip the footplate upwards. Adjusting footplate depth 1. With a 4mm Allen key, unfasten and remove both screws D. 2. Position the footplate and insert both screws D in the appropriate adjustment holes and tighten screws firmly. -
Page 61: Elevating And Articulating Legrest
Owner’s Manual ENGLISH Elevating and Articulating Legrest Installing the legrest 1. Install tube end A into the receiver on the front frame tube. 2. Turn the legrest inwards until the legrest locks in place. Adjusting legrest height at knee level 1. -
Page 62: Wheel Locks
NEOX Dynamic wheelchair ENGLISH Wheel Locks The installation of wheel locks must be done after the installation and adjustment of the propulsion wheels is completed. Be aware that the size of the propulsion wheels will affect the position of wheel lock brackets. If the propulsion wheel installation has not been completed, consult section Installing propulsion wheels –... -
Page 63: Using Wheel Locks
Owner’s Manual ENGLISH Test and readjust wheel lock position until the required brake force is obtained, and wheel locks effectively immobilize the wheelchair. If necessary, move the wheel lock bracket on the side frame rail. Once the required brake force is obtained, make sure all bolts are securely fastened. -
Page 64: Attendant Wheel Lock (4-Wheel Or 6-Wheel Option)
NEOX Dynamic wheelchair ENGLISH Attendant Wheel Lock (4-wheel or 6-wheel option) Installing the attendant wheel lock Insert parts A and B into tube C and adjust the width of the attendant wheel lock according to the width of the wheelchair. Position and adjust bracket on the side frame rails. -
Page 65: Anti-Tips
Owner’s Manual ENGLISH Anti-Tips Physipro Inc. recommends the installation of anti-tips on all wheelchairs. Installing anti-tips 1. Press button pin A, so that the lock pin is drawn inside the tube. Receiver 2. Insert anti-tip into the receiver. 3. Slide and turn the anti-tip tube until the button pin A and lock pin are positioned through the receiver’s mounting hole. -
Page 66: Disengaging Anti-Tips
Make sure both anti-tips are positioned at the same height. • Physipro Inc. recommends the installation of anti-tips on all wheelchairs. • Never tilt the wheelchair by pushing down on anti-tips. •... -
Page 67: Transport
Owner’s Manual ENGLISH 5. Transport The Neox Dynamic was designed to facilitate access to adapted transport and comes equipped with factory-installed securement points. It is important to carefully read the Technical sheet - Use as a seat in a motor vehicle, in its entirety before using your wheelchair in an adapted transport vehicle to familiarize yourself with your wheelchair’s technical specifications and requirements. - Page 68 ISO/DIS 7176-19:2019 standards or risk serious physical injury or death. If you have any questions regarding the use of this wheelchair as a seat in adapted transport, contact Physipro Inc. at the following number: 1 800 668-2252. INTRODUCTION The Neox...
- Page 69 This wheelchair meets the testing standard required by ISO/DIS 7176- 19:2019 with the configurations defined at page 75 of the current manual. Wheelchairs configured differently or with seating system provided by another manufacturer have not been tested, therefore, Physipro Inc. cannot guarantee the performance of these wheelchairs. •...
- Page 70 ISO/DIS 7176-19:2019 standard. • Physipro Inc. wheelchairs were dynamically tested in a forward-facing position with the occupant restrained with a pelvic belt and a shoulder belt. Both the pelvic belt and shoulder belt must be used to reduce the risk of head or chest injuries that may be sustained by impact with components of the vehicle.
- Page 71 Owner’s Manual ENGLISH Weight limitations: • The weight limit (for the occupant and accessories that are fixed to the wheelchair) is 120 kg (265 lbs) for use onboard an adapted vehicle. Never use a wheelchair on adapted transport if the weight limit is exceeded. Inspection: •...
- Page 72 NEOX Dynamic wheelchair ENGLISH • To secure the wheelchair to the vehicle, install the rear tie-down straps to the rear securement points of the wheelchair. Install the front tie-down straps to the front securement points, make se the vehicle’s front anchor points are spaced slightly wider than the wheelchair, this ensures better lateral stability.
- Page 73 Owner’s Manual ENGLISH WHEELCHAIR CLEARANCE INSIDE A MOTOR VEHICLE The wheelchair must be placed in a forward-facing position onboard a motor vehicle. The clear zones required to ensure the proper use of the vehicle’s pelvic and shoulder belts are as follows: Front clear zone (FCZ): The front clear zone is measured from the frontmost point of the occupant’s head and must measure 26 inches (66 cm) minimum.
- Page 74 NEOX Dynamic wheelchair ENGLISH WARNING: Securing wheelchair accessories: • To reduce the risk of injury to passengers, remove lap trays that have not been specifically designed for transport safety and secure separately inside the vehicle or affix lap tray securely to the wheelchair, as far away as possible from the occupant, with a shock-absorbing material placed in between the lap tray and the occupant.
- Page 75 Owner’s Manual ENGLISH THREE-POINT SEAT BELT Positioning: 1- Position the pelvic belt across the front of the lower pelvis. The pelvic belt should be in direct contact with the occupant’s pelvis and hip bones. The pelvic belt should be positioned at an angle between 45 and 75 degrees to the horizontal.
- Page 76 NEOX Dynamic wheelchair ENGLISH 3- The shoulder belt should lie across the center of the chest, directly over the sternum and the middle of the anterior shoulder. The upper anchor point must be located above and behind the occupant to ensure the occupant remains in place during transportation.
- Page 77 Owner’s Manual ENGLISH 5- The straps of safety belt should be positioned in a straight a line, with no more than 5-degree deviation between the occupant and both the left and right anchor points. 6- Make sure the straps of the safety belt are not twisted. 7- Adjust the safety belts as firmly as possible, without impeding the occupant’s normal breathing cycle or blood circulation.
-
Page 78: Cleaning And Maintenance
NEOX Dynamic wheelchair ENGLISH 6. Cleaning and Maintenance Regular cleaning and maintenance will extend the lifespan and performance of your wheelchair. We strongly recommend that when cleaning your wheelchair, you inspect all the parts and components to ensure they are in good condition. General Recommendations •... -
Page 79: Sling Backrest
Owner’s Manual ENGLISH Sling Backrest A weekly cleaning is recommended. 1. Gently wipe with a cloth dampened with a mild soap or neutral detergent. 2. Remove excess moisture by lightly patting the surfaces with a clean cloth. 3. Allow to air dry completely. WARNING machine wash or dry a sling backrest, doing so will damage the fabric. -
Page 80: Maintenance
NEOX Dynamic wheelchair ENGLISH Maintenance Performing regular maintenance will extend your wheelchair’s lifespan and ensure your safety during use. WARNING Upon receiving your wheelchair, a thorough inspection of all • components and parts should be completed to ensure their proper function and the occupant’s safety. - Page 81 Owner’s Manual ENGLISH Rear Caster Tilt Mechanism (if applicable) Check the condition and the proper operation of ✓ the Rear Caster Tilt Mechanism Wheel locks Check the effectiveness and condition of wheel ✓ locks Make sure wheel locks do not interfere with the ✓...
- Page 82 NEOX Dynamic wheelchair ENGLISH Elevating and Articulating Legrest (if applicable) Make sure the elevating legrest is securely attached ✓ and functions properly Seat and Backrest Make sure the seat, backrest and tension bar are ✓ securely attached Make sure the stroller bar functions properly ✓...
-
Page 83: Replacement Parts
Physipro Inc. Certain distributors may provide replacement units during the repair process. For more information, contact your representative. Physipro Inc. will provide repair parts for a minimum of 5 years or will provide a compatible replacement option. Revision 0... -
Page 84: Storage And Shipping
NEOX Dynamic wheelchair ENGLISH 7. Storage and Shipping Storage General Recommendations • Your wheelchair must be stored in a clean and dry area. Do not store near any pointed objects that may damage the wheelchair. • If your wheelchair is stored for several weeks, please consult the Maintenance Checklist, and proceed to a thorough inspection before use. -
Page 85: Warranty
Tires, inner tubes, comfort upholsteries, armrests, seat covers, backrest covers and ball bearings. Physipro inc. agrees to repair or replace any inoperative or defective part for the duration of the warranty period. Devices and components that are replaced or repaired under one of these warranties will remain subject to the warranty for the remaining warranty period. - Page 86 Replacement and repairs carried out during the warranty period must be made with the original parts and components. To obtain warranty service, please contact Physipro Inc. or an authorized dealer. Do not return this product without prior approval by Physipro Inc. If you are dissatisfied with...
- Page 87 Owner’s Manual ENGLISH Notes: Revision 0 July 2022...
- Page 88 Aides techniques à la posture et à la mobilité Canada Europe Importateur : LES ÉQUIPEMENTS SASU PHYSIPRO IMPORT ADAPTÉS PHYSIPRO INC. 370, 10e Avenue Sud Village des entrepreneurs Sherbrooke (Québec) 461, rue Saint-Léonard J1G 2R7 Canada 49000 Angers - France T.
Need help?
Do you have a question about the NeoX DYNAMIC and is the answer not in the manual?
Questions and answers