Table of Contents
Advertisement
Advertisement
Table of Contents

Related Manuals for Dometic OPTIMUS 360

Summary of Contents for Dometic OPTIMUS 360
- Page 1 OPTIMUS 360 JOYSTICK CONTROL SYSTEM Joystick Control System for Engines with Integrated Electronic Shift and Throttle Installation Manual — Book 63 WARNING Cancer and Reproductive Harm [REVISION G] Form No. 682114 | ©2020 Dometic Corporation www.P65Warnings.ca.gov...
- Page 2 About this Book This book contains: • instructions required to install and calibrate the Optimus 360 Joystick Control System for electronic shift and throttle engines. This document is to be utilized in conjunction with the Optimus Hydraulic EPS Installation Manual (PID #682158), Optimus Electric EPS Installation Manual Book 54 (PID #682220), and Book 65 (PID #682170).
-
Page 3: Table Of Contents
5.1.1 Evinrude ETEC G2 with iDock ........ 5-1 6 Suzuki .................. 6-1 6.1 Gateway installation ............6-1 6.2 Suzuki EST gateway and Optimus 360 interconnection ..6-2 6.2.1 Suzuki BCM CAN network connection ....6-5 6.2.2 Suzuki switch panel harness connection ....6-6 6.2.3 Optimus EST gateway connection ...... - Page 4 10.2 Yanmar and Optimus 360 CAN2 interconnection..... 10-3 10.3 Control head setup ............10-6 11 OXE ..................11-1 11.1 OXE and Optimus 360 network interconnection ....11-1 12 Post-Installation Warranty Checklist ........12-1 13 Updating Firmware............. 12-1 14 Warranty ................14-1 14.1 Statement of limited warranty .........
- Page 5 Appendix A – Mounting Templates ..........A-1 A.1 Joystick ................. A-1 A.2 Control head (Yanmar/Optimus) ........A-3 Appendix B – Setup and Tuning with Datalink ......B-1 B.1 Using Datalink ............... B-1 B.2 System setup ..............B-3 B.2.1 System parameters ..........B-3 B.2.2 Settings menu access .........
-
Page 6: Abbreviations
Abbreviations The following abbreviations are used in this manual: ABYC American Boat & Yacht Council Auxiliary Battery Boat Control Module (Suzuki) Controller Area Network CAN bus Controller Area Network (data) bus. (A harness of wires that carry digital signals and power between electronic modules) CL/CLP Command Link/Command Link Plus (Yamaha) -
Page 7: Important Safety Information
If you have any questions about safe installation or operation of this system, contact Dometic Marine. Please don’t guess. 1.1 Explanation of symbols The symbols below are used throughout this publication to alert you to potential hazards involved with the operation and installation of this product. -
Page 8: Safe Operation
• Know and obey all applicable federal, state, and municipal laws and regulations that govern boating in your area. Dometic recommends all boat operators take a boating safety course. • Never operate a boat while under the influence of drugs or alcohol. -
Page 9: Safety Considerations For Installers
– refer also to those instructions. • Do not substitute any component of the system. Dometic and Optimus parts are rigorously engineered and tested to ensure system integrity. Substitution of components may compromise safety, performance, and reliability. - Page 10 This page left intentionally blank.
-
Page 11: System Overview
2 System Overview 2.1 System description The Optimus 360 Joystick Control System builds on the base Optimus Electronic Power Steering (EPS) system. It uses the same helm, PCM, power steering pumps, service valves and smart steering cylinders. It also operates using the same CANbus networks (CAN1, CAN2, and the optional CAN3). - Page 12 This page left intentionally blank.
-
Page 13: Installation
TECH TIP If you are new to installing an Optimus 360 system it can be helpful to think of the process as adding a joystick to an installed Optimus EPS system. You may find your first installation simpler if you do a complete EPS installation first (i.e. -
Page 14: Part 1: Component Installation
3.2.1 Part 1 – Component installation Components may be installed in any order. Table 3-1 shows where the installation information can be found for each component. Component Reference Document Steering Helm Optimus EPS Installation Manual (Book 50.1) Optimus EPS Electronic Power Steering with CANtrak Display Electric Actuator Installation and User’s Hydraulic Pumps... -
Page 15: Installing The Joystick
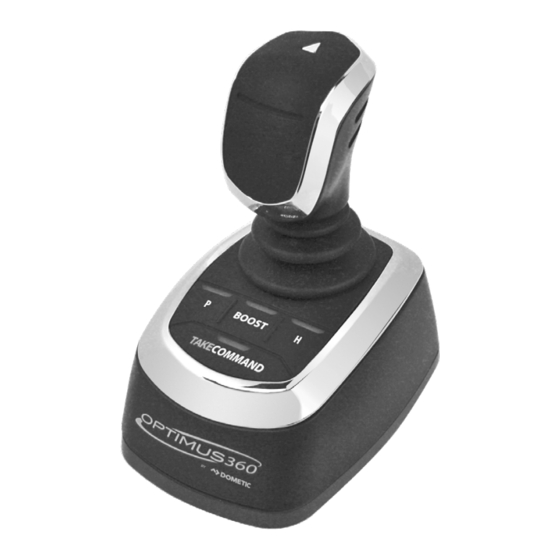
3.3 Installing the Joystick Install the joystick on the dash in an area that allows convenient, unobstructed access. Whenever possible, mount the joystick on a horizontal surface in a location that will minimize water spray. Install the joystick using the hardware provided in the kit. The joystick harnesses must be strain relieved to one of the mounting studs using the cable tie provided with the joystick hardware. -
Page 16: Can1 Harness Connections
Installation Manual (Book 50.1) or Optimus EPS Electronic Power Steering with Electric Actuator Installation and User’s Manual (Book 54). In addition to this, the Optimus 360 system requires a 6-pin CAN1 harness connection between the steering helm and the joystick. Refer to Book 50.1 or Book 54 for proper harness selection and strain relieving. -
Page 17: Can2 Harness Connections
3.5 CAN2 Harness connections The Optimus 360 system uses the same CAN2 network, cables and structure as the basic Optimus EPS system. The Optimus 360 system adds a joystick and control head (if applicable) to the CAN2 network. Figure 3-2 shows a sample CAN2 network diagram. The exact connections will vary depending on the engine manufacturer;... - Page 18 NOTE: TEES MAY NOT LOOK ON TEES EXACTLY AS SHOWN Figure 3-3. Correct CAN2 tee installation example. CAUTION! Do not connect anything other than Optimus components, or Dometic approved autopilots, to the CAN2 network. CM20064 SCREWS IN ALL MOUNT HOLES...
-
Page 19: System Setup, Purge, And Calibration
4 System Setup, Purge, and Calibration Before you proceed you need to have all Optimus EPS and Optimus 360 components installed, harnesses connected, and ignition sensing and power wiring completed. If you haven’t already done so you’ll need to go... - Page 20 2. Press > to enter the Select System Type menu. Figure 4-2. 3. Select Optimus 360 then press Save or to return to the System Setup menu. When you set the system type the CANtrak automatically configures the menus to show only items that relate to your system.
-
Page 21: Purge And Calibrate
8. Multiple helm stations only: choose Select Device Locations from the System Setup menu and press >. The display will list the installed components along with their serial numbers. Check the serial numbers and use the + and – buttons to toggle the components between Main and Second station. - Page 22 This page left intentionally blank.
-
Page 23: Evinrude
5.1.1 Evinrude ETEC G2 with iDock The Evinrude G2 shift and throttle system and the Optimus 360 system connect together through the CAN1 and CAN2 network. CAN3 is used to broadcast system information to a public NMEA2000 network. - Page 24 BACKBONE MP-MP 58747#(3-5) Figure 5-1. Evinrude G2 iDock – single station, twin engine. NOTE Configuration shown is a combination of Dometic and BRP components. Although a twin configuration is shown, the Optimus 360 connections are identical for triple and quad engine control.
-
Page 25: Suzuki
6 Suzuki To complete the system installation for a Suzuki SPC engine you need to: 1. Install the Suzuki control head (refer to installation instructions provided by Suzuki) 2. Install the Optimus EST gateway (section 6.1) 3. Complete the CAN network connections (section 6.2) 4. - Page 26 The Suzuki Precision Control (SPC) shift and throttle system connects to the Optimus 360 system through the EST Gateway, using the harness CM20018. The harness connects at the following points: 1. Suzuki boat control module (BCM) CAN network connector 2.
- Page 27 CM204XX PORT CM21702 ENGINE CM204XX CM204XX CM204XX PURPLE x 2 COLOR COLOR HELM JOYSTICK HELM JOYSTICK CANtrak 1 CANtrak 2 BUZZER BUZZER CM21504 CM21504 CENTER ENGINE TERMINATOR MAIN CM10051 CM100XX CM10060 TERMINATOR CM10052 GRAY x 1 CONTROL PURPLE x 1 CM20064 HEAD 1 CM20064...
- Page 28 TO 2nd CM21702 SEASTATION STATION SEAWAYS PORT CAN1 SENSOR ENGINE CM204XX PUBLIC N2K DEVICES PCM IGNITION SENSE EG1810 COLOR HELM JOYSTICK GATEWAY CANtrak 1 MASTER POWER PORT ENGINE BUZZER PORT PORT KEYPAD TERMINATOR TERMINATOR CM10051 CM10060 CM10052 CONTROL HEAD 1 STBD ENGINE TO SBW...
-
Page 29: Suzuki Bcm Can Network Connection
OPTIONAL 2nd STATION COMPONENTS 2nd STATION COLOR BUZZER HELM JOYSTICK CANtrak 2 REQUIRED IF NO CANtrak 2 BUZZER SUB PORT SUB PORT KEYPAD CONTROL HEAD 2 SUB STBD SUB STBD KEYPAD OPTIMUS CAN1 OPTIMUS CAN2 TO MAIN STATION TO GATEWAY TO GATEWAY EST GATEWAY MASTER MASTER SUB... -
Page 30: Suzuki Switch Panel Harness Connection
SINGLE STATION BOATS SUZUKI CAN CONNECTION ON MAIN BCM HARNESS SUZUKI SUB BCM HARNESS TERMINATOR PLUG CM20018 SUZUKI CAN HARNESS CONNECTION ON MAIN BCM HARNESS DUAL STATION BOATS TERMINATOR PLUG Figure 6-6. CM20018 connection to Suzuki CAN network. 6.2.2 Suzuki switch panel harness connection Locate the sixteen pin connector in the harness connected to the switch PURPLE panel. -
Page 31: Optimus Est Gateway Connection
6.2.3 Optimus EST gateway connection Connect the two large connectors on the CM20018 harness to the gateway and tighten the screws to secure them. Use cable ties to secure the harness cables to the strain relief plate as shown in figure 6-8. CABLE TIE CABLE TIE GATEWAY HARNESS... -
Page 32: Suzuki Spc System Calibration
Splice one of the ignition sensing wires to the purple switch power wire on the CM20018 harness (see figure 6-7) using 16AWG (1.3 mm2) wire to make any necessary extensions. Use crimped Molex Perma-Seal (or equivalent) butt splice connectors, or shrink-sealed solder connections. Locate all splices in a dry location and secure them properly against mechanical damage. - Page 33 When the software starts up you’ll see the home screen shown in Figure 6-10. If you are updating an existing installation, click BCM Initialization to clear the existing calibration from memory, then cycle the power (leave off for ten seconds). Otherwise, continue with the following steps. Figure 6-10.
- Page 34 2. You will be prompted to enter the number of stations and the number of engines. Always select Dual Station, regardless of the actual number of control stations. With the exception of the main remote control, all remote controls and joysticks are routed through the gateway and are treated as a second control station by the Suzuki system.
- Page 35 3. A confirmation window similar to Figure 6-13 will be shown. Ensure the information is correct, then click OK. Click Cancel to return to the previous screen if you need to make a change. 4. The wizard will then guide you to trim each engine down in turn in order to register their position in the boat control module (BCM).
- Page 36 6. When all lever positions have been set, and the screen shows check marks next to all of them (see Figure 6-16), return the control levers to the neutral position and click OK to save the calibration. Figure 6-16. Save calibrated values. 7.
- Page 37 Figure 6-17. Service Data. Sample of typical values. TECH TIP You are now ready to sea trial the steering system. Refer to book 65. When the sea trial is complete, proceed to the joystick setup in section 9 of this manual. 6-13...
- Page 38 This page left intentionally blank. 6-14...
-
Page 39: Yamaha
7 Yamaha The Optimus 360 Joystick system supports Yamaha DEC and Yamaha EX EST types. To complete the system installation for a Yamaha engine you need to: 1. Connect the gateway harness to the Yamaha remote control. Refer to Section 7.1.1 for Yamaha DEC and Section 7.2.1 for Yamaha EX 2. - Page 40 4. Remove the control head from the dash far enough to expose the cover mounting screws. (Refer to figure 7-2. Port side is shown.) Both sides will need to be removed, but it is recommended that you proceed with one side at a time. Be sure to support the control head so that the harnesses are not under strain.
- Page 41 YAMAHA LPS HARNESS CONNECTOR DASH SCREW x 3 CUT CABLE TIE COVER Figure 7-2. Cover removal and LPS harness identification. LPS HARNESS CONNECTOR GATEWAY HARNESS LPS HARNESS CONNECTOR Figure 7-3. Gateway harness connection.
- Page 42 8. Install a new cable tie to secure the harnesses to the chassis and re-install the cover. (Refer to figure 7-4.) LPS HARNESS CONNECTOR NEW CABLE TIE GATEWAY HARNESS SCREW x 3 DASH COVER LPS HARNESS CONNECTOR Figure 7-4. Cable tie and cover installation. 9.
-
Page 43: Est Gateway Installation For Yamaha Dec
9-PIN CONNECTOR (NORMALLY LOCATED 3 TO 4 INCHES BELOW THE CONTROL HEAD HOUSING) GATEWAY HARNESS Figure 7-5. Status LED connector identification and connection. 7.1.2 EST gateway installation for Yamaha DEC The EST gateway is an electronic interface device that connects the Optimus control system to the OEM shift and throttle control system. - Page 44 EST GATEWAY STRAIN RELIEF PLATE 2 X LONG SCREWS (NOT SUPPLIED) 2 X SHORT SCREWS (NOT SUPPLIED) Figure 7-6 Gateway with strain relief plate. CABLE TIE CABLE TIE GATEWAY HARNESS PART NO. CM20023 CM20023 HARNESS Figure 7-7. Harness connection to EST gateway.
-
Page 45: Yamaha Dec Est Gateway And Optimus 360
The Yamaha DEC (Digital Electronic Control) shift and throttle system connects to the Optimus 360 system through the EST Gateway, using the harness CM20023 (CM20025 for quad-engine boats). The gateway in turn connects to the Optimus 360 CAN1 and CAN2 networks, the Yamaha Command Link or Command Link Plus network, and the PCM ignition, through the same harness. - Page 46 CM21702 CM204XX CM204XX PORT ENGINE PURPLE x 2 COLOR CANtrak 1 HELM JOYSTICK BUZZER CM21504 COMMAND LINK / PLUS HUB(S) TERMINATOR STBD CM100XX CM10051 ENGINE CONTROL CM10060 HEAD 1 P_LPS S_LPS TERMINATOR CM10052 CM20064 OPTIMUS CAN2 OPTIMUS CAN1 CM20023 IGNITION CM20023 EXISTING YAMAHA HARNESS...
- Page 47 CM21702 CM204XX CM20406 PURPLE x 2 (SEE WARNING) PORT ENGINE COLOR HELM JOYSTICK CANtrak BUZZER CM21504 CENTER PORT PORT STARBOARD ENGINE CL+ HUB CL+ HUB TERMINATOR CM10051 CM10060 REMOTE CONTROL TERMINATOR CM10052 CENTER STBD CM20064 ENGINE STBD ENGINE P LED OPTIMUS CAN2 S LED OPTIMUS CAN1...
- Page 48 CM21702 PORT CM204XX ENGINE CM204XX CM20406 PURPLE x 2 (SEE WARNING) COLOR HELM JOYSTICK CANtrak CENTER PORT PORT STARBOARD ENGINE CL+ HUB CL+ HUB BUZZER CM21504 TERMINATOR CM10051 REMOTE CM10060 CONTROL CM20064 CENTER STBD ENGINE P LED S LED PORT STBD PORT STBD...
- Page 49 CM21702 CM204XX CM20406 PORT ENGINE PURPLE x 2 (SEE WARNING) COLOR HELM JOYSTICK CANtrak BUZZER CENTER PORT CM21504 ENGINE CAPPED CL+ HUB TERMINATOR CM10051 CM10060 REMOTE CONTROL CENTER STBD TERMINATOR CM10052 ENGINE CM20064 STBD ENGINE P LED S LED PORT STBD PORT STBD...
- Page 50 CM21702 CM204XX PORT CM204XX CM20406 ENGINE PURPLE x 2 (SEE WARNING) COLOR HELM JOYSTICK CANtrak CAPPED CL+ HUB CENTER PORT BUZZER ENGINE CM21504 TERMINATOR CM10051 REMOTE CM10060 CONTROL CM20064 CENTER STBD P LED ENGINE S LED PORT STBD PORT STBD GATEWAY HARNESS CM20025 GATEWAY...
-
Page 51: Yamaha Ex
7.2 Yamaha EX The Yamaha EX shift and throttle system connects to the Optimus 360 system through the EST Gateway, using the harness CM20046. The gateway in turn connects to the Optimus 360 CAN1 and CAN2 networks, and the Yamaha Command Link Plus network. -
Page 52: Est Gateway Installation For Yamaha Ex
7.2.2 EST gateway installation for Yamaha EX NOTICE! The Yamaha EX EST gateway harness does not have ignition/wake-up lines for the PCM. Ignition lines for the PCM should remain connected to the Yamaha key accessory switch. The EST gateway is an electronic interface device that connects the Optimus control system to the OEM shift and throttle control system. -
Page 53: Yamaha Ex Est Gateway And Optimus
7.2.3 Yamaha EX EST gateway and Optimus 360 connection The Yamaha EX shift and throttle system connects to the Optimus 360 system through the EST Gateway, using the harness CM20046. The gateway in turn connects to the Optimus 360 CAN1 and CAN2 networks, and the Yamaha Command Link Plus network. - Page 54 WARNING! All harness runs should be sufficiently bundled and strain relived to avoid accidental damage. YAMAHA ACCESSORY KEY SWITCH CM21702 CM204XX CM204XX PORT ENGINE PURPLE x 2 COLOR CANtrak 1 HELM JOYSTICK BUZZER CM21504 COMMAND LINK PLUS HUB(S) TERMINATOR CM100XX CM10051 CM10060 STBD...
-
Page 55: Yamaha Est Gateway Setup
7.3 Yamaha EST gateway setup Before configuring the EST gateway you should have already conducted the initial system setup described in section 4. If you have more than one control station you will need to configure each gateway separately, as they need to be calibrated to their adjacent remote control. - Page 56 Figure 7-19. 4. The status indication will guide you through the calibration steps. Move both control levers to the position indicated in the status field. You will be directed in turn through the following: a. Forward WOT – move the levers to the forward throttle stops b.
-
Page 57: Mercury Dts
8 Mercury DTS To complete the system installation for a Mercury DTS engine: 1. Connect the gateway harness to the Mercury DTS remote control (section 8.1). 2. Install the Optimus EST gateway (section 8.2) 3. Complete the CAN1, CAN2 and CAN3 network connections (refer to figure 8-3 and figure 8-4). - Page 58 5. Close and lock the harness retainer clip, ensuring the clip is buttoned securely into the brass plate. 6. Repeat steps 3–5 for the “LEVER 2” (PORT) side. CAN1 FTCAN PRIVATE NETWORK SEASTATION CAN2 PRIVATE NETWORK SEAWAYS SENSOR CAN3 PUBLIC N2K NETWORK EST GATEWAY LPS HARNESS MERCURY DTS SYSTEM HARNESS COLOR CANtrak...
- Page 59 OPTIONAL 2nd STATION COMPONENTS CAN1 FTCAN PRIVATE NETWORK CAN2 PRIVATE NETWORK EST GATEWAY LPS HARNESS 2nd COLOR CANtrak MERCURY DTS SYSTEM HARNESS DISPLAY 2nd JOYSTICK 2nd EST GATEWAY EG1840 BUZZER 2nd MERCURY DTS EST GATEWAY HARNESS CM20038 EPS HELM 2nd STATION BUZZER TERMINATOR CM10052...
-
Page 60: Est Gateway Installation
8.2 EST gateway installation NOTICE! The Mercury DTS EST gateway harness does not have ignition/wake-up lines for the PCM. Ignition lines for the PCM should remain connected to the Mercury accessory relay terminal block(s). The EST gateway is an electronic interface device that connects the Optimus control system to the OEM shift and throttle control system. -
Page 61: Mercury Dts/Est Gateway Setup
CABLE TIE CABLE TIE GATEWAY HARNESS PART NO. CM20038 CM20038 HARNESS Figure 8-6. Harness connection to EST gateway. 8.3 Mercury DTS/EST gateway setup Before configuring the EST gateway you should have already conducted the initial system setup described in section 4. If you have more than one control station you will need to configure each gateway separately, as they need to be calibrated to their adjacent remote control. - Page 62 2. At the main station CANtrak, navigate to Dealer Menu > Initial Setup > EST Gateway to bring up the EST Gateway Setup screen. If you have two gateways, and have correctly set the number of gateways in section 4, then you will also see a 2nd station gateway on your screen. Figure 8-7.
-
Page 63: Honda Ist
9 Honda IST To complete the system installation for a Honda IST engine: 1. Connect the gateway harness to the Honda IST remote control (section 9.1). 2. Install the Optimus EST gateway (section 9.3) 3. Complete the CAN1, CAN2 and CAN3 network connections (refer to figure 9-1 and figure 9-2). - Page 64 CAN1 FTCAN PRIVATE NETWORK SEASTATION CAN2 PRIVATE NETWORK SEAWAYS CAN3 PUBLIC N2K NETWORK SENSOR EST GATEWAY LPS HARNESS HONDA IST SYSTEM HARNESS COLOR CANtrak DISPLAY JOYSTICK EST GATEWAY EG1850 HONDA IST EST GATEWAY HARNESS BUZZER CM20039 CAN WYE HARNESS CM21702 EPS HELM HONDA IST CONTROL HEAD...
- Page 65 CAN1 FTCAN PRIVATE NETWORK OPTIONAL 2nd STATION COMPONENTS CAN2 PRIVATE NETWORK EST GATEWAY LPS HARNESS CAN3 PUBLIC N2K NETWORK 2nd COLOR CANtrak HONDA IST SYSTEM HARNESS DISPLAY 2nd JOYSTICK 2nd EST GATEWAY EG1850 BUZZER 2nd HONDA IST EST GATEWAY HARNESS CM20039 EPS HELM 2nd STATION...
-
Page 66: Honda Ist Ignition Line Connection
9.2 Honda IST ignition line connection NOTICE! The Honda EST gateway harness does not have ignition/wake-up lines for the PCM. Ignition lines for the PCM should connect to the Honda ignition panel via the CM20040 ignition wye harness. 6 PIN GREY CONNECTOR ST AR T CONNECT PLUG TO DISCONNECTED... - Page 67 EST GATEWAY STRAIN RELIEF PLATE 2 X LONG SCREWS (NOT SUPPLIED) 2 X SHORT SCREWS (NOT SUPPLIED) Figure 9-4. Gateway with strain relief plate. CABLE TIE CABLE TIE GATEWAY HARNESS PART NO. CM20039 CM20039 HARNESS Figure 9-5. Harness connection to EST gateway.
-
Page 68: Honda Ist/Est Gateway Setup
9.4 Honda IST/EST gateway setup Before configuring the EST gateway you should have already conducted the initial system setup described in section 4. If you have more than one control station you will need to configure each gateway separately, as they need to be calibrated to their adjacent remote control. - Page 69 3. Select Calibrate Main EST Gateway and press >. This will put the main station gateway into calibration mode. Figure 9-7. a. Forward WOT – move the levers to the forward throttle stops b. Forward detent – engage forward gear with levers in idle position c.
- Page 70 This page left intentionally blank.
-
Page 71: Yanmar
10 Yanmar To complete the system installation for a Yanmar BY2/BY3 EST engine with XT sterndrive you need to: 1. Install the Optimus control head (section 10.1) 2. Complete the CAN network connections (section 10.2) 3. Set up the control head using Datalink (section 10.3) 10.1 Installing the control head Install the control head on the dash in a location that allows convenient and unobstructed access. - Page 72 WARNING! All electrical connections and harness must comply with ABYC wiring standards, be rated for 105°C (221°F), and compliant with SAEJ1128. CONTROL HEAD HA5491 DUAL ENGINE TILT/TRIM SWITCH KIT AVAILABLE SEPARATELY IF SUPPLIED BY OTHERS, SWITCHES TO BE DP/DT, MOMENTARY CONTACT ON –...
- Page 73 10.2 Yanmar and Optimus 360 CAN2 interconnection The Yanmar BY2/BY3 shift and throttle system and the Optimus 360 system communicate over the CAN2 network. The interconnection is made by connecting the Yanmar CE10803 harness to the Optimus CAN2 network at a hub or tee. See figure 10-2 and figure 10-3 for detailed interconnection schematics.
- Page 74 HELM HARNESS I6800 ED1700 E50100 i5601E i5601E CONTROL COLOR (YANMAR) JOYSTICK HEAD CANtrak DISPLAY DISPLAY (YANMAR) (YANMAR) HELM HARNESS CM100xx E50100 (YANMAR) CM20064 CM100xx CM100xx (OPT.) CM20064 CM204xx HELM GREY THIRD PARTY NMEA 2000 DEVICES HA5492 NMEA 2000 COM KIT TERMINATOR TERMINATOR CM10052...
- Page 75 HELM HARNESS I6800 ED1700 E50100 i5601E i5601E CONTROL COLOR (YANMAR) JOYSTICK DISPLAY DISPLAY HEAD CANtrak (YANMAR) (YANMAR) CM100xx HELM HARNESS E50100 (YANMAR) CM20064 CM100xx DISCRETE WIRES FOR: FUEL TANK 1 TERMINATOR FUEL TANK 2 CM10055 PADDLE WHEEL (YANMAR) TRIM POSITION GEAR LUBE CM204xx HELM...
-
Page 76: Control Head Setup
This feature prevents accidental switching between control stations on multi-station boats by requiring a specific sequence of button presses on the control head. The Optimus 360 User’s Manual (Book 62) has more information about this feature. Controls the throttle behavior when the Power Train Sync (PTS feature is One Lever Sync mode engaged. - Page 77 FWD/REV throttle curve There are two throttle curves that control the response characteristics when the control lever is at or near idle. Curve 1 is the default curve, and is suitable for most applications. Curve 2 requires more lever travel before throttle is increased.
- Page 78 This page left intentionally blank. 10-8...
-
Page 79: Oxe
2. Complete the CAN network connections (11.1) 11.1 OXE and Optimus 360 network interconnection The OXE shift and throttle system and Optimus 360 system connect together through the CAN2 network. CAN3 is used to broadcast system information to a public NMEA2000 network. - Page 80 11-2...
-
Page 81: Post-Installation Warranty Checklist
After completion of the system installation, configuration and initial Sea Trial, the Post-Installation Warranty Checklist supplied with your system documentation must be filled out and returned to Dometic as part of the Limited Warranty Registration. Failure to fill out the form or incomplete information may result in loss of warranty coverage. - Page 82 This page left intentionally blank. 12-2...
-
Page 83: Warranty
Solutions products warranty statement. A complete warranty policy is available in our SeaStar Solutions products catalogue. For more information please visit our website: www.seastarsolutions.com/support-2/warranty-2/seastar-solutions-warranty 14.2 Return goods procedure Contact our warranty department at Marine.Warranty@dometic.com for instructions. 14.3 Technical support Phone: 604.248.3858 email: seastar@dometic.com Hours: Monday to Friday 05:00 –... - Page 84 This page left intentionally blank.
-
Page 85: Appendix A - Mounting Templates
Appendix A – Mounting Templates A.1 Joystick CAUTION! The helm may effect a ship’s or the autopilot’s compass. For less than one degree of effect keep the EPS helm and the compass a minimum of 8 inches (20.5 cm) apart. 1.02"... - Page 86 This page left intentionally blank.
-
Page 87: Control Head (Yanmar/Optimus
A.2 Control head (Yanmar/Optimus) CAUTION! The helm may effect a ship’s or the autopilot’s compass. For less than one degree of effect keep the EPS helm and the compass a minimum of 8 inches (20.5 cm) apart. 4 x 1/4" 1.5"... - Page 88 This page left intentionally blank.
-
Page 89: Appendix B - Setup And Tuning With Datalink
Appendix B – Setup and Tuning with Datalink B.1 Using Datalink The Optimus 360 uses the same Datalink dealer setup program as the standard Optimus EPS system. However, in order to communicate with the vessel command components the computer must be connected to the system via the CAN2 network rather than the CAN1 connection outlined in the Optimus EPS manual. - Page 90 TO CAN2 NETWORK TERMINATOR OTHER OPTIMUS 360 COMPONENTS OTHER OPTIMUS 360 COMPONENTS CM21106 CAN2 PROGRAMMING HARNESS CONVERTER 214720 CAN/COMPUTER HARNESS Figure B-1. Dealer kit connection.
-
Page 91: System Setup
B.2 System setup Basic system configuration is set through the color CANtrak display parameters. The display then broadcasts these settings to all the system devices connected to the network. Access the parameters by double-clicking on Main Color Display in the Datalink workspace, then clicking on the Configuration tab. -
Page 92: Settings Menu Access
B.2.2 Settings menu access Figure B-3. Display parameters. The adjustable steering settings are limited to those with Dealer Menu access by default. To allow users to adjust the steering settings, change the Settings Menu Access parameter to ‘All’. B.2.3 Cycle power to system Changes to system parameters will not take effect until the power has been cycled. -
Page 93: Joystick Tuning Procedure
B.3 Joystick tuning procedure The joystick setup procedure is organized into ten steps, detailed in the following sections. You will perform the majority of the procedure from the Setup tab (and its three sub-tabs) of the joystick’s Datalink interface. Figure B-4. Joystick Setup tab. NOTICE! The joystick tuning procedure will require maneuvering of the boat. -
Page 94: General Notes
B.3.1 General notes • The joystick tuning procedure consists of several steps, each of which may contain several sub-steps. To differentiate between these we use all capital letters to denote the main STEPS, and lower case letters to indicate the sub-steps. Example: Adjust the parameter as shown in step 7 of STEP 8. -
Page 95: Step 1 - Import Engine-Specific Settings
B.3.3 STEP 1 – Import engine-specific settings On the Setup tab of the Joystick interface, click Import Engine Specific Settings. A dialog will pop up, click Yes to confirm. A file selector will open. From the engine(s) listed, choose the one that matches yours and click Open. - Page 96 Figure B-8. Throttle Limits are found on the Setup tab. 2. Maximum Joystick Throttle (Forward) a. Slowly increase throttle until the engine reaches approximately 1800 RPM. b. Enter the throttle percentage in Port Max Forward Throttle. 3. Maximum Throttle at Idle (Reverse) a.
-
Page 97: Step 3 - Run Throttle Wizards
B.3.6 STEP 3 – Run throttle wizards The engine response wizards will use the values acquired in STEP 2 to develop a relationship between throttle and RPM that the joystick will use to improve its control of the vessel. Perform with boat safely secured, or in an open area. -
Page 98: Step 4 - Set Forward Heading Correction
7. If you changed the throttle parameters, repeat the wizard and recheck the results until the conditions are met. 8. Click Run Stbd Engine Forward Throttle Wizard to repeat this procedure for the starboard engine. The C LED will flash on the joystick to indicate the starboard wizard is running. -
Page 99: Step 5 - Balance Rotation Power
B.3.8 STEP 5 – Balance rotation power In this step you will tune the power ratio between the FWD and REV engines to yield tight circles in rotation (ROT) mode. Perform in an area with no wind or current to remove outside interference. 1. -
Page 100: Step 6 - Set Sideways Rudder Angle
B.3.9 STEP 6 – Set sideways rudder angle When moving sideways we don’t want the boat to rotate. We achieve this by tuning the Power Level vs Rotation Ratio map. Perform in an area with no wind or current to remove outside interference. This step only adjusts for rotation during sideways movement. -
Page 101: Step 7 - Balance Sideways Engine Power
B.3.10 STEP 7 – Balance sideways engine power In this step you will adjust the power ratio between the REV and FWD engines to eliminate fore/aft movement when moving the boat sideways. Perform in an area with no wind or current to remove outside interference. 1. -
Page 102: Step 8 - Adjust Power Levels
B.3.11 STEP 8 – Adjust power levels In this step you will customize the boat’s response by fine-tuning power levels associated with each direction. Note that large changes in these values can affect the rudder offset and FWD/REV ratios calibrated in STEP 4 through STEP 8. -
Page 103: Step 9 - Sea Trial
The joystick tuning (.ecu) file should be saved as a backup in the event of a joystick failure, or to facilitate setup of a second control station. You will also need to email a copy of the tuning file to Dometic as part of the post-installation warranty checklist (Part # 214740). Refer to section 9.2.10 in the Optimus EPS Installation Manual (Book 65) for instructions. -
Page 104: Adding A Second Control Station
B.4 Adding a second control station At a minimum, a second control station must consist of a helm, a control head, and an alarm buzzer. A secondary joystick and CANtrak display are optional. B.4.1 Configure the secondary helm and CANtrak display If the secondary helm and CANtrak display have not already been configured, refer to the Optimus EPS Installation Manual (Book 65) for instructions. -
Page 105: Importing A Joystick Tuning File
B.5 Importing a joystick tuning file The Import utility in Datalink allows you to copy an existing joystick tuning file into another joystick. This makes it easy to: • configure a second station joystick. • use a template tuning file to set up identical vessels without tuning every vessel individually. -
Page 106: Replacing A Joystick
All’ utility described in section 11.0 of the Optimus EPS Installation Manual (Book 65). If you have a situation in which you feel you need to update the joystick firmware on its own, please contact Dometic technical support. B.5.5 Basic import procedure 1. - Page 107 Figure B-17. Joystick instance setting for import. 5. The following confirmation dialog will be displayed. Click OK to accept. Figure B-18. Joystick import confirmation dialog. 6. Click Write to save the settings. At the subsequent prompt, click Yes. 7. The Optimus system requires a power cycle before use. Turn the ignition off, wait at least five seconds, then turn it on again.
-
Page 108: Yamaha Est Gateway Setup
B.6 Yamaha EST gateway setup Before configuring the EST gateway you should have already configured the PCM (section B.2) and cycled power to the system. If you haven’t done so, do this now. Note: when cycling the power it is important that you switch it off for at least ten seconds. -
Page 109: System
B.6.1 System Check that the Number of Engines and Number of Gateways parameters match the values entered into the PCM. If they don’t, open the PCM interface, make the changes to the PCM configuration, and cycle power again. Do not try to change the values in the gateway interface because they will be overwritten on... - Page 110 Figure B-21. Start LPS calibration. 2. The LPS Calibration Status field will change to read ‘Cal in Progress,’ and the Calibration Step field will read ‘Forward WOT’ as shown in figure B-22. Figure B-22. LPS calibration forward WOT. 3. Move both control levers to the forward WOT position.
- Page 111 4. The Calibration Step field will change to ‘Forward Detent.’ Move the levers to the correct position, and when the Calibration Step Status reads ‘Ready,’ click Save Calibration Point. 5. Continue in this manner through each lever position shown in the Calibration Step field.
- Page 112 _______________________________________________ Notes _______________________________________________ _______________________________________________ _______________________________________________ _______________________________________________ _______________________________________________ _______________________________________________ _______________________________________________ _______________________________________________ _______________________________________________ _______________________________________________ _______________________________________________ _______________________________________________ _______________________________________________ _______________________________________________ _______________________________________________ _______________________________________________ _______________________________________________ _______________________________________________ _______________________________________________ _______________________________________________ _______________________________________________ _______________________________________________ B-24...
- Page 113 _______________________________________________ Notes _______________________________________________ _______________________________________________ _______________________________________________ _______________________________________________ _______________________________________________ _______________________________________________ _______________________________________________ _______________________________________________ _______________________________________________ _______________________________________________ _______________________________________________ _______________________________________________ _______________________________________________ _______________________________________________ _______________________________________________ _______________________________________________ _______________________________________________ _______________________________________________ _______________________________________________ _______________________________________________ _______________________________________________ _______________________________________________ B-25...
- Page 114 _______________________________________________ Notes _______________________________________________ _______________________________________________ _______________________________________________ _______________________________________________ _______________________________________________ _______________________________________________ _______________________________________________ _______________________________________________ _______________________________________________ _______________________________________________ _______________________________________________ _______________________________________________ _______________________________________________ _______________________________________________ _______________________________________________ _______________________________________________ _______________________________________________ _______________________________________________ _______________________________________________ _______________________________________________ _______________________________________________ _______________________________________________ B-26...
- Page 116 Mobile living made easy. DOMETIC VANCOUVER 3831 NO.6 ROAD RICHMOND, B.C. CANADA V6V 1P6 www.dometic.com © 2020 DOMETIC PRINTED IN CANADA 01/21 ISO 25197:2020 Please scan FORM NO. 682114 REV. G this QR code and watch our latest Boating Safety video.
Need help?
Do you have a question about the OPTIMUS 360 and is the answer not in the manual?
Questions and answers