Table of Contents
Advertisement
Advertisement
Table of Contents

Subscribe to Our Youtube Channel
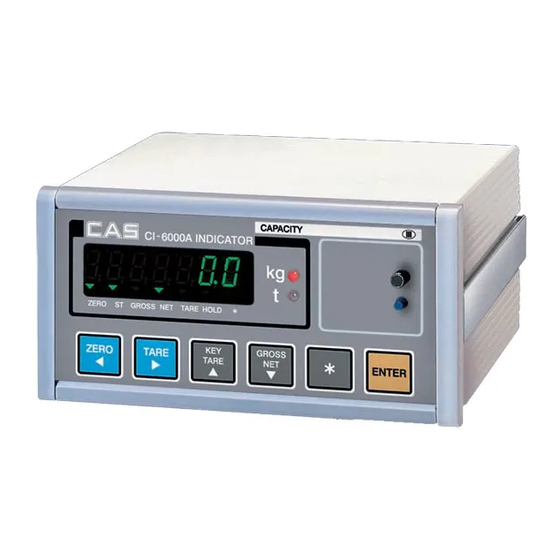
Related Manuals for CAS CI-6000A Series


Summary of Contents for CAS CI-6000A Series
- Page 2 Contents 1. Introduction ................. 4 2. Features ................6 3. Technical Specification ............7 4. Measure of Appearance ............ 9 5. Front Panel ................ 10 6. Rear Panel ................. 14 7. How to Install ..............15 8. Calibration Mode ............. 16 9.
- Page 3 We have designed this equipment with many advanced features, high quality construction, and user- friendly menu driven programming. CAS indicator is shaped firmly and delicately designed to coincide with the special requirements of several industrial fields and includes many functions and various external interfaces. Also, it contains help display functions to be used easily.
- Page 4 CAS feels that each of its valued customers should get the best service available. Whether it’s the initial installation of our product, maintenance/repair work, or simply answering questions about our products, CAS Corporation and all of its Authorized Dealers are highly trained to assist you with any need regarding CAS products.
- Page 5 2. Features 1) Features ■ High speed, High accuracy ■ The adoption of high speed micro processor ■ A/D conversion speed : Maximum 200 times/sec ■ Appropriate for weighing and measurement system ■ Easy operation and various options ■ Simple and prompt Full Digital Calibration (SPAC : Single pass automatic span calibration) ■...
- Page 6 3. Technical Specification ■ Analog Part & A/D Conversion Load Cell Excitation Voltage 8 x 350Ω load cells Zero Adjustment Range 0.05mV ∼ 20mV Input Sensitivity 0.6μV/D System Linearity Within 0.01% of FS. A/D Internal Resolution 1 / 1,000,000 A/D External Resolution 5,000 dd, 10,000 dd (Max) A/D Conversion Speed Maximum 200 times/sec...
- Page 7 ■General Specification AC 100 ~ 240V (50/60 Hz) Input DC +3.3V Digital Logic Power DC +24V External I/O DC +5V Analog, Load Cell AC 3.6V Product Size 192(W) x 189(D) x 96 (H) Temperature Range +60℃ ℃ Product Weight Approx. 2.4 kg...
- Page 8 4. Measure of Appearance...
- Page 9 5. Front Panel 1) VFD Display ■ Display Lamp( ▼) ZERO lamp Current weight is 0 kg ST lamp Weight is stable GROSS lamp Current weight is gross weight NET lamp Current weight is net weight TARE lamp Tare weight is saved HOLD lamp Lamp is on when HOLD function is activated Lamp is on only when “*”...
- Page 10 2) Keyboard You can use these keys as numeric keys Change the set value key increases set value and key decreases set value Change the position of cursor key moves one digit to right, key moves one digit to left Use 1 Enter tare weight Use 2...
- Page 11 ■ [ * KEY ] Used to set set-point value for batching operation. (Press * key for 3 seconds more and take off) You can select this function in set mode F23 0 : Do not use. 1 : PRINT Key. 2 : HOLD Key ■...
- Page 12 3) Slide Switch Calibration mode SW1 DIP 1 Switch DIP 1 on Go to calibration mode After calibration, it returns to weighing mode Switch DIP 1 off Set mode SW1 DIP 2 Switch DIP 2 on Go to set mode. Switch DIP 2 off After set mode, it returns weighing mode.
- Page 13 6. Rear Panel OPTION LOADCELL T250mA L250V COM2 COM1 CONTROL I/O RS-232 cable( 2 : TxD, 3 : RxD, 5,7 : Gnd ) - F33 = 1 ~ 4 function is enable (both of Set-point and Set- COM1 mode) to read and write - Computer, sub-display and printer RS-232 cable( 2 : TxD, 5,7 : Gnd) - F36 = 1 ~ 2 function is enable to read only...
- Page 14 7. How To Install 1) Load cell connection Connect load cell connector to load cell port which is in the backside CI-6000A * Connecting method 1 (EXC+) 2 (SEN+) 3 (EXC-) 4 (SEN-) 5 (SIG+) 6 (SIG-) 7 (SHIELD) Note 1. In case of 4 wires L/C connect EX+ with SEN+, and connect EX- with SEN-.
- Page 15 8. Calibration Mode 1) How to enter the Calibration Mode. Open the front cover of indicator and set SW1 DIP1 to on. At this time, message is shown on the display and is started. After done and off the SW1 DIP1, back to the weighing mode. 2) Availabe keys.
- Page 16 CAL 1 FUNCTION : Maximum Capacity Set (Range : 1 ~ 99,999) DISPLAY DESCRIPTION C = 05000 5000 kg Increase or decrease of number C = 0500.0 500.0 kg(First decimal point) Shift of cursor position ENTER : Save and go to next C = 050.00 50.00 kg (Second decimal point) menu...
- Page 17 CAL 3 FUNCTION : Setting Weight In Span CALIBRATION DISPLAY DESCRIPTION L=05000 5000 kg Increase or decrease of number Shift of cursor position ENTER : L=0500.0 500.0 kg (First decimal point) Save and go to next menu Note 1. The setting weight should be within the 10 % to 100 % of maximum weight 100% of maximum weight is set as a default but you can change it for your needs If the setting weight is under 10%, error message "Err 22"...
- Page 18 CAL 5 FUNCTION : Span Calibration DISPLAY DESCRIPTION Load the weight which was set in CAL 5 CAL 3 and press ENTER key. ENTER : Analog value of Span calibration. Span calibration load weight state Span calibration is finished. - - - You will go to micro span calibration(CAL 6) automatically.
- Page 19 CAL 7 FUNCTION : Weight Constant Calibration DISPLAY DESCRIPTION Enter password. FACtor Enter password. ENTER : Exit Note 1. Users do not have to use this menu, since it is used for calibration test without a weight.
- Page 20 4) Error Message (In CAL Mode) Error 20 ▣ Reason The resolution exceeds 1/10,000 ☞ Solution Lower the resolution. The resolution = allowed weight/one division. Modify the allowed weight in CAL1 or modify the division in CAL2 so that the resolution is below 1/10,000 Error 22 ▣...
- Page 21 Error 25 ▣ Reason Span value is too high Solution ☞ Load cell is damaged or setting of current resolution is not possible. Calibrate with less resolution Error 26 ▣ Reason Zero value is too high ☞ Solution Check whether the platter is empty Remove the setting cover and set SW2 DIP2 to on so that the zero value is increased.
- Page 22 5) Sealing Method ① Sealing method of cal switch ② Sealing method of Load Cell Connector...
- Page 23 9. Set Mode 1) How to go to set mode Open the front cover of indicator. set SW1 DIP2 to on. Then set mode is started. At this time, F01 message is shown on the display after “SET Mod” message. : You can select the menu that you want to set ①...
- Page 24 Batching Operation Function Zero Band Optional Preliminary Weight Preliminary Weight Final Weight Free Fall Weight High Limit Weight Low Limit Weight Timer - Start Delay Time Timer - Operating Delay Time of Finish Signal Measurement Mode Timer - Start Delay Time of Finish Signal Off Range of Finish Signal A Use of "*"...
- Page 25 Output the user’s message Date Change Time Change User’s Utility Set-point input type selection Load cell type selection Buzzer On/Off selection Options Select the Option Analog Out (Option -1) : 4~20mA Analog Out (Option -2) : 0~10V BCD Out (Option -3) : Output Logic of BCD Out Analog Output Adjustment at Display Zero Analog Output Adjustment at Maximum Capacity...
- Page 26 General function ① FUNCTION : Decimal Point Adjustment DISPLAY DESCRIPTION No Decimal Point (ex : 12345) Set value (ex : 1234.5) ( 0 ~ 3 ) (ex : 123.45) (ex : 12.345) FUNCTION : Weighing Unit DISPLAY DESCRIPTION Set value Kilogram (kg) ( 0, 1 ) Ton (t)
- Page 27 FUNCTION : Motion Detection Condition DISPLAY DESCRIPTION Stable lamp is off even with the change of only 1 division for 1 sec. Set value Stable lamp is on with changing of the weight below 5 division ( 00 ~ 99 ) for 3sec.
- Page 28 FUNCTION : ZERO, TARE & START keys Availability DISPLAY DESCRIPTION Set value Always ( 0 , 1 ) Works when weight is stable FUNCTION : Set Hold Type DISPLAY DESCRIPTION Average hold : Compute the average weight of oscillating weights Set value Peak hold : ( 0 ~ 2 )
- Page 29 FUNCTION : Free Fall Weight Set free fall weight which will be used in batching operation FUNCTION : High Limit Weight Set high limit weight which will be used in batching operation FUNCTION : Low Limit Weight Set low limit weight which will be used in batching operation FUNCTION : Timer –...
- Page 30 FUNCTION : Measurement Mode DISPLAY DESCRIPTION Do not use. Normal batching Customer Programmed Set value Control mode ( 0 ~ 4 ) Loss-in-Weight batching Normal batching Built-in automatic Program mode Loss-in-Weight batching FUNCTION : Timer – Start Delay Time of Finish Signal DISPLAY DESCRIPTION No delay time...
- Page 31 FUNCTION : A Use of “*” key DISPLAY DESCRIPTION Do not use Set value ( 0 ~ 2 ) PRINT key HOLD key Note 1. It is possible to print key (COM1 only) when the usage of COM2(F35) is to set 0. (F35 = 0).
- Page 32 FUNCTION : Device ID DISPLAY DESCRIPTION Set value Device No. 01 ( 00 ~ 99 ) Device No. 99 Note 1. It is used for identification of the indicator when system is connected. FUNCTION : Baud Rate of COM1 DISPLAY DESCRIPTION 600 bps 1200 bps...
- Page 33 FUNCTION : Output Mode of COM1 (RS-232) DISPLAY DESCRIPTION No data output Stream mode Set value Transmit one time only in stable condition after ( 0 ~ 4 ) Unloading to zero Transmit when data is required * Signal : device ID (F31 : Device ID) Command Mode Note 1.
- Page 34 (D, ID : 00~99, CR:0x0d, LF:0x0a) It is impossible to test with Print Key ( + Total Sum Print Key) ( Only possible when F35 = 0) ■ Format 1 [ Set Point Write :: COM1/COM2 Port available ] Write the Set-Point values to the CI-6000A with PC - Writing(Command) &...
- Page 35 ■ Format 3 [ Set Mode Write :: COM1 Port only ] Write the Set-Mode values [F01~F10, F18~F24, F40~F43, F50~F52] from CI-6000A with PC - Writing(Command) & Response Format ■ Format 4 [ Set Mode Read :: COM1 Port only ] Read the Set-Mode values from CI-6000A with PC - Command Format - Response Format...
- Page 36 FUNCTION : Band Rate of COM2 DISPLAY DESCRIPTION 600 bps 1200 bps Set value 2400 bps ( 0 ~ 5 ) 4800 bps 9600 bps 19200 bps FUNCTION : Usage of COM2 DISPLAY DESCRIPTION Set value Connection with printer ( 0 ,1 ) Connection with sub-display or computer FUNCTION : Output Mode of COM2 (RS-232, RS-422/485) DISPLAY...
- Page 37 FUNCTION : Output Format of COM1 and COM2 DISPLAY DESCRIPTION Transmit 22 byte of CAS Format Set value ( 0 ~ 2 ) Transmit 10 byte of CAS Format Transmit 18 byte of AND Format FUNCTION : Parity Bit DISPLAY...
- Page 38 : print, others : Do not print) Actually 1 data to 255 is printed. Note 3. Designate as follows if you want to add company name “CAS” on print format. P00-032( ASCII code 32 : Data start), P01-067( ASCII code 67 : character C)
- Page 39 P02-065( ASCII code 65 : character A),P03-083( ASCII CODE 83 :character S) P04-255( ASCII code 255: Data end) Note 4. ASCII code table CHA CODE CHA CODE CHA CODE CHA CODE CHA CODE CHA CODE SPACE “ & ‘ < >...
- Page 40 ⑤ User’s utility FUNCTION : Set-point Input DISPLAY DESCRIPTION Set value Disable external Set-point input ( 0 , 1 ) Enable external Set-point input FUNCTION : Load cell type DISPLAY DESCRIPTION Set value Compression or Tension Load cell ( 0mV ~ +40mV) ( 0 , 1 ) Compression and Tension Load cell (-- 20mV ~ +20mV) FUNCTION : Buzzer On/Off...
- Page 41 ⑥ Options FUNCTION : Select of Option DISPLAY DESCRIPTION Do not use Set value ( 0 , 2 ) Analog Out(Option – 1,2) BCD Out(Option – 3) FUNCTION : Output Logic – BCD Out DISPLAY DESCRIPTION Set value Positive Logic ( 0 , 1 ) Negative Logic FUNCTION : Analog Output Adjustment at Display Zero...
- Page 42 10. Test Mode 1) How to go to Test Mode Open the front cover of indicator. set SW1 DIP3 on. ① : Select test menu that you wish to test. ② Please select test menu with arrow keys and press ENTER key. : Test menu is selected.
- Page 43 TEST 2 FUNCTION : Display test DISPLAY DESCRIPTION ENTER: Go to menu tESt TEST 2 condition Selection mode Other keys : Perform test 8888888 TEST 2 is performed TEST 3 FUNCTION : A/D Conversion test DISPLAY DESCRIPTION : Change gain. tESt TEST 3 condition : Change filter...
- Page 44 Note 2. Please set F41(the kind of printer) in SET mode. Note 3. “Good” message is displayed if the printer connection is done correctly. Note 4. The test output format of printer is as follows: Computer Aided System CAS Corporation TEL 82-2-2225-3500 FAX 82-2-475-4668 TEST OK...
- Page 45 TEST 7 FUNCTION : Analog Output Test DISPLAY DESCRIPTION tESt TEST 7 condition : Output high value (20mA) ▲(Hi) (Lo) ▼ : Output high value (20mA) HiGH : Output maximum weight. HiGH ENTER: Go to menu (Adjust to 20mA) Selection mode ZEro : Output zero value Zero (Adjust to 4mA)
- Page 46 11. Weighing Mode 1) How to move Turn POWER switch on, and you will go to the Weighing Mode. 2) Available keys DESCRIPTION 1. Used to remove small variations in the indicator’s zero. 1. Used to weigh an item by using the container. 2.
- Page 47 3) External Control for Input / Output Interface ■ External input Pin No. SIGNAL LINE NAME DESCRIPTION 24, 25 GND (Input common) External input common ZERO input ZERO key operation TARE input TARE key operation START input Used as START key in batching operation STOP input Used as STOP key in batching operation “*”...
- Page 48 4) How to input the set-point code (00 ~ 49) There are two ways to input the set-point code ■ First way Press the ENTER key for 2 seconds to enter set-point (Set-point : 00~49) DISPLAY DESCRIPTION Code = 00 Set –...
- Page 49 5) How to input the set-point value There are four ways to input the set-point value ■ First way (F50 = 0 ) To enter set-point, press the * key for 2 seconds in weighing mode Note 1. Set F50 to 0 in set mode Note 2.
- Page 50 6) Set-point Condition Output is done according to the following condition in batching operation. MODE OUTPUT CONDITION COMMON Zero band output GROSS weight ≤ Zero band Optional preliminary NORMAL NET weight ≥ Final weight – Optional preliminary weight weight output Optional preliminary Loss –...
- Page 51 < Normal Batching Diagram > < Loss-in-Weight Batching Diagram >...
- Page 52 USER PROGRAM CONTROL MODE < Normal Batching >...
- Page 53 ■ You can operate external control for your needs in user program control mode. ■ External input and output signal is as follows. 1. Press TARE key so that the display shows 0kg (NET weight). 2. FIRST OUTPUT(Optional preliminary) : It is ON when the net weight is greater than the weight (Final - Optional preliminary).
- Page 54 USER PROGRAM CONTROL MODE < Loss-in-Weight >...
- Page 55 ■ You can operate external control for your needs in user program control mode. ■ External input and output signal is as follows. 1. FIRST OUTPUT(Optional preliminary) : It is ON when the gross weight is greater than optional preliminary weight. It is OFF when the gross weight is lower than final weight.
- Page 56 AUTOMATIC PROGRAM CONTROL MODE < Normal Batching >...
- Page 57 ■ Output/input is controlled according as the program of an indicator in utomatic program control mode. ■ External input and output signal is as follows. 1. Press TARE key so that the display shows 0kg (NET weight). 2. START INPUT: FIRST, SECOND, THIRD output is ON when START key is pressed. 3.
- Page 58 AUTOMATIC PROGRAM CONTROL MODE < Loss-in-Weight >...
- Page 59 ■ Output/input is controlled according as the program of an indicator in automatic program control mode. ■ External input and output signal is as follows. 1. FIRST OUTPUT (Optional preliminary) : It is ON when the gross weight is greater than optional preliminary weight. It is OFF when the gross weight is lower than final weight.
- Page 60 You pressed any key for long time or problem of key part Solution ☞ If there is no problem in key part, call your CAS dealer Error 08 ▣ Reason You have set the operating condition of ZERO key or TARE key not to operate when the indicator is not stable.
- Page 61 Error 14 ▣ Reason Gross weight is lower than final Weight in Loss-in-weight batching of Built-in automatic program mode OVER ▣ Reason The weight is exceeds maximum capacity of the indicator Solution ☞ Do not load the item exceeds the maximum tolerance. If the load cell is damaged, the load cell should be replaced...
- Page 62 Output Mode Command mode COM1,COM2 Data Format Data Out Format 22bytes and 10bytes of CAS, 18bytes of AND ①. 22 bytes of CAS - Data bit : 8, Stop bit : 1, Parity bit : None - Code : ASCII...
- Page 63 Byte 6 Byte 7 Byte 8 Byte 9 Error code ② 10 bytes of CAS - Data bit : 8, Stop bit : 1, Parity bit : None - Code : ASCII - Transmission data format (10 BYTE) DATA (8 byte) ③...
- Page 64 COM1, COM2 RS-232C Connection COM1 - TXD : 2 pin, RXD : 3 pin, GND : 7 pin COM2 - TXD : 2 pin, GND : 5 pin ㅇ ----------------------------- ㅇ 3 Transmit Data ----------------------------- ㅇ ㅇ 2 Receive Data ----------------------------- ㅇ...
- Page 65 COM2 RS-422 Connection COM 2 - OUT (+) : 8pin, OUT(-) : 9pin IN(+) : 6pin, IN(-) : 7pin - Transfer Mode : Same to the RS-232C interface Device ID 00 ~ 99 Baud Rate 600,1200,2400,4800,9600,19200bps Output Mode Stable, Stable or Unstable, Command mode Data Format : Same to the RS-232C interface(Only Tx of Indicator) - How to connect to the RS-485 port Rx(+):IN(+)⑥...
- Page 66 13. OPTIONS OP-1 Analog Output Interface (Current Output) ■ Set F56 to 1 in set mode. ■ Specification Output Current 4 – 20mA, 0 – 20mA, 0 – 24mA More than 1/2000 Resolution 0.01% Temperature Coefficient Maximum Load Resistor 500Ω MAX. ■...
- Page 67 ■ Switch setting Output 0 – 24mA 0 – 20mA 4 – 20mA Fixing or Flexibility Setting Set Mode Output Current F57(Min) F58(Max) 4000 20000 4 – 20mA Fixing 0000 20000 0 – 20mA 0000 24000 0 – 24mA When you use the Fixing Mode (SW4=SW5=0), you have to set one(1) of the SW1 &...
- Page 68 OP-2 Analog Output Interface (0-10V) ■ Set F56 to 1 in set mode. ■ Specification Output Voltage 0 – 10V More than 1/2000 Resolution 0.01% Temperature Coefficient ■ The output voltage is 0V when the display weight is "0". And the output voltage is 10V when the display weight is maximum capacity of the indicator. Output 0 –...
- Page 69 OP-3 BCD Output Interface Parallel BCD output is the interface that transmits the weight as BCD code. Inner circuit of input/output circuit is electronically disconnected by photo-coupler ■ Set F55 to 2 in set mode. ■ Transmission mode Output Logic Positive Logic, Negative Logic ■...
- Page 70 ■ 50 pin connector : CHAMP 57-40500(Amphenol) Female ■ TTL Open-Collector Output ■ SIGNAL LOGIC 1. BCD data output : Positive, Negative logic 2. Polarity output : “+” = High 3. OVER output : “OVER" = High 4. BUSY output : “BUSY”...
- Page 71 MEMO...
- Page 72 MEMO...
- Page 73 MEMO...
Need help?
Do you have a question about the CI-6000A Series and is the answer not in the manual?
Questions and answers