Table of Contents
Advertisement
Quick Links
Advertisement
Chapters
Table of Contents

Related Manuals for NTT docomo MONO MO01J


Summary of Contents for NTT docomo MONO MO01J
- Page 1 INSTRUCTION MANUAL ’16.10...
- Page 2 Introduction "Instruction Manual" (PDF file) Thank you for purchasing "MO-01J" mobile terminal. Explains the detailed information and operations of the functions. Before or while using the terminal, read this manual <From PC> https://www.nttdocomo.co.jp/english/support/ carefully to ensure safe use and handling. trouble/manual/download/mo01j/index.html * You can download the latest information.
- Page 3 Japanese only) (Notes and instructions ご利用にあたっての注意事項 for use) (in Japanese only) MO-01J main unit (with warranty) ■ ・ For optional accessories compatible with the terminal (optional), refer to NTT DOCOMO website. https://www.mydocomo.com/onlineshop/options/index.html (in Japanese only) SIM ejector (Sample) ■ Contents/Precautions...
- Page 4 Calling ............50 Contents Making a call ..............50 Receiving a call ..............52 ■ Basic package ............1 Operation during a call ............52 About using the terminal ........4 ■ Call history ................ 53 Safety Precautions (Always follow these directions) ■...
- Page 5 docomo backup ..............82 Appendix/Index ........117 Troubleshooting (FAQ) ............. 117 Settings ............. 85 Anshin Enkaku Support ........... 122 Settings menu ..............85 Warranty and After Sales Services ........123 Wireless & networks ............86 Software update .............. 125 Device ................91 Main specifications ............
- Page 6 ・ As with PCs, some user-installed applications or accessed About using the terminal websites may disrupt the stability of your terminal performance, or unexpectedly transmit information via the Internet causing improper use of your location information as well as personal information ・...
- Page 7 ・ If you want to use tethering, using Packet Pack/packet flat-rate requiring hospital admission for treatment or long-term hospital service is strongly recommended. attendance as an outpatient. ・ For details on usage charge, etc., refer to NTT DOCOMO website. Contents/Precautions...
-
Page 8: Table Of Contents
*2 Minor injury: This refers to injuries, burns (high- and low- "Precautions" are described in the following ■ temperature), electric shock, etc. that do not require hospital categories: admission for treatment or long-term hospital attendance as an Handling the terminal, adapter, and docomo nano UIM card outpatient. - Page 9 No liquids jack. Doing so may cause fire, burns, injury, electric shock, etc. For waterproofness, see the following. P.20 "Waterproofness/Dustproofness" → Use optional devices specified by NTT DOCOMO. Failure to do so may cause fire, burns, injury, electric shock, etc. Contents/Precautions...
-
Page 10: Handling The Terminal
If you notice anything unusual about the Keep the equipment out of the reach of babies and equipment such as an unusual odor, abnormal infants. noise, smoke generation, overheating, Failure to do so may cause accidental ingestion, injury, electric Don't shock, etc. - Page 11 If the display substance etc. contacts your eyes, Do not expose the camera lens to direct sunlight immediately rinse your eyes with clean water and for an extended period. see a doctor right away. Do not rub your eyes. Doing so may cause fire, burns, injury, etc. by the light-collecting Don't mechanism of the lens.
- Page 12 If you are wearing any electronic medical Be careful not to allow a pet etc. to bite the equipment, check with the relevant medical terminal. electronic equipment manufacturer or vendor Doing so may cause fire, burns, injury, etc. because of ignition, burst, heat or leaking of the internal battery.
-
Page 13: Handling The Adapter
If the substance etc. leaks out from the internal Watch the display in an adequately bright place battery, do not make it contact with your skin of taking a certain distance from it. face or hands, cloths, etc. Watching in a dark place or closely may reduce visual acuity etc. Don't Doing so may cause loss of sight, injury on your skin, etc. - Page 14 When you insert/remove a plug of AC adapter to/ Clean dust from the power plug. from power outlet, do not let it to contact with Using it with dust adhering may cause fire, burns or electric shock. metal objects such as metal strap. Don't Doing so may cause fire, burns, electric shock, etc.
-
Page 15: Handling The Docomo Nano Uim Card
Handling the terminal near electronic Immediately remove the power plug from an outlet medical equipment or accessory socket if liquid such as water (drinking water, sweat, seawater, urine of pet Unplug animals, etc.) enters inside. WARNING Doing so may cause fire, burns, electric shock, etc. Before cleaning, remove the power plug from an If you use an implantable cardiac pacemaker or outlet or accessory socket. -
Page 16: Material List
Material list ■ SIM ejector Surface Part Material ■ MO-01J main unit treatment Surface SIM ejector SUS301 None Part Material treatment Handling the sample (SIM ejector) Exterior case (ring) PA resin + 50% GF UV coating Exterior case (side face) PC resin Coating WARNING... - Page 17 Or ・ Use optional accessories specified by NTT DOCOMO. putting them on your body, humidity of sweat may cause internal Using optional accessories other than specified may cause a corrosion and malfunction.
- Page 18 PC, or cloud service, or keep a separate note. Replace the internal battery if the terminal has extremely short NTT DOCOMO is not liable for any loss of saved data. operation time on a full charge, though it may vary by operating ・...
- Page 19 UIM card. ・ When you use the power outlet with a mechanism to prevent NTT DOCOMO is not liable for any loss of saved data. ・ the plug from being removed, follow the instructions on the Take an expended docomo nano UIM card to a sales outlet outlets user's manual.
- Page 20 ・ Bluetooth function precautions Cautions on using Bluetooth devices The operating frequency band of the terminal is used by industrial, ・ This terminal is equipped with the security features, that are scientific, consumer and medical equipment including microwave compliant with Bluetooth standards for communication via ovens, premises radio stations for identifying mobile units used in the manufacturing lines of plants (radio stations requiring a license), Bluetooth.
- Page 21 Note - If there are multiple wireless LAN access points nearby and the same channel is used, search may not work correctly. ・ ・ 2.4GHz device cautions Never use a remodeled terminal. Using a remodeled terminal The operating frequency band of the WLAN device is used by violates the Radio Law/Telecommunications Business Act.
- Page 22 - Wash the terminal without rubbing hard. Waterproofness/Dustproofness To ensure waterproofness/dustproofness MO-01J provides waterproofness property of IPX5 , IPX7 To avoid water ingress, be sure to observe the following and dustproofness property of IP5X with the docomo nano points. UIM card/microSD card slot cover firmly attached. ・...
- Page 23 It is recommended to replace the parts for maintaining waterproof/dustproof property once every two years regardless of whether any abnormality is present. DOCOMO replaces the parts as a chargeable service. Bring the terminal to a sales outlet such as a DOCOMO-specified repair office. Important precautions Do not perform actions shown in the illustrations below.
- Page 24 ・ Draining water Do not put the terminal in hot water, use it in a sauna or apply hot airflow (from a hair dryer etc.) to it. ・ Do not move the terminal in water or slam the terminal against the When the terminal is wet, water may flow out after wiping it off;...
- Page 25 Notes on charging Swing the terminal about 10 times against a dry, clean cloth etc. to wipe off any water remaining in the earpiece, microphone/sub-microphone, speaker, stereo earphone Check the following before and after charging. ・ jack, microUSB jack, key, docomo nano UIM card/microSD Never charge the battery when the terminal is wet.
- Page 26 docomo nano UIM card/microSD card slot cover Before Using the Terminal There is a tray for docomo nano UIM card/microSD card. Volume key Mute key Set/cancel the silent mode. → P.30 Strap hole Part names and functions In-camera Earpiece Proximity/Light sensor Left Front Right...
- Page 27 ・ For details on the docomo nano UIM card, refer to the docomo nano UIM card manual or NTT DOCOMO website. Security code for docomo nano UIM card The docomo nano UIM card has a security code called a PIN code.
- Page 28 Draw the tray straight Insert the tray into the terminal ・ Check the orientation of tray to install correctly. With the IC side facing up, set the docomo Close the docomo nano UIM card/microSD card nano UIM card into the tray slot cover P.20 →...
- Page 29 ・ Take out the docomo nano UIM card from the If the SIM ejector is lost or damaged, you can use a paper clip instead. tray Charging Precautions on charging ・ If you use applications while charging, it may take time to complete Insert the tray into the terminal →...
- Page 30 ・ When the battery usage time per one charge becomes about half LED indicator of that at the time of purchase, replacing the internal battery is AC adapter recommended because the internal battery is near the end of life. Available charging adapter For details, refer to the operation manual of AC adapter or DC adapter.
- Page 31 Charging with a PC Basic operations You can charge the terminal via a PC using Micro USB Cable 01 (optional) etc. Using the touch panel Touch the touch panel directly to operate the terminal. Turning power on/off Notes on using the touch panel Turning power on Touch panel is designed for being touched lightly with fingers.
- Page 32 Touch and hold Flick Touch the screen for a while. Some operations can be operated by Touch the screen and sweep the finger quickly. keeping touching the screen with a finger. Drag/Slide (Swipe)/Pan Drag : Touch an item or icon on the screen and move it to the desired position.
- Page 33 ・ Even in silent mode or regardless of the volume settings, shutter Information ◆ sound for still image shooting, shooting start/end sound for video ・ Alternatively, from the Home screen, → [Disaster kit] → → recording, auto focus lock sound, count down sound for self-timer, [OK] to set Emergency mode.
- Page 34 ■ QWERTY keyboard Character entry Enter in Roman character. ・ Depending on character key, multiple characters, symbols, numbers are assigned to a key. When you touch and hold a target Enter characters using software keyboard appeared by tapping key, appears at the lower right of character that is displayed a character entry field.
- Page 35 Change the keyboard size Delete a character at the left side of cursor ・ Drag it to change the keyboard to a desired size. Move the cursor right : Activate voice input : Enter space : Display characters assigned to a key in reverse order : Convert characters : Undo the last operation : Enter a space/Convert characters...
- Page 36 iWnn IME setting ■ Toggle input Tap a key assigned the character you want to enter consecutively From the Home screen, [Settings] → [Language until the desired character is displayed. ・ & input] [iWnn IME] To enter a voiced sound/semi-voice sound/contracted sound/ →...
- Page 37 Editing text Initial settings You can copy texts in the character entry field, web page, or received mail and cut and paste texts, register words in the character entry When you turn on the terminal for the first time, make initial field.
- Page 38 Remote Initialization Service : Set Remote Initialization Display/Icon Service. ・ It appears when docomo apps password is set. Install all apps setting : Install applications necessary for using Keys on the navigation bar docomo services you subscribed all at once. Navigation keys appear on the navigation bar shown at the bottom of [Start using] the screen.
- Page 39 Icons on the status bar : Hidden notifications Main status icons ■ The status bar along the top of the screen shows notification icons : Signal conditions and status icons that allow you to check various conditions. : Out of service area Notification icon Status icon : During international roaming...
- Page 40 Notification panel Information ◆ ・ To close the Notification panel, flick the Notification panel upward, Flick the status bar downward to open the Notification panel. In the or tap (Back). Notification panel, you can check information of notification icon or make settings.
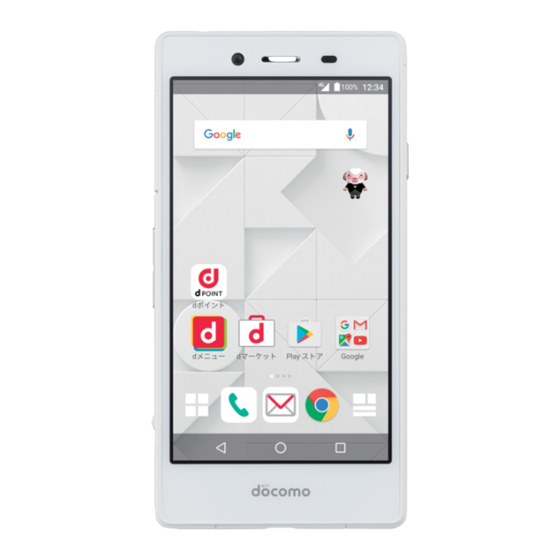
- Page 41 ・ Location P.76 → ・ Flashlight : Switch ON/OFF of the light. Information ◆ ・ To close the quick settings panel, flick the quick settings panel upward, or tap (Back). ® "ひつじのしつじくん (Butler Sheep)" ©NTT DOCOMO Before Using the Terminal...
- Page 42 ・ Depending on the setting of "Screen lock" ( P.98), → authentication is required after tapping on the lock screen. ・ on the lock screen to activate the camera. ・ on the lock screen to activate Shabette concier. Information ◆ ・...
- Page 43 You can locate applications or widgets in the Home screen. ® "ひつじのしつじくん ・ Applications located on the Home screen cannot be displayed in (Butler Sheep)" ©NTT DOCOMO the application list screen. Widget Touch and hold an area of the Home screen Activate widget (Google Search). Machi-chara where no applications etc.
- Page 44 Touch and hold an application/widget → Drag it Information ◆ to the Home screen display area at the bottom ・ To delete a folder, touch and hold a folder → Drag it to [Remove from of the screen Home]. The folder is deleted and stored applications are moved to the application list screen.
- Page 45 Changing the wallpaper Adding/Sorting/Deleting home screen You can change wallpaper of each page of the Home screen. Up to 7 home screens can be set. Display a page of the Home screen to change Touch and hold an area of the Home screen the wallpaper, touch and hold an area where no where no applications etc.
- Page 46 Option menu Application list screen Application list screen The options menu such as Kisekae, settings, etc. are displayed. Recommends button In the application list screen, you can activate applications or Install applications recommended by DOCOMO. → P.47 locate applications or widgets in the Home screen. Indicator (appears in each tab) ・...
- Page 47 Pre-installed application list Anshin Scan : An application that allows you to use your smartphone with peace of mind. It detects viruses, helps you Applications displayed on the Home screen or the application list understand which applications use your personal data, and alerts you screen by default are as follows.
- Page 48 (Manereko) : A banking app that allows you to check the マネレコ "docomo Data Copy" depending on version of the application. For balance of your bank account, details of your credit card, etc. details of docomo Data Copy, refer to NTT DOCOMO website. Messaging : Send/Receive SMS. P.60 →...
- Page 49 Managing the application list Installing "Recommends" application Moving applications In the application list screen, touch and hold an Install applications recommended by DOCOMO. application Drag it to a destination → From the Home screen, [Recommends] → Moving to the Home screen : In the application list screen, ・...
- Page 50 Select an application My Magazine The screen of selected application location is displayed and the icon is selected. My Magazine is a search service for displaying articles for categories you selected. By your tendency of read articles or Backing up and restoring the profile information, the more you use, the more it comes close to your preference.
- Page 51 Category setting You can select categories for information you want to view in My Magazine. From the Home screen, The list screen divided by genres appears. → [Display category setting] → Mark the category you want to display Information about the home application You can check version of the home application.
- Page 52 Calling When a call is ended, [END CALL] Information ◆ ・ With VoLTE, you can make high-quality voice and video calls. Making a call To use VoLTE, both parties must meet the following requirements. - Both terminals support VoLTE - Both parties are in a VoLTE service area From the Home screen, - "Preferred network type"...
- Page 53 ・ purposes, etc., they may decide to obtain your phone number and For WORLD CALL, refer to NTT DOCOMO website. accurate location information from your GPS, regardless of your From the Home screen, [Dial] + (Touch →...
- Page 54 Receiving a call Operation during a call Example When a call is received in sleep mode The following operations are possible in the screen during a 〈 〉 call. A call is received ・ You can adjust call volume with the volume key while dialing/during The incoming call screen (full-screen) appears.
- Page 55 Incoming tab Information ◆ Display received call history only. ・ → Put a checkmark to [Mute] to set Mute. Outgoing tab ・ When you subscribe to the Call waiting service, during a voice call, Display dialed call history only. Tap [Add call] to make a call to another person. →...
- Page 56 Answering Machine Call settings Set Answering Machine or play/delete recorded message. Make various settings for DOCOMO network services, call and Internet call. From the Home screen, [Call settings] → → → From the Home screen, → → [Call settings] [Answering Machine] Set each item Set each item Network service : The following DOCOMO network services are...
- Page 57 Reject call setting : Make settings for rejecting calls. Contact docomo : Make a call to each inquiry office ; " ドコモ故 ・ Tap the button at the top right of the screen to turn [Reject call 障問合せ (DOCOMO repair office)", " ドコモ総合案内・受付...
- Page 58 ・ The proximity sensor does not respond well to black objects. Phonebook If hair is blocking the earpiece as you bring the phone to your ear (when receiving a call), the proximity sensor may have trouble working and cause the call to not pick up. In this case, place the You can register phone numbers, email addresses, etc.
- Page 59 Deleting a phonebook entry Search Search contacts. Register → P.57 In the phonebook list, select a contact to delete Register a new phonebook entry. → → [Delete] → [OK] Logging in to/out from cloud ・ In the phonebook list, → Tap [Delete contact] to select and Display submenu delete contacts.
- Page 60 Registering a contact to a group Outgoing button Make a call. In the phonebook list, [Group] Information ◆ Select a group [Add member] Put a → → ・ on the profile screen to operate sharing, etc. ・ checkmark to a contact to add [OK] [OK] →...
- Page 61 My profile You can check your own phone number. You can also register or edit your own information. From the Home screen, [ ドコモクラウド (docomo cloud)] → [docomo phonebook] [My profile] [Edit] → Set required items → [Save] ・ To perform Send My profile, tap [Send My profile] and →...
- Page 62 [Send message] → Enter a message → computers. For details of docomo mail, refer to NTT DOCOMO website. Information ◆ https://www.nttdocomo.co.jp/service/docomo_mail/ (in ・ SMS can be also sent to or received from the parties using Japanese only) overseas network operators.
- Page 63 Displaying messages (SMS) → Enter a mobile phone number → ・ to select from contacts. From the Home screen, [Messaging] → Deleting a message (SMS) The thread list screen appears. ・ Sent/received message (SMS) is displayed in thread by From the Home screen, [Messaging] →...
- Page 64 Message validity : Set validity for message (SMS) to send. Early Warning "Area Mail" Gmail Area Mail is a service which allows you to receive earthquake early warning or tsunami warning delivered by the You can use email provided by Google or other general Meteorological Agency, and disaster/evacuation information providers.
- Page 65 [Early Warning "Area Mail"] → Select an Area Chrome Mail Deleting Area Mail You can view web pages like on a PC by using "Chrome" application. You can use the Chrome application via packet communication From the Home screen, [Disaster kit] →...
- Page 66 Displaying a web page in incognito tab Adding a bookmark to display the web page You can browse web pages without viewing history and search history. Adding a bookmark While displaying a web page, [New → incognito tab] While displaying a web page, →...
- Page 67 Information ◆ ・ In some web pages, downloading of files etc. may not be available. Setting the browser While displaying a web page, → [Settings] Set each item Mail/Web browser...
- Page 68 Apps dmarket dmarket provides a variety of services, offering digital content, such as music, videos, and books, and giving you access to a shopping site, travel booking site, and other sites. (dmenu) メニュー From the Home screen, [dmarket] Top screen of dmarket appears. In dmenu, you can easily access sites recommended by ・...
- Page 69 The terminal may be infected with a virus and the data may be damaged. Google Play screen appears. ・ NTT DOCOMO is not liable for malfunctions, if any, caused by the Search an application → Select an application application you installed. In such case, the repair is charged even during the warranty period.
- Page 70 When shooting under low light conditions, in ・ For details of ToruCa, refer to NTT DOCOMO website. particular, white lines or random color dots are likely to appear as noises. This is not a malfunction.
- Page 71 Shooting with auto shooting screen About the Copyright and Portrait rights From the Home screen, [Camera] Avoid reproducing, altering, or editing taken or recorded pictures or sounds using the terminal without the copyright holders The auto shooting screen appears. authorization, because, except for personal use etc., they are prohibited by the Copyright law.
- Page 72 ・ When you tap an object in the shooting screen, a white focus frame appears around the object and then changes into green if the focus is fixed. If you do not tap the shooting screen, a focus frame is displayed at the center of the screen automatically to focus on.
- Page 73 Common settings Shutter button ■ Switch of still image/video They are the setting items common to still image and video. Settings menu Geo-tagging : Put a checkmark to add location information acquired when shooting to the shot data. Displaying an object →...
- Page 74 Shutter button ( Start/ End) Gallery Switch of still image/video Settings menu Switch the shooting mode P.72 → You can view or play still images or videos shot with the camera or downloaded to the terminal. Displaying an object (Start) →...
- Page 75 Tap the tool icon to edit Information ◆ ・ (Filter) : Select [Style] or [Old Fashioned] and tap the image When the album list display is switched to [Date], data can be effect. viewed in a list with the plates of year and month and the included (Modify) : Select from [Crop], [Straighten], [Flip] and then data.
- Page 76 Select a song/video Media Player A play screen appears. ・ When you select [Artists]/[Albums], select artist name/album You can use the Media Player to play music/video and music/ until music/video you want to play is displayed. video contents downloaded from dmarket. ■...
- Page 77 Using Playlist SNS sharing Share the music information using LINE, Twitter or Facebook. When using a sharing application for the first time, follow the Register songs to the playlist to play songs only you like. onscreen instructions. From the Home screen, [Media Player] →...
- Page 78 ・ Some wireless communication products (mobile phone, data Location/GPS detectors and some others) block satellite signals and also causes instability of signal reception. ・ Some map displays based on location information (latitude/ You can use the GPS function on the terminal and a compatible longitude information) may be not accurate due to some countries’...
- Page 79 [Mode] → Select a mode Schedule ・ By default, "Battery saving" is selected for saving the battery consumption. To use GPS for improving information accuracy, You can manage your schedule. set to "High accuracy" mode. From the Home screen, [ (docomo ドコモクラウド...
- Page 80 Displaying schedule Information ◆ ・ To display the world clock on the clock screen, on the clock screen, Display information of registered schedule. Mark cities. → On the calendar screen, select a date of ・ You can make settings of the clock by tapping on the clock screen.
- Page 81 Enter time → Sound Recorder The countdown starts. When the countdown ends, Recording sound Pausing the countdown : During the countdown, ・ To restart the countdown, tap From the Home screen, [Sound Recorder] → Resetting the countdown : While pausing the countdown, When recorded data exists, a list of recorded files appears.
- Page 82 Editing recorded files Calculator From the Home screen, → [Sound Recorder] From the Home screen, [Calculator] → Touch and hold a recorded file Calculate The menu appears and you can operate [Delete], [Share], [Rename], [Edit], [Detailes], [Set as ringtone]. Deleting the input numbers and symbols : [DEL] Deleting all mathematical expressions : [DEL] (Touch and...
- Page 83 Editing and managing notes Note From the Home screen, [Note] → You can create voice notes, handwriting notes, still image/ A note list screen appears. video notes, etc. ・ Tap the bottom part of note to operate the following. - Edit : Edit the note. Creating and saving notes - Share : Share the note.
- Page 84 → [Unlock] → Enter a password. For details of "docomo Data Copy", refer to NTT DOCOMO website. ・ If the battery is low, backup or restore may not be done. In that case, charge the terminal and retry to back up or restore.
- Page 85 [Backup] → Select data to back up → [Start Information ◆ backup] [Backup] Enter docomo apps → → ・ Do not remove the microSD card from the terminal during backup password [Done] → or restoration. Data may be damaged. ・ If phonebook item names (e.g.
- Page 86 Information ◆ ・ With Periodical backup, you can back up specified item data to the Data Storage BOX automatically every month. ・ Note that use of Periodical backup may cause high packet communication charge. Restoring From the Home screen, → [docomo backup] →...
- Page 87 Menu Page Settings Personal docomo service/cloud P.95 Smart cover P.96 Navigation key P.96 Location P.76 Settings menu Security P.96 Accounts P.100 You can make various settings in the menu displayed from the Google P.100 Home screen, [Settings]. Language & input P.100 Menu Page...
-
Page 88: Wi-Fi
・ To connect Wi-Fi network with WPS compatible device, → Wireless & networks [Advanced] → [WPS Push Button]/[WPS Pin Entry] → Follow the onscreen instructions. Wi-Fi Information ◆ ・ Even when Wi-Fi is ON, mobile network is available. With Wi-Fi function, you can connect to an access point for your When a Wi-Fi network is disconnected, connection is automatically home, company network or public wireless LAN services to use mail switched to mobile network. -
Page 89: Data Usage
Enter a network SSID of Wi-Fi network to add → Keep Wi-Fi on during sleep : Set whether to keep or disconnect Wi-Fi connection when the terminal is in sleep mode. Select security You can set to keep the connection only when charging the ・... -
Page 90: More
Tethering & portable hotspot of [Data enabled] to set it ON ( Data usage volume (estimate) per period or per application Tethering is a function that allows devices connected via USB cable, appears. Wi-Fi, or Bluetooth communication to connect to the internet by using ・... - Page 91 Portable Wi-Fi hotspot Wi-Fi hotspot sleep notification You can use the terminal as a Wi-Fi access point to connect Wi-Fi Set to notify you when Portable Wi-Fi hotspot is turned off. devices to the Internet . From the Home screen, [Settings] [More] →...
- Page 92 The access point for accessing the internet (sp-mode) is registered by From the Home screen, [Settings] [More] → → default and you can add or change it if necessary. ・ For details of sp-mode, refer to NTT DOCOMO website. [VPN] https://www.nttdocomo.co.jp/service/spmode/ (in Japanese only) ・ Set each item [SAVE] +...
-
Page 93: Device Display
Adding an access point Device ・ Do not change the MCC/MNC to other than 440/10. The setting disappears from the screen. Display From the Home screen, [Settings] [More] → → [Mobile networks] [Access Point Names] → Set screen brightness or auto-rotate screen. From the Home screen, [Settings] [Display] →... -
Page 94: Sound & Notification
Screen brightness Do Not Disturb access : Manage applications that access notification contents which are not notified by setting of [Do not From the Home screen, [Settings] → [Display] → disturb]. [Brightness level] Volumes Slide the slider to adjust the brightness You can adjust volume of media playing sound, alarm sound, ringtone. -
Page 95: Apps
Apps Disabling applications Disabling application is available for some applications and services Manage, delete, etc. installed applications. that cannot be uninstalled. Disabled applications are not displayed in Viewing application information the applications list screen or the Home screen, or cannot be launched either. -
Page 96: Power Manager
Unmounting microSD card Power manager Cancel mount of microSD card (reading and writing are possible). Check the remaining amount of battery, etc. From the Home screen, [Settings] [Storage] → → From the Home screen, [Settings] [Power → of [SD card] manager] The microSD card is unmounted. -
Page 97: Memory
Battery saver Personal To reduce battery power consumption, restrict vibrator, location services, etc. docomo service/cloud ・ When the battery saver is activated, the status bar and navigation bar turn to orange, and is displayed. Make settings for docomo service or cloud. From the Home screen, [Settings] →... -
Page 98: Smart Cover
Navigation key docomo service initial settings : Set docomo service settings all at once. Switch USB debugging : Configure settings for using a Change the function for assigning to the navigation key. dedicated terminal at a docomo Shop. From the Home screen, [Settings] [Navigation →... - Page 99 Shop, or at docomo Information Center or " お客様サポート (Customer support)". It can be set any number at the subscription and also changed later by yourself. ・ For details on network security code, refer to NTT DOCOMO website. https://www.nttdocomo.co.jp/english/support/trouble/password/ network/ Settings...
- Page 100 Setting screen unlock method ■ PIN code You can set up a security code called a PIN code for your docomo Set a unlock method for the screen lock when turning the power on, nano UIM card. At the time of subscription, the code is set to "0000", or displaying the screen by canceling sleep mode which you can change by yourself.
- Page 101 When you forget unlock method Changing PIN code ・ ・ When you set the unlock method requiring authentication, if you fail PIN code can be changed when [Lock SIM card] is set to ON. unlocking screen lock 5 times or more, the unlocking operation From the Home screen, [Settings] [Security] →...
-
Page 102: Accounts
Accounts ■ To sync manually From the Home screen, [Settings] → [Accounts] Add or delete accounts. ・ Setting up your Google account allows you to use Google services Select an account type → Select an account → such as Gmail or Google Play. You can set multiple Google [Sync now] →... -
Page 103: Backup & Reset
Resetting the terminal Google voice typing : Set for the Google voice typing. iWnn IME : → P.34 If you reset the terminal, all applications you installed and saved data Moji-Henshu : Check detail of ドコモ文字編集 (docomo moji are erased. henshu) application. -
Page 104: Date & Time
Accessibility System Set for assistance of user operations. Date & time From the Home screen, [Settings] → [Accessibility] Set for date and time. ・ Set each item When [Automatic date & time]/[Automatic time zone] is OFF, you can set date & time and time zone manually. おすすめ使い方ヒント... -
Page 105: About Phone
About phone Display various information about the terminal. From the Home screen, [Settings] [About → phone] Check items Software Update : P.125 → Status : Display the battery status or battery performance, SIM status, etc. Legal information : Display the details of open source license, Google terms of use, etc. - Page 106 Folder Saved data File management Podcasts Files from Podcast (e.g. (/Internal storage/Podcasts) programs delivered via the Internet) Ringtones Phone ringtone (/Internal storage/Ringtones) Storage structure microSD card (External storage) The terminal (Internal storage) microSD card Created folders in the internal storage by default are as follows. ・...
- Page 107 Installing/Removing microSD card ■ Removing Open the docomo nano UIM card/microSD card slot cover → ・ Before installing/removing, cancel mounting (reading/writing P.20 available) ( P.94) and turning OFF the power. → Insert the tip of SIM ejector into the hole for removing the ・...
- Page 108 Information ◆ File operations ・ To create a new folder, select a storage in the storage list → Select a folder if necessary → You can manage data saved in the internal storage of the ・ To delete all folders/files registered to "Favorite" category, tap terminal and microSD card.
- Page 109 ・ Place a Bluetooth device as far as possible from other electric Data communication appliances, audio visual devices and office appliances. A microwave oven strongly affects the connection when it is operated. Connection may not be established correctly when other devices are powered on, or the connection may cause noises on TV or radio or reception difficulty.
- Page 110 Bluetooth function On/Off ■ When connection is requested from another Bluetooth device Set Bluetooth to On to use Bluetooth function. When you do not use If a Bluetooth pair setting request screen appears, confirm a pass Bluetooth, set it to Off in order to reduce the battery power code (PIN) and tap [PAIR].
- Page 111 Canceling connection with a Bluetooth device From the Home screen, [Settings] → [Bluetooth] to set it On ( Tap a device to cancel the connection [OK] → Unpairing from Bluetooth device From the Home screen, [Settings] [Bluetooth] → to set it On ( of a Bluetooth device →...
- Page 112 Information ◆ External device connection ・ When a microSD card is not mounted on the terminal, the microSD card cannot be recognized by a PC. In such case, from the Home screen, [Settings] [Storage] [SD card] Tap [MOUNT] and then →...
- Page 113 Printing Example Printing a web page browsed with Chrome 〈 〉 While displaying a web page, → [Print...] Select a printer Operate following the → onscreen instructions Information ◆ ・ Operation steps for printing vary by application. External device connection...
- Page 114 ・ For Country codes, International call access number, Universal Before leaving Japan number international prefix, supported countries/areas and network operators, refer to NTT DOCOMO website. To use the terminal overseas, check the following in Japan. Subscription ■ Check if you subscribe WORLD WING. For details, contact "General Inquiries"...
- Page 115 ■ ・ Overseas usage charges (call and packet communication) differ To perform packet communication overseas, set Data roaming from those in Japan. For details, refer to NTT DOCOMO website. settings to ON. ・ Some applications perform communication automatically. Packet From the Home screen, [Settings] [More] →...
- Page 116 ON, the date, time and time differences of the terminal clock are ・ For details on available countries, network operators, etc., refer to corrected by receiving the information related to time and time NTT DOCOMO website. differences from the network of overseas network operator you connect to. From the Home screen, ・...
- Page 117 Making calls inside the country you stay ■ Having someone make a call from other than Japan to the country you stay You can make a call to the other party's land-line phone or mobile You have to receive a call through Japan no matter where you are; phone in the same way you do in Japan.
- Page 118 International dial assist : P.116 Incoming call notification while roaming (charges apply) : → Network service : → P.116 → P.115 Roaming guidance (charges apply) : → P.115 Setting the international dial assistance Voicemail service (charges apply) : Take messages from callers when you are in a place where the radio wave does not From the Home screen, [Call settings]...
- Page 119 AC adapter is connected to the terminal correctly. diagnosis by yourself. P.28 → For details, refer to NTT DOCOMO website. ・ When using Micro USB Cable 01 (optional), check if the PC is https://www.nttdocomo.co.jp/english/support/trouble/repair/ turned on. ・...
- Page 120 ■ Terminal operation The screen reacts slowly when you tap or press keys ● When large amount of data is saved in the terminal or Become hot while operating/charging ● transferring large-size data between the terminal and microSD ・ While calling, depending on the radio wave condition or call card, the reactions on the screen may be delayed.
- Page 121 To exit the safe mode, turn power OFF and then ON. Cannot call (Even when moving, does not disappear, or ● * Back up the necessary data before using safe mode. although radio waves are enough, making/receiving calls is unavailable.) * Some widgets may be removed.
- Page 122 ■ Mail The terminal suddenly became unavailable while using ● overseas Cannot receive email automatically ● Check if usage amount exceeds the limit of maximum charges When Emergency mode is ON, email cannot be received for use. For use of "International roaming (WORLD WING)", the automatically.
- Page 123 Error messages ■ Bluetooth function The terminal cannot be connected to a Bluetooth ● Cellular network not available. communication device/A Bluetooth communication ● ・ The terminal is out of service area, or the received signal is too device cannot be found by search weak.
- Page 124 Please turn it on later. By sharing screens of your terminal with NTT DOCOMO, you The light may turn off automatically if it has been used for a long can receive technical support to make settings, use time, or temperature of the main unit becomes high.
- Page 125 Enter connection number notified by DOCOMO Warranty and After Sales Enkaku support starts when you are connected Services Warranty ・ Make sure that the warranty is received with the terminal upon purchase. Check to be sure that " 販売店名 ・ お買い上げ日 (the name of the retailer, date of purchase)", and other items have been filled out on the warranty before storing it in a safe place.
- Page 126 Within the warranty period discontinued. ・ We repair the terminal free of charge based on the terms For details on repair reception, refer to NTT DOCOMO website. documented in the warranty. https://www.nttdocomo.co.jp/support/trouble/repair/shop/ ・ When requesting a repair, make sure to bring the warranty card compatible/index.html (in Japanese only)
- Page 127 (Software Update) in the The terminal is waterproof. If inside of the terminal gets wet or status bar or information on the NTT DOCOMO website. Software moist, however, turn the power off, then bring the terminal to a repair office as soon as possible. Note that repair may not be update includes the following, etc.
- Page 128 ・ All key operations are disabled while installing and the installation ・ For update available period, refer to NTT DOCOMO website. cannot be stopped on the way. ・ When the update is complete, the terminal restarts. Updating software ・...
- Page 129 ■ When the icon does not appear in the status bar [Download and install]/[Download] Perform the update as follows. Download and install : After downloading is complete, the installation is performed automatically. Installation is performed From the Home screen, [Settings] →...
- Page 130 Updating applications Main specifications After the update is done, check if updates for applications are available. Without updating applications, operations may become ■ Phone unstable or functions may not work properly. Be sure to update to the latest version. Product name MO-01J ・...
- Page 131 Image pickup Type Out-camera : Backside-illumination Earphone/microphone jack φ 3.5 mm earphone jack, tetrapolar device layered CMOS Display language Japanese/English/Chinese In-camera : Backside-illumination Input language (Character Japanese/English layered CMOS entry) Size Out-camera : 1/3.0 inch Input language (Voice input) By Google voice search function In-camera : 1/5.0 inch *1 Continuous stand-by time is an estimate of the stand-by time Camera effective pixels...
- Page 132 Internal battery ■ Specific Absorption Rate (SAR) Battery type Lithium Ion Battery of Mobile Phones Voltage 3.8 V Nominal battery 2440mAh This model MO-01J mobile phone complies with Japanese capacity technical regulations and international guidelines regarding File formats of still images and videos taken by exposure to radio waves.
- Page 133 The highest SAR value for the device as reported to the FCC when NTT DOCOMO, INC. Website: tested for use at the ear is 0.595 /kg and when worn on the body, as https://www.nttdocomo.co.jp/english/product/sar/ described in this user guide, is 0.641W (Body-worn measurements...
- Page 134 The FCC has granted an Equipment Authorization for this device with NOTE: This equipment has been tested and found to comply with the all reported SAR levels evaluated as in compliance with the FCC RF limits for a Class B digital device, pursuant to part 15 of the FCC exposure guidelines.
- Page 135 Specification CE Caution Volume sonore EUT supports Radios GSM900/1800 application WCDMA Band 1 Use carefully with the earphone maybe possible excessive sound FDD LTE Band1, 3 pressure from earphones and headphones can cause hearing loss. 802.11b/g/n (HT20/HT40) Bluetooth V4.0+LE Battery Caution WCDMA Version Rel.8 Risk of explosion if battery is replaced by an incorrect type.
- Page 136 Specific Absorption Rate (SAR) EU DECLARATION OF Your mobile device is a radio transmitter and receiver. It is designed CONFORMITY not to exceed the limits for exposure to radio waves recommended by international guidelines. These guidelines were developed by the independent scientific organization ICNIRP and include safety margins designed to assure the protection of all persons, regardless of age and health.
- Page 137 Assessment Assessment Requirement Standard Report No. Requirement Standard Report No. Body Body Radio ETSI EN 301 511 SET2016- Telefication Health and EN 50360 2001 SET2016- Telefication Spectrum V12.1.1 09752 B.V. safety +A1:2012 10708 B.V. ETSI EN 301 908-1 SET2016- EN 62209-1:2006 SET2016- V11.1.1 09753...
- Page 138 ® The Bluetooth smart ready word mark and logos are owned by the Bluetooth SIG, INC. and any use of such marks by NTT DOCOMO, INC. is under license. Other trademarks and names are those of their respective owners. Appendix/Index...
- Page 139 ・ ・ Wi-Fi, logo of Wi-Fi, Wi-Fi Alliance, WMM, Wi-Fi This product is licensed under the AVC patent portfolio license for CERTIFIED, logo of Wi-Fi CERTIFIED, WPA, WPA2, the personal and noncommercial use of a consumer to (i) encode Wi-Fi Protected Setup, Wi-Fi Direct, and Passpoint are video in compliance with the AVC standard (henceforth referred to trademarks or registered trademarks of Wi-Fi Alliance.
- Page 140 SIM unlock This terminal supports SIM unlock. If you release SIM lock, you can use SIM by a carrier other than NTT DOCOMO. ・ Available services and functions may be limited. DOCOMO is not liable to any failures or malfunctions.
- Page 141 Sync ................索引 Index Adaptive brightness ............After Sales Services ............Airplane mode ..............Android Keyboard (AOSP)..........Anshin Enkaku Support ........... About phone ..............Answering Machine ............E-label certificate............Messages ............... Legal information............ON/OFF ................Status ................Recording ............... Access point ..............Settings ................
- Page 142 Settings ................Adding................Simple Japanese display ..........Deleting ................Authentication information Displaying a web page ............ Editing ................Deleting ................Displaying ............... Installing ................. Storage type ..............Calculator ................Call forwarding service ............Call history ................ Backup & reset ............... Call notification..............
- Page 143 Charging................Daydream................AC adapter ..............Declining a call ..............Charging adapter ............Default notification ringtone ..........DC adapter ..............Device ................PC .................. 24, 91 Display ............... Precautions..............Switching portrait/landscape view........Chrome ................Displaying all applications ..........Bookmarks ..............dmarket ................Displaying ...............
- Page 144 Remote Initialization Service ..........Send device error information .......... Switch USB debugging............ Gallery ................Double-tap................. Gmail ................Drag .................. Composing ..............Draining water ..............Displaying ............... Sending ................Google ................Google Maps ..............Early warning "Area Mail" ..........Google Play............... Earpiece ................
- Page 145 History icon..............50-key keyboard ............. Home icons ..............Notification icon .............. Status bar ............... Status icon..............Language ................ In-camera ................Language & input ............Initial settings ..............24, 36, 91 LED indicator............Initializing ............... Light .................. Intellectual Property Right..........Light sensor ..............Internal storage ..............
- Page 146 Setting ................Microphone................ microSD card..............Open source software ............. File transfers ..............Other sounds..............Formatting ..............Out-camera ............... Initializing ................ Overseas use ..............Installing ..............After returning to Japan..........Operation from a PC ............ Checking ..............Removing ..............Communication service ..........Unmounting ..............
- Page 147 Registering to a group ............. Reset ................Search ................Roaming settings............. Using Group ..............Network service (overseas) ..........PIN code ................Changing ................ Entering ................Pinch ................. Schedule ................Play Store................Display ................Deleting an application ............ Registering ..............Installing an application ........... Screen brightness .............
- Page 148 Editing ................Bluetooth tethering............Playing................Portable Wi-Fi hotspot............. Recording ............... USB tethering ..............101, 102 Sound & notification............Text-to-speech output..........Speaker ................Time ................Specifications ..............ToruCa ................Spell checker ..............Touch and hold ..............Status bar ................Touch panel ..............Status icon ................
- Page 149 VPN................... Adding ................Connecting ..............Disconnecting ..............Warranty................. Waterproofness/Dustproofness.......... When device is locked ............When device is rotated ............Wi-Fi.................. Adding ................Advanced Wi-Fi settings ..........Connecting ..............Deleting ................Wi-Fi antenna ..............Wi-Fi Direct ............... Wireless & networks ............WORLD CALL ..............
- Page 150 Pay attention to your location and volume of voice Use mobile phone with your manners! or ringtone Pay attention to volume of your voice etc. in quiet Remember to be courteous to others when you use your ■ places like restaurants and hotel lobbies. terminal.
- Page 151 Functions for good manners in public places Your terminal has useful functions such as setting for rejecting answer of incoming calls or muting sounds from the terminal. ● Public mode (Power OFF) → P.54 Tells the caller via a guidance message that receiver need to turn the power off, and the call ends automatically.
- Page 152 (Charges apply) of your country of stay * Voice communication charges to Japan apply. * For the international call access number, refer to NTT DOCOMO website. Business hours: 24 hours (open all year round) ● Please confirm the phone number before you dial.
- Page 153 ● Please confirm the phone number before you dial. ● For Applications or Repairs and After-Sales Service, please contact the above-mentioned information center or the docomo Shop etc. near you on the NTT DOCOMO website. NTT DOCOMO website https://www.nttdocomo.co.jp/english/ Inquiries About Samples ZTE Japan.
Need help?
Do you have a question about the MONO MO01J and is the answer not in the manual?
Questions and answers