Table of Contents
Advertisement
Quick Links
Advertisement
Table of Contents

Related Manuals for Microscan MS-615


Summary of Contents for Microscan MS-615
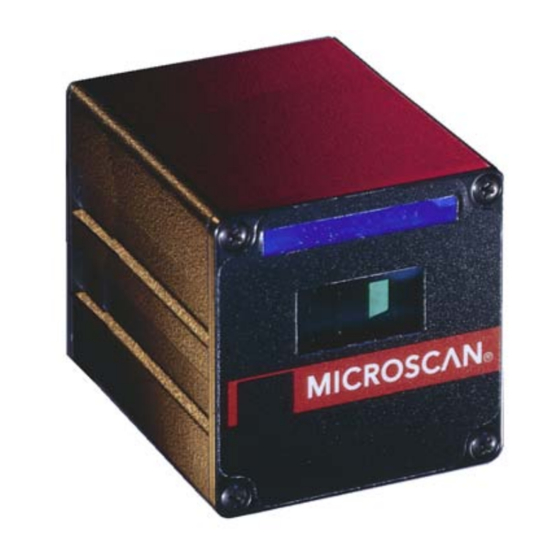
- Page 1 MS-610 Scanner User's Manual P/N 83-000600 Rev E...
- Page 2 A hard copy of a pur- chase order with the amount of the charge must be received by Microscan, either by mail or by FAX, before any equipment is returned. Warrantable products are repaired or replaced at no charge and returned freight prepaid.
-
Page 3: Table Of Contents
Table of Contents List of Illustrations .................. iv List of Tables................... v About the MS-610 Scanner..............vi About This Manual ................. vi Keystroke Entries ................... vi Approvals ....................vii Warning and Caution Summary ............vii Safety Labels ..................viii Chapter 1 Setup and Installation Step 1 - Plan Scanning System ............ -
Page 4: List Of Illustrations
Operations Commands................ 3-8 Code Types Commands..............3-10 User Outputs Commands ..............3-12 Chapter 4 Operational Commands Summary of Operational Commands ..........4-2 Program Management Commands ............ 4-3 Device Control Commands ..............4-3 Code Type Commands ............... 4-4 Counter Commands ................4-4 Test Commands ................. - Page 5 Figure 2-5 External Edge Trigger Signals ..........2-13 Figure 2-6 Match Code Logic Diagram ............ 2-18 Figure 2-7 Code Types Menu Structure ........... 2-20 Figure 2-8 User Outputs Menu Structure ..........2-26 Figure A-1 Dimensions................A-2 Figure A-2 Scan Range Width Graph ............A-3 Figure A-3 Ladder Orientation ..............A-6 Figure A-4 Picket Fence Orientation ............A-6 Figure A-5 Angled Picket Fence Orientation ..........A-7...
-
Page 6: About This Manual
This manual provides complete information on setting up and installing the MS-610 (visible) and the MS-615 (infrared) scanner. Unless otherwise noted, references to the MS-610 apply also to the MS-615. Chapter 1 provides overall step-by-step instructions for setting up and installing the MS-610 scanner with specific “go to”... -
Page 7: Warning And Caution Summary
Warning and Caution Summary Caution: This equipment has been tested and found to comply with the limits for a Class A digital device, pursuant to part 15 of the FCC Rules. These limits are designed to provide reasonable protection against harmful interference when the equipment is operated in a commercial environ- ment. -
Page 8: Safety Labels
Note: Back Label will carry a Class II designation when placed on an MS- 610 with 670 nm visible light and a Class I designation when placed on an MS-615 with 780 nm infrared light. 1201 S.W. 7th St. Ren ton, WA 9 8055... - Page 9 Chapter Setup and Installation Chapter Contents Step 1 - Plan Scanning System ............1-2 Step 2 - Verify Read Range and Scan Width........1-3 Step 3 - Calculate Number of Scans............ 1-4 Step 4 - Attach Cabling ................ 1-6 Step 5 - Configure Scanner ..............1-8 Step 6 - Position Scanner and Label ...........
-
Page 10: Chapter 1 Setup And Installation
Chapter 1 Setup and Installation Plan Scanning System Before installing the MS-610 scanner you should sketch out a diagram of your scanning system, showing equipment, connector and cable types, and cable lengths. Figure 1-1 shows a possible scanning system setup without an adapter box. If using an adapter box, refer to figure 1-2. -
Page 11: Step 2 - Verify Read Range And Scan Width
Verify Read Range and Scan Width Verify Read Range and Scan Width Table 1-1 shows readable ranges and maximum scan widths for specific bar code density (narrow-bar-width) types. Use this table as a reference to verify that the planned range for your label falls within one of the listed ranges. -
Page 12: Step 3 - Calculate Number Of Scans
Chapter 1 Setup and Installation Calculate Number of Scans To ensure reliable scanning, we recommend that you apply a minimum of five scans to each label. Use the formulas below to calculate the number of scans that your label will receive. For definitions of terms, see inset on page 1-5. -
Page 13: Figure 1-5 Angled Picket Fence Orientation
Calculate Number of Scans Angled Picket Fence Calculation Direction of label travel The number of complete scans for angled picket fence is calculated the same as that for picket fence, with the exception that the Scan scan width is shortened in proportion to Line scan tilt. -
Page 14: Step 4 - Attach Cabling
15-pin, D-subminiature socket connector (figure 1-7) for all input and output. Caution: Switching power supplies for Microscan equipment with switching noise Figure 1-7 High Density 15-pin of 20 mV p-p or greater with ±12 VDC are D-Sub Miniature Socket not recommended. -
Page 15: Table 1-4 Cable Distances
Attach Cabling Under ideal conditions, maximum cable Table 1-4 Cable Distances lengths can meet the distances shown in Maximum table 1-4. However, since cable lengths Interface Distance and sizes are dictated by local conditions such as wire size, wire shape (flat or 50 feet RS-232 round), shielding, grounding, extraneous... -
Page 16: Step 5 - Configure Scanner
Chapter 1 Setup and Installation Configure Scanner Settings for Communications, Operations, Code Types, and User Outputs are stored in non-volatile memory and can be configured from a host or auxiliary terminal by menu (Chapter 2, “Menu Configuration”) or serial com- mand (Chapter 3, “Serial Configuration”). -
Page 17: Step 6 - Position Scanner And Label
Position Scanner and Label Position Scanner and Label Before testing the read rate, you will need to position the scanner and label in a manner that matches as nearly as possible the actual conditions of your application. a. Position the scanner and label, taking care to avoid excessive tilt, skew, or pitch. -
Page 18: Step 7 - Do Read Rate Test
Chapter 1 Setup and Installation Do Read Rate Test To begin the read rate test: a. Position the label in front of a functioning scanner; enter the <C> com- mand from the host terminal to launch the read rate test (see Status Commands”... -
Page 19: Step 8 - Adjust Other Scanning Parameters
Adjust Other Scanning Parameters Adjust Other Scanning Parameters This section lists various adjustments that may improve read rates. After changing any of the parameters described in this section, a. If applicable, recalculate the number of scans (Step 3, “Calculate Num- ber of Scans,”... - Page 20 Chapter 1 Setup and Installation will receive more scans. Changing label density and/or bar code ratio is another way ranges, read rates, etc. can be altered. After making changes, repeat Step 3, “Calculate Number of Scans,” on page 1-4 and Step 7, “Do Read Rate Test,” on page 1-10. 1-12 MS-610 Scanner User’s Manual...
-
Page 21: Step 9 - Install Scanner
Install Scanner Install Scanner The MS-610 scanner can be mounted directly to a mounting surface of your choice, or indirectly, via a mounting plate. To permanently mount the scanner: 1. Position the scanner in a dry place, devoid of sunlight, bright lights, or laser light from other sources. -
Page 22: Step 10 - Position Object Detector
Chapter 1 Setup and Installation Position Object Detector If you are not using an object detector, continue with step 11. In a typical operation, a scanner will wait for bar code data only during a triggered read cycle. A read cycle is initiated by a “trigger” that can be in the form of a serial command from the host (internal trigger) or a signal from an object detector (external trigger). -
Page 23: Operational Tips
• Avoid excessive tilt, pitch, and skew of the bar code label. • Check the label for readability by doing a read rate test. If there is any question about the label's readability, contact your Microscan representa- tive. • After changing any parameter that might affect read rate, repeat read rate test. -
Page 24: Ground And Shield Considerations
13 (chassis ground) in the scanner; however, under certain conditions (e.g., when potential differences exist between power outlet grounds) signal and chassis grounds can be isolated from each other inside the scanner by Microscan technicians. Noise Interference Noise interference... - Page 25 Chapter Menu Configuration Chapter Contents Entering the Menu Configuration Program ......... 2-2 Using the Menu Configuration Program ..........2-2 Saving Menu Changes ................ 2-4 Loss of Communications ..............2-4 Defining Special Characters ............... 2-4 Communications Menu ................ 2-5 Operations Menu ................2-11 Code Types Menu................
-
Page 26: Chapter 2 Menu Configuration
Chapter 2 Menu Configuration Entering the Menu Configuration Program To see the Main menu (figure 2-1), from an ASCII terminal that is connected to the scanner, enter the operational command <D> (enter the < > brackets as well as the upper case D). M IC R O SC A N S YS T E M S , IN C . - Page 27 For example, to enable LRC (see figure 2-2, “Communications Menu Struc- ture,” on page 2-5 and “Longitudinal Redundancy Check” on page 2-8), you would use the following command line path: From the Main menu, press CR at Main —> Communications the Communications prompt (this is Main —>...
-
Page 28: Saving Menu Changes
Chapter 2 Menu Configuration Saving Menu Changes Press ESC (escape key) to see the following on the command line: Press M to return to the Main menu, or press E to exit the Menu Configura- tion program. If E is pressed, the following question will appear: Press N to exit without saving changes, or press Y to retain the current set- tings for power-on. -
Page 29: Communications Menu
Communications Menu Communications Menu The Communications menu allows you to set the communication protocols between the scanner and the host. Communications Bold text represents default settings. – Host Protocol (page 2-6) (page 2-8) (page 2-8) (page 2-8) (page 2-8) Protocol Preamble Preamble Postamble... - Page 30 Chapter 2 Menu Configuration Host Protocol Protocol Default: Point-to-Point Options: Point-to-Point, Point-to-Point with RTS/CTS, Point-to-Point with XON/XOFF, Point-to-Point with RTS/CTS & XON/XOFF, Polling Mode D, User Defined, User Defined Multidrop Protocols define the sequence and format in which information is trans- ferred between devices.
- Page 31 50 devices. (For Multidrop poll and Microscan MS-5000 select characters, see Table A-7, “Multidrop Address multidrop concentra- Characters,” on page A-18.)
- Page 32 Chapter 2 Menu Configuration Preamble Default: ^M (and a null). Corresponds to <CR><NUL> (carriage return/null) displayed in the menu. Options: Any ASCII character, including control characters. Control char- acters entered on the command line are displayed in the menu as mnemonic characters.
- Page 33 Communications Menu Response Timeout Default: 12 ms Options: 0 to 65,000 ms. A zero (0) will cause an indefinite wait. Allows you to set the time the scanner will wait before timing out if ACK, NAK, and ETX are enabled, and a host response is expected. Intercharacter Delay Default: 0.
- Page 34 Chapter 2 Menu Configuration Data Bits Default: Seven Options: Seven, Eight Allows you to establish the total number of bits in each character. RS-422 Default: Disabled Options: Disabled, Enabled Used only in Point-to-Point protocol, and not with RTS or CTS. Whenever RS-422 is disabled, RS-232 is enabled in the background.
-
Page 35: Operations Menu
Operations Menu Operations Menu The Operations menu allows you to set the operations parameters for the scanner. To help visualize the menu’s organization and to locate the page number where each topic is described, see figure 2-3. Bold text represents default settings. –... - Page 36 Chapter 2 Menu Configuration Allows you to establish the type of trigger event that will initiate or end the read cycle. (See “End of Read Cycle” on page 2-14.) Selecting: Has this effect: Continuous Trigger input options are disabled and the scanner is always Read in the read cycle.
-
Page 37: Figure 2-4 External Level Trigger Signals
Operations Menu a. Level and Edge apply to the active logic state (positive or negative) that exists while the object is in a read cycle, between the rising edge and falling edge. Rising edge is the trigger signal associated with the appearance of an object. - Page 38 Chapter 2 Menu Configuration End of Read Cycle Default: Timeout Options: Timeout, New Trigger, Timeout & New Trigger Allows you to choose the circumstances that will end the read cycle. The read cycle is the time during which the scanner will receive and process label data. When the Triggering Mode option is set in an External or Serial mode of opera- tion, the trigger event initiates the read cycle.
- Page 39 Allows you to determine whether a positive or negative transition will initiate the read cycle. Note: If using the Microscan object detector (P/N 99-440001-03), use positive trigger level. 1. For example, assigning an upper case D would nullify the <D> (Enter Menu Configuration) command.
- Page 40 Chapter 2 Menu Configuration Noread Message Default: NOREAD Options: Up to seven ASCII characters (except NUL) Allows you to define any combination of ASCII characters (except NUL) up to seven characters as the noread message. When enabled, the noread message will be transmitted to the host at a timeout or the end of a read cycle if the bar code label has not been decoded.
- Page 41 Operations Menu Good Decode Reads Default: Options: 1 to 31 Allows you to select the number of good reads (from 1 to 31) required per label before a good decode output. Note: Be sure to set the value within the determined scan rate for the scanning setup so that the scanner is capable of scanning a label the required number of times.
-
Page 42: Figure 2-6 Match Code Logic Diagram
Chapter 2 Menu Configuration Figure 2-6 on page 2-18 shows the sequence of operation (and reference) for setting up and entering master labels. Enable Match Code: * See the option/outputs available in the relay driver you have selected (page 2-26). 1. -
Page 43: Code Types Menu
Code Types Menu Code Types Menu The Code Types menu allows you to choose among five bar code types and define their parameters. To help visualize the menu’s organization and to locate the page number where each topic is described, see figure 2-7, “Code Types Menu Structure,” on page 2-20. -
Page 44: Figure 2-7 Code Types Menu Structure
Chapter 2 Menu Configuration Code Types Bold text represents default settings. – Narrow Margins Disabled – Enabled – Code 39 Large Interchar Check Digit Check Digit Fixed Code Code Length Status Output Length Disabled Enabled – – – Enabled User Disabled –... - Page 45 Code Types Menu Check Digit Output Default: Disabled Options: Disabled, Enabled When enabled, the check digit character is sent along with the label data. When disabled, label data is sent without the check digit. Large Intercharacter Gap Default: Disabled Options:Disabled, Enabled Allows the scanner to read labels with gaps between bar code characters exceeding three times the narrow element width.
- Page 46 Chapter 2 Menu Configuration Codabar Status Default: Disabled Options: Disabled, Enabled Start & Stop Match Default: Enabled Options: Enabled, Disabled Requires the Codabar start and stop characters (a, b, c, or d) to match before a valid read can occur. Start &...
- Page 47 Code Types Menu Interleaved 2 of 5 Status Default: Disabled Options: Disabled, Enabled Because I 2 of 5 is a continuous code, it is prone to substitution errors. Hence, a code length must be defined and a bar code label containing an even number of digits must be used.
- Page 48 Chapter 2 Menu Configuration Status Default: Disabled Options: Disabled, Enabled When enabled, the scanner will read UPC version A and UPC version E only. Default: Disabled Options: Disabled, Enabled Note: UPC must be enabled for EAN to take effect. When EAN is enabled, the scanner will read UPC version A, UPC version E, EAN 13, and EAN 8.
- Page 49 Code Types Menu Code 128 Status Default: Disabled Options: Disabled, Enabled Fixed Code Length Default: Disabled Options: Disabled, Enabled Allows you to increase data integrity by ensuring that only one label length will be accepted. Code Length Default: Options: 1 to 31 Note: Fixed Code Length must be enabled for Code Length to take effect.
-
Page 50: User Outputs Menu
Chapter 2 Menu Configuration User Outputs Menu The User Outputs menu allows you to control the external (video or audio) outputs that identify scanning conditions. To help visualize the menu’s organization and to locate the page number where each topic is described, see figure 2-8 on page 2-26. Beeper Status Default: On Good... - Page 51 User Outputs Menu Beeper Volume Default: Level 4 Options: Level 4, Level 5, Level 1, Level 2, Level 3 Beeper Speed Default: Fast Options: Fast, Slow Allows you to set the beeper to accommodate your application. The beeper takes approximately 80 ms to sound when Slow is enabled. If your application speed is faster than 80 ms (approximately), enable Fast.
- Page 52 Chapter 2 Menu Configuration Clock Speed Default: Slow Options: Slow, Fast Provides a means to set internal clock speed according to the label range and bar code label density. Generally, the slow setting is used with lower density labels (20 mil narrow-bar-width or wider) and with labels placed closer to the scanner;...
- Page 53 User Outputs Menu Relay Polarity Default: Positive Options: Positive, Negative Allows you to choose between positive and negative output signals at pin 7. Relay Pulse Width (in 10 ms incs) Default: 5 (.05 seconds). Corresponds to 50 ms displayed in the menu. Options: 0 to 255 (0 to 2.55 seconds).
- Page 54 Chapter 2 Menu Configuration 2-30 MS-610 Scanner User’s Manual...
- Page 55 Chapter Serial Configuration Chapter Contents Summary of Serial Configuration Commands........3-2 Serial Configuration Command Format ..........3-3 Concatenating Serial Commands ............3-4 Loss of Communications..............3-4 Trigger Filter Timing Value..............3-4 Communications Commands............... 3-5 Protocol....................3-5 Operations Commands ................ 3-8 Code Types Commands ..............
-
Page 56: Chapter 3 Serial Configuration
Chapter 3 Serial Configuration Summary of Serial Configuration Commands Table 3-1 Summary of Serial Configuration Commands Function Parameter Command Format <KF?> (Not in Trigger Filter <KFtime in 10 ms incre- Timing Value menu) ments> Communications <Kfprotocol,address> Protocol Preamble <Kdstatus,ASCII characters> Postamble <Kestatus,ASCII characters>... -
Page 57: Serial Configuration Command Format
Table 3-1 Summary of Serial Configuration Commands (continued) Function Parameter Command Format Beeper <Kustatus,volume,speed> New Master Pin <KNstatus> Laser On/Off <KCstatus> User Clock Speed <Kzspeed> Outputs Relay Driver <Kvstatus> Relay Polarity <Kwstatus> Relay Pulse Width <Kxnumber> Command Start Character <KEASCII character> Serial Configuration Command Format The format for a serial configuration command is, <Kparameterdata,data,...etc.><initializing command>... -
Page 58: Concatenating Serial Commands
Chapter 3 Serial Configuration • All fields preceding the modified field must be included. For example, in Host Port, to change Data Bits to Eight without changing any other field, enter either: <Ka,,,1> or <Ka4,1,0,1>. • All fields following the modified field can be left out. For example, in the RS-232 port, to change Baud Rate to 4800, enter <Ka3>. -
Page 59: Communications Commands
Communications Commands Communications Commands Protocol If selecting one of the options form 0 to 4 (Point-to-Point, Point-to-Point with RTS/CTS, Point-to-Point with XON/XOFF, Point-to-Point with RTS/CTS and XON/XOFF, or Polling Mode D), use this format: Format: <Kfprotocol> protocol: 4 = Polling Mode D 0 = Point-to-Point 5 = Multidrop (requires address) 1 = Point-to-Point with RTS/CTS... -
Page 60: Table 3-2 Protocol Commands
ACK and NAK will be displayed in the menu. Table 3-2 Protocol Commands Protocol Command Control Characters Effect of Command (Mnemonic displayed on (Entered in menu or serial Microscan menu) command) Reset Request Reset Start of Text End of Text Acknowledge... - Page 61 Communications Commands Postamble Format: <Kestatus,postamble character(s)> status: postamble character(s): 0 = Disabled Enter one or two postamble characters except a null (00H). Default characters are ^M^J. 1 = Enabled Example: To enable Postamble, enter <Ke1>. Response Timeout Format: <KAtimeout setting> timeout setting: Any number from 0 to 6500 (a zero creates an indefinite wait).
-
Page 62: Operations Commands
Chapter 3 Serial Configuration RS-422 Format: <KbRS-422> RS-422: 0 = Disabled 1 = Enabled Example: To enable RS-422, enter <Kb1>. Note: Whenever RS-422 is disabled, RS-232 is enabled in the background. However, an exception occurs whenever Multidrop has been selected. In this case the functioning protocol will be RS-485 regardless of the displayed status of RS-422 in the menus. - Page 63 Operations Commands Example: To define the Serial Trigger Character as a lowercase c, enter <Kic>. External Trigger Level Format: <Kjexternal trigger level> external trigger level (initiates a read cycle): 0 = Negative 1 = Positive Example: To change External Trigger Level to Negative, enter <Kj0>. Noread Message Format: <Kkstatus,message>...
-
Page 64: Code Types Commands
Chapter 3 Serial Configuration Code Types Commands Narrow Margins Format: <Kostatus> status: 0 = Disabled 1 = Enabled Example: To enable Narrow Margins, enter <Ko1>. Code 39 Format: <Kpstatus,check digit status,check digit output status,large intercharacter gap,fixed code length status,code length> status: check digit status: check digit output... - Page 65 Code Types Commands I 2 of 5 Format: <Krstatus,check digit status,check digit output status,code length #1,code length #2> status: check digit status: check digit output status: 0 = Disabled 0 = Disabled 0 = Disabled 1 = Enabled 1 = Enabled 1 = Enabled code length #1: code length #2:...
-
Page 66: User Outputs Commands
Chapter 3 Serial Configuration User Outputs Commands Beeper Format: <Kubeeper status,beeper volume,beeper speed> beeper status: beeper volume: beeper speed: 0 = Disabled 0 = Level 1 0 = Fast 1 = On Good 1 = Level 2 1 = Slow 2 = On Noread 2 = Level 3 3 = Level 4... - Page 67 User Outputs Commands Relay Driver Format: <Kvmode> mode: 0 = Good Read 3 = Mismatch 1 = Noread 4 = Mismatch or Noread 2 = Match Example: To change Relay Driver to NOREAD, enter <Kv1>. Relay Polarity Format: <Kwpolarity> polarity: 0 = Negative 1 = Positive Example: To change Relay Polarity to Negative, enter <Kw0>.
- Page 68 Chapter 3 Serial Configuration 3-14 MS-610 Scanner User’s Manual...
- Page 69 Chapter Operational Commands Chapter Contents Summary of Operational Commands .......... 4-2 Program Management Commands ..........4-3 Device Control Commands ............4-3 Code Type Commands ..............4-4 Counter Commands ..............4-4 Test Commands ................4-5 Status Commands ............... 4-5 Master Label Commands ............. 4-5 This chapter describes all of the serial operational commands and their func- tions.
-
Page 70: Chapter 4 Operational Commands
Chapter 4 Operational Commands Summary of Operational Commands Table 4-1 Summary of Operational Commands Command Command Result Type <A> Software Reset (does not save for power-on) Program <D> Enter Configuration Mode Management Software Reset/Save Parameters for <Z> Power-on <H> Enable Laser Scanning (Laser On) Device <I>... -
Page 71: Program Management Commands
Operational Commands Program Management Commands <A> Initialize <A> Software Reset. Initializes all serial configuration commands in RAM and resets all counters and operating param- eters. Changes for Baud Rate, Code NOVRAM Length, etc. do not take effect until this command is sent. Note: Software Reset will cause the numeric counters in use to lose their count;... -
Page 72: Code Type Commands
Chapter 4 Operational Commands Code Type Commands <P> Autodiscriminate All Codes. Enables the scanner to decode all available bar code types without changing scanner configuration settings. Note: For maximum scanning speed, enable only those bar code symbologies used in the application. <Q>... -
Page 73: Test Commands
Operational Commands Test Commands <C> Enter Read Rate Test. Instructs the scanner to output the read rate and label data (if any). The read rate can vary dramati- cally due to the angle and location of the label in relation to the scan beam (or scan Read Label Rate per... - Page 74 Chapter 4 Operational Commands downloaded at any time, and can be saved in nonvolatile memory with a <Z> command. A stored master label will not affect standard operation unless Match Code option is enabled. The Xs denote alphanumeric data, from 1 to 31 characters. <)>...
-
Page 75: Appendices
Appendices Contents Appendix A — Scanner Specifications ..........A-2 Appendix B — ASCII Table ..............A-5 Appendix C — Orientation ..............A-6 Appendix D — Defaulting the Scanner ..........A-8 Appendix E — Troubleshooting ............A-9 Appendix F — Optional Equipment ...........A-11 Appendix G — Bar Code Symbology ..........A-13 Appendix H —... -
Page 76: Appendix A - Scanner Specifications
Appendices Appendix A — Scanner Specifications Output Wavelength: 670 nm nominal (visible), Mechanical 780 nm nominal (infrared) Length: 2.92” (74.2 mm) Width: 2.25” (57.2 mm) Safety Class: CDRH Class II (visible), CDRH Class I (infrared) Height: 2.25” (57.2 mm) Weight: 9 oz. (257 g) Operating Life: 50,000 hours @ 25°C (visible), 400,000 hours @ 25°C (infrared) 2.25"... -
Page 77: Figure A-2 Scan Range Width Graph
Scanner Specifications figure A-2 and Table A-3 show scan widths and read range mini- Table A-2 Scanner/ mum and maximums for several bar code densities. Table A-1 15-pin MS-610 ADP Connector (adapter) Pinouts Scan Width Function Connectors +5 VDC (input) RS-232 (transmit) RS-232 (receive) RS-232 (signal gnd) -
Page 78: Table A-4 Status Lights
Appendices FIS Options Electrical Characteristics MS-610 models are identified by FIS (final instruction sheet) Power Supply Requirements: numbers. FIS options that are created for specific +12 VDC regulated @ 80 mA with 20 mV p-p max. ripple customer applications are not listed below. –12 VDC regulated @ 80 mA with 20 mV p-p max. -
Page 79: Appendix B - Ascii Table
ASCII Table Appendix B — ASCII Table Table A-5 ASCII Table with Control Characters Dec Hex Ctrl " & < > ∆ MS-610 Scanner User’s Manual... -
Page 80: Appendix C - Orientation
Appendices Appendix C — Orientation If the bar code label bars are parallel to the direction of travel, as shown in figure A-3, the label is said to be in a ladder orientation; if the bars are per- pendicular with the direction of travel, the label is said to be in a picket fence orientation (figure A-4). -
Page 81: Figure A-5 Angled Picket Fence Orientation
Orientation Note: Raster scanning is almost always done with picket fence labels. Maximum raster height is 0.38 inch at 10 inches. Angled Picket Fence Orientation The problems associated with picket fence can be minimized by slightly tilt- ing the scan line (figure A-5). This allows a larger portion of the label to be scanned and increases the label placement area by “simulating”... -
Page 82: Appendix D - Defaulting The Scanner
Appendices Appendix D — Defaulting the Scanner Defaulting the scanner resets the configuration parameters to factory default values. Defaulting is necessary if: • You wish to quickly restore default settings to the configuration program after making some temporary changes. • Communications between the scanner and another device are interrupted because of incompatible settings (for example, a terminal is set to communi- cate at 9600 baud, but the scanner is configured at 38.4K baud). -
Page 83: Appendix E - Troubleshooting
The MS-610 scanner when used correctly should produce good reads. If not, table A-6 lists some of the more common problems associated with set- ting up and using the scanner. If you are unable to locate or correct the problem, call your Microscan representative. Table A-6 Troubleshooting Table Problem... - Page 84 Appendices Problem Possible Cause Solution Low read rates See “Menus display...” in previous Prob- Poor label, range, place- during read rate lem heading. Do Step 8, “Adjust Other ment, etc. test (<C>) Scanning Parameters” on page 1-11. Object detector not Ensure read cycle is active during the positioned properly time the label is in the scan line.
-
Page 85: Appendix F - Optional Equipment
Optional Equipment Appendix F — Optional Equipment Mounting Plate Kit Part Number: 98-500002 To mount the scanner with the mounting plate, “pair up” the mounting plate’s four inner screw holes to the scanner’s mounting holes (see figure 3- 1 in chapter 3, “Installation”) and attach plate to scan head. Next, mount entire assembly using the four outer holes on the plate. -
Page 86: Figure A-9 Universal Stand
Appendices Universal Stand The Microscan Universal Stand is available in 4-inch, 6-inch, and 10-inch flex models as well as a 7-1/4" extension kit. 4-inch, knob adjustable handle 98-200008 6-inch, knob adjustable head and foot 98-200007 10-inch flax neck, adjustable head... -
Page 87: Appendix G - Bar Code Symbology
• range of the scanner • label printer capabilities • the speed of the conveyor Microscan standard scanner firmware supports the following five bar code symbologies. (Firmware can also be custom ordered to support other sym- bologies.) Code 39. An alphanumeric code with unique start/stop code patterns, com- posed of nine black and white elements per character, three of which are always wide. -
Page 88: Appendix H - Interface Standards
Interface Standards, established by the Electronic Industries Association (EIA), specify such things as the signaling voltage levels, maximum cable lengths, and number of drivers. With Microscan devices, selection of inter- face is made by pin assignment (see table A-3 on page A-3) and, in the case of the host communications, by software switching between RS-232 and RS-422. -
Page 89: Appendix I - Multidrop Communications
Multidrop Communications Appendix I — Multidrop Communications This appendix describes the rules for setting up a concentrator or controller to com- municate with a scanner in standard Multidrop protocol, as presented in “Protocol,” on page 2-6. Figure A-10 shows a typical Multi- drop network in which 1 to 50 scan- Host ners can communicate with a host... -
Page 90: Figure A-12 Select Sequence
Appendices Scanner 02) and a REQ (request). The scanner responds by first transmit- ting its own address, 1E, followed by a STX (start of text) character, and then the data. Next it transmits an ETX (end of text) character and an LRC (longitudinal redundancy check) character. - Page 91 Multidrop Communications select address, 1F hex, and an ACK (acknowledge). The concentrator then transmits an STX (start of text), the data (in this case a <T>), an ETX (end of text), and an LRC character. The scanner replies by transmitting its own address, followed by an ACK, acknowledging receipt of the command.
-
Page 92: Table A-7 Multidrop Address Characters
Appendices Table A-7 Multidrop Address Characters Poll Select Poll Select Multidrop Multidrop Character Character Character Character Address Address ASCII ASCII ASCII ASCII " & < > ∆ A-18 MS-610 Scanner User’s Manual... -
Page 93: Appendix J - Glossary Of Terms
Glossary of Terms Appendix J — Glossary of Terms Autodiscriminate. The ability to decode several different bar code symbol- ogies without changing configuration. AWG. Abbreviation for American Wire Gauge. This is a standard measuring system for wire sizes, listed from 0 (biggest) to 40 (smallest). A 26 AWG is equivalent to 0.0159 in. - Page 94 Appendices Label Height. Regardless of orientation, the measurement taken along the length of a label’s individual bars. Label Length. Regardless of orientation, the measurement taken across the label's bars from one end to the other, including the quiet zone. Label Speed. The rate in inches or centimeters per second at which a label moves through the scan beam.
- Page 95 Glossary of Terms Pitch. Label (or scanner) rotation around the center a line perpendicular to the label’s bars. Point-to-Point. A protocol consisting of a single communications event, typically used to connect a bar code reader to a terminal or host computer. Port.
- Page 96 Appendices Skew. Label (or scanner) rotation around the center of the skew axis. Specular Reflection. The direct, mirror-like reflection of laser light back to the scanner, causing over-light saturation. For the MS-610 scanner, specular reflection occurs at pitch angles between +3 and +5 degrees. Symbology.
-
Page 97: Index
Index Numerics of code 39 (menu) 2-19, 2-20 of code 39 (serial) 3-10 15-pin Connector A-3 of interleaved 2 of 5 (menu) 2-20, 2-23 of interleaved 2 of 5 (serial) 3-11 Check Digit Output ACK-NAK Protocol 2-7 of code 39 (menu) 2-20, 2-21 ADP A-3 of code 39 (serial) 3-10 Angled Picket Fence... - Page 98 Index listing A-2 menu structure 2-20 Electrical Characteristics A-4 operational commands 4-4 End of Read Cycle See also Codabar, Code 128, Code by menu selection 2-11, 2-14 39, Interleaved 2 of 5, Narrow by serial command 3-8 Margins, and UPC/EAN when to output option (menu) 2-11, 2-16 Command Start Character when to output option (serial) 3-9...
- Page 99 by serial command 3-7 of code 39 (serial) 3-10 Host Protocol Parameters Laser (enable/disable commands) 4-3 by menu selection 2-5, 2-6–2-9 Laser On/Off by serial command 3-5–3-7 by menu selection 2-26, 2-27 by serial command 3-12 Host Relay Driver Pulse 4-3 Light Source A-2 Longitudinal Redundancy Check by menu selection 2-5, 2-8...
- Page 100 Index Multidrop Message, Bar Code Output, by menu selection 2-5, 2-7 When to Output, Good Decode by serial command 3-5 Reads, Match Code Multidrop Address A-18 Optical Characteristics A-3 Multidrop Communications A-15–A-17 Optional Equipment A-11 multidrop addresses A-15 Output Wavelength A-2 polling sequences A-15 select sequences A-16 Parity A-2...
- Page 101 Preamble definition A-14 by menu selection 2-5, 2-8 RS-485 by serial command 3-6 definition A-14 See Approvals Product Approvals. See also Multidrop Program Management Operational Com- mands 4-3 Protocol Safety Class A-2 by menu selection 2-5, 2-6 Safety Labels viii by serial command 3-5 Saving Configuration Changes listing A-2...
- Page 102 Index Skew 1-9, A-3 Troubleshooting operational tips 1-15 Software Part Number (display) 4-5 table A-9–A-10 Software Reset 4-3 Spaces (as characters) 2-4 Specifications A-2–A-4 Specular Reflection 1-9 Universal Stand A-12 Start & Stop Match UPC/EAN by menu selection 2-20, 2-22 by serial command 3-11 by serial command 3-10 definition A-13...
Need help?
Do you have a question about the MS-615 and is the answer not in the manual?
Questions and answers