Table of Contents
Advertisement
Quick Links
Advertisement
Table of Contents

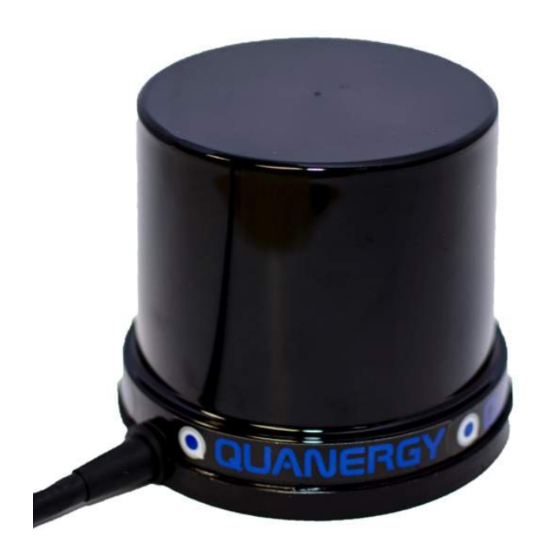
Summary of Contents for quanergy M8
- Page 1 M8 Sensor User Guide...
-
Page 2: Notices
Alteration or abridgement of the document is not permitted without the explicit written approval of Quanergy. QUANERGY, the QUANERGY Logo, QORTEX DTC and associated logos, M8, and Q-VIEW are all trademarks of Quanergy Systems, Inc. All other trademarks are the property of their respective owners. ISO 9001:2015 Certified Contact Quanergy Systems, Inc. -
Page 3: Revision History
Added overview of Q-View tool, Figure 2, Figure 3, Figure 4, Figure 19, Figure 20, Figure 22, and Table 14. Changed most M8-1 designations to refer to product family (M8) rather than specific model number (M8-1). Added URLs for downloadable documents. - Page 4 Omitted documents roadmap, ceiling-mounted scenario, and QPU references. Revised ripple power (16), Appendix 1 (66), and Appendix 2 (77). Added “ASTM G154” (12), M8 models (19), “Power over Ethernet” (17), “Intensity” (21), cross-talk prevention (26), “Managing the Sensor” (formerly M8 Sensor Settings User Guide) (38-60), sensor-mounting accessories (77-85), end-of-life Q&A (87), and Index (88).
-
Page 5: Table Of Contents
2. Introducing the Sensor ..................... 19 Applications ........................19 Features ..........................19 Models ..........................19 NMEA and PPS Inputs ......................19 Multiple Returns ........................20 Evaluation Rules ..........................20 Intensity ............................21 M8 Sensor User Guide, QPN 96-00001 Rev K Page 5... - Page 6 Hardware Label Reveals Serial Number ..................31 Q-View Software Reveals Serial Number and IP Address .............. 31 M8 Sensor Settings Management Application Reveals Serial Number and Versions ....32 Terminal Command Reveals Serial Number and IP Address ............32 5. Getting TCP Ethernet Packets ................. 33 Variable Definitions ......................
- Page 7 Synchronize Sensor with GPS Timestamp ..................74 Windows or Ubuntu Without ROS Driver..................74 Ubuntu With ROS Driver......................74 Check the GPS Signal Lock ......................76 For M8 Sensor Rev D5 ........................76 M8 Sensor User Guide, QPN 96-00001 Rev K Page 7...
- Page 8 Without the Adjustable Mount ....................83 Add the Sensor ..........................84 Adjust Pitch and Roll ........................84 Pitch Adjustment ........................... 84 Roll Adjustment..........................84 Appendix 3: Frequently Asked Questions ..............86 Index ..........................88 M8 Sensor User Guide, QPN 96-00001 Rev K Page 8...
-
Page 9: Figures
Figure 27. Web Server: M8 Sensor Tab's Welcome Mode ............43 Figure 28. Web Server: Settings Tab’s Menu Items ..............44 Figure 29. Web Server: Settings Tab’s M8 Settings Edit (top), Rings (right), GPS (bottom) ..45 Figure 30. Usage-Based Sensor Placement Improves Results ........... 46 Figure 31. -
Page 10: Tables
Table 7. Variable Definitions for the Packet Data ..............35 Table 8. Features Introduced in Each Revision of the Sensor (M8) and Web Server (WS) ..38 Table 9. Web Server: Scan Field Specifications Based on Sensor Placement ......47 Table 10. -
Page 11: Important Safety Notices
Do not modify the unit, remove its cover, disassemble it, or attempt to service it. No scheduled maintenance is necessary to keep the product in compliance. If there are visible defects or damage to the M8 LiDAR sensor, contact your service representative for all service or repair issues, or questions about safety. Refer all servicing and repairs of the sensor to authorized support representatives. -
Page 12: Compliances
Compliances Quanergy’s M8 LiDAR sensor has been tested and found to comply with the standards and specifications of several organizations. ASTM G154 This product complies with standard practices for operating fluorescent Ultraviolet (UV) lamp apparatus in the exposure of nonmetallic materials. Tests reproduced and measured the weathering effects that occur when materials are exposed to sunlight, either directly or through window glass. -
Page 13: Iec/En Safety Compliance
IP69K Compliance The M8 LiDAR sensor passed Water and Dirt/Dust Ingress Tests in compliance with the IEC 60529 IP69K specification. RoHS Compliance Bills of Material components of Quanergy’s 3D M8 LiDAR sensor have been reviewed for RoHS2 and found to be in compliance with the European Union (EU) Directive EU RoHS-2 Directive 2011/65/eu. -
Page 14: Getting Started
1. Getting Started The M8 sensor does not operate on its own; it requires a complete system involving additional parts to operate and collect data, as explained in the following subsections. This manual assumes the user will purchase those parts from Quanergy and/or assemble their own for a complete working system. -
Page 15: Complete Minimal Working System
M19 IP67-rated connector shown in Table 1 and the specifications in the “Connectors and Pins” section on pages 27-28. 2. Purchase a specialized Quanergy sensor interface cable as shown in Figure 2 (typically 15-foot length, with other lengths available upon request), which connects to the sensor cable, and the other end divides into three sub-cables: •... -
Page 16: Power Source
Providing power that fails to meet the specifications in Table 2 may damage the M8 sensor system. Disconnect from power properly: NO: Never unplug the cord at the M8 sensor’s ferrule power connector (Figure 14 right) or toggle a connected power strip’s on/off switch because the current still latent in the cord can shock the sensor. -
Page 17: Power Over Ethernet
Power over Ethernet (PoE) is a single cable solution for both communication and power. The M8 sensor has been operated 100 meters from a power source using IEEE 802.3at (PoE+) compliant PoE source and splitter. The PoE source injects DC power into a CAT5/6 cable. -
Page 18: User-Provided Items
NMEA/PPS timing signals OXTS RT3003 and VectorNav200 Support Documents Quanergy offers a suite of documents to aid the user in understanding how to set up and operate the M8 sensor system. Access a list of these and other downloadable documents at https://quanergy.desk.com/customer/portal/articles/2725667. -
Page 19: Introducing The Sensor
IP69K-rated ingress protection. Models The M8 family of LiDAR sensors includes three models to better serve Quanergy’s diverse customer base and market applications. Depending on industry requirements, choose a model according to its maximum measurement range. Assuming 80% reflectivity: •... -
Page 20: Multiple Returns
(Figure 5) and return to the LiDAR sensor as one or more return pulses. The M8 sensor measures and evaluates the distances and intensities of as many return pulses as there are, follows rules for which particular return values to report, then reports the distances and intensities of up to three of those return values. -
Page 21: Intensity
For visualization, the reported decibel value is assigned a color, which is defined by the user. While computer postprocessing can tease out additional information that is only hinted at in the RViz visualizer, the M8 sensor Rev D5 in Figure 6 clearly shows the distinction in intensity: •... -
Page 22: Mounting The Sensor
3. Mounting the Sensor The M8 sensor includes the hardware that allows a user to attach it to a preferred surface. The mounting assembly is illustrated in Figure 7. The sensor arrives from the factory securely attached to a round mounting base that must remain attached. Its four M3 threaded holes are used to mount securely to a surface. -
Page 23: Options
The sensor may be placed in different configurations and at different angles to accommo- date specific application needs. Various possible scenarios for installation are depicted as follows. Mounting accessories offered by Quanergy are discussed in “Appendix 2.” Vehicle Grill-Mounted Scenario Mounting the sensor on a vehicle’s grill works well for object detection and safety in... -
Page 24: Vehicle Rack-Mounted Scenario
For indoor testing, research, and development, mounting the sensor to a tripod with the detachable, rectangular base plate is a good solution, as shown in Figure 10. Figure 10. Indoor Tripod-Mounted Sensor with Detachable, Rectangular Base Plate M8 Sensor User Guide, QPN 96-00001 Rev K Page 24... -
Page 25: Side-Mounted On Drone Scenario
Figure 11. Drone with Side-Mounted Sensor Wall-Mounted Security Scenario Figure 12 shows a sensor mounted by a fixture to a wall. The M8 sensor dramatically boosts the surveillance power of a typical video monitoring system, as enabled by Quanergy’s security solution. The sensor can be mounted inside or outside, day or night, and is fully operational in any weather, with ingress protection from rain, snow, or dust. -
Page 26: Multi-Sensor Scenario
Multi-Sensor Scenario Some applications such as for vehicle operation or security monitoring use multiple M8 sensors simultaneously to cover a wide area. Figure 13 shows two sensors mounted in close proximity on a vehicle. Reduce the possibility of cross-talk by: •... -
Page 27: Connectors And Pins
(Figure 14 left). This connector attaches to an interface cable, which can be purchased from Quanergy or constructed by the user. Refer to the photo of the specialized interface cable available from Quanergy, which has the female version of the M19 IP67-rated connector on one end (Figure 14 center) and three sub-cables on the other (Figure 14 right). -
Page 28: Figure 16. M19 Pinout And Photo
J2 Female Sensor Cable Connector Interface Cable Connector Figure 16. M19 Pinout and Photo Keyed Pin 1 PPS Pin 3 NMEA Pin 2 GND Figure 17. M12 3-Pin Pinout and Photo M8 Sensor User Guide, QPN 96-00001 Rev K Page 28... -
Page 29: Integrating The Sensor
4. Integrating the Sensor Depending on which environment the M8 sensor is integrating into, the specifics of what happens may vary. Refer to the user guide related to your particular computing environment if details in this section are insufficient: • Q-View User Guide - https://quanergy.desk.com/customer/portal/articles/2717074 •... -
Page 30: Figure 19. Sensor Connections With Dynamic Ip Address
4. All M8 sensors are assigned the same static IP address to start with, so update each of the new sensors (one at a time) to accept dynamic IP addresses, or to have different static IP addresses, as follows: • Log into the sensor’s web server, as explained in the “Managing the Sensor”... -
Page 31: Find The Serial Number And Ip Address
The IP address, in either dynamic or static assignment, is essential for communicating with the M8 sensor over the Ethernet TCP connection. The “Edit Network” section on page 51 explains in detail how to configure the sensor to accept a static or dynamic IP address. -
Page 32: M8 Sensor Settings Management Application Reveals Serial Number And Versions
M8 Sensor Settings Management Application Reveals Serial Number and Versions If you know a sensor’s IP address, you can open the M8 Sensor Settings Management web application (“Managing the Sensor” section starting on page 38), which lists the sensor’s complete serial number in the footer of each web page (Figure 27). In addition, the Versions tab (page 56) lists the versions of various software components involved in the M8 sensor. -
Page 33: Getting Tcp Ethernet Packets
5. Getting TCP Ethernet Packets TCP Ethernet packet data is transmitted over Port 4141. Code for the current M8 sensor is Big Endian for transmitting multi-byte data in the more standard Network Byte Order. Variable Definitions The Ethernet packet data definitions vary depending on how the sensor is configured: •... -
Page 34: For All Three Returns
(3); 0 indicates an invalid point. Returns Intensities uint8[3][8] Array of intensity measurements per laser (8) per return (3); 255 indicates saturation. Returns Status uint8[8] Array of status per laser (8); always 0. M8 Sensor User Guide, QPN 96-00001 Rev K Page 34... -
Page 35: For Reduced Return
0 indicates an invalid point. This can be one of three returns as indicated by Return ID. Returns Intensities uint8[8] Array of intensity measurements per laser (8). 255 indicates saturation. M8 Sensor User Guide, QPN 96-00001 Rev K Page 35... -
Page 36: Timestamp
The timestamp for each packet occurs when the last firing of the packet has been completed. Laser Firing The M8 sensor spins at 10 Hz (at its default and recommended setting). The lasers fire at a constant rate of exactly 53,828 Hz. -
Page 37: Figure 23. Laser Firing Position (Top-Down View)
20 degrees, the theoretical value for beam spacing is 3 degrees, and the top beam is about +3 degrees. The laser firing position is shown in Figure 23. Figure 23. Laser Firing Position (Top-Down View) M8 Sensor User Guide, QPN 96-00001 Rev K Page 37... -
Page 38: Managing The Sensor
✔ These features also apply to M8 Rev D4 that includes the patch updating Base firmware to 7.03. A sensor has this configuration if its Versions tab (Figure 38) reports Top Ver 6.02 and Base Ver 7.03. (This is a special exception where a major version mismatch is allowed.) -
Page 39: Introducing The Web Server
Here is a summary of what users, who are called Editors, may do through the tabs: • In the M8 Sensor tab, Editors can log in and view a welcome banner with important notes about getting support. (See page 42.) •... -
Page 40: Opening The Web Server
192.168.1.0/255.255.255.0 address (e.g., ) is on the same network as the gateway (such as 192.168.1.25 192.168.1.1 These first three octets must match. Figure 24. Creating a Network on Non-Ubuntu Machine M8 Sensor User Guide, QPN 96-00001 Rev K Page 40... -
Page 41: Figure 25. Creating A Network On Windows 7 Machine
– Select the OK button to apply the changes and close the dialog box. – In the Local Area Connection Properties dialog box, select the OK button to close the box. Figure 25. Creating a Network on Windows 7 Machine M8 Sensor User Guide, QPN 96-00001 Rev K Page 41... -
Page 42: M8 Sensor Tab
• Welcome mode (Figure 27): states important user notes as explained below. Login To log in to the application: 1. When the Login fields appear on the M8 Sensor tab as shown in Figure 26, type the case-sensitive username and password. By default, that is: Username: editor Password: qeditor Figure 26. -
Page 43: Welcome
This sensor-specific footer appears on every page except, of course, the login page. You can return to this page at any time by clicking the M8 Sensor tab, which appears slightly enlarged in the upper left corner. -
Page 44: Settings Tab
Edit Settings Edit the sensor’s settings as follows: 1. Select the Settings tab's Edit Settings item (Figure 28) to open the M8 Settings Edit page (Figure 29). This page enables the user to edit specific values in the sensor's configuration file, as discussed in the following subsections. A collapsed view of the Settings tab is shown in Figure 29 (top), which expands into sections for the Ring settings (right) and GPS settings (bottom). -
Page 45: Figure 29. Web Server: Settings Tab's M8 Settings Edit (Top), Rings (Right), Gps (Bottom)
Figure 29. Web Server: Settings Tab’s M8 Settings Edit (top), Rings (right), GPS (bottom) M8 Sensor User Guide, QPN 96-00001 Rev K Page 45... -
Page 46: Scan Field
And if the purpose is to map only the left side of a road from an offset, a 45.0° field of view centered at 45.0° may be sufficient and conserve precious bandwidth. M8 Sensor User Guide, QPN 96-00001 Rev K Page 46... -
Page 47: Low Power Spinup
Sensor: Low Power Spinup The Low Power Spinup parameter applies to M8 Rev D5 and up, as well as to M8 Rev D4 with patch updating Base firmware to 7.03. When enabled, this option uses less torque during startup and delays turning on the lasers until the turret has reached the desired speed, saving about 2 watts from the peak startup power. -
Page 48: Return Data Select
Return Data Select The Return Data Select parameter applies to M8 Rev D5 and up, as well as to M8 Rev D4 with patch updating Base firmware to 7.03. If you have bandwidth constraints and don’t need all three of the returns, the Return Data Select dropdown menu allows you to specify which of the returns to report. -
Page 49: Gps Settings
1. Select the GPS Settings button text to expand that section of the M8 Settings Edit page. 2. The PPS Signal (Pulse per Second) from GPS checkbox is for setting the sensor to accept a positive (non-inverted) or negative (inverted) PPS signal from a GPS receiver, as explained in Appendix 1, starting on page 66. -
Page 50: Reset Settings
1. Select the Settings tab's Reset Settings item to open the M8 Settings Reset page (Figure 31). 2. A confirmation message immediately appears in the Settings tab: “Sensor settings will be reset to factory defaults. -
Page 51: Edit Network
“Reset a Static IP Address” section on page 59. Configure these sensor settings according to your preferences, as follows: 1. Select the Settings tab's Edit Network item to open the M8 Network Settings Edit page (Figure 32). -
Page 52: Admin Tab
Reboot (top) Admin Tab The Admin tab (Figure 33) is not available to Editors, so selecting this tab does not offer any selectable items. Figure 33. Web Server: Admin Tab M8 Sensor User Guide, QPN 96-00001 Rev K Page 52... -
Page 53: My Account Tab
3. Select the Save button. • If the process was successful, the M8 Sensor tab opens with this notification: “Your password has been changed.” • If the process was not successful, the My Account tab displays a message: “There was a problem with your submission. -
Page 54: Editor Logout
Status Tab The Status tab applies to M8 Rev D5 and up, as well as to M8 Rev D4 with patch updating Base firmware to 7.03. This tab offers one item: Basic Status (Figure 36). Figure 36. Web Server: M8 Status Tab The Status tab reports the sensor’s status for the GPS Lock, Frame Rate, Sensor Temperature,... -
Page 55: Figure 37. Web Server: M8 Sensor Status Tab's Report
Figure 37. Web Server: M8 Sensor Status Tab’s Report M8 Sensor User Guide, QPN 96-00001 Rev K Page 55... -
Page 56: Versions Tab
The Versions tab applies to sensors of Rev C and up. This tab is a simple report of each version of the software associated with the M8 sensor. To view the report, click the Versions tab. The web server may pause briefly to gather the very latest information before displaying a list of software items found. -
Page 57: Table 10. Web Server: M8 Software Version Definitions
Table 10. Web Server: M8 Software Version Definitions Version Refers To Top Ver Firmware programmed into the FPGA on the turret (top) Base Ver Firmware stated on the base (bottom) of the unit, consisting of the next several items Linux... -
Page 58: Reboot Tab
Reboot Tab The Reboot tab offers a software reboot option. It applies to M8 Rev D5 and up, as well as to M8 Rev D4 with patch updating Base firmware to 7.03. This is as an alternative to the equivalent physical method of unplugging the sensor’s power cord from the power source, waiting 2 seconds, plugging in the power cord, and waiting another 40 seconds before proceeding. -
Page 59: Reset A Static Ip Address
Figure 40. Creating a Network Environment for Fail Safe Mode For M8 Rev D1 and below, the fail safe IP address is 10.1.10.200, so in Steps 2 & 7 above, use subnet 10.1.10 instead of 192.168.1. M8 Sensor User Guide, QPN 96-00001 Rev K... -
Page 60: Closing The Web Server
Closing the Web Server After logging out as discussed on page 54, close the Sensor Settings Management web server application’s tab or window through mechanisms provided in your particular browser. M8 Sensor User Guide, QPN 96-00001 Rev K Page 60... -
Page 61: Taking The Next Steps
7. Taking the Next Steps Depending on which computing environment the M8 sensor has integrated into, the specific instructions vary for how to work with the sensor to accomplish data collection, visualization, and calibration. Refer to the user guide related to your particular computing environment for the next steps: •... -
Page 62: Troubleshooting Issues
9. Troubleshooting Issues The M8 sensor is designed for excellent reliability and longevity. However, if the sensor is prevented from integrating, connecting, spinning up, firing, or collecting data, your support representative is committed to fully support you in resolving it. - Page 63 Numerical value This rolling counter increments up from 0. After it reaches 999999999, it Nanoseconds increments the Seconds counter, resets its own counter to 0, and starts over. M8 Sensor User Guide, QPN 96-00001 Rev K Page 63...
-
Page 64: Perform Cleaning
• Dry the sensor with another lint-free cloth or tissue. Resolve an Issue Most issues that might be encountered with the M8 sensor can be resolved by using one or more of these strategies: • Make sure the sensor has an adequate heat sink, as explained on page 22. -
Page 65: Report An Issue
“View the Sensor Diagnostics” section in the Q-View User Guide, downloadable from https://quanergy.desk.com/customer/portal/articles/2717074.) • The M8 Sensor Settings Management application’s Versions tab reports versions of the software associated with the M8 sensor, as discussed on page 56. Report an Issue If problems persist with sensor operation after trying the previous strategies, contact your support representative and provide a description of what you’ve observed, what you’ve... -
Page 66: Appendix 1: Use Of Nmea/Pps Signals
This appendix is provided for users who need accurate, reliable timestamps on each data point collected by the M8 system. For the M8 system to enable the added value of a Coordinated Universal Time (UTC) timestamp, two inputs are required, and Global Positioning System (GPS) units typically provide them: •... -
Page 67: Purpose Of Pps
Electrical Interface and Transmission Settings By default, the M8 sensor is set to receive GPS communication at the industry standard 4800 baud rate. Some units may allow higher baud rates to enable the transmission of more data, but other units may require a lower baud rate. -
Page 68: Mechanical Interface
The M12 3-pin connector on the interface cable enables communication between the GPS receiver and the M8 sensor. The three pins are for the NMEA message, PPS signal, and ground. That signal carries through the three pins of the M19 IP67-rated connector and finally to the M8 sensor, as shown in Figure 44. -
Page 69: Data Communication
PPS signal first, followed only by the $GPRMC and/or $GPZDA NMEA sentences. (Filter out sentences that are not used). The M8 sensor accepts the GPS unit’s NMEA sentence in the $GPRMC and $GPZDA forms. If the GPS sends both messages, the sensor uses whichever it receives first. -
Page 70: Gpzda Nmea Sentence
GP indicates that a GPS is sending the data Date and time hours (00-23) minutes (00-59) ss.ss decimal seconds (00.99-60.99) day (01-31) month (01-12) yyyy year (1970-2069) local zone hours (disregarded) local zone minutes (disregarded) checksum (00-FF) M8 Sensor User Guide, QPN 96-00001 Rev K Page 70... -
Page 71: Procedures
Procedures Step through the next few illustrations and procedures to get the M8 system to fully cooperate with the Global Positioning System (GPS) unit and enable the Coordinated Universal Time (UTC) timestamp. Connect Single Sensor to the GPS Receiver Figure 46 illustrates the sending of the NMEA sentence and PPS signal from the GPS receiver to a single sensor. -
Page 72: Connect Multiple Sensors To The Gps Receiver
We recommend that you distribute the PPS signal with the PRL- 414B-BNC (Figure 47). Figure 46. NMEA/PPS Signals Synchronized on Multiple Sensors Figure 47. NMEA/PPS Signals Distributed by PRL-414B-BNC Buffer Amplifier For more details, refer to http://www.pulseresearchlab.com/products/fanout/prl-414B/prl-414B_main.htm. M8 Sensor User Guide, QPN 96-00001 Rev K Page 72... -
Page 73: Configure The Gps Settings
PPS is active high and universal asynchronous receiver/transmitter (UART) is active low. Figure 48. Normal Alignment: Positive PPS (top), Active Low NMEA (bottom) However, the M8 Sensor Settings Management (web server) user interface allows you to make some decisions (Figure 49) relative to those signals, as discussed in the “GPS Settings”... -
Page 74: Pps Signal
Configure the NMEA serial baud rate to be in sync with the GPS serial data rate. Synchronize Sensor with GPS Timestamp When the GPS receiver is connected to the M8 sensor and turned on, the incoming NMEA/PPS signals can synchronize with the sensor. Windows or Ubuntu Without ROS Driver. - Page 75 You will see a display of seconds incrementing from zero, as counted up from the sensor’s internal clock, which resets when the sensor is power cycled. 6. Reconnect the GPS receiver to the M8 sensor, and power it on. 7. Wait about thirty seconds for signals to fully synchronize with the sensor.
-
Page 76: Check The Gps Signal Lock
• The Seconds are counting up from the epoch time. • The Nanoseconds are between 0 and 999999999. True 1504238913 848061000 Figure 50. Web Server: Status Tab Report for GPS and UTC Timestamp M8 Sensor User Guide, QPN 96-00001 Rev K Page 76... -
Page 77: Appendix 2: Sensor Mounting And Accessories
Appendix 2: Sensor Mounting and Accessories The M8 sensor dimensions are provided in this appendix to help you design mounting configurations. Refer also to the “Mounting the Sensor” section on page 22. Sensor Dimensions The sensor’s round mounting base, which must remain attached, can mount to a custom surface. -
Page 78: Base Plate Dimensions
STANDARD TRIPOD HOLE Figure 52. M8 Sensor Mounting Drawing of Rectangular Base Plate Accessory for Mounting Some implementations of the M8 sensor are easier to achieve with the specialized NOTES: DESCRIPTION 1) STAMP/SCRIBE THE QUANERGY PART WITH PN, 4X-XXXXX, AND SITE-DATE CODE, XXXXXX. FOR Adjustable Mount accessory available for purchase from Quanergy. -
Page 79: Accessory For Weather Shielding
Accessory for Weather Shielding The Adjustable Mount can include an optional Weather Shield accessory (Figure 54) that you may purchase from Quanergy to protect the sensor from weather and solar loading. The “Address Environmental Concerns” section on page 83 explains how to install the Weather Shield. -
Page 80: Installation Of Accessories
For best results in outdoor environments, Quanergy recommends mounting the Weather Shield over the M8 sensor on an Adjustable Mount that is strapped to a pole or affixed to a flat surface. For indoor environments, the Weather Shield is not necessary. -
Page 81: Mounting To A Pole
8. Cut off the plastic tie wraps that are no longer necessary. Screws into the Adjustable Mount Back Plate Strapping Slot (4X) Strapping Pole 5 cm+ Strapping Clamp Figure 55. Adjustable Mount’s Pole Clamp M8 Sensor User Guide, QPN 96-00001 Rev K Page 81... -
Page 82: Mounting To A Flat Surface
DRAWING IS THE SOLE PROPERTY OF QUANERGY SYSTEMS INC. ANY FINISH REPRODUCTION IN PART OR AS A WHOLE SEE NOTE WITHOUT THE WRITTEN PERMISSION OF QUANERGY SYSTEMS INC IS PROHIBITED. DO NOT SCALE DRAWING M8 Sensor User Guide, QPN 96-00001 Rev K Page 82... -
Page 83: Address Environmental Concerns
If the installation environment is likely to receive heavy exposure to sun, heat, or precipitation, you may prefer to protect the M8 sensor by adding the optional Weather Shield accessory (Figure 57). This may be used with or without the Adjustable Mount. -
Page 84: Add The Sensor
When the Adjustable Mount is firmly affixed and stable, attach the M8 sensor as follows: 1. If the Weather Shield is attached to the Adjustable Mount, thread the M8 sensor cable out the back through the keyhole opening at the bottom of the Weather Shield. -
Page 85: Figure 58. Adjustable Mount's Roll Adjustments
QUANERGY SYSTEMS INC. ANY FINISH REPRODUCTION IN PART OR AS A WHOLE SEE NOTE WITHOUT THE WRITTEN PERMISSION OF QUANERGY SYSTEMS INC IS SCALE: 1:2 PROHIBITED. DO NOT SCALE DRAWING M8 Sensor User Guide, QPN 96-00001 Rev K Page 85... -
Page 86: Appendix 3: Frequently Asked Questions
3. Q: What is the voltage range for the M8 sensor? A: 24 VDC ± 1.2 V. 4. Q: How robust is the M8 sensor in terms of electromagnetic compatibility (EMC)? A: The sensor passed tests for the following EMC compliance specifications: EN 61000-4-2 ESD EN 61000-4-5 Surge... - Page 87 9. Q: If I change the rotational speed of the M8 sensor within the 5-20 Hz valid range, what happens to the laser fire timing? Does rotational speed affect heat production? A: Changing the frame rate does not affect laser fire timing, nor does it have a significant effect on heat production.
-
Page 88: Index
................65 lens cap ................64, 87 disconnect ...............16, 51 lighting conditions ............19, 86 disposal of sensor ..............87 log in ..................42 documents ................18 drone ..................25 M8 Sensor User Guide, QPN 96-00001 Rev K Page 88... - Page 89 ................15 security ................25, 26 water ..........14, 15, 19, 25, 27, 64, 86 sensor cable .............. 14, 15, 27 Weather Shield accessory ............. 79 sensor management Windows ................17 M8 Sensor User Guide, QPN 96-00001 Rev K Page 89...
- Page 90 For purchases made from a third party such as a value-added reseller or system integrator: contact them for support. Specifications are subject to change without notice. The Quanergy logo is a trademark of Quanergy Systems, Inc. All other trademarks or registered trademarks are the property of their respective owners.
Need help?
Do you have a question about the M8 and is the answer not in the manual?
Questions and answers
Where do I get the interface cable of the m8 lidar or a pinout diagram? I have the lidar but no adapter from m19 14 pin to rj45+power+ppm or whatever