Table of Contents
Advertisement
Quick Links
Advertisement
Table of Contents

Related Manuals for Epson TP3


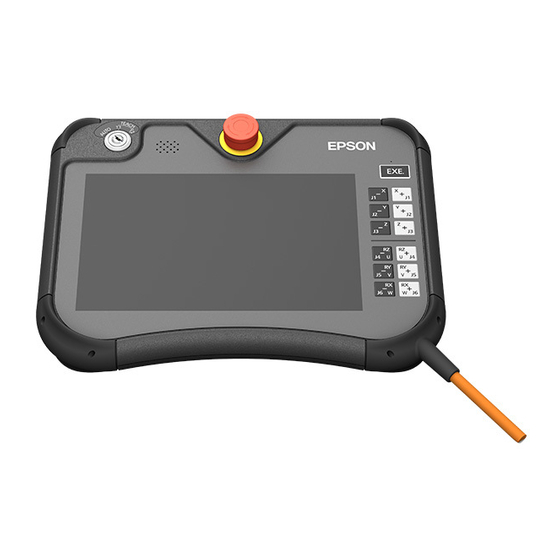
Summary of Contents for Epson TP3
- Page 1 Robot Controller RC700-A Option Teach Pendant Rev.8 EM183F3602F...
- Page 3 Robot Controller RC700-A Option Teach Pendant Rev.8 Copyright © 2015-2018 SEIKO EPSON CORPORATION. All rights reserved. RC700-A option TP3 Rev.8...
- Page 4 2. If you do not follow the WARNINGS and CAUTIONS in this manual, we cannot be responsible for any malfunction or accident, even if the result is injury or death. 3. We cannot foresee all possible dangers and consequences. Therefore, this manual cannot warn the user of all possible hazards. RC700-A option TP3 Rev.8...
- Page 5 Microsoft Corporation in the United States and/or other countries. Other brand and product names are trademarks or registered trademarks of the respective holders. iWnn IME of OMRON SOFTWARE Co., Ltd. is used for TP3. iWnn IME © OMRON SOFTWARE CO., Ltd. 2014 All Right Reserved.
- Page 6 This option is used with the following combinations of Controllers and software. Controller / Manipulator Software RC700-A EPSON RC+ 7.0 Ver.7.2.0 or later T series EPSON RC+ 7.0 Ver.7.3.1 or later For T series Manipulator user only T series Manipulators are controller integrated manipulators.
-
Page 7: Table Of Contents
6. Enable Switch 7. Touch Panel 7.1 Operating the Touch Panel ............... 21 7.2 Operating the Menu .................. 22 7.3 Operating the Panels ................23 7.4 Operating the Software Keypad ............... 24 7.4.1 Floating mode ................25 RC700-A option TP3 Rev.8... - Page 8 3.1 Control Panel .................... 46 3.1.1 Motors ..................46 3.1.2 Free Joints ..................46 3.1.3 Command Buttons ............... 47 3.2 Jog & Teach ....................48 3.2.1 Mode..................... 49 3.2.2 Speed ................... 49 3.2.3 Coordinate System ............... 49 RC700-A option TP3 Rev.8...
- Page 9 5.2.2 Restore ..................78 5.2.3 Controller Maintenance ..............79 5.2.4 Robot Maintenance ..............80 5.3 Configuration ..................... 81 5.3.1 Preferences .................. 81 5.3.2 System Information ..............82 5.3.3 Update Software ................82 5.3.4 Shutdown ..................83 RC700-A option TP3 Rev.8...
- Page 10 Robot does not move by pressing the Jog key ..........85 Operation mode does not switch from TEACH mode to AUTO mode ....85 Program list is not displayed in program verification window of TEST mode ......................85 8. Maintenance Parts List viii RC700-A option TP3 Rev.8...
-
Page 11: Functions & Installation
Functions & Installation This section contains information about functions and installation of the Teach Pendant to be known before operation and maintenance. -
Page 13: Safety
The personnel who have taken the safety training acquire knowledge of industrial robots (operations, teaching, etc.). The personnel who have completed the robot system-training class held by the manufacturer, dealer, or locally-incorporated company are allowed to maintain the robot system. RC700-A option TP3 Rev.8... - Page 14 Damaged cables, disconnection, or WARNING contact failure is extremely hazardous and may result in electric shock and/or improper function of the system. Do not use the cables near heat or fire. RC700-A option TP3 Rev.8...
-
Page 15: Safety-Related Requirements
Industrial, scientific and medical (ISM) radio-frequency equipment -- Electromagnetic CISPR11 disturbance characteristics -- Limits and methods of measurement EN 55011 Electromagnetic compatibility (EMC) -- Part 6-2: Generic standards -- Immunity for IEC 61000-6-2 industrial environments EN 61000-6-2 RC700-A option TP3 Rev.8... -
Page 16: Emergency Stop
(4) Tap the [Control Panel] tab on the touch panel to display the [Control Panel] panel. Press the <Reset> button to reset the Emergency Stop. [Emergency Stop] on status bar of the touch panel is “OFF”. Check that RC700-A option TP3 Rev.8... -
Page 17: Using Teach Pendant In Safeguarded Area
To switch the mode from TEACH to AUTO, release the latched condition by inputting the latch release input signal. ■ Although the Teach Pendant can be operated inside the safeguarded area as described above, operate the robot system while all operators are outside of the safeguarded area wherever possible. CAUTION RC700-A option TP3 Rev.8... -
Page 18: Specifications
[Test] tab on the touch panel. For details of the operation modes, refer to Functions & Installation 4 Operation Mode (TEACH, AUTO, TEST). NOTE T2 mode cannot be used on RC700-A Controllers complying with the UL standards. RC700-A option TP3 Rev.8... - Page 19 The cover can be removed by holding and lightly pulling the thin part at the tip. ■ Make sure to set the cover to protect the USB port when the USB port is not used. CAUTION (10) USB port The port for connecting the USB memories. RC700-A option TP3 Rev.8...
-
Page 20: Standard Specifications
10.1 inches TFT color LCD Display specifications Pixels 1280 × 800 2.3 Outer Dimensions [Unit: mm] NOTE Use the installation metal in the attachment when attaching the Teach Pendant to a panel, or the like. RC700-A option TP3 Rev.8... -
Page 21: Installation
The surface of the buttons may be damaged as they are easily scratched. ■ Wipe the dirt and oils adhering to the surface of the Teach Pendant display with a soft cloth dampened with neutral detergent or alcohol solvent. RC700-A option TP3 Rev.8... -
Page 22: Wall Bracket (Option)
Installation position: X × 2 parts, Y × 1 part Screw size: M5 (2) Hang the Teach Pendant handle to A. (3) Place the Teach Pendant to B. Cable (4) Hang the teach Pendant cable to C. RC700-A option TP3 Rev.8... -
Page 23: Connection
Connect the TP bypass plug when the Teach Pendant is not connected. Removal from the Robot Controller (1) Switch the mode selector key switch to “AUTO”. (2) Tap the [Configuration] tab to display the [Configuration] panel. RC700-A option TP3 Rev.8... -
Page 24: Connection Examples
3.5.2 Connection Examples When connecting the Teach Pendant to the Controller directly: When using an extension cable: Extension cable NOTE To extend the cable, use the extension cable (optional: 10 m or 15 m). RC700-A option TP3 Rev.8... -
Page 25: Power Supply
The power to the Teach Pendant is supplied via the TP connector on the Controller. After communication between the Controller and the Teach Pendant is established, the following screen will appear on the display of the Teach Pendant. TEACH mode AUTO mode RC700-A option TP3 Rev.8... -
Page 26: Operation Mode (Teach, Auto, Test)
(including the safety door) is open. Unlike the TEST/T1, the program verification in a high speed is available in this mode. In this mode, the specified Function can be executed with multi-task / single-task, multi-manipulator / single-manipulator at high speed. RC700-A option TP3 Rev.8... - Page 27 3.6 Direct Teach AUTO Operator Panel 5.1 Operator Panel Maintenance 5.2 Maintenance Configuration 5.3 Configuration : Panel name : Relevant section NOTE T2 mode cannot be used on RC700-A Controllers complying with the UL standards. RC700-A option TP3 Rev.8...
-
Page 28: Switching The Operation Modes
(RC700 / RC700-A) Setup & Operation 9.1 Safety Door Switch and Latch Release Switch For T series manipulator T series manipulator manual Setup & Operation 11.1 Safety Door Switch and Latch Release Switch RC700-A option TP3 Rev.8... -
Page 29: Jog Keys And Exe. Key
S axis (additional axis). Joint mode Jogs J6 or J9 (additional axis) Rotates the tool coordinate system around the X Other than axis of the rectangular coordinate system. Or Joint mode jogs the T axis (additional axis). RC700-A option TP3 Rev.8... -
Page 30: Enable Switch
OFF state. Also, the following error message will appear when an error is occurred. Restart (supply the power source of the Controller again) of the teaching pendant is required to recover from the error. RC700-A option TP3 Rev.8... -
Page 31: Touch Panel
Flick Touch and slide a finger or touch pen in one direction and immediately release. Swipe Touch the panel and move a finger or touch pen to one direction while keeping the finger/pen touches the panel. RC700-A option TP3 Rev.8... -
Page 32: Operating The Menu
7.2 Operating the Menu Tap→ Swipe from left side of the screen→ How to display the menu - Swipe the screen from left side to center. - Tap the button on the left side of the screen. RC700-A option TP3 Rev.8... -
Page 33: Operating The Panels
To change the position Change the right half-size window to left half-size: Tap the square on the left end. Change the left half-size to upper half-size: Tap the square on the upper side of the window. RC700-A option TP3 Rev.8... -
Page 34: Operating The Software Keypad
This function may not be supported depending on the language setting. Adjusts the height of the keypad. The height can be changed by swiping the bar on the top Adjust keypad height of the keypad. Floating mode ON/OFF Switches the floating mode RC700-A option TP3 Rev.8... -
Page 35: Floating Mode
Swipe the middle of the bar at the bottom. Move Swipe the size button at the lower right and release at the Change size desired size. Tap the transparency button at the lower left and adjust Transparency transparency using the displayed scroll bar. RC700-A option TP3 Rev.8... -
Page 36: Usb Port
Functions & Installation 8. USB Port 8. USB Port Connect a commercial USB flash drive to the TP3 memory port to use the following features. - Backup Controller information to a USB flash drive. (Refer: Operation 5.2.1 Backup) - Restore Controller information from a USB flash drive. - Page 37 Operation This section contains information about operation of the Teach Pendant and maintenance procedure.
-
Page 39: Teaching Procedure
[Jog & Teach] tab displays the following panel. To change the robot, refer to the following section: Operation 2.1 Current Robot NOTE T2 mode cannot be used on RC700-A Controllers complying with the UL standards. RC700-A option TP3 Rev.8... -
Page 40: Jog Operation
(3) Enter the point label and comment in the displayed message dialog box. (4) Tap the <OK> button of the message dialog box to temporarily store the robot position. (5) Press the <Save> button to save your changes. RC700-A option TP3 Rev.8... -
Page 41: Direct Teaching
CAUTION For details of the setting and operation check, refer to the following manual. EPSON RC+ 7.0 Option Force Control 7.0 NOTE This function is available when Force Control 7.0 is setup. ... - Page 42 (14) Tap the <Teach> button. (15) Enter the point label and comment on message dialog. (16) Tap the <OK> button on the message dialog to save the robot position temporary. (17) Tap the <Save> button to save the change. RC700-A option TP3 Rev.8...
-
Page 43: Common Functions
Refer to: Operation 2.2 Status Bar C: Tap the icon to display the each tool menu. Refer to: Operation 2.3 Tool D: Tap the menu button to display the sub menu. Refer to: Operation 2.4 Sub menus RC700-A option TP3 Rev.8... -
Page 44: Current Robot
<Reset> button. Refer to: Operation 3.1.3 Command Buttons Displays the safety door status ON / OFF Safeguard Motor Displays the robot motor status ON / OFF Power Displays the robot motor power status HIGH / LOW RC700-A option TP3 Rev.8... -
Page 45: Tool
Statuses of the selected inputs are continuously updated, while outputs are updated when the output bits are changed. The I/O can be searched by the I/O label. Enter the text to search and tap the search button. You can search through the currently displayed list. RC700-A option TP3 Rev.8... -
Page 46: Robot 3D View
Z axis: Red Point display: To display the point, tap the <Point> button and select the point number from the current point file. You can select several points. The point can be displayed on the 3D display. RC700-A option TP3 Rev.8... - Page 47 Automatic and manual update can be selected. Tap the Auto/Manual button to switch between automatic update and manual update. Auto : Automatically and periodically updates the display. Manual : The display is updated by tapping the <Refresh> button. RC700-A option TP3 Rev.8...
-
Page 48: Brake Setting
The brakes will be locked. Brake OFF: Uncheck the checkboxes. The confirmation massage will appear when you uncheck the checkboxes. Read the message and tap <OK> to release the brakes. The joints can be moved by hands. RC700-A option TP3 Rev.8... -
Page 49: Command Window
The commands can be entered with both uppercase and lowercase characters. The following are descriptions for the buttons. <Enter> : Sends the commands to the Robot system. <Clear> : Clears the strings of either window. <All Clear> : Clears the strings of both windows. RC700-A option TP3 Rev.8... -
Page 50: Task Manager
Task line number Line Function name of the task Function Program Program name of the task Start Start time of the task CPU load rate of each task This function assists problem detection of user-created tasks RC700-A option TP3 Rev.8... -
Page 51: Force Monitor
Select from defined object (number or label) list. If selecting Force Monitor the force monitor object, force and torque of force coordinate Object system appear. Monitor Start Display the current value on the graph. Force Sensor Reset Set force and torque value as “0”. RC700-A option TP3 Rev.8... -
Page 52: Sub Menus
Load the data from the Robot system. Refresh Date and time of the selected item are displayed according to Date/Time [Time Zone]. Event : Information of operation and mode changes by the Type operator. RC700-A option TP3 Rev.8... -
Page 53: Motor
Motor OFF : Tap the <Motor OFF> button with Motor ON. The motors will be OFF immediately. 2.4.4 Reset Select the “Reset” from the sub menu to reset the robot servo system and emergency stop status. RC700-A option TP3 Rev.8... -
Page 54: Error Messages
2.5 Error Messages An error message appears when an error occurs. Example: A message displayed in the panel. Example: A message displayed in a pop-up window. Tapping <OK> closes the pop-up window and returns to the original panel. RC700-A option TP3 Rev.8... -
Page 55: Teach/T1 Mode
TEACH/T1 Control Panel 3.1 Control Panel Jog & Teach 3.2 Jog & Teach Programming 3.3 Programming Test 3.4 Test Robot Parameters 3.5 Robot Parameter Direct Teach 3.6 Direct Teach : Panel name : Relevant section RC700-A option TP3 Rev.8... -
Page 56: Control Panel
: Checking the checkbox of each joint releases the servo control. Unchecking the checkbox locks the servo control. <Free All> : Releases the servo control of all joints. <Lock All> : Locks the servo control of all joints. RC700-A option TP3 Rev.8... -
Page 57: Command Buttons
Switch ON while the confirmation dialog is displayed. <MCal> : Performs calibration (detect the mechanical home position). This can be executed by pressing the <EXE.> key with the Enable Switch ON while the confirmation dialog is displayed. RC700-A option TP3 Rev.8... -
Page 58: Jog & Teach
[Change Jog Key] : Operation. 2.3.5 Change Jog Key [Motor] : Operation. 2.4.3 Motor [Reset] : Operation. 2.4.4 Reset In the [Jog & Teach] panel, the guide corresponding to the jog keys is displayed on the right end. RC700-A option TP3 Rev.8... -
Page 59: Mode
Arm coordinate system defined as the additional arm. This is available for the following robots. Rectangular coordinate robots SCARA robots Defined coordinate system of the external control point. This is available when the external control point is enabled. RC700-A option TP3 Rev.8... -
Page 60: Current Position
The robot jogs in continuous mode. The [Jog Distance] text boxes cannot be changed. When other than “Continuous” is selected: The robot jogs in the step mode for the distance specified in the [Jog Distance] text box. RC700-A option TP3 Rev.8... -
Page 61: Registering The Robot Position
(2) Press the <EXE.> key with the Enable Switch ON. The command is executed while the <EXE.> key is being pressed. The motion stops when either one or both of the Enable Switch and <EXE.> key is released. RC700-A option TP3 Rev.8... -
Page 62: Jog Key Guide
3.2.9 Jog Key Guide The current key assignment of the jog keys can be displayed. The key assignment changes by a combination of following items, and the display changes accordingly. Robot type Jog Mode Jog key change RC700-A option TP3 Rev.8... -
Page 63: Programming
Tapping the file name in the file tree display opens the file. The edited project can be built. Tap the <Build> button. The message appears when the project is built properly. If an error occurs, the error message will be displayed. RC700-A option TP3 Rev.8... -
Page 64: Program Editing
Select the point file from the file tree to display the list of data. Change the point data values: (1) Tap the value to change to display the edit dialog panel. (2) Enter the value. (3) Tap <OK> to close the dialog window. RC700-A option TP3 Rev.8... - Page 65 Deletes all data. Delete All The file will be empty. Save Saves changes to the Robot system. Restores changes. Restore The file will be restored to previous state. RC700-A option TP3 Rev.8...
-
Page 66: Test
[Task Manager] : Reference Operation 2.3.5 Task Manager [I/O Monitor] : Reference Operation 2.3.1 I/O Monitor The menu button cannot be used during program execution. Open the sub menu panels before starting the program or while it is paused. RC700-A option TP3 Rev.8... -
Page 67: Single-Task Program Verification
■ Before performing program verification, check that the robot system operates normally by using the EPSON RC+ debug function. For details on the EPSON RC+ debug function, refer to the EPSON RC+ User’s Guide. If debugging is insufficient, the robot may cause unintended motion. This is extremely hazardous and may cause serious bodily injury or severe damage to the robot. - Page 68 *1 Xqt task types (NoPause, NoEmgAbort) cannot be executed. When these tasks are specified, they are performed the program verification as normal tasks. *2 When background tasks are specified, they are performed the program verification as normal tasks. RC700-A option TP3 Rev.8...
-
Page 69: Multi-Task Program Verification
After tapping the <Start> key, tap the operation key (Continue), and then press the <EXE.> key while the Enable Switch is ON with the confirmation window open. To stop the program temporarily: Release the Enable Switch or the <EXE.> key. The moving robot stops. (Quick Pause) RC700-A option TP3 Rev.8... - Page 70 ■ Before performing the program verification, check that the robot system operates normally by using the EPSON RC+ debug function. For details on the EPSON RC+ debug function, refer to the EPSON RC+ User’s Guide. If debugging is insufficient, the robot may cause unintended motion. This is extremely hazardous and may cause serious bodily injury or severe damage to the robot.
- Page 71 ■ The faster the speed, the longer the free running distance in the emergency stop or pause is. When operating the robot where interference with peripheral equipment is predictable, perform the program verification at low speed while CAUTION taking the free running distance into consideration. RC700-A option TP3 Rev.8...
-
Page 72: Test Mode Operation Method
Executes until the next motion command or output command, and then stops. Walk You can configure whether to stop the program by the output command in the EPSON RC+. This is available for the single-task program verification. RC700-A option TP3 Rev.8... -
Page 73: Robot Parameters
command window. For details, refer to the following manual. EPSON RC+ SPEL+ Language Reference The cells with no Local coordinate system definition are empty. Entering the value to the undefined Local coordinate system sets remaining cells to “0”. The Local coordinate systems numbering from 1 to 15 can be defined. Tapping the <Apply>... -
Page 74: Tool Coordinate System Setting
The Tool coordinate systems numbering from 1 to 15 can be defined. Tapping the <Apply> button configures the Tool coordinate system. For details of the Tool setting, refer to the following manual. EPSON RC+ SPEL+ Language Reference : TLSet Statement Item Description The X coordinate of the tool. -
Page 75: Additional Arm Setting
The cells with no Arm definition are empty. Entering the value to undefined Arm sets remaining cells to “0”. Tapping the <Apply> button configures the additional Arm. For details of the Arm setting, refer to the following manual. EPSON RC+ SPEL+ Language Reference : ArmSet Statement Item Description... -
Page 76: Direct Teach
Be careful when configuring the settings and check operation before executing the direct teaching. CAUTION For details of the setting and operation check, refer to the following manual. EPSON RC+ 7.0 Option Force Control 7.0 NOTE This function is available when Force Control 7.0 is setup. ... -
Page 77: Coordinate System
Joint Current coordinate of the joints Pulse Current pulse of the joints 3.6.3 Current Arm Orientation This group displays the current arm orientation. Flags representing the arm orientation vary depending on the type of the robot. RC700-A option TP3 Rev.8... -
Page 78: Force Setting
Tap the [Force Settings] tab to display the [Force Settings] panel. [Mass Properties] : Select the mass property object. The mass property object can be set in [Mass/Gravity] panel of EPSON RC+. For more details about [Mass/Gravity] panel, refer to the following manual. EPSON RC+ 7.0 Option Force Control 7.0 Executing the direct teaching with improper settings of the mass property object ... - Page 79 Force Sensor. CAUTION The Force Sensor cannot detect the force when it is applied to the robot arm or the Force Sensor itself, and it may result in unintended robot motion. Caution is required in this regard. RC700-A option TP3 Rev.8...
-
Page 80: Teaching
(1) Tap the < Direct Teach Start > button. Confirmation panel appears. (2) Tap the <OK> button with turning ON the enable switch. Execute while pushing the enable switch. Stop the operation when turn OFF the enable switch. RC700-A option TP3 Rev.8... - Page 81 For details about registration of robot position, refer to the following section. Operation 3.2.7 Registering the Robot Position When operating the command Tap the [Command Execute] tab to display the [Command Execute] panel. For details about command, refer to the following section. Operation 3.2.8 Command RC700-A option TP3 Rev.8...
-
Page 82: Teach/T2 Mode
This chapter only describes 4.1 Test (T2). For other functions and operations, refer to the following sections. Operation 3.1 Control Panel Operation 3.2 Jog & Teach Operation 3.3 Programming Operation 3.5 Robot Parameters Operation 3.6 Direct Teach RC700-A option TP3 Rev.8... -
Page 83: Test (T2)
Other operating procedures are the same as “Test” except for the color of the panel. Reference: Operation 3.4 Test The password for Test (T2) cannot be configured on the Teach pendant,. Set the password in the EPSON RC+. RC700-A option TP3 Rev.8... -
Page 84: Auto Mode
However, the robot cannot be operated and the program cannot be executed while the safety door is open. The robot cannot be changed. Reference: Operation 2.1 Current Robot AUTO 5.1 Operator Panel Operator Panel Maintenance 5.2 Maintenance Configuration 5.3 Configuration : Panel name : Relevant section RC700-A option TP3 Rev.8... -
Page 85: Operator Panel
Selecting the sub menu displays the dialog accordingly. For details, refer to the following sections. I/O Monitor : Operation 2.3.1 I/O Monitor Task Manager : Operation 2.3.5 Task Manager System History : Operation 2.4.2 System History RC700-A option TP3 Rev.8... -
Page 86: Program Execution
Operation 5. AUTO Mode 5.1.1 Program Execution First, select “TP3” in the EPSON RC+ [Controller]-[Configuration]-[Control Device]. Then, turn ON the <Operate> button on the [Operation Panel] of TP3. Turning ON the button displays and enables the following buttons: <Start> <Stop> <Pause> <Continue>... -
Page 87: Maintenance
Restore Controller Maintenance Robot Maintenance The password is required if it is set in the EPSON RC+. Enter the password. 5.2.1 Backup This panel is used for saving the Controller information to the USB memory. To save the current status: Tapping the <Backup>... -
Page 88: Restore
To remove the USB memory: Tapping the <Unmount> button displays the removal instruction. Remove the USB memory by following the instruction. For details of cautions for using the USB memory, refer to Operation 8. USB Port. RC700-A option TP3 Rev.8... -
Page 89: Controller Maintenance
To cancel the warning: Tap the <Clear> button. For details of the parts consumption management, refer to the following manual. Robot Controller Manual RC700 / RC700-A For T series manipulator, refer to the following manual. T series manipulator RC700-A option TP3 Rev.8... -
Page 90: Robot Maintenance
To cancel the warning: Tap the <Clear> button. For details of the parts consumption management, refer to the following manual. Robot Controller Manual RC700 / RC700-A For T series manipulator, refer to the following manual. T series manipulator RC700-A option TP3 Rev.8... -
Page 91: Configuration
: Sets the speaker volume. Move the slider to set appropriate volume. Font Size : Sets the font size displayed in the file contents display area of the [Programming] panel and [Test] panel. Select from “Small”, “Middle”, or “large”. RC700-A option TP3 Rev.8... -
Page 92: System Information
The following two items are required for updating. - USB memory with sufficient capacity - PC to write the update file to the USB memory Preparation (1) Insert the USB memory to PC. (2) Copy the update file from PC to USB memory. RC700-A option TP3 Rev.8... -
Page 93: Shutdown
The following operations stop power supply to the Teach Pendant. Before conducting the following operations, make sure to shut down the Teach Pendant system. When turning off the Controller When removing the Teach Pendant from the Controller RC700-A option TP3 Rev.8... - Page 94 You can set a password to restrict operators to use the following functions. Brake function (6-axis robot only) Maintenance Test (T2) function Set the password in the EPSON RC+. NOTE with T2 mode cannot be used on RC700-A Controllers complying the UL standards.
-
Page 95: Troubleshooting
- Check for the setting whether it is set to store execution source files to the Controller. Settings can be confirmed by following steps: Select EPSON RC+ menu- [Project]-[Properties]-[Source Files In Controller] and check if desired files are checked in [Select source files to store in controller:]. -
Page 96: Maintenance Parts List
Operation 8. Maintenance Parts List 8. Maintenance Parts List Part Name Code Note Wall Bracket R12NZ900NH 10 m R12NZ900NJ Option Extension Cable 15 m R12NZ900NK RC700-A option TP3 Rev.8...
Need help?
Do you have a question about the TP3 and is the answer not in the manual?
Questions and answers