Table of Contents
Advertisement
Quick Links
Advertisement
Table of Contents

Subscribe to Our Youtube Channel
Related Manuals for Epson RC420


Summary of Contents for Epson RC420
- Page 1 ROBOT CONTROLLER RC420 Rev.9 EM073C1492F...
- Page 3 ROBOT CONTROLLER RC420 Rev.9 Copyright 2002-2007 SEIKO EPSON CORPORATION. All rights reserved. RC420 Rev.9...
- Page 4 FOREWORD Thank you for purchasing our robot products. This manual contains the information necessary for the correct use of the RC420 robot controller. Please carefully read this manual and other related manuals before installing the robot system. Keep this manual handy for easy access at all times.
- Page 5 Please prepare the following items before you contact us. - Your controller model and its serial number - Your manipulator model and its serial number - Software and its version in your robot system - A description of the problem SERVICE CENTER RC420 Rev.9...
- Page 6 MANUFACTURER & SUPPLIER Japan & Others SEIKO EPSON CORPORATION Suwa Minami Plant Factory Automation Systems Dept. 1010 Fujimi, Fujimi-machi, Suwa-gun, Nagano, 399-0295 JAPAN : +81-(0)266-61-1802 : +81-(0)266-61-1846 SUPPLIERS North & South America EPSON AMERICA, INC. Factory Automation/Robotics 18300 Central Avenue...
-
Page 7: Table Of Contents
Checking Latch Release Switch Operation....34 Emergency Stop Switch............35 5.2.1 Emergency Stop Switch ..........35 5.2.2 Checking Emergency Stop Switch Operation ....35 E. STOP Box................36 5.3.1 E. STOP Box ..............36 5.3.2 Checking E. STOP Box Operation ......36 Pin Assignments ..............37 RC420 Rev.9... - Page 8 Timing Diagram for Safety Door Input Sequence..74 8.2.5 Timing Diagram for Emergency Stop Sequence ..74 8.2.6 Timing Diagram for RECOVER Sequence ....75 9. RS-232C Settings..........77 RS-232C cable ...............77 9.1.1 Pin Assignments............77 9.1.2 Connection Example ..........78 Preparation for Communication ..........78 RC420 Rev.9...
- Page 9 10.5.3 Life Cycle of Battery............81 10.5.4 Replacement of Battery ..........83 10.6 Setting up Windows ..............84 10.6.1 Installing RC420 UPS Drivers ........84 10.6.2 Basic Configuration of Windows ........96 10.6.3 Setting up the Automatic Shutdown at the Time of a Power Failure ............98 10.6.4 UPS Setup Consideration ........102...
- Page 10 (With “EasyRestore” License Label) ......144 12.1.3 Windows Recovery (Without “EasyRestore” License Label) ....147 12.2 Configuring Windows ............151 12.3 Setting Up EPSON RC+ (Using the Network) .....151 12.3.1 Necessary Items............151 12.3.2 Sharing Configuration ..........151 12.3.3 Network Configuration..........153 12.3.4 Starting EPSON RC+ Setup Program .....157 12.3.5 Installing EPSON RC+ ..........157...
-
Page 11: Setup & Operation
Setup & Operation This manual contains information for setup and operation of the RC420 Robot Controller. - Page 12 Setup & Operation...
-
Page 13: Safety
Please read this manual and other related manuals before installing the robot system or before connecting cables. Keep this manual in a handy location for easy access at all times. Read the Safety chapter in EPSON RC+ User’s Guide and confirm “Safety-related requirements”. 1.1 Conventions Important safety considerations are indicated throughout the manual by the following symbols. -
Page 14: Safety Precautions
EMERGENCY connector so that the Emergency Stop switch in the operation unit or the ATTEND (TEACH) control device connected to the OPTIONAL DEVICE connector always functions. (Refer to the typical application diagram in the Setup & Operation 5.5 Circuit Diagrams.) RC420 Rev.9... - Page 15 (For EPSON RC+ Users, only the hardware that has been approved by EPSON can be installed on the robot system.) Do not install any other software in the robot system except for the software that was originally installed at ship time.
- Page 16 Do not open the cover(s) of the Controller except while maintaining it. Opening the cover(s) of the Controller is extremely hazardous and may result in electric shock even when its main power is OFF because of the high voltage charge WARNING inside the Controller. RC420 Rev.9...
-
Page 17: Safety Features
Setup & Operation 1. Safety 1.3 Safety Features The RC420 robot control system supports safety features described below. However, the user is recommended to strictly follow the proper usage of the robot system by thoroughly reading the attached manuals before using the system. Failure to read and understand the proper usage of the safety functions is highly dangerous. - Page 18 Manipulator’s actual position and commanded position exceeds the margin of error allowed. Speed Overflow-Servo Error-Detection The dynamic brake circuit is activated when the Manipulator’s actual speed is detected to mark an overflow (the actual speed is outside the nominal range) error. RC420 Rev.9...
-
Page 19: Rc420 Rev
The dynamic brake circuit is activated when the temperature of the power device inside the Motor Driver module is above the nominal limit. Over-Voltage Detection The dynamic brake circuit is activated when the voltage of the Controller is above the normal limit. (When a regeneration module is mounted.) RC420 Rev.9... - Page 20 Setup & Operation 1. Safety RC420 Rev.9...
-
Page 21: Part Names And Functions
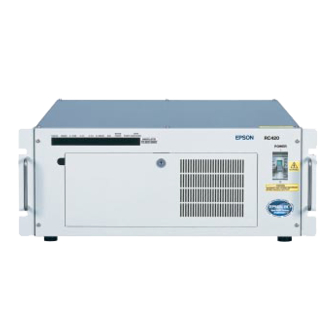
Setup & Operation 2.1 System Configuration (Part Names and Functions) 2. Part Names and Functions 2.1 System Configuration The RC420 can control up to four AC Servo Motors simultaneously. Example : One Controller and One Manipulator 2.2 Standard Specifications Item... - Page 22 AC 200V to AC 240V Power Source Single phase 50/60 Hz Maximum Power 2000W (Depending on the Manipulator model) Consumption Insulation Resistance 100 MΩ or more Rated Ambient Temperature 5 to 40 deg.C Rated Relative Humidity 20% to 80% (with no condensation) RC420 Rev.9...
-
Page 23: Controller
If any other hardware is installed to the robot system, the robot system may not only function improperly but also cause safety problems. (For EPSON RC+ Users, only the hardware that has been approved by EPSON can be installed on the robot system.) ■... - Page 24 Manipulator has an error. The number starts from 01. When an error occurs that has no relation to a Manipulator or joint, the error number will appear, but the Manipulator number and joint number will both be displayed as 00. RC420 Rev.9...
- Page 25 In this case, make sure to contact your dealer before performing any maintenance procedures. (8) Power switch Turns ON or OFF the Controller. (9) USB connector Connects the USB-enabled hardware (CD-ROM drive, etc.). There is another port on the rear of the Controller. RC420 Rev.9...
- Page 26 For details, refer to the Setup & Operation 4. OPTIONAL DEVICE Connector. ■ Do not connect the EPSON RC+ software key to the OPTIONAL DEVICE connector. Connecting the EPSON RC+ software key to the OPTIONAL DEVICE connector while the Controller is ON may cause damage to the EPSON RC+ software key.
-
Page 27: Rear Panel
Connects the USB-enabled hardware (CD-ROM drive, etc.). There is another port on the front of the Controller. (3) IEEE-1284 (parallel) connector This connector is for the EPSON RC+ software key. (4) EMERGENCY connector This connector is used for input/output from/to Emergency Stop and Safety Door switches. - Page 28 Up to 4 slots are available for optional boards such as the Expansion I/O Board or Pulse Generating Board. Do not mount boards other than the optional boards for the RC420. (11) CPU Board For details, refer to the Setup & Operation 2.2 Standard Specifications.
-
Page 29: Dimensions
Setup & Operation 2.3 Controller (Part Names and Functions) 2.3.3 Dimensions 35.0 415.0 383.0 483.0 433.0 [Unit: mm] NOTE Do not remove any rubber feet of the Controller. RC420 Rev.9... - Page 30 Setup & Operation 2.3 Controller (Part Names and Functions) RC420 Rev.9...
-
Page 31: Installation
- There must also be room behind the Controller so that one can attach and remove cables and boards. - Do not block airflow to or from the fan. The RC420 Controller must be normally placed horizontally. NOTE Do not remove any rubber feet of the RC420 Controller. RC420 Rev.9... -
Page 32: Power Supply
10kHz or more leakage current. If you install a circuit breaker, please select one that will handle the above mentioned “peak current”. The power receptacle shall be installed near the equipment and shall be easily accessible. RC420 Rev.9... -
Page 33: Power Plug
The serial number of the Manipulator that should be connected is indicated on the Connection Check Label on the Controller. Connect the Controller and the Manipulator correctly. Improper connection between the Controller and the Manipulator may cause not only improper function of the robot system but also CAUTION safety problems. RC420 Rev.9... -
Page 34: Typical Cable Connection
AC200V power (6) Protective Earth Protective Earth Protective earth Terminal Expansion I/O (option) Input/output unit MONITOR Monitor (8) Mouse Cable Mouse MOUSE/KEYBOARD (9) Keyboard Cable Keyboard ATTEND (TEACH) OPTIONAL DEVICE Control Device or Operation Unit or Dummy Plug RC420 Rev.9... - Page 35 (5) AC Power Cable INPUT AC200V power (6) Protective Earth Protective Earth Protective earth Terminal Expansion I/O (option) Input/output unit MONITOR Monitor (10) Mouse/Keyboard Cable Mouse MOUSE/KEYBOARD Keyboard ATTEND (TEACH) OPTIONAL DEVICE Control Device or Operation Unit or Dummy Plug RC420 Rev.9...
- Page 36 ■ Connect the mouse and the keyboard properly when the power in OFF. If the mouse or keyboard is connected when the power in ON or connected incorrectly, the robot system cannot function properly. CAUTION RC420 Rev.9...
-
Page 37: Connecting The Manipulator To The Controller
Controller. Therefore the Controller should be connected to the Manipulator whose serial number is specified in the Connection Check label attached on the front of the Controller. NOTE The Manipulator’s serial number is indicated on the signature label on the back of the Manipulator. RC420 Rev.9... -
Page 38: Noise Countermeasures
- As they are easily influenced by static electricity or the noise from power source, keep the mouse and keyboard away from peripheral noise sources. NOTE It is sometimes effective in suppressing such noise to wind the keyboard or mouse cables around a ferrite core several times. RC420 Rev.9... -
Page 39: Optional Device Connector
User’s Guide. Please refer to them to keep the robot system safe. 4.1 OPTIONAL DEVICE Connector ■ Do not connect the EPSON RC+ software key to the OPTIONAL DEVICE connector. Connecting the EPSON RC+ software key to the OPTIONAL DEVICE connector while the Controller is ON may cause damage to the EPSON RC+ software key. -
Page 40: Attend (Teach) Control Device
4.2 ATTEND (TEACH) Control Device The name of the control device depends on the software used in your Controller as shown below EPSON RC+ : TEACH control device SPEL CT : ATTEND control device To operate the Manipulator at a short distance without any operation unit (option), you should use the ATTEND (TEACH) control device. -
Page 41: Optional Device Dummy Plug
In this case, however, you cannot operate the Manipulator while the safety door is open. When designing and manufacturing robotic systems, follow the descriptions of the Safety chapter in EPSON RC+ User’s Guide. OPTIONAL DEVICE OPTIONAL DEVICE Dummy Plug... -
Page 42: Pin Assignments
Connect to SG (13 pin) Open The ATTEND (TEACH) control device Disabled Open Connect to SG (13 pin) If you are connecting an Emergency Stop switch, connect it to the EMERGENCY connector on the rear of the Controller. RC420 Rev.9... -
Page 43: Emergency Connector
Therefore, make sure that the Safety Door switch has two separate redundant circuits and that each connects to the specified pins at the EMERGENCY connector on the Controller. - The Safety Door must be designed and installed so that it does not close accidentally. RC420 Rev.9... -
Page 44: Latch Release Switch
In order to change the latched condition of the TEACH mode, turn the mode selector switch on the operation unit to the AUTO mode or turn the ATTEND (TEACH) control device enable/disable switch to “disable”. Then, close the latch release input. RC420 Rev.9... -
Page 45: Emergency Stop Switch
Emergency Stop at the Controller via the EMERGENCY connector, make sure that the desired equipment is connected to the Emergency Stop output terminals. The relay contacts at the EMERGENCY connector (#5 & #6) (normally closed) will open at the input of Emergency Stop state. RC420 Rev.9... -
Page 46: Stop Box
(3) Make sure that “E.Stop” is displayed on the status bar on the monitor window. (4) Release the E. STOP box switch. (5) Execute the RESET command. (6) Make sure that “E-STOP” LED is turned OFF and the “E.Stop” is no longer visible (or dimmed) from the status bar. RC420 Rev.9... -
Page 47: Pin Assignments
Latch Release rated input current 10mA/24V input Emergency Stop output relay contact rated +30V 0.5A or under 5-6 pin load NOTE The total electrical resistance of the Emergency Stop switches and their circuit should be 1Ω or less. RC420 Rev.9... -
Page 48: Circuit Diagrams
Stop detection Dynamic brake control Emergency Stop detection Emergency Stop detection External Dynamic +24V brake control Safety Door input 1 Safety Door input 2 Latch release input External Latch release input +24V GND Close: latch off Open: latch on RC420 Rev.9... -
Page 49: Example 2: External Safety Relay Typical Application
Emergency stop detection Emergency stop detection External +24V External Dynamic +24V brake control Safety Door input 1 Safety Door input 2 Latch release input External Safety Door latch release input +24V GND Close: latch off Open: latch on RC420 Rev.9... - Page 50 Setup & Operation 5.5 Circuit Diagrams (EMERGENCY Connector) RC420 Rev.9...
-
Page 51: Standard I/O Connector
Refer to the Setup & Operation 7. Expansion I/O Board - Optional for the specified model of an expansion I/O Board. For cable wiring, refer to the Setup & Operation 3.4 Noise Countermeasures in order to prevent noise. RC420 Rev.9... -
Page 52: Input Circuit
(Same) 6 Input No. 4 (Same) 7 Input No. 5 (Same) 8 Input No. 6 (Same) 9 Input No. 7 (Same) 10 Input No. 8 to 15 common (Same) 11 Input No. 8 12 Input No. 9 (Omit) RC420 Rev.9... - Page 53 (Same) 6 Input No. 4 (Same) 7 Input No. 5 (Same) (Same) 8 Input No. 6 9 Input No. 7 (Same) 10 Input No. 8 to 15 common (Same) 11 Input No. 8 12 Input No. 9 (Omit) RC420 Rev.9...
-
Page 54: Output Circuit
24 Output No. 5 (Same) 25 Output No. 6 (Same) 26 Output No. 7 (Same) 28 Output No. 8 (Same) 29 Output No. 9 (Same) (Omit) 44 Output common (GND) 45 Output common (GND) 46 Output common (GND) RC420 Rev.9... - Page 55 24 Output No. 5 (Same) 25 Output No. 6 (Same) 26 Output No. 7 (Same) 28 Output No. 8 (Same) 29 Output No. 9 (Same) (Omit) 44 Output common (+DC) 45 Output common (+DC) 46 Output common (+DC) RC420 Rev.9...
-
Page 56: Pin Assignments
Output common Output No. 2 Output common Output No. 3 +24V Output Output No. 4 +24V Output Output No. 5 +24V GND Output Output No. 6 +24V GND Output Connector Standard D-Sub 50 pin STANDARD I/O Connector #4-40 screw RC420 Rev.9... -
Page 57: Standard I/O Connector Optional Cable For Usa Specification - Pin Assignments
Input No. 15 Output No. 0 Output common Output No. 1 Output common Output No. 2 Output common Output No. 3 +24V Output Output No. 4 +24V Output Output No. 5 +24V GND Output Output No. 6 +24V GND Output RC420 Rev.9... - Page 58 Setup & Operation 6.3 Pin Assignments (STANDARD I/O Connector) RC420 Rev.9...
-
Page 59: Expansion I/O Board - Optional
■ Be sure to wire the output circuit properly. Especially the expansion I/O board has no protection circuitry for short-circuit and reverse-connection. Improper wiring may cause malfunction of the parts on the board and then improper CAUTION function of the robot system. RC420 Rev.9... -
Page 60: Protected Expansion I/O Board
When the Expansion I/O Board is used, the appropriate software settings must be done in addition to the jumper settings. For details about software settings, refer to the section, Expansion I/O Board Software Configuration in the chapter, I/O Systems in EPSON RC+ User’s Guide. -
Page 61: Input Circuit
1 Input No.48 to 51 common 470 Ω 2.2 kΩ 3 Input No.48 4 Input No.49 (Same) 5 Input No.50 (Same) 6 Input No.51 (Same) 51 Input No.52 to 55 common 53 Input No.52 (Same) 54 Input No.53 (Same) (Omit) RC420 Rev.9... - Page 62 1 Input No.48 to 51 common 470 Ω 2.2 kΩ 3 Input No.48 4 Input No.49 (Same) 5 Input No.50 (Same) 6 Input No.51 (Same) 51 Input No.52 to 55 common 53 Input No.52 (Same) 54 Input No.53 (Same) (Omit) RC420 Rev.9...
-
Page 63: Output Circuit
77 Output No. 52 (Same) (Omit) : + 12 V to 24 V ±10% Rated Output Voltage Maximum Output current : 250 mA/1 output Output Driver : N channel power MOS FET Saturation Voltage : 1.0 V or under RC420 Rev.9... - Page 64 77 Output No. 52 (Same) (Omit) : + 12 V to 24 V ±10% Rated Output Voltage Maximum Output current : 250 mA/1 output Output Driver : P channel power MOS FET Saturation Voltage : 1.0 V or under RC420 Rev.9...
-
Page 65: Expansion I/O Board
When an Expansion I/O Board is used, the appropriate software settings must be done in addition to the jumper settings. For details about software settings, refer to the section, ISA I/O Board Software Configuration in the chapter, I/O Systems in EPSON RC+ User’s Guide. -
Page 66: Output Circuit
26 Output No. 48 to 51 common (GND) (Same) 77 Output No. 52 (Omit) : + 12 V to 24 V ±10% Rated Output Voltage Maximum Output current : 250 mA/1 output Output Driver : Transistor array Saturation Voltage : 1.6 V or under RC420 Rev.9... - Page 67 83 Output No. 60 (Same) 84 Output No. 61 (Same) (Omit) : + 12 V to 24 V ±10% Rated Output Voltage Maximum Output Current : 100 mA/1 output Output Driver : Photo coupler Saturation Voltage : 1.6 V or under RC420 Rev.9...
-
Page 68: Expansion I/O Board: Pin Assignments
Input common G (No. 72 to 75) Output common G (GND: No. 72 to 75) Output No.72 Input No.72 Output No.73 Input No.73 Output No.74 Input No.74 Output No.75 Input No.75 Output common A (+DC: No. 48 to 51) RC420 Rev.9... - Page 69 Input common H (No. 76 to 79) Output common H (GND: No. 76 to 79) Output No.76 Input No.76 Output No.77 Input No.77 Output No.78 Input No.78 Output No.79 Input No.79 Output common B (+DC: No. 52 to 55) RC420 Rev.9...
-
Page 70: Pin Assignments (Pnp Type)
Input common G (No. 72 to 75) Output common G (+DC: No. 72 to 75) Output No.72 Input No.72 Output No.73 Input No.73 Output No.74 Input No.74 Output No.75 Input No.75 Output common A (GND: No. 48 to 51) RC420 Rev.9... - Page 71 Input common H (No. 76 to 79) Output common H (+DC: No. 76 to 79) Output No.76 Input No.76 Output No.77 Input No.77 Output No.78 Input No.78 Output No.79 Input No.79 Output common B (GND: No. 52 to 55) RC420 Rev.9...
-
Page 72: Expansion I/O Connector
7.5.2 Expansion I/O Connector Cable The Expansion I/O connector cable is an optional part. It has a 100-pin connector on one end and two 50-pin connectors on the other end. 100-pin 50-pin × 2 Expansion I/O board RC420 Rev.9... -
Page 73: Cable - Pin Assignments
(60) Input No.61 (84) Output No.61 (61) Input No.62 (85) Output No.62 (62) Input No.63 (86) Output No.63 (49) FG (50) FG The number in parentheses in the Pin No. above means the corresponding pin number on the 100-pin connector. RC420 Rev.9... - Page 74 Output No.77 23 (73) Input No.78 (97) Output No.78 24 (74) Input No.79 (98) Output No.79 25 (99) FG (100) FG The number in parentheses in the Pin No. above means the corresponding pin number on the 100-pin connector. RC420 Rev.9...
- Page 75 23 (61) Input No.62 48 (85) Output No.62 24 (62) Input No.63 49 (86) Output No.63 25 (49) FG 50 (50) FG The number in parentheses in the Pin No. above means the corresponding pin number on the 100-pin connector. RC420 Rev.9...
- Page 76 Input No.77 (96) Output No.77 (73) Input No.78 (97) Output No.78 (74) Input No.79 (98) Output No.79 (99) 50 (100) FG The number in parentheses in the Pin No. above means the corresponding pin number on the 100-pin connector. RC420 Rev.9...
-
Page 77: I/O Remote Settings
For further details, refer to the section, Remote Control Software Configuration in the chapter, Remote Control in EPSON RC+ User’s Guide. For details about I/O cable connection, refer to sections on Setup & Operation 6. STANDARD I/O Connector, and Setup & Operation 7. Expansion I/O Board - Optional in this manual. -
Page 78: I/O Signal Description
Therefore, it is recommended that the remote equipment uses the Error output and Reset input to monitor and clear error conditions. The remote input signals for EPSON RC+ are as follows: Name Description Turns motors on for the current robot. - Page 79 (*2) The Start input is enabled for the group number specified with SelGroup0-3 bits. (*3) Specify the manipulator number with SelRobot0 - 3 as shown in the table below. Specified SelRobot0 SelRobot1 SelRobot2 SelRobot3 Manipulator 0 : OFF, 1 : ON RC420 Rev.9...
- Page 80 Setup & Operation 8.1 I/O Signal Description (I/O Remote Settings) (*4) Specify the group number with SelGroup0-3 referring to the table below. Specified SelGroup0 SelGroup1 SelGroup2 SelGroup3 Group No. 0 : OFF, 1 : ON RC420 Rev.9...
-
Page 81: Remote Output Signals
Setup & Operation 8.1 I/O Signal Description (I/O Remote Settings) 8.1.2 Remote Output Signals Remote outputs provide status for the current Manipulator and Controller. The remote output signals for EPSON RC+ are as follows: Function Description MotorOn Indicates that motors are on for the current robot. -
Page 82: Timing Specifications
The pulse width of an input signal must be 25 or more milliseconds to be detected. 8.2.2 Timing Diagram for Operation Execution Sequence CmdRunning Output Power High Output MotorOn About 1000 Output Depending on AtHome HOME motion About 1000 Output MotorOn Input MotorOff Input Home Input PowerHigh Input PowerLow Input [Unit: msec] RC420 Rev.9... -
Page 83: Timing Diagram For Program Execution Sequence
Output Paused Output (*1) SelGroup Input Start Input Pause Input Cont Input AbortAll Input [Unit: msec] *1: The duration varies depending on the Quick Pause (QP) setting and the program’s operating status at the time of Pause input. RC420 Rev.9... -
Page 84: Timing Diagram For Safety Door Input Sequence
Paused Output SafeGuard Output MotorOn Depending on Program Output Safety Input Input Latch Input Input Cont Input [Unit: msec] 8.2.5 Timing Diagram for Emergency Stop Sequence TasksRunning Output MotorOn Output EStopOn Output Emergency Input Reset Input [Unit: msec] RC420 Rev.9... -
Page 85: Timing Diagram For Recover Sequence
Setup & Operation 8.2 Timing Specifications (I/O Remote Settings) 8.2.6 Timing Diagram for RECOVER Sequence Remote Auto Recover Paused Output SafeGuard Output RecoverReqd Output RecoverInCycle Output Safety Input Input Latch Input Input Recover Input Start Input [Unit: msec] RC420 Rev.9... - Page 86 Setup & Operation 8.2 Timing Specifications (I/O Remote Settings) Remote Manual Recover Paused Output SafeGuard Output RecoverReqd Output RecoverInCycle Output Safety Input Input Latch Input Input Recover Input Start Input [Unit: msec] RC420 Rev.9...
-
Page 87: Rs-232C Settings
The Standard RC420 Controller comes with two RS-232C channels to facilitate controlling of the data communication among the host computer, robot system and their peripheral equipment. 9.1 RS-232C cable RS-232C cables are not included with the standard RC420 Controller. The user must prepare them as necessary. Connector Standard... -
Page 88: Connection Example
For communication via RS-232C between the Controller and peripheral equipment to work, the port configuration on both units must be the same. For details on the set-up procedure and communication commands, refer to the section, RS-232 Software Configuration in the chapter, RS-232 Communications in EPSON RC+ User’s Guide. RC420 Rev.9... -
Page 89: Ups (Uninterruptible Power Supply)
10.3 Normal Shutdown of Robot System Exit EPSON RC+ and shut down Windows. After the Controller is ready to be turned OFF, turn OFF the power switch of the Controller. Then, all the power supplies except for the UPS will be turned OFF immediately and the UPS power supply will be turned OFF approximately five seconds later. -
Page 90: While Windows Is Being Booted Up
→ The power switch is left OFF. The UPS automatically shuts down Windows when detecting power-off. After Windows is shut down, the SHUTDOWN LED on the front panel of the Controller lights. Approximately five seconds later, the UPS power is turned OFF automatically. RC420 Rev.9... -
Page 91: Ups Battery
Dispose of the used battery appropriately in accordance with the laws and acts of your national or local government. If you cannot dispose of a used battery properly, please inquire of your EPSON robot supplier how to dispose of it. 10.5.2 Charging Battery Turning ON the Controller will automatically charge the UPS battery. - Page 92 (10) Turn ON the Controller and keep it energized for approximately 80 minutes to charge the UPS battery. (11) Set the driver [SPEL VSRCSHUT] whose setting was “Disable” in Step (6) to the “Enable”. (Right-click on the [SPEL VSRCSHUT] and select the “Enable” from the pop-up menu.) RC420 Rev.9...
-
Page 93: Replacement Of Battery
Insert the new battery into the Controller Secure the battery cover to the Controller with the six mounting screws. (10) Connect the battery connector. (11) Secure the front cover to the Controller with the four mounting screws. (12) Turn ON the UPS ON/OFF switch. RC420 Rev.9... -
Page 94: Setting Up Windows
Normally, it is not necessary to install the UPS drivers following the procedure described in this section. When the UPS is installed in the RC420 Controller, you must configure COM4 to allow communication with the device and also install the UPS driver following the procedure below. - Page 95 (7) Select the “Add a new device”, then click the <Next> button. (8) Select the <No, I want to select the hardware from a list> option button, then click the <Next> button. (9) Select the “Ports [COM & LPT]”, then click the <Next> button. RC420 Rev.9...
- Page 96 <OK> button. (12) Select “Basic configuration 0008” in the [Setting based on] box in the [Add New Hardware Wizard Properties] dialog. (13) Click the “Input/Output Range” in the [Resource settings] box in the [Add New Hardware Wizard Properties] dialog. RC420 Rev.9...
- Page 97 (19) Click the <Next> button in the wizard and finish the installation. (20) Reboot the system when prompted to do so. (21) Double-click the <Add / Remove Hardware> icon in the [Control Panel]. The [Add / Remove Hardware Wizard] dialog will appear. (22) Click the <Next> button. RC420 Rev.9...
- Page 98 (23) Select the <Add / Troubleshoot a device> option button, then click the <Next> button. (24) Select the “Add a new device”, then click the <Next> button. (25) Select the <No, I want to select the hardware from a list> option button, then click the <Next> button. RC420 Rev.9...
- Page 99 (26) Select the “Other devices”, then click the <Next> button. (27) Click the <Have disk...> button. (28) Enter or browse for the target path for the “VSRCShut.inf” file located in “c:\EpsonRc\RC420\Drivers”. Then click the <Next> button. (29) Reboot the system when prompted. EPSON RC+4.2 or after (Windows XP) (1) Restart the Controller and enter the BIOS.
- Page 100 (8) Select the “Add a new hardware device”, then click the <Next> button. (9) Select the <Install the hardware that I manually select from a list> option button, then click the <Next> button. (10) Select the “Ports [COM & LPT]”, then click the <Next> button. RC420 Rev.9...
- Page 101 (11) Select the “Communications Port” in the [Models] box, then click the <Next> button. (12) Click the <Next> button in the Add Hardware Wizard. (13) Click [View or change resources for this hardware] in the Add Hardware Wizard. (14) Click the <Set Configuration Manually> button. RC420 Rev.9...
- Page 102 (17) Enter “02E8-02EF” for the [Value] box and click the <OK> button. (18) Select the “Interrupt Request” in the [Resource settings] box in the dialog of step (15) and click the <Change Setting …> button. The [Edit Interrupt Request] dialog will appear. RC420 Rev.9...
- Page 103 (24) Double-click the <Add Hardware> icon. (25) Click the <Next> button on [Add Hardware Wizard]. (26) Select [Yes, I have already connected the hardware], then click the <Next> button. (27) Select [Add a new hardware device], then click the <Next> button. RC420 Rev.9...
- Page 104 Setup & Operation 10. UPS (Uninterruptible Power Supply) (28) Select [Install the hardware that I manually select from a list], then click the <Next> button. (29) Select [Show All Devices], then click the <Next> button. (30) Click the <Have disk...> button. RC420 Rev.9...
- Page 105 Setup & Operation 10. UPS (Uninterruptible Power Supply) (31) Enter or browse for the target path for the VSRCShut.inf file located in c:\EpsonRc\RC420\Drivers. Then click Next. (32) Click the <Next> button in the wizard and finish the installation. (33) Reboot the system when prompted. RC420 Rev.9...
-
Page 106: Basic Configuration Of Windows
The UPS has been enabled before shipping. Normally, it is not necessary to configure Windows following the procedure described in this section. Open the Control Panel. When using EPSON RC+4.2 (Windows XP), select [Switch to Classic View]. Double-click the <Power Options> icon in the [Control Panel]. The [Power Options properties] dialog will appear. - Page 107 Click the <Select…> button in the [UPS] panel. The [UPS Selection] dialog will appear. Select the “SEIKO EPSON CORPORATION” from the [Select manufacturer] box. Select the “RC420 UPS” from the [Select model] box. Select the “COM4” from the [On port] box.
-
Page 108: Setting Up The Automatic Shutdown At The Time Of A Power Failure
Controller following the procedure below. (1) Open the Control Panel. When using EPSON RC+4.2 (Windows XP), select [Switch to Classic View]. (2) Double-click the <Power Options> icon in the [Control Panel]. The [Power Options Properties] dialog will appear. - Page 109 Setup & Operation 10. UPS (Uninterruptible Power Supply) (4) Click the <Configure…> button. The [UPS Configuration] dialog will appear. (5) Check the [When the alarm occurs, run this program] checkbox. RC420 Rev.9...
- Page 110 : This is the default computer name. The actual computer name varies depending on serial number at shipping or user setting. EPSON RC User : This is the default user name. Specify the user name for logging on the Controller. (7) Enter the file name for the [Run] box.
- Page 111 (9) Click the <OK> button. The [UPS Configuration] dialog will appear. (10) Click the <OK> button. (11) Click the <OK> or <Apply> button in the [Power Options Properties] dialog. (12) Double-click the file name. EPSON RC+ : C:\EpsonRC\RC420\drivers\UPS.reg SPEL CT : C:\PSPELWORK\SYS\REG\UPS folder\Wait0.reg (13) Click the <Yes> button.
-
Page 112: Ups Setup Consideration
If this time is set to longer than 2 minutes, execute the “UPS.reg” and set the time to “0” referring to step (11) in the section 10.6.3 Setting up the Automatic Shutdown at the Time of a Power Failure. RC420 Rev.9... - Page 113 After you change the computer name, user name, or password, configure the UPS again so that it will automatically shut down the RC420 Controller in the case of a power failure. For details, refer to the section 10.6.3 Setting up the Automatic Shutdown at the Time of a Power Failure.
- Page 114 Setup & Operation 10. UPS (Uninterruptible Power Supply) RC420 Rev.9...
-
Page 115: Maintenance
Maintenance This manual contains maintenance procedures for the RC420 Robot Controller. - Page 116 Maintenance RC420 Rev.9...
-
Page 117: Safety Precautions On Maintenance
■ Do not lose the screws removed at maintenance. When the screw is dropped into the Controller, be sure to take it out. Leaving the screw in the Controller may cause short circuit and may result in equipment damage to the parts and/or robot system. RC420 Rev.9... -
Page 118: Lockout
The tagout method is attaching a tag or sign plate to the Power switch to prevent any one from turning ON the robot system by mistake while someone else is within the safeguarded area for maintenance or repair. RC420 Rev.9... -
Page 119: Regular Maintenance Inspection
4 months (1000 h) 5 months (1250 h) 6 months (1500 h) 7 months (1750 h) 8 months (2000 h) 9 months (2250 h) 10 months (2500 h) 11 months (2750 h) 12 months (3000 h) 13 months (3250 h) RC420 Rev.9... -
Page 120: Inspection While The Controller Is Turned Off
- Do not allow the positive (+) and negative (-) electrodes to short circuit at CAUTION maintenance. - Do not throw batteries into fire or heat them to high temperature. - Do not disassemble or alter batteries. When discarding batteries, insulate the terminals by wrapping them with tape, etc. RC420 Rev.9... - Page 121 3-8. Press the <Esc> key twice. The [BIOS] dialog will appear. 3-9. Press the <F10> key. The message “SAVE to COMS and EXIT (Y/N)?” will appear. 3-10. Press the <Y> key and then <Enter> key. The system will be automatically restarted. RC420 Rev.9...
-
Page 122: Backup Of Data
For EPSON RC+, you can save and restore the system configuration using the MKVER and SETVER commands. Before servicing the system, you should execute MKVER and store the system configuration on a floppy disk. - Page 123 (3) Type in a unique name to identify the system in the [MKVER Name] text box. (4) Select the disk drive where you want to save the information in the [Drive] box. (You can select any drive except for C drive.) (5) Click the <OK> button to save the system configuration. RC420 Rev.9...
- Page 124 (2) Click the <SETVER> button to open the [SETVER] dialog. (3) Select the drive where the backed-up information is stored in the [Drive] box. (4) Select the system configuration from the [Select MKVER files] list box. (5) Click the <OK> button to restore the system configuration. RC420 Rev.9...
- Page 125 Backing up / Restoring a Project You can back up the whole of stored project and restore it. You can also move your developing EPSON RC+ applications into another system. Back up a project Follow the steps below to make a backup copy of the current project.
- Page 126 (4) Select the “C drive” in the [New Project Drive] box. (5) Enter a project name for the [New Project Name] box. (6) Click the <OK> button. NOTE The currently open project is the project stored in the C drive. RC420 Rev.9...
-
Page 127: Controller Internal Layout
Motor Driver removing the Motor Driver modules. module slot, as shown above. You can see the layout as shown in the picture below when removing the Bottom Cover. Switching Power Supply Module 1 Switching Power Supply Module 2 (Front) RC420 Rev.9... - Page 128 Maintenance 3. Controller Internal Layout RC420 Block Diagram Motor Driver Motor Driver Motor Driver Motor Driver Regeneration Module RC420 Rev.9...
-
Page 129: Pin Assignments For The System Connectors
The following tables show the pin assignments for the M/C power connector and M/C signal connector. As for the pin assignments of the connectors not covered in this section, refer to the Setup & Operation. Pin No. Signal Name Pin No. Signal Name SHIELD RC420 Rev.9... -
Page 130: M/C Signal Cable
Signal Name 1HOME ENC+5V ENC+5V 4HOME ENC+5V EMB1 +24V HCOM ENC+5V 3HOME ENC+5V ENC+5V EMB2 +24V 2HOME ENC+5V ENC+5V NOTE The Controller’s and Manipulator’s pin numbering layout differs: one is lined horizontally and the other is lined vertically. RC420 Rev.9... -
Page 131: Switching Power Supply Module
If this LED is not blinking or it is dim, the +5V and +12V power outputs may be not NOTE normal. STATUS MOTOR SAFE ERROR POWER D-ERROR E-STOP POWER SHUTDOWN (3) RUN LED (Green) (2) POWER LED (Green) RC420 Rev.9... -
Page 132: Replacement
Controller. Battery (9) Remove six mounting screws, and remove the Bottom Cover. (10) Remove the CN1 and CN2 connectors. (11) Remove the screws 1 and 2, and remove the Switching Power Supply module 1. Screw 2 Screw 1 RC420 Rev.9... -
Page 133: Replacing Switching Power Supply Module 2
(1) Perform the step (1) through (9) in the previous section 5.3.1 Replacing Switching Power Supply Module 1 . (2) Remove five connectors from the Switching Power Supply module 2. CN7 and CN8 connectors: Projections on the upper side CN15 connector: Projections on the lower side Connectors RC420 Rev.9... - Page 134 (12) Connect the connector of the board for display to the front cover. (13) Secure the front cover to the Controller with the four mounting screws. (14) Turn ON the UPS ON/OFF switch. (15) Connect the all the cables to the back of the Controller. RC420 Rev.9...
-
Page 135: Motor Driver Module
Record the CT data to be entered in the Controller before placing the Top Cover back on the Controller when replacing the Motor Driver module. After the replacement, refer to User’s Guide and set up the CT data. RC420 Rev.9... -
Page 136: Replacing A Motor Driver Module
(5) Pull the Motor Driver module up far enough so that the cable connected on the back can be disconnected. Compress the projections on both sides of the connector to disconnect the cable. (6) Connect the cable to a new Motor Driver module. RC420 Rev.9... - Page 137 (8) Secure the new Motor Driver module. (9) Record the CT data. (10) Mount the Top Cover. (11) Set up the CT data. For details, refer to the section, RC420 Drive Module Software Configuration in the chapter, Motion Systems in EPSON RC+ User’s Guide. RC420 Rev.9...
- Page 138 Maintenance 6. Motor Driver Module RC420 Rev.9...
-
Page 139: Dpb (Drive Power Board)
The connector to connect the Cooling Fan on the right side as you X317 face the front. The connectors are on the back side of the DPB as shown below. Remove the Bottom Cover from the Controller to check these connectors. X307 X306 X308 X315 X309 X310 X311 RC420 Rev.9... -
Page 140: Adjusting Encoder Voltage
“-” direction by 1/2 turn to lower the voltage. (5) Repeat step (2) to ensure that the voltage is between 4.9 V and 5.2 V. (6) If necessary, repeat steps (4) and (5) until the voltage is within the range of 4.9 V to 5.2 V. RC420 Rev.9... -
Page 141: Dmb (Drive Main Board)
+24V output voltage of the Switching Power Supply module TP17 GND for all the control power sources TP18 +12V +12V for the system panel TP19 +5V for the Motor Driver module TP20 +5.6V Encoder power supply voltage TP21 GND for all the control power sources RC420 Rev.9... -
Page 142: Replacing Dmb
(3) Wait for about 1 minute until the high voltage is discharged. (4) Turn over the Controller. (5) Remove the six mounting screws of the Bottom Cover and remove the Bottom Cover. (6) Disconnect the cables (X103, X105A, and X105B) from the backside of the DMB. RC420 Rev.9... - Page 143 (13) Pull each Motor Driver module up and disconnect the cables from the back. Compress the projections on both sides of the connector to disconnect the cable. RC420 Rev.9...
- Page 144 (24) Turn over the Controller. (25) Connect the cables to the backside of the DMB. (26) Mount the Bottom Cover to the Controller. (27) Turn over the Controller again. (28) Connect the cables to the back of the Controller. RC420 Rev.9...
-
Page 145: Regeneration Module
Then, remove the Top Cover by removing the six mounting screws. (4) Remove the two mounting screws for the Regeneration module. (5) Pull the Regeneration module up carefully, and disconnect the connector X102 from the DMB. X 1 0 2 X 3 0 5 RC420 Rev.9... - Page 146 (6) Connect the X102 connector of a new Regeneration module to the DMB. (7) The new Regeneration module must be pushed in carefully, while making it sure that the X305 connector engages properly. X102 X305 (8) Mount the Regeneration module securely. Place the Top Cover back on. RC420 Rev.9...
-
Page 147: Replacing Maintenance Parts
(1) Shut down Windows. Turn OFF the Controller. (2) Disconnect the cables for the CPU board from the back of the Controller. (3) Remove the Top Cover from the Controller. (4) Remove the four mounting screws for the board holder assembly and remove it. RC420 Rev.9... - Page 148 - Do not allow the positive (+) and negative (-) electrodes to short circuit at maintenance. CAUTION - Do not throw batteries into fire or heat them to high temperature. - Do not disassemble or alter batteries. - When discarding batteries, insulate the terminals by wrapping them with tape, etc. RC420 Rev.9...
-
Page 149: Hdd
(4) Pull out the HDD. (5) Install a new HDD. (6) Insert the key to the HDD key lock and turn the key to the left. NOTE Refer to the instructions supplied with the new HDD for new hard disk settings. RC420 Rev.9... -
Page 150: Fan Filter
Pull out the filter from the fan filter holder forward. Clean or replace the filter. When you clean the filter, use a vacuum cleaner. Insert the filter back into the filter holder. Make sure the filter is placed inside the hook. RC420 Rev.9... -
Page 151: Verifying Robot System Operation
OFF unless there is an Emergency Stop input. If there is an Emergency Stop input at this time, the LED will stay ON. E-STOP This LED turns ON when there is an Emergency Stop input to the Controller’s OPTIONAL DEVICE connector and EMERGENCY connector. RC420 Rev.9... - Page 152 - The MOTOR POWER LED on the Controller’s Front Panel turns ON. - The Manipulator operates normally, and there is excitation. (4) Execute various motion commands (such as JUMP, etc.). The Manipulator must operate accordingly and normally without vibration or unusual sounds. RC420 Rev.9...
-
Page 153: Recovering The Hdd
NOTE PS/2 keyboard and PS/2 mouse. NOTE Data for recovery incorporated in the HDD for the RC420 Embedded OS installed in may not be recovered by the HDD condition. Replace the HDD when recovery is unable. NOTE HDD for RC420 that installs Windows XP does not support recovery. Contact us when recovery is necessary. -
Page 154: Recovering Windows
12.1.2 Windows Recovery (With “EasyRestore” License Label) NOTE When you accidentally turn on the RC420 with the Recovery startup disk in its FD drive, the RC420 will start from the recovery startup disk. In this case, turn OFF the Controller before the restore begins. - Page 155 Do not skip the bad sector check About 20 minutes NOTE For the recovery of the HDD that has been used in the RC420, selecting “N” is recommended. (6) Terms of use appears. Follow the procedure and press the <Enter> key three times.
- Page 156 (9) Check the contents of the [Warning] dialog and click the <Yes> button. NOTE If clicking the <No> button, the Easy Restore ends. When you accidentally turned ON the RC420 with the recovery disk in the FD drive, click the <No> button in this dialog. (10) Restore starts.
-
Page 157: Windows Recovery (Without "Easyrestore" License Label)
Controller (inside the front door) in the [Product Key] dialog and click the <Next> button. (14) Input the serial number (SN*****) of the RC420 to the [Computer Name] box in the [Computer Name and Administrator Password] dialog and click the <Next> button. - Page 158 Maintenance 12. Recovering the HDD For the recovery of the HDD that has been used in the RC420, selecting “N” is recommended. (6) The message “Select “CONTINUE” to Start the Recovery process. Select “CANCEL” to exit.” Appears. Read the message and press the <Y> key.
- Page 159 NOTE If you press the <N> key, Windows recovery will not be executed. When you accidentally turned ON the RC420 with the recovery disk in the FD drive, click the <N> key in this window. (8) Restore starts. Please wait (9) After the restore is completed, “A:\>”...
- Page 160 Controller (inside the front door) in the [Product Key] dialog and click the <Next> button. (12) Input the serial number (SN*****) of the RC420 to the [Computer Name] box in the [Computer Name and Administrator Password] dialog and click the <Next> button.
-
Page 161: Configuring Windows
- Disabling the automatic update 12.3 Setting Up EPSON RC+ (Using the Network) This section describes the easiest procedure for setting up EPSON RC+ with “NetBEUI” protocol using the network. 12.3.1 Necessary Items Prepare the following items for the EPSON RC+ installation. - Page 162 (4) Click the <If you understand the security risk but want to share files without running the wizard, click here.> in the [Network sharing and security] group box. (5) Select the <Just enable file sharing> option button in the [Enable File Sharing] dialog and click the <OK> button. RC420 Rev.9...
-
Page 163: Network Configuration
12.3.3 Network Configuration Configure the network to use “NetBEUI” protocol in RC420 and your PC. For RC420, refer to the procedure from step (2) in 5. Windows XP. Procedure in step (1) is already configured at shipment. For your PC, refer to the applicable section according to Windows version installed in your PC. - Page 164 Copy the necessary files from the Windows XP installation CD-ROM since the “NetBEUI” protocol is not a standard support for Windows XP. After copying the files, install the “NetBEUI” protocol in Windows XP. The NetBEUI protocol is installed in the “\VALUEADD\MSFT\NET\NETBEUI” in the Windows XP installation CD-ROM. RC420 Rev.9...
- Page 165 (2) After completing the copy, open the [Control Panel] and click the <Network and Internet Connections> icon. (3) Click the <Network Connections> icon in the [Network and Internet Connections] window. (4) Right-click the icon of the network to install the “NetBEUI” and select the [Properties]. RC420 Rev.9...
- Page 166 <Add> button. (7) Select the “NetBEUI Protocol” in the [Select Network Protocol] dialog and click the <OK> button. (8) The [Check if the “NetBEUI Protocol” is added in the [Local Area Connection] dialog and click the <Close> button. RC420 Rev.9...
-
Page 167: Starting Epson Rc+ Setup Program
Maintenance 12. Recovering the HDD 12.3.4 Starting EPSON RC+ Setup Program (1) Start Windows in your PC and set the EPSON RC+ setup CD-ROM in the drive. (2) Start Explorer in the RC420 Controller and open the following folder. \My Network\Entire Network\Microsoft Windows Network\Workgroup name of... - Page 168 When you finish reserving address resources of the EPSON RC+ options, click the <Yes> button in the [System Setting Change] dialog and restart Windows. After setting up EPSON RC+, set up UPS and restore the back-up data. For details, NOTE refer to the Setup &...
-
Page 169: Setting Up Epson Rc
Reserve address resources of the EPSON RC+ options following the procedure in the section 12.3. 6 Reserving Address Resources of EPSON RC+ Options. After setting up EPSON RC+, set up UPS and restore the back-up data. For details, NOTE refer to the Setup & Operation 10.6 Configuring Windows and Maintenance 2.5 Backup of Data. - Page 170 Maintenance 12. Recovering the HDD RC420 Rev.9...
-
Page 171: Maintenance Parts List
EMERGENCY Connector R13R520DRU014 Standard accessory for E. STOP Box R12B020201 UL specifications Battery R13A060000100 For UPS Standard IO Cable for RC420 (3 m) R12B020205 For USA specification Terminal Block (USA specification) R12B061001 For USA specification Connector for Mouse Name Model Number... - Page 172 Code 2.5" HDD R13A110401000 Japanese R13B110415 2.5" HDD with Windows XP Installation S/N30001 or later English R13B110416 Japanese R13B110411 From S/N20001 Recovery HDD for RC420 to S/N30000 English R13B110412 Name CPU board Serial Number Language Code PC-686BX(PC)-EPC850 Japanese R13A110401300 From S/N00001...
Need help?
Do you have a question about the RC420 and is the answer not in the manual?
Questions and answers