Konica Minolta bizhub 4020 Service Manual
Hide thumbs
Also See for bizhub 4020:
- User manual (367 pages) ,
- Shortcut manual (41 pages) ,
- Quick reference (2 pages)
Table of Contents
Advertisement
Quick Links
Download this manual
See also:
User Manual
Advertisement
Table of Contents

Related Manuals for Konica Minolta bizhub 4020


Summary of Contents for Konica Minolta bizhub 4020
-
Page 1: Service Manual
SERVICE MANUAL 2015.12 Ver. 1.1... - Page 2 4020/3320 Service Manual Trademarks KONICA MINOLTA and KONICA MINOLTA logo are trademarks or resisted trademarks of KONICA MINOLTA, INC. bizhub is trademarks or resisted trademarks of KONICA MINOLTA, INC. Mac and the Mac logo are trademarks of Apple Inc., registered in the U.S. and other countries.
-
Page 3: Table Of Contents
4020/3320 Service Manual Contents Notices and safety information ....................... 16 Laser notices ..........................16 1.1.1 Laser notice ........................16 1.1.2 Laser-Hinweis ........................16 1.1.3 Avis relatif à l'utilisation du laser ..................16 1.1.4 Avvertenze sui prodotti laser .................... 16 1.1.5... - Page 4 3.1.1 Using the printer control panel ..................25 3.1.2 Understanding the colors of the indicator and Sleep button lights ........26 Understanding the control panel and menus (bizhub 4020) ............ 27 3.2.1 Using the printer control panel ..................27 3.2.2 Understanding the colors of the indicator and Sleep button lights ........
- Page 5 4020/3320 Service Manual Paper jams ..........................56 4.3.1 Avoiding jams ........................56 4.3.2 Understanding jam messages and locations ..............58 4.3.3 200 paper jams ......................... 59 4.3.4 201 paper jams ......................... 68 4.3.5 202 paper jams ......................... 70 4.3.6 23y paper jams .........................
- Page 6 4020/3320 Service Manual 4.4.21 Imaging unit nearly low [84.xy] ..................99 4.4.22 Imaging unit very low, [x] estimated pages remain [84.xy] ..........99 4.4.23 Incorrect paper size, open [paper source] [34] ..............99 4.4.24 Insufficient memory, some Held Jobs were deleted [37] ..........99 4.4.25...
- Page 7 4020/3320 Service Manual 4.4.54 Replace defective imaging unit [31.xy] ................106 4.4.55 Replace jammed originals if restarting job..............106 4.4.56 Replace imaging unit, 0 estimated pages remain [84.xy] ..........106 4.4.57 Replace maintenance kit, 0 estimated pages remain [80.xy] ......... 106 4.4.58...
- Page 8 4020/3320 Service Manual 4.5.10 Insufficient memory service check .................. 116 4.5.11 Imaging unit low service check ..................116 4.5.12 Toner cartridge low service check .................. 117 Printer hardware errors ......................118 4.6.1 111 errors........................118 4.6.2 126 errors........................122 4.6.3...
- Page 9 ADF streak service check ....................166 4.8.14 ADF feed errors service check ..................167 4.8.15 ADF duplex service check (bizhub 4020 only) ............... 168 4.8.16 Modem/fax board service check ..................169 4.8.17 Blank spaces on incoming fax service check ..............170 4.8.18...
- Page 10 4020/3320 Service Manual 5.1.9 OUTPUT BIN TESTS ..................... 194 5.1.10 BASE SENSOR TEST ....................195 5.1.11 DEVICE TESTS ......................196 5.1.12 PRINTER SETUP ......................197 5.1.13 EP SETUP ........................198 5.1.14 REPORTS........................200 5.1.15 EVENT LOG ........................201 5.1.16 Scanner tests ........................
- Page 11 Updating the printer firmware ....................228 5.8.1 Confirming the firmware version ..................228 5.8.2 Procedures for updating the firmware via USB flash/thumb drive (bizhub 4020 only) ... 228 5.8.3 Procedures for updating the firmware via USB connection ..........230 5.8.4 Procedures for updating the firmware via network connection ........
- Page 12 4020/3320 Service Manual 5.8.5 Procedures for rewriting the firmware in recovery mode (bizhub 3320 only) ....233 Repair information ......................... 234 Removal precautions ......................234 6.1.1 Data security notice ......................234 6.1.2 Handling ESD-sensitive parts ..................234 6.1.3 Controller board/control panel replacement ..............235 6.1.4...
- Page 13 4020/3320 Service Manual 6.5.8 Control panel board removal (bizhub 4020) ..............280 6.5.9 Control panel board removal (bizhub 3320) ..............281 6.5.10 Control panel board shield removal ................282 6.5.11 USB cable bracket removal (bizhub 4020) ..............282 6.5.12 Speaker removal ......................
- Page 14 4020/3320 Service Manual 6.6.14 Pick/lift motor gearbox removal (bizhub 4020) ............... 324 6.6.15 Tray guide removal ......................324 Rear side removals ........................ 326 6.7.1 Dust cover removal ......................326 6.7.2 Rear exit door removal ....................327 6.7.3 Rear cover removal ......................327 6.7.4...
- Page 15 4020/3320 Service Manual 6.10.1 Pick roller removal ......................354 6.10.2 Separator roll assembly removal ..................355 6.10.3 ACM assembly removal ....................357 Component locations ........................361 bizhub 4020 ..........................361 7.1.1 Front view ........................361 7.1.2 Rear view ........................362 bizhub 3320 ..........................
- Page 16 4020/3320 Service Manual Theory of operation ........................382 12.1 POR sequence ........................382 12.2 Printer control ......................... 382 12.3 Paper path information ......................382 12.3.1 Input tray ......................... 382 12.3.2 Multipurpose feeder (MPF) ..................... 382 12.3.3 Simplex printing ......................383 12.3.4...
-
Page 17: Notices And Safety Information
4020/3320 Service Manual 1. Notices and safety information 1.1 Laser notices 1.1.1 Laser notice The printer is certified in the U.S. to conform to the requirements of DHHS 21 CFR, Chapter I, Subchapter J for Class I (1) laser products, and elsewhere is certified as a Class I laser product conforming to the requirements of IEC 60825-1. -
Page 18: Aviso Sobre Laser
4020/3320 Service Manual Los productos láser de Clase I no se consideran peligrosos. La impresora contiene un láser interno de Clase IIIb (3b) que nominalmente es un láser de arseniuro de galio de 12 milivatios que funciona en una longitud de onda de 650-670 nanómetros. El sistema láser y la impresora se han diseñado para que ningún individuo acceda nunca a las radiaciones láser por encima del nivel de Clase I durante su... -
Page 19: Lasermerknad
4020/3320 Service Manual Laserprodukter av klass I anses inte vara skadliga. Skrivaren innehåller en klass IIIb (3b)-laser, vilket är en 12 mW galliumarseniklaser som arbetar inom en våglängd på 650-670 nm. Lasersystemet och skrivaren är utformade så att människor aldrig utsätts för laserstrålning över klass I-nivå under normala förhållanden vid användning, underhåll eller service. -
Page 20: 雷射聲明
4020/3320 Service Manual 一般认为分类 I 激光产品不具有危险性。本打印机内部含有分类 IIIb(3b)的激光,在操作过程中会产 生额定 12 毫瓦的砷化镓激光,其波长范围在 650-670nm 之间。本激光系统及打印机的设计,在一般操 作、使用者维护或规定内的维修情况下,不会使人体接触分类 I 以上等级的辐射。 1.1.16 雷射聲明 本印表機係經過美國核可,符合 DHHS 21 CFR,Chapter I,Subchapter J 規定的 I (1) 級雷射產品激 光注意事项;在美國以外的地區,為符合 IEC 60825-1 規定的 I 級雷射產品。 根據 I 級雷射產品的規定,這類產品不會對人體造成傷害。本機所採用之 IIIb (3b) 級雷射只會產生 12 百萬分之一瓦特... -
Page 21: Norme Di Sicurezza
4020/3320 Service Manual 1.2.3 Norme di sicurezza La sicurezza del prodotto si basa sui test e sull'approvazione del progetto originale e dei componenti specifici. Il produttore non è responsabile per la sicurezza in caso di sostituzione non autorizzata delle parti. -
Page 22: Informações De Segurança
4020/3320 Service Manual Existe mayor riesgo de descarga eléctrica y de daños personales durante el desmontaje y la reparación de la máquina. El personal cualificado debe ser consciente de este peligro y tomar las precauciones necesarias. PRECAUCIÓN: POSIBLES DAÑOS PERSONALES La batería de litio de este producto no debe reemplazarse. -
Page 23: 安全信息
4020/3320 Service Manual 본 제품에 관한 유지 보수 설명 서는 전문 서비스 기술자 용으로 작성된 것이므로, 비 전문가는 사용할 수 없습니다. 본 제품을 해체하거나 정비할 경우, 전 기전 인 충 경 을 받거나 상 처를 입을 위험이... -
Page 24: Preface
4020/3320 Service Manual 2. Preface This manual contains maintenance procedures for service personnel. It is divided into the following chapters: General information contains a general description of the printer. Special tools and test equipment are discussed. Diagnostic information contains diagnostic aids you can use to isolate failing FRUs. These diagnostic aids include error code tables, symptom tables, and service checks. -
Page 25: Change History
4020/3320 Service Manual 2.2 Change History Ver 1.1 Updated the print head unit removal procedure. Updated the 97y, 98y and 99y error message tables. Added the Scanner carriage failure service check topic. Added the explanation of the Tray Linking. -
Page 26: General Information
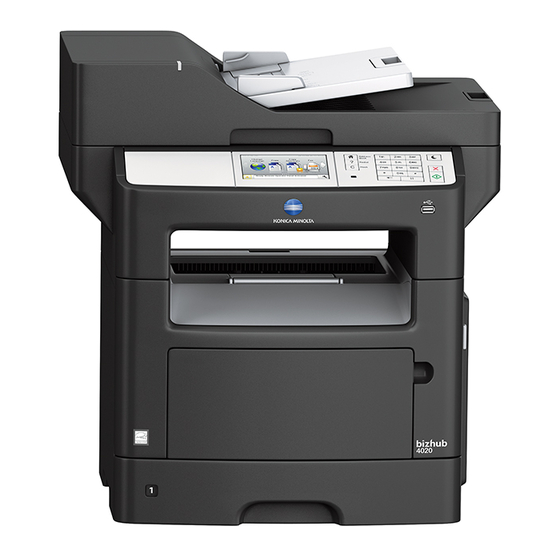
4020/3320 Service Manual 3. General information The KONIKA MINOLTA bizhub 3320, bizhub 4020 are network-capable, multi-function laser printers that print monochrome print jobs. All information in this service manual pertains to all models unless explicitly noted. The printers are available in the following models:... -
Page 27: Understanding The Colors Of The Indicator And Sleep Button Lights
4020/3320 Service Manual Use the Redial button View the last number dialed. Keypad Enter numbers, letters, or symbols. Sleep button Enable Sleep mode or Hibernate mode. Do the following to wake the printer from Sleep mode: Press any hard button. -
Page 28: Understanding The Control Panel And Menus (Bizhub 4020)
4020/3320 Service Manual Sleep button light color and its corresponding printer status Sleep button light Printer status The printer is idle or in Ready state. Solid amber The printer is in Sleep mode. Blinking amber The printer is waking from or entering Hibernate mode. -
Page 29: Understanding The Colors Of The Indicator And Sleep Button Lights
4020/3320 Service Manual Use the Sleep button Enable Sleep mode or Hibernate mode. Do one of the following to wake the printer from Sleep mode: Press any hard button. Open a door or cover. Send a print job from the computer. -
Page 30: Understanding The Home Screen
4020/3320 Service Manual Sleep button light Printer status Blinking amber for 0.1 second, then The printer is in Hibernate mode. goes completely off for 1.9 seconds in pulsing pattern 3.2.3 Understanding the home screen When the printer is turned on, the display shows a basic screen, referred to as the home screen. Use the home screen buttons and icons to initiate an action such as copying, faxing, or scanning;... -
Page 31: Using The Touch-Screen Buttons
4020/3320 Service Manual Touch Status/Supplies Show a printer warning or error message whenever the printer requires intervention to continue processing. View more information on the printer warning or message, and on how to clear it. This may also appear on the home screen:... - Page 32 4020/3320 Service Manual Touch the Radio button Select or clear an item. Up arrow Scroll up. Down arrow Scroll down. Accept button Save a setting. Cancel button Cancel an action or a selection. Return to the previous screen.
-
Page 33: Menus List
Depending on the printer setup, this menu item appears as Standard Network or Network [x]. This menu is supported only for the bizhub 4020 and appears only when the option card installed. This menu is supported only for bizhub 4020. -
Page 34: Media Guidelines
4020/3320 Service Manual 3.4 Media guidelines 3.4.1 Paper guidelines Selecting the correct paper or specialty media reduces printing problems. For the best print quality, try a sample of the paper or specialty media before buying large quantities. Paper characteristics The following paper characteristics affect print quality and reliability. -
Page 35: Unacceptable Paper
4020/3320 Service Manual Fiber content Most high-quality xerographic paper is made from 100% chemically treated pulped wood. This content provides the paper with a high degree of stability resulting in fewer paper feeding problems and better print quality. Paper containing fibers such as cotton can negatively affect paper handling. -
Page 36: Using Recycled Paper And Other Office Papers
4020/3320 Service Manual Selecting preprinted forms and letterhead Use these guidelines when selecting preprinted forms and letterhead: Use grain long for 60 to 90 g/m (16 to 24 lb) weight paper. Use only forms and letterhead printed using an offset lithographic or engraved printing process. -
Page 37: Using Specialty Media
4020/3320 Service Manual 3.4.3 Using specialty media Tips on using card stock Card stock is heavy, single-ply specialty media. Many of its variable characteristics, such as moisture content, thickness, and texture, can significantly impact print quality. Print samples on the card stock being considered for use before buying large quantities. -
Page 38: Tips On Using Labels
4020/3320 Service Manual Tips on using labels Print samples on the labels being considered for use before buying large quantities. Note: Use only paper label sheets. Vinyl, pharmacy, and two-sided labels are not supported. When printing on labels: ... -
Page 39: Supported Paper Sizes, Types, And Weights
4020/3320 Service Manual Tips on using transparencies Print a test page on the transparencies being considered for use before buying large quantities. Feed transparencies from the standard tray, or the multipurpose feeder. Use transparencies designed specifically for laser printers. Transparencies must be able to withstand temperatures up to 185°C (365°F) without melting, discoloring, offsetting, or releasing... - Page 40 4020/3320 Service Manual Paper size and Standard 250- Optional 250- Multipurpose Scanner Duplex dimension sheet tray or 550-sheet feeder glass mode tray Legal 215.9 x 355.6 mm (8.5 x 14 in.) Executive 184.2 x 266.7 mm (7.25 x 10.5 in.) Oficio (México)
- Page 41 4020/3320 Service Manual Paper size and Standard 250- Optional 250- Multipurpose Scanner Duplex dimension sheet tray or 550-sheet feeder glass mode tray C5 Envelope 162 x 229 mm (6.38 x 9.01 in.) B5 Envelope 176 x 250 mm (6.93 x 9.84 in.) Other Envelope 85.7 x 165 mm to...
-
Page 42: Supported Paper Types And Weights
Supported paper types and weights The standard tray of the bizhub 3320 supports 60-90-g/m (16-24-lb) paper weights. The standard tray of the bizhub 4020 supports 60-120-g/m (16-32-lb) paper weights. The optional tray supports 60–120- (16–32-lb) paper weights. The multipurpose feeder supports 60–163-g/m (16–43-lb) paper... -
Page 43: Data Security Notice
4020/3320 Service Manual 3.5 Data security notice This printer contains various types of memory that are capable of storing device and network settings, information from embedded solutions, and user data. The types of memory, along with the types of data stored by each, are described below. -
Page 44: Diagnostic Information
4020/3320 Service Manual 4. Diagnostic information CAUTION—SHOCK HAZARD: Remove the power cord from the electrical outlet before you connect or disconnect any cable or electronic board or assembly for personal safety and to prevent damage to the printer. Disconnect any connections between the printer and PCs/peripherals. -
Page 45: Using Safe Mode
4020/3320 Service Manual 6. The main drive motor turns on. 7. The EP drive assembly drives the developer shaft located in the imaging unit. 8. The exit rollers turn. 9. The control panel indicator light blinks. 10. Ready appears on the display. -
Page 46: Fixing Print Quality Issues
4020/3320 Service Manual 4.2 Fixing print quality issues The symptoms described in this chapter might require replacement of one or more CRUs (Customer Replaceable Units) designated as supplies or maintenance items, which are the responsibility of the customer. With the customer's permission, you might need to install a developer (toner) cartridge. -
Page 47: Gray Background Or Toner Fog On Prints
4020/3320 Service Manual 4.2.2 Gray background or toner fog on prints Actions Step 1 Go to step 2. Replace the cartridge plunger. See Cartridge Check the cartridge plunger. plunger removal. Is the cartridge plunger properly attached to the front door and... -
Page 48: Repeating Defects
4020/3320 Service Manual 4.2.3 Repeating defects Actions Step 1 Replace the imaging unit. Go to step 2. Measure the distance between defects. Is the distance between defects equal to any of the following? 3.82 in. (97 mm) ... -
Page 49: Printer Is Printing Solid Black
4020/3320 Service Manual Actions Step 3 Go to step 4. Replace the transfer roll. Check the transfer roll for surface contamination or excessive wear. Is it free of contamination and wear? Step 4 Go to step 5. Replace the printer. -
Page 50: Shadow Images Appear On Prints
4020/3320 Service Manual Actions Step 3 Replace the power Replace the printer. supply. See Power Check the imaging unit contacts for damage. supply removal. Are they free of damage? 4.2.6 Shadow images appear on prints Actions Step 1 Go to step 2. -
Page 51: Skewed Print
4020/3320 Service Manual Actions Step 5 The problem is solved. Replace the fuser. See Fuser removal. Turn off the printer. Remove the rear door and cover. Disconnect the fuser cable connected to PCN5 of the power supply. Check for approximate correct resistance on the fuser cable: 220V fuser—43 ohms... - Page 52 4020/3320 Service Manual Actions Step 3 Check the media source. If the media is from tray 1, go to step 4. If the media is from the MPF, go to step 6. Step 4 Go to step 5. Replace the pick tires.
- Page 53 4020/3320 Service Manual Actions Step 9 Go to step 10. Replace the redrive assembly. See Make sure the redrive rollers are free of debris. Check for Redrive assembly wear or damage. removal. Are they free of wear or damage? Step 10 Go to step 11.
-
Page 54: Streaked Horizontal Or Vertical Lines Appear On Prints
4020/3320 Service Manual 4.2.8 Streaked horizontal or vertical lines appear on prints Actions Step 1 Go to step 2. Replace the imaging unit. Check the imaging unit for wear or damage. Is it free of wear or damage? Step 2 Go to step 3. -
Page 55: Toner Rubs Off
4020/3320 Service Manual 4.2.9 Toner rubs off Actions Step 1 Go to step 2. Tighten the screws. Check if the fuser screws are tightly fastened. Are they tightly fastened? Step 2 Go to step 3. Replace the fuser. See Fuser removal. -
Page 56: Toner Specks Appear On Prints
4020/3320 Service Manual 4.2.10 Toner specks appear on prints Actions Step 1 Go to step 2. Replace the imaging unit. Check the imaging unit for wear or damage. Is it free of wear or damage? Step 2 Go to step 3. -
Page 57: Paper Jams
4020/3320 Service Manual 4.3 Paper jams 4.3.1 Avoiding jams Load paper properly Make sure paper lies flat in the tray. Correct loading of paper Incorrect loading of paper Do not remove a tray while the printer is printing. - Page 58 4020/3320 Service Manual Use recommended paper Use only recommended paper or specialty media. Do not load wrinkled, creased, damp, bent, or curled paper. Flex, fan, and straighten paper before loading it. Do not use paper that has been cut or trimmed by hand.
-
Page 59: Understanding Jam Messages And Locations
4020/3320 Service Manual 4.3.2 Understanding jam messages and locations When a jam occurs, a message indicating the jam location and information to clear the jam appears on the printer display. Open the doors, covers, and trays indicated on the display to remove the jam. -
Page 60: Paper Jams
4020/3320 Service Manual 4.3.3 200 paper jams [x]-page jam, open front door. [20y.xx] CAUTION—HOT SURFACE: The inside of the printer might be hot. To reduce the risk of injury from a hot component, allow the surface to cool before touching it. - Page 61 4020/3320 Service Manual 3. Lift the green handle, and then pull the imaging unit out of the printer. Warning—Potential Damage: Do not touch the shiny blue photoconductor drum under the imaging unit. Doing so may affect the quality of future print jobs.
- Page 62 4020/3320 Service Manual 6. Firmly grasp the jammed paper on each side, and then gently pull it out. Note: Make sure all paper fragments are removed. 7. Insert the imaging unit by aligning the arrows on the side rails of the unit with the arrows on the side rails inside the printer, and then insert the imaging unit into the printer.
- Page 63 4020/3320 Service Manual 200 paper jam messages Error code Description Action 200.01 Input sensor covered during warm-up sequence. Go to Sensor (input) static jam service check. 200.02 Input sensor covered too quickly. Go to Sensor (input) early/late arriving service check.
- Page 64 4020/3320 Service Manual Error code Description Action 200.23 Laser servo never started due to potential conflict Go to Sensor (input) image jam service with the transfer servo. check. 200.24 Measured gap at input sensor too small to meet video delivery requirements. (Not enough time since prior image finished to start new image).
- Page 65 4020/3320 Service Manual Sensor (input) static jam service check Action Step 1 Go to step 2. Clear the paper path of any media fragments. Check the input sensor area for jammed media fragments. Is the paper path free of partially fed or jammed media?
- Page 66 4020/3320 Service Manual Action Step 3 Go to step 4. Contact the next level of support. Check the MPF solenoid for proper operation: Remove the left cover. POR into the Diagnostics menu and perform a feed test: Diagnostics Menu >Input Tray Tests >Feed Test >Multipurpose feeder...
- Page 67 4020/3320 Service Manual Sensor (input) image jam service check Action Step 1 Go to step 2. Reseat the cables. Check the printhead unit cables for proper connection. Are they properly connected? Step 2 Go to step 3. Replace the printhead unit.
- Page 68 4020/3320 Service Manual Main drive motor control jam service check Action Step 1 Go to step 2. Reseat the cable. Remove the main drive gearbox. Check the main drive gearbox cable for proper connection. Is it properly connected? Step 2 Go to step 3.
-
Page 69: Paper Jams
4020/3320 Service Manual 4.3.4 201 paper jams [x]-page jam, clear standard bin. [20y.xx] 1. Firmly grasp the jammed paper on each side, and then gently pull it out. Note: Make sure all paper fragments are removed. 2. From the printer control panel, touch to clear the message and continue printing. - Page 70 4020/3320 Service Manual Sensor (narrow media) jam service check Action Clear the paper path Step 1 Go to step 2. of any media fragments. Check the narrow media sensor for jammed media fragments. Is the paper path free of partially fed or jammed media? Step 2 Go to step 3.
-
Page 71: Paper Jams
4020/3320 Service Manual 4.3.5 202 paper jams [x]-page jam, open rear door. [20y.xx] 1. Open the front door to loosen the jammed paper in the rear door. 2. Gently pull down the rear door. CAUTION—HOT SURFACE: The inside of the printer might be hot. To reduce the risk of injury from a hot component, allow the surface to cool before touching it. - Page 72 4020/3320 Service Manual 4. Close the rear door, and then the front door. 5. From the printer control panel, touch to clear the message and continue printing. For non- touch-screen printer models, select Next >[OK] >Clear the jam, press OK >[OK].
- Page 73 4020/3320 Service Manual 202 paper jam messages Error code Description Action 202.01 Exit sensor is covered during warm up. Go to Sensor (fuser exit) jam service check. 202.03 Media did not reach the fuser exit sensor. 202.05 Fuser exit sensor covered too long by the current sheet.
- Page 74 4020/3320 Service Manual Sensor (fuser exit) jam service check Action Step 1 Go to step 2. Clear the paper path of any media fragments. Check the input sensor area for jammed media fragments. Is the paper path free of partially fed or jammed media? Step 2 Go to step 3.
-
Page 75: 23Y Paper Jams
4020/3320 Service Manual 4.3.6 23y paper jams [x]-page jam, remove tray 1 to clear duplex. [23y.xx] CAUTION—HOT SURFACE: The inside of the printer might be hot. To reduce the risk of injury from a hot component, allow the surface to cool before touching it. - Page 76 4020/3320 Service Manual 4. Insert the tray. 5. From the printer control panel, touch to clear the message and continue printing. For non- touch-screen printer models, select Next >[OK] >Clear the jam, press OK >[OK]. 23y paper jam messages...
- Page 77 4020/3320 Service Manual Duplex service check Action Step 1 Go to step 2. Replace the redrive assembly. See Redrive Remove the rear cover. assembly removal. Check the redrive rollers for wear or damage. Are they free of wear or damage? Step 2 Go to step 3.
-
Page 78: Paper Jams
4020/3320 Service Manual 4.3.7 241 paper jams [x]-page jam, open tray [x]. [24y.xx] 1. Pull the tray completely out of the printer. Note: The message on the printer display indicates the tray where the jammed paper is located. 2. Firmly grasp the jammed paper on each side, and then gently pull it out. - Page 79 4020/3320 Service Manual 241 paper jam messages Error code Description Action 241.01 Paper over tray 1 trailing edge sensor on warmup. Go to Tray 1 jam service check. 241.02 Sensor (input) early arriving jam. 241.03 Tray 1 trailing edge sensor never became covered when feeding a sheet from an option below.
- Page 80 4020/3320 Service Manual Error code Description Action 241.41 Media feed stall in tray 1. Go to Tray 1 jam service check. 241.42 Media feed under-speed in tray 1. 241.43 Media feed under-speed in tray 1. 241.44 Pick/lift motor stalled.
- Page 81 4020/3320 Service Manual Action Step 6 Go to step 7. Go to step 6. POR into the Diagnostics menu and perform a feed test: Diagnostics Menu >Input Tray Tests >Feed Test >Tray 1 >Continuous Cancel the test after five pages.
-
Page 82: Paper Jams
4020/3320 Service Manual 4.3.8 242-244 paper jams [x]-page jam, open tray [x]. [24y.xx] 1. Pull the tray completely out of the printer. Note: The message on the printer display indicates the tray where the jammed paper is located. 2. Firmly grasp the jammed paper on each side, and then gently pull it out. - Page 83 4020/3320 Service Manual 242 paper jam messages Error code Description Action 242.01 Paper over tray 2 pass-through sensor on Go to Option tray jam service check. warmup. 242.02 Input sensor detected late feed during a pick retry from tray 2.
- Page 84 4020/3320 Service Manual Error code Description Action 242.32 Tray not ready. Go to Option tray jam service check. 242.33 Pick received but detected a tray pulled. 242.41 ACM motor stalled. 242.42 ACM motor PWM overflow error (underspeed). Motor underspeed (max PWM and motor underspeed, typical accordion jam).
- Page 85 4020/3320 Service Manual Error code Description Action 243.09 Tray 3 pick motor lost encoder. Go to Option tray jam service check. 243.10 Failed to feed from tray. 243.11 Autocomp Pick / Lift Motor - Encoder never detected in tray 3.
- Page 86 4020/3320 Service Manual Error code Description Action 243.45 Separator/Pass-through motor PWM overflow Go to Option tray jam service check. error (underspeed). Motor underspeed (max PWM and motor underspeed, typical accordion jam). 243.46 Separator/Pass-through motor ramp (end ramp - did not reach speed, typical pack feed paper jam).
- Page 87 4020/3320 Service Manual Error code Description Action 244.16 The engine timed out waiting for the tray 4 to Go to Option tray jam service check. report 'ready' before the 1st pick attempt. 244.17 Page was not properly picked from tray 4. Have not exhausted all pick retry attempts as there are sheets committed to the paper path from below.
- Page 88 4020/3320 Service Manual Option tray jam service check Action Step 1 Replace the option tray. Go to step 2. Restart the printer. Does it fail to complete the POST sequence and display a 242.01 error? Step 2 The problem is solved.
-
Page 89: Paper Jams
4020/3320 Service Manual Action Step 9 Contact the next level of The problem is solved. support. Does the error remain? 4.3.9 250 paper jams [x]-page jam, clear manual feeder. [25y.xx] 1. From the multipurpose feeder, firmly grasp the jammed paper on each side, and then gently pull it out. - Page 90 4020/3320 Service Manual 3. Reload paper into the multipurpose feeder. Note: Make sure the paper guide lightly rests against the edge of the paper. From the printer control panel, touch to clear the message and continue printing. For non-touch-screen printer models, select Next >[OK] >Clear the jam, press OK >[OK].
-
Page 91: Mpf Service Check
4020/3320 Service Manual MPF service check Action Step 1 Go to step 2. Replace the MPF assembly. MPF tray removal. Check the springs, links, and tray guides on the MPF assembly for damage. Are they free of damage? Step 2 Go to step 3. -
Page 92: 28Y Paper Jams
4020/3320 Service Manual 4.3.10 28y paper jams [x]-page jam, open automatic feeder top cover. [28y.xx] 1. Remove all original documents from the ADF tray. Note: The message is cleared when the pages are removed from the ADF tray. 2. Open the ADF cover. -
Page 93: Adf Paper Jam Service Check
4020/3320 Service Manual Error code Description Action 283.05 1st Scan Sensor Jam—TE never clears 1st Scan Go to ADF paper jam service check. Sensor. 286.02 ADF Backfeed—Page(s) in the exit area Too many sheets of paper in the ADF exit bin. - Page 94 4020/3320 Service Manual Actions Step 6 Go to step 7. Go to step 8. Perform the ADF paper present and scan sensor tests. Scanner tests Are the sensors working properly? Step 7 Go to step 9. Go to step 8.
-
Page 95: 29Y Paper Jams
4020/3320 Service Manual 4.3.11 29y paper jams 29y paper jam messages Error code Description Action 290.11 ADF Cover Open Jam—Posted when Go to ADF cover open service check. ADF top cover is opened during ADF job. ADF cover open service check... - Page 96 4020/3320 Service Manual Actions Step 8 Go to step 9. Secure all the connections. Inspect the connections on the ADF relay board in the ADF. Are all the connections properly connected? Step 9 Go to step 10. Replace the ADF cable.
-
Page 97: Understanding Printer Messages
4020/3320 Service Manual 4.4 Understanding printer messages 4.4.1 Cartridge low [88.xy] You may need to order a toner cartridge. If necessary, select Continue on the printer control panel to clear the message and continue printing. For non-touch-screen printer models, press [OK] to confirm. -
Page 98: Change [Paper Source] To [Paper Type] [Paper Size] Load [Orientation]
4020/3320 Service Manual 4.4.7 Change [paper source] to [paper type] [paper size] load [orientation] Try one or more of the following: Load the correct paper size and type in the tray, verify the paper size and type settings are specified in the Paper menu on the printer control panel, and then select Finished changing paper. -
Page 99: Defective Flash Detected [51]
4020/3320 Service Manual Cancel the current print job. For non-touch-screen printer models, press [OK] to confirm. Install additional printer memory. 4.4.12 Defective flash detected [51] Try one or more of the following: Replace the defective flash memory card. -
Page 100: Fax Station Number Not Set Up. Contact System Administrator
4020/3320 Service Manual Complete the Analog Fax Setup. If the message appears again after completing the setup, then contact your system support person. 4.4.19 Fax Station Number not set up. Contact system administrator. Try either of the following: ... -
Page 101: Insufficient Memory, Some Held Jobs Will Not Be Restored [37]
4020/3320 Service Manual 4.4.25 Insufficient memory, some held jobs will not be restored [37] Try one or more of the following: From the printer control panel, select Continue to clear the message. For non-touch-screen printer models, press [OK] to confirm. -
Page 102: Load Manual Feeder With [Paper Size] [Paper Orientation]
4020/3320 Service Manual Depending on your printer model, touch Continue or press [OK] to clear the message and continue printing. Note: If no paper is loaded in the feeder when Continue or [OK] is selected, then the printer manually overrides the request, and then prints from an automatically selected tray. -
Page 103: Load [Paper Source] With [Custom Type Name] [Paper Orientation]
4020/3320 Service Manual 4.4.34 Load [paper source] with [custom type name] [paper orientation] Try one or more of the following: Load the tray or feeder with the correct size and type of paper. To use the tray that has the correct size or type of paper, select Finished loading paper on the printer control panel. -
Page 104: Maintenance Kit Very Low, [X] Estimated Pages Remain [80.Xy]
Connect the printer to an analog phone line. 4.4.45 Non- Printer Manufacture [supply type], see User’s Guide [33.xy] Note: The supply type can be toner cartridge or imaging unit. The printer has detected a non- KONICA MINOLTA supply or part installed in the printer. - 103 -... -
Page 105: Not Enough Free Space In Flash Memory For Resources [52]
Use of third-party supplies or parts may affect the performance, reliability, or life of the printer and its imaging components. All life indicators are designed to function with KONICA MINOLTA supplies and parts and may deliver unpredictable results if third-party supplies or parts are used. Imaging component usage beyond the intended life may damage your KONICA MINOLTA printer or associated components. -
Page 106: Remove Paper From Standard Output Bin
4020/3320 Service Manual 4.4.50 Remove paper from standard output bin Remove the paper stack from the standard bin. The printer automatically detects paper removal and resumes printing. If removing the paper does not clear the message, then select Continue on the printer control panel. -
Page 107: Replace Defective Imaging Unit [31.Xy]
4020/3320 Service Manual Notes: The x and y values are the .xy of the error code shown on the printer control panel. The x and y values must match for printing to continue. 4.4.54 Replace defective imaging unit [31.xy] Replace the defective imaging unit to clear the message. -
Page 108: Replace Unsupported Cartridge [32.Xy]
4020/3320 Service Manual 4.4.59 Replace unsupported cartridge [32.xy] Remove the toner cartridge, and then install a supported one to clear the message and continue printing. For more information, see the instruction sheet that came with the supply or see the “Replacing supplies”... -
Page 109: Serial Option [X] Error [54]
4020/3320 Service Manual 4.4.67 Serial option [x] error [54] Try one or more of the following: Make sure that the serial cable is properly connected and is the correct one for the serial port. Make sure that the serial interface parameters (protocol, baud, parity, and data bits) are set correctly on the printer and computer. -
Page 110: Too Many Flash Options Installed [58]
4020/3320 Service Manual 4.4.73 Too many flash options installed [58] 1. Turn off the printer. 2. Unplug the power cord from the electrical outlet. 3. Remove the extra flash memory. 4. Connect the power cord to a properly grounded electrical outlet. -
Page 111: User Attendance Messages (0-99.99)
4020/3320 Service Manual 4.5 User attendance messages (0–99.99) 4.5.1 User attendance messages (0-99.99) Error Description Action code 31.40 Toner cartridge smart chip error Go to Toner cartridge smart chip contact service check. 31.41 Toner cartridge I2C packet timeout Go to Toner cartridge smart chip contact service check. -
Page 112: Toner Cartridge Smart Chip Contact Service Check
4020/3320 Service Manual Error Description Action code Printer/cartridge mismatch Go to Printer/cartridge mismatch service check. Flash full Go to Flash full service check. Network error Go to Network service check. Maintenance kit Go to Maintenance kit service check. Imaging unit low... -
Page 113: Imaging Unit Smart Chip Contact Service Check
4020/3320 Service Manual 4.5.3 Imaging unit smart chip contact service check Action Step 1 Go to step 2. The problem is solved. Make sure that the imaging unit is properly installed. Check if the imaging unit is supported. Replace with a supported imaging unit if necessary. -
Page 114: Imaging Chip Compatibility Service Check
4020/3320 Service Manual 4.5.5 Imaging chip compatibility service check Action Step 1 Go to step 3. Go to step 2. Verify if the imaging unit is supported by this device. Is the imaging unit supported? Step 2 Go to step 3. - Page 115 4020/3320 Service Manual Action Step 4 Go to step 5. Replace the trailing edge sensor. See Trailing edge sensor removal. Make sure the trailing edge sensor is free of debris. Check it for damage. Is it free of damage? Step 5 Go to step 6.
-
Page 116: Printer/Cartridge Mismatch Service Check
4020/3320 Service Manual 4.5.7 Printer/cartridge mismatch service check Action Step 1 Go to step 2. The problem is solved. Check if the toner cartridge is supported. Replace with a supported toner cartridge if necessary. Does the problem remain? Step 2 Go to step 3. -
Page 117: Maintenance Kit Service Check
4020/3320 Service Manual 4.5.9 Maintenance kit service check Action Replace the maintenance kit and reset the Maintenance Contact the next level of The problem is counter. support. solved. Does the error remain? 4.5.10 Insufficient memory service check Action Step 1 Go to step 2. -
Page 118: Toner Cartridge Low Service Check
4020/3320 Service Manual Action Step 2 Go to step 3. The problem is solved. Make sure the imaging unit smart chip contact cable is properly connected to the controller board. Make sure the contacts are free of debris. Does the problem remain? -
Page 119: Printer Hardware Errors
4020/3320 Service Manual 4.6 Printer hardware errors 4.6.1 111 errors 111 error messages Error code Description Action 111.00 Pel clock check failed. Go to printhead unit service check. 111.01 Downlevel ASIC detected. Go to printhead unit service check. 111.31 Printhead never delivered HSYNCs. - Page 120 4020/3320 Service Manual Error code Description Action 111.62 Closed-loop printhead error, off-resonant PI Go to printhead unit service check. effort state. 111.63 Timed out on POR sweep. Go to printhead unit service check. 111.64 Attempted to exceed open loop drive limits.
-
Page 121: Error Messages
4020/3320 Service Manual 121 error messages Error code Description Action 121.07 Fuser has been on for more than allowed Go to Fuser service check. after a gap blowout, and the temperature is still too cold. 121.08 Fuser was under temp when page was in... -
Page 122: Fuser Service Check
4020/3320 Service Manual Fuser service check Action Step 1 Go to step 2. The problem is solved. Restore the engine settings to their defaults: Diagnostics Menu >Printer Setup >Defaults Restore the EP setup settings to their defaults: Diagnostics Menu >EP Setup >Defaults... -
Page 123: Errors
4020/3320 Service Manual 4.6.2 126 errors 126 error messages Error code Description Action 126.01 Line frequency outside operating range of Check the power cord for continuity. Replace device. if necessary. Make sure the nominal voltage source is 126.02 No line frequency detected. -
Page 124: Errors
4020/3320 Service Manual 4.6.3 132 errors 132 error messages Error code Description Action 132.01 TDS baseline too low. Go to Toner density sensor service check. 132.02 TDS baseline too high. Go to Toner density sensor service check. 132.03 TDS baseline excessive range. -
Page 125: Errors
4020/3320 Service Manual Action Step 4 Replace the controller Replace the toner board. See Controller density sensor. See Check the cable JTDS for damage and pinch points. board removal. Toner density sensor removal. Is it free of damage? 4.6.4... -
Page 126: Errors
4020/3320 Service Manual 4.6.5 140 errors 140 error messages Error code Description Action 140.10 Transport motor halls not detected. Go to Main drive gearbox service check. 140.20 Transport motor took too long to stop. 140.30 Transport motor unable to lock (before motor ID). -
Page 127: Errors
4020/3320 Service Manual Action Step 3 Replace the controller Replace the main drive board. See Controller gearbox. See Main drive Check the main drive motor for proper operation: board removal. gearbox removal. Remove the main drive gearbox. Note: Do not disconnect the main drive gearbox cable. -
Page 128: Errors
4020/3320 Service Manual Action Step 2 Go to step 3. Replace the pick/lift motor gearbox. See Check the pick/lift motor gearbox for the following: Pick/lift motor gearbox removal. Gear tooth breakage Freedom of rotation Is it free of wear or damage? Step 3 Go to step 4. - Page 129 4020/3320 Service Manual Cartridge gearbox service check Action Step 1 Go to step 2. Go to step 3. Is the button aligned with the front of the toner cartridge? Step 2 Go to step 5. The problem is solved.
-
Page 130: Errors
4020/3320 Service Manual Action Step 7 Go to step 8. Reseat the cable. Check the cartridge gearbox cable for proper connection to the controller board. Is it properly connected? Step 8 Replace the controller Replace the cartridge board. See Controller gearbox. -
Page 131: Acm Service Check
4020/3320 Service Manual Action Step 2 Go to step 3. Replace the controller board. See Controller Turn off the printer, and disconnect JFAN1 from the board removal. controller board. Turn on the printer, and measure the voltage across JFAN1. -
Page 132: Procedure Before Starting The 9Yy Service Checks
4020/3320 Service Manual 4.6.9 Procedure before starting the 9yy service checks Before starting the service checks in this section, you will need to retrieve certain information. This will aid your next level of support in diagnosing the problem before replacing the controller board. -
Page 133: Errors
4020/3320 Service Manual C. Collecting the settings from the menu settings page Note: The menu settings page is different for each printer. For more information see the User’s Guide. Your next level of support will tell you which page they want to see. - Page 134 4020/3320 Service Manual Action Step 1 Go to step 2. The problem is solved. POR the printer. Does the error remain? Step 2 Go to step 3. Go to step 6. Write down the exact 900.xx error code displayed on the device.
- Page 135 4020/3320 Service Manual Action Step 7 Go to step 8. Go to step 10. Note: Before performing this step, write down the following information about the file being sent to the printer: Application used Operating system ...
- Page 136 4020/3320 Service Manual Action Step 13 Go to step 14. Go to step 16. Is there optional memory installed? Step 14 Go to step 15. Go to step 16. Reinstall the memory. Send a print job to the printer.
- Page 137 4020/3320 Service Manual Action Step 21 Go to step 22. The problem is solved. Is there an ISP option installed? Step 22 Go to step 24. Go to step 23. Reinstall the first ISP option. POR the printer. Does the error remain? Step 23 Go to step 24.
-
Page 138: Errors
4020/3320 Service Manual Action Step 29 Go to step 30. Go to step 26. Upgrade the firmware if it was not upgraded in a previous step. Note: Contact your next level of support for the correct firmware level to use. -
Page 139: Errors
4020/3320 Service Manual 4.6.12 940 errors 940 error messages Error code Description Action 940.xx Controller to engine communication failure—the Go to LVPS service check. zero crossing signal used for fuser control in the low voltage (LV) power supply has failed, or the wrong low voltage power supply has been installed. -
Page 140: Nvram Mismatch Failure Service Check
4020/3320 Service Manual Error code Description Action 956.xx Controller board failure—processor failure. Go to Controller board removal. Replace the controller board. 956.01 Processor Overtemp. Go to Controller board removal. Replace the controller board. 957.xx Controller board failure—ASIC failure. Go to Controller board removal. -
Page 141: Error
4020/3320 Service Manual Action Step 4 Go to step 6. The problem is solved. Replace the current controller board assembly with the original controller board assembly. Go to Controller board removal. Does the problem continue? Step 5 Contact the next level The problem is of support. - Page 142 4020/3320 Service Manual Error code Description Action 959.04 Jump to unverified address. Go to Controller board removal. Upgrade firmware. If that fails, replace the controller board. 959.05 Unknown Boot Failure. Go to Controller board removal. Upgrade firmware. If that fails, replace the controller board.
-
Page 143: 96Y Error
4020/3320 Service Manual Error code Description Action 959.32 Failure to init physical interface. Go to Controller board removal. Replace the controller board. 959.33 Unknown/unexpected Error. Go to Controller board removal. Replace the controller board. 959.34 System Pensive Bus Busy Error. - Page 144 4020/3320 Service Manual Error code Description Action 964.xx Download Emulation Cyclic Redundancy Check Go to Download emulation cyclic (CRC) Error—checksum failure detected in the redundancy service check. emulation header or emulation file. 975.xx Network Error—unrecognizable network port Call the next level of support.
-
Page 145: 97Y Error
4020/3320 Service Manual Invalid firmware/controller board service check Action Update the firmware. Replace the controller The problem is board. See Controller solved. Note: Contact the next level of support for the correct firmware board removal. level. Does the error remain? -
Page 146: 98Y Error
4020/3320 Service Manual Error Description Action code 976.xx Network Error—unrecoverable software error in Call the next level of support. network port 978.xx Network Error—bad checksum while Call the next level of support. programming network port 979.xx Network Error—flash parts failed while Call the next level of support. -
Page 147: 99Y Error
4020/3320 Service Manual 4.6.18 99y error 99y error messages Error code Description Action 990.xx An equipment check condition has occurred in the Call the next level of support. specified device, but the device is unable to identify the exact component failure—device can ... -
Page 148: Dead Machine Service Check
4020/3320 Service Manual 4.7.2 Dead machine service check Action Step 1 Go to step 3. Go to step 2. Is the machine plugged in? Step 2 The problem is Go to step 3. solved. Plug the machine in. Did this fix the problem? Step 3 Go to step 4. - Page 149 4020/3320 Service Manual Action Step 1 Go to step 2. Go to step 3. POR the machine. Did the control panel, fuser, fan, and drive motor function at startup? Step 2 Go to step 3. There is no issue.
- Page 150 4020/3320 Service Manual Action Step 9 Go to step 10. Replace the controller board. Go Is the LED on the bottom of the board illuminating? Controller board removal. Step 10 Contact the next level Replace the of support. controller board. Go Verify the controller board power outputs.
-
Page 151: Control Panel Service Check
4020/3320 Service Manual 4.7.4 Control panel service check Warning—Potential Damage: Do not replace the control panel and controller board at the same time. Each board contains the printer settings. When either of these boards is new, it obtains some of the settings from the other board. -
Page 152: Control Panel Button Service Check
4020/3320 Service Manual 4.7.5 Control panel button service check Action Step 1 Go to step 2. Perform control panel service check. Are the display and LEDs on the control panel illuminated? Go to Control panel service check. Step 2 Go to step 4. -
Page 153: Front Door Not Closed Service Check
4020/3320 Service Manual Action Step 4 Go to step 6. Go to step 5. Check the printer driver. Is the correct driver being used and properly set up? Step 5 The problem is Go to step 6. solved. Use a different driver. -
Page 154: Network Service Check
4020/3320 Service Manual Action Step 3 Go to step 4. Go to step 5. Check the switch on the front cover for dirt or debris that might keep the switch trigger from properly moving. Is there dirt or debris? - Page 155 4020/3320 Service Manual Actions Step 3 Go to step 5. Go to step 4. Check the printer’s online status under Printers and Faxes on the host computer. Delete all print jobs in the print queue. Is the printer online and in a Ready state?
- Page 156 4020/3320 Service Manual Actions Step 12 Go to step 13. Go to step 15. Is the device physically connected (Ethernet cable) to the network? Step 13 The problem is Go to step 14. solved. Try using a different Ethernet cable.
- Page 157 4020/3320 Service Manual Actions Step 22 Go to step 24. Go to step 23. Verify that the antenna is properly connected to the wireless card. Is it connected correctly? Step 23 The problem is Go to step 24. solved.
-
Page 158: Adf/Scanner Hardware Errors
4020/3320 Service Manual 4.8 ADF/Scanner hardware errors 4.8.1 8yy error messages Error code Description Action The scanner is disabled and can’t be used. 840.01 Go to Scanner disabled error service check. The scanner is disabled and can’t be used. -
Page 159: Scanner Disabled Error Service Check
4020/3320 Service Manual 4.8.2 Scanner disabled error service check Actions Step 1 Go to step 2. The problem is solved. POR the machine into Configuration menu >Disable Scanner. From there, select Enabled to change the setting to re-enable the scanner module, and then save the setting. - Page 160 4020/3320 Service Manual Actions Step 7 Go to step 8. The problem is solved. Replace the ADF unit. See ADF unit removal. POR the machine into Configuration menu >Disable Scanner. From there, select Enabled to change the setting to re-enable the scanner module and then save the setting.
-
Page 161: Scanner Carriage Failure Service Check
4020/3320 Service Manual 4.8.3 Scanner carriage failure service check Action Step 1 The problem is Go to step 2. solved. POR the printer, open the scanner cover, and do the following: Check if the scanner carriage moves away, and then back to its home position. -
Page 162: Adf Service Check
4020/3320 Service Manual 4.8.4 ADF service check Action Step 1 Go to step 3. Go to step 2. Check all cables connecting the ADF and flatbed to the controller board. Are they properly connected? Step 2 The problem is Go to step 3. -
Page 163: Scanner Configuration Error Service Check
4020/3320 Service Manual 4.8.5 Scanner configuration error service check Action Contact the next level of support. They will give the instructions on how to resolve the error. 4.8.6 Scan/fax/copy symptoms Symptom Action ADF does not duplex (Duplex ADF only) -
Page 164: Black Or Blank Page Copy Service Check
4020/3320 Service Manual 4.8.7 Black or blank page copy service check Actions Step 1 Printer is printing Go to step 2. solid black pages. Print a menu page or a page from the host. Is the page black? Step 2 Go to step 4. -
Page 165: Ccd Service Check
4020/3320 Service Manual 4.8.8 CCD service check Actions Step 1 Go to step 2. No issue. Restart the device, and then retry the scan / copy job. Repeat this step with a few copy jobs. Does the error return? Step 2 Go to step 3. -
Page 166: Adf Rattling Noise Service Check
4020/3320 Service Manual Actions Step 2 Go to step 3. Go to step 5. Perform the home position sensor test. See Scanner tests. Is the sensor working properly? Step 3 Go to step 4. Properly connect the cable. Check JFBM1 on the controller for proper connection. -
Page 167: Flatbed Legal Scan Service Check
4020/3320 Service Manual 4.8.12 Flatbed legal scan service check Action Step 1 Go to step 3. Go to step 2. Check the JPLEN1 connector on the controller board for proper connection. Is it properly connected? Step 2 The problem is Go to step 3. -
Page 168: Adf Feed Errors Service Check
4020/3320 Service Manual 4.8.14 ADF feed errors service check Actions Step 1 Clean them with a lint Replace the free cloth and separator pad and If the ADF is multi-feeding, check for dirt on the ADF separator isopropyl alcohol. -
Page 169: Adf Duplex Service Check (Bizhub 4020 Only)
Does this fix the situation? 4.8.15 ADF duplex service check (bizhub 4020 only) Note: This service check should be used if the paper feeds and jams in the ADF. If the paper is not feeding into the ADF see ADF feed errors service check. -
Page 170: Modem/Fax Board Service Check
4020/3320 Service Manual Actions Step 6 Go to step 7. Replace the ADF cable. ADF cable removal. Check the ADF cable for continuity. Make sure pin 22 has continuity. Does pin 22 have continuity? Step 7 Problem solved. Replace the controller board. -
Page 171: Blank Spaces On Incoming Fax Service Check
4020/3320 Service Manual Actions Step 7 Go to step 8. Replace the modem board cable. Check the modem board ribbon cable for continuity. Is there continuity? Step 8 Replace the fax board. Replace the controller Modem removal. board. See... -
Page 172: Fax Reception Service Check
4020/3320 Service Manual 4.8.19 Fax reception service check Note: Before performing this service check, verify that the correct country code for the MFP is selected. This setting must match the country in which the MFP is used to transmit and receive faxes. If the setting is wrong, then change the modem settings in the Fax/SE menu. -
Page 173: Fax Transmission Service Check
4020/3320 Service Manual Actions Step 10 Go to step 11. Go to step 12. Is a dial prefix needed to get an outside line? Step 11 The problem is solved. Go to step 12. Try sending a fax using a dial prefix. - Page 174 4020/3320 Service Manual Actions Step 2 The problem is solved. Go to step 3. Properly connect the phone line to the modem board and to the wall jack. Did this fix the problem? Step 3 Go to step 4.
- Page 175 4020/3320 Service Manual Actions Step 12 Go to step 13. Stop here. This is an issue with the VOIP IS the VOIP server configured to support fax? provider. Step 13 Go to step 14. Go to step 15. Does the MFP have reception issues with only a certain...
-
Page 176: Fax Error Log Codes
4020/3320 Service Manual Actions Step 20 The problem is solved. Contact your second-level of support. See Press **411 to enter the SE Menu. Select “Print Logs”. Escalating a fax issue to second-level support. Print the T30 transmission/ job log. Check the error code being reported. - Page 177 4020/3320 Service Manual Error code Description Action Too many timeouts occurred during ECM reception. If error persists, then disable ECM mode. Fax cancelled by user No action needed. Unexpectedly received a disconnect command from Check line quality. the remote end.
- Page 178 4020/3320 Service Manual Error code Description Action Failed to detect a fax device at the remote end. Verify MFD is answering to fax call and not a voice call. Decrease value of ‘Rings To Answer’ setting. No more data rates available in V34 modulation Adjust to a lower modulation scheme.
- Page 179 4020/3320 Service Manual Error code Description Action Select a lower “Max Speed” under Failure to transmit training successfully in V29, V27 terminal modulation schemes. Fax Send settings. Adjust the “Transmit Level”. Check line quality. Select a lower “Max Speed” under Failure to transmit training successfully in V17 terminal modulation scheme.
-
Page 180: Escalating A Fax Issue To Second-Level Support
4020/3320 Service Manual Error code Description Action Busy tone detected. Check with remote end if successive attempts fail. Hardware error detected. Modem/fax board service check. A timeout occurred after dialing the number and Check with remote end if successive waiting for a response. - Page 181 4020/3320 Service Manual 2. The MFP’s SE menu page will display. Click the “Dump Job History” link. The following displays: 3. Write down the type of connection, the type of error, and the job in which the error occurred.
-
Page 182: Input Option Hardware Errors
4020/3320 Service Manual 4.9 Input option hardware errors 4.9.1 321-344 errors 321-344 error messages Error code Description Action 321.51 ACM motor no first encoder Go to Option tray ACM motor service check. 321.52 ACM motor stop error 321.53 ACM PWM underflow (motor overspeed) 322.54... - Page 183 4020/3320 Service Manual Error code Description Action 334.57 ACM motor no first encoder Go to Option tray ACM motor service check. 334.58 ACM motor stop error 334.59 ACM PWM underflow (motor overspeed) 335.60 Hardware error—Board ID unknown Go to Option tray controller board service check.
- Page 184 4020/3320 Service Manual Action Step 2 Go to step 3. Replace the tray. Check the ACM motor for the following: Gear tooth breakage Freedom of rotation Is it free of wear or damage? Step 3 Contact the next level of Replace the tray.
- Page 185 4020/3320 Service Manual Option tray ACM motor service check Action Step 1 Go to step 2. Reseat the cable. Check the cable J11 on the option tray controller board. Is it properly connected? Step 2 Go to step 3.
-
Page 186: Service Menus
Envelopes-MP Feeder (bizhub 4020 only) Continuous Print Quality Pages Panel Test Button Test DRAM Test Serial Wrap Test (bizhub 4020 only) Test J HARDWARE TESTS Test K Port 0, Port 1, Port Test SE0 NAK 2, Port 3 USB HS Test Mode... - Page 187 Operation Narrow Input Wide Open Exit Closed Open Front Door Closed Quick Disk Test (bizhub 4020 only) DEVICE TESTS Disk Test/Clean (bizhub 4020 only) Flash Test US (*) Defaults Non-US Printed Page Count 0 - 9999999 Perm Page Count 0 - 9999999...
-
Page 188: Entering The Diagnostics Menu
Diagnostics Menu Values, Operation or Setting Operation Paper FB Long (bizhub 4020 only) Continue Scanner Calibration Reset Exit ADF Magnification (bizhub 4020 only) Magnification 0.98 - 1.015 FB Magnification (bizhub 4020 only) Magnification 0.98 - 1.015 5.1.1 Entering the Diagnostics menu 1. -
Page 189: Scanner Calibration
4020/3320 Service Manual Note: The alignment of the left margin positions the black plane to the right or left. The alignment of the right margin does not alter the margins and should only be used to adjust the printhead. -
Page 190: Print Quality
4020/3320 Service Manual The content of the test page varies depending on the media in the selected input source: If the selected source contains paper, then a page similar to the Quick test page is printed, but without the print registration diamonds. -
Page 191: Dram Test
4020/3320 Service Manual To run the Button test: 1. From the Diagnostics menu, navigate to: HARDWARE TESTS >Button Test 2. With no buttons pressed, a pattern matching the control panel buttons is displayed. Press each control panel button one at a time, and the panel highlights the represented button in the matching pattern. - Page 192 4020/3320 Service Manual Transmit Empty Error Threshold Error Receive Data Ready Error Break Interrupt Error Framing Error Parity Error Overrun Error Data Error Data 232 Error Data 422 Error FIFO Error DSR Error DSR PIO Error DSR Interrupt Error...
-
Page 193: Duplex Tests
4020/3320 Service Manual 5.1.7 DUPLEX TESTS Quick Test The Duplex quick test determines if the top margin at the back of a duplexed page is set correctly. This test prints a duplexed version of the Quick test page that can be used to adjust the duplex top margin. -
Page 194: Left Margin
4020/3320 Service Manual 3. Depending on the printer model, press OK or touch to save the desired margin value. Left Margin This setting allows the user to shift the position of the left margin of the back side of a duplexed page to the left or right. -
Page 195: Input Tray Tests
4020/3320 Service Manual 5.1.8 INPUT TRAY TESTS Feed Tests This test feeds blank pages through the paper path. It can run using any of the paper or envelope sizes supported by the printer. To run the Feed test: 1. From the Diagnostics menu, navigate to: Input Tray Tests >Feed Tests... -
Page 196: Base Sensor Test
4020/3320 Service Manual To run this test: 1. From the Diagnostics menu, navigate to: Output Bin Tests >Feed Tests 2. Select the output bin into which you want the paper to exit. All installed output bins appear. 3. Select one of the following: Single—Feeds a single page. -
Page 197: Device Tests
If the block is good, then the saved data is written back to the disk. Note: This test is available on the bizhub 4020 only. To run the quick disk test: 1. -
Page 198: Printer Setup
4020/3320 Service Manual The test cannot be stopped or canceled after it has begun. 3. After the test is complete, a message appears indicating a pass or fail result. 4. Press X to return to the Device tests menu. -
Page 199: Ep Setup
4020/3320 Service Manual Printer default values US value Non-US value PPDS Code Page Universal Units of Measure Inches Millimeters To change this setting: 1. From the Diagnostics menu, navigate to: Printer Setup >Defaults 2. Choose U.S. or Non-U.S. 3. Do one of the following: Depending on the printer model, press OK or touch to save any changes. -
Page 200: Transfer Adjust
4020/3320 Service Manual To restore the EP defaults: 1. From the Diagnostics menu, navigate to: EP Setup >EP Defaults 2. Select Restore to restore the default values, or press X to exit without changing the settings. Fuser Temperature (Fuser Temp) This setting adjusts the fuser temperature to solve problems with paper curl on low-grade paper and/or melting of letterheads on some papers. -
Page 201: Reports
4020/3320 Service Manual Gap Adjust The setting adjusts the minimum gap between sheets. Increasing this value may reduce curl of some printed media and eliminate some output bin stacking problems. However, increasing this value also results in slower overall performance, measured in pages per minute. -
Page 202: Event Log
4020/3320 Service Manual 5.1.15 EVENT LOG Display Log This version of the Event log displays the panel text that appeared when the event occurred. To view the Event log: 1. From the Diagnostics menu, navigate to: Event Log >Display Log 2. -
Page 203: Scanner Tests
4020/3320 Service Manual Print Log Summary The event log summary is printed. To print the Event log summary: From the Diagnostics menu, navigate to Event Log >Print Log Summary. Clear Log Use this to remove all the current information in the Event log. This affects both the viewed log and the printed log information. - Page 204 4020/3320 Service Manual ADF pick When Motor On is selected, the device runs the pick motor continuously for five seconds and then automatically stops the motor. To perform this test, do the following: 1. Navigate to Scanner Tests >Motor Tests.
-
Page 205: Feed Test
4020/3320 Service Manual Feed test This test enables a servicer to execute a continuous feed test from either the ADF or the flatbed. The default is to perform the ADF test if paper is loaded into the ADF. To perform the Feed Test, do the following: 1. - Page 206 4020/3320 Service Manual To test the Paper FB long test, place a sheet of legal paper on the flatbed and close the cover. If the sensor is working properly, the indicator will change from 0 to 1. To test the Home sensor, perform the following steps: 1.
- Page 207 4020/3320 Service Manual Flatbed cover open Paperfeed sensor Scanner calibration reset This is test is run to reset the scanner calibration. This test should only be run after a flatbed or ADF unit has been replaced. To perform this operation, do the following: 1.
-
Page 208: Exit Diags
Select this to exit the Diagnostics menu. The printer performs a POR, and restarts in normal mode. For bizhub 4020, this menu appears as a soft button at the bottom right corner of the panel. This is always accessible to the user from the main Diagnostics menu. -
Page 209: Configuration Menu
The Configuration menu group consists of menus, settings, and operations that are used to configure a printer for operation. Configuration Menu Intermediate Menu, Setting or Operation Reset ADF Maintenance Kit Counter (bizhub 4020) Reset Separator Roll and Pick Assembly Counter (bizhub 3320) Maintenance Counter Value Reset Maintenance Counter... -
Page 210: Entering The Configuration Menu
Do Not Delete Jobs On Disk (bizhub 4020 only) Delete Disable Disk Encryption (bizhub 4020 only) Enable Erase All Information on Disk (bizhub 4020 Single Pass Erase only) Multiple Pass Erase Wipe All Settings (bizhub 3320 only) Font Sharpening 0 - 150 (24*) -
Page 211: Reset Adf Maintenance Kit Counter
4020/3320 Service Manual 5.2.2 Reset ADF Maintenance Kit Counter Note: This menu is displays for the bizhub 4020 only and it is not used for this product. 5.2.3 Reset separator roll and pick assembly counter Note: This menu is displays for the bizhub 3320 only and it is not used for this product. -
Page 212: Panel Menus
4020/3320 Service Manual To print the Menu settings page from the Configuration menu: 1. From the Configuration menu, navigate to: Reports >Menu Settings Page 2. Depending on the printer model, press OK or touch to print the page, or press X to return to the Configuration menu. -
Page 213: Download Emuls
4020/3320 Service Manual Activate 5.2.11 Download Emuls This appears only if at least one download emulator (DLE) is installed. The default setting is Disable. All download emulators (DLEs) are reenabled automatically after two PORs. 5.2.12 Safe Mode The settings for this menu item are On and Off (default). When enabled, Safe Mode lets the printer operate in a special limited mode in which it attempts to continue offering as much functionality as possible despite known issues. -
Page 214: Fax Low Power Support
3. Select Submit to save the change. 5.2.17 Num pad job assist Note: This menu is available on the bizhub 4020 only. This setting determines if a user can configure and initiate a job using the control panel’s hard buttons. -
Page 215: Adf Edge Erase
4020/3320 Service Manual 5.2.19 ADF edge erase This menu item sets the size, in millimeters, of the no-print area around an ADF scan job. All copy jobs have a minimum of a two millimeter border. Copy jobs will use the setting or two millimeters, whichever is larger. -
Page 216: Disable Scanner
4020/3320 Service Manual 11. To view and adjust the duplex ADF backside registration, place the quick test page face down up into the ADF, and select Copy Quick Test. 12. After the quick test page copies, select ADF Back. -
Page 217: Envelope Prompts
4020/3320 Service Manual 2. Select from the available options: Auto (default) Multi-purpose Feeder Manual Paper 3. Depending on the printer model, press OK or touch to save the setting, or press X to return to the Configuration menu without saving any changes. -
Page 218: Jobs On Disk
Disk Encryption. 5.2.28 Erase All Information on Disk Note: This setting is available on the bizhub 4020 only. This setting performs a wipe of the printer hard disk, erasing all data. Warning—Potential Damage: This deletes all data on the printer hard disk, including downloaded fonts, macros, and held jobs. -
Page 219: Wipe All Settings
5.2.32 Require Standby Note: This menu is available on the bizhub 4020 only. This sets Standby Mode to On or Off. The default is On. To change the setting: 1. From the Configuration menu, navigate to Require Standby. -
Page 220: A5 Loading
Configuration menu without saving any changes. 5.2.35 LES Applications (bizhub 4020 only) Note: This menu is displays for the bizhub 4020 only and it is not used. 5.2.36 Key Repeat Initial Delay Note: This setting is available on the bizhub 4020 only. -
Page 221: Key Repeat Rate
4020/3320 Service Manual To adjust this setting: 1. From the Configuration menu, navigate to Key Repeat Initial Delay. 2. Touch the arrow keys to adjust the setting. 3. Touch to save the setting, or press X to return to the Configuration menu without saving any changes. -
Page 222: Automatically Display Error Screens
5.2.43 Restore Factory Defaults Warning—Potential Damage: This operation cannot be undone. Note: This setting is available on the bizhub 4020 only. Restore Settings This setting enables a user to restore all of the printer settings to either the network settings (on network models only) or to the base printer settings. -
Page 223: Exit Config Menu
4020/3320 Service Manual Erase Printer Memory This operation will clear all settings, apps, jobs, and faxes on the printer memory. The printer will reboot during this process. To erase the printer memory: 1. From the Configuration Menu, navigate to Restore Factory Defaults > Erase Printer Memory. -
Page 224: Entering Invalid Engine Mode
In the event that a new firmware update causes problems in the printer, the administrator can roll the printer back to a previous state. This function is available on the bizhub 4020 only. 1. Turn off the printer. 2. Press and hold the 7 and 8 buttons simultaneously. -
Page 225: Accessing The Network Se Menu
4020/3320 Service Manual 5.6 Accessing the Network SE menu This menu contains settings for fine tuning the communication settings for the network interfaces and protocols. 1. Navigate to: Networks/Ports >Standard Network >STD NET SETUP 2. Press and hold 6, 7, and 9 simultaneously. -
Page 226: Service Engineer Menu
4020/3320 Service Manual 5.7 Service Engineer menu 5.7.1 Accessing the service engineer (SE) menu From a Web browser on a host PC, add /se to the printer IP address. This menu should be used as directed by the next level of support. - Page 227 4020/3320 Service Manual Printer default values Intermediate Menu, Setting, Values or Operation or Operation 8. V.27 Receive 2. Detect EOLS EOLS: End at Pages Enter a value between 0 and 6 3. Print Logs 1. Print T30 log 2. Print all T30 logs 3.
- Page 228 4020/3320 Service Manual Printer default values Intermediate Menu, Setting, Values or Operation or Operation 2. Caller ID Pattern 0: Disabled (0) 1: DT-AS FSK Ring (1) 2: RP-AS FSK Ring (2) 3: LR DT-AS FSK Ring (3) 4: NTT (4)
-
Page 229: Updating The Printer Firmware
(bizhub 4020 only) The following procedure explains the firmware update by using USB flash/thumb drive. This procedure is applied for bizhub 4020 only. Note: USB drive must be formatted for the FAT32 and not NTFS. 1. Store the firmware file (xxxx.fls) which are compatible with the product to the USB flash/thumb drive. - Page 230 4020/3320 Service Manual 3. Touch the appropriate *****.fls file is selected on the LCD. [Update Code] or [Delete file] appears on the LCD. 5. Touch the [Update Code]. 6. Observe "CRC check" (cyclic redundancy check). This precedes the firmware transfer.
-
Page 231: Procedures For Updating The Firmware Via Usb Connection
4020/3320 Service Manual 5.8.3 Procedures for updating the firmware via USB connection The following procedure explains the firmware update when the printer is connected to PC by using USB cable. NOTE: Before updating the firmware, install the printer drivers on the PC used for the firmware update. - Page 232 4020/3320 Service Manual 9. Observe the progress bar to completion. 10. Close the update tool. 11. Observe the LCD status of the printer. Note: Do not turn off the power during the firmware update. bizhub 4020 bizhub 3320 12. After the update completes, the printer restarts automatically.
-
Page 233: Procedures For Updating The Firmware Via Network Connection
4020/3320 Service Manual 5.8.4 Procedures for updating the firmware via network connection The following procedure explains the firmware update when the printer is connected to the network. 1. Store the firmware file (xxxx.fls) which is compatible with the printer in an arbitrary directory of the PC. -
Page 234: Procedures For Rewriting The Firmware In Recovery Mode (Bizhub 3320 Only)
4020/3320 Service Manual 5.8.5 Procedures for rewriting the firmware in recovery mode (bizhub 3320 only) The following procedure explains the firmware rewriting in Recovery Mode. (bizhub 3320 only) Recovery Mode will allow the printer to boot from a secondary set of instructions to allow firmware to the printer. -
Page 235: Repair Information
4020/3320 Service Manual 6. Repair information 6.1 Removal precautions CAUTION—SHOCK HAZARD: For personal safety and to prevent damage to the printer, remove the power cord from the electrical outlet before you connect or disconnect any cable, electronic board, or assembly. Disconnect any connections between the printer and the PCs/peripherals. -
Page 236: Controller Board/Control Panel Replacement
4020/3320 Service Manual Put the ESD wrist strap on your wrist. Connect the wrist band to the system ground point. This discharges any static electricity in your body to the machine. Hold the ESD-sensitive part by its edge connector shroud (cover); do not touch its pins. If you are removing a pluggable module, use the correct tool. -
Page 237: Ribbon Cable Connectors
4020/3320 Service Manual 6.1.4 Ribbon cable connectors Zero Insertion Force (ZIF) connectors Zero Insertion Force (ZIF) connectors are used on the boards in this printer. Before inserting or removing a cable from these connectors, read this entire section. Great care must be taken to avoid damaging the connector or cable when inserting or removing the cable. - Page 238 4020/3320 Service Manual Removing a cable from the horizontal top contact connector 1. Place a finger at each end of the locking actuator, and then gently lift the actuator to the unlocked position. 2. Slide the cable out of the connector.
-
Page 239: Horizontal Bottom Contact Connector
4020/3320 Service Manual 2. Insert the cable with the contacts on the cable facing up. Insert the cable on top of the actuator. Note: Verify that the cable is installed squarely into the connector. If the cable is not squarely installed, then intermittent failures could occur. - Page 240 4020/3320 Service Manual Removing a cable from the horizontal bottom contact connector 1. Place two fingers towards each end of the locking actuator, and then gently lift the actuator to the unlocked position. 2. Slide the cable out of the connector.
-
Page 241: Vertical Mount Contact Connector
4020/3320 Service Manual 2. Insert the cable into the ZIF connector with the contacts facing downward and away from the locking actuator. The cable needs to be inserted below the actuator. Note: Verify that the cable is installed squarely into the connector. If the cable is not squarely installed, then intermittent failures could occur. - Page 242 4020/3320 Service Manual Warning—Potential Damage: When opening or closing this type of actuator, gently lift the center of the actuator using your finger. Do not use a fingernail or screwdriver to open the actuator. This could damage the ribbon cable. Do not close the actuator from the ends of the actuator.
-
Page 243: Horizontal Sliding Contact Connector
4020/3320 Service Manual 2. Insert the cable with the contacts on the cable away from the locking actuator. Insert the cable on top of the actuator. Note: Verify that the cable is installed squarely into the connector. If the cable is not squarely installed, then intermittent failures could occur. - Page 244 4020/3320 Service Manual Warning—Potential Damage: When opening or closing this type of actuator, gently push or pull the two tabs located on each end of the actuator. Do not close the actuator from the center of the actuator. Do not use a screwdriver to open or close the actuator. Damage to the cable or connector could occur.
- Page 245 4020/3320 Service Manual 2. Insert the cable with the contacts on the cable facing away from the locking actuator. Insert the cable on top of the actuator. 3. Slide the locking actuator towards the connector, locking the cable into place. The cable should not move when this step is performed.
-
Page 246: Printhead Unit Adjustments
4020/3320 Service Manual Inserting a cable into the LIF connector 1. Looking at the connector, take note on which side the contacts are located. Many boards will have the word “contacts” stamped on them to indicate which side of the LIF has the contacts. When looking at the board, take note that the contacts from the board to the connector are located on the side of the connector with the contacts. - Page 247 4020/3320 Service Manual Note: Skew is caused by a sheet being fed through the printer while misaligned. The entire image is rotated relative to the sheet edges. However, a mechanically misaligned printhead causes the horizontal lines to appear skewed, while the vertical lines remain parallel to the vertical edges. There are no adjustments for skew.
- Page 248 4020/3320 Service Manual 4. If the grid lines of the right flap align below the corresponding lines on the left flap, then adjust the printhead clockwise relative to the printer, and recheck. If the grid lines of the left flap align below the corresponding lines of the right side, then adjust the printhead counterclockwise.
- Page 249 4020/3320 Service Manual Printhead unit electronic adjustment Note: Before aligning the printhead electronically, first align the printhead mechanically. 1. POR into the Diagnostics menu, and print a Quick test page: Diagnostics Menu >Registration >Quick Test Sample Quick test page. Use the actual sheet.
-
Page 250: Removal Procedures
4020/3320 Service Manual 6.2 Removal procedures Keep the following tips in mind as you replace parts: Some removal procedures require removing cable ties. You must replace cable ties during reassembly to avoid pinching wires, obstructing the paper path, or restricting mechanical movement. -
Page 251: Main Drive Gearbox Removal
4020/3320 Service Manual 3. Release the two tabs (B) on the bottom of the cover. 4. Pull the cover forward, and remove it from the printer. 6.3.2 Main drive gearbox removal 1. Remove the left cover. See Left cover removal. - Page 252 4020/3320 Service Manual 2. Squeeze the latch, and then detach the link from the front door. 3. Remove the 4 screws (A), and then remove the main drive gearbox. 4. Disconnect the cable from the main drive gearbox. - 251 -...
-
Page 253: Mpf Gearbox Removal
4020/3320 Service Manual 5. Remove the spring (B) and the fuser gear (C). 6.3.3 MPF gearbox removal 1. Remove the left cover. See Left cover removal. 2. Remove the main drive gearbox. See Main drive gearbox removal. 3. Remove the front access cover. See Front access cover removal. - Page 254 4020/3320 Service Manual 4. Disconnect the spring from the printer (A). 5. Remove the three screws (B), and then remove the front left mount. - 253 -...
- Page 255 4020/3320 Service Manual 6. Remove the three screws (C), and then remove the MPF gearbox. 7. Release the two latches (D), and then remove the main input drive gears. - 254 -...
-
Page 256: Reverse Solenoid Removal
4020/3320 Service Manual 8. Remove the E-clip (E), and then remove the MPF sector gear (F). 6.3.4 Reverse solenoid removal 1. Remove the right cover. See Right cover removal. 2. Remove the left cover. See Left cover removal. 3. Remove the rear door and cover. See... -
Page 257: Cartridge Gearbox Removal
4020/3320 Service Manual 8. Remove the two screws (A) securing the reverse solenoid. 6.3.5 Cartridge gearbox removal 1. Remove the left cover. See Left cover removal. 2. Remove the right cover. See Right cover removal. 3. Remove the rear door and cover. See... -
Page 258: Duplex Gear Assembly Removal
4020/3320 Service Manual 6.3.6 Duplex gear assembly removal 1. Remove the left cover. See Left cover removal. 2. Remove the rear door and cover. See Rear exit door removal Rear cover removal. 3. Remove the power supply. See Power supply removal. - Page 259 4020/3320 Service Manual 11. From behind the three gears, remove the duplex coupling (D). 12. Remove the duplex link (E) from the duplex. - 258 -...
-
Page 260: Right Side Removals
4020/3320 Service Manual 6.4 Right side removals 6.4.1 Right cover removal 1. Remove the paper tray. 2. Remove the screw (A) securing the the right cover to the front of the printer frame. 3. Open the memory access cover. - Page 261 4020/3320 Service Manual 4. Remove the two screws (B) securing the right cover to the controller board shield. 5. Open the front cover. 6. Slightly lift the printer, slide the right cover forward, and pull out and away from the printer.
-
Page 262: Memory Access Door Removal
4020/3320 Service Manual 6.4.2 Memory access door removal 1. Open the memory access door. 2. Gently release the latches (A) securing the access door to the right cover. 3. Slide the access door to release the hinges, then remove it from the right cover. -
Page 263: Cooling Fan Removal
4020/3320 Service Manual 4. Release the three latches (C), and then pry to remove the tray present sensor. 6.4.4 Cooling fan removal 1. Remove the right cover. See Right cover removal. 2. Disconnect the cable JFAN1 from the controller board. -
Page 264: Controller Board Removal
3. Disconnect all cables from the controller board. Installation warning (for bizhub 4020): The cables (JCART1 and JLIFT) are not interchangeable. JCART1 connects to the cartridge motor, while JLIFT goes to the lift motor. Plugging these connectors incorrectly could lead to damage on the imaging unit. - Page 265 4020/3320 Service Manual 4. Remove the screw (A) from the rear side of the printer. 5. Remove the seven screws (B) securing the controller board. Installation note: After the new controller board is installed, perform scanner manual registration, see...
-
Page 266: Controller Board Shield Removal
4020/3320 Service Manual 6.4.6 Controller board shield removal 1. Remove the right cover. See Right cover removal. 2. Remove the two screws (A). - 265 -... - Page 267 4020/3320 Service Manual 3. Remove the screw (B) securing the shield to the printer. 4. Remove the screw (C) securing the shield to the printer. - 266 -...
-
Page 268: Toner Cartridge Smart Chip Contact Removal
4020/3320 Service Manual 5. Carefully remove the shield from the printer. 6.4.7 Toner cartridge smart chip contact removal 1. Remove the right cover. See Right cover removal. 2. Remove the controller board shield. See Controller board shield removal. 3. Remove the controller board. See Controller board removal. - Page 269 4020/3320 Service Manual 5. Remove the two screws (B), and then detach the right cartridge guide. 6. From behind the right cartridge guide, release the 4 latches (C) to detach the toner cartridge smart chip contact. Note: Pay attention to the original position of the spring and the actuators.
-
Page 270: Modem Removal
4020/3320 Service Manual Installation notes: 1. Test for proper installation of the spring and the actuators. 2. Press the cartridge actuator. The cartridge lock should move up. 3. Release the cartridge actuator. The cartridge lock should move back to its original position. - Page 271 4020/3320 Service Manual 5. Loosen the two screws (A) securing the modem to the controller board shield. 6. Lift the modem to release, and then remove. 7. Disconnect the 2P connector from the modem.(bizhub 3320 only) - 270 -...
-
Page 272: Front Removals
4020/3320 Service Manual 6.5 Front removals 6.5.1 Left front mount removal 1. Remove the left cover. See Left cover removal. 2. Remove the front access cover. See Front access cover removal. 3. Remove the three screws (A), and then remove the left front mount. -
Page 273: Transfer Roll Removal
4020/3320 Service Manual 4. Remove the four screws (B), and then remove the right front mount. 6.5.3 Transfer roll removal Warning—Potential Damage: Do not touch the transfer roll with bare hands. Oil from the skin can damage it. 1. Squeeze the latches at each end of the transfer roll. -
Page 274: Cartridge Plunger Removal
4020/3320 Service Manual 2. Lift to remove the transfer roll. Warning—Potential Damage: Do not remove the spring under the left latch. Doing so will damage the printer. 6.5.4 Cartridge plunger removal 1. Open the front door. 2. Tilt the cartridge plunger. - Page 275 4020/3320 Service Manual 3. Twist and then remove the cartridge plunger. Installation notes: 1. Use a spring hook to hold the spring, and then reinstall the cartridge plunger. - 274 -...
-
Page 276: Name Plate Cover Removal
4020/3320 Service Manual 2. Set the spring over the plunger. 6.5.5 Name plate cover removal 1. Open the front door. 2. Remove the two screws (A) securing the right side of the name plate cover. - 275 -... -
Page 277: Front Bin Cover Removal
4020/3320 Service Manual 3. Remove the two screws (B) securing the left side of the name plate cover. 4. Release the tabs on top of the cover, and then remove the name plate cover. 6.5.6 Front bin cover removal 1. -
Page 278: Control Panel Assembly Removal
4020/3320 Service Manual 2. Remove the two screws (A) securing the front bin cover to the front access cover. 3. Lift the left side of the cover, and then remove the front bin cover. 6.5.7 Control panel assembly removal 1. - Page 279 4020/3320 Service Manual 2. Remove the three screws (A) from the control panel assembly. 3. Open the control panel cover. - 278 -...
- Page 280 4020/3320 Service Manual 4. Lift the control panel to access the Control panel board underneath. 5. Disconnect the cave LED cable from the controller board. - 279 -...
-
Page 281: Control Panel Board Removal (Bizhub 4020)
6. Remove the screw (B) to release the toroid holder, and then slide the toroid holder away from the Control panel board connector. 7. Disconnect the cable from the controller board, and then remove the control panel assembly. 6.5.8 Control panel board removal (bizhub 4020) 1. Remove the control panel assembly. See Control panel assembly removal. -
Page 282: Control Panel Board Removal (Bizhub 3320)
4020/3320 Service Manual 2. Disconnect the video cable (A) from the board. 3. Remove the five screws, and then remove the Control panel board. 6.5.9 Control panel board removal (bizhub 3320) 1. Remove the control panel assembly. See Control panel assembly removal. -
Page 283: Control Panel Board Shield Removal
6.5.10 Control panel board shield removal Note: This is not a FRU. Remove the three screws (A), and then remove the Control panel board shield. 6.5.11 USB cable bracket removal (bizhub 4020) 1. Remove the Control panel board shield. See Control panel board shield removal. -
Page 284: Speaker Removal
4020/3320 Service Manual 2. Remove the two screws (A), and then remove the USB cable bracket. 3. Remove the USB cable bracket. 6.5.12 Speaker removal 1. Remove the control panel assembly. See Control panel assembly removal. 2. Remove the Control panel board shield. See Control panel board shield removal. -
Page 285: Control Panel Cover Removal
4020/3320 Service Manual 4. Remove the screw (B) fastening the speaker to the scanner assembly. 5. Slide the speaker off the scanner assembly. 6.5.13 Control panel cover removal 1. Flex the frame to the right to release the hinge of the cover. -
Page 286: Display Removal (Bizhub 4020)
4020/3320 Service Manual 2. Remove the control panel cover. 6.5.14 Display removal (bizhub 4020) 1. Remove the control panel assembly. See Control panel assembly removal. 2. Remove the Control panel board. See Control panel board removal. 3. Remove the four screws (A) securing the bracket to the keypad assembly. -
Page 287: Display Removal (Bizhub 3320)
4020/3320 Service Manual 4. Remove the ground shield. 5. Remove the display. 6.5.15 Display removal (bizhub 3320) 1. Remove the Control panel board. See Control panel board removal (bizhub 3320). - 286 -... -
Page 288: Light Tube Removal (Bizhub 4020)
4020/3320 Service Manual 2. Remove the three screws (A) securing the display bracket to the control panel. 3. Slide the display off the LCD cover. 6.5.16 Light tube removal (bizhub 4020) 1. Remove the control panel assembly. See Control panel assembly removal. - Page 289 4020/3320 Service Manual 3. Remove the four screws (A) securing the bracket to the keypad assembly. 4. Remove the ground shield. - 288 -...
-
Page 290: Keypad Assembly Removal
3. Remove the display. See Display removal (bizhub 4020). See Display removal (bizhub 3320) 4. Remove the light tube (bizhub 4020 only). The keypad assembly remains. 6.5.18 MPF tray removal 1. Remove the front access cover. See Front access cover removal. - Page 291 4020/3320 Service Manual 3. Disconnect the left and right MPF links from the front access cover. 4. Push the MPF tray to the left to release the right pivot on the front access cover. - 290 -...
- Page 292 4020/3320 Service Manual 5. Slide the tray to the right, and remove the MPF tray and spring. - 291 -...
-
Page 293: Mpf Pick Roller Cover Removal
4020/3320 Service Manual Installation note: Insert the straight end of the spring into the hole on the front access cover before sliding the MPF tray onto the left pivot of the front access cover. 6.5.19 MPF pick roller cover removal 1. -
Page 294: Bail Removal
4020/3320 Service Manual 3. Pull the MPF pick roller outward to remove. Warning—Potential Damage: Do not touch the pick tire with bare hands, as this can damage the pick roller. 6.5.21 Bail removal 1. Remove the MPF pick roller cover. See MPF pick roller cover removal. -
Page 295: Jam Access Cover Removal
4020/3320 Service Manual 3. Squeeze the latches, and then remove the bail. 6.5.22 Jam access cover removal 1. Remove the MPF pick roller cover. See MPF pick roller cover removal. 2. Remove the MPF pick roller. See MPF pick roller removal. - Page 296 4020/3320 Service Manual 2. Disconnect the cartridge gear linkage (A) from the front access cover. 3. Rotate the front access cover to a position that aligns the gap on the cover with the right hinge. 4. Release the right hinge off the pivot by lifting up on the right side of the front access cover.
-
Page 297: Front Door Sensor Removal
4020/3320 Service Manual 5. Slide the front access cover to the right, removing it from the print engine. 6.5.24 Front door sensor removal 1. Remove the front access cover. See Front access cover removal. 2. From under the right mount, remove the screw (A). - Page 298 4020/3320 Service Manual 6. Disconnect cable JMPF1 from the controller board. 7. Remove the four screws (A). 8. Push and hold the cam restraint to release the MPF shaft. 9. Rotate the MPF shaft inward so that the cams at each end point up.
-
Page 299: Separator Pad Removal
4020/3320 Service Manual 6.5.26 Separator pad removal 1. Remove the right cover. See Right cover removal. 2. Remove the front access cover. See Front access cover removal. 3. Remove the MPF pick roller cover. See MPF pick roller cover removal. - Page 300 4020/3320 Service Manual 7. While pressing down the MPF sensor flag (B) and separator pad (C), move the restraint roller (D) and MPF pick roller hub (E) to the right. 8. Remove the pin (F). 9. While pressing down the MPF sensor flag and separator pad, move the restraint roller (G) to the right.
-
Page 301: Bottom Removals
4020/3320 Service Manual 10. Remove the E-clip (H), and then move the shaft (I) to the right. 11. Remove the separator pad and the spring underneath. 6.6 Bottom removals 6.6.1 Power supply removal 1. Remove the left cover. See Left cover removal. -
Page 302: Power Supply Shield Removal
4020/3320 Service Manual 6. Remove the five metal screws (D) and the plastic screw (E) securing the power supply. 7. Remove the power supply, and then disconnect the cable from the power supply. 6.6.2 Power supply shield removal 1. Remove the left cover. See Left cover removal. -
Page 303: Duplex Removal
4020/3320 Service Manual 5. Remove the three screws (A), and then remove the power supply shield. 6.6.3 Duplex removal 1. Remove the left cover. See Left cover removal. 2. Remove the rear door and cover. See Rear exit door removal Rear cover removal. -
Page 304: Duplex Sensor And Input Sensor Removal
4020/3320 Service Manual 6. Remove the four screws (A) securing the duplex. Note: The duplex link (B) is part of the FRU. 6.6.4 Duplex sensor and input sensor removal 1. Remove the left cover. See Left cover removal. 2. Remove the right cover. See Right cover removal. - Page 305 4020/3320 Service Manual 6. Remove the duplex. See Duplex removal. 7. Disconnect the cable JDUPPI1 from the controller board. 8. Remove the two screws (A), and cut the cable near the frame to detach the sensors. 9. Remove the other half of the cable from the printer.
-
Page 306: Duplex Sensor And Input Sensor Removal (Bizhub 3320)
4020/3320 Service Manual Installation notes: 1. Install the duplex sensor, followed by the input sensor. 2. Route the cable using the new path. 3. Secure the cable near the liftplate gearbox using cable ties. Cut off any excess cable tie. - Page 307 4020/3320 Service Manual 2. Remove the right cover. See Right cover removal. 3. Remove the rear door and cover. See Rear exit door removal Rear cover removal. 4. Remove the power supply. See Power supply removal. 5. Remove the power supply shield. See Power supply shield removal.
-
Page 308: Index Sensor Removal
4020/3320 Service Manual 9. Remove the other half of the cable from the printer. Installation note: Route the cable using the new path, and secure it with a cable tie (A). 6.6.6 Index sensor removal 1. Remove the left cover. See Left cover removal. -
Page 309: Media Present Sensor Removal
4020/3320 Service Manual 9. Route off the cable, and then remove the index sensor. 6.6.7 Media present sensor removal 1. Remove the left cover. See Left cover removal. 2. Remove the rear door and cover. See Rear exit door removal Rear cover removal. -
Page 310: Toner Density Sensor Removal
4020/3320 Service Manual 7. Disconnect the cable from the media present sensor (A). 8. From inside the printer, release the three latches (B). 6.6.8 Toner density sensor removal 1. Remove the left cover. See Left cover removal. 2. Remove the main drive gearbox. See Main drive gearbox removal. -
Page 311: Trailing Edge Sensor Removal (Bizhub 4020)
7. Disconnect the spring (A) from the printer. 8. Remove the two screws (B). 9. Disconnect the cable from the sensor. 6.6.9 Trailing edge sensor removal (bizhub 4020) 1. Remove the left cover. See Left cover removal. 2. Remove the right cover. See Right cover removal. -
Page 312: Trailing Edge Sensor Removal (Bizhub 3320)
4020/3320 Service Manual 10. Remove the screw (C). 6.6.10 Trailing edge sensor removal (bizhub 3320) 1. Remove the left cover. See Left cover removal. 2. Remove the right cover. See Right cover removal. 3. Remove the rear door and cover. See... - Page 313 4020/3320 Service Manual 8. Remove the screw (A), and then remove the sensor. 9. Remove the other half of the cable from the printer. - 312 -...
- Page 314 4020/3320 Service Manual Installation notes: 1. Install the sensor to the ACM. 2. Route the cable along the two cable holders on the side of the ACM. Note: Make sure that the cable is not loose. 3. Bring the cable in front of the two cable holders near the ACM shaft.
- Page 315 4020/3320 Service Manual 4. Loop the cable behind the right cable holder. 5. Twist the cable so that it forms a loop. 6. Place the loop over the left cable holder. - 314 -...
-
Page 316: Media Present Flag Removal (Bizhub 4020)
7. Pull the free end to make sure that the cable is tightly looped around the cable holders. 8. Route the cable using the new path, and secure it with a cable tie (A). 6.6.11 Media present flag removal (bizhub 4020) 1. Remove the left cover. See Left cover removal. - Page 317 4020/3320 Service Manual 8. Remove the two screws (C). Below are the cam release and bracket. - 316 -...
- Page 318 4020/3320 Service Manual 9. Remove the screw (D) securing the ACM lift cam to the ACM housing. 10. Remove the ACM lift cam by sliding it off the shaft. 11. Remove the screw (E), and then remove the media present sensor flag.
- Page 319 4020/3320 Service Manual Installation note: Do the to ensure proper installation of the sensor flag: following Lift the ACM. 2. The protrusion on the ACM must align with the notch on the sensor flag. 3. The sensor flag must align with the media present sensor (A).
-
Page 320: Acm Assembly Removal (Bizhub 4020)
4020/3320 Service Manual 6.6.12 ACM assembly removal (bizhub 4020) Remove the left cover. See Left cover removal. Remove the rear door and cover. See Rear door and cover removal. Remove the power supply. See Power supply removal. Remove the power supply shield. See Power supply shield removal. -
Page 321: Acm Assembly Removal (Bizhub 3320)
4020/3320 Service Manual Remove the ACM assembly along with its shaft. Below is the ACM assembly. 6.6.13 ACM assembly removal (bizhub 3320) 1. Remove the left cover. See Left cover removal. 2. Remove the main drive gearbox. See Main drive gearbox removal. - Page 322 4020/3320 Service Manual 9. While blocking the roller, remove the screw (B). 10. Pull out the ACM clutch, and cut cable close to the clutch to detach it. 11. Remove the screw (A) and then detach the trailing edge sensor.
- Page 323 4020/3320 Service Manual 12. Disconnect the two springs (B). 13. Pry the pointed end of the ACM bushing to release the locking pin underneath. - 322 -...
- Page 324 4020/3320 Service Manual 14. Rotate, and then remove the ACM bushing. 15. Pry the pointed end of the 2nd pickup pushing to release the locking pin underneath. 16. Rotate, and then remove the 2nd pickup bushing. 17. Pull out the shaft, and remove the ACM.
-
Page 325: Pick/Lift Motor Gearbox Removal (Bizhub 4020)
4020/3320 Service Manual 6.6.14 Pick/lift motor gearbox removal (bizhub 4020) 1. Remove the left cover. See Left cover removal. 2. Remove the rear door and cover. See Rear exit door removal Rear cover removal. 3. Remove the power supply. See Power supply removal. - Page 326 4020/3320 Service Manual 3. Turn the printer on its side (left side down), then remove the three screws (A) from the left guide. Installation note: Before removing the guide, note the position of the ground spring. It will need to be re-installed when the guide is re-installed.
-
Page 327: Rear Side Removals
4020/3320 Service Manual 5. Turn the printer on its side (right side down), then remove the three screws (B) from the right guide. 6. Remove the guide from the frame. 7. Squeeze the latches to release the connector, then push the connector off the guide. -
Page 328: Rear Exit Door Removal
4020/3320 Service Manual 6.7.2 Rear exit door removal 1. Open the rear door as shown below. 2. Pull the exit door upward to release the hinges, and remove. 6.7.3 Rear cover removal 1. Open the rear exit door. - 327 -... -
Page 329: Narrow Media/Bin Full Sensor Removal
4020/3320 Service Manual 2. Remove the two screws (A) securing the rear cover. 3. Lift the upper portion of the machine to release the cover, and then remove the cover. 6.7.4 Narrow media/bin full sensor removal 1. Remove the right cover. See Right cover removal. - Page 330 4020/3320 Service Manual 7. Remove the six screws (A) securing the narrow media/bin full sensor and upper exit guide to the redrive assembly. 8. Remove the ground (B), narrow media/bin full sensor (C), and sensor flag (D). - 329 -...
-
Page 331: Redrive Assembly Removal
4020/3320 Service Manual 6.7.5 Redrive assembly removal 1. Remove the right cover. See Right cover removal. 2. Remove the left cover. See Left cover removal. 3. Remove the rear door and cover. See Rear exit door removal Rear cover removal. -
Page 332: Fuser Removal
4020/3320 Service Manual 8. Remove the six screws (B) securing the redrive assembly. 6.7.6 Fuser removal 1. Remove the right cover. See Right cover removal. 2. Remove the rear door and cover. See Rear exit door removal Rear cover removal. -
Page 333: Top Side Removals
4020/3320 Service Manual 6.8 Top side removals 6.8.1 Top cover assembly removal 1. Remove the scanner assembly. See Scanner assembly removal. 2. Remove the two screws securing the top cover to the printer frame assembly. 3. Lift the top cover assembly, and remove. -
Page 334: Bin Extender Removal
4020/3320 Service Manual 6.8.2 Bin extender removal 1. Pull the bin extender to the extended position. 2. Push up on the center tab of the bin extender while pulling the extender towards the front of the printer. - 333 -... -
Page 335: Printhead Unit Removal
4020/3320 Service Manual 3. Pull the bin extender off the top cover. 6.8.3 Printhead unit removal MFP printhead adjustment After re-installing the current printhead unit or installing a new printhead unit, a mechanical and electronic printhead unit adjustment must be performed. Before starting the printhead unit removal, disable the scanner in the configuration menu. - Page 336 4020/3320 Service Manual Removal procedure 1. Remove the top cover. See Top cover assembly removal. 2. Disconnect the cable (J6: bizhub4020 / JGLV1: bizhub 3320) from the controller board. 3. Before loosening the screws securing the printhead unit, use a sharp pencil or a small, flat-blade screwdriver to mark the location of the printhead unit on the printer frame.
-
Page 337: Adf/Scanner Removals
4020/3320 Service Manual 6.9 ADF/scanner removals 6.9.1 ADF separator pad removal (bizhub 3320) 1. Open the ADF top cover. 2. Squeeze the latches to release the separator pad. 3. Pull away the separator pad and remove. - 336 -... -
Page 338: Adf Separator Roll Removal (Bizhub 4020)
4020/3320 Service Manual 6.9.2 ADF separator roll removal (bizhub 4020) 1. Open the ADF top cover. 2. Squeeze the latches to release the separator roll. 3. Pull away the separator roll and remove. - 337 -... -
Page 339: Flatbed Cushion Removal
4020/3320 Service Manual 6.9.3 Flatbed cushion removal 1. Open the scanner. 2. Hold the cushion by its handles, then peel it off the scanner. 6.9.4 Scanner front cover removal 1. Open the front cover. 2. Pull down the cover and remove. -
Page 340: Scanner Rear Cover Removal
4020/3320 Service Manual 6.9.5 Scanner rear cover removal Hold the cover at both ends. Pull the cover off the scanner to remove. 6.9.6 ADF input tray removal 1. Firmly grasp the tray with one hand. 2. Release the tray by pushing its front edge inwards, and then remove the tray. -
Page 341: Adf Unit Removal
4020/3320 Service Manual 6.9.7 ADF unit removal 1. Open the ADF unit with one hand. 2. Insert a flat-blade screwdriver into the slot, and release the tab fastening the ADF harness cover to the ADF unit. 3. Disconnect the blade fastener (A) holding the ground cable to the ADF relay board. - Page 342 4020/3320 Service Manual 4. Disconnect the ADF cable (B) from the ADF unit. 5. Route the cable off the ADF unit. 6. Slightly lift the ADF, and use a flat-blade screwdriver to press the tab on the right hinge, releasing it from the flatbed unit.
- Page 343 4020/3320 Service Manual 7. Remove the ADF unit. Installation note: After the new ADF is installed, perform scanner manual registration, see Scanner manual registration and scanner calibration, see Scanner calibration. - 342 -...
-
Page 344: Scanner Assembly Removal
4020/3320 Service Manual 6.9.8 Scanner assembly removal 1. Remove the rear cover. See Rear cover removal. 2. Open the front access cover. 3. Remove the left cover. See Left cover removal. 4. Remove the right cover. See Right cover removal. - Page 345 4020/3320 Service Manual 9. Remove the screw (C) securing the rear right side of the scanner assembly to the printer frame. 10. Remove the screw securing the rear left side of the scanner assembly to the printer frame. - 344 -...
- Page 346 4020/3320 Service Manual 11. Remove the two screws (E) securing the front side of the scanner assembly to the printer frame. 12. Lift the scanner assembly, and remove. - 345 -...
-
Page 347: Adf Top Cover Assembly
4020/3320 Service Manual 6.9.9 ADF top cover assembly 1. Open the ADF top cover. Note: Pay attention to the original position of the top cover. 2. Release the cover by gently bending the ADF away from the top cover (1), and then lift the top cover (2) and remove. -
Page 348: Adf Cable Removal
4020/3320 Service Manual 6.9.10 ADF cable removal 1. Remove the ADF unit. See ADF unit removal. 2. Using a flat-blade screwdriver, remove the cable cover from the rear of the scanner assembly. 3. Remove the scanner assembly from the MFP. -
Page 349: Usb Cable Removal (Bizhub 4020)
4020/3320 Service Manual 6.9.11 USB cable removal (bizhub 4020) 1. Remove the right cover. See Right cover removal. 2. Remove the controller board shield. See Controller board shield removal. 3. Remove the fan. 4. Disconnect the MFP wireless cable from the controller board. -
Page 350: Usb Wireless Cable Removal (Bizhub 3320)
4020/3320 Service Manual 6.9.12 USB wireless cable removal (bizhub 3320) 1. Remove the right cover. See Right cover removal. 2. Remove the controller board shield. See Controller board shield removal. 3. Remove the fan. 4. Disconnect the MFP wireless cable from the controller board. -
Page 351: Adf Hinge Removal
4020/3320 Service Manual 6.9.13 ADF hinge removal Note: The removal shown is for the left ADF hinge. The right ADF hinge is removed in a similar manner. 1. Remove the ADF assembly. See ADF unit removal. 2. Remove the four screws (A) securing the ADF hinge to the ADF assembly. -
Page 352: Control Panel Ribbon Cable Removal
4020/3320 Service Manual 6.9.15 Control panel ribbon cable removal 1. Remove the left cover. See Left cover removal. 2. Remove the scanner front cover. See Scanner front cover removal. 3. Remove the three screws (A) securing the control panel assembly to the scanner assembly. -
Page 353: Speaker Cable Removal
5. Remove the control panel assembly. See Control panel assembly removal. 6. Remove the Control panel board drip pan. 7. Disconnect the speaker cable from the controller board (bizhub 4020) or the modem (bizhub 3320). 8. Disconnect the speaker cable from the speaker. - 352 -... -
Page 354: Cave Light Cable Removal (Bizhub 4020)
4020/3320 Service Manual 9. Feed the speaker cable through the channel on the right side of the printer. 6.9.17 Cave light cable removal (bizhub 4020) 1. Remove the scanner front cover. See Scanner front cover removal. 2. Remove the control panel assembly. See Control panel assembly removal. -
Page 355: Restraint Pad Removal
4020/3320 Service Manual 6.9.18 Restraint pad removal 1. Open the ADF top cover. 2. Peel the restraint pad off of the ADF top cover. Be sure that any excess adhesive or pieces of pad are removed from the ADF top cover to avoid misfeeds. -
Page 356: Separator Roll Assembly Removal
4020/3320 Service Manual 6.10.2 Separator roll assembly removal 1. Remove the screw (A) from under the tray insert. - 355 -... - Page 357 4020/3320 Service Manual 2. Remove the E-clip, and then remove the gear. 3. Remove the four screws (B). - 356 -...
-
Page 358: Acm Assembly Removal
4020/3320 Service Manual 4. Push out the top part of the drawer cover, and then remove the separator roll assembly. 6.10.3 ACM assembly removal 1. Remove the seven screws (A), and release the two latches (B) from the top of the drawer. - Page 359 4020/3320 Service Manual 2. Remove the two screws (C), and then release the two latches under the screws. 3. Swing the right cover backward to remove. - 358 -...
- Page 360 4020/3320 Service Manual 4. Remove the screw (D). 5. Disconnect the spring (E). - 359 -...
- Page 361 4020/3320 Service Manual 6. Remove the two screws (F), and then remove the controller board cover. 7. Disconnect the cable J11 from the controller board. 8. Unroute the cable, and then remove the ACM assembly. - 360 -...
-
Page 362: Component Locations
4020/3320 Service Manual 7. Component locations Printer configurations CAUTION—TIPPING HAZARD: Floor-mounted configurations require additional furniture for stability. You must use either a printer stand or printer base if you are using a high-capacity tray and an input option, or more than one input option. If you purchased a multifunction printer (MFP) that scans, copies, and faxes, you may need additional furniture. -
Page 363: Rear View
4020/3320 Service Manual Optional 250- or 550-sheet tray 100-sheet multipurpose feeder Paper stop Standard bin 7.1.2 Rear view Part name Printer power cord socket Power switch Ethernet port EXT port LINE port USB port (Not used) Note: This port is not supported for this machine. -
Page 364: Bizhub 3320
4020/3320 Service Manual 7.2 bizhub 3320 7.2.1 Front view Printer control panel Automatic document feeder (ADF) ADF tray ADF bin Front door release button Standard 250-sheet tray Optional 250- or 550-sheet tray 50-sheet multipurpose feeder Paper stop Standard bin... -
Page 365: Rear View
4020/3320 Service Manual 7.2.2 Rear view Part name Printer power cord socket Power switch Ethernet port EXT port LINE port USB printer port Security slot - 364 -... -
Page 366: Maintenance
Damaged, missing, or altered covers, especially in the area of the top cover and the power supply cover Possible safety exposure from any non-KONICA MINOLTA attachments Use the following table to determine when specified parts should be inspected: EVERY... -
Page 367: Scheduled Maintenance
4020/3320 Service Manual EVERY EVERY EVERY EVERY NOTES SERVICE 100K 200K 400K CALL FUSER UNIT Fuser unit Inspect Inspect Replace Inspect Sensor (fuser exit) Clean Clean Clean Blower brush REDRIVE ASSEMBLY Redrive assembly Inspect Replace EVERY EVERY EVERY NOTES... -
Page 368: Resetting The Maintenance Counter
4020/3320 Service Manual When performing the 200K scheduled maintenance procedure, the following areas should be cleaned of media dust and toner contamination: Media trays Imaging unit area Transfer roll area Duplex area Standard bin 8.2.2... - Page 369 4020/3320 Service Manual 1. Slightly dampen a soft, lint-free cloth or paper towel with water. 2. Open the scanner cover. 3. Clean all the areas shown, and then let them dry. White underside of the scanner cover Scanner glass...
-
Page 370: Electrical Parts Layout
4020/3320 Service Manual 9. Electrical parts layout 9.1 bizhub 4020 Control panel board Cooling fan Controller board Power supply Speaker Reverse solenoid - 369 -... - Page 371 4020/3320 Service Manual Fuser assembly Narrow media/ bin full sensor Pick/ lift motor Tray present sensor MPF solenoid Printhead unit - 370 -...
- Page 372 4020/3320 Service Manual [11] [10] Front door sensor Input sensor Narrow Media Sensor Duplex sensor MPF sensor Index sensor Trailing edge sensor Media present sensor Toner destiny sensor [10] Main motor [11] Toner cartridge motor - 371 -...
-
Page 373: Bizhub 3320
4020/3320 Service Manual 9.2 bizhub 3320 Control panel board Cooling fan Controller board Power supply Speaker Reverse solenoid - 372 -... - Page 374 4020/3320 Service Manual Fuser assembly Narrow media/ bin full sensor Tray present sensor MPF solenoid ACM clutch Printhead unit - 373 -...
- Page 375 4020/3320 Service Manual Front door sensor Input sensor Narrow Media Sensor Duplex sensor MPF sensor Trailing edge sensor Toner density sensor Main motor Toner cartridge motor - 374 -...
-
Page 376: Printer Specifications
4020/3320 Service Manual 10. Printer specifications 10.1 Electrical specifications Low-voltage models 100 to 127 V ac at 50 to 60 hertz (Hz) nominal 90 to 137 V ac, extreme High-voltage models 220 to 240 V ac at 50 to 60 hertz (Hz) nominal (not available in all countries and regions) 10.2 Operating clearances... - Page 377 4020/3320 Service Manual bizhub 3320 Status 1 meter average sound Declared sound power level pressure (dBA) (Bels) Idle (Standby) 15 dBA 3.3 Bels Quiet Mode 49 dBA 6.3 Bels Printing 53 dBA 6.8 Bels Sleep Mode 15 dBA 3.3 Bels...
-
Page 378: Operating Environment
4020/3320 Service Manual 10.4 Operating environment Environment Specification Printer operating Temperature 60 to 90 °F (16 to 32 °C) Relative humidity 8 to 80% Maximum wet bulb temperature 73 °F (23 °C) Printer off Temperature 50 to 110 °F (10 to 43 °C) -
Page 379: Operational Environment
4020/3320 Service Manual Standard ADF media types Dimensions Letter, Legal, A4, A5, A6, JISB5, Folio, Officio, Executive, Statement Weight 16–24 lb, 64–90 gm/m ADF speed Simplex (bizhub 3320) Up to 50 ppm Duplex (bizhub 4020) 45 images/minute in simplex, 20 images/minute in duplex... -
Page 380: Fax Specifications
4020/3320 Service Manual Scanner assembly life A4 flatbed (bizhub 3320) 90,000 pages Legal flatbed (bizhub 4020) 120,000 pages Simplex ADF (bizhub 3320) 90,000 pages Duplex ADF (bizhub 4020) 220,000 pages 10.6 Fax specifications Fax standard Super G3 Modem speed 33.6 Kbps... -
Page 381: Options And Features
4020/3320 Service Manual 11. Options and features Some of the following options are not available in every country or region. 11.1 Available internal options 11.1.1 bizhub 4020 Memory card - EM-P04 Expanded Memory Unit 1GB - EM-P03 Expanded Memory Unit 2GB - UK-P01 Upgrade Kit 256MB User Flash ... -
Page 382: Media Handling Options
11.2 Media handling options Standard 250-sheet tray Optional 550-sheet tray* Optional 250-sheet tray* Multipurpose feeder Any combination of 550-sheet and 250-sheet trays may be installed up to a total of 3 optional trays on the bizhub 4020 models only. - 381 -... -
Page 383: Theory Of Operation
4020/3320 Service Manual 12. Theory of operation 12.1 POR sequence At power on, the engine code goes through a series of tests to verify hardware integrity. If a hardware failure is detected, it will be reported to the printer. If the POR sequence cannot be completed successfully, the printer may post an error message identifying service may be needed. -
Page 384: Simplex Printing
4020/3320 Service Manual end of the shaft disengage the MPF tray. Each side of the tray is connected to the front access cover by springs. When disengaged from the shaft, the springs pull the tray causing the media to come into contact with the MPF pick roller. -
Page 385: Media Handling Components
4020/3320 Service Manual 12.4 Media handling components 12.4.1 Main drive gearbox The gearbox supplies all mechanical power requirements of the printer. Its motor, through several gears, transfers power to following paths: photoconductor drum, transfer roll, fuser, paper exit, input, duplex, and MPF. -
Page 386: Key Components
4020/3320 Service Manual 12.5 Key components 12.5.1 Sensors Trailing edge sensor Detects the media’s trailing edge as it passes the pick tires. Among other capabilities, this sensor can be used to determine the paper size sensor and the media stack height. -
Page 387: Other Key Components
4020/3320 Service Manual Pass through sensor (option tray) Detects when the media from the option tray passes. This will trigger the pick roller to pick the next media. Capacitive Toner Level Sensor (CTLS) Detects the amount of toner in the imaging unit. If the toner level is low, the cartridge auger motor is triggered to add toner from the toner cartridge to the imaging unit. -
Page 388: Electrophotographic Process (Ep Process)
4020/3320 Service Manual Rollers 12.6 Electrophotographic process (EP process) 12.6.1 Printhead The printhead scans the photo conductor drum surface with a laser beam. It consists of the following components: Laser diode (LD) board assembly Oscillator Start of scan board assembly When a laser beam is scanned across the photoconductor drum surface from one end to the other while turning on and off the beam, one line of latent image is created. -
Page 389: Step 2: Expose
4020/3320 Service Manual 12.6.3 Step 2: Expose The laser fires a focused beam of light at the surface of the photoconductor and writes an invisible image, called a latent image. The laser beam only discharges the surface where the beam hits the photoconductor. -
Page 390: Step 4: Transfer
4020/3320 Service Manual This process would be similar to using glue to write on a can and then rolling it over glitter. The glitter sticks to the glue but not to the rest of the can. 12.6.5 Step 4: Transfer As the paper travels between the transfer roll and the photoconductor, the transfer roll applies a positive charge to the back of the media. -
Page 391: Adf Theory
4020/3320 Service Manual 12.7 ADF theory 12.7.1 ADF theory of operation ADF cross section (bizhub 4020) ADF cross section (bizhub 3320) - 390 -... - Page 392 4020/3320 Service Manual Document sensor Pickup roller Separator roller Stage and interval sensors Paperfeed 1 roller Paperfeed 2 roller Feed sensor Scan area Duplex sensor Eject 2 roll Exit roller The duplex ADF enables the user to create duplex scans automatically, eliminating the need to stop the scanning process to flip the media being duplicated over.
- Page 393 4020/3320 Service Manual 3. If the media has actuated the document sensor, then an ADF scan is executed. At this point the pickup roller (2) on the pick arm assembly drops and advances the paper into the ADF. To minimize the possibility of multiple sheets being fed, a counter rotating separator roll (3) is used.
-
Page 394: Acronyms
4020/3320 Service Manual 13. Acronyms 13.1 Acronyms Autocompensator Mechanism ASIC Application-Specific Integrated Circuit BLDC Brushless DC Motor Black Only Retract Charge Coupled Device Carbonless Copy Paper Cyclic Redundancy Check Customer Setup DIMM Dual Inline Memory Module DRAM Dynamic Random Access Memory... - Page 395 4020/3320 Service Manual MROM Masked Read Only Memory Microswitch Nonvolatile Memory NVRAM Nonvolatile Random Access Memory Original Equipment Manufacturer Optical Sensor Photoconductor pel, pixel Picture element Power-On Reset POST Power-On Self Test Position Sensing Device Pulse Width Modulation Raster Imaging Processor...
- Page 396 4020 Overall wiring diagram 15-N 16-N 18-N 19-N 20-N 23-N 25-N 26-N 28-N 17-N 21-N 22-N 24-N 27-N JHOME1 IMAGING CARRIAGE HOME SENSOR JFBM1 15-O 16-O 17-O 18-O 19-O 20-O 21-O 22-O 23-O 24-O 25-O 26-O 27-O 28-O FLATBED MOTOR...
- Page 397 bizhub 3320 Overall wiring diagram 15-N 16-N 18-N 19-N 20-N 23-N 25-N 26-N 28-N 17-N 21-N 22-N 24-N 27-N JHOME1 IMAGING CARRIAGE HOME SENSOR JFBM1 15-O 16-O 17-O 18-O 19-O 20-O 21-O 22-O 23-O 24-O 25-O 26-O 27-O 28-O FLATBED MOTOR JCIS1 HSYNC LASER SCANNING UNIT...
- Page 398 © 2013 KONICA MINOLTA,INC. © 2013 KONICA MINOLTA,INC. Use of this manual should be strictly supervised to avoid Use of this manual should be strictly supervised to avoid disclosure of confidential information. disclosure of confidential information.
Need help?
Do you have a question about the bizhub 4020 and is the answer not in the manual?
Questions and answers
Voglio fare reset Konica Minolta 4020 chip
To reset the chip on a Konica Minolta bizhub 4020, remove the old chip from the toner cartridge and replace it with a new reset chip. No special tools are required, and the new chip works automatically once installed.
This answer is automatically generated