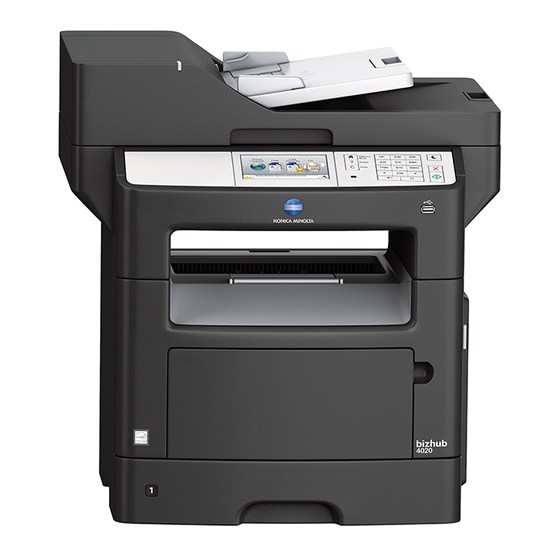
Konica Minolta bizhub 4020 Shortcut Manual
Hide thumbs
Also See for bizhub 4020:
- Service manual (398 pages) ,
- User manual (367 pages) ,
- Quick reference (2 pages)
Table of Contents
Advertisement
Quick Links
Advertisement
Table of Contents

Related Manuals for Konica Minolta bizhub 4020


Summary of Contents for Konica Minolta bizhub 4020
- Page 1 Education Newsletter bizhub 4020 Shortcut Manual 簡易說明書...
-
Page 3: Control Panel
Control Panel 淸單 Manual 1.輕觸顯示幕 1. Touch Screen 2.清除/重設 2. Clear/Reset 3. Help 3.提示 4. Return to home 4.返回主頁 5. Sleep mode 5.睡眠按鍵 6. Stop 6.停止工作 7. Start 7.開始 8. Number pad 8.數字鍵 9. Status indicator 9.指示燈... - Page 4 Main Function 主要功能 Copy Function 複印功能 Direct input/save fax number 直接輸入或儲存傳真號碼 Recall fax number in shortcuts list 呼叫快捷鍵清單內的傳真號碼 Direct input/save email address 直接輸入或儲存電郵地址 5. Recall email in shortcuts list 呼叫快捷鍵清單內的電郵地址 直接輸入或儲存掃描到FTP的位置 Direct input/save FTP destination Recall FTP destination in shortcut 呼叫快捷鍵清單內的FTP目的地...
- Page 5 Copy Setting 影印設定 Paper Size/paper Tray Selection 紙張尺寸/選擇紙盤 1.按[原稿尺寸]選擇原稿 1. Touch 的大小 [Copy from] to select original size 2.按[複印目標]選擇出紙 尺寸和紙盤 2. Touch [Copy to] to select output paper size and paper tray ID Card ID卡 Copy the front and back sides of the card 把卡片的正反兩面印在紙張的同一面上...
- Page 6 Copy Setting 影印設定 Zoom 比例 Copies can be scaled 影印可調整25%至 from 25% to 400% of 400%的縮放比例 the original document size. 1. 按[+]或[﹣]調整縮 放比例或按[比例]選擇預 1. Touch [+] or [-] to 設比例[25﹪], adjust the zoom ratio or [100﹪],[200﹪]或 Touch [Scale] to select [400﹪] preset ratio [25%], [100%],[200%] or...
- Page 7 Copy Setting 影印設定 Duplex 雙面列印 1. Touch 按[雙面列印] [Sides(Duplex)] 選擇需要的單雙面設定 2. Select desired duplex setting 按[ ] 3. Touch [ ] Collate 逐份列印 選擇當影印多份時的排序 Select the output 方式 method when printing multiple sets of copies 1.按[逐份列印] 1.
- Page 8 Copy Setting 影印設定 Content 內容 Adjust the copy quality 調整影印的品質 1.按[內容] Touch [Content] 2.選擇 Select the content i. [文字] type ii. [文字/相片] i. [Text] iii. [相紙]或 ii. [Text/Photo] iv.[圖形] iii. [Photo] iv.[Graphics] 3.按[ ] Touch [ ] 4.按...
-
Page 9: Margin Shift
Copy Setting 影印設定 Margin Shift 邊界偏移 Increase or reduce the 增加或減少邊界的空白範 圍 size of the page margin 1.按[邊界偏移] Touch [Margin 2.按[+]或[﹣]調整偏移 Shift] 數值 Touch [+] or [-] to 3.按[ ] adjust the margin value Touch [ ] Edge Erase 除邊... - Page 10 Copy Setting 影印設定 Overlay 背景畫面 Create a watermark in 在複印本加入浮水印 content 1.按[背景畫面] 1. Touch 2.選擇需要的文字或 [Overlay] 按[輸入自訂文字]自訂文 字 2. Select overlay message or 3.按[ ] Touch [Custom Text] to enter desired message 3. Touch [ ] Separator Sheet 分隔頁...
- Page 11 Copy Setting 影印設定 Cover Page Setup 封面設定 Set up the front and 封面和封底的設定 back cover page of 1.按[封面設定] copies 2.選擇需要的模式 1. Touch [Cover Page i. [前面]﹣ 只設定封面 Setup] ii. [上一步]﹣ 只設定封 底 2. Select cover mode iii. [己滿] ﹣ 設定封面和 i.
- Page 12 Copy Setting 影印設定 Header/Footer 頁首/頁尾 Insert header or footer on copies 加入頁首和頁尾的內容 1. Touch 1.按[頁首/頁尾] [Header/Footer] 2.按[頁首]或[頁尾] 2. Touch [Header] or [Footer] 3.按[ ] 3. Touch [ ] 4.選擇位置 4. Select area on the 5.選擇...
- Page 13 Copy Setting 影印設定 Paper Saver 省紙功能 Combine multi pages 把多頁原稿放在同一頁上 original on the same page 1.按[省紙功能] 2.選擇需要的組合,如: 1. Touch i. [2-Up直印] [Paper Saver] ii. [4-Up直印] iii. [2-Up橫印] 2. Select desired N-up iv.[4-Up橫印] setting, such as: i. [2-up Portrait] 3.按[ ] ii.
- Page 14 Copy Setting 影印設定 Auto Center 自動置中 Automatically align the 自動把縮放的內容放到中 content at the center 間 of the page 1.按[增強影像] 1. Touch [Advanced 2.按[自動置中]開啟功能 Imaging] 2. Touch [Auto Center] to turn on the function Background Removal 背景移除 Adjust the density of 調整背景顏色的濃度(列...
- Page 15 Copy Setting 影印設定 Color Dropout 濾除色彩功能 Remove a specific color on copies 在複印時移除某種指定的顏色 1. Touch 1.按[增強影像] [Advanced Imaging] 2.按[ ]或[ ] 2. Touch [ ]or [ ] to 選擇要移除的顏色[紅色], select desired color, [綠色]或[籃色] [Red], [Green] or [Blue] to remove 3.按[ ] 3.
- Page 16 Copy Setting 影印設定 Scan Edge to Edge 邊封邊掃描 Scan the original 掃描整幅原稿 document edge-to- edge/full area 1.按[增強影像] 1. Touch [Advanced 2.按[邊封邊掃描]開啟功 Imaging] 能 2. Touch [Scan Edge to Edge] to turn on the function...
- Page 17 Scan/Fax Function 掃描/傳真功能 Scan to Email 掃描到電字郵件 Recall email address in shortcut list 在快捷鍵清單選擇已登記的電郵地址 Touch [E-mail shortcuts] 1.按[電子郵件快捷鍵] Touch email destination in the list 2.於清單選擇電郵地址 Touch [ ] to change desired scan 3.按[ ]更改需要的 settings 掃描設定 Press [ ] to scan 4.按[ ]掃描...
- Page 18 Scan/Fax Function 掃描/傳真功能 Scan to FTP 掃描到FTP Recall scan to FTP destination in 在快捷鍵清單選擇已登記的FTP掃描目的 shortcut list 地 Touch [FTP Shortcuts] 1.按[FTP快捷鍵] Touch destination in 2.於清單選擇掃描目的地 the list Touch [ ] to 3.按[ ]更改需要的 change desired scan 掃描設定 settings 4.按[ ]掃描 Press [ ] to scan Scan to Network...
- Page 19 Scan/Fax Function 掃描/傳真功能 傳真 Direct input fax number to fax 直接輸入傳真目的地 1. Touch [Fax] 1.按[傳真] 2. Input fax number 2.輸入傳真號碼 3. Touch [ ] to select 3.按[ ]選擇需要的 desired scan settings 掃描設定 4. Press [ ] to fax 4.按[ ]傳真 Recall fax number in shortcut list 在快捷鍵清單選擇已登記的傳真目的地...
- Page 20 Scan/Fax Setting 掃描/傳真設定 Fax Setting 傳真設定 1. Input fax number in [Fax] or 1.在[傳真]直接輸入傳真號碼或在 recall fax number in [Fax [傳真快捷鍵]選擇已登記的傳真 shortcuts] 2. Touch [ ] to change 2.按[ ]更改需要的設定 desired fax setting...
- Page 21 Fax/Scan Setting 掃描/傳真設定 Email/FTP setting 電郵/FTP設定 1.在[電郵],[電郵快捷鍵]或 1. Recall or input scan [FTP快捷鍵]直接輸入或選擇已 destination in [E-mail], 登記的目的地 [Email-shortcuts] or [FTP shortcuts] 2.鍵 按[ ]更改需要的 2. Touch [ ] to 設定 change desired scan setting...
- Page 22 Scan/Fax Setting 掃描/傳真設定 Scan to Network Setting 掃描至網路設定 1. Touch [Scan to Network] 1.按[掃描至網路] 2. Select scan destination 2.選擇已登記的目的地 3. Touch 3.按[掃描設定]轉變需要 [Scan Settings] to 的設定 change desired scan settings...
- Page 23 Scan/Fax Setting 掃描/傳真設定 Darkness 間暗度 Adjust the scan/fax density 調整掃描傳真濃度 按[明暗度] 1. Touch [Darkness] 按[+]或[﹣]調整掃描的明暗度 2. Touch [+] or [-] to adjust the scanning density Resolution 解析度 Adjust the scan/fax resolution 調整掃描傳真解析度 1. Touch [Resolution] 按[解析度] 2. Touch [+] or [-] to adjust the 按[+]或[﹣]調整解析度...
- Page 24 Scan/Fax Setting 掃描/傳真設定 Scan Size 原始尺寸 Adjust the scanning 調整掃描尺寸 area 按[原始尺寸] 1. Touch [Original Size] 選擇需要的原稿尺寸 2. Select desired original size Content 內容 Adjust the scanning quality 調整掃描的品質 1.按[內容] Touch [Content] Select the content 2.選擇 type i. [文字] i. [Text] ii.
- Page 25 Scan/Fax Setting 掃描/傳真設定 Background Removal 背景移除 Adjust the density of colored 調整背景顏色的濃度(列如報紙) background(Such as newspaper) 1.按[增強影像] 1. Touch [Advanced Imaging] 2.在[背景移除]按[+]或[﹣]調整背 景的濃度 2. Touch [+] or [-] in [Background Removal] to adjust the background density Scan Edge to Edge 邊對邊掃描 Scan the original document edge- 掃描全篇幅的原稿內容...
-
Page 26: File Format
Scan/Fax Setting 掃描/傳真設定 Color 彩色 1. Touch [Color] to change color 按 [彩色]轉換黑白或彩色模式 mode File Format 檔案格式 Change file format 更改檔案格式 1. Touch [Send As] 按 [傳送為] 2. Select desired file type for scan 選擇需要的檔案格式 transmission 按[ ] 3. - Page 27 Scan/Fax Setting 掃描/傳真設定 Page Setup 頁面設定 Duplex scan/fax 雙面傳真或掃描 1. Touch 按 [頁面設定] [Page Setup] 按[面數]換到雙面掃描 2. Touch [Sides]and change to 2 sided for 按[ ] duplex scanning 3. Touch [ ] Transmission Log 傳送記錄...
- Page 28 Scan/Fax Setting 掃描/傳真設定 Change File Name-Email/FTP 更改檔案名稱-電郵/FTP 1. Touch 1.按 [E-mail], [電郵], [E-mail shortcut], [電郵快捷鍵]或 [FTP] or [FTP快捷鍵] [FTP shortcut] 2.按[檔名]更改檔案名稱 2. Touch [File Name] to change desired file 3.按[ ] name 3. Touch [ ]...
- Page 29 Print Fax History 列印傳真報告 1. Touch [ 按[ 2. Touch [Report] 按[報告] 3. Touch 按 [Fax Job Log] or [傳真工作記錄]或 [Fax Call Log] to [傳真呼叫紀錄] print report...
- Page 30 Manage Fax/Email 管理掃描/傳真 Destination 目的地 Register Email address 登記電郵地址 1. Touch [Email] 1.按[電子郵件] 2. Touch [Recipient(s)] to input 2.按收件人輸入電郵地址, email address and 再按[ ] touch [ ] 3. Touch[Save As 3.按[另存為快捷鍵...
- Page 31 Manage Fax/Email 管理掃描/傳真 Destination 目的地 Register Fax number 登記傳真號碼 1.按[傳真] 1. Touch [Fax] 2.輸入傳真號碼,再按 2. Input fax number and touch [ 3.輸入傳真號碼名稱再按 3. Enter a name for [ ] the shortcut and touch[ ] 4.按[OK],確認設定...
- Page 32 Manage Fax/Email 管理傳真/電郵 Destination 目的地 Delete Fax/EmailShortcut 刪除傳真/電郵快捷鍵 1. Touch [ 1.按[ 2. Touch 2.按[管理快捷鍵] [Manage Shortcuts] 3.按[傳真快捷鍵]或 3. Touch [電郵快捷鍵],再選擇要刪 [Fax Shortcuts]or 除的快捷鍵 [E-mail Shortcuts] and then select desired shortcut to delete...
- Page 33 Stop/Cancel Job 停止/取消工作 1. Press [ 1.按[ 2. Select job type 2.選擇工作類別[列印] [Print], [Fax] or [傳真]或[網路] [Network] 3.選擇要刪除的工作再 3. Select job and 按[ Touch [ ] to delete...
- Page 34 Print Function 列印功能 Confidential Print 機密列印 Send confidential print job 傳送機密列印工作 1. Click [File]g[Print]g[Select Printer] 1.按〔檔案]g〔列印]g〔選擇印 表機] 2. Click [Preference] 2.按〔內容〕 3. Click [Basic]g [Job Retention]g [Confidential 3.按〔基本]g〔機密列印〕 Print] and click [User g〔⽤用者設定〕 Settings] 4.在密碼欄輸入4位數字的自訂 4. Input 4 digitals confidential 密碼...
- Page 35 Print Function 列印功能 Print Envelope or custom size paper 列印信封或自定尺寸紙張 Printer Driver Setting 列印驅動程式設定 1. Open file in the application and click 1. 在電腦開啟文件,選〔檔案〕, 再按 [File], click [Print] 〔列印〕 2. Select printer and click [Preferences] 2. 選擇打印機, 再按〔內容〕 or[Properties] 3. 按〔基本〕 3.
-
Page 36: Print Counter List
Check meter 檢查計數器 Please send the meter report monthly 請每月把咪錶報告電郵至 through: bhkg_csmeter@bhk.konicaminolta.hk email bhkg_csmeter@bhk.konicaminolta.hk 2565-2128 或 傳真至 2565-2128 OR fax Print Counter list 機身讀取 1.按 [ 1. Touch [ 2.按〔報告〕 2. Touch [Reports] 3.按〔資產報告〕 3. Touch (Asset Report) to print... - Page 37 USB Drive Function USB記憶體功能 Insert USB memory into 插入記憶體於USB埠 USB port 支援格式: FAT 檔案類型: PDF, XPS, gif, Supported Format: FAT jpeg/jpg, bmp, tiff/tif, png,dcx Supported File Type: PDF, XPS, gif, jpeg/jpg, bmp, tiff/tif, png,dcx Print from USB Drive 外置記憶體打印 1. Touch the document 選擇要打印的文件...
- Page 38 Replacing 更換碳粉 Toner Cartridge To order new toner, please: 電郵至 bhkg_csorder@bhk.konicaminolta.hk email bhkg_csorder@bhk.konicaminolta.hk 2565-2190 或 致電 2565-2190 OR call...
- Page 39 Remove 清除塞紙 Jammed Paper...
- Page 40 部門熱線Particulars 聯絡方法Contact us 市務科 Marketing Division Ø 銷售熱線Sales Hotlines 電話Tel : 2565 2111 • 查詢產品及銷售詳情 New Product and Sales Enquires 電郵Email : bhkg_sales@bhk.konicaminolta.hk 服務科 Technical Service Division Ø 維修熱線Repair Hotline 電話Tel : 2565 2176 • 多功能產品之維修服務 傳真Fax : 2856 1024 MFP Repair Services 服務科...
Need help?
Do you have a question about the bizhub 4020 and is the answer not in the manual?
Questions and answers