JUMO mTRON T Operating Manual
Measuring, control, and automation system process engineering application
Hide thumbs
Also See for mTRON T:
- Operating manual (278 pages) ,
- Manual (114 pages) ,
- System description (74 pages)

Related Manuals for JUMO mTRON T


Summary of Contents for JUMO mTRON T
- Page 1 JUMO mTRON T Measuring, Control, and Automation System Process Engineering Application Operating Manual 70500152T90Z001K000 V2.00/EN/00642561...
-
Page 3: Table Of Contents
Contents Introduction ............5 Available technical documentation . - Page 4 Contents 3.8.3 DeltaT setpoint value calculation ..........58 Setpoint values (program generator outputs) .
-
Page 5: Introduction
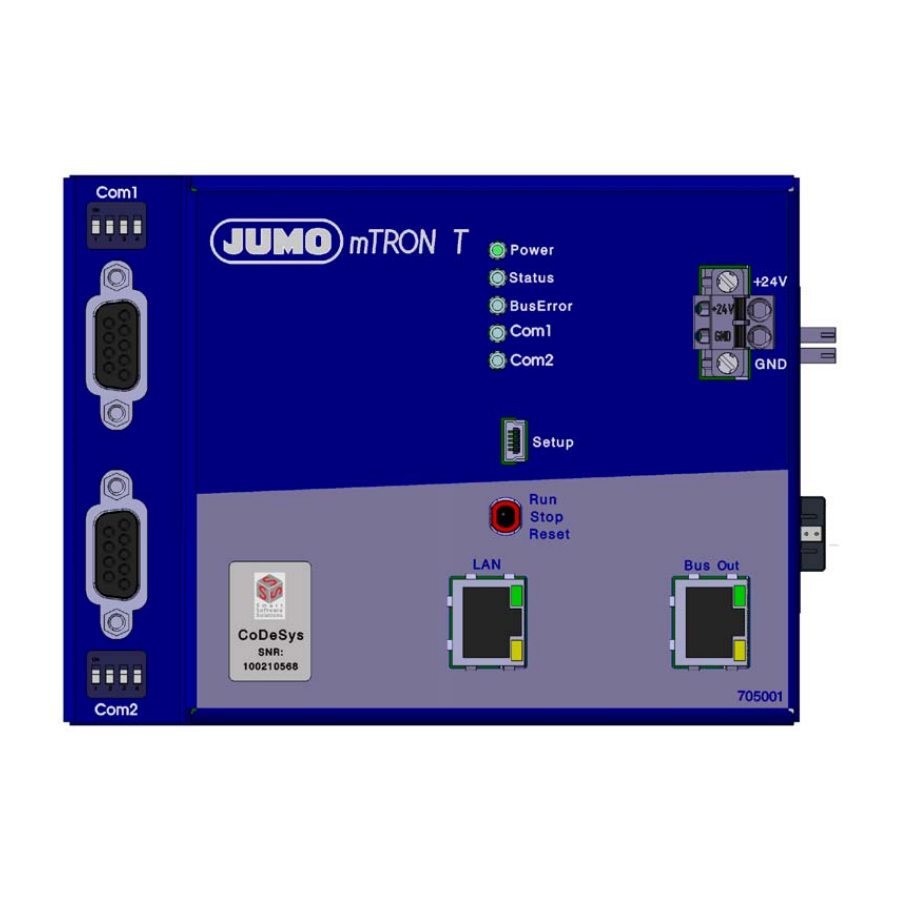
1 Introduction Available technical documentation The documents specified below are available for the measuring, control, and automation sys- tem. 1.1.1 General information Product Type of documentation Printed PDF file Measuring, Data sheet 70500000T10... control, and System manual B 705000.0 automation system Setup program manual B 705000.6 System description... -
Page 6: Special Modules
1 Introduction Product Type of documentation Printed PDF file Analog Data sheet 70502500T10... output module Operating manual 70502500T90... 4-channel Installation instructions 70502500T94... Digital input/ Data sheet 70503000T10... output module Operating manual B 705030.0 12-channel Installation instructions B 705030.4 1.1.4 Special modules Product Type of documentation Printed... -
Page 7: Safety Information
1 Introduction Safety information 1.2.1 Warning symbols DANGER! This symbol indicates that personal injury caused by electrical shock may occur if the re- spective precautionary measures are not carried out. WARNING! This symbol in connection with the signal word indicates that personal injury may occur if the respective precautionary measures are not carried out. -
Page 8: Intended Use
1 Introduction 1.2.3 Intended use The measuring, control, and automation system is intended for use in an industrial environ- ment, as specified in the technical data of the individual system modules. Other uses beyond those defined are not viewed as intended uses. The modules are manufactured in compliance with applicable standards and directives as well as the applicable safety regulations. -
Page 9: Required System Version
1 Introduction Required system version The process engineering application is supported from system version 03. The system version of the measuring, control, and automation system is determined using the compatibility index of the base unit. Further information on the compatibility index: ... - Page 10 1 Introduction...
-
Page 11: Process Screen Operation
2 Process screen operation NOTE! Process screen operation is fundamentally only possible in system status "run". In system status "stop", certain inputs are accepted (for example, user log-on and log-out), but no process screens are updated. In system status "stop", the toolbar is automatically displayed and its functions are activated. Overview screen The overview screen is the access point to the process screen operation. - Page 12 2 Process screen operation Program generators with programs (1) Status bar: "master" user is logged on; (5) Program generator in basic status "toolbar", "user administration", and "event Frame colour white list" symbols (2) Overview of all configured program gener- (6) Program generator in basic status with ators active program end signal: Touch the corresponding field to call up a...
- Page 13 2 Process screen operation Status bar symbols and buttons Symbol/But- Meaning/Function No user logged on Tap the symbol to log on. User is logged on (user name is displayed). Tap the symbol to log off. Display toolbar (user-dependent) Hide toolbar (user-dependent) Open "log-on"...
-
Page 14: User Log-On
2 Process screen operation User log-on Users can log on from the status bar on the overview screen. If no user is logged on, the relevant symbol is displayed (as well as date and time): If a user is already logged on, the relevant symbol together with the user name (in this case: master) is displayed: User log-on Step... - Page 15 2 Process screen operation User groups and user rights A user is assigned to a user group and therefore possesses the rights that are associated with that user group. The user groups available in the process engineering application are identical to those in the measuring, control, and automation system standard application: •...
- Page 16 2 Process screen operation The following users are already set up by default: User Name Password User group User 1 Master System master 9200 1: Masters User 2 User 1 Data management 2: Users 1 User 3 User 2 Data management 3: Users 2 User 4 User 3...
-
Page 17: Program Generator (Detailed Screen)
2 Process screen operation Program generator (detailed screen) By tapping a program generator on the overview screen, you are taken to the detailed screen of the program generator (user log-on required). The detailed screen display depends on the current operating status of the program generator: •... - Page 18 2 Process screen operation Status bar symbols Symbol Meaning Program generator in basic status Program generator in automatic mode Program generator stopped (pause) Program generator in manual mode Program editor Temporary program change Program (followed by program name or "manual mode") Program section (followed by section number)
-
Page 19: Basic Status
2 Process screen operation 2.3.1 Basic status (1) Status bar: (3) Display of process data: Symbol for program generator status (in Background dark grey this case: basic status) Actual values orange Program generator number (in this case: 2) Symbols to identify process data (see "P"... -
Page 20: Detailed Information
2 Process screen operation 2.3.2 Detailed information Call up from the basic status Process screen (1) Status bar: (3) Display of detailed information (program generator process data; in this case: pro- Symbol for program generator status (in gram has not yet been started): this case: basic status) Setpoint values Program generator number (in this case: 2) -
Page 21: Program Editor
2 Process screen operation 2.3.3 Program editor Call up from the basic status Select program (1) Status bar: (3) Program selection: "Edit program" symbol Select program from the program list (2) Control element: Back (basic status) - Page 22 2 Process screen operation Select a program (1) Status bar: (3) Program selection: "Edit program" symbol Previously selected program (new program selection possible) (2) Control elements (from left to right): (4) Edit: Delete program Edit name of selected program Copy program Start program editor (5) Assign program generator: Back (basic status)
- Page 23 2 Process screen operation Delete program After pressing the "delete program" control element (button), the confirmation prompt needs to be answered: (1) Confirmation (program will be deleted) (2) Abort (program will not be deleted; back to "program selection" screen) Copy program After pressing the "copy program"...
- Page 24 2 Process screen operation Edit program After pressing the "start program editor" control element (button), the program editor process screen is displayed: (1) Status bar: (3) Program sections: "Edit program" symbol Previous section (for information only) "P" symbol (program) and program name Selected section "P/i"...
- Page 25 2 Process screen operation Setpoint values and section time The description of the setpoint values and of their limits are specified in the program generator configuration; the limits of the section time are specified via the process step. Entries in the pro- gram editor are only possible within these limits.
- Page 26 2 Process screen operation Display of limit value violations In the case of a limit value violation concerning a setpoint value or the section time, the relevant value will be displayed as red. It is possible to move forwards or backwards to the sections that also contain a limit value violation using the additional buttons in the status bar.
-
Page 27: Program Quickstart
2 Process screen operation 2.3.4 Program quickstart Call up from the basic status With this function, the last active program will be started directly. If a lead time was set for the program, this will not be observed. This function is also available when a new program was selected but has not yet started. After the program start, the symbol on the button changes to enable immediate program abort. -
Page 28: Manual Mode
2 Process screen operation 2.3.5 Manual mode Call up from the basic status With this function manual mode is selected and the program editor is initially called up. Create program for manual mode A program that consists of a single program section is created for the manual mode of a pro- gram generator. - Page 29 2 Process screen operation Process step When editing a program section, the process step must first be specified. The process step de- termines which setpoint values are available and which limits are valid for the section time. Process steps are created via configuration with the setup program. ...
-
Page 30: Program Selection/Start
2 Process screen operation 2.3.6 Program selection/start Call up from the basic status With this function, a program is selected and started. There is the option to choose the start section and to specify a delay time or a start time (date and time). Select program (1) Status bar: (3) Select program:... - Page 31 2 Process screen operation Start the program After selecting the program – and, if necessary, entering the start section and lead time – the program can be started. (1) Status bar: (3) Selected program: "Program generator in basic status" symbol Program name is displayed (reselection possible) Program generator number (in this case: 2)
- Page 32 2 Process screen operation Delayed program start (1) Status bar: (3) Start time: "Program generator in automatic mode" Pre-assigned start time (date and time) or symbol Calculated start time (date/time at start + Program generator number (in this case: 2) lead time) "P"...
-
Page 33: Automatic Mode
2 Process screen operation 2.3.7 Automatic mode After the program start, the process screen for automatic mode is displayed. Process screen (1) Status bar: (3) Display of process data: Symbol for the program generator status Active process step (in this case: automatic mode) Actual values (orange) and setpoint values Program generator number (in this case: 1) (green) of the plant... - Page 34 2 Process screen operation Section change A section change (previous/next section) is carried out directly without additional confirmation prompt. If the program generator is in the last section, the program will end immediately with "next section". Actual values and setpoint values in the process screen The actual value for the display is selected in the PLC configuration of the central processing unit from the analog selector (system analog signals).
-
Page 35: Detailed Information In Automatic Mode
2 Process screen operation 2.3.8 Detailed information in automatic mode Call up from automatic mode Process screen (1) Status bar: (3) Display of detailed information (all program generator process data): Symbol for the program generator status (in this case: automatic mode) Setpoint values Program generator number (in this case: 2) Operating contacts (in this case: contact 1... -
Page 36: Temporary Changes
2 Process screen operation 2.3.9 Temporary changes Call up from automatic mode With this function, the program editor is started in order to implement temporary changes in the current program. During start, the program editor jumps to the current program section. Here, the display of the section time will be updated cyclically. - Page 37 2 Process screen operation Program editor (1) Status bar: (3) Program sections: "Temporary change" symbol Previous section (for information only) Program generator number (in this case: 2) Selected section "P" symbol (program) and program name Next section (for information only) "P/i"...
-
Page 38: Event List
2 Process screen operation 2.3.10 Event list The last 150 events are listed in the central processing unit event list with dates and times. The events include: • Events, such as, configuration change, status change of a program generator (start, pause, abort, section change), limit value violation, system status change (RUN, STOP), power on/ •... - Page 39 2 Process screen operation Event list (1) Control elements (from left to right): (2) Event list: Advance to more recent events Time (date/time) when the event happened (in this case: button inactive since no more Description (event texts from the central recent events exist) processing unit configuration) Advance to older events...
-
Page 40: Alarm List
2 Process screen operation Symbol Meaning Event on Event off (no symbol) Additional events 2.3.11 Alarm list There is a separate alarm list for each program generator in which the alarm texts of eight dig- ital signals are listed. These digital signals are assigned individual parameters in the PLC con- figuration (configuration level of the central processing unit), which are then analyzed by the PLC. - Page 41 2 Process screen operation Alarm list (1) Control elements (from left to right): (2) Collective alarm in the event list Acknowledgement (ack) Tap the symbol to open the event list. Back (detailed screen) (3) Alarm on: time when the alarm was trig- gered Alarm off: time when the alarm stopped (if it has not yet been acknowledged)
- Page 42 2 Process screen operation...
-
Page 43: Configuration
3 Configuration Overview of the configuration steps The configuration of different input and output signals, texts, process steps, and program gen- erators is required to use the process engineering application. This will be demonstrated here as an example of a program generator. The following steps are required for configuration: 1) Actual values: select analog signals to be displayed as actual values in the program gener- ator... - Page 44 3 Configuration All analog selector signals are available here. In this example, the analog inputs 1 (AI01) to 3 (AI03) of the 4-channel analog input module (Analog In 4x\ ...) will be used. The actual values "Px actual value 1" to "Px actual value 3" (x = 1 to 9) are used in the following process screens: Program generator overview screen: Px actual value 1 (in this case: ----) Detailed screen of the program generator: Px actual value 1, Px actual value 2, Px actual value...
-
Page 45: Alarms
3 Configuration Alarms Select digital signals which trigger an alarm in the program generator CPU > Configuration level > PLC configuration All analog selector signals are available here. In this example, three input signals of the 12- channel input/output module (Digit.I/O 12x\ ...) are used. Each program generator can be as- signed up to eight digital alarm signals. - Page 46 3 Configuration Text numbers of the alarm texts of each program generator: Generator Text numbers Generator Text numbers Generator Text numbers 410 to 417 440 to 447 470 to 477 420 to 427 450 to 457 480 to 487 430 to 437 460 to 467 490 to 497 Determine alarm signal description...
- Page 47 3 Configuration Connect a signal to control a warning device (e.g. horn) with a digital output [Module] > Configuration level > NV connecting list: In this example, the alarm signal (PG1_horn) is issued via output 7 (NV_DO07) of the 12 chan- nel digital input/output module.
-
Page 48: Process Steps
3 Configuration Process steps Define process steps including process contacts In a process step, requirements for creating the program with the program editor are defined. A certain process step is assigned to each program section. In this way, it is guaranteed that in the program section, only admissible setpoint values are used and the section time stays within the pre-assigned limits. - Page 49 3 Configuration The "..." button opens the menu for configuring the process contacts: Function: • Inactive: process contact is not active • Direct: process contact is active during the process step (no special switching behavior) • Switch-on delayed: process contact activation is delayed •...
-
Page 50: Door Open" And "Pause" Events
3 Configuration cess contact for starting the smoke generator is set to "switch-on advanced" and the lead time (control function time) is specified. "Door open" and "pause" events Deactivate process contacts (yes/no) CPU > Configuration level > PLC configuration In this example, all process contacts of program generator 1 are deactivated for the duration of the "door open"... -
Page 51: Use Of Process Contacts
3 Configuration Use of process contacts Determine descriptions of the process contacts CPU -> Setup only -> Texts for PLC digital output. (> Texts for block 14): The descriptions are used in the digital selector for the program generator process contacts. Each program generator (PG1 to PG9) provides up to 16 process contacts. -
Page 52: Program Generators
3 Configuration Connect signals of the process contacts with digital outputs [Module] > Configuration level > NV connecting list: In this example, both the process contacts of program generator 1 are issued via outputs 9 und 10 (NV_DO09, NV_DO10) of the 12 channel digital input/output module. Program generators Activate program generators and implement general settings CPU ->... - Page 53 3 Configuration duration of the end signal was set at 60 seconds, whereby the signal is active for 60 seconds after the program end (remaining time of the signal is displayed in the process screen of the program generator). Enter setpoint limits and descriptions CPU ->...
- Page 54 3 Configuration Set changeover condition (time/setpoint value) In the same window, the condition for section changeover is also defined: Section changeover: • Time: after expiry of section time • Setpoint value: after reaching the setpoint value (core temperature = core setpoint value) (No section time can be entered in the program plan.) •...
-
Page 55: Special Plc Functions
3 Configuration Special PLC functions: 3.8.1 Section changeover With section changeover, moving to the next program section occurs once the actual value (core temperature) has reached the setpoint value. Here, the section time can serve as an ad- ditional criterion for the changeover. The setpoint value for the section changeover (core setpoint value) must be selected in the pro- gram generator configuration and be specified in the program. -
Page 56: F Value Calculation
3 Configuration 3.8.2 F value calculation The F value is calculated from the actual value (core temperature) and the exposure time. The calculation is based on the F value table F70 (meat processing) or F121 (preserves). The F values of the corresponding table are added up as soon as the actual value has exceeded the respective temperature limit (F70: ≥... - Page 57 3 Configuration F value as actual value for the section changeover The calculated F value is available in the analog selector and can be used as the actual value for the section changeover. In this example, the F value of program generator 1 (PG1_F-Value) is used as the actual value for section changeover (P1 X changeover).
-
Page 58: Deltat Setpoint Value Calculation
3 Configuration 3.8.3 DeltaT setpoint value calculation With deltaT cooking, the setpoint value (chamber temperature) is continuously adapted to the actual value (core temperature) throughout the entire program section. So a constant differ- ence between the two temperatures is maintained (deltaT value). The process technology ap- plication provides the deltaT setpoint value calculation. -
Page 59: Setpoint Values (Program Generator Outputs)
3 Configuration Setpoint values (program generator outputs) Setpoint values of the program generator (outputs) are to be used in a plant-specific manner. Here are just two examples of how a setpoint value is connected to an analog output of the 4 channel analog output module or is used as a controller setpoint value for the multichannel con- troller module. - Page 60 3 Configuration Use setpoint value as setpoint value controller of the multichannel controller module [Module] > Configuration level > NV connecting list (> Analog signal): In this example, setpoint value 1 (Channel 1 SP1) of program generator 1 is connected with an input signal (NV_C01Setpoint) of the multichannel controller module.
-
Page 61: Adapt Plc Application To Hardware Assignment
3 Configuration 3.10 Adapt PLC application to hardware assignment The PLC application for process engineering only uses the central processing unit (CPU) and the multifunction panel 840 (HMI) as supplied. If the hardware assignment is changed by the user in the setup program to adapt it to an individual system (adding modules), the PLC appli- cation must also be adapted: Step Activity... - Page 62 3 Configuration...
- Page 64 JUMO GmbH & Co. KG JUMO Instrument Co. Ltd. JUMO Process Control, Inc. Street address: JUMO House 6733 Myers Road Moritz-Juchheim-Straße 1 Temple Bank, Riverway East Syracuse, NY 13057, USA 36039 Fulda, Germany Harlow - Essex CM20 2DY, UK Phone:...
Need help?
Do you have a question about the mTRON T and is the answer not in the manual?
Questions and answers