Konica Minolta bizhub pro 1050 User Manual
Hide thumbs
Also See for bizhub pro 1050:
- Operator's manual (1054 pages) ,
- Service manual (859 pages) ,
- User manual (510 pages)
Table of Contents
Advertisement
Quick Links
Copier
• Machine Information
Section 1: Safety Information
Section 2: Preparation for Use
Section 3: Paper and Original Information
Section 4: Supplies & Handling
Section 5: Troubleshooting
Section 6: Maintenance
Section 7: Machine Specifications
• Copying Operation
Section 8: Before Making Copies
Section 9: Basic Job Settings
Section 10: Job Management
Section 11: Applications
Section 12: Setting Output Methods
Section 13: Advanced Information
Advertisement
Chapters
Table of Contents
Troubleshooting

Related Manuals for Konica Minolta bizhub pro 1050


Summary of Contents for Konica Minolta bizhub pro 1050
- Page 1 Copier • Machine Information Section 1: Safety Information Section 2: Preparation for Use Section 3: Paper and Original Information Section 4: Supplies & Handling Section 5: Troubleshooting Section 6: Maintenance Section 7: Machine Specifications • Copying Operation Section 8: Before Making Copies Section 9: Basic Job Settings Section 10: Job Management Section 11: Applications...
- Page 3 PRO 1050/1050e User’s Guide ® NERGY Program NERGY TAR Program has been established to encourage the widespread and voluntary use of energy- efficient technologies that reduce energy consumption and prevent pollution. As an NERGY TAR Partner, we have deter mined that this product meets the...
- Page 4 OR INFORMATION, RESULTING IN FINES OR IMPRISONMENT FOR VIOLATORS. ACKNOWLEDGEMENTS: KONICA MINOLTA, KONICA MINOLTA Logo, and The essentials of imaging are registered trademarks or trademarks of KONICA MINOLTA HOLDINGS, INC. PageScope and bizhub PRO are registered trademarks of KONICA MINOLTA BUSINESS TECHNOLOGIES, Inc.
- Page 5 This guide describes the operation of the printer function equipped for the machine as standard. Please refer to this guide for how to use PCL driver, Adobe PS driver, Konica Minolta PS driver, and PageScope Web Connection in user mode.
-
Page 7: Table Of Contents
Contents Composition of User’s Guide Contents Machine Information Section 1: Safety Information Safety Information................1-2 Regulation Notices................. 1-9 Caution Labels and Indicators ............. 1-11 Installation Space................. 1-13 Section 2: Preparation for Use Machine Configuration ..............2-2 External Machine Items ..............2-2 Internal Machine Items............... - Page 8 Contents (continued) Section 3: Paper and Original Information Paper Information................3-2 Paper Weight ..................3-2 Tray/ Exit Tray Capacity..............3-3 Paper Size..................3-6 To Store Copy Paper ................. 3-7 Original Information................ 3-8 Using Original Glass ................3-8 ADF Originals..................3-9 Section 4: Supplies &...
- Page 9 Contents (continued) Section 6: Maintenance Cleaning Image Scanning Section..........6-2 Cleaning the ADF Scanning Glass ............ 6-2 Cleaning the Original Glass ............... 6-2 Cleaning the ADF Guide Cover ............6-3 Precautions for Paste Pellets and the Perfect Binder ....6-4 Precautions for Paste Pellets.............
- Page 10 Copying Operation Section 8: Before Making Copies Copy Screen .................. 8-2 Machine Status Screen ..............8-3 Features of the bizhub PRO 1050/1050e........8-4 How to Make a Basic Copy ............8-8 Positioning Originals ..............8-11 Positioning Originals in ADF ............8-11 Positioning Original on Original Glass..........
- Page 11 Contents (continued) Paper Tray Setting ............... 9-34 To Select Paper Size Automatically (APS) ........9-34 To Specify Desired Paper Size (AMS)..........9-36 Rotation.................... 9-38 Using Paper Not Specified for Any Tray (Paper Presetting) .... 9-40 Reserve Job Setting..............9-48 Section 10: Job Management Overview of Job List Screen ............
- Page 12 Contents (continued) Reducing Images to Create Binding Margin (Reduce&Shift) ....11-54 Printing Stamp, Page, Date/Time onto Copies (Stamp)..... 11-57 Printing Watermark onto Copies (Stamp) ........11-64 Print Words, Date/Time, Annotation Number onto Copies (Annotation)....11-67 Overlay an Image onto Each Page Copied in the Job (Overlay)....11-71 Store Image in HDD / Overlay Stored Image (Overlay Memory)....
- Page 13 Contents (continued) Section 13: Advanced Information Checking Feature Selections by Proof Copying ......13-2 Checking Feature Selections Before Copying (Check Mode) ....13-4 Interrupt Copying ................. 13-7 Storing and Recalling Job Conditions (Mode Memory)...... 13-9 Storing Job Conditions..............13-9 Recalling Stored Job Settings............13-12 Recalling Previous Job Settings ..........
-
Page 15: Machine Information
Machine Information... - Page 17 Section 1: Safety Information Precautions for Installation and Use Safety Information ............1-2 Regulation Notices ............1-9 Caution Labels and Indicators ........1-11 Installation Space ............1-13...
-
Page 18: Safety Information
Safety Information This section contains detailed instructions on the operation and maintenance of this machine. To achieve optimum utility of this device, all operators should carefully read and follow the instructions in this manual. Please read the following section before connecting the machine to the supply. It contains important information related to user safety and preventing equipment problems. -
Page 19: Section 1: Safety Information
Safety Information (continued) Disassemble and modification WARNING • Do not attempt to remove the covers and panels which have been fixed to the product. Some products have a high-voltage part or a laser beam source inside that could cause an electr ical shock or blindness. - Page 20 Safety Information (continued) Power source WARNING • Use only the specified power source voltage. Failure to do that could result in a fire or electrical shock. • Connect power plug directly into wall outlet having the same configuration as the plug. Use of an adapter leads to the product connecting to inadequate power supply (voltage, current capacity, grounding), and may result in fire or shock.
- Page 21 Safety Information (continued) Grounding WARNING • Connect the power cord to an electrical outlet that is equipped with a grounding terminal. Installation WARNING • Do not place a flower vase or other container that contains water, or metal clips or other small metallic objects on this product.
- Page 22 Safety Information (continued) Actions in response to troubles WARNING • Do not keep using this product, if this product becomes inordinately hot or emits smoke, or unusual odor or noise. Immediately turn OFF the power switch, unplug the power cord from the power outlet, and then call your authorized service representative.
- Page 23 Safety Information (continued) When moving the machine CAUTION • Whenever moving this product, be sure to disconnect the power cord and other cables. Failure to do this could damage the cord or cable, resulting in a fire, electrical shock, or breakdown. •...
- Page 24 Safety Information (continued) Perfect Binder CAUTION • Do not use the Perfect Binder without ventilation for an extended period of time. Ensure to ventilate the room on a regular basis. It is recommended that the Perfect Binder should be installed in a place with a local exhaust system.
-
Page 25: Regulation Notices
Regulation Notices m Laser Safety This product employs a Class 3B laser diode having maximum power of 15 mW and wavelength of 770 - 800 nm. This product is certified as a Class 1 laser product. Since the laser beam is concealed by protective housings, the product does not emit hazardous laser radiation as long as the product is operated according to the instructions in this manual. - Page 26 Regulation Notices (continued) Rear side of main body m Ozone Release During print operation, a small quantity of ozone is released. This amount is not large enough to harm anyone adversely. However, be sure the room where the machine is being used has adequate ventilation, especially if you are printing a high volume of materials, or if the machine is being used continuously over a long period.
-
Page 27: Caution Labels And Indicators
Caution Labels and Indicators The caution labels and indicators are attached to the machine areas, as shown below, where you are advised to pay special attention to avoid any dangerous situations or serious injury. (Entrance of the reversal output unit) CAUTION (Right side of the fixing unit) DO NOT INSERT your finger... - Page 28 Caution Labels and Indicators (continued) CAUTION The paste tank unit is very hot. To avoid getting burned DO NOT TOUCH. Do not remove caution labels. Should any caution label or caution indicator be illegible due to soilage, clean the label. If any caution label is removed or cleaning does not render the label legible, please contact your service representative.
-
Page 29: Installation Space
Installation Space Allow sufficient space for facilitating copy operation, replenishing consumables, changing parts, and periodic inspection. The whole machine may weigh approx. 2,348 lb (1,065 kg) at maximum, depending on the combination of options. Be sure to choose a level and solid floor for the installation place. - Page 30 Installation Space (continued) Unit: inches (mm) 12.0(306) 25.6 (650) 15.3 (389) (213) 62.2 (1580) 40.2 (1020) 30.9 30.9 35.2 31.8 (895) (807) (785) (785) 128.8 (100) (100) (3272) 136.6 (3472) Main body + DF-603 + PF-701 + LS-501 + LS-502 Unit: inches (mm) 12.0(306) 25.6...
- Page 31 Installation Space (continued) Unit: inches (mm) 12.0(306) 25.6 (650) 15.3 (389) (213) 62.2 (1580) 48.5 40.2 (1231) (1020) 15.7 31.8 35.2 21.4 46.1(1170) (237) (400) (807) (544) (895) 3.4(85) (100) (100) 162.9(4138) 170.7(4338) Main body + DF-603 + PF-701 + FD-501 + SD-501 + FS-503 Unit: inches (mm) 12.0(306) 25.6...
- Page 32 Installation Space (continued) Unit: inches (mm) 62.2 (1580) 40.2 (1020) 30.2 26.6 (766) (675) 37.4 30.5 (950) (775) 75.8 (1925) 7.9(200) Main body + DF-603 + PF-701 + SD-501 (Side view) Unit: inches (mm) 12.0(306) 25.6 (650) 15.3 (389) (213) 62.2 48.5 (1580)
- Page 33 Installation Space (continued) Unit: inches (mm) 12.0(306) 25.6 (650) 15.3 (389) (213) 48.5 (1231) 62.2 (1580) 48.1 40.2 (1223) (1020) 35.2 31.8 22.2 29.1 46.1 15.7 (895) (807) (563) (740) (1170) (400) (100) (200) 180.1 (4575) 191.9 (4875) Main body + DF-603 + PF-701 + FD-501 + SD-501 + PB-501 Unit: inches (mm) 12.0(306) 25.6...
- Page 35 Section 2: Preparation for Use Machine Information and Management for Use Machine Configuration............2-2 Turning On/Off the Power Switch........2-18 To Use Machine When Power Save LED Lights..... 2-21 Making User Authentication..........2-25...
-
Page 36: Machine Configuration
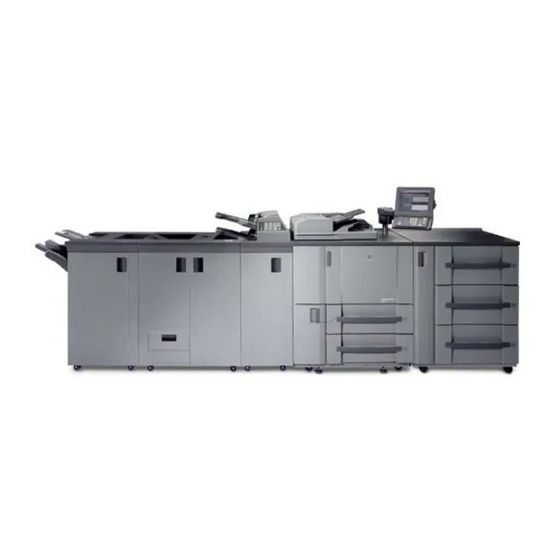
Machine Configuration External Machine Items 2 Touch panel 1 ADF 3 Sub power switch 4 Control panel 13 Left side door 5 Tray 3 6 Tray 4 Options (See description for each on the following pages.) 11 Front door 9 Tray 1 12 Toner unit door 8 Tray left side door 10 Tray 2... -
Page 37: Internal Machine Items
Machine Configuration (continued) Internal Machine Items 1 Total counter 6 Main power switch 2 Conveyance fixing unit 4 Drum unit 3 Lever A 5 Fixing unit Total counter indicates the total number of copies and prints made. Conveyance fixing unit passes the paper through the drum unit, and fuses the toner onto the copy paper, and is to be withdrawn for removal of mishandled paper. -
Page 38: Control Panel Layout
Machine Configuration (continued) Control Panel Layout Sub power switch turns machine power on/off when pressed. Keypad enters numeric values. Reset restores copier to the initial settings. Interrupt stops copying/printing/scanning in progress to allow a simple copying job. Stop ceases the copying sequence; deletes the stored memory. Proof Copy outputs a single set of copies to confirm whether the current settings are selected properly. - Page 39 Machine Configuration (continued) 16 Power Save enables temporary use of the machine when the Power Save LED is lit, or activates power-saving mode for times when the copier is inactive. 17 Power Save LED lights when any power-saving mode is activated, machine power is off due to the timer function, or user password is required for use.
-
Page 40: Folding Unit Fd-501
Machine Configuration (continued) Folding Unit FD-501 4 Upper cover feed tray guide plates 3 Upper cover feed tray 5 Upper cover 1 Lower cover feed tray 2 Lower cover feed tray guide plates 6 Folding unit door FD-501 FS-503 Lower cover feed tray holds cover sheets. Lower cover feed tray guide plates hold cover sheets to fix the position. - Page 41 Machine Configuration (continued) 12 Conveyance knob/2 1 Inlet lever 2 Post inserter conveyance lever 7 Outlet lever 3 Trash basket 4 Upper/Lower conveyance lever 6 Conveyance knob/1 5 Folding unit handle 11 Upper lever 10 Left side lever (right/left) 9 Upper/Middle/ 8 Upper/Lower Lower knob right side lever...
- Page 42 Machine Configuration (continued) Large Capacity Stacker LS-501/LS-502 4 Paper removal indicator 5 Paper removal button 1 Secondary (Sub) tray 6 Large capacity stacker door 2 Top cover handle (left) 3 Top cover handle (right) 3 Top cover handle (right) 9 Stacker conveyance 9 Stacker conveyance knob knob...
- Page 43 Machine Configuration (continued) Secondary (Sub) tray holds sets output in Non-sort mode. Top cover handle (left) opens to remove mishandled paper. Top cover handle (right) opens to remove mishandled paper. Paper removal indicator lights while the stacker goes down in order to allow takeout of printed sheets.
-
Page 44: Saddle Stitcher Sd-501
Machine Configuration (continued) Saddle Stitcher SD-501 2 Multi-folding mode outlet cover handle 3 Multi-folding mode tray 1 Secondary (Sub) tray of Saddle Stitcher SD-501 4 Secondary (Sub) tray 5 Right side door of Saddle Stitcher SD-501 8 Left side door of Saddle Stitcher SD-501 7 Dust box... - Page 45 Machine Configuration (continued) External View Secondary (Sub) tray of Saddle Stitcher SD-501 holds non-sorted sets output from Saddle Stitcher. Multi-folding mode outlet cover handle opens the cover to remove mishandled paper when using multi-folding mode. Multi-folding mode tray holds sets output in multi-folding mode. Secondary (Sub) tray holds non-sorted sets output from the machine on the right side of the Saddle Stitcher.
-
Page 46: Perfect Binder Pb-501
Machine Configuration (continued) Perfect Binder PB-501 2 Secondary (Sub) tray 1 Paste hopper cover 7 Feeding button 6 Perfect binder tray cover 3 Front door of Perfect Binder PB-501 4 Cover feeding tray 5 Perfect binder tray 3 Pellet stacking correction lever 4 Clamp unit lever 5 Secondary (Sub) tray... - Page 47 Machine Configuration (continued) External View Paste hopper cover opens for supply of paste pellet of for removal of paste pellets stuck inside the paste hopper. Secondary (Sub) tray holds sets output without being processed by the perfect binder. Front door of Perfect Binder PB-501 opens to remove mishandled paper and waste trimmings.
-
Page 48: Finisher Fs-503
Machine Configuration (continued) Finisher FS-503 6 Secondary (Sub) tray conveyance lever (left) 5 Secondary (Sub) tray 3 Secondary (Sub) tray conveyance lever (right) 4 Inlet lever 8 Stapler unit conveyance lever 2 Primary (Main) tray 7 Stapler unit conveyance knob 9 Stapler unit handle 1 Finisher door 10 Stapler unit knob... -
Page 49: Standard/Optional Equipment
Machine Configuration (continued) Standard/Optional Equipment Finisher FS-503 Finisher FS-503 + Folding Unit FD-501 Saddle Stitcher SD-501 + Folding Unit FD-501 Main Body + Paper Feeder Unit PF-701 + Reverse Automatic Document Feeder DF-603 Finisher FS-503 + Saddle Stitcher SD-501 + Folding Unit FD-501 Large Capacity Stacker LS-502 + Folding Unit FD-501 Finisher FS-503 + Large Capacity... - Page 50 Machine Configuration (continued) Perfect Binder PB-501 + Folding Unit FD-501 Perfect Binder PB-501 + Saddle Stitcher SD-501 + Folding Unit FD-501 Saddle Stitcher SD-501 Main Body + Paper Feeder Unit PF-701 + Reverse Automatic Document Feeder DF-603 Finisher FS-503 + Saddle Stitcher SD-501 Perfect Binder PB-501 + Saddle Stitcher SD-501...
- Page 51 Machine Configuration (continued) Large Capacity Stacker LS-502 Finisher FS-503 + Large Capacity Stacker LS-501 Saddle Stitcher SD-501 + Large Capacity Stacker LS-501 Main Body + Paper Feeder Unit PF-701 + Reverse Automatic Document Feeder DF-603 Perfect Binder PB-501 + Large Capacity Stacker LS-501 Large Capacity Stacker LS-502 + Large Capacity Stacker LS-501 Finisher FS-503 +...
-
Page 52: Turning On/Off The Power Switch
Turning On/Off the Power Switch The machine has two power switches, namely, main power switch and sub power switch. To Turn On the Power Turn ON the main power switch. The main power switch is located inside the machine. Open the front door and left side door to reach it. When the main power switch is turned on, the Power LED on the control panel will light in red. - Page 53 Turning On/Off the Power Switch (continued) The Wake-up Screen and Machine Status Screen with warm-up image will be displayed. A few seconds after the Wake-up Screen appears in the touch panel, the Machine Status Screen with four types of warm-up image will be displayed in succession for approx.
-
Page 54: To Turn Off The Power
Turning On/Off the Power Switch (continued) To Turn Off the Power Turn OFF the sub power switch. The sub power switch is located on the right side of the control panel. The touch panel and all the LEDs on the control panel other than the Power LED will go out, and the Power LED will turn red from green. -
Page 55: To Use Machine When Power Save Led Lights
To Use Machine When Power Save LED Lights If you find the Power Save LED lit on the control panel, the machine cannot be operated due to the Power Save or Weekly Timer function. Press [Power Save] on the control panel. If Power Save has been activated, the machine will become available for copying operation. -
Page 56: Auto Shut-Off
To Use Machine When Power Save LED Lights (continued) Auto Shut-Off This function achieves further energy conservation by reducing power consumption to 105W or less in standby mode. In the initial setting, Auto Shut-Off follows Auto Low Power after a specified period (initially 120 minutes) of copier inactivity, with the Power Save LED lit and all other LEDs on the control panel and touch panel turned off. -
Page 57: When Weekly Timer Is Activated
To Use Machine When Power Save LED Lights (continued) Be sure to press [Power Save] for one second or longer, otherwise the following message will be displayed and the Shut-Off (Low Power) mode will not be activated. Press POWER SAVER more than one second, then release it for shut off mode Press POWER SAVER continuously more than one second for low power mode... - Page 58 To Use Machine When Power Save LED Lights (continued) Input copy time 0 hour(s) 05 minute(s) If the above message is displayed, proceed to step 3. Enter the Timer Interrupt password, then press [Start]. Enter a 4-digit Timer Interrupt password using the control panel keypad. Timer interrupt mode Please input password #### Press [Start].
-
Page 59: Making User Authentication
Making User Authentication This machine can prohibit its operation until the user name, user password, section name, and/or section password specified by the machine manager are verified. Copy quantity limit for each section can also be set. When the machine is turned on, one of the following User Authentication screen will be displayed according to the authentication setting. - Page 60 Making User Authentication (continued) Enter the user name, user password, section name, and/or section password, as required. Touch the desired item key to display the keypad screen. Enter your user name (max. 64 characters), user password (max. 64 characters), section name (max. 8 characters) and/or 8-digit section password.
-
Page 61: Section 3: Paper And Original Information
Section 3: Paper and Original Information Paper Information ............. 3-2 Original Information ............3-8... -
Page 62: Paper Information
Paper Information This machine is equipped with the following trays for loading copy paper. • Tray 1and 2 (Main body trays) • Tray 3, 4, and 5 (Paper Feeder Unit PF-701) Also, the following equipment is provided for conveying/delivering copies. •... -
Page 63: Tray/ Exit Tray Capacity
Paper Information (continued) • The paper weight setting for trays 1 to 5 is described in the POD Administrator’s reference. See p. 1-7 for details. • The paper weight specified for each tray can be changed for temporary use. See p. 9-40 for details. •... - Page 64 Paper Information (continued) Large Stacker Max. 5,000 sheets (12”×18”, 11”×17”, 8.5”×14”, capacity 8.5”×11”, 8.5”×11”R, A3, B4, A4, A4R) Wide stacker sizes (Max. 12.76”×18.11”) Max. 3,000 sheets (Coated paper, Min. 8.3”× 15.0”(210mm × 380mm) to Max. 12.8”×18.1”(324mm × 460mm)) Max. 2,000 sheets (B5, A5) Secondary (sub) Max.
- Page 65 Paper Information (continued) • Using Folding or Z-fold, the finished set can be delivered to any tray of Finisher primary (main) tray, secondary (sub) tray, and secondary (sub) tray on the left side of Folding unit. • Using Letter fold-in, Letter fold-out, Double parallel, or Gate mode, the finished set will be delivered only to the secondary (sub) tray on the left side of the Folding unit.
-
Page 66: Paper Size
Paper Information (continued) Paper Size Paper Trays Available Sizes Tray 1 to 5 STD size: 12"×18", 11"×17", 8.5"×14", 8.5"×11", A3, B4, A4, A4R, B5, B5R, A5 Available to detect 5.5”×8.5” instead of A5, 8.5"×11"R instead of A4R, 8"×13"/8.12"×13.2"/ 8.25"×13"/8.5"×13" instead of 8.5"×14" Non STD size: Max. -
Page 67: To Store Copy Paper
Paper Information (continued) Saddle Saddle stitcher 12"×18", 11"×17", 8.5"×14", 8.5"×11"R, A3, B4, stitcher tray A4R, B5R, F4*, 8K, 16KR, Wide size paper Max. 12.76" × 18.11" (324 mm × 460 mm) × F4 indicates the following four sizes: 8" 13", ×... -
Page 68: Original Information
Original Information Use the original glass or document feeder to position originals to copy. Using Original Glass Use the original glass when originals are not suitable for use with the document feeder, e.g., when size is incompatible, or when originals are folded, stapled, torn, or in generally poor condition. -
Page 69: Adf Originals
Original Information (continued) ADF Originals Following four modes are provided when using the document feeder (ADF) to scan originals. • Normal mode • Mixed Original mode • Z-Folded Original mode • SDF mode Specifications for each mode are described as follows. Detectable paper size can be changed from only A series to Inch series, AB series, or AB series and Inch series mixed by the machine manager. - Page 70 Original Information (continued) Z-Folded Original mode Use Z-Folded Original mode to scan folded originals without using the size detection sensor of the ADF. See p. 9-12 for details. • Detectable original size: 11"×17", 8.5"×14", 8.5"×11", 8.5"×11"R, 5.5"×8.5", 5.5"×8.5"R, A4 (297mm × 432mm ~ 128mm × 140mm) •...
- Page 71 Section 4: Supplies & Handling How to Add Paper/Toner/Staples, Dispose Punch Trash, and Remove Finished Sets from Stacker Loading Paper ..............4-2 Adding Toner ..............4-8 Inserting a New Staple Cartridge into Finisher FS-503 .. 4-11 Inserting a New Staple Cartridge into Saddle Stitcher SD-501..4-14 Adding Paste Pellet to Perfect Binder PB-501 ....
-
Page 72: Loading Paper
Loading Paper A paper indicator is shown on each tray key of the Machine Status Screen and of the Copy Screen to indicate the paper level of the tray. (Six levels are provided: When paper in a tray becomes empty, the indicator “ ”... - Page 73 Loading Paper (continued) Place paper on the tray with any curl turning up, then move the side guide plates and rear edge guide to the edge of the paper. Tray 1 and 2 Paper holding lever Limit level Tray 3, 4, and 5 Paper holding lever Limit level Load paper aligning it to the paper feed roller side of the tray.
-
Page 74: Loading Cover Paper In Cover Feeding Tray Of Perfect Binder
Loading Paper (continued) Loading Cover Paper in Cover Feeding Tray of Perfect Binder PB-501 Withdraw the cover feeding tray. Open the paper feed roller. Load cover paper in the tray. - Page 75 Loading Paper (continued) Place cover paper faceup, with the top to be rear in the tray. When making the book bound on the right side, the front side in the tray will be the top. Align it to the paper feed roller side. Do not load above the limit level, and carefully load the paper to be seated under the paper holding lever at the air.
-
Page 76: Loading Tabbed Sheets In Tray
Loading Paper (continued) Loading Tabbed Sheets in Tray Tabbed sheets can be used if the tray paper size is specified as tabbed sheets in the Tray Setting or Paper Presetting. Follow the procedure below to supply the tray with tabbed sheets. Example: 9 Tabbed sheets loaded in position for 3 finished sets. - Page 77 Loading Paper (continued) Be sure that the side guide plates and rear edge guide are securely aligned to the paper; otherwise the machine cannot detect the correct paper size, or machine trouble may occur. When paper is seated properly, close the paper feed roller. Push in the tray until it locks into place.
-
Page 78: Adding Toner
Adding Toner This machine is equipped with a toner storage for keeping a bottle stock of toner. When toner supply from the toner bottle becomes low, the message “Toner Bottle can be exchanged” will be displayed on the touch panel. When toner supply runs out from both toner bottle and toner storage, the message “Toner will be used up / Exchange Toner Bottle”... - Page 79 Adding Toner (continued) Pull the toner unit lever forward to withdraw the bottle holder until it stops. Remove the empty toner bottle. Shake the new toner bottle several times to loosen toner.
- Page 80 Adding Toner (continued) Remove the cap from the new toner bottle, then put it to the used one. Used Set the new toner bottle into the bottle holder. Be sure to set the label of the toner bottle upward, then fit its bottom to the hollow part of the bottle holder;...
-
Page 81: Inserting A New Staple Cartridge Into Finisher Fs-503
Inserting a New Staple Cartridge into Finisher FS-503 When the staple cartridge of the Finisher is empty, the Cartridge indicator lights in red in the option status area of the Machine Status Screen. Follow the procedure below to set the staple roll into the staple cartridge. Open the Finisher door. -
Page 82: Inserting A New Staple Cartridge Into Finisher Fs-503
Inserting a New Staple Cartridge into Finisher FS-503 (continued) Remove the staple cartridge. Pull down the handle of the staple cartridge to draw it downward. Set the staple roll into the staple cartridge. Open the staple cartridge cover, then set the staple roll into the cartridge. Close the cover, then remove the lock tape pulling it in horizontal direction. - Page 83 Inserting a New Staple Cartridge into Finisher FS-503 (continued) Set the staple cartridge. Return the staple cartridge to its original position as shown below. Push up and in to secure it in place. Return the stapler unit to its original position. Close the Finisher door.
-
Page 84: Inserting A New Staple Cartridge Into Saddle Stitcher Sd-501
Inserting a New Staple Cartridge into Saddle Stitcher SD-501 When the staple cartridge of the Saddle Stitcher SD-501 is empty, the Cartridge indicator lights in red in the option status area of the Machine Status Screen. If printing job is in progress, a message will be displayed on the Copy Screen. Follow the procedure below to replace the staple cartridge. -
Page 85: Inserting A New Staple Cartridge Into Saddle Stitcher Sd-501
Inserting a New Staple Cartridge into Saddle Stitcher SD-501 (continued) The machine is mounted with two staple cartridges. Be sure to remove the empty one. Set the new cartridge. Check that the top side of the staple cartridge is up, otherwise it cannot be inserted. - Page 86 Adding Paste Pellet to Perfect Binder PB-501 If the Perfect Binder PB-501 is out of paste pellets, the machine warmup cannot be completed with the following message displayed on the Machine Status Screen, and consequently the binding operation is unavailable. When the paste pellets run out during the binding operation, the machine stops the job immediately and the binding operation also becomes unavailable.
-
Page 87: Adding Paste Pellet To Perfect Binder Pb-501
Adding Paste Pellet to Perfect Binder PB-501 (continued) Open the paste hopper cover. Supply the paste hopper with paste pellet. Do not add the paste pellet above the limit level indicated inside the paste hopper. 4-17... - Page 88 Adding Paste Pellet to Perfect Binder PB-501 (continued) Close the paste hopper cover. Be sure to close the paste hopper cover firmly, otherwise an error message will be displayed. 4-18...
-
Page 89: Empty Trash Basket Of Folding Unit Fd-501
Empty Trash Basket of Folding Unit FD-501 When the trash basket becomes full, the Punch Dust indicator lights in red in the option status area of the Machine Status Screen. Follow the procedure below to empty the trash basket. Open the Finisher door, then withdraw the trash basket. 4-19... -
Page 90: Empty Trash Basket Of Folding Unit Fd-501
Empty Trash Basket of Folding Unit FD-501 (continued) Empty the trash basket. Return the trash basket to its original position, then close the Finisher door securely. 4-20... -
Page 91: Empty Dust Box Of Saddle Stitcher Sd-501
Empty Dust Box of Saddle Stitcher SD-501 When the dust box of the Saddle Stitcher SD-501 becomes full, the Trim Dust indicator lights in red in the option status area of the Machine Status Screen. If printing job is in progress, a message will be displayed on the Copy Screen. Follow the procedure below to empty the dust box. -
Page 92: Empty Dust Box Of Saddle Stitcher Sd-501
Empty Dust Box of Saddle Stitcher SD-501 (continued) Open the top cover of the dust box. Take waste paper out of the dust box. Close the top cover of the dust box, then return it to its original position. Be sure to return the dust box to its original position, otherwise the trimming function cannot be performed. -
Page 93: Empty Dust Box Of Perfect Binder Pb-501
Empty Dust Box of Perfect Binder PB-501 When the dust box of the Perfect Binder PB-501 becomes full, the Trim Dust indicator lights in red in the option status area of the Machine Status Screen. If printing job is in progress, a message will be displayed on the Copy Screen. Follow the procedure below to empty the dust box. -
Page 94: Empty Dust Box Of Perfect Binder Pb-501
Empty Dust Box of Perfect Binder PB-501 (continued) Withdraw the dust box. Take waste paper out of the dust box. Return the dust box to its original position, then close the front door of the perfect binder. 4-24... -
Page 95: Removing Finished Sets From Large Capacity Stacker Ls-501/502
Removing Finished Sets from Large Capacity Stacker LS-501/502 Large Capacity Stacker LS-501/502 can hold 5,000 output sheets (2,000 sheets for B5 and A5) at maximum. Follow the procedure below to take out paper from the stacker. Press the Paper removal button. The stacker unit will move down to the carriage. -
Page 96: Removing Finished Sets From Large Capacity Stacker Ls-501/502
Removing Finished Sets from Large Capacity Stacker LS-501/502 (continued) Withdraw the carriage by holding its handle. Be sure to withdraw the carriage straightforward, and do not change the direction forcibly while driving it. The carriage is for the exclusive use of carrying paper. Do not drive it in any other use. - Page 97 Removing Finished Sets from Large Capacity Stacker LS-501/502 (continued) Return the carriage to its original position, then close the large capacity stacker door. When returning the stacker unit to its original position, fit the two projections of the carriage to the two holes of the stacker unit, otherwise the carriage cannot be returned properly.
- Page 99 Section 5: Troubleshooting How to Handle Machine Troubles If “Please Call Service” Message Is Displayed....5-2 If Paste Pellets Stick Inside Paste Hopper......5-4 Clearing Mishandled Paper ..........5-6 If MACHINE Tab Blinks in Orange ........5-8 If “Memory Full” Message Is Displayed (Memory Overflow) ..5-12 If Power OFF/ON Screen Is Displayed ......
-
Page 100: If "Please Call Service" Message Is Displayed
If “Please Call Service” Message Is Displayed A “Please Call Service” message indicates a machine condition that requires the attention of your service representative. The Call for Service Screen usually displays the telephone and facsimile numbers of your service representative. If paste pellets stick inside the paste hopper, report code “SC78-17”... - Page 101 If “Please Call Service” Message Is Displayed (continued) Contact your service representative and report the condition and report code number. DETAILS: Limited Use of the Copier in Trouble If the message shown below is displayed on the Call for Service Screen, you may continue operating the copier on a limited function basis and utilize the trays and ADU that are not affected by the trouble.
-
Page 102: If Paste Pellets Stick Inside Paste Hopper
If Paste Pellets Stick Inside Paste Hopper If paste pellets stick inside the paste hopper, report code “SC78-17” will be displayed with “Please Call Service” message. Follow the procedure below for recovery. Open the paste hopper cover. Raise the pellet stacking correction lever. - Page 103 If Paste Pellets Stick Inside Paste Hopper (continued) Push in the pellet stacking correction lever and then draw it out just one time. Do not repeat this action, otherwise machine trouble may be caused due to a heavy supply of paste pellets. Return the pellet stacking correction lever to its original position.
-
Page 104: Clearing Mishandled Paper
Clearing Mishandled Paper When a paper misfeed occurs, the machine stops making copies and the Jam Position Screen displays to indicate misfeed area(s). The [Start] LED turns red on the control panel, and copying operation cannot be continued until all the misfeed locations are cleared. Message area An action will be displayed. - Page 105 Clearing Mishandled Paper (continued) • Touch Next to go to the next page of a series of illustrations, if provided. • Touch Jam Position to return to the Jam Position Screen. Illustration key • If paper misfeed occurs in the Perfect Binder PB-501, the is not displayed.
-
Page 106: If Machine Tab Blinks In Orange
If MACHINE Tab Blinks in Orange If any trouble occurs in the machine, one of the following messages will be displayed in the message area and the MACHINE tab will blink in orange. • Paper Misfeed: “Mishandled paper” • Tray Empty: “Please load ## paper” •... -
Page 107: Tray Empty
If MACHINE Tab Blinks in Orange (continued) Tray Empty If the popup screen shown below is displayed after touching Detail Check, the selected tray has become empty. Follow the procedure below to change the tray selection for the current job, or supply the empty tray with copy paper. -
Page 108: Inconformity In Paper Presetting
If MACHINE Tab Blinks in Orange (continued) To supply the empty tray with paper: Load paper in the empty tray. For details of loading paper, see p. 4-2. Touch Close to restore the Machine Status Screen. Press [Start]. Printing operation will resume using the tray supplied with paper. Inconformity in Paper Presetting The machine automatically stops when copy paper in the selected tray should be replaced according to the paper presetting specified in reserve setting, and displays... - Page 109 If MACHINE Tab Blinks in Orange (continued) Using Standard size paper of different size: Replace paper in the tray with that specified in the paper presetting. Touch Change, then press [Start] to start the printing operation. If wrong size is loaded in the tray, the above popup screen will be displayed. Replace with the correct size, then touch Close.
-
Page 110: If "Memory Full" Message Is Displayed (Memory Overflow)
If “Memory Full” Message Is Displayed (Memory Overflow) In certain modes, this machine uses memory to make operations convenient and smooth flowing. Occasional memory overflow may occur if the installed memory is inadequate for the copy conditions selected, and the machine will stop its operation with the following popup screen displayed. -
Page 111: If Power Off/On Screen Is Displayed
If Power OFF/ON Screen Is Displayed When any trouble affects the electrical signal of the copier, “Please switch Off/On” will be displayed in the message area. Follow the procedure below to turn the machine power off then on. Turn OFF the sub power switch. Turn OFF the main power switch. - Page 112 If Power OFF/ON Screen Is Displayed (continued) Wait about 10 seconds. Turn ON the main power switch and sub power switch. 5-14...
-
Page 113: Troubleshooting Tips
Troubleshooting Tips COPIER DOES NOT OPERATE WHEN SUB POWER SWITCH IS ON Check to be sure power plug is firmly inserted in electrical socket. Check to be sure main power switch is ON. Check to see if Weekly Timer function is activated. See p. 2-23 for details. Check to see if User Authentication is required on the screen. - Page 114 Troubleshooting Tips (continued) THE ORIGINAL PAPER IS MISHANDLED OR SKEWED IN THE DOCUMENT FEEDER Originals should conform to the recommended size and weight. Be sure originals are not stapled. Align originals evenly in the ADF. Check to make sure paper guides meet the width of mixed size originals. ADF CANNOT BE USED AFTER [Reset] IS PRESSED Fully close ADF.
- Page 115 Troubleshooting Tips (continued) FINISHER STAPLE RESULT IS NOT AS EXPECTED The 2 staple position functions only on copy paper that is loaded vertically (portrait style). Check to see if Rotation functions. Release it, if necessary. COPIES SKEW IN THE STAPLED SETS Check to see if copy paper is excessively curled in the tray.
- Page 117 Section 6: Maintenance How to Maintain the Copier Cleaning Image Scanning Section ........6-2 Precautions for Paste Pellets and the Perfect Binder ..6-4 Checking Copy Count............6-5 If “Trim Receiver Exchange” Message Is Displayed ..6-8 Cleaning Conveyance Belt of Saddle Stitcher Tray ..6-9 Preventive Maintenance ..........
-
Page 118: Cleaning Image Scanning Section
Cleaning Image Scanning Section In order to maintain optimum copy quality, always keep the following areas clean. Cleaning the ADF Scanning Glass Keep the ADF scanning glass clean; otherwise soil marks may be copied, resulting in dark lines on the copies. Raise the document feeder, then clean the glass with a clean soft cloth. -
Page 119: Cleaning The Adf Guide Cover
Cleaning Image Scanning Section (continued) Cleaning the ADF Guide Cover The ADF guide cover should be kept clean; otherwise soil marks may be copied or the original size cannot be detected correctly. Raise the document feeder, then clean the ADF guide cover with a clean soft cloth. Never use paint solvents, such as benzene or thinners, to clean the ADF guide cover. -
Page 120: Precautions For Paste Pellets And The Perfect Binder
Precautions for Paste Pellets and the Perfect Binder To ensure safety and product reliability, observe the precautions for using paste pellets and the Perfect Binder. Read p. 1-7 as well. Precautions for Paste Pellets • Paste pellets are not edible; do not put them in your mouth nor swallow them. •... -
Page 121: Checking Copy Count
Checking Copy Count The Utility Menu Screen allows you to view the current indication of the following items as a list. • Total count • Feed paper count • Output paper count • Printer total count • Copier total count •... - Page 122 Checking Copy Count (continued) The Utility Menu Screen can be displayed even when the job operation is in progress. The counter information will be displayed on the left side of the screen. Touching Exit will return to the previous screen. Touch Detail.
-
Page 123: If "Trim Receiver Exchange" Message Is Displayed
If “Trim Receiver Exchange” Message Is Displayed This machine trims the printed sets using a cutting blade and its receiver, which may require replacement in a long period of use. When replacement is due, a “Trim Receiver exchange” message appears under the Trim Dust indicator in the option status area of the Machine Status Screen. -
Page 124: Cleaning Conveyance Belt Of Saddle Stitcher Tray
Cleaning Conveyance Belt of Saddle Stitcher Tray The conveyance belt of saddle stitcher tray should be kept clean, otherwise soil marks may be copied. Follow the procedure below to clean the conveyance belt. In order to maintain optimum copy quality, we recommend to clean it every time before using the saddle stitcher tray. - Page 125 Cleaning Conveyance Belt of Saddle Stitcher Tray (continued) Clean the surface of the two conveyance belts with a soft cloth dampened slightly with alcohol (cleaner). Move the conveyance belt to clean the whole length. Raise the two belts lightly, then pull them both frontward at the same time in order to show the hidden parts.
- Page 126 Cleaning Conveyance Belt of Saddle Stitcher Tray (continued) Clean the bottom plate of the saddle stitcher tray. Wipe the whole surface of the bottom plate with a soft cloth slightly dampened with alcohol (cleaner). Return the tray stand to its original position, then return the saddle stitcher tray.
-
Page 127: Preventive Maintenance
Preventive Maintenance After a set number of copies (750,000 copies) have been made on your machine, Preventive Maintenance (PM) will be required for maintaining optimal performance. When preventive maintenance is due, a message and the PM icon ( ) will prompt you to contact your service representative for maintenance. -
Page 129: Section 7: Machine Specifications
Section 7: Machine Specifications Main Body & Option Specifications Main Body Specifications ..........7-2 Option Specifications............7-4... -
Page 130: Main Body Specifications
Main Body Specifications Main Body Name: bizhub PRO 1050/1050e Type: Console type Transfer method: Indirect electrostatic method Original glass: Fixed Light-sensitive unit: Light source: Xenon lamp Developing method: Dry, 2-component magnetic brush developing Fixing method: Heat roller Density adjustment: Automatic and manual (9 steps) Magnification ratio: 1.0%... -
Page 131: Adf (Df-603)
Main Body Specifications (continued) Power consumption: 3.00 KW max. (with option) Sound power level: 80 dB max. (with option) Weight: Approx. 727.5 lb (main body + ADF) + 312.4 lb w/Paper feeder unit (PF-701) + 242 lb w/Large stacker (LS-501/LS-502) + 176 lb w/Finisher (FS-503) + 264 lb w/Folding unit (FD-501) + 579.8 lb w/Saddle stitcher (SD-501) - Page 132 Option Specifications Paper Feeder Unit PF-701 Function: Paper feed into main body (3 trays) Paper sizes: 12”×18”, 11”×17”, 8.5”×14”, 8.5”×11”, 8.5”×11”R, 5.5”×8.5”, A3, B4, A4, B5, B5R, F4, and those wide sizes (max. 12.76” × 18.11”) Types of paper: 13 ~ 135 lb (244 g/m ) paper (tray 3 and 5) 13 ~ 166 lb (300 g/m ) paper (tray 4)
- Page 133 Option Specifications (continued) In-Bin Stapler Finisher FS-503 Type: Offset catch tray Functions: Staple, Straight delivery, Shift delivery, Output to secondary tray Paper sizes: Staple; 12”×18”, 11”×17”, 8.5”×14”, 8.5”×11”, 8.5”×11”R, 5.5”×8.5”, A3, B4, A4, A4R, B5, A5, F4, 8K, 16K and those wide sizes (max. 12.76” × 18.11”) Straight/Shift delivery;...
- Page 134 Option Specifications (continued) Folding Unit FD-501 Functions: Punch, Folding, Post inserting (PI), Straight delivery, Output to secondary tray Number of punch holes: 2 or 3 Hole diameter: 6.5 mm 0.5 mm (2 holes) / 8.0 mm 0.5 mm (3 holes) ±...
- Page 135 Option Specifications (continued) Saddle Stitcher SD-501 Functions: Multi-folding (Multi Center, Multi Letter), Fold&Staple, Trimming, Straight delivery Processing capability: 105 sheets per minute at maximum Types of paper: 13 to 43 lb, 60 to 91 lb (cover) paper (Multi Center, Fold&Staple, Trimming) 13 to 24 lb paper (Multi Letter) Paper sizes: Multi Center, Fold&Staple, and Trimming;...
-
Page 136: Pre-Printed Paper Feeding Kit Pp-701
Option Specifications (continued) Perfect Binder PB-501 Functions: Hot-melt type binding, Trimming, Straight delivery to secondary (sub) tray Processing capability: 105 sheets per minute at maximum Number of sheets (1 set): 10 to 300 sheets, or within 30 mm thick Paper sizes: Perfect binding tray;... - Page 137 Copying Operation...
- Page 139 Before Making Copies Basic Information on Copying Operation Copy Screen..............8-2 Features of the bizhub PRO 1050/1050e ......8-4 How to Make a Basic Copy..........8-8 Positioning Originals............8-11 Setting Print Quantity ............. 8-15 Setting Job During Warm-up .......... 8-16...
-
Page 140: Copy Screen
Copy Screen The Copy Screen is used to select the desired copy conditions when setting a new copy job and also reserve jobs. 5 6 7 8 9 COPY tab is touched to display the Copy Screen. Original Setting key is touched to specify the condition of originals to be scanned. -
Page 141: Machine Status Screen
Machine Status Screen The Machine Status Screen displays when copying operation becomes available after warm-up, or when any copying job has been completed. COPY tab is touched to display the Copy Screen. JOB LIST tab is touched to display the Job List Screen. MACHINE tab is touched to display the Machine Status Screen, and blinks in red when machine trouble occurs. -
Page 142: Features Of The Bizhub Pro 1050/1050E
Features of the bizhub PRO 1050/1050e • All-Image Area Makes copies printed completely to the edges of the paper to avoid image loss. • AES - Automatic Exposure Selection Automatically adjusts exposure to compensate for quality of the original. • AMS - Automatic Magnification Selection Automatically selects an appropriate magnification ratio when paper size is selected manually. - Page 143 Features of the bizhub PRO 1050/1050e (continued) • Density Shift Shifts each of nine density levels in four enhance modes (Text & Photo, Text, Photo, Low Contrast) to three levels lighter or three levels darker. • Frame/Fold Erasure Erases border and/or fold image area using Frame (1 - 300mm), Fold (1 - 99mm), or Frame &...
- Page 144 Features of the bizhub PRO 1050/1050e (continued) • No Image Area Erase When copying from the original glass when the document cover is open, copies only the image area and not the exposed area of glass, which would otherwise copy as black.
- Page 145 Features of the bizhub PRO 1050/1050e (continued) • Proof Copy To ensure correct output before running multiple copies, run a proof copy by pressing [Proof Copy] on the control panel or touching Proof Copy on the Check Screen. • Repeat Selects the horizontal image area across the page, and repeats it down the page as many times as the repeat width setting (10 ~ 150mm) permits in manual or auto.
-
Page 146: How To Make A Basic Copy
How to Make a Basic Copy Follow the procedure below to make a basic copy. Use Function key to recall the job setting previously registered using Mode Memory. Up to five settings can be recalled. The following procedure is basic and not always applicable to the operation of selected copy conditions. - Page 147 How to Make a Basic Copy (continued) Position originals FACE UP in the document feeder, or FACE DOWN on the original glass. For details of positioning originals, see p. 8-11. Press [Start] on the control panel. When the machine starts scanning originals, the current job status will be displayed on the popup menu.
- Page 148 How to Make a Basic Copy (continued) • The screen to be displayed after machine power is turned on can be selected either from the Machine Status Screen (initially selected) or the Copy Screen. The popup screen will vary depending on this selection. •...
-
Page 149: Positioning Originals
Positioning Originals Positioning Originals in ADF The document feeder (ADF) automatically feeds up to 100 originals directly to the original glass area, starting with the top sheet. The ADF should only be used for unstapled, smooth, flat originals. Positioning originals in Normal mode Arrange originals in order. - Page 150 Positioning Originals (continued) Positioning originals in Mixed Original mode Mixed size originals can be copied together from the document feeder. To use the Mixed Original mode, see procedure on p. 9-10. Arrange originals in order. Arrange the mixed size originals as illustrated below. To the To the left depth...
- Page 151 Positioning Originals (continued) Positioning originals in Z-Folded original mode Z-Folded original mode detects the folded original size without using the size detection sensor of the ADF. To use the Z-Folded original mode, see procedure on p. 9-12. Arrange originals in order. Position original(s) FACE UP in the document feeder tray.
-
Page 152: Positioning Original On Original Glass
Positioning Originals (continued) Positioning Original on Original Glass Use the original glass when originals are not suitable for use with the document feeder, e.g., when size is incompatible, or when originals are folded, stapled, torn, or in generally poor condition. Raise the document feeder. -
Page 153: Setting Print Quantity
Setting Print Quantity This section describes how to set or change print quantity. To Set Print Quantity The copier is initially set to copy the original set in amounts determined by the print quantity setting, then outputs sorted sets. Enter the desired print quantity from the control panel keypad. Entered quantity will be displayed on the touch panel. -
Page 154: Setting Job During Warm-Up
Setting Job During Warm-up While the copier is warming up after power is turned on, select copy conditions and start scanning so that the copier may start printing immediately the copier engine is ready. This function can be disabled by service. Contact your service representative, if desired. - Page 155 Setting Job During Warm-up (continued) When scanning the original for the job is started, the popup menu will appear on the Copy Screen. Touch Yes or Close to return to the Copy Screen to make another reserve job setting. See p. 9-48 for details. •...
-
Page 156: To Stop Scanning/Printing
To Stop Scanning/Printing Follow the procedure below to stop scanning or printing. This procedure is effective only for the job in progress. To stop the reserved jobs on standby, operate on the Job List Screen. See p. 10-2 for details. Press [Stop] while the current job is in progress. - Page 157 To Stop Scanning/Printing (continued) Scanning the job in Memory Scan mode: Touch Stop Job to cancel the job, or touch Continue to complete the job. Touching Stop Job will delete all the scanned data. Batch printing is in progress: Touch Stop Job to cancel the job, or touch Continue to complete the job. Touching Stop Job will delete all the scanned data.
- Page 158 To Stop Scanning/Printing (continued) Scanning and printing the job using Program Job: Touch Stop Job to cancel the job, or touch Continue to complete the job. Touching Stop Job will delete all the scanned data. Scanning reserve job while printing: Select to stop scanning, printing, or to stop both operation.
- Page 159 To Stop Scanning/Printing (continued) (3) Press [Stop]. Machine operation will be ceased, and the following popup menu will be displayed. (4) Select the job to cancel. Touch Scan to stop scanning the reserve job and continue printing. Touch Print to stop printing and continue the scanning job. Touch Scan/Print to cancel both scanning and printing jobs.
- Page 161 Section 9: Basic Job Settings How to Use Basic Functions Copy Conditions Incompatible with Basic Settings... 9-2 Function Key..............9-6 Original Setting..............9-8 Memory Scan Mode ............9-18 Special Image..............9-19 Zoom ................9-24 Copy Mode ..............9-27 Paper Tray Setting ............9-34 Reserve Job Setting ............
-
Page 162: Copy Conditions Incompatible With Basic Settings
Copy Conditions Incompatible with Basic Settings Copy Mode/Magnification Special Image Original Setting Copy Conditions Incompatible with Basic Settings - *5 Memory Scan Mode (Glass) *5 x x Memory Scan Mode (ADF) z z z 1.000 Magnification ZOOM z z z Preset Magnification Rotation x x x... -
Page 163: Copy Conditions Incompatible With Basic Settings
Copy Conditions Incompatible with Basic Settings (continued) Application / File Edit Application / Image Edit u u u u u u u u u u u x x x x x x x x x x x x x x x x x x x x x x x... - Page 164 Copy Conditions Incompatible with Basic Settings (continued) Output Application Copy Conditions Incompatible with Basic Settings Memory Scan Mode (Glass) Memory Scan Mode (ADF) 1.000 Magnification ZOOM Preset Magnification Rotation *4 *4 *4 Manual Density Preset Density Text & Photo (Enhance) Low Contrast Photo (*5) Text...
- Page 165 Copy Conditions Incompatible with Basic Settings (continued) Output Application None : Compatible : Grayed out (including automatic release) : Output message : Originally incompatible but selectable (Function last selected has priority.) : Released automatically Overlay cannot be selected in Program Job. Selecting Auto in Repeat, Non-Image Area Erase will also be selected automatically and cannot be released.
-
Page 166: Function Key
Function Key The Function key allows you to assign up to five job settings previously stored using Mode Memory. This section describes how to make a copy by simply touching the Function key to recall the desired job setting. • For storing job settings using Mode Memory, see p. 13-9. •... - Page 167 Function Key (continued) Touch the desired Function key. The copy conditions of Mode Memory assigned to that key will resume on the screen.
-
Page 168: Original Setting
Original Setting Specifying Original Direction Specify the direction of the originals placed on ADF or original glass. This setting is required to obtain copy results as expected when making double-sided copies with binding position specified or when staple position is specified. Originals on platen glass: Originals on ADF: See Setting Binding Direction for Duplex Copies (p. -
Page 169: Selecting Binding Direction Of Originals
Original Setting (continued) Selecting Binding Direction of Originals When copying double-sided originals in 2-1 or 2-2 mode, the copied sets will be exactly the same in page arrangement as the originals. Use this function to obtain the single- or double-sided copies having the same edge as page top, from double-sided originals printed upside down on the reverse side. -
Page 170: Copying Mixed Size Originals (Mixed Original)
Original Setting (continued) Copying Mixed Size Originals (Mixed Original) Use the Mixed original mode with the document feeder to copy mixed size originals. Each original in the mixed set will be copied to paper of the same size (APS mode) or to paper of desired size with appropriate ratio automatically selected (AMS mode). - Page 171 Original Setting (continued) Touch OK to return to the Copy Screen. APS is automatically selected on the Copy Screen. To select AMS, touch the tray key on the Copy Screen to select the desired paper size. Position mixed original(s) FACE UP in the document feeder. Arrange the mixed size originals aligning the left and rear sides.
-
Page 172: Copying Z-Folded Originals (Z-Folded)
Original Setting (continued) Copying Z-Folded Originals (Z-Folded) Use the Z-Folded mode with the document feeder to copy Z-folded originals. Otherwise, the size detection sensor of the ADF may function incorrectly. Specifications for Z-Folded Original ❒ Use ADF. ❒ This mode requires more scanning time to detect the original size. Z-folded original Touch Original Setting on the Copy Screen. -
Page 173: Feeding Single Original From Adf (Single Feed)
Original Setting (continued) Feeding Single Original from ADF (Single Feed) Use the Single Feed mode to copy thick originals or paste-ups to be fed one sheet at a time in the document feeder. Copying usually starts after the [Start] key is pressed, however, the machine manager can set the machine to automatically feed the original one second after placing the original in the document feeder. - Page 174 Original Setting (continued) Position Single Feed original FACE UP in the document feeder. Position a sheet of the original in the document feeder, then align the paper guides to the original. Never set more than one thick original or paste up, otherwise machine trouble may be caused.
- Page 175 Original Setting (continued) Touch OK to return to the Copy Screen. Memory Scan is automatically highlighted on the Copy Screen. Touch Recall STD to restore the initial setting, or touch Cancel to resume the previous setting. Select additional copy conditions, as desired. Adjust the ADF paper guides.
-
Page 176: Copying Non-Standard Size Originals (Custom Size / Tab Paper)
Original Setting (continued) Copying Non-Standard Size Originals (Custom Size / Tab Paper) The copier usually detects the standard size of originals fed through ADF or positioned on the original glass (Standard Size mode). Use Custom Size mode to specify the scanning area manually for copying or printing special size originals. - Page 177 Original Setting (continued) Touch the desired size key. Touch OK on the popup menu. The popup menu will disappear. Touch OK to complete the setting and return to the Copy Screen. Touch Recall STD to restore the initial setting, or touch Cancel to resume the previous setting.
-
Page 178: Memory Scan Mode
Memory Scan Mode Use Memory Scan mode to scan more than 100 originals into memory then to start a continuous printing job, or to combine images scanned from ADF and original glass. Specification for Memory Scan Mode ❒ Memory Scan mode is necessarily used in the following functions: Making double-sided copies using original glass, Image Insert, Book Copy, Program Job, Storing image in Overlay Memory Make copying selections on the Copy Screen, as desired. -
Page 179: Special Image
Special Image Selecting Exposure Level and Adjusting Background Whiteness Automatic Exposure Selection (AES) operates with the default settings. It detects the density of the original image and automatically selects the appropriate exposure for the copy. Select manual copy density to adjust exposure (density) when originals are too light or too dark. - Page 180 Special Image (continued) Touch Darker to darken, or Lighter to lighten the copy image. Highlight the desired exposure level indicator. Touch Normal to select the middle density level. When resuming AES, touch AES. Select the desired background adjustment level. (1) Touch Special Image. The Special Image popup menu will be displayed.
- Page 181 Special Image (continued) Recall the preset density. (1) Touch Special Image. The Special Image popup menu will be displayed. (2) Touch Preset1 or Preset2 in the Preset Density area to recall the desired density setting. (3) Touch OK. The Copy Screen will be restored. Touch Recall STD to restore the initial setting, or touch Cancel to resume the previous setting.
-
Page 182: Making Copy Quality Closer To Originals (Text/Photo Enhance)
Special Image (continued) Making Copy Quality Closer to Originals (Text/Photo Enhance) Use this function to enhance the reproducibility of half tones so that the copy quality more closely matches to that of the original. Text & Photo Mode Use this mode to copy an original including both text and photo image. Low Contrast Mode Select Low Contrast to darken lightly printed images (e.g., pencil) without changing background exposure. - Page 183 Special Image (continued) Touch Special Image on the Copy Screen. The Special Image popup menu will be displayed. Touch the desired mode key to highlight it. Touch OK to return to the Copy Screen. Touch Recall STD to restore the initial setting, or touch Cancel to resume the previous setting.
-
Page 184: Zoom
Zoom In the initial settings on the Copy Screen, the magnification is automatically set at “1.000” (full size). This section describes how to change the magnification ratio. To Copy in 1.000 Magnification Mode Follow this procedure to make a 100% copy of the original image. Close the ADF securely, then press [Reset]. - Page 185 Zoom (continued) Specify the desired magnification. Manual Zoom (proportional): (1) Touch the key at the upper left corner in the Manual Zoom area. (2) Use the screen keypad to enter the desired magnification ratio. The entered ratio will be displayed on the Copy Screen. •...
- Page 186 Zoom (continued) • If wrong number is entered, continue by entering the correct number. • Touching arrow keys ▲ and ▼ will change the ratio in 0.001 (0.1%) steps. Enlarge/Reduce: Touch the desired zoom key in the Enlarge/Reduce area. Preset Zoom: Touch the desired preset zoom key in the Preset Zoom area.
-
Page 187: Copy Mode
Copy Mode The Copy Screen is initially set to 1-1 copy mode to make single-sided copies from single-sided originals. Follow the procedure below to make double-sided copies from the originals scanned from the document feeder or from the original glass, and also to make single-sided copies from double-sided originals. - Page 188 Copy Mode (continued) Specify other conditions for making double-sided copies. Selecting the original set direction: (1) Touch Original Setting on the Copy Screen to display the Special Original popup menu. (2) Touch the desired original direction key to highlight it. (3) To make normal double-sided copies (having the same edge as page top) from double-sided originals printed upside down on the back pages, touch Upper Binding to highlight it.
-
Page 189: Making Double-Sided Copies Using Original Glass
Copy Mode (continued) For details in specifying binding direction of double-sided copies, see p. 12-10. Select additional copy conditions, as desired. Position originals FACE UP in the document feeder. Set originals according to the original direction icon displayed on the Copy Screen. - Page 190 Copy Mode (continued) Selecting the binding mode: (1) Touch Output Application on the Copy Screen to display the Output Application popup menu. (2) Touch the desired binding direction key to highlight it. To make double- sided copies arranged upside down on the back pages, touch Upper. (3) Touch OK to return to the Copy Screen.
- Page 191 Copy Mode (continued) DO NOT press [Reset] at this point, otherwise the Memory Scan mode will be released to disable the copier from scanning the original placed on the original glass. Select additional copy conditions, as desired. Press [Start] to scan. The front side image of the double-sided copy will be scanned into memory.
-
Page 192: Making Single-Sided Copies From Double-Sided Originals
Copy Mode (continued) Making Single-Sided Copies from Double-Sided Originals Use ADF and select 2-1 copy mode to make single-sided copies from double-sided originals. Specifications for Making Single-Sided Copies from Double-Sided Originals ❒ Position originals according to the original direction icon on the Copy Screen. ❒... - Page 193 Copy Mode (continued) Specify copy conditions for making copies from double-sided originals. Selecting the original set direction and binding direction: (1) Touch Original Setting on the Copy Screen to display the Special Original popup menu. (2) Touch the desired original direction key to highlight it. (3) To make normal double-sided copies (having the same edge as page top) from double-sided originals printed upside down on the back pages, touch Up Binding to highlight it.
-
Page 194: Paper Tray Setting
Paper Tray Setting Each paper tray has been preset with paper size, paper type/weight, and air assist on/off by machine manager. Paper Size: The machine manager has been set each tray to detect the standard paper size when loaded or exclusively to accommodate a specific size. (non-standard size, wide size, or tabbed paper size) The tray specified as standard size or tabbed paper size allows APS (Automatic Paper Selection), AMS (Automatic Magnification Selection), and Rotation to function,... - Page 195 Paper Tray Setting (continued) Touch Auto Paper Select at lower right corner of the Copy Screen. Select additional copy conditions as desired, then position original(s). Press [Start]. Scanned image will be printed on the paper size automatically selected. If the appropriate copy paper is not loaded in any tray, no copying will be performed, and a message will prompt you to load the appropriate paper.
-
Page 196: To Specify Desired Paper Size (Ams)
Paper Tray Setting (continued) To Specify Desired Paper Size (AMS) When a paper size is specified on the touch panel, an appropriate reduction or enlargement ratio will be selected automatically according to the original size detected from the ADF or the original glass. Specifications for AMS ❒... - Page 197 Paper Tray Setting (continued) See the table below for the original size, copy paper size, and magnification ratio automatically selected. ORIGINAL SIZE AMS TABLE 11"x17" 8.5"x14" 8.5"x11" 8.5"x11"R 5.5"x8.5" 5.5"x8.5"R 11"x17"/ 1.000 1.214 1.000 1.294 1.294 2.000 0.941 11"x17"W (0.647) (0.786) (1.294) (1.000)
-
Page 198: Rotation
Paper Tray Setting (continued) Rotation This function allows you to utilize APS or AMS and copy the original documents onto size 8.5”x11” or 5.5”x8.5”, irrespective of the copy paper feeding direction. The machine manager can set this function ON, or to operate when APS, AMS or reduce functions. - Page 199 Paper Tray Setting (continued) Touch Rotation Off on the Copy Screen to highlight it. When Rotation is released, the Rotation icon on the Copy Screen will disappear to indicate that this function is cancelled. Touch to deselect Rotation Off to resume this function. When Rotation is resumed, the Rotation icon will be displayed on the screen.
-
Page 200: Using Paper Not Specified For Any Tray (Paper Presetting)
Paper Tray Setting (continued) Using Paper Not Specified for Any Tray (Paper Presetting) Each paper tray has been preset with paper size, paper type/weight, and air assist on/off by machine manager. If you want to use another paper than any loaded in the trays, follow the procedure below to temporarily change the setting of the tray to be used. - Page 201 Paper Tray Setting (continued) Select the tray to change the setting temporarily. Touch the desired tray key on the popup menu. Change the paper size. Select one of the following four items. Standard Size, Custom Size, Wide Size Paper, Tab Paper Setting Standard Size: (1) Touch Size Setting, then touch Standard Size.
- Page 202 Paper Tray Setting (continued) Setting Custom Size: (1) Touch Size Setting, then touch Custom Size. (2) Touch the vertical/horizontal size key, then use the screen keypad or arrow keys ▲ and ▼ to enter the desired size. Entered size should fall within 182 mm ~ 324 mm in vertical dimension, 140 mm ~ 460 mm in horizontal dimension.
- Page 203 Paper Tray Setting (continued) (6) Touch the horizontal size key, then use the screen keypad or arrow keys ▲ and ▼ to enter the horizontal size. The entered number should fall within the range from the horizontal size of the standard size corresponding to the selected wide size, to a maximum of 460 mm.
- Page 204 Paper Tray Setting (continued) Change the paper setting. Change the paper setting of the tray either by selecting the one previously registered or by programing a new setting. Selecting the paper setting: (1) Touch Type/Weight. (2) Use Next or Previous to scroll to the desired paper type/weight from the list, then touch the key to highlight it.
- Page 205 Paper Tray Setting (continued) (1) Touch Change. (2) Touch Type, then select the desired paper type key. Touch OK to complete the setting. The paper type specifications are described in POD Administrator’s reference. See p. 1-3 for details. (3) Touch Weight. Touch the desired paper weight key, then touch OK.
- Page 206 Paper Tray Setting (continued) (5) Touch Hole-Punch. Touch With Punch Hole if the paper has punch holes, or touch Non Punch Holes if not, then touch OK. (6) Touch Both Sides Adj. Touch Front or Back to select the printed side, select the adjustment item (vertical zoom, horizontal zoom, vertical shift, or horizontal shift), and then touch + <-->...
- Page 207 Paper Tray Setting (continued) Touch Close on the Paper Presetting popup menu. The tray with the paper setting changed will be selected on the screen, and all paper level indicators will disappear from the tray keys. However, the name indicated on the tray key will not be changed. Load copy paper into the tray with the setting change made.
-
Page 208: Reserve Job Setting
Reserve Job Setting The Reserve function allows you to set up a new job while a current job is in process. When the current job is finished, the Reserve job starts printing immediately. Service can set the machine to disable this function. Contact your service representative, if desired. - Page 209 Reserve Job Setting (continued) While printing job is in progress: The message “Printing in progress” is displayed in the message area of the Machine Status Screen. Touch COPY tab to display the Copy Screen with the message “Ready to set reserve Job”. Select copy conditions for the reserve job as desired, position original(s), then press [Start].
-
Page 211: Section 10: Job Management
Section 10: Job Management How to Check and Manage Jobs on Job List Screen Overview of Job List Screen........... 10-2 Job Operation on Job List Screen ........10-3... -
Page 212: Overview Of Job List Screen
Overview of Job List Screen The Job List Screen allows you to check/operate the following items. • Reserved job • Output History • Send History • Incomplete • Suspended (The letters on the key turn red if any suspended job remains.) •... -
Page 213: Job Operation On Job List Screen
Job Operation on Job List Screen To Check/Control Reserved Jobs Use this function to display all the reserve jobs as a list. The list includes following information. • Job No.: consecutive numbers of both copy and print jobs • User Name: user who transmitted the job •... - Page 214 Job Operation on Job List Screen (continued) To change the order of jobs: Touch to highlight the desired reserve job key, then touch Priority. The highlighted job will be advanced by one in printing order unless the job preceding the selected one is already in progress. If printing order cannot be changed for the selected job, a message will be displayed for information.
-
Page 215: To Display Output History
Job Operation on Job List Screen (continued) To Display Output History Use this function to display output history as a list. The list includes following information. • Job No.: consecutive numbers of both copy and print jobs • User Name: user who transmitted the job •... -
Page 216: To Display Send History
Job Operation on Job List Screen (continued) To Display Send History Use this function to display send history as a list. The list includes following information. • Job No.: consecutive numbers of both copy and print jobs • User Name: user who transmitted the job •... -
Page 217: To Check Incomplete Jobs
Job Operation on Job List Screen (continued) To Check Incomplete Jobs Use this function to display Incomplete jobs as a list. The list includes following information. • Job No.: consecutive numbers of both copy and print jobs • User Name: user who transmitted the job •... -
Page 218: To Check/Operate Suspended Jobs
Job Operation on Job List Screen (continued) To Check/Operate Suspended Jobs Use this function to display all suspended jobs as a list. The list includes following information. • Job No.: consecutive numbers of both copy and print jobs • User Name: user who transmitted the job •... - Page 219 Job Operation on Job List Screen (continued) To output all suspended jobs: Touch All Release, then touch Yes on the popup menu. All suspended jobs will be output according to the current printing order. To check the printing order, touch Reserved Job to display the reserved job list.
-
Page 220: To Check/Control Spool Jobs
Job Operation on Job List Screen (continued) To Check/Control Spool Jobs Use this function to display spool jobs as a list. The list includes following information. • Job No.: consecutive numbers of both copy and print jobs • Mode: Wait for RIP or Receiving (current status of the spool job) Follow the procedure below to change the output order or delete the spool jobs. - Page 221 Section 11: Applications How to Use Application Functions Copy Conditions Incompatible with Applications ......11-2 To Use Application Function ............11-6 Inserting Sheets and Covers (Sheet Insertion) ....... 11-8 Locating Title Pages on the Right Side (Chapter) ......11-14 Lay Out Several Pages onto One Sheet (Combination) ....11-16 Making a Multiple Page Signature Booklet (Booklet) ....
-
Page 222: Copy Conditions Incompatible With Applications
Copy Conditions Incompatible with Applications Copy Mode/Magnification Special Image Original Setting Copy Conditions Incompatible with Applications Program Job (First job) Sheet Insertion Insertion using PI Front Cover Back Cover Front PI (Upper/Lower) Back PI (Upper/Lower) Chapter Chapter (Print Insertion) x Combination Booklet Adhesive Binding... -
Page 223: Copy Conditions Incompatible With Applications
Copy Conditions Incompatible with Applications (continued) Application / File Edit Application / Image Edit x x x x x x x x x x x x x x x x x x x x x x x x x x x x x x x x x x x x x x x... - Page 224 Copy Conditions Incompatible with Applications (continued) Output Application Copy Conditions Incompatible with Applications Program Job (First job) x x x Sheet Insertion x x x Insertion using PI x x x Front Cover Back Cover Front PI (Upper/Lower) Back PI (Upper/Lower) Chapter x x x Chapter (Print Insertion)
- Page 225 Copy Conditions Incompatible with Applications (continued) Output Application None : Compatible : Grayed out (including automatic release) : Output message : Originally incompatible but selectable (Function last selected has priority.) : Released automatically 2 in 1 and 2 Repeat are available. (Grayed out if not.) Limited to Job Store function in Copy mode.
-
Page 226: To Use Application Function
To Use Application Function Follow the procedure below to display the Application popup menu and select the desired copying features. Touch COPY tab on the Machine Status Screen to display the Copy Screen. Touch Application on the Copy Screen. The Application popup menu will be displayed on the touch panel. •... - Page 227 To Use Application Function (continued) Touch OK on the Application popup menu. Selections will be completed and the Copy Screen will be restored, with the selection listed in the area under the Application key. With the Copy Screen displayed, you can press [Start] to perform the operation. Selected functions can be directly accessed from the Application area of the Copy Screen to change or clear the setting you made.
-
Page 228: Inserting Sheets And Covers (Sheet Insertion)
Inserting Sheets and Covers (Sheet Insertion) Use Sheet Insertion in print mode or blank mode to insert chapter sheets or separator sheets into the finished set, as well as front and back covers. The covers and insertions can be fed from different tray source for each, and also available from Post inserter if Folding unit FD-501 option is installed. - Page 229 Inserting Sheets and Covers (Sheet Insertion) (continued) Load regular sheets, insertion sheets and covers into any tray. When using the Post inserter, load covers or insertion sheets into the Post inserter tray. • Be sure that the trays for copy paper, front/back cover, and insertions have the same paper size loaded.
- Page 230 Inserting Sheets and Covers (Sheet Insertion) (continued) To insert a front cover: Touch Front Cover. The Front Cover Screen will be displayed. Select the desired front cover mode, copy mode (Simplex/Duplex), and tray paper to be used. To use covers loaded in the Post inserter, touch Cover and select the tray to be used.
- Page 231 Inserting Sheets and Covers (Sheet Insertion) (continued) To insert the insertion sheets: Touch Insertion Sheets. The Insertion Sheets Screen will be displayed. Enter the desired insertion type setting. The Set 01 key is active to be ready for the first insertion type setting. Select the desired insertion mode (Print/Blank), copy mode (Simplex/ Duplex), and tray paper to be used.
- Page 232 Inserting Sheets and Covers (Sheet Insertion) (continued) Enter the page number. (1) Touch Set to display the touch panel keypad. (2) To specify the insertion page, touch Page to highlight it. Use the touch panel keypad to enter the page number of insertion location.
- Page 233 Inserting Sheets and Covers (Sheet Insertion) (continued) NOTES: • The page numbers entered at random will be sorted automatically. • Entering “0” or the same page number twice will be ignored on the screen. • When a page number entered is larger than the total original page count, it will be ignored.
-
Page 234: Locating Title Pages On The Right Side (Chapter)
Locating Title Pages on the Right Side (Chapter) Chapter is used with ADF in 1-2 mode for the purpose of locating title pages on the right side, rather than reverse side, of a duplex copy to improve the presentation of double-sided copies. - Page 235 Locating Title Pages on the Right Side (Chapter) (continued) Use the control panel keypad to enter the page number of each title page. Touch Set after each entry to move to the next key. To set more than 15 locations, touch the arrow key to move to the next page. To clear an incorrect entry, touch Delete.
-
Page 236: Lay Out Several Pages Onto One Sheet (Combination)
Lay Out Several Pages onto One Sheet (Combination) Use this function to lay out and copy a fixed number (2, 4, or 8) of pages onto one sheet of copy paper (2 in 1, 4 in 1, or 8 in 1). Specifications for Combination ❒... - Page 237 Lay Out Several Pages onto One Sheet (Combination) (continued) Select the desired Combination mode. Touch 2 in 1, 4 in 1 or 8 in 1 in the desired order area, referring to the illustration on the following page. Touch OK. The Application popup menu will be restored.
- Page 238 Lay Out Several Pages onto One Sheet (Combination) (continued) Enter the desired print quantity from the control panel keypad. Position originals FACE UP in the document feeder. Press [Start]. Refer to the table below to select the desired Combination mode. Horizontal order Vertical order Layout...
-
Page 239: Making A Multiple Page Signature Booklet (Booklet)
Making a Multiple Page Signature Booklet (Booklet) Use the Booklet to make a multiple page signature booklet on both sides of paper. Original images are scanned into memory and automatically arranged in booklet format in correct order. If the machine is equipped with Saddle stitcher SD-501 option, folded, stapled, and/ or trimmed booklets can be made. - Page 240 Making a Multiple Page Signature Booklet (Booklet) (continued) Touch Booklet on the Application popup menu. Touch to highlight the desired Booklet mode key. When a cover sheet is required, touch Cover Tray Select to select the cover sheet tray source. Touch Left Binding or Right Binding if you want to change the output order.
- Page 241 Making a Multiple Page Signature Booklet (Booklet) (continued) If the copier is equipped with FD-501, Folding output mode is available. Enter the desired print quantity from the control panel keypad. Position originals FACE UP in the document feeder, then press [Start].
-
Page 242: Copying Onto Transparent Films (Ohp Interleave)
Copying onto Transparent Films (OHP Interleave) Use the OHP Interleave function in 1-1 or 2-1 mode to copy onto overhead projection transparent films, and output a blank or copied interleaf sheet with each copied transparent film. In the Interleave Blank mode, a blank interleaf sheet is output with each transparent film to keep the film material from sticking together. - Page 243 Copying onto Transparent Films (OHP Interleave) (continued) Touch OHP Interleave on the Application popup menu. Select the desired OHP Interleave mode, then touch OK. To cancel the setting, touch Cancel. To cancel the function without clearing the setting made, touch Function OFF. Touch OK on the Application popup menu.
-
Page 244: Inserting Images Into Printed Sets (Image Insert)
Inserting Images into Printed Sets (Image Insert) Use the Image insert mode to combine images scanned from the original glass, such as photos, paste-ups, newspaper articles, graphs, etc., with images scanned from the document feeder. Then, output the combined images as a finished set. The selected copy paper size is determined by the size of originals loaded in the document feeder. - Page 245 Inserting Images into Printed Sets (Image Insert) (continued) Use the control panel keypad to enter the page number. Touch Set after each entry to move to the next key. When setting more than 15 locations, touch the arrow key to move to the next page.
- Page 246 Inserting Images into Printed Sets (Image Insert) (continued) Scan the document feeder images: Position originals FACE UP in the document feeder. If the number of originals exceeds 100, divide them into blocks not exceeding 100 sheets and load them from the block with the first page. Press [Start].
-
Page 247: Dividing An Image Into Right And Left Pages (Book Copy)
Dividing an Image into Right and Left Pages (Book Copy) The Book Copy mode performs image division on the original image. Use this function to copy an open book or a ledger sheet onto two 8.5”x11” sheets in 1-1 or 2- 1 mode, or onto the front and back sides of one 8.5”x11”... - Page 248 Dividing an Image into Right and Left Pages (Book Copy) (continued) Touch Book Copy on the Application popup menu. The Book Copy Screen will be displayed. Select the desired Book Copy mode. Touch to highlight the desired mode key. Touch Left Binding or Right Binding to select the output order according to the original pagination.
- Page 249 Dividing an Image into Right and Left Pages (Book Copy) (continued) • Available paper size is 8.5"x11". • When selecting Full scan mode and scanning from the original glass, select 1-1 or 1-2 copy mode. • APS and AMS are released and 1.000 magnification is selected automatically. Change the magnification manually, if desired.
- Page 250 Dividing an Image into Right and Left Pages (Book Copy) (continued) Scanning Original for Cover Use original glass for scanning original for cover. 1 Open the document feeder. 2 Position original for front cover FACE DOWN on the original glass. 3 Press [Start] to start scanning.
-
Page 251: Programming Different Settings For An Output Job (Program Job)
Programming Different Settings for an Output Job (Program Job) In the ordinary Memory Scan mode, the combined features selected for the job are applied to all originals to be scanned. In the Program Job mode, you may scan multiple sets of originals and apply different settings on each set (referred to as JOB), then output them all as a complete set. - Page 252 Programming Different Settings for an Output Job (Program Job) (continued) Select the desired copy conditions. Position originals FACE UP in the document feeder or FACE DOWN on the original glass. If the number of document feeder originals exceeds 100, divide them into blocks not exceeding 100 sheets and load them from the block with the first page.
-
Page 253: Erasing Outside Of The Original (No Image Area Erase)
Erasing Outside of the Original (No Image Area Erase) The No Image Area Erase mode is used to copy non standard or special originals, such as books, magazines, paste-ups, graphs, thick or thin materials, etc. from the original glass. The exposed glass area outside the borders of the original will not be copied. - Page 254 Erasing Outside of the Original (No Image Area Erase) (continued) DO NOT CLOSE THE DOCUMENT FEEDER. Original size should be larger than 10mm x 10mm. Press [Start]. DETAILS: Oblique Erase and Rectangle Erase Modes The No Image Area Erase has two modes; Rectangle erase mode and Oblique erase mode.
-
Page 255: Reversing Color In Black And White Image (Neg. Pos. Reverse)
Reversing Color in Black and White Image (Neg. Pos. Reverse) Use Neg. Pos. Reverse to reverse the image from black-on-white to white-on-black, and vice versa. This is very good for copying white-on-black originals and reversing them to fax. Original Neg. Pos. Reverse copying Touch Application on the Copy Screen. -
Page 256: Repeating Selected Image Area (Repeat: Vert./Horiz. Mode)
Repeating Selected Image Area (Repeat: Vert./Horiz. Mode) Use this function to repeat the selected image area of 10mm ~ 150mm in both vertical and horizontal widths measured from the rear left corner of the A3 original area indicated on the left edge of the original glass. Vertical/Horizontal Width Setting Mode Specifications ❒... - Page 257 Repeating Selected Image Area (Repeat: Vert./Horiz. Mode) (continued) Touch Manual, then specify the vertical and horizontal widths of the scanning area. Use up/down arrow key to enter the width from 10 to 150 mm in 1 mm increments. Keep touching the key to increase/decrease the value continuously.
- Page 258 Repeating Selected Image Area (Repeat: Vert./Horiz. Mode) (continued) • Copy mode is automatically set to 1-1. When selecting 1-2 mode, Memory Scan mode will function automatically. Enter the desired print quantity from the control panel keypad. Position original FACE DOWN on the original glass. See the illustration on p.
-
Page 259: Repeat Automatically Or Select Repeat Times (Repeat: Auto Detect/ Repeat Mode)
Repeat Automatically or Select Repeat Times (Repeat: Auto Detect/ Repeat Mode) Auto Detect mode will automatically set the equal repeat area to the size of the original placed onto the original glass by activating No Image Area Erase. Repeat mode will scan the image area specified by the selected paper size and mode (2 Repeat, 4 Repeat, or 8 Repeat), then arrange the image by specified times in one copy sheet. - Page 260 Repeat Automatically or Select Repeat Times (Repeat: Auto Detect/ Repeat Mode) Touch Repeat on the Application popup menu. The Repeat Screen will be displayed. Touch to highlight the desired mode key. Touch Auto to select the Auto Detect mode. Touch 2 Repeat, 4 Repeat, or 8 Repeat to select the desired Repeat mode. If you want the image upside down on the other side in 2 Repeat mode, touch R-Reverse or L- Reverse.
- Page 261 Repeat Automatically or Select Repeat Times (Repeat: Auto Detect/ Repeat Mode) • APS and AMS are automatically released, and 1.000 (100%) is selected as a magnification ratio. • When 2 Repeat, 4 Repeat, or 8 Repeat is selected, the scanning area will be a portion of the selected paper size equally divided according to the selected mode.
-
Page 262: Eliminating Black Copy Marks Along Borders (Frame/Fold Erase)
Eliminating Black Copy Marks Along Borders (Frame/Fold Erase) Use Frame/Fold Erase to eliminate black copy marks along borders to clean up and improve the presentation of the copy. Frame Frame erasure erasure Frame Fold Frame Set original erasure erasure erasure General copying Frame Erasure Fold Erasure... - Page 263 Eliminating Black Copy Marks Along Borders (Frame/Fold Erase) (continued) Touch to highlight the desired mode key. Touch All sides, Each side, or Fold Erasure to highlight it. Either Frame erasure mode and Fold erasure can be selected in combination. Specify the erasure amount in the selected mode. To specify Frame Erasure (All sides) amount: •...
- Page 264 Eliminating Black Copy Marks Along Borders (Frame/Fold Erase) (continued) To specify Frame Erasure (Each side) amount: • Touch to highlight Frame, if not highlighted, then touch Up Side, Right Side, Down Side, or Left Side. The selected side amount will be highlighted in the left illustration area of the screen.
- Page 265 Eliminating Black Copy Marks Along Borders (Frame/Fold Erase) (continued) When lowering the document feeder onto thick original (e.g. open book), do not press it down too hard. Keep the document feeder open, if required. Press [Start]. 11-45...
-
Page 266: Copying Image In The Center Of Copy Paper (Image Centering)
Copying Image in the Center of Copy Paper (Image Centering) Use this function to detect the image area of the original and center the whole image on the copy paper making it easy to copy small pieces of paper. Specifications for Image Centering ❒... - Page 267 Copying Image in the Center of Copy Paper (Image Centering) (continued) • APS and AMS are automatically released, and 1.000 (100%) is selected as a magnification ratio. • Copy mode is automatically set to 1-1. When selecting 1-2 mode, Memory Scan mode will function automatically.
-
Page 268: Printing Images Fully To The Edges (All-Image Area)
Printing Images Fully to the Edges (All-Image Area) Use this function to make copies printed completely to the edges. Original Normal copy All-Image Area copy Touch Application on the Copy Screen. When starting a new copying job, be sure to close the ADF securely, then press [Reset]. -
Page 269: Adjusting Position Of Copy Image (Image Shift)
Adjusting Position of Copy Image (Image Shift) Use Image Shift to adjust the position of copy images, e.g. for the purpose of creating a new binding margin on originals to make it easier for filing purposes. Page Space function is available only when Booklet or 2 Repeat mode of Repeat has been already selected. - Page 270 Adjusting Position of Copy Image (Image Shift) (continued) Touch Image Shift on the Application popup menu. Touch Image Shift on the Image Shift Screen, then specify the shift direction and amount. Touch Front or Back to specify the shift direction and amount individually; or touch Both Sides to specify collectively.
- Page 271 Adjusting Position of Copy Image (Image Shift) (continued) When Booklet or 2 Repeat mode of Repeat has been already selected, the Creep Adj. or Page Space key appears clear on the screen to show its availability. Touch Creep Adj. to make space between left and right pages of a booklet. Or, touch Page Space to highlight it, then enter the desired amount of the space between the two repeated images using the touch panel keypad or up/down arrow key.
- Page 272 Adjusting Position of Copy Image (Image Shift) (continued) Page space function is available only when Booklet or 2 Repeat mode of Image Repeat has been already selected. Use this function to increase/decrease the blank space between the two images on a page. See the illustration below for details. Page space (+) Booklet Page space (–)
- Page 273 Adjusting Position of Copy Image (Image Shift) (continued) Creep Adjustment function is available only when Booklet (except Adhesive Binding mode) has been already selected. Use this function in combination with Page space to make space between the two images two images widening gradually from the inner pages to the outer pages in a folded/ folded&stapled and trimmed booklet, so that the outer margin should be uniform on all pages through.
-
Page 274: Reducing Images To Create Binding Margin (Reduce&Shift)
Reducing Images to Create Binding Margin (Reduce&Shift) Use Reduce & Shift instead of regular Image Shift to prevent image loss when creating a binding margin. Specifications for Reduce & Shift ❒ AMS is automatically selected and cannot be released. ❒ Shift amount: 0 to 250 mm in 1 mm increments ❒... - Page 275 Reducing Images to Create Binding Margin (Reduce&Shift) (continued) Select the copy mode and paper size, as required. Touch Application on the Copy Screen. When starting a new copying job, be sure to close the ADF securely, then press [Reset]. Touch Image Shift on the Application popup menu. Touch Reduce &...
- Page 276 Reducing Images to Create Binding Margin (Reduce&Shift) (continued) Touch OK. The Application popup menu will be restored. Touch OK on the Application popup menu. The Copy Screen will be restored. 11-56...
-
Page 277: Printing Stamp, Page, Date/Time Onto Copies (Stamp)
Printing Stamp, Page, Date/Time onto Copies (Stamp) This function allows you to print onto output copies the desired type of stamp, page number, numbering, and date/time at the location designated on the screen. The four stamp types and watermark (described in the next subsection) provided on the Stamp/Overlay Selection Screen can be used individually or in multiple combinations. - Page 278 Printing Stamp, Page, Date/Time onto Copies (Stamp) (continued) Touch to select the desired key in the Stamp area. The subsequent screen will be displayed to allow you to specify the selected stamp type. When selecting Stamp: Specify the stamp type, printing position, character size and printed page.
- Page 279 Printing Stamp, Page, Date/Time onto Copies (Stamp) (continued) When selecting Set Numbering: Specify the numbering type, printing position, character size, printed page and start number. Touch to highlight the desired numbering type key and printing position key on the screen. If fine adjustment is required, touch Fine Adjustment to display the Fine Adjustment Setting Screen.
- Page 280 Printing Stamp, Page, Date/Time onto Copies (Stamp) (continued) NOTE: Selecting -1-, -2-, -3-, you can also specify the length of the dash (-) in the Utility mode. Touch Change Character to select the character size (8point, 10point, 12point or 14point) and type (Gothic or Ming). See p. 11-62 for details. Touch Printed Page to designate whether to print the selected stamp on the front/back cover or insertions.
- Page 281 Printing Stamp, Page, Date/Time onto Copies (Stamp) (continued) DETAILS: Fine Adjustment Setting Screen When Fine Adjustment is touched, the Fine Adjustment Setting Screen will be displayed. Touch UP SIDE, DOWN SIDE, RIGHT SIDE, or LEFT SIDE to specify the direction, then use the touch panel keypad or up/down arrow key to enter the desired amount, from 0 to 50 mm.
- Page 282 Printing Stamp, Page, Date/Time onto Copies (Stamp) (continued) Start Number Setting Screen: Available from Page Numbering Touch Start Number on the Page Numbering Screen to specify the starting number of page numbering and page to be started with that starting number. When Chapter function is already selected, the chapter starting number and the chapter to be printed with that chapter starting number can also be specified in addition to the above.
- Page 283 Printing Stamp, Page, Date/Time onto Copies (Stamp) (continued) Cover/Insert Print Setting Selection Screen: from Page Numbering When copied/blank insertion mode of Sheet Insertion has been already selected, this screen allows you to specify whether to print the page number on insertions, or skip them from the page count. Touch to select the desired key, then touch OK to return to the previous screen.
-
Page 284: Printing Watermark Onto Copies (Stamp)
Printing Watermark onto Copies (Stamp) Use this function to print the desired letter type obliquely in the center of the page (Watermark), or the numbers in the specified form repeatedly over the scanned image (Set Numbering). Set Numbering Watermark Touch Application on the Copy Screen. When starting a new copying job, be sure to close the ADF securely, then press [Reset]. - Page 285 Printing Watermark onto Copies (Stamp) (continued) Touch Watermark or Set Numbering in the Watermark area, as desired. The subsequent screen will be displayed to allow you to specify the selected watermark type. When selecting Watermark: Specify the desired watermark type and density.
- Page 286 Printing Watermark onto Copies (Stamp) (continued) When selecting Set Numbering: Specify the desired numbering type, density, character size and start number. Touch to highlight the desired watermark key and density key on the screen. Touch Character Size to select 20 point. or 30 point. Touch Start Number to designate the start number, if required.
-
Page 287: Print Words, Date/Time, Annotation Number Onto Copies (Annotation)
Print Words, Date/Time, Annotation Number onto Copies (Annotation) This function allows you to register words, current date/time, and annotation number as a set and to print it onto output copies at the location designated on the screen. The setting previously made for annotation number in the Utility setting can be changed temporarily on the annotation Screen. - Page 288 Print Words, Date/Time, Annotation Number onto Copies (Annotation) Touch Application on the Copy Screen. When starting a new copying job, be sure to close the ADF securely, then press [Reset]. Touch Stamp/Overlay on the Application popup menu. The Stamp/Overlay Screen will be displayed. Touch Annotation.
- Page 289 Print Words, Date/Time, Annotation Number onto Copies (Annotation) Select the desired Annotation type, then specify its printing position. Touch Next or Previous to display the desired Annotation setting key on the screen, then touch to highlight it. Up to 40 setting keys are available on the screen.
- Page 290 Print Words, Date/Time, Annotation Number onto Copies (Annotation) Touch OK to complete the setting and return to the Annotation Screen. • With this setting specified, the entered number or word will be printed on all pages the annotation number will not be counted in the former setting. •...
-
Page 291: Overlay An Image Onto Each Page Copied In The Job (Overlay)
Overlay an Image onto Each Page Copied in the Job (Overlay) Use this function to scan an image, then overlay the image onto each page copied in the job. Specification for Overlay ❒ Memory Scan mode is automatically selected. Copies in Overlay mode Originals scanned 1st scanned original 2nd and later... - Page 292 Overlay an Image onto Each Page Copied in the Job (Overlay) (continued) Touch Overlay. Touch OK on the Stamp/Overlay Screen. The Application popup menu will be restored. Touch OK on the Application popup menu. The Copy Screen will be restored. Memory Scan mode is automatically selected.
-
Page 293: Store Image In Hdd / Overlay Stored Image (Overlay Memory)
Store Image in HDD / Overlay Stored Image (Overlay Memory) Use Overlay Memory to scan and store several images in HDD, then recall the desired image from the HDD to overlay onto each page copied in the job. Image Store ABCD Store in HDD Overlaying image... - Page 294 Store Image in HDD / Overlay Stored Image (Overlay Memory) (continued) Touch Overlay Memory. The Store Image Screen will be displayed. Proceed to step 9, when recalling only the stored image. Touch Store Image to display the Image Name Entry Screen. Enter the desired image name.
- Page 295 Store Image in HDD / Overlay Stored Image (Overlay Memory) (continued) Position the overlaying original on the original glass. The document feeder cannot be used for storing the overlaying image. Press [Start] to scan. The Store Image Screen will be displayed. To stop scanning, press [STOP].
- Page 297 Section 12: Setting Output Methods How to set the output application using the optional equipment, and how to use the tandem function Copy Conditions Incompatible with Output Modes ..12-2 Selecting an Output Tray ..........12-6 Setting Binding Direction for Duplex Copies....12-10 Using Finisher FS-503..........
-
Page 298: Copy Conditions Incompatible With Output Modes
Copy Conditions Incompatible with Output Modes Copy Mode/Magnification Special Image Original Setting Copy Conditions Incompatible with Output Modes Collated (Offset) Uncollated Collated (Rotation) Uncollated (Rotation) 1 Stapling (Upper Left) 1 Stapling (Upper Right) 2 Stapling (Top) 2 Stapling (Left) 2 Stapling (Right) Z-Fold Folding (Inside Print) Folding (Outside Print) - Page 299 Copy Conditions Incompatible with Output Modes (continued) Application / File Edit Application / Image Edit u u u u u u u u u u u u u u u u - u u u u u u u u u u u u u u - u u u u u u u u...
- Page 300 Copy Conditions Incompatible with Output Modes (continued) Output Application Copy Conditions Incompatible with Output Modes - z z z z z z z z z z z z z z z z Collated (Offset) Uncollated Collated (Rotation) Uncollated (Rotation) z z z z z z z z z z z z z z c 1 Stapling (Upper Left) z z z...
- Page 301 Copy Conditions Incompatible with Output Modes (continued) Output Application None : Compatible : Grayed out (including automatic release) : Output message : Originally incompatible but selectable (Function last selected has priority.) : Released automatically Limited to Job Store function in Copy mode. z z z z z Overlay cannot be selected in Program Job.
-
Page 302: Selecting An Output Tray
Selecting an Output Tray This section describes how to select an output tray. Touch Output Application on the Copy Screen. The Output Application Screen appears. Trays that can output paper will be have keys on the front image of the machine, and the tray that is currently set to output paper is shown with a depressed key. - Page 303 Selecting an Output Tray (continued) Select the desired output tray. Touch the desired tray position key [=] to select it. Machine with Large Capacity Stacker LS-502 (1 unit), or with Large Capacity Stacker LS-501 + Finisher FS-503: In addition to the tray position key [=], the Pile Setting key is shown. If you touch Pile Setting, a popup screen will appear.
- Page 304 Selecting an Output Tray (continued) Machine with Large Capacity Stacker LS-501 + LS-502, or with Large Capacity Stacker LS-501 + LS-501 + Finisher FS-503: In addition to the tray position key [=] and the Pile Setting key, the Stacker Auto key is shown. If you touch Stacker Auto, in case the selected output tray and the large capacity stacker become full or if problems occur, paper will be automatically output to another large capacity stacker.
- Page 305 Selecting an Output Tray (continued) Withdraw the Saddle stitcher tray, if selected as an output tray. Open the tray stand when fully withdrawn. Never return the Saddle stitcher tray to its original position with the tray stand opened. Be careful not to exceed the finisher tray / stacker capacity when selecting the print quantity, otherwise unexpected trouble may be caused.
-
Page 306: Setting Binding Direction For Duplex Copies
Setting Binding Direction for Duplex Copies When setting duplex mode (simplex ! duplex / duplex ! duplex), a binding direction must be selected. It should be set when making duplex copies with upper binding (front and back sides have the opposite side up) from simplex or duplex originals of right/left binding (front and back sides have the same side up). - Page 307 Setting Binding Direction for Duplex Copies (continued) Touch Upper to select it. Touch OK. 12-11...
- Page 308 Using Finisher FS-503 The Finisher FS-503 has a primary (main) tray and a secondary (sub) tray, each of which has the following output modes. Output to the Primary (Main) Tray Non-sort : Non-sort mode simply means that the offset-stacker finisher modes are not selected.
-
Page 309: Using Finisher Fs-503
Using Finisher FS-503 (continued) Output to the Secondary (Sub) Tray Collated : Collated mode outputs multiple copies of the original set. No offset output is available. Uncollated : Uncollated mode groups together multiple copies of each original. No offset output is available. Combined with the output modes above, you can also choose to output face up or face down, and output front to back or back to front. -
Page 310: Non-Sort / Collated / Uncollated Output To The Primary (Main) Tray
Using Finisher FS-503 (continued) Non-sort / Collated / Uncollated Output to the Primary (Main) Tray A machine with Finisher FS-503 installed is set to collate output to the primary (main) tray by default, regardless of whether or not other optional devices are attached. - Page 311 Using Finisher FS-503 (continued) Select an output mode. For non-sort output, cancel both Collated and Uncollated. For collated output, touch Collated to select it. For uncollated output, touch Uncollated to select it. Select output face (Face Down / Face Up), and output order (1 to N / N to 1) as needed.
-
Page 312: Stapling Output To The Primary (Main) Tray
Using Finisher FS-503 (continued) Stapling Output to the Primary (Main) Tray Copies will be stapled in this mode. Follow the procedures below to select stapling position and number of staples: upper left/upper right 1 stapling, left/up/right 2 stapling. Specifications for Stapling Output to the Primary (Main) Tray ❒... - Page 313 Using Finisher FS-503 (continued) Touch Stapling and select stapling style and position. The Stapling Selection Screen appears. Touch any stapling position key to select it. If you touch Cancel, it returns to the previous setting. If you touch Function Off, stapling output will be turned off but the stapling position will be kept in memory.
-
Page 314: Collated / Uncollated Output To The Secondary (Sub) Tray
Using Finisher FS-503 (continued) Collated / Uncollated Output to the Secondary (Sub) Tray A machine with Finisher FS-503 installed is set to collate output to the primary (main) tray by default, regardless of whether or not other optional devices are attached. - Page 315 Using Finisher FS-503 (continued) Select an output mode. For collated output, touch Collated to select it. For uncollated output, touch Uncollated to select it. Select output face (Face Down / Face Up), and output order (1 to N / N to 1) as needed.
-
Page 316: Using Large Capacity Stacker Ls-501/Ls-502
Using Large Capacity Stacker LS-501/LS-502 The Large Capacity Stacker LS-501/LS-502 Large Capacity Stacker has a stacker (on the carriage) and a secondary (sub) tray, each of which has the following output modes. Output to the Stacker Non-sort : Non-sort mode simply means that the offset-stacker finisher modes are not selected. -
Page 317: Using Large Capacity Stacker Ls-501/Ls-502
Using Large Capacity Stacker LS-501/LS-502 (continued) Touch Output Application on the Copy Screen. The Output Application Screen appears. The output tray location is indicated by a depressed key on the front image of the machine. If the primary (main) tray is not selected as the output tray, touch Output Tray to select it. - Page 318 Using Large Capacity Stacker LS-501/LS-502 (continued) Touch OK on the Output Application Screen. The icon of the specified output application appears on the Copy Screen. Be careful not to exceed the finisher tray / stacker capacity when selecting the print quantity, otherwise unexpected trouble may be caused. 12-22...
-
Page 319: Punching File Holes In Copies
Using Folding Unit FD-501 There are three elements for output settings: • Intermediary processing • Output mode • Output tray position The Folding Unit FD-501 does the intermediary processing, while Finisher FS-503/ Saddle Stitcher SD-501/Perfect Binder PB-501 sets an output mode and changes output tray position. -
Page 320: Using Folding Unit Fd-501
Using Folding Unit FD-501 (continued) Touch Punch on the Copy Screen The Output Application Icon shows the number of punch holes and punch position. If you want to change number of punch holes and position, proceed to the following steps. Touch Output Application. - Page 321 Using Folding Unit FD-501 (continued) Touch Punch and select the number of punch holes and position. The Hole-Punch Screen appears. Touch any punch key to select it. Touch OK. It will return to the Output Application Screen. If you touch Cancel, it returns to the previous setting. If you touch Function Off, punch output will be turned off but the selected punch settings will be kept in memory.
-
Page 322: Folding Copies
Using Folding Unit FD-501 (continued) Folding Copies Copies will be folded in this mode. Follow the procedures below to select from six folding types. Specifications for Folding Copies ❒ Folding types: Z-Fold, Letter Fold-in, Letter Fold-out, Double Parallel, Gate, Folding ❒... - Page 323 Using Folding Unit FD-501 (continued) Touch Folding to select a folding type. The Folding Mode Screen appears. Touch any punch key to select it. Touch OK. It will return to the Output Application Screen. If you touch Cancel, it returns to the previous setting. If you touch Function Off, folding output will be turned off but the selected folding settings will be kept in memory.
-
Page 324: Making Folded Booklet
Using Saddle Stitcher SD-501 Making Folded Booklet Machine with the Saddle Stitcher SD-501 installed provides Fold & Staple mode in combination with Booklet feature to make two-sided signature booklet, folded and stapled at two positions (saddle stitched) in the center. Use Trimming mode to trim the edge that opens the booklet, if desired. -
Page 325: Using Saddle Stitcher Sd-501
Using Saddle Stitcher SD-501 (continued) Touch Fold&Staple, then select to use Trimming or not. The Fold&Staple Screen will be displayed. Touch Trimming or Non Trimming to select it. Touch OK. The Output Application Screen will be restored. If you touch Cancel, the previous setting will be restored. Touching Function Off will deselect the Fold&Staple (and Trimming) mode, however, the specified setting will be kept in memory. - Page 326 Using Saddle Stitcher SD-501 (continued) Withdraw the Saddle stitcher tray. Open the tray stand when fully withdrawn. The folded and stapled (and trimmed) sets will be delivered into the Saddle stitcher tray. If the tray is not fully withdrawn, the machine will detect that the tray is filled up, even with less number of finished sets than that specified in specifications.
-
Page 327: Folding Copied Set
Using Saddle Stitcher SD-501 (continued) Folding Copied Set Machine with the Saddle Stitcher SD-501 installed provides Multi Center mode to double-fold up to 5 sheets of copied set, or Multi Letter mode to fold it inside in three. Using Multi Letter, the print side can be specified on the screen. Specifications for Multi Center / Multi Letter Paper weight: Multi Center 13 - 42 lb Bond, Multi Letter 13 - 24 lb ❒... - Page 328 Using Saddle Stitcher SD-501 (continued) Touch Multi Center or Multi Letter to select it. If Multi Center is selected, the Multi Center Screen will be displayed to specify whether or not to trim the edge of the folded sheets. Touch Trimming or Non Trimming to select it. Touch OK.
- Page 329 Using Saddle Stitcher SD-501 (continued) If Multi Center is selected, withdraw the Saddle stitcher tray. Open the tray stand when fully withdrawn. • The double-folded sets will be delivered into the Saddle stitcher tray. If the tray is not fully withdrawn, the machine will detect that the tray is filled up, even with less number of finished sets than that specified in specifications.
-
Page 330: Using Post Inserter On Folding Unit Fd-501
Using Post Inserter on Folding Unit FD-501 This function uses the post inserter on Folding Unit FD-501 to attach a cover. • Using Sheet Insertion function, cover sheets loaded in the top/bottom tray of the post inserter can be attached as a front cover, back cover, or insertion sheet to output copies, in order to create a stapled book with a cover and chapter title pages. -
Page 331: Using Post Inserter On Folding Unit Fd-501
Using Post Inserter on Folding Unit FD-501 (continued) Place paper on the upper and lower trays of the post inserter. Upper tray Lower tray Do not load more than 500 sheets (20 lb) for each of the upper and lower trays. -
Page 332: Using Folder/Finisher Functions Manually
Using Folder/Finisher Functions Manually If the optional Folding Unit FD-501 / Finisher FS-503 / Saddle Stitcher SD-501 are installed, you can load paper in the lower tray of the post inserter and manually punch, fold, and/or staple copies. Specifications for Using Folder/Finisher Functions Manually ❒... - Page 333 Using Folder/Finisher Functions Manually (continued) Multi-Feed Detection 1 Stapling 2 Holes Punch Z-Fold Letter Fold-in Folding Function ON 2 Stapling 3 Holes Punch Letter Double Gate Multi-Feed Detection Fold-out Parallel Function OFF Fold & Staple Punch selection Start/Stop button Multi-Feed Detection button button Fold Selection button Staple Selection button Place paper in the upper tray of the post inserter.
- Page 334 Using Folder/Finisher Functions Manually (continued) Select a mode. Punch selection button Staple Selection button Fold Selection button When selecting 1 or 2 stapling / fold&staple, press the Staple selection button to turn on the desired mode lamp. When selecting 2- or 3-hole punching, press the Punch selection button to turn on the desired mode lamp.
- Page 335 Using Folder/Finisher Functions Manually (continued) If multi-feeding is detected and the machine stops even if single sheet is fed, press the Multi-Feed Detection button to turn on the lamp below. To interrupt the operation, press the Start/Stop button again. Lower tray Multi-Feed Detection button Using Fold&Staple mode, the finished sets will be delivered to the saddle stitcher tray of Saddle stitcher SD-501.
- Page 336 Using Perfect Binder PB-501 The machine with the optional Perfect Binder PB-501 installed automatically attaches a copied set with a cover sheet to make a perfect-bound book, applying a dab of glue in the center line of the cover sheet to fix the spine. In the Perfect Binding mode, both simplex and duplex copying are available for the body set, and also the cover sheet can be blank, simplex-printed or duplex-printed, and even trimmed to match with the thickness of the body set to cover.
-
Page 337: Using Perfect Binder Pb-501
Using Perfect Binder PB-501 (continued) Even number originals Body set: simplex, Cover print: Off Blank Blank Blank Blank Body set: duplex, Cover print: Off Blank Blank Blank Blank Body set: duplex, Cover print: On, Cover print side: simplex Blank Blank Body set: duplex, Cover print: On, Cover print side: duplex Body set Cover... - Page 338 Using Perfect Binder PB-501 (continued) Odd number originals Body set: simplex, Cover print: Off Blank Blank Blank Blank Body set: duplex, Cover print: Off Blank Blank Blank Blank Blank Body set: duplex, Cover print: On, Cover print side: simplex Blank Blank Blank Body set: duplex, Cover print: On, Cover print side: duplex...
- Page 339 Using Perfect Binder PB-501 (continued) Specifications for Using Perfect Binder PB-501 ❒ Warm-up/Low Power/Shut-Off The perfect binder requires longer warm-up time than that required for the main body, while the Low Power/Shut-Off mode activates at the same time on main body and perfect binder. We recommend you to specify the time to activate the Low Power/Shut-Off mode in view of the frequency to use the perfect binder.
- Page 340 Using Perfect Binder PB-501 (continued) : Specify the custom size of body set from the Paper Presetting Screen. For details, see p. 9-40. Specify the custom size of covers from the Perfect Binding Screen. For details, see p. 12-48. : For 8.5”×11” body set to be bound with a cover sheet fed from tray 1 to 5, the maximum thickness will be less than 30 mm.
- Page 341 Using Perfect Binder PB-501 (continued) Touch COPY tab to display the Copy Screen, select the tray loaded with paper for body sets, and change the paper setting as required. The paper size will be detected automatically. If paper weight specified for the tray loaded with paper for body sets is inadequate, the binding operation cannot be performed.
- Page 342 Using Perfect Binder PB-501 (continued) Touch Output Application, then touch Perfect Bind. The Perfect Binding Screen will be displayed. 12-46...
- Page 343 Using Perfect Binder PB-501 (continued) Select the tray loaded with covers, then specify the paper setting. (1) Touch Cover Tray to display the Cover Tray Screen. (2) Touch the tray loaded with covers in step 1 to highlight it. If any other tray than tray 1 to 5, the Cover Print setting in step 5 will be limited to Cover Print Off.
- Page 344 Using Perfect Binder PB-501 (continued) (3) Touch Change Paper Set to display the Tray Setting Screen. (4) Enter the cover paper dimensions. Touch Size Setting to display the Size Setting Screen. Use the screen keypad or arrow keys ▲ and ▼ to enter the dimensions of the covers loaded in step 1, then touch OK.
- Page 345 Using Perfect Binder PB-501 (continued) (5) Specify the paper type and weight. Touch Change to display the Change Setting Screen. Touch Type to select the desired paper type, then touch OK. Touch Weight to select the desired paper weight, then touch OK. If unsuitable selection is made, the binding operation will not be performed.
- Page 346 Using Perfect Binder PB-501 (continued) Select the desired one from 72-91g, 92-130g and131-161g. The binding operation may not be performed even if one of the paper weight mentioned above is specified. For details, see POD Administrator’s reference, page 5-26. To recall the paper setting previously registered, touch Type/Weight to display the Register Screen, select the desired key, then touch OK.
- Page 347 Using Perfect Binder PB-501 (continued) Specify the cover print setting. This setting is available when one of the tray 1 to 5 is specified as the cover tray source. Select On to print on covers, or Off to attach blank covers. Also select Simplex to print only on the front side, or Duplex to have both front and back sides printed.
- Page 348 Using Perfect Binder PB-501 (continued) Specify the cover trimming setting. Touch On to trim the cover, or No to deactivate this function. If the trimming width estimated by the machine does not fall within the range from 3 to 40 mm, a message will be displayed to inform you that the trimming mode is unavailable.
- Page 349 Using Perfect Binder PB-501 (continued) Touch Front or Back to select the printed side, then Up/Down or Right/ Left to select the direction to be adjusted. Use +5– to select positive/negative, then use the screen keypad, arrow keys ▲ and ▼, or the control panel keypad to enter the desired value. Touch OK to complete the setting.
- Page 350 Using Perfect Binder PB-501 (continued) Take out the perfect-bound books from the perfect binder tray. To take out the books stacked in the rear side of the perfect binder tray, press the feeding button to move them forward. Open the perfect binder tray cover. The perfect binder tray cover will not open while the machine operation is in process, and also the feeding button will not function.
- Page 351 Using Perfect Binder PB-501 (continued) Take out the books, then close the perfect binder tray cover. 12-55...
-
Page 352: Using Two Copiers In Tandem
Service setting is required to use the tandem mode. Contact your service representative, if desired. Specifications for Tandem Mode ❒ The combination of the two copiers can be either the two bizhub PRO 1050 copiers, two bizhub PRO 1050P printers, or bizhub PRO 1050 copier and bizhub PRO 1050P printer. - Page 353 Using Two Copiers in Tandem (continued) Touch Tandem to highlight it, then touch OK. The copier with Tandem highlighted will become the master machine; the other copier will function as the tandem machine. The Master icon displays on the Copy Screen of the master machine to indicate that the two units are ready to work in tandem mode.
- Page 354 Using Two Copiers in Tandem (continued) The tandem mode cannot be selected/continued in the cases shown below. The message “Please wait/ Reserve is not available in Tandem machine,” “Tandem machine error/ Please check tandem machine,” or “Please check tandem machine” will be displayed, as required. •...
- Page 355 Using Two Copiers in Tandem (continued) Press [Start] on the control panel of the master machine. The Tandem icon will display on the Copy Screen of the tandem machine to indicate that the two copiers will start working in tandem. The tandem mode will be released automatically when the tandem mode copying is completed, and the Master and Tandem icons on each Copy Screen will disappear.
-
Page 356: To Stop Scanning/Printing
Using Two Copiers in Tandem (continued) To Stop Scanning/Printing To cancel the tandem copying job: Press [Stop] on the control panel of the master machine. The scanning/printing job stops immediately, and the popup menu appears on the Copy Screen of the master machine to ask you whether to continue or terminate the job. -
Page 357: Troubleshooting
Using Two Copiers in Tandem (continued) Troubleshooting When a paper jam, SC-code (E-code, F-code) trouble or unloaded paper occurs on either the master or tandem machine: Remove the mishandled paper, take the appropriate troubleshooting measures to correct the problem, or add paper. When the trouble is cleared, the machine will restart printing for the remaining print quantity. - Page 359 Section 13: Advanced Information How to Use Advanced Functions Checking Feature Selections by Proof Copying ..... 13-2 Checking Feature Selections Before Copying (Check Mode) .. 13-4 Interrupt Copying ............13-7 Storing and Recalling Job Conditions (Mode Memory) ..13-9 Recalling Previous Job Settings ........13-14 Displaying Screen for Operation Guide (Help Mode) ...
-
Page 360: Checking Feature Selections By Proof Copying
Checking Feature Selections by Proof Copying Use Proof copy to produce a sample of the copied set before making multiple copies. This is a convenient and cost effective way of viewing the results of the copying selections. Specifications for Proof Copy ❒... - Page 361 Checking Feature Selections by Proof Copying (continued) Change the settings or print quantity, as required. The setting keys that cannot be changed or released will appear dimmed to show inactivity. If the desired setting cannot be changed, press [Stop] to delete all the data in memory.
-
Page 362: Checking Feature Selections Before Copying (Check Mode)
Checking Feature Selections Before Copying (Check Mode) Display the Check Screen to check the feature selections you made, and use Proof Copy to make a sample copy if needed, before making multiple copies. This is a convenient and cost effective way of viewing the results of the copying selections. Specifications for Check Mode ❒... - Page 363 If making a sample copy, proceed to the next step. To start printing, proceed to step 7. The image data can be corrected on a PC using PageScope Jobproofer. For details, refer to the CD enclosed with bizhub PRO 1050/1050e copier main body. 13-5...
- Page 364 Checking Feature Selections Before Copying (Check Mode) (continued) Make a sample copy. Position originals in the ADF. Or, use Memory Scan mode to scan all originals. Press [Proof Copy] on the control panel or touch Proof Copy on the Check Screen.
-
Page 365: Interrupt Copying
Interrupt Copying Use the Interrupt mode to interrupt copying in progress to perform a simple job. When interrupt copying is completed, the settings for the previous job restore automatically and the Copy Screen displays. Specification for Interrupt Mode ❒ The Interrupt mode cannot be selected with the following copier conditions: Machine is not operating printing or scanning job. - Page 366 Interrupt Copying (continued) When Interrupt copying is completed, press [Interrupt] again. The [Interrupt] LED turns out and the settings of the initial job will be restored. Press [Start] to resume copying. 13-8...
-
Page 367: Storing And Recalling Job Conditions (Mode Memory)
Storing and Recalling Job Conditions (Mode Memory) Use Mode Memory to store up to 30 frequently used copy job settings, which can be recalled at any time. The stored jobs can be given alphabetical names. Storing Job Conditions Follow the procedure below to store the copy job setting. Specifications for Storing Job Conditions ❒... - Page 368 Storing and Recalling Job Conditions (Mode Memory) (continued) Review the settings, then touch OK. The Mode Memory Screen will be restored. If any correction is required, touch Cancel to return to the Copy Screen. Make new selections, then restart the operation from step 2. Touch the desired job key, then touch OK.
- Page 369 Storing and Recalling Job Conditions (Mode Memory) (continued) Enter a job name, then touch OK. Enter a job name in up to 16 characters, using the touch panel alphabet keypad. Use arrow keys b and a to move the cursor, and use Shift to enter upper case letters or symbols.
-
Page 370: Recalling Stored Job Settings
Storing and Recalling Job Conditions (Mode Memory) (continued) Recalling Stored Job Settings Follow the procedure below to recall jobs that are already stored. Specifications for Recalling Job Conditions ❒ The Mode Memory Screen can be displayed only from the Copy Screen. If any other screen such as Machine Status Screen is displayed, pressing [Mode Memory] will be ignored. - Page 371 Storing and Recalling Job Conditions (Mode Memory) (continued) Touch Job Check. The Job Recall Check Screen displays to enable you to review the settings. Touch OK. The settings of the selected job will be recalled on the restored Copy Screen. Position original(s), then press [Start] to print.
-
Page 372: Recalling Previous Job Settings
Recalling Previous Job Settings Follow the procedure below to copy with a previous job settings. Specifications for Recalling Previous Job Settings ❒ Only the last-completed output job settings can be recalled as the previous job settings. Non-completed job or reserve job settings cannot be recalled, even if the setting operations have been made last. - Page 373 Recalling Previous Job Settings (continued) Touch OK. The settings of the previous output job will be recalled on the Copy Screen. Position original(s), then press [Start]. 13-15...
-
Page 374: Displaying Screen For Operation Guide (Help Mode)
Displaying Screen for Operation Guide (Help Mode) The Help Screen provides you with the information about copy job setting procedure, toner and paper supply, and control panel and touch panel key operation. Help Screen comprises the following menu items. 01 Copy provides information on function and operation of the keys on Copy Screen. 02 Scanner provides information on function and operation of the keys on Scanner Screen. - Page 375 Displaying Screen for Operation Guide (Help Mode) (continued) Pressing [Help] when Copy Screen is displayed: Top Page of the Help Screen: This screen appears when Top Menu on the subordinate Help Screen is touched. 13-17...
-
Page 376: Adjusting Response Time Of Touch Keys (Accessibility)
Adjusting Response Time of Touch Keys (Accessibility) This machine can sets the desired interval between touching the screen key and machine response in advance. Pressing the Accessibility key on the control panel will select this interval, so that the machine will respond to the touch key operation only when the key is kept touched for a specified period of time. -
Page 377: Controlling/Monitoring Copier From Browser
Controlling/Monitoring Copier from Browser When the machine is connected with a PC over a network, the web browser activated on the PC enables you to operate the machine. Also, the state of the machine can be monitored through web browser. This function promotes efficiency in operation using PC keyboard and mouse. -
Page 378: Controlling Copier From Browser: Remote Panel
Controlling/Monitoring Copier from Browser (continued) • The setting procedure for the IP address is provided in POD Administrator’s reference. For details, see page 6-120. • To specify the IP address of the PC to be used for Remote Panel function, see page 8-18 of POD Administrator’s reference. - Page 379 Controlling/Monitoring Copier from Browser (continued) Using a mouse and keyboard, perform job operation. Operations performed using remote panel can be recorded and replayed. Click [Operation Log On], then start the operation. To save the operation, click a number key under “Save to MFP.” To recall the operation, click the desired number key under “Load from MFP.”...
-
Page 380: Monitoring Copier From Browser: Remote Monitor
Controlling/Monitoring Copier from Browser (continued) Monitoring Copier from Browser: Remote Monitor Start the web browser, then enter the IP address of the main body in the address bar. The Web Utilities screen will be displayed. Click [Remote Monitor] on the Web Utilities screen. The state of the machine, touch panel screen, and job condition will be displayed. -
Page 381: Monitoring Copier From Browser: Multi Monitor
Controlling/Monitoring Copier from Browser (continued) Monitoring Copier from Browser: Multi Monitor Start the web browser, then enter the IP address of the main body in the address bar. The Web Utilities screen will be displayed. Click [Multi Monitor] on the Web Utilities screen. The state, touch panel screen, and job condition of up to 10 machines are displayed in tile view. - Page 382 Controlling/Monitoring Copier from Browser (continued) • The background color of the Remote Monitor varies according to the state of the machine. Green: IDLING, WARMUP, ADJUSTMENT Blue: OPERATING Yellow: JAM Red: SC • When the Operation panel lock function is activated, the Remote Monitor displays the lock screen of the touch panel.
- Page 383 Index...
- Page 385 Index Symbols Background Whiteness 9-19 Before successive holidays 1-7 [C] (Clear quantity) key 2-4 Binding Direction for Duplex Copies 12- Numerics Binding Direction of Originals 9-9 Binding margin 11-54 1.000 Magnification mode 9-24 Book Copy 11-27 1-2 9-27 Booklet 11-19 2 in 1 11-16 Bookmark key 11-6 2 Repeat 11-39...
- Page 386 IP address 13-19 Exposure (density) 9-19 External Machine Items 2-2 Jam Position Screen 5-6 Job list 8-3 Features of the bizhub PRO 1050/1050e Job List Screen 10-2 JOB LIST tab 8-3, 10-2 Finisher FS-503 2-14 Fixing unit 2-3 Fold & Staple mode 12-28...
- Page 387 Index (continued) MACHINE tab 8-3 Output to the Stacker 12-20 Main Body Specifications 7-2 Output Tray key 12-6 Main power switch 2-3 Overlay 11-71 Maintenance & supply indicator 8-3 Overlay Memory 11-73 Making Double-Sided Copies Using ADF Ozone Release 1-10 9-27 Making Double-Sided Copies Using Original Glass 9-29...
- Page 388 Index (continued) Stapling Output to the Primary (Main) Tray 12-16 Recalling Previous Job Settings 13-14 Start key 2-4 Recalling Stored Job Settings 13-12 Start LED 2-4 Reduce&Shift 11-54 Start/Stop button 12-38 Regulation Notices 1-9 Stop key 2-4 Remote Monitor 13-22 Stop Scanning/Printing 8-18 Remote Panel 13-20 Store Image in HDD (Overlay Memory)
- Page 389 Index (continued) Uncollated mode 12-12, 12-13, 12-20 Unsuitable ADF Originals 3-8 User Authentication 2-25 Using Folder/Finisher Functions Manual- ly 12-36 Using Power Save Manually 2-22 Utility Menu Screen 6-5 Utility/Counter key 2-4 Ventilation 1-5 Wake-up Screen 2-19 WARNING 1-2 Warning and Precaution Symbols 1-2 Watermark 11-64 Web browser 13-19 Weekly Timer 2-23...
Need help?
Do you have a question about the bizhub pro 1050 and is the answer not in the manual?
Questions and answers