Table of Contents
Advertisement
Quick Links
Download this manual
See also:
User Manual
Advertisement
Table of Contents
Troubleshooting

Related Manuals for Xerox 665


Summary of Contents for Xerox 665
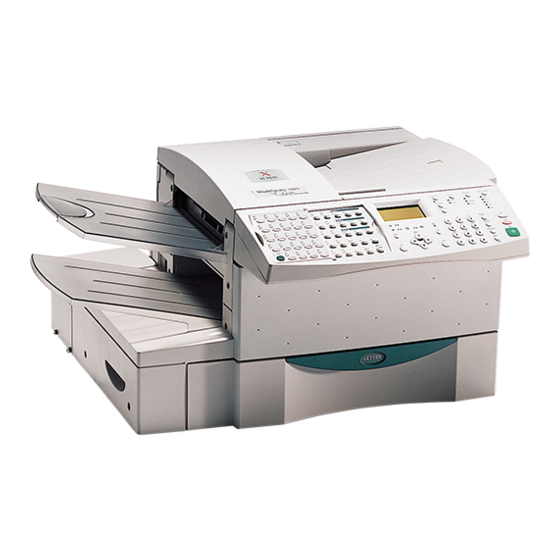
- Page 1 XEROX WorkCentre Pro 665, 685, 765, 785 System Administrator’s Guide...
- Page 2 AL7 1HL United Kingdom ©1999 by Xerox Corporation. All rights reserved. Xerox®, Xerox Limited® and all the products mentioned in this publication are trademarks of Xerox Corporation and Xerox Limited. Products and trademarks of other companies are also acknowledged. Copyright protection claimed includes all forms and matters of...
-
Page 3: Table Of Contents
Character Code Table ...2-8 Entering Characters...2-9 Correcting Characters ...2-9 Deleting or Inserting Characters...2-10 Direct Access Function Keys...2-11 Setting Up the Phonebook...2-13 Planning the Phonebook ...2-13 Pre-setting Speed Dial Numbers ...2-14 Modifying or Deleting Speed Dial Numbers...2-21 Pre-setting One Touch Numbers...2-22 WorkCentre Pro 665/685/765/785... - Page 4 Monitor Volume Setting ... 2-55 Send After Scan Default Setting...2-56 Remote Service Setting... 2-57 Remote Access ... 2-57 Download ... 2-58 RDC Password... 2-59 Supplies Order ... 2-60 Separator Page Default Setting... 2-61 Line Monitor Default Setting ... 2-63 WorkCentre Pro 665/685/765/785...
- Page 5 Alpha Dialing ...4-4 Speed Dialing ...4-6 One Touch Dialing...4-7 Keypad Dialing ...4-8 Automatic Redialing* ...4-9 Manual Redial Last Number (Off-hook)...4-9 Manual Redial Last 5 Numbers (On-hook)*...4-10 Chain Dialing ...4-11 Charge Card Transmissions...4-12 * Not available in all markets. WorkCentre Pro 665/685/765/785...
- Page 6 Secure Send Transmission ... 5-24 Send After Scan Enable ... 5-25 Advanced Transmissions ... 5-27 Using an Account Code... 5-27 Account Code Default Setting ... 5-28 Transmitting Using a Department Code ... 5-29 Resend Stored Fax Default Setting... 5-30 WorkCentre Pro 665/685/765/785...
- Page 7 Polling a Remote Document (Poll-once or Multi-poll Box)...7-8 Group Polling...7-9 Continuous Polling* ...7-11 Deleting Continuous Poll Jobs ...7-13 Chapter 8 Mailbox Communications ...8-1 Mailbox ITU-T Communications ...8-1 Local Mailbox (ITU-T) ...8-2 * Not available in all markets. WorkCentre Pro 665/685/765/785...
- Page 8 Relay Originator Report ... 9-12 Relay Station Report ... 9-14 Relay Destination Report ... 9-16 Confirmation Report Override ... 9-18 Reception Report Setup ... 9-19 Printing Reports and Lists ... 9-21 Activity Report ... 9-21 ITU-T Mailbox Report ... 9-22 WorkCentre Pro 665/685/765/785...
- Page 9 Setting the Fax Send Options...15-6 Setting the Cover Sheet and Send Header Options...15-6 Choosing How to Send Faxes ...15-6 Sending Faxes Using Security ...15-7 Setting the Redial Options...15-7 Faxing Long Originals...15-8 * Not available in all markets. WorkCentre Pro 665/685/765/785...
- Page 10 Opening a Phonebook File... 15-19 Creating Mailboxes...15-20 Creating a Mailbox ... 15-20 Editing a Mailbox ... 15-21 Deleting a Mailbox... 15-22 Using Department Codes ... 15-22 Setting up Department Codes ... 15-22 Changing a Department Code... 15-23 viii WorkCentre Pro 665/685/765/785...
- Page 11 Saving the WorkCentre Settings ...15-26 Saving WorkCentre Settings to a File...15-26 Opening a Saved WorkCentre Settings File...15-26 Creating a New WorkCentre Settings File...15-26 Enabling Xerox personnel to perform remote tests ...15-27 Setting up automatic supply ordering ...15-27 Firmware Download...15-28 Chapter 16 Troubleshooting...16-1 Self Test ...16-1...
- Page 12 Appendix D Safety Certification and Environmental Compliance ... D-1 Laser Safety Information ... D-3 Third Party Certification... D-4 Radio Frequency Emissions USA ... D-4 Unique European Certification ... D-5 Approvals and Certification ... D-5 UK Electricity at Work Regulation ... D-6 WorkCentre Pro 665/685/765/785...
- Page 13 SWISS ENERGY 2000... D-9 Telecommunications Requirements ... D-10 European Fax Approvals and Certification ... D-10 FCC Regulations ... D-11 Send Header Requirements ... D-11 Data Coupler Information ... D-11 Canadian Certification ... D-13 * Not available in all markets. WorkCentre Pro 665/685/765/785...
- Page 14 WorkCentre Pro 665/685/765/785...
-
Page 15: Chapter 1 Introduction
Introduction Thank you for purchasing the Xerox WorkCentre Pro. The WorkCentre is designed for ease of use, but to use your machine to its fullest potential, take some time to read the Documentation. You will be ready to send and receive faxes and make copies with your machine as soon as you have read the User Guide. - Page 16 Describes the Polling functions and instructs how to perform each function. Mailbox Communications - Chapter 8 Describes both the Xerox Mailbox system and the standard ITU-T Mailbox system and instructs how to use the mailbox functions for each system. Reports - Chapter 9 Describes the reports and lists and instructs how to setup or print each report.
-
Page 17: Information Provided By The User's Guide
Getting Started - Chapter 4 Includes the procedures for setting up the basic machine information such as date, time, language, machine ID, send header and receive footer. Simple instructions to send, receive, print, and copy are also provided. WorkCentre Pro 665/685/765/785 Introduction... - Page 18 Basic Troubleshooting - Chapter 5 Guides the user through problem solving, and recommended corrective actions. Environment Specifications - A Provides the safety, data coupler, and Canadian certification information. Index Refer to the Index to locate specific information. WorkCentre Pro 665/685/765/785...
-
Page 19: Document Conventions
To print the header in the document area, press To print the header above the document area, press To not print a header, press 3. The menu selection screen redisplays. Press Stop to return to the Standby Mode. WorkCentre Pro 665/685/765/785 Menu Send header 1. Inside 2. Outside 3. -
Page 20: Notes, Cautions, And Warnings
The following are examples of a caution and a warning: CAUTION Do not touch the green drum surface. Touching the drum could reduce the print quality. WARNING Do not touch the heater unit inside the machine. The heater unit is hot while the machine is operating. WorkCentre Pro 665/685/765/785... -
Page 21: Chapter 2 Programming The Machine
Since 4 lines are displayed at a time, additional features are displayed one line at a time as you scroll down the list. Additional features WorkCentre Pro 665/685/765/785 Programming the Machine Confidential 1. Print mailbox 2. -
Page 22: Keys Used In Menu Mode Operation
Enter key to display the screen of sub-items. Press the Exit key to exit the menu mode. Exit The Numeric Keypad is used to enter numeric information. Keyboard The Keyboard is used to enter alpha and special characters information. WorkCentre Pro 665/685/765/785... - Page 23 For example: The Machine ID feature is accessed by first selecting Initial Setup (5), then Machine ID (3). Therefore, to access this menu item, press: Menu Note: Double digit menu numbers (01. Speaker volume) WorkCentre Pro 665/685/765/785 1. Fax features Menu 2. Print reports 3. Phonebook setup 4.
-
Page 24: Menu Flow Map
Programming the Machine Menu Flow Map WorkCentre Pro 665/685/765/785... - Page 25 Programming the Machine WorkCentre Pro 665/685/765/785...
- Page 26 Programming the Machine WorkCentre Pro 665/685/765/785...
-
Page 27: Character Entries
Keys used to Enter Characters Insert Delete Numeric KeyPad Keyboard WorkCentre Pro 665/685/765/785 Programming the Machine Function Moves the cursor to the left to delete, change or add characters. Moves the cursor to the right to delete, change or add characters or spaces. -
Page 28: Character Code Table
Pressing the alpha key displays the special characters you can enter. Select your desired character by using press Enter . Uppercase special characters can be selected by pressing the alpha key while holding down Shift key after Int’l or key on arrow keys, and key is pressed. WorkCentre Pro 665/685/765/785... -
Page 29: Entering Characters
Input correct characters over the existing characters. Enter name X ER IX Enter name X ER O X WorkCentre Pro 665/685/765/785 reposition the cursor prior to entering or deleting a new character. Programming the Machine 1. Using the arrow keys, position the cursor at the character to be corrected. -
Page 30: Deleting Or Inserting Characters
1. Using the arrow keys, position the cursor at the character to be deleted or at the point of insertion. Insert Press: The message “Insert” is displayed. 3.To insert, enter the correct character(s). Delete To delete, press WorkCentre Pro 665/685/765/785... -
Page 31: Direct Access Function Keys
Panel, are programmed to perform some of the most frequently used features automatically. Several of these keys use multi-layered menus similar to the Menu Mode. The following maps illustrates the Direct Access Function Keys displaying the available programmable features. WorkCentre Pro 665/685/765/785 Programming the Machine 2-11... - Page 32 Programming the Machine 2-12 WorkCentre Pro 665/685/765/785...
-
Page 33: Setting Up The Phonebook
Pause key. • Determine if you want to store a Charge Code. To enter and hide a charge code, press the Charge Code key after you have entered the telephone number. WorkCentre Pro 665/685/765/785 Programming the Machine 2-13... -
Page 34: Pre-Setting Speed Dial Numbers
An alternate telephone number may be stored with the speed dial number. If the number dialed is busy, the alternate number is dialed after the redial attempts. The alternate number dialing function is not performed in Relay transmissions, polling receptions, or mailbox transmissions. 2-14 WorkCentre Pro 665/685/765/785... - Page 35 3. Press Enter . Note: If you select an assigned Speed Dial number, you have the *** Menu item numbers may vary according to configurations. WorkCentre Pro 665/685/765/785 Programming the Machine To print a list of all assigned Speed Dial numbers, press: (See the User’s Guide.)
- Page 36 To enter a pause, press the Pause key. To enter a charge code, press the Charge Code key after entering the telephone number. Speed dial: Fax number (128 max): Speed dial: Alternate fax nbr: WorkCentre Pro 665/685/765/785...
- Page 37 To select Confirm report , press To select Listen to dial , press To select Fax speed , press To select Sub address , press To select Line selection , press WorkCentre Pro 665/685/765/785 Programming the Machine Fax options? 1. Yes 2. No...
- Page 38 15. To select 14400bps, press To select 9600bps, press To select 4800bps, press To skip this option, press 16. To add an additional option, go to step 8. To exit, press go to step 25 to complete the procedure. 2-18 WorkCentre Pro 665/685/765/785...
- Page 39 Enter. 21. To exit the sub address option, press 22. To add an additional option, go to step 8. To exit, press go to step 25 to complete the procedure. WorkCentre Pro 665/685/765/785 Programming the Machine Subaddress SUB (20 max): address is secure.
- Page 40 Exit or Stop to return to the Standby Mode. ** Not available on some models. 2-20 Speed dial: Press one touch key to enter or ENTER to skip option of deleting or retaining the information previously stored. WorkCentre Pro 665/685/765/785...
-
Page 41: Modifying Or Deleting Speed Dial Numbers
Standby Mode. Note: When modifying a Speed Dial number that is tied to a One *** Menu item numbers may vary according to configurations. WorkCentre Pro 665/685/765/785 Menu To modify the number information, press To retain the number information, press Touch key, you do not have to re-apply the number to the One Touch. -
Page 42: Pre-Setting One Touch Numbers
(See Chapter 9, “Reports”.) option of deleting, modifying or retaining the information stored with the number. Refer to “Modifying or Deleting One Touch Numbers” later in this section. Press one touch key [<] back to previous STOP to complete WorkCentre Pro 665/685/765/785... - Page 43 Enter . After 2 seconds Hint: 4. Using the Numeric Keypad, enter the remote fax telephone number (max. 128 digits), then press Enter . WorkCentre Pro 665/685/765/785 Programming the Machine One Touch key: Name (20 max): Enter name...
- Page 44 , and go to step 22. , and go to step 8. , then go to step 10. , then go to step 12. , then go to step 14. , then go to step 16. , then go to step 2. WorkCentre Pro 665/685/765/785...
- Page 45 12. To enable the Listen to Dial option, press To disable this option, press 13. To add an additional option, go to step 7. To exit, press go to step 22. WorkCentre Pro 665/685/765/785 Programming the Machine Send later Time HH:MM...
- Page 46 18. Enter the numeric remote sub address, then press Enter . Note: Secure address locations require a password if the 2-26 . Go to step 21. Subaddress SUB (20 max): address is secure. Go to Step 18. If not go to Step 20. WorkCentre Pro 665/685/765/785...
- Page 47 26. When you have completed the One Touch Key assignments, press Exit or Stop to return to the Standby Mode. ** Not available on some models. WorkCentre Pro 665/685/765/785 Programming the Machine to select PWD; or to exit this option, go to step 20.
-
Page 48: Modifying Or Deleting One Touch Dial Numbers
4. The Enter One Touch screen redisplays. Press Exit or Stop to return to the Standby Mode. 2-28 Press one touch key [<] back to previous STOP to complete One touch key 1. Delete 2. Modify 3. Retain WorkCentre Pro 665/685/765/785... -
Page 49: Pre-Setting Group Numbers
One Touch Key Assigning To preset numbers to a group: 1. Press: *** Menu item numbers may vary according to configurations. WorkCentre Pro 665/685/765/785 To print the Group Phonebook, press: Phonebook (See Chapter 9, “Reports”.) Comments Any 50 numbers between 1 and 1999 (50 groups maximum). - Page 50 Group number: Group name (20 max): Enter name Group name (20 max): Group number: Enter speed dial or OT ENTER to complete Group number: Press one touch key to enter or ENTER to skip WorkCentre Pro 665/685/765/785 0025 0025 0025...
-
Page 51: Programming Group Send
3. Press Phonebook . Phonebook 4. Press Note: If the group is assigned to a One Touch Key, press that WorkCentre Pro 665/685/765/785 Programming the Machine Group Transmissions are easier if a group is linked to a One Touch Key. -
Page 52: Deleting Or Modifying A Group Number
*** Menu item numbers may vary according to configurations. 2-32 Group nbr (1-1999): Enter group number Menu [<] back to previous ENTER to complete Enter group number: 1. Delete 2. Modify 3. Retain WorkCentre Pro 665/685/765/785 . (Refer to “Presetting Group... -
Page 53: Filling Out The One Touch Label
Programming the Machine Filling out the One Touch Label As you assign phone numbers to the One Touch keys, use a pencil to fill in the location name on the One Touch Label. One Touch Label WorkCentre Pro 665/685/765/785 2-33... -
Page 54: Setting The Department Codes
To setup Department Codes 1. Press: ***Menu item numbers may vary according to configurations. 2-34 Menu Set dept. code 1. Yes 2. No CAUTION If a master code has been assigned, selecting 2 disables the programmed Master Code. WorkCentre Pro 665/685/765/785... - Page 55 Note: If the Master Number is assigned, go to step 6 to set Note: Department code 01 is reserved for the Master Code. After 2 seconds WorkCentre Pro 665/685/765/785 Programming the Machine To recover the Department Code already being set, press 1.
- Page 56 6. Enter a number between 2 and 99 to assign to this Department, then press Enter. 2-36 Enter master code Dept. number: SERVICE Enter master code Dept. number: Master code: Department Code feature to perform any modifications. Please remember your Master Code. Set dept. code Dept. number (1-99): WorkCentre Pro 665/685/765/785...
- Page 57 Note: The 5-digit Department Code is required to access and 9. The Department Code entry is completed. To set additional Department codes, repeat steps 6 through 8. To exit this feature, press Exit or Stop . WorkCentre Pro 665/685/765/785 Programming the Machine Set dept. code Dept. number: Dept.
-
Page 58: Changing The Department Code Settings
*** Menu item numbers may vary according to configurations. 2-38 Menu Set dept. code 1. Yes 2. No CAUTION To disable the Department Control feature, press , then press Exit or Stop to return to the Standby Mode. WorkCentre Pro 665/685/765/785 , then go to step 4. - Page 59 To exit without changing this Dept. code, press 7. Modify the information as desired. If needed, refer to “Setting the Department Codes” procedure. Press Exit or Stop to exit. WorkCentre Pro 665/685/765/785 Programming the Machine . Setting the Set dept. code 1.
-
Page 60: Setting The Machine Default Settings
To disable ECM, press 3. The menu selection screen redisplays. Press Exit or Stop to return to the Standby Mode. *** Menu item numbers may vary according to configurations. 2-40 your machine. Menu Error correct-ECM 1. On 2. Off WorkCentre Pro 665/685/765/785... -
Page 61: Long Original Setting
3. The menu selection screen redisplays. Press Exit or Stop to return to the Standby Mode. *** Menu item numbers may vary according to configurations. WorkCentre Pro 665/685/765/785 Allows document sizes up to 1 Meter in length (39.4 inches). If a document longer than 1M is scanned, a “Paper Jam”... -
Page 62: Bypass Tray Paper Size Setting
If this happens, please try an envelope where all the edges of the envelope, other than the opening, are fully glued, leaving no unglued edges. Slider Paper Guide Exit Tray 08-05 WorkCentre Pro 665/685/765/785... -
Page 63: Redial Count And Interval Setting
2. Select the Redial Mode you want to change: To select Interval, press To select Number of redials, press * Not allowed in all markets. *** Menu item numbers may vary according to configurations. WorkCentre Pro 665/685/765/785 Menu 01. Interval 02. Number of redials Programming the Machine , then go to step 3. - Page 64 6. The menu selection screen redisplays. Press Exit or Stop to return to the Standby Mode, or enter 06 to go to redials screen again. 2-44 Redials Interval (01-15) min. , use the Numeric Keypad to enter the Redials Redials: WorkCentre Pro 665/685/765/785 (00-14):...
-
Page 65: Receive Interval
5th document. Then, press Enter . 3. The menu selection screen redisplays. Press Exit or Stop to return to the Standby Mode. WorkCentre Pro 665/685/765/785 Menu Receive interval Interval Programming the Machine... -
Page 66: Resolution And Contrast Setting
Selected when the Contrast LED is off. Use for documents with dark print that need to be adjusted to print lighter. Use for documents with light or faint print that need to be adjusted to print darker. WorkCentre Pro 665/685/765/785... - Page 67 To select Darken, press To select Lighten, press 4. The menu selection screen redisplays. Press Exit or Stop to return to the Standby Mode. *** Menu item numbers may vary according to configurations. WorkCentre Pro 665/685/765/785 Menu Resolution 1. Standard 2. Fine 3.
-
Page 68: Power Saver Setting
Printer Power Saver mode button on the control panel. Menu Super power save 1. Automatic 2. Manual 3. Off . Then, go to Step 4. WorkCentre Pro 665/685/765/785 . Then, go to Step 3. . Then, go to Step 4. - Page 69 5. The menu selection screen redisplays. Press Exit or Stop to return to the Standby Mode. *** Menu item numbers may vary according to configurations. WorkCentre Pro 665/685/765/785 To enable the Printer Power Save mode, press To disable the Printer Power Save mode, press...
-
Page 70: Print Density
3. The menu selection screen redisplays. Press Exit or Stop to return to the Standby Mode. 2-50 Menu Set print density Density (-2 to +2): Lighter -2 -1 0 keys, select the print density, then press Enter . WorkCentre Pro 665/685/765/785 Darker +1 +2... -
Page 71: Refuse Junk Mail Setting
To disable the Refuse Junk Mail feature, press 3. The menu selection screen redisplays. Press Exit or Stop to return to the Standby Mode. *** Menu item numbers may vary according to configurations. WorkCentre Pro 665/685/765/785 Menu Refuse junk mail 1. On 2. -
Page 72: Ringer Volume Setting
3. The menu selection screen redisplays. Press Exit or Stop to return to the Standby Mode. *** Menu item numbers may vary according to configurations. 2-52 Menu Ringer volume Volume (0-7): 0 1 2 3 4 5 6 7 display. WorkCentre Pro 665/685/765/785... -
Page 73: Alarm Volume Setting
0-7, then press Enter . 3. The menu selection screen redisplays. Press Exit or Stop to return to the Standby Mode. *** Menu item numbers may vary according to configurations. WorkCentre Pro 665/685/765/785 Menu Alarm volume Volume (0-7): 0 1 2 3 4 5 6 7 display. -
Page 74: Key Touch Volume Setting
3. The menu selection screen redisplays. Press Exit or Stop to return to the Standby Mode. *** Menu item numbers may vary according to configurations. 2-54 Menu Key touch volume Volume (0-7): 0 1 2 3 4 5 6 7 display. WorkCentre Pro 665/685/765/785... -
Page 75: Monitor Volume Setting
0-7, then press Enter . 3. The menu selection screen redisplays. Press Exit or Stop to return to the Standby Mode. *** Menu item numbers may vary according to configurations. WorkCentre Pro 665/685/765/785 Menu Monitor volume Volume (0-7): 0 1 2 3 4 5 6 7 display. -
Page 76: Send After Scan Default Setting
*** Menu item numbers may vary according to configurations. 2-56 Menu Type of send 1. Dial while scan 2. Dial after scan When memory full 1. Delete scan pages 2. Send scan pages WorkCentre Pro 665/685/765/785 , then go to step 4. , then go to step 3. -
Page 77: Remote Service Setting
Remote Service Setting Remote Access This feature allows a remote Xerox test facility or service center to perform diagnostic tests on your machine. There are three Remote Access selections: Always On, One Time Access, and Always Off. To select On, press To select Off, press 2. -
Page 78: Download
2. The menu selection screen redisplays. Press Exit or Stop to return to the Standby Mode. *** Menu item numbers may vary according to configurations. 2-58 Press: Menu Download firmware 1. No job in memory 2. Anytime WorkCentre Pro 665/685/765/785... -
Page 79: Rdc Password
Allows you to password protect the machine from any unauthorized person dialing into the machine. This should be used as security to allow only Xerox authorized service persons to use RDC (remote diagnostics centre) to dial into the machine to retrieve information. -
Page 80: Supplies Order
To select Off, press 2. The menu selection screen redisplays. Press Exit or Stop to return to the Standby Mode. *** Menu item numbers may vary according to configurations. 2-60 Press: Menu Auto supply ordering 1. On 2. Off WorkCentre Pro 665/685/765/785... -
Page 81: Separator Page Default Setting
2. Select the Fax Separator Page option: To enable the Fax Separator Page feature, press To disable the Fax Separator Page feature, press WorkCentre Pro 665/685/765/785 Sending machines telephone number, fax received time and the number of pages. Copy start time and the number of pages copied. - Page 82 To disable the PC Print Separator Page feature, press 5. The menu selection screen redisplays. Press Exit or Stop to return to the Standby Mode. *** Menu item numbers may vary according to configurations. 2-62 PC separator page 1. On 2. Off WorkCentre Pro 665/685/765/785...
-
Page 83: Line Monitor Default Setting
To disable the Line Monitor feature, press 3. The menu selection screen redisplays. Press Exit or Stop to return to the Standby Mode. *** Menu item numbers may vary according to configurations. WorkCentre Pro 665/685/765/785 Menu Line monitor 1. Always 2. - Page 84 Programming the Machine 2-64 WorkCentre Pro 665/685/765/785...
-
Page 85: Chapter 3 Receiving Documents
Secure User selectable option. Use for Receive Secure Receptions. WorkCentre Pro 665/685/765/785 Receiving Documents Sequence of Operation Upon receiving a call, the machine answers and receives a document automatically. Upon receiving an incoming call, pick... -
Page 86: Basic Receive
To select Auto answer, press To select Manual answer mode, press Stop to return to the Standby Mode. Answer mode 1. Auto answer 2. Manual answer , then go to Step 3. , then press Exit or WorkCentre Pro 665/685/765/785... -
Page 87: Setting The Answer Mode (Line 2)
(refer to Chapter 2, “Setting up the Phone book”). * This number varies in some Countries. WorkCentre Pro 665/685/765/785 Rings to answer number of rings occurs, the machine answers with a fax signal tone and enters the Auto Receive mode. -
Page 88: Receiving Documents
4. The menu selection screen redisplays. Press Exit or Stop to return to the Standby Mode. Answer mode (Line 2) 1. Send & receive 2. Receive only 3. Set receive time Receive only Start/Stop time: 00:00 - 00:00 WorkCentre Pro 665/685/765/785 . Then press Stop to... -
Page 89: Auto Receive
2. When you finish talking and are ready to receive the document, and the remote party is ready to send, press the Start key. 3. Hang up the handset. The document is received. WorkCentre Pro 665/685/765/785 Polling function is in use (see “Chapter 7, “Polling” and Chapter 8, “Mailbox Communications”). -
Page 90: Advanced Receive
When enabled, documents are received to memory during specified times. When enabled, discards up to 10mm of the lower portion of a long document. Menu Collate fax 1. On 2. Off Description WorkCentre Pro 665/685/765/785... -
Page 91: Reduce Incoming Fax Setting
To automatically reduce oversized documents, press To automatically divide oversized documents into multiple pages, press 3. The menu selection screen redisplays. Press Exit or Stop to return to the Standby Mode. WorkCentre Pro 665/685/765/785 Menu Reduce incoming fax 1. On 2. Off... -
Page 92: Receive To Memory
100 jobs have been received. If the Free Memory becomes zero during Receive to Memory, document reception stops and no further receptions are possible until memory becomes available. Menu Receive to memory 1. On 2. Off WorkCentre Pro 665/685/765/785... -
Page 93: Secure Receive
To setup the Secure Receive Mode: 1. Press: WorkCentre Pro 665/685/765/785 To enable the Receive to Memory mode, press To disable the Receive to Memory mode, press Menu Receiving Documents 01. - Page 94 Enter your new code and press Enter. Security code Enter new code Security code: Security code Enter existing code Security code: Secure receive 1. Security code 2. Security On/Off Secure receive Security code: WorkCentre Pro 665/685/765/785...
- Page 95 Note: The time period displays in 12 hour format if you have “12 7. Enter the time period during which you want the WorkCentre to receive Secure documents each day, then press Enter . WorkCentre Pro 665/685/765/785 Secure receive 1. On 2.
- Page 96 10. Repeat Step 9 to set the Secure Receive for each day of the week. 11. The menu selection screen redisplays. Press Exit or Stop to return to the Standby Mode. 3-12 . The setting is Monday Secure all day: 1. Yes 2. No WorkCentre Pro 665/685/765/785...
-
Page 97: Manual Secure Receive
To manually enforce Secure Receive Mode: 1. Press: 2. To start the Secure Receive Mode, press The Secure Receive Mode is activated and the machine returns to the Standby Mode. WorkCentre Pro 665/685/765/785 Menu Secure receive 1. Start 2. Stop... -
Page 98: Printing The Stored Document In Secure Receive Mode
The machine prints all documents received during the Secure Receive Mode, then returns to the Secure Receive Mode. 3-14 Menu Secure receive 1. Start 2. Stop Secure receive Security code: Ready Free memory: 80% Printing: 12-01-1999 15:47 WorkCentre Pro 665/685/765/785... -
Page 99: Discard Extra Setting
To automatically divide oversized documents into multiple pages, press 3. The menu selection screen redisplays. Press Exit or Stop to return to the Standby Mode. * Not available in all markets. WorkCentre Pro 665/685/765/785 Menu Discard extra 1. On 2. Off... - Page 100 Receiving Documents Notes: 3-16 WorkCentre Pro 665/685/765/785...
-
Page 101: Chapter 4 Dialing Methods
This section describes the following dialing methods: • Manual Dial (On-hook and Off-hook Dialing) • Speed Dialing • One Touch Dialing • Keypad Dialing • Redialing • Alpha Dialing • Chain Dialing • Manual Group Dialing WorkCentre Pro 665/685/765/785 Dialing Methods... -
Page 102: Manual Dial (On-Hook And Off-Hook Dialing)
Pause key. To enter a Charge Code, press the Charge Code key after the telephone number. Manual Dial 12-01-1999 13:47 Ready Free memory 100% Dial or press Copy Dial fax number Fax number: WorkCentre Pro 665/685/765/785... - Page 103 Start , then place the handset in the cradle. The machine sends the document and returns to the Standby Mode. * If a handset or telephone is installed. WorkCentre Pro 665/685/765/785 Dialing Methods Communicating Job number:...
-
Page 104: Alpha Dialing
Enter the first letter at the prompt. Go to step 4. 12-01-1999 13:47 Ready Free memory 100% Dial or press Copy for “Alpha dial”. Phonebook 1. Speed dial 2. Alpha dial 3. Group dial Enter search name: Name (20 max): WorkCentre Pro 665/685/765/785... - Page 105 6. When the desired name is highlighted, press Start . after 2 seconds 7. The machine automatically dials the phone number of the name you selected, confirms the connection, and sends the document. WorkCentre Pro 665/685/765/785 Shift Enter arrow keys to scroll through the...
-
Page 106: Speed Dialing
3. Press the Phonebook key. 4. Prompt for a Phonebook, select 12-01-1999 13:47 Ready Free memory 100% Dial or press Copy for “Speed dial”. Phonebook 1. Speed dial 2. Alpha dial 3. Group dial Speed dial (1-999): WorkCentre Pro 665/685/765/785... -
Page 107: One Touch Dialing
To dial the remote station using One Touch dialing: 1. Load the document face down in the Document Tray. 2. Select the desired Resolution and Contrast . 3. Press a One Touch key. WorkCentre Pro 665/685/765/785 Dialing Methods Speed dial XEROX... -
Page 108: Keypad Dialing
Code, press the Charge Code key and enter the number after the telephone number. After 2 seconds... Scanning into Memory Job number: Free memory 12-01-1999 13:47 Ready Free memory: Dial or press Copy Fax number (128 max): 5551515 Scanning into memory Job number: Free memory: WorkCentre Pro 665/685/765/785... -
Page 109: Automatic Redialing
1. Pick up the handset, if available, or press: Manual Dial 2. Press Redial key. The display indicates the last number dialed. WorkCentre Pro 665/685/765/785 To change the redial settings, press: Menu (See Chapter 2, “Redial Count and Interval Default Setting”.) -
Page 110: Manual Redial Last 5 Numbers (On-Hook)
If the line is still busy, the job remains in the pending job list. *Not allowed in all markets. 4-10 Ready Free memory: Dial or press Copy Redial Redial last number 12345 Pause ENTER to start arrow keys to select the number you 12-01-1999 13:47 100% WorkCentre Pro 665/685/765/785... -
Page 111: Chain Dialing
To use Speed Dial or Alpha Dial, press Speed Dial . Select and press Enter. Note: Press the Redial/Pause key to enter a pause between WorkCentre Pro 665/685/765/785 Chain Dial , enter the Speed Dial number or select the Alpha name, numbers. -
Page 112: Charge Card Transmissions
7. Press pause. 8. Press Speed Dial 001. (to enter the account number). 9. Press pause. 10. Enter the password from the Dial Keypad. The Fax will be sent. 4-12 Scanning into memory Job number: Free memory: 100% WorkCentre Pro 665/685/765/785... -
Page 113: Manual Group Dialing
4. Using one of the dialing methods, enter the first number. If the number is entered using a One Touch key, do not press Enter . If the number is entered using Keypad or Speed Dialing, you must press Enter . WorkCentre Pro 665/685/765/785 Manual Group Dialing Methods... - Page 114 The machine dials each number in the group and sends the document. 4-14 delete or retain that second entry. Manual group [ ] to previous Enter more or press START keys to select the desired number and then press Enter. WorkCentre Pro 665/685/765/785...
-
Page 115: Chapter 5 Transmitting Documents
If the Confirmation Report feature is enabled, the machine automatically prints a report after each transmission. To discontinue printing the report, set the user option to OFF (See Chapter 9, “Reports”). * Not available in all markets. WorkCentre Pro 665/685/765/785 Transmitting Documents... -
Page 116: Transmitting Documents
A Job Number is used to identify the communication if there is a need to cancel a pending transmission (see Chapter 6, “Cancelling Jobs”). Job Number Free Memory Scanning Page Scanning into memory Job number: Free Memory: 100% Scanning page: WorkCentre Pro 665/685/765/785... -
Page 117: Memory Send Or Direct Send Default Mode
In this mode the machine sends each page as it is scanned. Set the Memory Send mode to OFF to enable the Direct Send transmission mode. To change the default transmission mode: 1. Press: WorkCentre Pro 665/685/765/785 Menu Memory send 1. On 2. Off Transmitting Documents... -
Page 118: Memory Send
Free Memory is at or near 0%. If there is not enough available memory, a Memory Full message is displayed. Press Stop and wait until memory is available or use Direct Send from the ADF. WorkCentre Pro 665/685/765/785... - Page 119 Start , if necessary. (See Chapter 4, “Dialing Methods”.) The machine assigns a job number and scans the document into memory. After 2 seconds The machine then dials the number, confirms the connection and sends the fax. WorkCentre Pro 665/685/765/785 Transmitting Documents 12-01-1999 13:47 Ready Free memory 100%...
-
Page 120: Direct Send
Start , if necessary. (See Chapter 4, “Dialing Methods”.) The machine assigns a job number, dials the number and scans the pages as they are transmitted. 12-01-1999 13:47 Ready Free memory Dial or press Copy selected option for the procedure. Dialing Job number: 5551212 WorkCentre Pro 665/685/765/785 100%... -
Page 121: Direct Send With Memory Send Selected
5. Using one of the dialing methods, enter the fax number and press Enter , if needed. The machine assigns a job number, dials the number and transmits the pages as they are scanned. WorkCentre Pro 665/685/765/785 Document Tray until the document is transmitted. Direct Send to send the document. -
Page 122: Manual Send
DD represents the day of the month. If a number above 31 is entered, the job is started on the first day of the following month. selected option for the procedure. Send later Time: HH:MM DD WorkCentre Pro 665/685/765/785... -
Page 123: Priority Transmission
4. Using one of the dialing methods, enter the remote fax number, then press Enter , if needed. The document is transmitted immediately or immediately following the operation in process. WorkCentre Pro 665/685/765/785 Priority selected option for the procedure. Transmitting Documents... -
Page 124: Line Selection
Enter . The document is scanned and sent using the line you selected. 5-10 Line Select selected option for the procedure. Line selection 1. Either line 2. Line #1 3. Line #2 Free memory: 100% Enter fax number WorkCentre Pro 665/685/765/785... -
Page 125: Charge Codes
6. Enter the Charge Code. The Charge Code is entered and hidden with “$” symbols displayed in place of the code. 7. Press Enter to start the job. WorkCentre Pro 665/685/765/785 Transmitting Documents Fax number (128 max): 5151212 + Fax number (128 max):... -
Page 126: Cover Sheet
Selecting Retain returns you to the Standby mode. To use the cover sheet option, the cover sheet feature must first be enabled, and the cover sheet created. 5-12 8.3 in. (210 mm) Effective Range 5.9 in. (150 mm) Feed Direction WorkCentre Pro 665/685/765/785... -
Page 127: Cover Sheet Setup
4. Select the Cover Sheet image option: To create a cover sheet without an image, press To add an image to your cover sheet, press ***Menu item numbers may vary according to country configurations. WorkCentre Pro 665/685/765/785 Menu Cover sheet 1. On 2. -
Page 128: Sending A Document With A Cover Sheet
2. Select the desired Resolution and Contrast . 3. Press: 4. Select the Cover Sheet option: To print a Cover Sheet, press To attach a Cover Sheet when sending this document, press 5-14 Cover Sheet Cover sheet 1. Send 2. Print Enter to: Name WorkCentre Pro 665/685/765/785... - Page 129 7. Using one of the dialing methods, enter the fax number and press Enter if necessary. The document is sent with a Cover Sheet, if selected, and the machine returns to the Standby Mode. WorkCentre Pro 665/685/765/785 Enter from: Name Free memory: 100% Enter fax number selected option for the procedure.
-
Page 130: Batching
When there is any variation in options designated, batching does not occur. Hint: 5-16 You can “intentionally” batch by using One Touch dialing keys to ensure that the same phone number, locations, and time are used. WorkCentre Pro 665/685/765/785... -
Page 131: Confirming A Transmission
Activity Report (Refer to Chapter 9, “Reports”.) • Confirmation Report — A Confirmation Report can be printed automatically following each transmission or only following error occurrences. (Refer to Chapter 9.) WorkCentre Pro 665/685/765/785 Transmitting Documents 5-17... -
Page 132: One Time Fax Options
ID. If the numbers do not match, the document is not sent. Once the Send After Scan Mode Default Setting is set to Off, this feature allows you enable the Send After Scan mode for a single transmission. WorkCentre Pro 665/685/765/785... -
Page 133: Number Of Pages
5. Press Menu to select additional fax options or, using one of the dialing methods, enter the fax number, then press Enter, if necessary. The document is sent and the machine returns to the Standby Mode. WorkCentre Pro 665/685/765/785 Number of pages Menu Pages (1-999):... -
Page 134: Listen To Dial
The document is sent and the machine returns to the Standby Mode. ** Not available in earlier versions of the WorkCentre. Menu item numbers may vary according to configurations. 5-20 Menu Listen to dial 1. On 2. Off Free memory Enter fax number WorkCentre Pro 665/685/765/785 100%... -
Page 135: Send Then Poll
3. Press: 4. Select the Send then Poll option: To enable the Send then Poll feature, press To disable the Send then Poll feature, press step 6. WorkCentre Pro 665/685/765/785 Menu Send then poll 1. On 2. Off Send then poll Add security code? 1. - Page 136 The document is sent. If this feature is enabled, the document set to poll is received, then the machine returns to the Standby Mode. 5-22 , then use the Numeric Free memory 100% Enter fax number Free memory 100% Enter fax number WorkCentre Pro 665/685/765/785...
-
Page 137: Ecm Disable
Enter if necessary. The document is sent and the machine returns to the Standby Mode. WorkCentre Pro 665/685/765/785 installed. Disabling ECM also turns the 33.6K BPS Modem off. If the ECM Default setting is set to “OFF”, the ECM Disable feature is not available. -
Page 138: Secure Send Transmission
The document is sent and the machine returns to the Standby Mode. 5-24 send feature on all future transmissions, see “Secure Send Settings” later in this chapter. Menu Secure send 1. On 2. Off Free memory Enter fax number WorkCentre Pro 665/685/765/785 100%... -
Page 139: Send After Scan Enable
3. Press: 4. Select the Send After Scan option. To enable the Send After Scan Mode for this transmission, press To disable the Send After Scan Mode for this transmission, press WorkCentre Pro 665/685/765/785 Menu Send after scan 1. Yes 2. - Page 140 6. Press Menu to select additional fax options, or using one of the dialing methods, enter the fax number, then press Enter if necessary. The document is sent and the machine returns to the Standby Mode. 5-26 Free memory 100% Enter fax number WorkCentre Pro 665/685/765/785...
-
Page 141: Advanced Transmissions
To transmit the document without an Account Code, press Start . The document is sent and the machine returns to the Standby Mode. If an Account Code was used, it is recorded on the Activity Report. WorkCentre Pro 665/685/765/785 Transmitting Documents Enter account code or press START... -
Page 142: Account Code Default Setting
To disable the Account Code feature, press 3. The menu selection screen redisplays. Press Stop to return to the Standby Mode. *** Menu item numbers may vary according to configuration. 5-28 Menu Account code 1. On 2. Off WorkCentre Pro 665/685/765/785... -
Page 143: Transmitting Using A Department Code
Enter the 5-digit Department Code, then press Enter . The standby mode screen displays. If no activity is performed within 1 minute after entering the Department Code, the display returns to the “Enter Dept. code” screen. WorkCentre Pro 665/685/765/785 Transmitting Documents 12-01-1999 13:47 Free memory 100% Enter dept. -
Page 144: Resend Stored Fax Default Setting
Stop to return to the Standby mode. 5-30 stored time is recorded in the Pending Jobs Report (see Chapter 12). Menu Resend stored fax 1. On 2. Off Resend stored fax Store for (01-24) hrs: WorkCentre Pro 665/685/765/785 , then... -
Page 145: Resending A Stored Fax
3. While viewing the job to resend, press Enter or Start. (If the original job was dialed using the keypad, the next screen will allow the phone number to be changed). WorkCentre Pro 665/685/765/785 Resend keys to view the jobs stored for... - Page 146 6. Press Enter. The designated job is resent, then the machine returns to the Standby Mode. 5-32 . The machine starts dialing the number. 1. Start 2. Send to one number 3. Change Fax number (128max): 1234567890 WorkCentre Pro 665/685/765/785...
-
Page 147: Secure Send Setting
2. Select the Secure Send option: To enable the Secure Send feature, press To disable the Secure Send feature, press 3. The menu selection screen redisplays. Press Stop to return to the Standby Mode. WorkCentre Pro 665/685/765/785 Menu Secure send 1. On 2. Off... -
Page 148: Itu-T Relay Communications
Speed Dial Speed Dial number or One numbers, One Touch key on Touch keys, or the Initiating Groups. Station. End Stations (up to 50 stations/groups) Station Station WorkCentre Pro 665/685/765/785... - Page 149 If you do not want to assign a password, press step 7. 6. Using the Numeric Keypad, enter the password you want to assign to this box, then press Enter . WorkCentre Pro 665/685/765/785 Mailbox Transmitting Documents Send (Relay) Box number (20 max): Setup password 1.
- Page 150 The document is sent to the Relay Station. The Relay Station will then retransmit the document to the specified End Stations. 5-36 Send (Relay) Enter fax number. or press Phonebook key or one touch key WorkCentre Pro 665/685/765/785...
-
Page 151: Presetting Itu-T Relay Box
You can assign up to 100 Relay Boxes. Each relay box can contain up to 50 End Stations that are preset to Speed Dial numbers or One Touch keys or Groups. Originator Initiating Station WorkCentre Pro 665/685/765/785 Transmitting Documents Relay Boxes in Relay Station Relay Relay... - Page 152 5-38 Mailbox Enter mailbox new# Box number (20 max.) Program password 1. Yes 2. No and go to step 4. and go to Enter password Password(20 max.): Relay end number Enter phonebook key or one touch key WorkCentre Pro 665/685/765/785...
- Page 153 Enter . To assign a Group Number to the End Station: Press: Press the Group Number you want to assign to the End Station, then press Enter . WorkCentre Pro 665/685/765/785 Phonebook Phonebook Phonebook Relay end number One touch key...
- Page 154 Dial Number, press Enter to complete. To skip this selection, press Enter . 9. The Mail Box Setup screen redisplays. Press Exit or Stop to return to the Standby Mode. 5-40 Transmission report Enter fax number, speed dial or OT Enter to complete WorkCentre Pro 665/685/765/785...
-
Page 155: Deleting A Relay Box
Enter .) 4. The menu Selection screen redisplays. Press Exit or Stop to return to the Standby Mode. WorkCentre Pro 665/685/765/785 To print a list of all documents in your ITU-T mailboxes, press:... - Page 156 Transmitting Documents Notes: 5-42 WorkCentre Pro 665/685/765/785...
-
Page 157: Chapter 6 Cancelling Jobs
The active job can be monitored in the display and cancelled if desired. When you press the Job Status key, the job currently being processed is displayed. To monitor and/or cancel the active job: 1. Press: WorkCentre Pro 665/685/765/785 Job Status Cancelling Jobs Dialing Job number:... -
Page 158: Cancel Job Key
Polled” job reserved on your machine to be polled. • Job Number — Enter a job number you want to cancel. Cancel Job to cancel the displayed job, or press Cancel this job? Job number: 1. Yes 2. No to return WorkCentre Pro 665/685/765/785... -
Page 159: Cancelling Jobs
To cancel a Document Waiting to be Polled, press To cancel a Job Number, press ** If no job is reserved for the job type, such job type is not displayed and the displayed numbers vary. WorkCentre Pro 665/685/765/785 Cancel Job Cancelling Jobs Cancel job 1. - Page 160 To exit this mode without cancelling a job, press The machine returns to the Standby Mode. is displayed. arrow keys to view each pending job Send to one number 5551212 12-01-1999 13:47 Job number: Cancel this job? Job number 1. Yes 2. No WorkCentre Pro 665/685/765/785...
-
Page 161: Direct Send Jobs
Redial Mode the job is a pending job. Refer to the Cancel Job key. 1. If the document is being transmitted, press Stop . 2. To cancel the job, press The job is cancelled and the document feeds through the scanner. WorkCentre Pro 665/685/765/785 Cancelling Jobs Cancel this job? 1. XXXXX 2. No... - Page 162 Cancelling Jobs Notes: WorkCentre Pro 665/685/765/785...
-
Page 163: Chapter 7 Polling
Continuous Poll). The Polling feature allows you to retrieve a document from a remote machine when you call that machine. You can also transmit a document to a remote machine when the remote machine calls you. WorkCentre Pro 665/685/765/785 Polling... -
Page 164: Storing A Document To Be Polled
A 4-digit security code 0000-9999. Only WorkCentre Pro 745, 635, 645, 657, 655, 755 machines can poll your machine. The remote machine fax number. Both the remote machine fax number and a 4-digit security code. WorkCentre Pro 665/685/765/785... -
Page 165: Storing A Document To Be Polled In A Poll-Once Box
1. Load the document face down in the Document Tray. 2. Select the desired Resolution and Contrast . 3. Press: 4. To store the document in a Poll-once box, press WorkCentre Pro 665/685/765/785 assigned to a One Touch key. (See “Presetting Group Numbers”.) Menu Scan to be polled: 1. - Page 166 Secure fax (20 max): you select the same security features and numbers, you are prompted to delete it, retain it or add the new document to it. WorkCentre Pro 665/685/765/785 and go to step 6. and go to step 6.
-
Page 167: Storing A Document To Be Polled In A Multi-Poll Box
Poll-once box you cannot store a document in the Multi-poll box. The document is scanned and stored in the Multi-poll box. When a polling machine calls, the document will be transmitted. WorkCentre Pro 665/685/765/785 Menu Scan to be polled: 1. Poll-once box 2. -
Page 168: Cancelling Documents Stored In A Polling Box
Scan to be polled: 1. Poll-once box 2. Multi-poll box , and go to step 5. , and go to step 7. Security/fax number? 1. No 2. Security code 3. Fax number 4. Security & Fax nbr WorkCentre Pro 665/685/765/785... - Page 169 The machine returns to the Standby Mode. To retain the current stored document, press press Stop . The machine returns to the Standby Mode. WorkCentre Pro 665/685/765/785 , then go to step 7. Scan to be polled: Security code Scan to be polled: –...
-
Page 170: Polling A Remote Document (Poll-Once Or Multi-Poll Box)
Code obtained from the remote operator, then press Enter . If no Security Code is required by the sending machine, press Menu Poll one number Enter fax number Poll Add security code? 1. Yes 2. No . Then enter the Security WorkCentre Pro 665/685/765/785... -
Page 171: Group Polling
A maximum of 50 groups can be preset for use with Multiple Polling Receptions. Note: Group Polling is initiated when the Group Number is To poll documents from Multiple Remote Machines: 1. Press: 2. Press: WorkCentre Pro 665/685/765/785 assigned to a One Touch key. (See “Presetting Group Numbers”). Menu Manual Group... - Page 172 7. Using the numeric keypad, enter the required Security Code, then press Enter . The machine dials each number in the group and retrieves the document. 7-10 Poll a group Add security code? 1. Yes 2. No Poll a group Security code: WorkCentre Pro 665/685/765/785...
-
Page 173: Continuous Polling
1. Press: Note: The interval is the period of time between polling 2. Enter the polling interval (first digit only), then press Enter . * Not allowed in all markets. WorkCentre Pro 665/685/765/785 Menu Continuous poll Interval 10-70min: procedures. Possible settings are 10 to 70 minutes, in 10 minute increments. - Page 174 7. When you finish entering telephone numbers, press Start . 7-12 Continuous poll ] for setting Start/Stop days: Mon-Fri Continuous poll Enter fax number or press Phonebook key or one touch key Continuous poll One touch key: Enter more or press START Continuous poll Security code: WorkCentre Pro 665/685/765/785...
-
Page 175: Deleting Continuous Poll Jobs
2. To delete the Continuous Poll Job, press return to the Standby Mode. The Continuous Poll Job is deleted and the machine returns to the Standby Mode. WorkCentre Pro 665/685/765/785 must be set with the same code. Menu Already assigned 1. - Page 176 Polling Notes: 7-14 WorkCentre Pro 665/685/765/785...
-
Page 177: Chapter 8 Mailbox Communications
Mailbox Reception Reports: Your WorkCentre can be set to automatically print a report whenever a document is stored in one of its ITU-T mailboxes either by a remote user or locally. See Chapter 9, “Reports”. WorkCentre Pro 665/685/765/785 Mailbox Communications... -
Page 178: Local Mailbox (Itu-T)
Mailbox, a password must be setup when creating ITU-T mailboxes. Hint: To create a mailbox: 1. Press: Mailbox To print a list of all documents in your ITU-T mailboxes, press: Menu (See Chapter 9 “Reports”.) Mailbox setup 1. Done 2. Mailbox setup 3. Mailbox delete WorkCentre Pro 665/685/765/785... - Page 179 To create a Bulletin Board type Mailbox, press 5. Using the Numeric Keypad enter a mailbox number, then press Enter . Note: A password is required to transmit or receive to a Bulletin WorkCentre Pro 665/685/765/785 Mailbox Communications , then go to step 4. Mailbox type 1.
-
Page 180: Deleting An Itu-T Mailbox
To print a list of all documents in your ITU-T mailboxes, press: Menu (See Chapter 9 “Reports”.) Mailbox setup 1. Done 2. Mailbox setup 3. Mailbox delete and go to step 7. and go to , or you can return to the or Stop . WorkCentre Pro 665/685/765/785... -
Page 181: Storing A Document In A Local Itu-T Mailbox
To store a document in your local mailbox: 1. Load the document face down in the Document Tray. 2. Select the desired Resolution and Contrast . 3. Press: Mailbox WorkCentre Pro 665/685/765/785 Mailbox Communications Delete Mailbox # Box Number (20 max): Mailbox 1. - Page 182 – or – Bulletin board 1. Print mailbox 2. Send to mailbox 3. Poll from mailbox 4. Store to mailbox 5. Delete contents Store (Confidential) Box number (20 max): – or – Store (Bull. board) Box number (20 max): WorkCentre Pro 665/685/765/785...
-
Page 183: Printing A Document Stored In A Local Itu-T Mailbox
2. Select the type of mailbox you want to print the document from. To print from a Confidential mailbox, press To print from a Bulletin Board mailbox, press WorkCentre Pro 665/685/765/785 Mailbox Communications when creating this ITU-T Mailbox number , you must enter that same password here to store the document. - Page 184 3. Poll from mailbox 4. Store to mailbox 5. Delete contents Print (Confidential) Box number (20 max): – or – Print (Bull board) Box number (20 max): Mailbox, you must enter that password here to print the document. WorkCentre Pro 665/685/765/785...
-
Page 185: Deleting A Document Stored In A Local Itu-T Mailbox
2. Select the type of mailbox you want to delete the document from. To delete from a Confidential mailbox, press To delete from a Bulletin Board mailbox, press WorkCentre Pro 665/685/765/785 To print a list of all documents stored in ITU-T mailboxes, press: Menu (See Chapter 9, “Reports”.) -
Page 186: Remote Itu-T Mailbox
Sending a document to a Remote Confidential Mailbox requires only the remote mailbox number. Remote Bulletin Board Mailboxes must be setup with a password. Obtain the ITU-T mailbox number and password from the remote user to use in the following procedure. WorkCentre Pro 665/685/765/785... - Page 187 3. Press: 4. Select the type of mailbox you want to send the document to. To send to a Confidential mailbox, press To send to a Bulletin Board mailbox, press WorkCentre Pro 665/685/765/785 Mailbox Mailbox 1. Confidential 2. Bulletin board 3.
- Page 188 The document is sent to the remote station and stored in the box type you selected. 8-12 Send (Confidential) Box number (20 max): – or – Send (Bulletin board) Box number (20 max): must be setup with a Bulletin Board Mailbox Password. WorkCentre Pro 665/685/765/785...
-
Page 189: Polling A Remote Itu-T Mailbox
2. Select the type of mailbox from which you want to retrieve the document. To retrieve from a Confidential mailbox, press To retrieve from a Bulletin Board mailbox, press – or – WorkCentre Pro 665/685/765/785 Mailbox Communications Mailbox 1. Confidential 2. Bulletin board 3. - Page 190 The machine dials the remote station and retrieves the document from the mailbox you selected. 8-14 Poll (Confidential) Box number (20 max): – or – Poll (Bulletin Board) Box number (20 max): be setup with a Confidential Mailbox Password. WorkCentre Pro 665/685/765/785...
-
Page 191: Attaching An Itu-T Sub Address
(Refer to Chapter 4, “Setting up the Phonebook”.) If you store the sub address in the Speed Dial/One Touch setup, and when dialing using this procedure, the sub address attached here will be used. WorkCentre Pro 665/685/765/785 Mailbox Communications 8-15... -
Page 192: Transmitting A Document To An Itu-T Sub Address
1. Done 2. Subaddress (SUB) 3. Select. Polling (SEP) 4. Password (PWD) Subaddress SUB (20 max): enter the remote ITU-T mailbox number. the remote and local machines must have the same passwords. to select PWD. Using the WorkCentre Pro 665/685/765/785... -
Page 193: Polling A Document Using A Sub Address
2. Press: 3. To poll a document from a remote fax sub address, press select SEP. 4. Enter the remote sub address and press Enter. WorkCentre Pro 665/685/765/785 to select Done. address programmed in a One Touch or Speed Dial number. - Page 194 Note: The sub address entered in this procedure overrides a sub 8-18 to select PWD. Using the to select Done. Load document To poll press START Poll Add security code? 1. Yes 2. No to select No. address programmed in a One Touch or Speed dial number. WorkCentre Pro 665/685/765/785...
-
Page 195: Chapter 9 Reports
• Reception Reports — Contain the details of documents received to a Relay Station, Local Mailbox, or Remote Mailbox. WorkCentre Pro 665/685/765/785 Reports... -
Page 196: Activity Report Setup
Number of pages sent or received (max. 999). Remote name or facsimile number (the attached when the alternate number or subaddress is used). Department number that was entered for that job. Account number. WorkCentre Pro 665/685/765/785 “ ” mark is... - Page 197 2400 bps 4800 bps 7200 bps 9600 bps 12000 bps 14400 bps 33600 bps Status WorkCentre Pro 665/685/765/785 Description Communication mode* 2nd Line Communication EX: Exclusive Error Control Mode G3: G3 Mode EC: G3 Error Control Mode Polling Communications Relay Group Communications...
- Page 198 To select Auto Print Off, 5. The menu selection screen redisplays. Press Stop to return to the Standby Mode. *** Menu item numbers may vary according to configurations. Menu Activity report 1. Set key default 2. Auto print , then: WorkCentre Pro 665/685/765/785...
-
Page 199: Confirmation Report Setup
Relay Destination Report results sent from the Relay Station to the Originator Station, and printed by the Originator Station. * Not allowed in all markets. WorkCentre Pro 665/685/765/785 — A report is not automatically printed. — Prints transmission results for a Direct –... -
Page 200: Confirmation Report
To disable the report feature, press 3. Press Exit or Stop to return to the Standby Mode. *** Menu item numbers may vary according to configurations. Menu Confirmation report 1. Always 2. On error 3. Off WorkCentre Pro 665/685/765/785... -
Page 201: Confirmation Report - Memory Send
Confirmation Report - Memory Send To set the Confirmation Report-Memory Send automatic print status. 1. Press: *** Menu item numbers may vary according to configurations. WorkCentre Pro 665/685/765/785 Description Job Number of transmission. Date and time that the job was accepted. - Page 202 To print the report without the first fax page, press 4. Press Exit or Stop to return to the Standby Mode. * Not allowed in all markets. , then go Show first fax page 1. On 2. Off WorkCentre Pro 665/685/765/785...
-
Page 203: Group Send Report
Group Send Report To set the Group Send Report automatic print status. 1. Press: *** Menu item numbers may vary according to configurations. WorkCentre Pro 665/685/765/785 Description Job Number of transmission. Date and time that the job was accepted. Number of pages of memory input. - Page 204 To print the report without the first fax page press 4. Press Exit or Stop to return to the Standby Mode. * Not allowed in all markets. 9-10 , then go to step 4. Show first fax page 1. On 2. Off WorkCentre Pro 665/685/765/785...
-
Page 205: Group Poll Report
To disable the report feature, press 3. Press Exit or Stop to return to the Standby Mode. *** Menu item numbers may vary according to configurations. WorkCentre Pro 665/685/765/785 Description Job Number of transmission. Date and time that the job was accepted. -
Page 206: Relay Originator Report
List of Speed Dial or Group numbers where the transmission was sent. List of Speed Dial or Group numbers where an error occurred. Sent Pages - The number of pages sent. Menu Relay originator 1. Always 2. On error 3. Off WorkCentre Pro 665/685/765/785... - Page 207 To print the report without the first fax page, press 4. Press Exit or Stop to return to the Standby Mode. * Not allowed in all markets. WorkCentre Pro 665/685/765/785 Reports . Then go to Step 4. Show first fax page 1.
-
Page 208: Relay Station Report
List of Speed Dial or Group numbers where the transmission was sent. List of Speed Dial or Group numbers where an error occurred. Sent Pages - The number of pages sent. Menu Relay station 1. Always 2. On error 3. Off WorkCentre Pro 665/685/765/785... - Page 209 To print the report without the first fax page, press 4. Press Exit or Stop to return to the Standby Mode. * Not allowed in all markets. WorkCentre Pro 665/685/765/785 Reports , then go to step 4. Show first fax page 1.
-
Page 210: Relay Destination Report
List of Speed Dial or Group numbers where the transmission was sent. List of Speed Dial or Group numbers where an error occurred. Sent Pages - The number of pages sent. Menu Relay destination 1. Always 2. On error 3. Off WorkCentre Pro 665/685/765/785... - Page 211 To print the report without the first fax page press 4. Press Exit or Stop to return to the Standby Mode. * Not allowed in all markets. WorkCentre Pro 665/685/765/785 Reports , then go to step 4. Show first fax page 1.
-
Page 212: Confirmation Report Override
5. Using one of the dialing methods, enter the phone number and press Enter , if necessary. The document is sent and, if selected, a report is printed. 9-18 Confirm. Confirmation report 1. Always 2. On error 3. Off Free memory: 100% Enter fax number WorkCentre Pro 665/685/765/785... -
Page 213: Reception Report Setup
To automatically print a Relay Station Reception Report, press prints following a Relay Station Reception (see Chapter 5, “Relay Communications”). To select another, enter *** Menu item numbers may vary according to configurations. WorkCentre Pro 665/685/765/785 Menu 01. Local to mailbox 02. Remote to mailbox 03. Relay station . - Page 214 The following information is printed on the Mailbox Reception Report: Item Job number Mailbox Mailbox Type Document Pages From 9-20 Description Job number. Mailbox number. Mailbox Type: Poll-once, Multi-poll, Private Mailbox. Number of document pages entered. Station through which the mail document was entered. WorkCentre Pro 665/685/765/785...
-
Page 215: Printing Reports And Lists
To print the Activity Report: 1. Press: 2. To print the 50 communication Activity Report, press To print the 100 communication Activity Report, press To print the 150 communication Activity Report, press WorkCentre Pro 665/685/765/785 Activity Print number 1. 1-50 (1paper) 2. 1-100 (2paper) 3. -
Page 216: Itu-T Mailbox Report
The ITU-T Mailbox Report prints, then the machine returns to the Standby Mode. 9-22 Description Mailbox number. Type of mailbox. Number of pages. Job number. Time of input. Local designates this machine. Name or number designates the remote machine. Menu WorkCentre Pro 665/685/765/785... -
Page 217: Pending Jobs Report
Time To print the Pending Jobs Report: 1. Press: Menu The Pending Jobs Report prints, then the machine returns to the Standby Mode. WorkCentre Pro 665/685/765/785 Description Job number. Type of communication. Number of pages. Mailbox number. Designated time or time of reception. -
Page 218: Department Code Report
The Department Code Report prints, then the machine returns to the Standby Mode. 9-24 Description Department Number. Department Name. Department Code for operating the department. Number of pages transmitted by the department. Number of pages received by the department. Number of pages copied by the department. WorkCentre Pro 665/685/765/785... -
Page 219: Power Failure List
Resend Stored Fax communications: Item Type Mail From Date/Time WorkCentre Pro 665/685/765/785 Description Job number of the communication. Type of Communication (Continuous poll, Poll-once, Group poll, To be Polled Box, Bulletin Board, etc.). Box number for a Mailbox communication. Station where the communication occurred, or the Mailbox is input. -
Page 220: Menu Map
The Menu Map is a list of all machine features in a flow chart format. Refer to Chapter 2 for a detailed Menu Flow Map. To print the Menu Map: 1. Press: Menu -or- Press Menu Map. 2. The Menu Map prints, then the machine returns to the Standby mode. 9-26 WorkCentre Pro 665/685/765/785... -
Page 221: Settings Report
Answer mode Answer mode (#2) Fax-send Memory send Secure send Cover sheet Resend stored fax Send header Send after scan WorkCentre Pro 665/685/765/785 Separator Cassette Ring to answer Reports Fax-receive Secure receive Receive to memory Reduce *Discard extra* Collate fax... - Page 222 The Settings Report prints, then the machine returns to the Standby Mode. 9-28 Printed pages, it is not the same as Drum count that is found on the Activity Report. the Settings Report. Refer to this number when calling for service. Menu WorkCentre Pro 665/685/765/785...
-
Page 223: Chapter 10 Copying Documents
2. Press: 3. If desired, set the Contrast , Resolution and Reduction. Note: The resolutions available for copying are different than WorkCentre Pro 665/685/765/785 Copy those available for faxing. You can select Fine, Superfine, Fine Photo and Superfine Photo Refer to the User’s Guide. -
Page 224: Copying Documents
Select LT, LG or A4 for the bypass tray. You cannot select when copying from the bypass tray. When the Bypass tray is selected, the display changes to select the paper thickness. Select the desired thickness. Copying Paper WorkCentre Pro 665/685/765/785 tray 1: LT* Pages... -
Page 225: Chapter 11 Scan Functionality
Scan Size Resolution Original Type Lighten/Darken Scan Cancel About WorkCentre Pro 665/685/765/785 Specifies the document size that you are scanning. Sets the scanning resolution. Specifies the type of document that you are scanning. Adjusts the lightness and darkness of the scanned document. - Page 226 Scan Functionality Notes: 11-2 WorkCentre Pro 665/685/765/785...
-
Page 227: Chapter 12 Pcl Printing Functionality
PCL Printing Functionality This option will be made available soon. When you order this option, you will receive the latest documentation which will support this option and its functionality. WorkCentre Pro 665/685/765/785 PCL Printing Functionality 12-1... - Page 228 PCL Printing Functionality Notes: 12-2 WorkCentre Pro 665/685/765/785...
-
Page 229: Chapter 13 Network Functionality
Network Functionality This option will be made available soon. When you order this option, you will receive the latest documentation which will support this option and its functionality. WorkCentre Pro 665/685/765/785 Network Functionality 13-1... - Page 230 Network Functionality Notes: 13-2 WorkCentre Pro 665/685/765/785...
-
Page 231: Chapter 14 Internet Fax Functionality
Internet FAX Functionality This option will be made available soon. When you order this option, you will receive the latest documentation which will support this option and its functionality. WorkCentre Pro 665/685/765/785 Internet FAX Functionality 14-1... - Page 232 Internet FAX Functionality Notes: 14-2 WorkCentre Pro 665/685/765/785...
-
Page 233: Chapter 15 Using The Controlcentre
Control Centre. To open the ControlCentre and connect to the WorkCentre: Click the Windows Start button. Choose Programs>Xerox WorkCentre Pro 665 & 765>Xerox ControlCentre. The ControlCentre displays. From the toolbar, click the Connect button. -
Page 234: Setting Up The Workcentre
Received only Provides information about the faxes received at the WorkCentre. 6. To set the WorkCentre volume levels, select a number from the range 0 (off) to 7 (high) for the Ringer, Key touch, Alarm and Line monitor volumes. 15-2 WorkCentre Pro 665/685/765/785... -
Page 235: Setting Up The Telephone Lines
In the Dial mode box, set the mode to Tone if your telephone has touch-tone capability, or Pulse if it doesn’t. WorkCentre Pro 665/685/765/785 Using the ControlCentre 15-3... -
Page 236: Using The Power Save Features
Minutes (1-60) box. Manual Begins Super Power Save when the Power Save key is pressed on the WorkCentre control panel. Off Disables Super Power Save. Click Apply to set the options at the WorkCentre. 15-4 WorkCentre Pro 665/685/765/785... -
Page 237: Setting The Pc's Date And Time On The Workcentre
In the Old password box, type the password currently in use. In the New password box, type the new password you want to use. In the Confirm new password box, retype the new password. Click OK. WorkCentre Pro 665/685/765/785 Using the ControlCentre 15-5... -
Page 238: Setting The Fax Send Options
The WorkCentre assigns a job number to each fax stored in memory. You can later identify the fax by its job number should you need to cancel it. When a fax is stored in memory, the 15-6 WorkCentre Pro 665/685/765/785... -
Page 239: Sending Faxes Using Security
To save a fax in memory if it could not be sent after the specified number of redials, click Store fax for resend. Enter the length of time, from 1 to 24 hours, you want to store the fax in the Hours (1-24) box. WorkCentre Pro 665/685/765/785 Using the ControlCentre 15-7... -
Page 240: Faxing Long Originals
1 meter (39.36 inches) To scan documents up to one meter in length. If a document longer than one meter is scanned, a paper jam will occur. Any length To scan documents of any length. Click Apply to set the option at the WorkCentre. 15-8 WorkCentre Pro 665/685/765/785... -
Page 241: Setting The Fax Receive Options
The secure receive feature enables you to keep received documents confidential during a specified time period each day or 24 hours a day. All documents received during the time period are stored in WorkCentre Pro 665/685/765/785 Using the ControlCentre 15-9... -
Page 242: Setting The Receive Interval
Click the Fax icon and then click the Fax Receive tab. In the Receive interval (0-14 min) box, select the number of minutes for the time interval. Click Apply to set the option at the WorkCentre. 15-10 WorkCentre Pro 665/685/765/785... -
Page 243: Collating And Reducing Incoming Faxes
WorkCentre discards the portion of the document that exceeds the recording area. Click the Fax icon and then click the Fax Receive tab. Click Print extra on another page. Click Apply to set the option at the WorkCentre. WorkCentre Pro 665/685/765/785 Using the ControlCentre 15-11... -
Page 244: Receiving Faxes To Your Pc
Assigning a Speed Dial or Group Dial Number to a One Touch Key. Click the Phonebook icon. Click the One Touch tab. Click the Add button. In the One Touch (01-68) box, select the number you want to preset. 15-12 WorkCentre Pro 665/685/765/785... -
Page 245: Using The Controlcentre
12 Do one of the following: • • 13 Click Apply to set the options at the WorkCentre. WorkCentre Pro 665/685/765/785 Click OK to close the One Touch Entry dialog box. Click Apply to preset another individual One Touch number. Using the ControlCentre... -
Page 246: Assigning A Speed Dial Or Group Dial Number To A One Touch Key15-14
Assigning a Speed Dial or Group Dial Number to a One Touch Key. Click Apply to set the options at the WorkCentre. 15-14 Click OK to close the One Touch Entry dialog box. Click Apply to preset another One Touch number. WorkCentre Pro 665/685/765/785... -
Page 247: Deleting One Touch Key Entries
Dial using To specify the telephone line to use. Maximum fax speed To specify a maximum fax speed. Select the speed from the list of options. Listen to dial To turn on the WorkCentre speaker to monitor the line tones. WorkCentre Pro 665/685/765/785 Using the ControlCentre 15-15... -
Page 248: Editing A Speed Dial Number
In the Speed Dial Entry dialog box, click OK. Click Apply to set the options at the WorkCentre. 15-16 Click OK to close the Speed Dial Entry dialog box. Click Apply to preset another speed dial number. WorkCentre Pro 665/685/765/785... -
Page 249: Deleting Speed Dial Numbers
Dial or One Touch key entry that you want to assign to the group, then click the -- > button. Note To not assign the entry to the group, click the entry from the Group Members list, then click the < -- button. WorkCentre Pro 665/685/765/785 Using the ControlCentre 15-17... -
Page 250: Editing A Group Dial Number
Note To delete all the Group Dial numbers at once, click Clear All. Click Delete. Click Apply to set the options at the WorkCentre. 15-18 Click OK to close the Group Dial Entry dialog box. Click Apply to preset another Group Dial number. WorkCentre Pro 665/685/765/785... -
Page 251: Saving A Phonebook To Your Pc
If you made changes to the Phonebook that is currently open, save it before opening another Phonebook. Click the Phonebook icon. Click the Open File button. In the Look in box, find the Phonebook’s location and then select the Phonebook. Click Open. WorkCentre Pro 665/685/765/785 Using the ControlCentre 15-19... -
Page 252: Creating Mailboxes
For a Bulletin Board mailbox, type the password to be used for local and remote secure transmissions and receptions. Optionally, you can use the password for secure document retrievals (polling operations). For a relay mailbox, type the password to be used at the initiating station. WorkCentre Pro 665/685/765/785... -
Page 253: Editing A Mailbox
In the Mailbox Entry dialog box, click OK. Click Apply to set the options at the WorkCentre. WorkCentre Pro 665/685/765/785 To specify a fax number for the end station, select Fax number in the Entry from box. Type the number in the Fax number box. -
Page 254: Deleting A Mailbox
In the Department name box, type the name you want to assign to the department. Do one of the following: • 15-22 Click OK to close the Department Code Entry dialog box. WorkCentre Pro 665/685/765/785... -
Page 255: Changing A Department Code
Select the department code you want to delete. Note To delete all the department codes at once, click Clear All. Click Delete. Click Apply to set the options at the WorkCentre. WorkCentre Pro 665/685/765/785 Click Apply to assign another department code. Using the ControlCentre 15-23... -
Page 256: Printing Reports
In the Group send box, select the option you want when faxing documents to a group. If you select either Always or On error, you can click Show first fax page to have the WorkCentre print the first page of the fax on the report. 15-24 WorkCentre Pro 665/685/765/785... -
Page 257: Reception Reports Setup
Do one of the following: • • In the Print Setup dialog box, click OK. The WorkCentre prints the report. WorkCentre Pro 665/685/765/785 From the File menu, click Print Settings Report. From the toolbar, click the Print button. Using the ControlCentre 15-25... -
Page 258: Saving The Workcentre Settings
From the File menu, click Save Settings. From the toolbar, click the Save button. From the File menu, click Open Settings. From the toolbar, click the Open button. Click Yes to save the changes. Click No to not save the changes. WorkCentre Pro 665/685/765/785... -
Page 259: Enabling Xerox Personnel To Perform Remote Tests
Enabling Xerox personnel to perform remote tests Click the General icon and then click the Advanced Features tab. Click Remote access to allow a remote Xerox test facility or service center to perform diagnostic tests on the WorkCentre. In the Download box, select one of the following options: Always Allow Xerox service persons to download firmware to the WorkCentre at any time. -
Page 260: Firmware Download
• In the Quantity box, select the number of cartridges to order. Firmware Download Information regarding this feature can be found in the On-line Help facility within the Control Centre software loaded onto your PC. 15-28 WorkCentre Pro 665/685/765/785... -
Page 261: Chapter 16 Troubleshooting
Self Test The self test enables you to understand the performance of the machine and diagnose any problems it may have. You may be requested to do this by a Xerox customer support center representative. To enter self test: 1. Press. -
Page 262: Troubleshooting
. This test will turn on all the then . When you run this test please then . You will be prompted to then . During this test you will be then . When selected the machine WorkCentre Pro 665/685/765/785... -
Page 263: Calling For Service
Error Message Device error XX Network disabled PCL disabled Scanner quality low WorkCentre Pro 665/685/765/785 Probable Cause Corrective Action Hardware device error Turn off the power and turn on occurred. "xx" is an error the power again. If the same... - Page 264 All paper trays are empty. Add paper to the paper trays and ensure the trays are closed correctly. The upper paper tray is Add paper to the upper paper empty. tray and close the tray correctly. WorkCentre Pro 665/685/765/785...
- Page 265 Middle paper empty Lower paper empty Memory is full Network error Check line - 1 Check line -2 WorkCentre Pro 665/685/765/785 Probable Cause Corrective Action The middle paper tray is Add paper to the middle empty. paper tray and close the tray correctly.
-
Page 266: Error Codes
Check the security code and retry the operation. Recover sufficient memory by completing reserved job, then retry the communication. Confirm the telephone number is correct, then retry the communication. Confirm the remote party’s security code, password and telephone number. WorkCentre Pro 665/685/765/785... - Page 267 Network communication problem. Picture signal problem. Communication error. Picture memory error. Printer problem. Communication error. WorkCentre Pro 665/685/765/785 Troubleshooting Corrective Action Check the remote machine. Retry the transmission. Verify the remote station is compatible, then retry the communication.
-
Page 268: Device Error Codes
LSU, Call for Service. LSU, Call for Service. Fan, Call for Service. 2nd paper tray, Call for Service. 3rd paper tray, Call for Service. Main pwb, Call for Service. Main pwb, Call for Service. Main pwb, Call for Service. WorkCentre Pro 665/685/765/785... -
Page 269: Paper Jam
See Chapter 4, “Loading Documents” for document specifications and recommendations which can help avoid paper jams. Note: The power can be left ON when clearing a paper jam. WorkCentre Pro 665/685/765/785 Code Location In the 1st Paper Tray... - Page 270 Troubleshooting 1. Remove any documents from the Document Tray. 2. Grasp the Top Cover Open Lever to open the Top Cover. 16-10 Remove Documents Top Cover Open Lever Top Cover WorkCentre Pro 665/685/765/785...
- Page 271 3. Open the Right Side Cover and remove any jammed paper. 4. Remove the Developer Assembly with the Drum Unit. Drum Unit WorkCentre Pro 665/685/765/785 CAUTION Always hold the Developer Assembly by the green handles. Do not expose the green drum to light for more than 3 minutes.
- Page 272 Troubleshooting 5. Pull up on the green Paper Feed Release Lever and remove jammed paper. Avoid tearing the paper. 16-12 Paper Paper Feed Release Lever WorkCentre Pro 665/685/765/785...
- Page 273 6. If the paper is jammed partway through the Fuser Unit (black colored housing), remove the jammed paper in the direction of the arrow. Avoid tearing the paper. WorkCentre Pro 665/685/765/785 WARNING The black colored fuser housing may be hot if the machine was in use prior to this paper jam.
- Page 274 Drum Unit clicks into place. 8. Close the Right Side Cover, then close the Top Cover. 9. Press down on the Top Cover until a “click” is heard to ensure the latches engage. 16-14 Top Cover Right Side Cover WorkCentre Pro 665/685/765/785...
-
Page 275: Document Jam
Document has tape or pieces of paper taped to it. The Transmission Cover is not fully closed. The document is stapled. WorkCentre Pro 665/685/765/785 Troubleshooting Recommended Procedure Adjust the Document Guides to the edges of the document. Make a duplicate using a copier and use the copy as the sending document. - Page 276 Troubleshooting 1. Remove all documents from the Document Tray. 2. Press the Transmission Cover Release Button to open the Transmission Cover. 16-16 Transmission Cover WorkCentre Pro 665/685/765/785 Remove Documents Control Panel Release Button...
- Page 277 3. Remove the document jam. Remove any pieces of paper, paper clips, or staples that may have caused the jam. 4. Close the Transmission Cover. Ensure the latch engages. 5. Verify the display has returned to the Standby Mode. WorkCentre Pro 665/685/765/785 Troubleshooting Remove Paper Push here to close...
-
Page 278: Status Code Table
Transmission Speed Code Line Density 8 pels/mm x 3.85 lines/mm 8 pels/mm x 7.7lines/mm 8 pels/mm x 15.4 lines/mm — 16 pels/mm x 15.4 lines/mm 5 0 2 8 pels/mm x 3.85/lines/mm 14400 bps Code Encoding JBIG WorkCentre Pro 665/685/765/785... -
Page 279: Transmission Problems
2 pages feed at a time. The remote station receives a blank or elongated printout. WorkCentre Pro 665/685/765/785 Check Items • Have you inserted the document far enough into the feeder? • Is the power cord connected to the AC outlet? •... -
Page 280: Reception Problems
• Is the original document on the sending side of poor quality? Check with the remote station. • Is there a problem with the remote machine? • Does the same problem happen when you copy a document? If so, clean the Recording Unit. See “Maintaining the Machine”. WorkCentre Pro 665/685/765/785... -
Page 281: Image Quality
With the H/N model, if a second line is not plugged in and you try to send group jobs you will get a comms failure as line 2 is not plugged Set line 2 to 'receive only'. WorkCentre Pro 665/685/765/785 Check Items • Is the machine out of toner? •... - Page 282 Troubleshooting Notes: 16-22 WorkCentre Pro 665/685/765/785...
-
Page 283: Appendix A Ordering Supplies
Ordering Supplies Ordering Supplies To order supplies, contact the Xerox supplies center at the following number: • – Supplies center – Fax number • Canada – French – English • Europe – Call your local sales and service provider. Supplies: Item Paper (letter size, 20 lb.) -
Page 284: Ordering Supplies Automatically
Supplies can be ordered through the customer’s internal supplies center, through a dealer or even through Xerox Supplies. This is determined when the order center fax number is input after the auto supplies order is activated (see Supplies Order in Chapter 2). You... - Page 285 WorkCentre Pro 665/685/765/785...
-
Page 286: Entering The Part Details
Enter fax number. or press Phonebook key or one touch key Menu Supplies order setup 1. Destination setup 2. Supplies 3. Other information 4. Image print Select supplies 1. Toner 2. Drum to enter Toner or WorkCentre Pro 665/685/765/785 to enter Drum. - Page 287 5. Press required. 6. The menu selection screen redisplays. Press Exit or Stop to return to the Standby Mode. WorkCentre Pro 665/685/765/785 xxxxx ordering 1. Select auto order 2. Enter part number 3. Enter quantity then to order automatically.
-
Page 288: Entering Ordering Details
4. Image print Other information 1. Customer number 2. Contact name 3. Contact tel number 4. Ship to name 5. Ship to address Enter customer number Number (20 max) : and use the keypad to enter your customer number. WorkCentre Pro 665/685/765/785... - Page 289 Press items. 4. The menu selection screen redisplays. Press Exit or Stop to return to the Standby Mode. WorkCentre Pro 665/685/765/785 Enter contact name Name (40 max) : and use the keypad to enter the contact name. Enter tel number...
-
Page 290: Printing The Order Form
3. The menu selection screen redisplays. Press Exit or Stop to return to the Standby Mode. Menu Supplies order setup 1. Destination setup 2. Supplies 3. Other information 4. Image print . The order form will print. WorkCentre Pro 665/685/765/785... -
Page 291: Appendix B Maintaining The Product
Replace the paper using the following procedure: To replace the paper: 1. Open the Paper Tray. 2. Do not fan the paper. Make sure that the corners of paper are neatly aligned. WorkCentre Pro 665/685/765/785 Paper Tray... - Page 292 4. Insert up to 250 sheets into the paper tray. CAUTION To avoid paper jams, do not exceed the upper limit line on the Paper Guide. Be careful not to damage the claws of the paper tray. Upper Limit Line WorkCentre Pro 665/685/765/785 Paper Pressure Plate Paper...
- Page 293 Push the paper tray all the way into the machine. Paper Tray WorkCentre Pro 665/685/765/785...
-
Page 294: Replacing The Toner Cartridge And Fuser Cleaner
1. Grasp the Top Cover Open Lever and open the Top Cover. CAUTION Only replace the Toner Cartridge after TONER IS LOW or OUT OF TONER displays. If the Toner Cartridge is replaced prematurely, print quality problems can occur. WorkCentre Pro 665/685/765/785 Top Cover Open Lever... - Page 295 2. Remove the Developer Assembly from the machine. The following figure shows how to remove the Developer Assembly. 3. Place the Developer Assembly on a level surface. WorkCentre Pro 665/685/765/785 CAUTION Always hold the Developer Assembly by the green handles. Do not touch the green drum area or the black toner roller.
- Page 296 Developer Assembly. Note: Avoid touching the toner to your clothing since toner Drum Unit cannot be removed easily. If the toner sticks to your clothing, immediately rinse out the toner with cold water. Developer Assembly WorkCentre Pro 665/685/765/785...
- Page 297 9. Lift the Toner Cartridge from the Developer Assembly. Dispose of the used toner cartridge properly. 10. Hold the New Toner Cartridge with both hands and shake the cartridge back and forth several times. WorkCentre Pro 665/685/765/785 Toner Cartridge New Toner Cartridge...
- Page 298 13. Holding the Developer Assembly with one hand, grasp the edge of the protective strip under the toner housing. Pull the Strip firmly to completely remove it from the cartridge. Toner Cartridge Developer Assembly WorkCentre Pro 665/685/765/785 Developer Assembly Strip...
- Page 299 Developer Assembly. Without touching the green drum surface, hook the Drum Unit to the Developer Assembly. The following figure shows how to join the Drum Unit and the Developer Assembly. WorkCentre Pro 665/685/765/785 Drum Unit Developer Assembly...
- Page 300 Developer Assembly sides with the slots in the machine frame. Lower the assembly into the machine . The following figure shows how the shafts on the Developer Assembly align with the slots. B-10 Developer Assembly WorkCentre Pro 665/685/765/785...
- Page 301 16. Press firmly on the green squares on the Drum Unit until the Drum Unit clicks into place. The following figure shows how to press the Drum Unit into place. Drum Unit WorkCentre Pro 665/685/765/785 B-11...
- Page 302 17. Grasp the two green tabs and lift the Fuser Cleaner from the machine. B-12 WARNING The black colored fuser housing may be hot if the machine was in use prior to this servicing. WorkCentre Pro 665/685/765/785 Fuser Cleaner Fuser Cleaner...
- Page 303 At this time, the guides of the fuser cleaner should be positioned on the right side. Then, move the fuser cleaner to the back side so that the guides of the fuser cleaner align with the guides of the fuser housing. WorkCentre Pro 665/685/765/785 076-1 076-2 B-13...
- Page 304 20. Close the Top Cover. Press down on the Top Cover until a “click” is heard to ensure the cover is closed. Top Cover B-14 WorkCentre Pro 665/685/765/785...
-
Page 305: Replacing The Drum Unit
To replace the Drum Unit: 1. Grasp the Top Cover Open Lever and open the Top Cover. Top Cover WorkCentre Pro 665/685/765/785 CAUTION Do not expose the green Drum to light for more than 3 minutes. Never expose the drum to direct sunlight or touch the drum. - Page 306 Do not leave the Drum Unit out of the machine for an extended period. Touching the drum or exposing the Drum Unit to light could lower the print quality. Drum Unit Developer Assembly Developer Assembly WorkCentre Pro 665/685/765/785...
- Page 307 Drum Unit and the Developer Assembly. 6. Holding the Developer Assembly by the green handles, align the three shafts on the Developer Assembly sides with the slots in the machine frame. Lower the assembly into the machine. WorkCentre Pro 665/685/765/785 Drum Unit Developer Assembly...
- Page 308 Assembly align with the slots. 7. Press firmly on the green squares on the Drum Unit until the Drum Unit clicks into place. The following figure shows how to press the Drum Unit into place. Drum Unit B-18 WorkCentre Pro 665/685/765/785...
- Page 309 8. Remove the Ozone Filter from the inside of the machine. Then, place the new ozone filter into the machine. 9. Close the Top Cover. Press down on the Top Cover until a “click” is heard to ensure the latches engage. WorkCentre Pro 665/685/765/785 Top Cover Ozone Filter B-19...
-
Page 310: Cleaning The Machine
Use a vacuum cleaner or brush to remove dust from the vents and the Ozone Filter (see figure). Refer to “Replacing the Ozone Filter” in the previous section to replace the Ozone Filter. B-20 Ventilation Openings WorkCentre Pro 665/685/765/785... -
Page 311: Cleaning The Document Scanner
2. Wipe the glass surface and the guide with a soft dry cloth (lens cleaner cloth). If the surfaces require moisture to remove the dirt, use a cloth slightly dampened with water to remove the dirt, followed by a dry cloth to remove streaks. WorkCentre Pro 665/685/765/785 Guide Glass B-21... - Page 312 3. Wipe the Retard Pad and the rollers with a dry cloth. If the surfaces require moisture to remove the dirt, use a cloth slightly dampened with water to remove the dirt, followed by a dry cloth. 4. Close the Transmission Cover. B-22 Retard Pad WorkCentre Pro 665/685/765/785...
-
Page 313: Cleaning The Developer Assembly And The Surrounding Parts
Discharge Wire are located under the Developer Assembly inside the machine. • Paper Guide —The Paper Guide is located under the Developer Assembly inside the machine. • Developer Assembly —The Developer Assembly has a Mylar Sheet below the toner roller. WorkCentre Pro 665/685/765/785 B-23... - Page 314 1. Grasp the Top Cover Open Lever and open the Top Cover. WARNING Do not touch the fuser housing inside the machine. The fuser housing is extremely hot while the machine is operating. B-24 Top Cover Top Cover Open Lever WorkCentre Pro 665/685/765/785...
- Page 315 3. Place the Developer Assembly on a level surface. Cover the assembly with a clean cloth to protect the drum from exposure to light. WorkCentre Pro 665/685/765/785 CAUTION Always hold the Developer Assembly by the green handles. Do not touch the green drum area or the black roller.
- Page 316 5. Wipe the Paper Guide with a dry cloth. The following figure shows the Paper Guides. B-26 CAUTION Do not touch the Discharge Wire or Transfer Wire with your hands. The oils from your hands could contaminate the wire resulting in lower print quality. Transfer Wire WorkCentre Pro 665/685/765/785 Paper Guide...
- Page 317 8. Place the Developer Assembly over paper to protect the surface on which you are working. 9. Use a cotton swab to clean above the Mylar Sheet of the Developer Assembly. The following figure shows how to clean the Mylar Sheet. WorkCentre Pro 665/685/765/785 Drum Unit Mylar Sheet Developer Assembly...
- Page 318 Developer Assembly. Without touching the green drum surface, hook the Drum Unit to the Developer Assembly. The following figure shows how to join the Drum Unit and the Developer Assembly. B-28 Drum Unit WorkCentre Pro 665/685/765/785 Developer Assembly...
- Page 319 Developer Assembly sides with the slots in the machine frame. Lower the assembly into the machine. The following figure shows how the shafts on the Developer Assembly align with the slots. WorkCentre Pro 665/685/765/785 Developer Assembly Developer...
- Page 320 Drum Unit clicks into place. The following figure shows how to press the Drum Unit into place. 13. Close the Top Cover. Press down on the Top Cover until a “click” is heard to ensure the cover is closed. B-30 Drum Unit Top Cover WorkCentre Pro 665/685/765/785...
-
Page 321: Cleaning The Charger Wire And The Laser Beam Window
1. Grasp the Top Cover Open Lever and open the Top Cover. WARNING Do not touch the fuser housing inside the machine. The fuser housing is extremely hot while the machine is operating. WorkCentre Pro 665/685/765/785 Top Cover Top Cover Open Lever... - Page 322 To clean the Laser Beam Window Wipe the laser beam window with a cotton swab or a dry cloth (lens cleaner cloth). The following figure shows the laser beam window. B-32 WorkCentre Pro 665/685/765/785 Laser Beam Window...
- Page 323 To clean the Charger Wire 3. Remove the Developer Assembly from the machine. The following figure shows how to remove the Developer Assembly. WorkCentre Pro 665/685/765/785 CAUTION Always hold the Developer Assembly by the green handles. Do not touch the green drum area or the black roller.
- Page 324 6. Locate the Charger Wire on the Drum Unit. 7. Use the Charger Cleaner to lightly wipe the Charger Wire on the Drum Unit. The following figure shows how to clean the Charger Wire. B-34 Drum Unit Drum Unit Charger Wire WorkCentre Pro 665/685/765/785 Developer Assembly Charger Cleaner...
- Page 325 Developer Assembly. Without touching the green drum surface, hook the Drum Unit to the Developer Assembly. The following figure shows how to join the Drum Unit and the Developer Assembly. WorkCentre Pro 665/685/765/785 Drum Unit Developer Assembly...
- Page 326 Developer Assembly sides with the slots in the machine frame. Lower the assembly into the machine. The following figure shows how the shafts on the Developer Assembly align with the slots. B-36 Developer Assembly WorkCentre Pro 665/685/765/785...
- Page 327 Drum Unit clicks into place. The following figure shows how to press the Drum Unit into place. 11. Close the Top Cover. Press down on the Top Cover until a “click” is heard to ensure the cover is closed. WorkCentre Pro 665/685/765/785 Drum Unit Top Cover B-37...
-
Page 328: Cleaning The Components As Needed
Document Scanner — The Document Scanner is located on the underside of the Control Panel. • Scanner Rollers and Retard Pad — The Scanner Rollers and the Retard Pad are parts of the automatic document feeder inside the scanner. B-38 WorkCentre Pro 665/685/765/785... - Page 329 1. Grasp the Top Cover Open Lever and open the Top Cover. WARNING Do not touch the fuser housing inside the machine. The fuser housing is extremely hot while the machine is operating. WorkCentre Pro 665/685/765/785 Top Cover Top Cover Open Lever...
- Page 330 Do not touch the green drum area or the black roller. Do not leave the Drum Unit out of the machine for an extended period. Touching the drum or exposing the Drum Unit to light could lower the print quality. WorkCentre Pro 665/685/765/785 Developer Assembly...
- Page 331 Drum Unit and the Developer Assembly. 5. Place the Drum Unit on a level surface. Cover the Drum Unit with a clean cloth to protect the unit from exposure to light. WorkCentre Pro 665/685/765/785 Drum Unit Developer Assembly...
- Page 332 6. Use a cotton swab to clean the silver contacts in the machine. Contacts are located inside the chassis in the front, on the right, and in the rear. The following figure shows the locations of the contacts. B-42 Front Right Side WorkCentre Pro 665/685/765/785...
- Page 333 7. Use the Mylar Scraper to scrape off the toner between the metering blade and the black toner roller on the Developer Assembly. The following figure shows how to clean the Metering Blade. WorkCentre Pro 665/685/765/785 Rear Mylar Scraper Metering Blade...
- Page 334 9. Holding the Developer Assembly by the green handles, align the three shafts on the Developer Assembly sides with the slots in the machine frame. Lower the assembly into the machine. B-44 Drum Unit WorkCentre Pro 665/685/765/785 Developer Assembly Developer Assembly...
- Page 335 The following figure shows how the shafts on the Developer Assembly align with the slots. WorkCentre Pro 665/685/765/785 B-45...
-
Page 336: Installing The Maintenance Kit
11. Close the Top Cover. Press down the Top Cover until a “click” is heard to ensure the cover is closed. Installing the maintenance kit An Installation Sheet will be provided to the customer in the Maintenance Kit packaging. B-46 Drum Unit Top Cover WorkCentre Pro 665/685/765/785... -
Page 337: Appendix C Product Data Sheet
Paper Output Tray Capacity Effective Scanning Width Effective Printing Width Compatibility Communication Modes WorkCentre Pro 665/685/765/785 Specification Width: 8.5 in. max. (216 mm) max. 5.8 in. min. (148 mm) min. Length: 16.5 in. max. (420 mm) max. 3.9 in. min. (100 mm) min. - Page 338 16800/14400/12000/9600/7200/4800/2400 bps JBIG/MMR/MR/MH Electrophotography and Laser Printing Desk-top type with both transmission/reception functions Pro 665, Pro 685 - 1 line Pro765, Pro 785 - 2 lines 600 x 600 class printing 406 x 391 dpi Fax/Copy Windows 95/98 or NT 4.0...
- Page 339 3,800 prints, assuming 4% print coverage. 50 (368 stations per group) 100 boxes Up to 100 sheets of paper Pro 665, Pro 685 - 3 Mb Pro765, Pro 785 - 7 Mb Storage is by JBIG encoding method. Standard, Fine, Superfine...
- Page 340 Paper - (20 lb.) - 3R6296 (Recycled) Transparencies - 3R3108 Legal: Paper - (20 lb.) - 3R727 Paper - (20 lb.) - 3RTBD (Recycled) Paper - (80g/m ) - 3R91820 Paper - (80g/m ) - 3R94565 (Recycled) Transparencies - 3R96023 WorkCentre Pro 665/685/765/785...
-
Page 341: Appendix D Safety Certification And Environmental Compliance
Safety Certification and Environmental Compliance Your Xerox product and supplies have been designed and tested to meet strict safety requirements. These include safety agency examination and approval, and compliance to established environmental standards. Please read the following instructions carefully before operating the equipment and refer to them as needed to ensure the continued safe operation of your machine. - Page 342 Never spill liquid of any kind on the product. Never remove covers or guards that require a tool for removal, unless directed to do so in a Xerox approved maintenance kit. Never defeat interlock switches. Machines are designed to restrict operator access to unsafe areas.
-
Page 343: Laser Safety Information
Xerox installation procedures, ensure that concentration levels meet safe limits. If you need additional safety information concerning the copier or Xerox supplied materials you may call the following number: Europe: +44 (0)1707 353434 USA: 1800 928 6571 Laser Safety Information This equipment is certified as a Class 1 laser product under the U.S. -
Page 344: Third Party Certification
Changes or modifications to this equipment not specifically approved by the Xerox Corporation may void the users authority to operate this equipment. Shielded cables must be used with this equipment to maintain compliance with FCC regulations. -
Page 345: Unique European Certification
Unique European Certification Approvals and Certification The CE marking applied to this product symbolizes Xerox Limited Declaration of Conformity with the following applicable Directives of the European Union as of the dates indicated: January 1, 1995: Council Directive 73/23/EEC amended by Council Directive 93/68/EEC, approximation of the laws of the member states related to low voltage equipment. -
Page 346: Uk Electricity At Work Regulation
9000 quality certification and are subject to regular audits by the British Standards Institution or equivalent national standards body. Xerox equipment which has been properly and regularly serviced and maintained should not have to undergo additional specific safety tests pursuant to the 1989 Regulation. Customers wishing to complete safety testing should contact Xerox Limited Technical Centre (see page 1) for advice prior to any test implementation. - Page 347 Xerox equipment in such premises is safe. Xerox Limited’s Product Safety function has prepared a guide which contains a list of tests which may be completed by your Xerox Limited Customer Service Organization. THESE TESTS MUST BE CARRIED OUT ONLY BY PERSONS WHO POSSESS THE RELEVANT SKILL, KNOWLEDGE AND EXPERIENCE TO CARRY OUT SUCH TESTS.
- Page 348 Engineer will provide you with a certificate which details the results of all tests completed. In the event of any defect being noted, the Xerox equipment will be switched off and disconnected from the supply until the defect has been corrected. You will be advised of such action to enable such defects to be corrected.
-
Page 349: Environmental Choicem
Choice EcoLogo requirements for minimized impact on the environment. SWISS ENERGY 2000 230V, 50Hz Xerox Corporation has designed and tested this product to meet the energy restrictions required by Swiss Energy 2000 compliance has been notified to the registration authorities. WorkCentre Pro 665/685/765/785... -
Page 350: Telecommunications Requirements
Denmark France Finland In the event of problems, you should contact your local Xerox representative in the first instance. The product has been tested against TBR21. To assist in the use and application of terminal equipment which complies with this standard,... -
Page 351: Fcc Regulations
ID and name. Data Coupler Information This Xerox WorkCentre Pro 665/685/765/785 machine contains an internal data coupler. Its use is restricted by the FCC (Federal Communications Commission). To comply with the FCC rules, you must carefully read and follow the instructions listed below. - Page 352 Part 68 compliant. Do not connect this machine to a party or coin operated phone line. Repairs to the machine should be made only by a Xerox representative or an authorized Xerox service agency. This applies at any time during or after the service warranty period.
-
Page 353: Canadian Certification
This precaution may be particularly important in rural areas. WorkCentre Pro 665/685/765/785 WARNING When programming emergency numbers and/or making test calls to emergency numbers: Remain on the line and briefly explain to the dispatcher the reason for the call before hanging up. - Page 354 Interference Regulations of Industry Canada. Cet appareil numérique est conforme aux limites d'émission de bruits radioélectriques pour les appareils de classe A stipulées dans le Règlement sur le brouillage radioélectrique du ministère des Industries du Canada. D-14 WorkCentre Pro 665/685/765/785...
- Page 355 ControlCentre 15-14 authorizing setting the department control 2-34 automatic document feeder see also document feeder WorkCentre Pro 665/685/765/785 maximum capacity C-1 automatic receive mode answering a call 3-5 default setting 3-2 described 3-1 receiving a document 3-5...
- Page 356 15-6 creating mailbox 15-20 – 2-31 date and time setting 15-5 deleting mailbox 15-22 deleting one touch key 15-15 department code setting 15-22 department codes changing 15-23 department codes deleting 15-23 – 9-17 5-28 – 15-23 WorkCentre Pro 665/685/765/785...
- Page 357 – copying 10-1 10-2 collating 10-1 preventing document jams 16-15 cover sheet creating 5-13 WorkCentre Pro 665/685/765/785 sending a cover sheet 5-14 setting using ControlCentre 15-6 Cover Sheet Key used 5-14 creating & deleting ITU-T mailboxes 8-2 15-18 darken contrast 2-46...
- Page 358 B-15 default 2-40 described 5-18 disable 5-23 with 33.6K BPS modem 2-40 editing one touch key using ControlCentre 15-14 enabling account codes 5-28 cover sheet 5-13 – 10-2 – 7-13 box 8-7 – 3-15 WorkCentre Pro 665/685/765/785...
- Page 359 2-34 ECM 2-40 Enabling Xerox personnel to perform remote tests 15-27 encoding systems C-2 end tone 5-17 Enter Key for programming the menu mode 2-2 entering characters 2-7 envelopes problems 16-21 environmental compliance D-1 ENERGY STAR D-9 Environmental Choice D-9...
- Page 360 C-3 ??– specifications type C-2 weight C-3 machine features menu map 2-4 – mailbox communications 8-1 creating using ControlCentre 15-20 deleting using ControlCentre 15-22 editing using ControlCentre 15-21 – ITU-T mailboxes 8-1 8-18 WorkCentre Pro 665/685/765/785 9-17 8-18...
- Page 361 – default setting 3-2 described 3-1 receiving documents 3-5 reception problems 16-20 manual send 5-8 master code WorkCentre Pro 665/685/765/785 changing the department codes 2-38 memory error code 16-6 free memory 3-8 paper jams 16-9 receive to memory 3-1 8-13...
- Page 362 Pending Jobs Key used 9-23 Pending Jobs Report 9-23 personal documents confidential ITU-T mailboxes 8-1 secure receive 3-1 secure send 5-24 phonebook setting one touch numbers 2-22 5-19 – 16-14 – 16-14 9-24 9-26 WorkCentre Pro 665/685/765/785...
- Page 363 ITU-T mailbox numbers 8-2 one touch keys 2-22 relay groups 5-37 speed dial numbers 2-14 printer printer width C-1 printer driver C-2 WorkCentre Pro 665/685/765/785 printer not available receive to memory 3-8 printing 12-1 – 15-19 documents in a ITU-T mailbox 8-7...
- Page 364 Department Code Report 9-24 group poll 9-5 group send 9-5 Mailbox ITU-T Report 9-22 Menu Map 9-26 Pending Jobs Report 9-23 Power Failure List 9-25 printing 9-21 printing from ControlCentre 15-24 WorkCentre Pro 665/685/765/785 – 5-42 9-12 9-19 – 9-21 15-24 – 9-17 9-11 –...
- Page 365 D-2 building codes D-2 cleaning D-1 covers D-2 data coupler D-11 earthing D-2 energy saving D-2 extension cord D-2 WorkCentre Pro 665/685/765/785 fuser area D-3 grounding D-2 guards D-2 insurance requirements D-2 interlock switches D-2 laser safety D-3 location D-2...
- Page 366 6-1 – 16-7 described 6-1 for programming the menu mode 2-2 store for resending and redial interval 2-43 – 15-8 resend 5-30 stored documents – 15-26 ??– 15-27 5-20 ??– – 5-31 WorkCentre Pro 665/685/765/785...
- Page 367 A-1 toner pack fuser cleaner and B-4 toner pack yield C-3 tones alarms 16-3 toner empty B-4 top cover WorkCentre Pro 665/685/765/785 error code 16-6 total pages 5-18 transmission features see transmitting transmission modes default settings 5-3 delayed 5-8...
- Page 368 TWAIN settings 11-1 11-2 type, machine type C-2 voltage C-2 volume,ringer adjusting 2-52 2-53 2-54 wattage C-2 weight C-3 width machine dimensions C-3 printing width C-1 scanning width C-1 WorkCentre setting using ControlCentre 15-2 INDEX-14 2-55 – 15-5 WorkCentre Pro 665/685/765/785...