Sign In
Upload
Manuals
Brands
Midas Manuals
Music Mixer
XL8
User Manuals: Midas XL8 Digital Console
Manuals and User Guides for Midas XL8 Digital Console. We have
3
Midas XL8 Digital Console manuals available for free PDF download: Operator's Manual, Quick Reference Manual
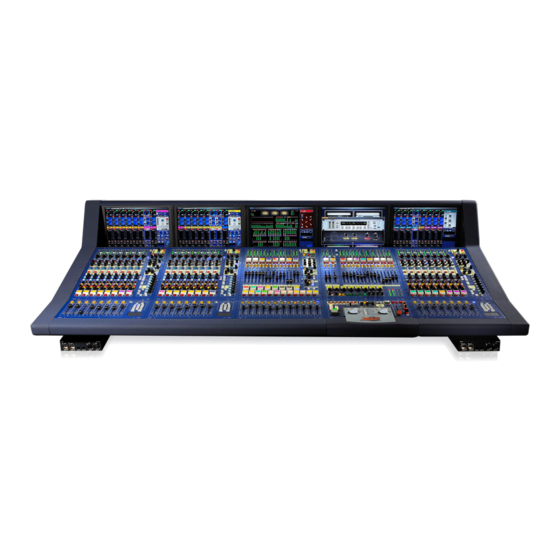
Midas XL8 Operator's Manual (342 pages)
Control Centre
Brand:
Midas
| Category:
Music Mixer
| Size: 15 MB
Table of Contents
Table of Contents
15
Chapter 1 Introduction
25
Warranty and Registration
26
About this Manual
26
Purpose
26
Intended Readers
26
Equipment Covered by this Manual
26
Revisions
26
Document Structure
26
Conventions
28
Symbols for Control Operation
28
Page Layout
29
Signposts
30
Terminology
31
Service and Support
31
Chapter 2 XL8 Live Performance System Overview
33
Features
33
System Hardware
35
Network
36
System Interconnections
36
FOH and MON
37
Audio Physical Connections
39
Uses of the Configurable Audio Connections
39
MIX Matrix
41
Console Linking
41
Input Channel Processing
41
MIX Channel Processing
42
Output Channel Processing
43
Effects Processing and Geqs
43
Control Software
44
Gui
44
Resilience to Failure (Redundancy)
44
Integration of Third Party Software
48
System Documentation
49
Chapter 3 XL8 Control Centre Description
51
Bays
52
Control Surface Layout
53
Gui
54
Input Bay GUI Display
54
MIX Bay GUI Display
54
Output Bay GUI Display
55
Pull-Out Keyboard
55
Front and Rear Connections
55
Chapter 4 Input Bays
57
Input Signal Routing
58
Input Bay Control Surface
59
Input Bay GUI
60
Meters
61
MIC Amp - Preliminary Input Processing
62
Channel Configuration
64
Input Channel Source (GUI Only)
65
Input Channel Direct Output
66
Input Channel Safes
66
Input Channel Delay (GUI Only)
67
Processing Order
67
Input Channel Gain and Filter
68
Direct out
70
Compressor (D Zone)
72
Compressor Graph
74
Gate (D Zone)
76
Insert
78
EQ (E Zone)
80
Auxes and Matrices
82
Master Controls and Fader
85
Side Chain
88
Select Side-Chain Source Window
89
Input Channel Select
90
Chapter 5 MIX Bay
91
MIX Bay Control Surface
92
MIX Bay GUI
93
MIX Fast Strip
94
Meters, Talk and Dynamic/Eq
94
LCD and solo
95
Faders
96
Auxes
97
Configuration Controls
98
Direct Input Controls
99
Dual Dynamics, Side Chain and Talk MIC
100
Insert Controls
102
Parametric EQ
103
Matrix Outputs
104
Faders and Masters
106
Returns
108
Configuration Controls
109
Matrix Outputs
110
Faders and Masters
112
Bank/Channel Selection
114
VCA Faders
115
VCA/POP Groups
116
Chapter 6 Output Bay
117
Output Bay Control Surface
118
Output Bay GUI
120
Master Overview Strips
122
Output Fast Strips
126
Reset Switches
130
Comms
130
Talk MIC
131
Signal Generator
132
Talk Osc/Routing
133
Monitoring
134
Intercom and USB Keys
134
Solo System
135
Source and Output (a and B)
137
Afl, Pfl and Talk Back
139
Monitor a and B Output Panel and Meters
140
Automation
141
Auto-Mute Groups
142
Chapter 7 GUI Menu Options
143
Common Screen Elements
143
GUI Menu Overview
144
GUI Menu Flowchart
145
Menu Option Identification
146
Default Screen
146
Files Screen
147
Input Channels Screen
148
Input Channel Sheet Screen
149
Input Channels Screen
149
MIX & Outputs Screen
150
Output Channel Sheet Screen
151
Aux Returns 1-16 (MIX Channels) Screen
152
Aux Sends 1 - 16 (MIX Channels) Screen
152
Matrix Outputs 1 - 16 Screen
153
Master Outputs Screen
153
Dashboard Screen
154
Population Groups Screen
155
Group Management
156
Group Sheet Screen
157
VCA Groups Screen
158
Mute Groups Screen
159
Talk Groups Screen
160
Rack Units Screen
161
Effects Sheet Screen
162
Automation Screen
163
Monitors Screen
163
Diagnostics Screen
163
Preferences Screen
163
General Screen
164
Linking Screen
165
Lock Screen
166
Admin Screen
167
Shutdown System Screen
167
Chapter 8 Connections, Setting up and Powering up
169
Description of the XL8 Connections
169
Front and Rear Connector Panels
169
Front Panel Connections
170
Keyboard Connections and Bay Allocation
171
Rear Panel Connections
172
Monitor Connector Panels
173
KVM, Monitor and Synchronisation Connector Panel
174
System Interconnection Panel
175
Power Supply
176
Warnings, Cautions and Important Information
177
Connecting up the XL8
178
Cable Type and Function
180
Manual Set-Up of Unit Ids
181
Powering the XL8 System
182
To Power up the XL8 System
182
To Power down the XL8 System
182
Switching the XL8 Control Centre On/Off
183
To Switch on the XL8 Control Centre
183
To Switch off the XL8 Control Centre
184
Booting up
184
GUI Screen Brightness - Adjustment
184
Chapter 9 Basic Operation
185
Control Surface Layout
185
Hints and Tips
186
Check What Is Hidden
186
Check the Dashboard Screen
186
Saving a Show Versus Storing a Scene
186
Working with the Controls
187
To Adjust a GUI Control Knob Via Glide Pad/Trackball
187
Selecting a Detail Area to the Channel Strip Via the GUI
188
Operating the Control Knobs
188
Operating the Pushbuttons/Switches
188
LCD Buttons (Control Surface Only)
189
Leds
189
Meters
189
Faders
190
Quick Access Buttons
190
Using the Keyboard
190
Digital Signal Path and Input Routing
191
To 'Soft Patch' an Input Channel to a Source
191
Navigating the Inputs
192
How Input Channels Are Displayed on the GUI
192
To Select a Bank of Input Channels
193
To Select an Input Channel by Typing in Its Number
194
To Select an Input Channel Via a Switch or Button
195
To Select an Input Channel Via the GUI
196
To Select a Channel Section to the Gui's Channel Strip
197
Setting a MIC Amplifier's Input Gain
198
To Set Stage Box Gain/Console Gain
198
Setting the High and Low Pass Filters
199
To Set both High and Low Pass Filters in
199
Input Equalisation (E Zone)
200
To EQ the Input Signal
200
Input Dynamics Processing (D Zone)
201
To Set up a Compressor/Limiter
201
To Set up a Gate
202
VCA/POP Groups
203
To Assign Input Channels to a VCA/POP Group
203
To Set up the Name and Colour of a VCA/POP Group
204
To Recall a VCA/POP Input Group
205
To Recall a VCA/POP Output Group
206
Navigating the Outputs
207
To Select the Output Screen
207
To Select a Bank of Auxes or Returns to the MIX Bay
207
To Select an Output Channel
208
Setting up a MIX
209
To Set up a Mono Aux MIX
209
To Program a MIX Preset
211
Setting up the Effects Rack
212
To Add an Effect
212
Routing an Aux to an Effect or Output
213
To Route an Aux
213
Simple Routing to Master Stereo Outputs
214
Scenes (Automation)
215
To Create a New Show
215
To Save a Show
216
To Load a Show
216
To Store a Scene
217
To Recall a Scene
218
Naming Inputs and Outputs
219
To Change the Name and Colour of an Input
219
To Change the Name and Colour of an Output
219
Areas a and B (Split Surface/Dual Operation)
220
Saving Your Show Files to USB Memory Stick
221
To Save a Show File to a USB Memory Stick
221
Troubleshooting
222
To Check Active Master Controller Via the GUI
222
Chapter 10 Advanced Operation
223
Mixer Details
223
Mixing (Buses)
223
To Set up a Stereo Aux
224
To Set up a Group (Subgroup)
224
To Set up a MIX Minus
224
Side Chain
225
To Select a Side Chain Source
225
Security (Locking Mode)
226
Locking the XL8 Control Centre
226
Unlocking the XL8 Control Centre
226
Monitors
226
Muting
227
Safes
228
Solo
228
Solo a
228
Solo B
230
Solo Hierarchy
230
To Select a Bay as Area B
230
Solo in Place (SIP)
231
Communications
231
Internal Talk MIC
231
To Select the Internal Talk MIC
231
External Talkback
231
To Select External Talkback
231
Talk Groups
231
To Use Internal Talk or Osc Routing
232
To Activate a Talk Group
232
To Deactivate a Talk Group
232
To Set up a Talk Group
232
To Configure a Talk Group (GUI Only)
232
Control Groups
233
Mute Groups (Auto-Mutes)
233
Assigning to a Mute Group
233
Stereo Linking
233
Input Channels
233
Output Channels
234
Service Information
235
Routine Maintenance
235
Cleaning the Control Centre
235
Cleaning a GUI Screen
235
Equipment Disposal
236
Chapter 11 Graphic Equaliser (GEQ)
237
The Graphic Eqs Screen
237
Front Panel Features
238
Graphic EQ Section
238
Filters
238
Example of System Connection
239
Using the GEQ
240
Studio and Creative Use
240
Live Use (FOH)
240
Live Use (MON)
241
Bypassing the EQ
241
Equalising a System
242
Preparing for Equalisation
242
Equalisation Using an RTA
242
Effects of Equalisation
244
Effects of Equalisation on Voice Reproduction
244
Effects of Equalisation on Music Reproduction
244
Audio Signal Path
245
Proportional-Q Filter Response
246
Applications
250
Front-Of-House
250
Monitors
250
Examples
251
Corrective Use of Notch Filters
252
Responses of Proportional-Q and Symmetrical-Q
252
Overlapping Notch Filters
252
Eqing a Monitor Wedge
253
Technical Specifications
254
Performance
254
Equalisation
254
Frequency Centres
254
Frequency Chart
255
Using a Rapide with the Geqs
256
GEQ Channel Number Allocation
256
To Connect the Xl8/Rapide
257
To Set up the Rapide
258
Using the Rapide to Remotely Control the XL8
259
Solo
259
Chapter 12 Automation
261
Automation Control
261
Automation Navigation
264
Automation Data
264
Initial Snapshot Scene
264
Scope
264
MIDI Functions
265
MIDI Output
265
MIDI Input
265
Chapter 13 Effects
267
Effect Configuration
268
Effect Programs
268
Virtual DN-780 Effects
268
Virtual DN-780 Effects Screen
269
Virtual DN-780 Front Panel
270
Levels
271
Operation
271
To Choose an Algorithm
271
To Create a New Variation
272
To Store New Variations
272
To Recalling Existing Variations
272
Parameter Application Notes
272
Pre-Delay
272
Pattern
272
Level
272
Decay
272
LF Key
273
HF Key
273
Room Size
273
Special Effects Programs
273
Recalling an Effect
273
Modifying and Storing the Effect
274
Direct Signal
274
Delay" Effect
274
ADT" Effect
274
Multi-Tap Echo" Effect
275
Sound-On-Sound" Effect
275
Infinite Room" Effect
276
Alive", "Non-Linear" and "Reverse" Effects
276
Technical Specifications
277
Audio
277
Digital
277
Parameters
277
Controls
277
Delay Effects
278
Front Panel
279
Flanger Effects
280
Front Panel
281
Phaser Effects
282
Front Panel
283
Front Panel - Common Element
284
Rear Panel - Common
285
Chapter 14 External Interfaces
287
Mouse
287
MIDI
288
Usb
288
Vga
288
HELIX Auto solo
288
Network Inter-Operability
288
HELIX Rapide DN9331
288
Chapter 15 Testing, Diagnostics and Updating
289
Diagnostics
290
Diagnostic Screen Description
291
Diagnostic Screen - Hardware Status
292
Remote De-Bugging
292
Fault Finding and Recovery
292
To Reset a Master Controller or Router
292
Mapping a GUI Screen to Another Bay
293
To Re-Map a GUI Screen
293
Chapter 16 Application Notes
295
Spatial Imaging System (SIS™)
295
XL8 Compressor Modes (Dynamic)
296
Description
296
Threshold
296
Ratio
296
Attack
296
Release
296
Knee
296
More (Output Compressors Only)
297
Gain
297
Side Chain Filter
297
Soft Clip Level
297
Compressor Envelope Modes
297
Knee
298
More
298
Corrective Mode (Exponential Peak - Fast)
298
Adaptive Mode (Exponential RMS - Accurate)
298
Creative Mode (Linear Peak - Slow)
299
Vintage Mode (Adaptive Peak - Bright)
299
Shimmer Mode (Overshoot Peak - Slow)
299
XL8 EQ Modes
300
Basic Specification
300
Description
300
Soft Treble
300
Classic Treble
300
Bright Treble
301
Warm Bass
301
Classic Bass
301
Deep Bass
301
Appendix A Functional Block Diagrams
303
XL8 System Buses
304
XL8 System Diagram
305
MIC Splitter Signal Flow
306
Mono Input Channel Signal Flow
307
Stereo Input Channel Signal Flow
308
Mono Auxes and Returns Signal Flow
309
Stereo Auxes and Returns Signal Flow
310
Mono Group Signal Flow
311
Stereo Group Signal Flow
312
Master Signal Flow
313
Mono MIX Signal Flow
314
Stereo MIX Signal Flow
315
Monitor Signal Flow
316
Comms Signal Flow
317
Dynamics Signal Flow
318
Appendix B Technical Specification
319
XL8 General Statistics
319
XL8 General Specifications
320
XL8 Audio Performance Specifications
321
Frequency Response
321
Gain Error at 1Khz
321
Input CMRR
322
Distortion at 0Dbu
322
Distortion at +20Dbu
322
Mixing Noise (All Bus Types) 22Hz to 22Khz Unweighted
323
Signal Path Noise 22Hz to 22Khz Unweighted (Inputs 150R Terminated)
323
Dynamic Range 22Hz to 22Khz Unweighted
323
XL8 System Inputs and Outputs
324
DL431 Splitter - Analogue Inputs
324
DL431 Splitter - Analogue Outputs
324
DL431 Splitter - Digital (System) Outputs
324
DL451 I/O - Analogue Inputs
325
DL451 I/O - Analogue Outputs
325
DL451 I/O - Digital Inputs
325
DL451 I/O - Digital Outputs
325
DL451 I/O - MIDI and GPIO
325
DL451 I/O - Digital System Inputs and Outputs
325
DL461 Router - Digital Audio System Inputs and Outputs
326
DL461 Router - Control Data System Inputs and Outputs
326
DL461 Router - Miscellaneous Inputs and Outputs
326
XL8 Control Centre - Analogue Audio System Inputs
326
XL8 Control Centre - Analogue Audio System Outputs
327
XL8 Control Centre - Digital Audio System Inputs and Outputs
327
XL8 Control Centre - Control Data System Inputs and Outputs
327
XL8 Control Centre - Miscellaneous Inputs and Outputs
328
XL8 Input and Output Characteristics
329
Analogue Input Characteristics
329
Analogue Output Characteristics
329
Digital I/O Characteristics
329
Miscellaneous Digital Characteristics
330
XL8 Main Processing Functions
331
Input Channel Functions
331
Output Channel Functions
332
Effects Channel Functions
333
XL8 Status Functions
334
Meters
334
Screens
334
Glossary
335
Advertisement
Midas XL8 Quick Reference Manual (92 pages)
Brand:
Midas
| Category:
Recording Equipment
| Size: 22 MB
Table of Contents
General Precautions
11
Safety Warnings
11
Audio Connections
12
Table of Contents
15
Overview
17
About this Guide
19
Chapter 1 Introduction
19
Optional Extras
19
XL8 Host Software Version
19
Service and Support
20
Warranty and Registration
20
Chapter 2: Introducing the XL8 Live Performance System
21
System Components (Standard Supply)
21
Chapter 3: About the XL8 Control Centre
23
Overview of the XL8 Control Centre
23
Bay and GUI Layout
24
XL8 Control Surface
25
Gui
26
Front and Rear Connections
27
Pull-Out Keyboard
28
Operation
29
Chapter 4 Before You Start
31
Principles of Operation
31
Hints and Tips
31
Saving Your Work
31
Chapter 5 Working with the XL8 Control Centre
33
About GUI Operation
33
Operating the GUI Screen Controls
34
Using the GUI Menu
35
Text Editing
36
Chapter 6: Navigation
37
An Introduction to XL8 Navigation
37
About the Navigational Controls
38
Location of the Navigational Controls
39
About GUI Navigation
42
How to Navigate
43
Chapter 7: Patching
45
Introduction
45
About the Patching Procedure
47
Configuring the Devices
47
Configuring the XL8 with the Snake Type
48
Setting up the I/O Rack Devices
48
How to Patch
49
Chapter 8: Basic Operation
51
Setting a MIC Amplifier's Input Gain
51
Setting the High and Low Pass Filters
52
Input Equalisation (E Zone)
53
Input Dynamics Processing (D Zone)
54
Output Processing
55
Using VCA/POP Groups
56
Setting up a MIX
58
Fader Flip
62
Setting up the Effects Rack
62
Simple Routing to Master Stereo Outputs
64
Automation
65
Configuring the Inputs and Outputs
69
Using Copy and Paste
70
User Library (Presets)
71
Surround Panning
72
Two-Man Operation
73
Saving Your Show Files to a USB Memory Stick
74
External AES50 Synchronisation
75
Security (Locking Mode)
75
Connecting and Setting up the System
77
Chapter 9: Setting up the System
79
Initial Set-Up Procedure
79
Unpacking the Equipment
79
Making up the Racks
79
Wiring Instructions
80
XL8 System Interconnections
82
Powering the XL8 System
84
Switching the XL8 Control Centre On/Off
85
Setting up the ID of the Dl4N1 Units
86
Appendices
87
Appendix A Troubleshooting
89
No Audio
89
Diagnostics
89
Midas XL8 Quick Reference Manual (60 pages)
Control Centre
Brand:
Midas
| Category:
Music Mixer
| Size: 3 MB
Table of Contents
Important Safety Instructions
3
Eu Declaration of Conformity
5
General Precautions
9
Safety Precautions
9
Safety Warnings
9
Handling the Equipment
10
Audio Connections
11
Electric Fields
12
Optional Equipment
12
Radio Frequency Interference
12
Special Accessories
12
Table of Contents
13
Chapter 1 Introduction
15
About this Guide
15
XL8 Live Performance System Overview
16
Control Centre
16
Bays
17
Control Surface Layout
18
Gui
19
Input Bay GUI Display
19
MIX Bay GUI Display
19
Output Bay GUI Display
20
Pull-Out Keyboard
20
Front and Rear Connections
20
Chapter 2 Connections, Setting up and Powering up
21
Description of the XL8 Connections
21
Front and Rear Connector Panels
21
Connecting up the XL8
22
Cable Type and Function
24
Manual Set-Up of Unit Ids
25
Powering the XL8 System
26
To Power up the XL8 System
26
To Power down the XL8 System
26
Switching the XL8 Control Centre On/Off
27
To Switch on the XL8 Control Centre
27
To Switch off the XL8 Control Centre
28
Booting up
28
Chapter 3 Getting Started
29
Control Surface Layout
29
Saving Your Work
29
Saving a Show Versus Storing a Scene
29
Working with the Controls
30
To Adjust a GUI Control Knob Via Glide Pad/Trackball
30
Navigating the Inputs
31
How Input Channels Are Displayed on the GUI
31
To Select a Bank of Input Channels
32
To Select an Input Channel by Typing in Its Number
33
Setting a MIC Amplifier's Input Gain
34
To Set Stage Box Gain/Console Gain
34
Setting the High and Low Pass Filters
35
To Set both High and Low Pass Filters in
35
Input Equalisation (E Zone)
36
To EQ the Input Signal
36
Input Dynamics Processing (D Zone)
37
To Set up a Compressor/Limiter
37
To Set up a Gate
38
VCA/POP Groups
39
To Assign Input Channels to a VCA/POP Group
39
To Set up the Name and Colour of a VCA/POP Group
40
To Recall a VCA/POP Input Group
41
Navigating the Outputs
42
To Select the Output Screen
42
To Select a Bank of Auxes or Returns to the MIX Bay
42
To Select an Output Channel
43
Setting up a MIX
44
To Set up an Aux MIX
44
To Program a MIX Preset
46
Setting up the Effects Rack
47
To Add an Effect
47
Routing an Aux to an Effect or Output
48
To Route an Aux
48
Simple Routing to Master Stereo Outputs
49
Scenes (Automation)
50
To Create a New Show
50
To Save a Show
51
To Load a Show
51
To Store a Scene
52
To Recall a Scene
53
Naming Inputs and Outputs
54
To Change the Name and Colour of an Input
54
To Change the Name and Colour of an Output
54
Areas a and B (Split Surface/Dual Operation)
55
Saving Your Show Files to USB Memory Stick
56
To Save a Show File to a USB Memory Stick
56
Troubleshooting
57
To Check Active Master Controller Via the GUI
57
Advertisement
Advertisement
Related Products
Midas XL8 DL431
Midas XL8 DL461
Midas XL8 DL451
Midas XL8 DL471
Midas XL402
Midas XL405
Midas XL413
Midas XL421
Midas XL431
Midas XL441
Midas Categories
Music Mixer
Recording Equipment
Amplifier
DJ Equipment
Media Converter
More Midas Manuals
Login
Sign In
OR
Sign in with Facebook
Sign in with Google
Upload manual
Upload from disk
Upload from URL