Sign In
Upload
Manuals
Brands
Canon Manuals
Fax Machine
CLC5151
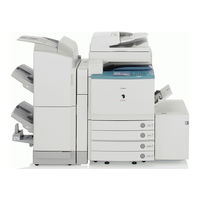
Canon CLC5151 Manuals
Manuals and User Guides for Canon CLC5151. We have
4
Canon CLC5151 manuals available for free PDF download: Service Manual, Reference Manual, Sending And Facsimile Manual, Copying And Mail Box Manual
Canon CLC5151 Service Manual (620 pages)
Brand:
Canon
| Category:
All in One Printer
| Size: 38 MB
Table of Contents
Symbols Used
4
Symbol Description
4
Chapter 1 Introduction
27
Product Specifications
31
Laser Safety
34
Handling the Laser Assembly
34
Safety of Toner
35
Notes When Handling a Lithium Battery
35
Notes before It Works Serving
35
Chapter 2 Installation
37
Making Pre-Checks
41
Points to Note
41
Spatial Requirements
42
Order of Installing Accessories
44
Checking the Contents
44
Unpacking and Installation
48
Mounting the Transfer Cleaning Unit
52
Fitting the Toner Container in Place
54
Fitting the Drum Unit in Place
54
Fitting the Secondary Transfer Outside Roller Unit in Place
56
Cassette Setup
57
Other Work
57
Dealing with Power Code Mount
58
Connecting the Power Cord
60
Adjustment of the Margin Along Leading Edge of Image
61
Checking the Connection to the Network
62
Ping Operation
62
Troubleshooting the Network
63
Installing the Copy Tray
63
Installation Procedure
64
Installing the Card Reader
65
Installation Procedures
66
Installation Procedure in the Imageware Accounting Manager (Henceforth: Iwam) Environment
67
Installing the Key Switch Unit
67
Checking after the Installation
69
Installing the Reader Heater
70
Turning off the Host Machine
70
Installing the Cassette Heater
77
Installing the Voice Guidance Kit
81
Chapter 3 Basic Operation
91
Functional Construction
95
Basic Sequence
95
Basic Sequence of Operations
96
Chapter 4 Basic Operations (as a Printer)
99
Construction of the Electrical Circuitry
103
DC Controller PCB 2 (MAISY)
104
Full Color
106
Chapter 5 Main Controller
109
Main Controller Circuit Board (MAIN)
113
SRAM Circuit Board
114
Start-Up Sequence
115
Actions When HDD Error
117
Image Processing
119
Overview of the Flow of Image Data
119
Reader Input Image Processing
120
Printer Output Image Processing
120
Compression, Decompression, and Edit Processing Blocks
121
Flow of Image Data for Copier Functions
122
Flow of Image Data for Box Functions
122
Flow of Image Data for SEND Functions
123
Flow of Image Data for Fax Transmission Functions
123
Flow of Image Data for Fax Reception Functions
124
Flow of Image Data for PDL Functions
124
Main Controller PCB
125
Parts Replacement Procedure
126
Removing the Main Controller Box
126
Removing the Main Controller PCB (Main)
126
Removing the Main Controller PCB (Sub R-A)
128
Removing the Main Controller PCB (Sub SJ-A)
129
When Replacing the SRAM PCB
132
Removing the Boot ROM PCB
132
Removing the Image Memory (SDRAM) PCB
133
Preparation for Removing the HDD
134
Removing the Controller Fan
134
When Replacing the HDD
134
Chapter 6 Original Exposure System
135
Table of Contents
137
Construction
139
Specifications, Control Mechanisms, and Functions
139
Major Components
139
Construction of the Control System
140
Reader Controller PCB
141
Basic Sequence
142
Basic Sequence of Operation at Power-On
142
Basic Sequence of Operation in Response to a Press on the Start Key
142
Various Control Mechanisms
143
Controlling the Scanner Drive System
143
Overview
143
Controlling the Scanner Motor
144
Enlargement/Reduction
145
Changing the Magnification in Main Scanning Direction
145
Changing the Magnification in Sub Scanning Direction
145
Controlling the Scanning Lamp
145
Overview
145
Scanning Lamp
146
Turning on and off the Scanning Lamp
146
Detecting the Size of Originals
146
Identifying the Size of Originals
146
Points of Measurement Used for Original Size Identification
146
Overview of Operation
147
Dirt Sensor Control
149
Stream Reading Dust Detection Control
149
White Plate Dust Detection Control
150
Image Processing
151
Overview
151
CCD Drive
152
CCD Gain Correction, Offset Correction
152
CCD Output A/D Conversion
152
Outline of Shading Correction
153
Shading Adjustment
153
Shading Correction
153
Parts Replacement Procedure
154
Copyboard Glass
154
Removing the Copyboard Glass
154
Exposure Lamp
154
Preparation for Removing the Scanning Lamp
154
Removing the Scanning Lamp
154
Reader Controller PCB
155
Preparation for Removing the Reader Controller PCB
155
Removing the Reader Controller PCB
155
After Replacing the Reader Controller
155
Interface PCB
156
Preparation for Removing the Interface PCB
156
Removing the Interface PCB
156
Points to Note When Attaching the Interface PCB
157
Inverter PCB
157
Preparation for Removing the Inverter PCB
157
Removing the Inverter PCB
157
After Replacing the Inverter PCB
157
CCD Unit
157
Preparation for Removing the CCD Unit
157
Removing the CCD Unit
158
After Replacing the CCD Unit
158
Scanner Motor
158
Preparation for Removing the Scanner Motor
158
Removing the Scanner Motor
158
Attaching the Scanner Motor
159
ADF Open/Close Sensor
159
Preparation for Removing the ADF Open /Close Sensor
159
Removing the ADF Open/Closed Sensor
159
Scanner HP Sensor
160
Preparation for Removing the Mirror Base Home Position Sensor
160
Removing the Mirror Base Home Position Sensor
160
Original Sensor
160
Preparation for Removing the Original Size Sensor
160
Removing the Original Size Sensor
161
Cooling Fan
161
Preparation for Removing the Cooling Fan
161
Removing the Cooling Fan
161
Scanner Drive Cable
161
Preparation for Removing the Scanner Drive Cable
161
Removing the Scanner Drive Cable
162
Attaching the Scanner Drive Cable
165
Chapter 7 Laser Exposure
167
Construction
171
Specifications, Control Mechanisms, and Functions
171
Major Components
171
Construction of the Control System
172
Basic Sequence
173
Basic Sequence of Operation
173
Various Control
174
Controlling the Laser Activation Timing
174
ON/OFF Control
174
Controlling Synchronization in Main Scanning Direction
176
Controlling Synchronization in Sub Scanning Direction
177
Controlling the Intensity of Laser Light
178
APC Control
178
PWM Control
178
Controlling the Laser Scanner Motor
178
Laser Scanner Motor Control
178
DC Controller PCB 1(IMG)
179
Laser Scanner Motor Speed Change Control
179
Controlling the Laser Shutter
180
Laser Shutter Control
180
Correcting Image Displacement
180
Outline
180
Timing of Color Displacement Detection/Correction
181
Detecting/Correcting Color Displacement in Sub Scanning Direction
181
Detecting/Correcting the Angle in Main Scanning Direction
182
Detecting/Correcting Color Displacement in Main Scanning Direction
183
Detecting/Correcting Changes in the Reproduction Ratio in Main Scanning Direction
184
Parts Replacement Procedure
185
Laser Unit
185
Preparation for Removing the Laser Unit
185
Removing the Laser Unit
185
After Replacing the Laser Unit
186
Chapter 8 Image Formation
187
Construction
193
Specifications, Control Mechanisms, and Functions
193
Major Components of the Image Formation System
194
Charging Specifications
195
Image Formation Process
196
Image Formation Process (General)
196
Image Formation Process (Image Formation)
197
Image Formation Process (Transfer)
197
Basic Sequence
198
At Power-On (1)
198
During Copying/Printing Operations (Normal Speed)
199
Making Copies/Prints (Half Speed)
200
After Replacing the Drum Unit (D-UNIT)
200
Printing Originals Containing a Color Page
201
Driving and Controlling the Image Formation System
201
Driving and Controlling the Image Formation System and the High-Voltage System
201
High-Voltage Control
201
Image Stabilization Control
202
Outline of Image Quality Control
202
Automated Image Stabilization Control
202
ATR Control
205
Discharge Current Level Control
206
ATVC Control (Transfer Bias Level Correction)
206
PASCAL Control (Image Gradation)
206
SALT-Dmax Control (Development Characteristics Correction)
207
SALT-Dhalf Control (Development Characteristics Correction)
207
Auto Gradation Control
208
Drum Unit
209
Outline of the Drum Unit
209
Drum Receptacle Presence / Absence Detection
209
Drum Unit (D-UNIT) Drive Control
210
Developing Assembly
210
Construction of the Developing Assembly
210
Controlling the Developing Bias
211
Auxiliary Brush
212
Construction of the Auxiliary Brush
212
Controlling the Auxiliary Bias
213
Environment Sensor
214
DC Controller Pcb
214
Charging Mechanism
216
Construction of the Charging Mechanism
216
Controlling the Charging Bias
216
Cleaning Sheet
216
Toner Container
218
Outline of the Toner Container
218
Toner Receptacle Presence / Absence Detection
218
Controlling the Toner Container Drive
219
Checking the Level of Toner
219
Controlling the Supply of Toner
220
Transfer Unit
220
Outline of the Transfer Unit
220
Transfer Unit Drive Control
221
Controlling the Transfer Bias
221
Transfer Bias Control
221
Cleaning
223
Intermediate Transfer Belt (ITB)
223
Secondary External Roller
223
Waste Toner Collection Mechanism
224
Separation Mechanism
224
Separation
224
Parts Replacement Procedure
226
Drum ITB Motor
226
Preparation for Removing the Drum ITB Motor
226
Removing the Drum ITB Motor
226
Drum Drive Unit
226
Preparation for Removing the Drum Drive Unit
226
Removing the Drum Drive Unit
227
Drive Roller
227
Preparation for Removing the Drive Roller
227
Removing the Drive Roller
228
Secondary Transfer Unit
229
Preparation for Removing the Secondary Transfer Unit
229
Removing the Secondary Transfer Unit
230
Intermediate Transfer Unit
230
Preparation for Removing the Intermediate Transfer Unit
230
Transfer Cleaning Unit
231
Preparation for Removing the Transfer Cleaning Unit
231
Removing the Transfer Cleaning Unit
231
Intermediate Transfer Belt
231
Preparation for Removing the Intermediate Transfer Belt
231
Removing the Intermediate Transfer Belt
232
Intermediate Transfer Belt Tension Roller
234
Preparation for Removing the Intermediate Transfer Belt Tension Roller
234
Removing the Intermediate Transfer Belt Tension Roller
234
Primary Transfer Roller
234
Preparation for Removing the Primary Transfer Roller
234
Removing the Primary Transfer Roller
235
Secondary Transfer External Roller
235
Preparation for Removing the Secondary Transfer External Roller
235
Removing the Secondary Transfer External Roller
235
Secondary Transfer Internal Roller
236
Preparation for Removing the Secondary Transfer Internal Roller
236
Removing the Secondary Transfer Internal Roller
237
Toner Container Drive Unit
237
Preparation for Removing the Toner Container Drive Unit
237
Removing the Toner Container Drive Unit
238
Waste Toner Detection PCB
238
Preparation for Removing the Waste Toner Detection PCB
238
Removing the Waste Toner Detection PCB
239
Feedscrew Rotation Sensor
239
Preparation for Removing the Feedscrew Rotation Sensor
239
Removing the Feedscrew Rotation Sensor
241
Tone Container Motor
241
Preparation for Removing the Toner Container Motor
241
Removing the Toner Container Motor
242
Waste Toner Feedscrew Case
242
Preparation for Removing the Waste Toner Feedscrew Case
242
Removing the Waste Toner Feedscrew Case
243
Pattern Reader Unit
243
Preparation for Removing the Pattern Reader Unit
243
Removing the Pattern Reader Unit
243
Auto Registration Sensor PCB
244
Preparation for Removing the Auto Registration Sensor PCB
244
Removing the Auto Registration Sensor PCB
245
SALT Sensor
245
Preparation for Removing the SALT Sensor
245
Removing the SALT Sensor
246
Chapter 9 Pickup/Feeding System
247
Construction
253
Specifications, Control Mechanisms, and Functions
253
Arrangement of He Units
253
Arrangement of Rollers
253
Diagram of the Paper Paths
254
Arrangement of Sensors
255
Arrangement of the Clutches and Solenoids
256
Route of Dive
256
Basic Sequence
257
Basic Sequence of Operations at Power-On
257
Basic Sequence of Operations in Response to a Press on the Start Key
257
Detecting Jams
258
Delay Jams
258
Delay Jam in the Cassette Pickup Assembly
258
Delay Jam Outside the Cassette Pickup Assembly
258
Stationary Jams
259
Stationary Jams at Power-On
259
Cassette
259
Identifying the Paper Size
259
Detecting the Level of Paper
260
Cassette Pick-Up Unit
262
Outline
262
Basci Sequence of Operations
263
Manual Feed Pickup Unit
263
Outline
263
Basic Sequence of Operations
264
Identifying the Size of Paper
264
Detecting the Presence/Absence of Paper
265
Detecting the Last Paper
266
Registration Unit
267
Outline
267
Duplex Feeding Unit
268
Outline
268
Controling Horizontal Registration
269
Face-Down Delivery, A4, 5 Sheets in Circulation
270
Face-Down Delivery, A3, 3 Sheets in Cirucilation
272
Delivery
274
Movement in the Direction of Face-Down Delivery
275
Movement in the Direction of Face-Up Delivery
275
Movement for Centertray Delivery
276
Moement for Copy Tray Dievyer
276
Parts Replacement Procedure
277
Cassette Pickup Unit
277
Preparatipon for Removing the Pickup Unit
277
Removing the Pickup Unit
277
Cassette Size Detection Unit
277
Preparation for Removing the Cassette Size Detection Unit
277
Removing the Cassette Size Detection Unit
278
Pre-Registration Roller
278
Preparation for Removing the Pre-Registration Roller
278
Removing the Pre-Registration Roller
278
Registration Upper Roller
279
Preparation for Removing the Registration Lower Roller
279
Remove the Registration Lower Roller
279
Re-Pickup Roller
280
Preparation for Removing the Re-Pickup Roller
280
Removing the Re-Pickup Roller
281
Pickup Roller
282
Preparation for Removing the Pickup Roller
282
Removing the Pickup Roller
282
Feed Roller
282
Preparation for Removing the Feeding Roller
282
Removing the Feeding Roller
282
Separation Roller
282
Preparation for Removing the Separation Roller
282
Removing the Separation Roller
282
Cassette Pickup Motor
282
Cassette Retry Paper Sensor
283
Preparation for Removing the Cassette Retry Paper Sensor
283
Removing the Cassette Retry Paper Sensor
284
Points to Note When Mounting the Pickup System Sensor Mounting Plate
284
Cassette Paper Sensor
284
Preparation for Removing the Cassette Paper Sensor
284
Removing the Cassette Paper Sensor
285
Points to Note When Mounting the Pickup System Sensor Mounting Plate
286
Cassette Paper Level Sensor (A/B)
286
Preparation for Removing the Cassette Paper Level Sensor (A/B)
286
Removing the Cassette Paper Level Sensor (A/B)
287
Points to Note When Mounting the Pickup System Sensor Mounting Plate
287
Slide Resistor
288
Preparation for Removing the Slide Resistor
288
Removing the Slide Resistor
288
Cassette Pickup Solenoid
289
Preparation for Removing the Cassette Pickup Solenoid
289
Removing the Cassette Pickup Solenoid
289
Manual Feed Tray Unit
289
Preparation for Removing the Manual Feed Tray Unit
289
Removing the Manual Feed Tray Unit
290
Manual Feed Unit
290
Removing the Manual Feed Unit
290
Manual Feed Roller
291
Advertisement
Canon CLC5151 Reference Manual (524 pages)
Brand:
Canon
| Category:
Copier
| Size: 14 MB
Table of Contents
Manuals for the Machine
4
Table of Contents
6
Preface
14
How to Use this Manual
14
Symbols Used in this Manual
14
Keys Used in this Manual
15
Displays Used in this Manual
15
Illustrations Used in this Manual
16
Operations and Terms Used in this Manual
17
Legal Notices
19
Equipment Name
19
Preventing Counterfeit Documents
19
EMC Directive
19
Laser Safety
20
Additional Information
20
International Energy Star Program (Clc5151/Ir C4580I Only)
21
WEEE Directive
21
Abbreviations Used in this Manual
21
Trademarks
22
Copyright
23
Disclaimers
25
Legal Limitations on the Usage of Your Product and the Use of Images
25
Important Safety Instructions
27
Installation
27
Power Supply
29
Handling
30
Maintenance and Inspections
34
Consumables
36
Other Warnings
36
Periodic Inspection of the Breaker
37
Checking the Breaker
37
Check Sheet for the Periodic Inspection of the Breaker
40
Before You Start Using this Machine
41
Installation Location and Handling
42
Installation Precautions
42
Avoid Installing the Machine in the Following Locations
42
Select a Safe Power Supply
45
Provide Adequate Installation Space
46
Moving the Machine
47
Handling Precautions
47
Parts and Their Functions
51
External View
51
Internal View
53
Control Panel Parts and Functions
55
Main Power and Control Panel Power
56
How to Turn on the Main Power
56
Control Panel Power Switch
62
Shutting down the Machine
62
System Settings
67
Chapter 1
69
Basic Operations
69
What this Machine Can Do
70
Sending Function
71
Overview of the Clc5151/Clc4040/Ir C4580I/Ir C4080I
73
The Touch Panel Display
73
Switching the Functions Indicated on the Touch Panel Display
73
Various Touch Panel Display Screens
76
Adding New Functions
77
Specifying Settings
79
Functions that Conserve Power
80
Auto Sleep Mode
81
Checking, Changing, and Cancelling Print Jobs
82
Checking Job and Device Status
83
Displaying a Help Screen
84
Reading Messages from the System Manager
86
Types of Message Boards
86
Other Useful Functions
88
Auto Orientation
90
Using the Touch Panel Display
91
Frequently Used Keys
91
Touch Panel Key Display
92
Numeric Keys
93
Adjusting the Brightness
94
Entering Characters from the Touch Panel Display
95
Entering Characters
95
Values in Inches
96
Entering the Department ID and Password
97
Using a Login Service
100
Placing Originals
105
Document Sizes
105
Orientation
106
Platen Glass
107
Feeder (Color Image Reader-F1)
111
Making Prints Using the Stack Bypass
114
Standard Size
116
Multifunctional Operations
129
Available Paper Stock
131
System Configuration
134
Optional Equipment
134
Sample System Configurations
136
System Options
137
Secure Watermark
138
Available Combinations of Options
140
Utilities
142
Cassette Feeding Unit-Z1
143
Parts and Their Functions
143
Optional Accessories
144
Paper Deck-Y1
145
Parts and Their Functions
145
Plain Pedestal-E1
146
Color Image Reader-F1
147
Parts and Their Functions
148
Color Image Reader-E1
149
Parts and Their Functions
149
Finisher-X1
150
Parts and Their Functions
150
Finishing Modes
151
Finisher-W1/Saddle Finisher-W2/Puncher Unit-AG1
154
Parts and Their Functions
154
Finishing Modes
156
Offset Mode
157
Copy Tray-N1
162
Parts and Their Functions
162
Copy Tray-M1
163
Parts and Their Functions
163
Card Reader-D1
164
Procedure before Using the Machine
165
Procedure after Using the Machine
166
Department ID Management
166
Flow of Additional Functions Operations
166
Changing the Password and Page Limit
169
Checking the Page Counts on a Control Card
175
Checking and Printing Counter Information
176
Clearing Page Totals
177
Accepting Print and Scan Jobs with Unknown Ids
178
Accepting B&W Copy and Print Jobs Without a Control Card
179
What Are Additional Functions
183
Additional Functions Settings Table
186
Common Settings
187
Timer Settings
191
Report Settings
193
System Manager Settings
194
Communications Settings
200
Mail Box Settings
203
Specifying Common Settings
205
Initial Function at Power on
205
Default Display after Auto Clear
208
Tone Settings
209
Display the Remaining Paper Message
210
Text/Photo Priority in a Black-And-White Original
210
Display the Black Mode Shortcut Key
211
Inch Entry
211
Auto Paper Selection/Auto Drawer Switching
212
Identifying the Type of Paper in a Paper Source
214
Energy Saver Mode
215
Energy Consumption in the Sleep Mode
216
Output Tray Designation
218
Setting the Printing Priority
221
Image Form
222
Storing an Image Form
222
Checking Image Form Details
224
Erasing an Image Form
224
Setting the Image Priority
225
User-Defined Text for Page Numbers and Watermarks
225
Registering User-Defined Text
226
Editing User-Defined Text
226
Erasing User-Defined Text
227
Standard Paper for the Stack Bypass
227
Irregular Paper Size Settings for the Stack Bypass
229
Registering and Editing Irregular Paper Sizes
229
Naming a Size Key
230
Erasing Irregular Paper Sizes
231
Setting the Speed or Print Side Priority
232
Standard Local Print Settings
233
Changing the Language Shown on the Touch Panel Display
234
Reversing the Contrast of the Touch Panel Display
235
Alternating the Print Output (Offset Jobs)
235
Inserting a Job Separation Sheet between Print Jobs
236
Inserting a Job Separation Sheet between Copy Sets
236
Job Duration Display
237
Number of Copies/Wait Time Status Display
238
Clean the Original Scanning Area Prompt
238
Data Compression Ratio for Remote Scans
239
Setting the Gamma Value for Remote Scans
240
Distinguishing LTRR and STMT Originals
240
Limiting Functions
241
Erasing the Remaining Toner Error Message
242
Returning the Common Settings to Their Defaults
242
Canon CLC5151 Copying And Mail Box Manual (468 pages)
Brand:
Canon
| Category:
All in One Printer
| Size: 12 MB
Table of Contents
Manuals for the Machine
4
Table of Contents
7
Preface
15
How to Use this Manual
15
Symbols Used in this Manual
15
Keys Used in this Manual
16
Displays Used in this Manual
16
Illustrations Used in this Manual
17
Legal Notices
18
Trademarks
18
Copyright
18
Disclaimers
18
Folding Copies
19
Preserving Colour Copies
19
Overview of the Clc5151/Clc4040/Ir C4580I/Ir C4080I
22
Switching the Copy Basic Features Screen
22
Various Copying Features
23
Flow of Copy Operations
26
Paper Selection
32
Cancelling a Copy Job
37
Using the Touch Panel Display
37
Using the Stop Key
37
Using the System Monitor Screen
38
Reserved Copying
40
Reserving Copy Jobs
40
Using the Stack Bypass
42
Interrupt Mode
48
Sample Set
50
Confirming/Changing/Cancelling Selected Settings
53
Chapter 1
55
Introduction to the Mail Box Functions
55
Various Mail Box Functions
56
Print Screen
62
Flow of Mail Box Operations
66
Storing Originals into an Inbox
66
Printing Documents Stored in an Inbox
73
Paper Selection
79
Cancelling a Job
84
While Scanning
84
Using the Touch Panel Display
84
Using the Stop Key
85
While Printing
85
Using the Touch Panel Display
85
Using the System Monitor Screen
86
Reserving Jobs
88
Storing Originals While Printing
88
Reserving Print Jobs
89
Using the Stack Bypass
92
Sample Print
98
Storing Print Settings
101
Arranging Documents Stored in an Inbox
103
Changing the Name of a Document
103
Checking a Document's Detailed Information
104
Erasing a Document
106
Printing Lists
107
Moving/Duplicating a Document
108
Editing/Checking the Contents of a Document
110
Checking an Image in a Document
110
Storing Multiple Documents as One Document
111
Inserting a Document into Another Document
112
Erasing Part of a Document
115
Basic Copying and Mail Box Features
117
Exposure and Original Type Settings
118
Manual Exposure Adjustment
118
Copying
118
Mail Box (Scan)
119
Original Type Selection
119
Copying
120
Mail Box (Scan)
121
Automatic Exposure Adjustment
122
Copying
122
Mail Box (Scan)
123
Exposure Adjustment During Copying/Printing
124
Copying
124
Mail Box (Print)
125
Changing the Copy (Zoom) Ratio
126
Preset Zoom
126
Copying
127
Mail Box (Scan)
128
Zoom by Percentage
128
Copying
129
Mail Box (Scan)
129
Auto Zoom
130
Copying
130
Mail Box (Scan)
131
Entire Image
132
Reducing/Enlarging Using the Original and Copy/Record Sizes
133
Making Copies (Scanning) with the same XY Copy/Zoom Ratio (Zoom)
134
Making Copies (Scanning) with Different XY Copy/Zoom Ratios (XY Zoom)
134
Setting the X and y Axes Independently
138
Copying
138
Mail Box (Scan)
138
Mail Box (Scan)
141
Poster
142
Determining the Copy Ratio and Number of Sheets Needed
143
Specifying the Copy Ratio in Percentage
143
Selecting the Number of Output Pages
145
Pasting the Sheets of the Divided Image Together
147
Collating Copies/Prints
149
Page Order (Collate)
153
Copying
153
Mail Box (Print)
155
Same Page (Group)
155
Copying
155
Mail Box (Print)
157
Page Order (Staple)
157
Copying
157
Mail Box (Print)
160
Two-Sided Copying/Printing
161
To 2-Sided
162
Copying
162
Mail Box (Print)
163
To 2-Sided
164
To 1-Sided
166
Book to 2-Sided
167
Scanning Two-Sided Originals
169
Changing Colour Modes
171
Full Color
172
Single Color
172
Copying
173
Mail Box (Scan)
174
Mail Box (Print)
175
Merging Documents
176
Chapter 2
179
Chapter 3
179
Special Copying and Mail Box Features
179
What Are Special Features
181
Specifying the Special Copying Features
181
Specifying the Special Mail Box Features for Scanning
183
Specifying the Special Mail Box Features for Printing
185
Page Separation
187
Copying
188
Mail Box (Scan)
188
Cover/Sheet Insertion
189
Tab Paper
191
Copying
192
Mail Box (Print)
195
Cover/Job Separator
196
Booklet Mode
199
Copying
201
Mail Box (Print)
204
Booklet Scanning
205
Transparency Interleaving
207
Image Combination
210
Copying
211
Mail Box (Scan)
213
Shifting the Original Image
214
Using the Arrow Keys
214
Using the Numeric Keys
215
Copying
216
Mail Box (Print)
217
Margin Mode
218
Copying
219
Mail Box (Print)
220
Frame Erase
221
Original Frame Erase
221
Copying
222
Mail Box (Scan)
223
Book Frame Erase
223
Copying
224
Mail Box (Scan)
225
Binding Erase
225
Copying
226
Mail Box (Scan)
226
Job Done Notice
227
Different Size Originals
229
Copying
230
Mail Box (Scan)
230
Job Build
231
Copying
233
Mail Box (Scan)
235
Scan Image Check
236
Using Image Creation Modes
238
Inverting Images (Nega/Posi)
238
Copying
238
Mail Box (Scan)
239
Image Repeat
239
Mirror Image
244
Area Designation
244
Using the Edit Pen
245
Using the Numeric Keys
250
Tab Paper Creation
253
Copying
254
Mail Box (Print)
255
Adjusting the Image
256
Image Quality Adjustment
256
Remove Background
256
Prevent Bleeding
258
Adjusting the Colour
259
Adjusting the Colour Balance
259
Storing Colour Balance Settings
262
Naming a Colour Balance Key
264
Recalling Colour Balance Settings
266
Erasing Colour Balance Settings
267
One Touch Colour Mode
269
Copying
270
Mail Box (Print)
270
Advertisement
Canon CLC5151 Sending And Facsimile Manual (476 pages)
Brand:
Canon
| Category:
Fax Machine
| Size: 10 MB
Table of Contents
Table of Contents
6
Preface
13
How to Use this Manual
13
Symbols Used in this Manual
13
Keys Used in this Manual
14
Displays Used in this Manual
14
Illustrations Used in this Manual
15
Abbreviations Used in this Manual
16
Legal Notices
17
R & TTE Directive
17
Super G3
17
Trademarks
18
Copyright
18
Disclaimers
19
Introduction to Sending and Fax Functions
21
What this Machine Can Do
22
Overview of the Clc5151/Clc4040/Ir C4580I/Ir C4080I
27
Things You Must Do before Using this Machine
33
Setting the Display Language
35
Selecting the Type of Telephone Line
35
Setting the Current Date and Time
36
Registering Your Machine's Fax Number
38
Registering Sender Names
39
Registering the Unit's Name
40
Flow of Sending Operations
42
Sending Fax Documents Manually
54
Cancelling a Job
58
Using the Touch Panel Display
58
Using the Stop Key
59
Using the System Monitor Screen
59
E-Mail, I-Fax, Sending to a File Server, or Storing in a User Inbox
59
Fax
61
Chapter 1
63
Basic Sending Methods
63
Specifying Destinations Using the New Address Tab
64
Specifying a Fax Number
65
Specifying an E-Mail Address
68
Specifying an I-Fax Address
69
Specifying a File Server
74
Using the Keyboard
76
Using the Browse Key (Windows (SMB))
80
Using the Browse Key (Netware (IPX))
83
Using the Host Search Key (Windows (SMB))
86
Specifying a User Inbox
88
Sending Documents to Yourself
89
Specifying Registered Destinations
90
Using the Address Book
90
Using the One-Touch Buttons
92
Using the Favorites Buttons
93
Using a Server
94
Setting CC and Bcc Addresses
100
Checking/Changing a Destination
102
Erasing a Destination
104
Registering New Destinations Using the Register Key
105
Chapter 2
107
Basic Scanning Features
107
Selecting a Scan Mode
108
Scan Settings
110
2-Sided Original
110
Different Size Originals
112
Document Size
114
Specifying the Document Size
115
Registering the Specified Document Size
117
Resolution
119
Scan Exposure and Original Type Settings
121
Manual Exposure Adjustment
121
Original Type Selection
122
Automatic Exposure Adjustment
124
Changing the Zoom Ratio
126
Preset Zoom
126
Zoom by Percentage
128
Auto Zoom
129
Changing Colour Modes
131
Chapter 3
135
Special Scanning Features
135
What Are Special Features
136
Page Separation
138
Frame Erase
139
Original Frame Erase
140
Book Frame Erase
142
Binding Erase
144
Job Build
145
Adjusting the Contrast (Sharpness)
148
Image Quality Adjustment
149
Remove Background
150
Prevent Bleeding
151
User Preset Keys
152
Storing Scan Settings
153
Naming a User Preset Key
155
Erasing Scan Settings
156
Sending Methods
158
Sending a Fax
159
Sending an E-Mail Message
161
Sending an I-Fax
165
Sending a Job to a File Server
168
Sending a Job to a User Inbox
171
Delaying a Send Job
173
Job Done Notice
175
Previewing Originals
177
Stamping Originals
179
Setting the File Format to Send a Document in
181
Setting the File Format
182
Sending a Traced and Smoothed PDF
185
Sending a Compact PDF
188
Sending a Searchable PDF
190
Encrypting PDF Files
191
Adding a Digital Signature to a PDF
196
Adding a Device Signature
197
Adding a User Signature
199
Job Recall
201
Receiving Print, Fax, and I-Fax Documents
204
Receiving Documents
205
Processing Received Documents
207
Setting the Memory Lock Mode
209
Forwarding Received Documents
209
Erasing Received Documents
210
Available Paper Sizes
212
Chapter 4
213
Chapter 5
213
Chapter 6
213
Special Fax Functions
213
Sending with a Subaddress
214
Special Dialing
217
Calling from an Extension
217
Entering International Fax Numbers
219
Fax Information Services
221
Checking/Changing the Status of Send Jobs
224
Checking Send Job Details
224
Changing the Destination
227
Resending a Job
229
Printing the Send Job Status/Log
230
Checking/Changing the Status of Fax Jobs
232
Checking Fax Job Details
232
Printing the Fax Activity Report
233
Checking/Changing the Status of Receive and Forwarded Jobs
235
Checking Receive Job Details
235
Printing the Receive Job Log
236
Checking the Arrival of a Receive Job
237
Checking the Status of Jobs that Have Been Forwarded
238
Advertisement
Related Products
Canon CLC4040
Canon Laser Class 3170 Series
Canon LASER CLASS 3175
Canon Laser Class 700 Series
Canon LASER CLASS 5500
Canon LASER CLASS 7500
Canon LASER CLASS 5000
Canon LASER CLASS 8000
Canon LASER CLASS 7000
Canon MULTIPASS C75
Canon Categories
Printer
Digital Camera
All in One Printer
Camcorder
Scanner
More Canon Manuals
Login
Sign In
OR
Sign in with Facebook
Sign in with Google
Upload manual
Upload from disk
Upload from URL