Table of Contents
Advertisement
Megapixel
1280 x 960
software zoom
30 Frames/s
VGA (640 x 480)
10 fps Mega
-22°F to +140°F
Weatherproof
-30°C to +60°C, IP65
no heating necessary
IEEE 802.3af
PoE
network power
even in winter
microphone & speaker
Audio
bi-directional via IP
variable framerates
Video SIP Client
IP-Telephony
alarm notify,
cam remote control
Video motion
multiple windows
precision pixel-based
lip-syncronized audio
Recording
event-ringbuffer
30 cams each 30 fps
Live viewing
30 cams at 30 fps
all on one screen
Backlight
safe using CMOS
without mechanical iris
Vandalism-protected
Wall bracket
with cable cover
for RJ45 wall outlet
Robust
no moving parts
fiber glass housing
D12
Camera Manual
Complete integration for web and security
MOBOTIX AG • Security-Vision-Systems • Made in Germany
www.mobotix.com • sales@mobotix.com • 2.5.2007
Part 1
Current PDF File:
www.mobotix.com > Support > Manuals
Security-Vision-Systems
X
MOBOTIX
Advertisement
Table of Contents

Related Manuals for Mobotix D12


Summary of Contents for Mobotix D12
-
Page 1: Live Viewing
CMOS www.mobotix.com > Support > Manuals without mechanical iris Vandalism-protected Wall bracket with cable cover for RJ45 wall outlet MOBOTIX AG • Security-Vision-Systems • Made in Germany Robust no moving parts www.mobotix.com • sales@mobotix.com • 2.5.2007 fiber glass housing... -
Page 2: D12 Camera Manual Part 1
Admin User Name: Admin Password: ISDN Dial-In Number: ISDN User Name: ISDN Password: Notes: Note: MOBOTIX offers inexpensive seminars that include a workshop and practical excercises: Basic Seminar 3 days, Advanced Seminar 2 days. For more information, see www.mobotix.com © MOBOTIX AG • Security-Vision-Systems • Made in Germany... -
Page 3: Table Of Contents
The MOBOTIX D12D-Fixdome Outdoor 1.5.1 MOBOTIX D12D-Outdoor Concept 1.5.2 MOBOTIX D12D-Outdoor Product Advantages Feature Overview D12 Hard- and Software Differences of the MOBOTIX D10/D12 Important Notes 1.8.1 Password for the Administration Menu 1.8.2 Password for ISDN Dial-In 1.8.3 Irreversibly Deactivating the Microphone 1.8.4 Starting the Camera Using the Factory IP Address... - Page 4 2.16.1 Mounting to a Wooden Wall of Surface 2.16.2 Mounting to a Drywall 2.16.3 Mounting to a Concrete or Brick Wall 2.16.4 After Mounting the Camera 2.17 Cleaning Instructions 2.17.1 Cleaning the Dome © MOBOTIX AG • Security-Vision-Systems • Made in Germany www.mobotix.com • sales@mobotix.com...
- Page 5 3.7.1 MX Interface Connector for Direct Connections 3.7.2 MOBOTIX Cam-IO: Expansion Module for Easy Installation Signal Input/Output (RS232 Interface) 3.8.1 Signal Input 3.8.2 Signal Output D12 Drilling Templates © MOBOTIX AG • Security-Vision-Systems • Made in Germany www.mobotix.com • sales@mobotix.com...
-
Page 6: D12 Camera Manual Part 1
4.11 Fast Video Streaming 4.12 Operating Multiple Cameras BASIC CAMERA CONFIGURATION Overview Quick Installation Connection Test Basic Settings Image Controls Logos Exposure Settings Day & Night Modes Managing Settings © MOBOTIX AG • Security-Vision-Systems • Made in Germany www.mobotix.com • sales@mobotix.com... -
Page 7: Overview
Sample Configurations for IP Telephony via Internet Sample Configurations for IP Telephony via LAN MOBOTIX CAMERAS ON THE WEB 10.1 Overview 10.2 Displaying Cameras on the Web 10.3 Configuring Routers and Firewalls © MOBOTIX AG • Security-Vision-Systems • Made in Germany www.mobotix.com • sales@mobotix.com... - Page 8 Copyright © 1999-2007 MOBOTIX AG, Kaiserslautern, Germany. All rights reserved. MOBOTIX, MxPEG and MxControlCenter are worldwide trademarks of MOBOTIX AG. Microsoft, Windows and Windows Server are reg- istered trademarks of Microsoft Corporation. Apple, the Apple logo, Mac and Mac OS X are trademarks of Apple Inc. Linux is a trademark of Linus Torvalds.
- Page 9 D12 Camera Manual Part 1 /124 Notes: © MOBOTIX AG • Security-Vision-Systems • Made in Germany www.mobotix.com • sales@mobotix.com...
-
Page 10: Introduction
BASIC models with different software features; the Web and Basic models do not have a microphone. The D12 can be fitted with any of the five high- performance lenses; additional lenses will be available in the future. Apart from the... - Page 11 Corner and Pole Mount together with the Outdoor Wall Mount. The Corner and Pole Mount is available for all D12 models! D12 with Corner and Pole Mount © MOBOTIX AG • Security-Vision-Systems • Made in Germany www.mobotix.com • sales@mobotix.com...
-
Page 12: Mobotix Cost Benefits
Additional functions and other extras included Audio support, lens, wall mount and weatherproof housing (-30° to +60°C, -22° to +140°F) included; microphone & speaker available in certain models © MOBOTIX AG • Security-Vision-Systems • Made in Germany www.mobotix.com • sales@mobotix.com... -
Page 13: Mobotix Technlcal Advantages
SIP standard with automatic alarm call and remote control MxControlCenter included Dual screen technology with building plans, free camera positioning, event search, image processing, lens distortion correction and PTZ support © MOBOTIX AG • Security-Vision-Systems • Made in Germany www.mobotix.com • sales@mobotix.com... -
Page 14: Mobotix D12 Concept
Low Bandwidth Requirements MOBOTIX' patent pending MxPEG streaming format allows fast live video with audio at extremely low network load (1 to 2 Mbps). Since the MOBOTIX camera it- self detects movements in the image, video is only transmitted if movements occur, and when the video and audio data are stored. - Page 15 Special programs control vacation times and holidays. Remote Alerting In case of an alarm, MOBOTIX cameras automatically pop up windows or activate other functions at a remote security control center. The cameras can use network/ wireless, GSM/GPRS/UMTS (3G) or Internet connections for this purpose.
- Page 16 D Sub 15 HD socket, allowing you to expand the range of sensors already in the MOBOTIX D12. Likewise, you can use the signal outputs of the camera to or trigger external devices, such as alarm systems. This socket also provides a Line In pin, a...
- Page 17 Lights Power supply Logos, Animated or Freestyle The Logo generator of MOBOTIX cameras allows integrating different banners and graphics (including files loaded from any URL) into the current camera im- Logo generator integrated ages—with optional scheduler control. MOBOTIX cameras are the only network IP cameras supporting animated and transparent graphics.
-
Page 18: D12 Standard Lens Options
L22 Super Wide-Angle 90° has very little distortion, even when using the 4x digital zoom of the D12. If a camera with a Super Wide-Angle lens has been mounted in the corner of a room, the complete room is visible on the image. - Page 19 /124 Note Focal lengths of The focal lengths of MOBOTIX lenses do not reflect the actual focal MOBOTIX lenses are al- length of the lenses, but the focal length ( Lxx mm) converted to 35 mm ways given as compared to camera format.
-
Page 20: The Mobotix D12D-Fixdome Outdoor
After the position of the wall mount has been determined, the installer of the MOBOTIX camera system can connect the camera system to an installed network outlet, which has been properly tested and configured by the network installer. - Page 21 D12 Camera Manual Part 1 /124 Robust design makes for a long life Like all MOBOTIX cameras, the outdoor wall mount is made from PBT-30GF (Poly- No yellowing of housing even after years thanks butyleneterephtalate with 30% fiberglass). This material is used heavily in the auto-...
-
Page 22: Mobotix D12D-Outdoor Product Advantages
Outdoor wall mount with Corner and Pole mount Corner and Pole Mount (rear view) 1.5.2 MOBOTIX D12D-Outdoor Product Advantages Besides the many product advantages inherent to the MOBOTIX D12, the MOBOTIX D12D-Outdoor offers these additional benefits: • Attractive design blends in well with building façades. -
Page 23: Feature Overview D12
D12 Camera Manual Part 1 /124 1.6 Feature Overview D12 The MOBOTIX D12 includes the following main features (some features are model- dependent): 1280 x 960 pixels • Live images of up to 1280 x 960 pixels resolution via network, ISDN, GSM, GPRS, UMTS, wireless up to 30 fps (at 640 x 480 resolution), also adapted for... - Page 24 • Transfer profiles for improved handling of FTP, E-Mail, phone calls, network transmissions and messages. • Multiple possibilities for connecting external devices, sensors and signal lines using the D Sub 15 HD socket of the camera or the MOBOTIX Cam-IO in- stallation box. Speaker phone •...
-
Page 25: Hard- And Software Differences Of The Mobotix
D12 Camera Manual Part 1 /124 Hard- and Software Differences of the MOBOTIX D10/D12 To cut a long story short – nothing changes with the basic functionality or the looks of the camera. Users, who have worked with D10 models before will not have any problems adjusting to a MOBOTIX D12. -
Page 26: Important Notes
Microphone dialog. CAUTION: This deactivation is permanent and cannot be reversed even by MOBOTIX engineers. Deactivating the microphone will also deactivate all features that use the camera's microphone. © MOBOTIX AG • Security-Vision-Systems • Made in Germany www.mobotix.com • sales@mobotix.com... -
Page 27: Starting The Camera Using The Factory Ip Address
MOBOTIX camera only displays the Text WWW.MOBOTIX.COM, the time stamp and the MOBOTIX logo at the top of the image. Once the camera arming has been activated, the text at the bottom of the live image (event, action and messaging symbols) will also appear. -
Page 28: Using Internet Browsers
D12 Camera Manual Part 1 /124 Note: MOBOTIX offers special models for the Japanese market that support the Japanese ISDN standard. For additional information on this topic, see the Japanese section at www.mobotix.com. 1.8.10 Using Internet Browsers Current Internet browsers (Internet Explorer, Netscape, Mozilla, Firefox, Safari, Kon- queror, Opera, …) with... -
Page 29: Enlarged Dome For D12D-180° And D12M-Cs
Another source of information on all dialogs and parameters of the MOBOTIX cam- era is the Reference Manual that you can download from www.mobotix.com. The Reference Manual consists of the MOBOTIX camera's online help in one PDF file. -
Page 30: Overview Of The Camera Versions
MOUNTING THE MOBOTIX D12 Overview of the Camera Variants The MOBOTIX D12 is offered in three variants: • D12D: The standard version of the D12 can be used with all MOBOTIX lenses with M14 thread and is available with different combi-... -
Page 31: Directions
2.10: Delivered Parts of the Corner and Pole Mount 2.11: Mounting the Corner and Pole Mount 2.12: Mounting the Camera with the Outdoor Wall Mount 2.13: Finishing the Installation © MOBOTIX AG • Security-Vision-Systems • Made in Germany www.mobotix.com • sales@mobotix.com... -
Page 32: Preparatory Steps
D12 Camera Manual Part 1 /124 2.3 Preparatory Steps Before mounting the MOBOTIX D12 and (if required) the Outdoor Wall Mount (see sections 2.9 and 2.12), the following questions should be solved: • Which connections should the camera use (network/ISDN/RS232)? •... -
Page 33: Mounting To A Wall
The notch should be 3 mm wide (as wide as the Allen wrench) and should point downwards when camera mounted. © MOBOTIX AG • Security-Vision-Systems • Made in Germany www.mobotix.com • sales@mobotix.com... -
Page 34: Deciding On The Connections (Network/Isdn/Rs232)
Free software updates mounting the camera is not an option. SIP telephony reduces costs ISDN connection of MOBOTIX cameras is not required if the network permits SIP connections for Internet phone connections. Thanks to the SIP capabilities of the (see chapter 9, Telephony Features , in the Software Manual ), the MOBOTIX D12 camera can place voice calls (e.g. -
Page 35: Selecting The Power Supply
Caution In contrast to the MOBOTIX D10, it is not possible to use an ISDN NT and the S0 bus to supply power to the D12. Using the ISDN split cable and MOBOTIX PoE products (see section 2.17, Optional Ac-... -
Page 36: Using Uninterruptible Power Supplies (Ups)
When using more powerful 19" rack-mounted USPs, you can also protect all other network components (e.g. switches, routers, PoE switches, etc.). Since MOBOTIX cameras do not require any heating even in the wintertime, the power consumption of 3 W is quite low. This in turn means that you can centralize the USP-protected power supply by injecting power into the network cables (max. -
Page 37: Providing The Connections (Network/Isdn/Rs232)
Once the camera position, the position of the cable outlets, and the method of power supply have been decided upon, the cabling should be installed. Before mounting the MOBOTIX D12, you should make sure that the network and ISDN connections are properly tested, so that the proper functioning of the camera is guaranteed. - Page 38 When mounting the cable cover, take care to cover (IP65)! properly align the cover with the seal of the camera housing and the two cable guides. This will ensure that the camera remains weatherproof (IP65). © MOBOTIX AG • Security-Vision-Systems • Made in Germany www.mobotix.com • sales@mobotix.com...
-
Page 39: Connecting A Cable To The Serial Interface (Rs232)
2.3.8 Connecting a Cable to the Serial interface (RS232) Switching external relays If the RS232 interface of the MOBOTIX D12 is to be used for switching external using the RS232 interface lays (lights, alarm sirens, gates, etc.), evaluating... -
Page 40: Delivered Parts, Components And Dimensions (D12D Standard)
Outer shell Ethernet cable Allen wrench 3 mm Custom tool with magnet Dowels 10 mm Stainless steel washers Ø 9 mm Stainless steel wood screws with hex head 8x70 mm © MOBOTIX AG • Security-Vision-Systems • Made in Germany www.mobotix.com • sales@mobotix.com... -
Page 41: Camera Housing And Connectors (D12D Standard)
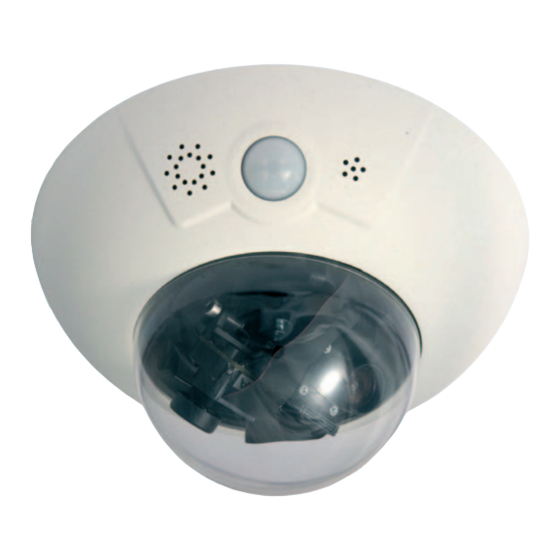
2.4.2 Camera Housing and Connectors (D12D Standard) The MOBOTIX D12D consists of three main components (camera housing (item 1), outer shell (item 9) and dome (item 8)). Like the MOBOTIX M12 models, the MOBOTIX D12D is also delivered with PIR sensor, microphone and speaker. -
Page 42: Dimensions Of The D12D Standard
D12 Camera Manual Part 1 /124 2.4.3 Dimensions of the D12D Standard Two freely positionable camera modules ø 201 mm/7.9 in © MOBOTIX AG • Security-Vision-Systems • Made in Germany www.mobotix.com • sales@mobotix.com... - Page 43 D12 Camera Manual Part 1 /124 Notes: © MOBOTIX AG • Security-Vision-Systems • Made in Germany www.mobotix.com • sales@mobotix.com...
-
Page 44: Installing The Lens Units (D12D Standard)
/124 2.5 Installing the Lens Units (D12D Standard) The standard models of the MOBOTIX D12 are delivered with a pre-mounted dome. Lens units (lens mount, image sensor and lens) are delivered separately and need to be installed as described in the following:... - Page 45 Make sure that the ribbon cables are running properly along the inside of the dome's rim. The ribbon cables must not obstruct the line of vision of the lenses! © MOBOTIX AG • Security-Vision-Systems • Made in Germany www.mobotix.com • sales@mobotix.com...
- Page 46 Note: The camera comes with an additional tinted dome! (6) Adjust the lenses and install the outer shell For additional information on this topic, see section 2.13, Finishing the Instal- lation . © MOBOTIX AG • Security-Vision-Systems • Made in Germany www.mobotix.com • sales@mobotix.com...
-
Page 47: Setting The Configuration In The Quick Installation Wizard
Admin Menu > Im- Admin Menu > age Sensor Configuration dialog. Image Sensor Configura- tion For additional information on this topic, see section 3.2, Overview of the Configura- tion Settings . © MOBOTIX AG • Security-Vision-Systems • Made in Germany www.mobotix.com • sales@mobotix.com... -
Page 48: Delivered Parts, Components And Dimensions (D12D-180°)
Dowels 10 mm Stainless steel washers Ø 9 mm Stainless steel wood screws with hex head 8x70 mm Stainless steel Allen screws M4x10 mm Stainless steel washers Ø 4.3 mm Lens bridge © MOBOTIX AG • Security-Vision-Systems • Made in Germany www.mobotix.com • sales@mobotix.com... -
Page 49: Camera Housing And Connectors (D12D-180°)
2.6.2 Camera Housing and Connectors (D12D-180°) The MOBOTIX D12D-180° consists of three main components (camera housing (item 1), outer shell (item 9) and dome (item 8)). Like the MOBOTIX M12 models, the MOBOTIX D12D-180° is also delivered with PIR sensor, microphone and spea- ker. -
Page 50: Dimensions Of The D12D-180
D12 Camera Manual Part 1 /124 2.6.3 Dimensions of the D12D-180° Two 90° lenses (180°) ø 201 mm/7.9 in © MOBOTIX AG • Security-Vision-Systems • Made in Germany www.mobotix.com • sales@mobotix.com... - Page 51 D12 Camera Manual Part 1 /124 Notes: © MOBOTIX AG • Security-Vision-Systems • Made in Germany www.mobotix.com • sales@mobotix.com...
-
Page 52: Delivered Parts, Components And Dimensions (D12D-Cs)
Dowels 10 mm Stainless steel washers Ø 9 mm Stainless steel wood screws with hex head 8x70 mm Stainless steel Allen screws M4x10 mm Stainless steel washers Ø 4.3 mm Lens bridge © MOBOTIX AG • Security-Vision-Systems • Made in Germany www.mobotix.com • sales@mobotix.com... -
Page 53: Camera Housing And Connectors (D12M-Cs)
2.7.2 Camera Housing and Connectors (D12M-CS) The MOBOTIX D12M-CS consists of three main components (camera housing (item 1), outer shell (item 9) and dome (item 8)). Like the MOBOTIX M12 models, the MOBOTIX D12M-CS is also delivered with PIR sensor, microphone and speaker. -
Page 54: Dimensions Of The D12M-Cs
D12 Camera Manual Part 1 /124 2.7.3 Dimensions of the D12M-CS CS-Mount lens unit ø 201 mm/7.9 in © MOBOTIX AG • Security-Vision-Systems • Made in Germany www.mobotix.com • sales@mobotix.com... - Page 55 D12 Camera Manual Part 1 /124 Notes: © MOBOTIX AG • Security-Vision-Systems • Made in Germany www.mobotix.com • sales@mobotix.com...
-
Page 56: Indoor/Outdoor Mounting Instructions
2.8.1 Mounting Indoor Cameras to a Wall or Ceiling In order to mount the MOBOTIX D12 to a ceiling or wall, you need to drill the holes for the fixtures. Use the supplied drilling template to mark the position of the holes for the fixtures and the holes through which the cables will be led later on. -
Page 57: Mounting Outdoor Cameras To A Wall
2.8.3 Mounting Outdoor Cameras to a Wall or Pole If you would like to mount the MOBOTIX D12 to the corner of a building or a pole, you should consider using the MOBOTIX Corner and Pole Mount. The Corner and Pole Mount can be used only together with the Outdoor Wall Mount. -
Page 58: Delivered Parts Of The Outdoor Wall Mount (Optional Accessory)
Stainless steel Allen screws M4x10 mm Stainless steel hex nuts M4 Stainless steel Allen screws M4x25 mm Stainless steel washers Ø 4.3 mm rectangular hole the rear covers the wall outlet Depth: 275 mm/10.8 in Width: 293 mm/11.5 in © MOBOTIX AG • Security-Vision-Systems • Made in Germany www.mobotix.com • sales@mobotix.com... -
Page 59: Delivered Parts Of The Corner And Pole Mount (Optional Accessory)
M8 (item 26) Item Count Part Name Stainless steel Allen screws M8x30 mm Stainless steel washers Ø 9 mm Stainless steel lock nuts M8 Stainless steel straps Width: 293 mm/11.5 in Depth: 175 mm/6.9 in © MOBOTIX AG • Security-Vision-Systems • Made in Germany www.mobotix.com • sales@mobotix.com... -
Page 60: Mounting The Corner And Pole Mount
/124 2.11 Mounting the Corner and Pole Mount If you would like to mount the MOBOTIX D12 to the corner of a building or a pole, you should consider using the MOBOTIX Corner and Pole Mount. This mount is made of 3 mm powder-coated stainless steel (white) and has been designed... -
Page 61: Mounting To The Corner Of A Building
Next, mount the Outdoor Wall Mount to the Corner and Pole Mount, as de- scribed in section 2.11.3, Mounting the Outdoor Wall Mount to the Corner and Pole Mount . © MOBOTIX AG • Security-Vision-Systems • Made in Germany www.mobotix.com • sales@mobotix.com... -
Page 62: Mounting To A Pole
Next, mount the Outdoor Wall Mount to the Corner and Pole Mount, as de- scribed in section 2.11.3, Mounting the Outdoor Wall Mount to the Corner and Pole Mount . © MOBOTIX AG • Security-Vision-Systems • Made in Germany www.mobotix.com • sales@mobotix.com... -
Page 63: Mounting The Outdoor Wall Mount To The Corner And Pole Mount
Corner and Pole Mount. Next, mount the camera to the Outdoor Wall Mount, as described in section 2.12.3, Determining the Position of the Camera on the Bottom Plate . © MOBOTIX AG • Security-Vision-Systems • Made in Germany www.mobotix.com • sales@mobotix.com... -
Page 64: Mounting The Camera With The Outdoor Wall Mount
The PIR sensor reaches about 10 me- ters (33 ft) and has a field of view of ±15°. The positions that are available depend on how high the MOBOTIX D12D-Outdoor has been mounted and the position of the camera on the bottom plate (item 2), which can be adjusted in steps of 15 degrees (see... -
Page 65: Mounting The Outdoor Wall Mount
Wall outlet D12 Outdoor Wall Mount CAT5 cable Mounting the Outdoor Wall Mount and the Cam- 90 mm/3.5 in 15 mm/0.6 in 160 mm/6.3 in 293 mm/11.5 in © MOBOTIX AG • Security-Vision-Systems • Made in Germany www.mobotix.com • sales@mobotix.com... - Page 66 70 cm (28 in) from the wall or wall out- the Corner and Pole Mount (80 cm (32 in) when using the Corner and Pole Mount, see section 2.11). © MOBOTIX AG • Security-Vision-Systems • Made in Germany www.mobotix.com • sales@mobotix.com...
-
Page 67: Determining The Position Of The Camera On The Bottom Plate
• PIR sensor of the camera looks to the left: Use the PIR looking to the left: 7 holes marked by the number for the M4 hex nuts (item 20). © MOBOTIX AG • Security-Vision-Systems • Made in Germany www.mobotix.com • sales@mobotix.com... -
Page 68: Mounting The Camera On The Bottom Plate
Allen screws M4x25 mm (item 21) with the corre- sponding washers to mount the cam- era to the bottom plate. © MOBOTIX AG • Security-Vision-Systems • Made in Germany www.mobotix.com • sales@mobotix.com... -
Page 69: Connecting The Camera And Mounting The Bottom Plate
• Push the front of the bottom plate upwards. • Mount the bottom plate to the wall mount (eight Allen screws M4x10 mm; item 19) and make sure the screws are all properly fastened. © MOBOTIX AG • Security-Vision-Systems • Made in Germany www.mobotix.com • sales@mobotix.com... -
Page 70: Finishing The Installation
• Mount the dome again using the cotton cloth and finally check the focus of both lenses on the monitor. © MOBOTIX AG • Security-Vision-Systems • Made in Germany www.mobotix.com • sales@mobotix.com... -
Page 71: Mounting The Camera's Outer Shell
Tighten the dome by turn- clockwise Caution The MOBOTIX D12D-Outdoor is only weatherproof if the camera hous- ing has been mounted tightly to the bottom plate and both the camera dome and the outer shell are properly seated. © MOBOTIX AG • Security-Vision-Systems • Made in Germany... -
Page 72: Dismantling The Camera
Start dismantling the camera by removing the outer shell of the D12. For removing the outer shell of the D12, you need the supplied custom tool; for dismounting the dome, a lint-free cotton cloth is required (see section 2.15, Cleaning Instructions ). - Page 73 (see figure ). (4) Remove the dome Take a cotton cloth and remove the transpar- ent dome by turning it in counter-clockwise direction. © MOBOTIX AG • Security-Vision-Systems • Made in Germany www.mobotix.com • sales@mobotix.com...
- Page 74 Dismount the dome by units turning it counter-clock- Remove the central lens screw using the sup- wise plied 3 mm Allen wrench. Lift the lens units out of their seats. © MOBOTIX AG • Security-Vision-Systems • Made in Germany www.mobotix.com • sales@mobotix.com...
- Page 75 D12 Camera Manual Part 1 /124 Notes: © MOBOTIX AG • Security-Vision-Systems • Made in Germany www.mobotix.com • sales@mobotix.com...
-
Page 76: Mounting The Camera
All measurements in mm! Caution Never use screws with countersunk heads to fasten the mount, as these screws will destroy the mount. © MOBOTIX AG • Security-Vision-Systems • Made in Germany www.mobotix.com • sales@mobotix.com... -
Page 77: Mounting The Camera To Different Surfaces
Wall thickness: Make sure that the wall is at least five centimeters (2") thick if you intend to use the supplied dowels and screws. © MOBOTIX AG • Security-Vision-Systems • Made in Germany www.mobotix.com • sales@mobotix.com... -
Page 78: Mounting To A Wooden Wall Of Surface
• Insert the screws (with washers) into the openings in the foot of the camera. Max. torque for all • Tighten the screws using the wrench or ratchet (max. torque is 4 Nm/ screws: 4 Nm 2.95 lbf ft). (2.95 lbf ft) © MOBOTIX AG • Security-Vision-Systems • Made in Germany www.mobotix.com • sales@mobotix.com... -
Page 79: Mounting To A Drywall
• Insert the screws (with washers) into the openings in the foot of the camera and into the dowels. Max. torque for all screws: 4 Nm • Tighten the screws using the wrench or ratchet (max. torque is 4 Nm/ (2.95 lbf ft) 2.95 lbf ft). © MOBOTIX AG • Security-Vision-Systems • Made in Germany www.mobotix.com • sales@mobotix.com... -
Page 80: Mounting To A Concrete Or Brick Wall
• Insert the four screws (with washers) into the openings in the foot of the camera and into the dowels. • Tighten the screws using the wrench or ratchet (max. torque is 4 Nm/ Max. torque for all 2.95 lbf ft). screws: 4 Nm (2.95 lbf ft) © MOBOTIX AG • Security-Vision-Systems • Made in Germany www.mobotix.com • sales@mobotix.com... -
Page 81: After Mounting The Camera
Make sure that you insert the dome into the housing with the mark of the dome pointing towards the camera's PIR sensor, in order to pre- serve the camera's weatherproofness! © MOBOTIX AG • Security-Vision-Systems • Made in Germany www.mobotix.com • sales@mobotix.com... -
Page 82: Cleaning Instructions
When installing the wiring in or out of buildings, make sure you always adhere to the relevant regulations on wiring, fire prevention and protection against lightnings. MOBOTIX recommends having MOBOTIX cameras installed only by certified spe- cialists accustomed to installing network devices and having proper respect for the... -
Page 83: Fire Prevention
This includes surge protectors for 19" racks, add- ing an uninterruptible power supply (UPS) to the MOBOTIX camera, and in- stalling surge arresters or similar for routers, switches, servers, etc. -
Page 84: Optional Accessories
(see below), or a PoE-compatible switch or router. IEEE 802.3af! Network Power Adapter (MX-NPA-3-RJ) The Network Power Adapter allows injecting the power supply for the MOBOTIX Power supply for smaller camera into the network cable. It thus allows using a single cable for connecting to... - Page 85 When mounted to the Outdoor Wall Mount, the Outdoor Wall Mount from sturdy PBT 30GF D12 can be used outside for enhanced outdoor sur- veillance. When mounted to the outdoor wall mount, the MOBOTIX D12 reaches protection class IP65 (absolutely dustproof, resistant against water jets).
-
Page 86: Operating The Camera
OPERATING THE CAMERA 3.1 General Procedure The MOBOTIX camera does not require any software installation; all you need is your preferred browser with JavaScript support to operate the camera. Thus, the MOBOTIX camera is supported by all common operating systems (such as Win- dows, Macintosh and Linux, ...). - Page 87 D12 Camera Manual Part 1 /124 Note After first booting a new MOBOTIX camera or after resetting to factory defaults, accessing the Administration menu (Admin Menu button) will automatically start the Quick Installation wizard. This is where you Always use...
-
Page 88: Overview Of The Configuration Settings
These options are also available for users belonging to the users group. Some of these settings can be changed using the corresponding pull-down menus above the image on the Live screen. © MOBOTIX AG • Security-Vision-Systems • Made in Germany www.mobotix.com • sales@mobotix.com... -
Page 89: Basic Camera Configuration
D12 Camera Manual Part 1 /124 • The image settings are already optimized Recommendation: The factory image settings of MOBOTIX cameras deliver excellent images for Always use factory image most application scenarios and should not be changed. If you do wish to settings! make changes, your changes should be minor and gradual. -
Page 90: Connecting The Camera
In order to inject the power supply into the tions network cabling, MOBOTIX PoE products have proven reliable and Use the 19" MOBOTIX easy to install for one camera (MX-NPA-3-RJ), for up to four cameras Netpower rack-mount (MX-NPR-4) and for 8 or 20 cameras (MX-NPR-8/20;... -
Page 91: Ethernet: Power Supply Using A Network Power Rack (Mx Poe)
• Higher reliability of the system as a whole, since standard switches without PoE can be used (lower risk of failure). • Easy installation on DIN rails ( MX-NPR-4 ) or in 19" racks ( MX- NPR-8/20 ). © MOBOTIX AG • Security-Vision-Systems • Made in Germany www.mobotix.com • sales@mobotix.com... -
Page 92: Ethernet: Power Supply Using Poe Products (Power Over Ethernet)
Since the power consumption of MOBOTIX cameras is very low compared to other products, this in- creases the reliability of the entire system and expands the life cycle of these components. -
Page 93: Isdn: Power Supply Using A Network Power Adapter
120 m (130 yd) Caution Missing termination resistors and wrong cable lengths are the most common installation errors! Always observe the instructions regarding maximum cable lengths and proper ISDN termination! © MOBOTIX AG • Security-Vision-Systems • Made in Germany www.mobotix.com • sales@mobotix.com... -
Page 94: Isdn: Directly Supplying Power Using The External Power Supply
Power is supplied only via the Ethernet cable and the 10BaseT/NET connector of the camera (using MOBOTIX PoE products or Power over Ethernet according to IEEE 802.af). Ethernet ISDN © MOBOTIX AG • Security-Vision-Systems • Made in Germany... -
Page 95: Camera Startup Sequence
During the startup sequence, the LEDs will always light up, even if they have been deactivated in Admin Menu > LED Setup. Signals of the camera LEDs: Camera Network Camera "L" key Microphone © MOBOTIX AG • Security-Vision-Systems • Made in Germany www.mobotix.com • sales@mobotix.com... -
Page 96: The First Image From The Camera
• Display the camera using MxControlCenter (free Windows client for with activated JavaScript! MOBOTIX cameras; section 3.4.7, The First Image in MxControlCenter ) Open the browser-based user interface of the camera to complete the re- maining configuration tasks (see section 4.3, The Live Screen in the Browser , in the Software Manual ). - Page 97 If you receive an answer from another network device although the camera is not the IP address of your connected, you will have to remove that device until you have reset the MOBOTIX camera instead of camera to a free IP address. We recommend using the Quick Installation wizard for 10.1.0.99!
-
Page 98: Preparing The Isdn Connection
Password: 3.4.3 Simultaneously Using ISDN and Ethernet Connections (Gateway) In most cases, MOBOTIX cameras will be used either on an Ethernet LAN or on ISDN, not both. The gateway (for accessing computers outside of the local network) needs to be set manually for Ethernet; it is usually obtained automatically for ISDN. -
Page 99: The First Image In The Browser
After entering the camera's IP address in the browser address bar (e.g. http:// Make sure that you use 10.1.0.99), you will see the Live screen of the MOBOTIX camera with its user in- the IP address of your terface controls, such as softbuttons, buttons for the different camera screens, pull- camera instead of 10.1.0.99! -
Page 100: Additional Information
Another source of information on all dialogs and parameters of the MOBOTIX cam- era is the Reference Manual that you can download from www.mobotix.com. The Reference Manual consists of the MOBOTIX camera's online help in one PDF file. -
Page 101: Camera Screens In The Browser
/124 3.4.6 Camera Screens in the Browser Per factory default, the MOBOTIX camera first shows the Live screen. You can set a different start page in order to prevent others from changing the settings. In addi- tion to this, you can assign user names and passwords to prevent unauthorized access or you can restrict access to the current live image only by setting the Guest screen as the start page. -
Page 102: Access Using Zeroconf/Bonjour
Note It is the huge advantage of Zeroconf/Bonjour, that you do not need to know the IP address or the name of the MOBOTIX camera in or- der to access it. Another advantage of Bonjour is the fact that cameras are found re- gardless if they are in the same subnet as the computer or in other subnets, as long as they are in the same physical network. - Page 103 The list of Bonjour-enabled network devices is shown in Internet Explorer once the Bonjour add-on has been activated in the main toolbar of Internet Explorer. Internet Explorer with activated Bonjour sidebar © MOBOTIX AG • Security-Vision-Systems • Made in Germany www.mobotix.com • sales@mobotix.com...
- Page 104 Konqueror address bar. The displayed list contains all Zeroconf-enabled network services (see figure below). Clicking on /WWW servers displays the list of all available MOBOTIX cameras (and all other Bonjour-enabled devices). Linux users can also use the mdns-scan applica- tion in a terminal to search for Bonjour-enabled devices on the network.
- Page 105 Caution: Proxy servers sage when trying to access a MOBOTIX camera in the web browser. may cause errors when Make sure that the list of proxy exceptions in your browser contains...
-
Page 106: The First Image In Mxcontrolcenter (Mxcc)
MxControlCenter can do quite a bit more than simply display the video and audio data from MOBOTIX cameras. The unique features of MxControlCenter in combina- tion with the MOBOTIX cameras create a full-featured security system: intelligent alarm handling, various ways of arranging the camera views on different layouts... - Page 107 If this is not the case or if you would like to update an older version, you can download the latest Windows installer (MSI file) from the MOBOTIX website and then manually install the current version. The latest version is available at www.mobotix.com >...
- Page 108 Automated Search for MOBOTIX Cameras If you start MxControlCenter for the first time or if you have not yet stored a start layout with the desired video sources (i.e. MOBOTIX cameras), the Open Video Sources dialog will open and automatically starts scanning the network.
- Page 109 Anytime you connect a new camera to the local network, you can initiate the search in the Open Video Sources dialog again by pushing the button. If the desired MOBOTIX cameras are highlighted in the video source list, proceed to Selecting Video Sources . Configuring MOBOTIX Cameras for a Different Network...
- Page 110 • Add MxPEG clip: Adds an MxPEG video clip previously recorded by a MOBOTIX camera as a video source. • Add file server path: Adds the alarm images previously stored by a MO- BOTIX camera on an external file server as a video source.
- Page 111 If you interrupt the discovery process (section Config- uring MOBOTIX Cameras for a Different Subnet ) or require a password that is different from the factory preset one, you can always launch the configuration process from the popup menu at a later time and enter the appropriate user name and password.
-
Page 112: Starting The Camera With An Automatic Ip Address (Dhcp)
DHCP server. If this is not the case, the address camera cannot obtain a valid IP address and will fall back to its last IP address. © MOBOTIX AG • Security-Vision-Systems • Made in Germany www.mobotix.com • sales@mobotix.com... -
Page 113: Starting The Camera Using The Factory Ip Address
(see section 1.6.5), the users and passwords defined in the camera will not be reset if the camera is being booted using the factory IP address. © MOBOTIX AG • Security-Vision-Systems • Made in Germany www.mobotix.com • sales@mobotix.com... -
Page 114: Connecting External Devices And Sensors: Mx Interface Connector And Mobotix Cam-Io
MOBOTIX Cam-IO 3.7.1 MX Interface Connector for Direct Connections The MOBOTIX camera's MX Interface Connector (D Sub 15 HD) features one signal input and one signal output for switching loads. In addition, the in- terface also provides two signal inputs and two signal outputs of the RS232 interface. -
Page 115: Mobotix Cam-Io: Expansion Module For Easy Installation
D12 Camera Manual Part 1 /124 camera (e.g. when using a MOBOTIX camera as a video conferencing system and in access control scenarios). 3.7.2 MOBOTIX Cam-IO: Expansion Module for Easy Installation This expansion module has the following main tasks: • It represents a unified installation platform with... -
Page 116: Signal Input/Output, Rs232 Interface
3.8 Signal Input/Output, RS232 Interface The signal lines of the se- The MOBOTIX camera provides a signal input/output as well as two additional sig- rial interface can also be nal input pins and two signal output pins on its RS232 interface. You can use the... -
Page 117: Signal Output
3.8.2 Signal Output Pins Activate the signal output in Admin Menu > LED When an event is detected, the MOBOTIX camera can switch the signal output Setup or for specific (pin 1). Use the corresponding options in Setup Menu > Actions to set how long events in Setup Menu >... -
Page 118: D12 Drilling Templates
(scale 1:1) at the end of the manual as a fold-out Sample! Find the 1:1 scale drilling template at the end of the manual as a fold- out! © MOBOTIX AG • Security-Vision-Systems • Made in Germany www.mobotix.com • sales@mobotix.com... - Page 119 D12 Wall Mount and weather protection Sample! Find the 1:1 scale drilling template at the end of the manual as a fold- out! 15 mm/0.6 in 75 mm/3 in © MOBOTIX AG • Security-Vision-Systems • Made in Germany www.mobotix.com • sales@mobotix.com...
- Page 120 4,000 VGA images approx. 1,250 1,250 2,500 2,500 2,500 2,500 Mega images approx. External audio (Line-In/Out) Signal input Signal output Concealed cabling In stock Outdoor Wall Mount (accessory) © MOBOTIX AG • Security-Vision-Systems • Made in Germany www.mobotix.com • sales@mobotix.com...
- Page 121 *** Not available for Image sensor (color / BW) Color Color Color & BW Color & BW D22M models Standard lens for software version L22* L22* L22* Audio support (Microphone/Speaker) © MOBOTIX AG • Security-Vision-Systems • Made in Germany www.mobotix.com • sales@mobotix.com...
- Page 122 D12 Camera Manual Part 1 /124 IP65 Certificate © MOBOTIX AG • Security-Vision-Systems • Made in Germany www.mobotix.com • sales@mobotix.com...
- Page 123 D12 Camera Manual Part 1 /124 Declaration of Conformity © MOBOTIX AG • Security-Vision-Systems • Made in Germany www.mobotix.com • sales@mobotix.com...
- Page 124 D12 Camera Manual Part 1 /124 Notes © MOBOTIX AG • Security-Vision-Systems • Made in Germany www.mobotix.com • sales@mobotix.com...
- Page 125 D12 Camera Manual Part 1 /124 Notes © MOBOTIX AG • Security-Vision-Systems • Made in Germany www.mobotix.com • sales@mobotix.com...
- Page 126 D12 Camera Manual Part 1 /124 Notes © MOBOTIX AG • Security-Vision-Systems • Made in Germany www.mobotix.com • sales@mobotix.com...
- Page 127 D12 Camera Manual Part 1 MOBOTIX ... the new face of IP video All images in this manual are genuine MOBOTIX camera images. Enjoy the image quality! Manufacturer: CEO: MOBOTIX AG Dr. Ralf Hinkel Luxemburger Str. 6 67657 Kaiserslautern Court of Registration:...
- Page 128 CMOS www.mobotix.com > Support > Manuals without mechanical iris Vandalism-protected Wall bracket with cable cover for RJ45 wall outlet MOBOTIX AG • Security-Vision-Systems • Made in Germany Robust no moving parts www.mobotix.com • sales@mobotix.com • 2.5.2007 fiber glass housing...
Need help?
Do you have a question about the D12 and is the answer not in the manual?
Questions and answers