Table of Contents
Advertisement
Quick Links
D14D Camera Manual
One camera, two lenses.
Seeing more is just not possible.
Two lenses, two HiRes image sensors, up to 64 GB internal storage and a dual image of a maximum
of 6 megapixels make the D14D DualDome an efficient security solution: It is possible to secure two
different areas using just one camera. All without vulnerable mechanical components!
MOBOTIX D14D Dual Dome - one camera, two views (left: telephoto lens, right: wide angle lens)
HiRes Video Innovations
The German company MOBOTIX AG is known as the leading pioneer in network camera technology and its
decentralized concept has made high-resolution video systems cost efficient.
MOBOTIX AG • D-67722 Langmeil • Tel: +49-6302-9816-103 • Fax: +49-6302- 9816-190 • sales@mobotix.com
The HiRes Video Company
Advertisement
Table of Contents

Related Manuals for Mobotix D14D


Summary of Contents for Mobotix D14D
- Page 1 Two lenses, two HiRes image sensors, up to 64 GB internal storage and a dual image of a maximum of 6 megapixels make the D14D DualDome an efficient security solution: It is possible to secure two different areas using just one camera. All without vulnerable mechanical components!
- Page 2 Download the latest version of this manual and the MxEasy and MxControlCenter manuals as PDF files from www.mobotix.com (Support > Manuals). All rights reserved. MOBOTIX, MxControlCenter, MxEasy, ExtIO and CamIO are internationally protected trademarks of MOBOTIX AG. Microsoft, Windows and Windows Server are registered trademarks of Microsoft Corporation.
-
Page 3: Table Of Contents
1.7.10 MX-NPA-Box Mounting Overview Of Mounting Options 2.1.1 Mounting Indoor Cameras To A Ceiling Or Wall (Without Accessories) 2.1.2 Outdoor Installation On A Wall, Pole Or Corner (With Accessories) © MOBOTIX AG • Security-Vision-Systems • Made in Germany www.mobotix.com • sales@mobotix.com... - Page 4 3.2.1 Manually Setting Up The Network Parameters In A Browser 3.2.2 First Images And The Most Important Settings In The Browser 3.2.3 First Images And Network Parameter Configuration In MxControlCenter © MOBOTIX AG • Security-Vision-Systems • Made in Germany www.mobotix.com • sales@mobotix.com...
- Page 5 3.5.2 Formatting The Card 3.5.3 Activate Recording 3.5.4 Accessing Camera Data 3.5.5 Deactivating The Card Memory 3.5.6 Using A MicroSD Card In A Different MOBOTIX Camera 3.5.7 Limitations On Warranty When Using Flash Storage Media Configuration In The Browser 3.6.1 Overview 3.6.2 General Browser Settings...
-
Page 6: Foreword
Congratulations on your decision to purchase an exceptionally efficient premium network camera 'Made in Germany.' Thanks to its double lens and sensor assembly, the D14D can monitor two different areas at once, for example, making it the most powerful MOBOTIX Fixdome camera yet. - Page 7 (expandable up to 64 GB) High frame rates up to 30 fps (Mega) Shock detector MiniUSB interface for extensions PoE class adjustable & variable MxBus interface for additional modules © MOBOTIX AG • Security-Vision-Systems • Made in Germany www.mobotix.com • sales@mobotix.com...
-
Page 8: The Mobotix Concept
30 times more detail. As a result, larger image areas with up to 360° allround views are possible, thus reducing the number of cameras, and therefore the costs. For example, four lanes of a gas station can be recorded with one MOBOTIX camera instead of four conventional cameras. - Page 9 Robust And Low-Maintenance MOBOTIX cameras have neither mechanical motors for lenses nor for movement. Without any moving parts, they are therefore so robust that maintenance is reduced to a minimum. The unique temperature range from -30 to +60 °C (-22 to +140 °F) is achieved without heating or a fan at only 3 watts.
-
Page 10: Superior Storage Solution
Standard system requires an extra PC including software for analysis and storage If, like with MOBOTIX cameras, the camera adjusts the image format and the frame rate to the correct values for the specific application (at a gas station, two frames per second are enough for the recording), it relieves the load both of the network and of the recording device (PC, server). - Page 11 /132 SD Card Memory Reduces Storage Costs MOBOTIX cameras are also able to store up to 64 GB of video in their integrated memory. Thanks to this high storage capacity and the option of recording only the sequences in which an event occurs, external storage devices such as hard drives are rarely required.
-
Page 12: Added Security Value
(e.g. cameras). This ensures maximum reliability and readiness for use. Additionally, the D14D is the first MOBOTIX camera with a pre-installed shock detector (for all IT and Secure versions). If, for example, the camera’s housing receives an impact, it can simultaneously take video of the offender, trigger an alarm and notify the security company via telephone. - Page 13 MOBOTIX) Sound Increases The Chance Of Detection In the event of an alarm, MOBOTIX cameras can turn on their built-in microphones and record lip-synchronous sound. They are therefore an even greater help in analyzing a situation and easing clarification. In addition, the video system can be used for bidirectional communication via a loudspeaker/microphone.
-
Page 14: Cost Benefits And Technical Advantages
(WLAN). Intelligent Cameras Reduce The Number Of Storage Devices The decentralized MOBOTIX concept enables the user to save around 10 times the standard number of cameras using just one storage device. Event-Controlled Image Format Minimizes Storage Costs Automatic image adjustment (frame rate, size) in the case of movement, noises or sensor action reduces bandwidth and storage requirements. - Page 15 Day & Night Maintenance-Free MOBOTIX dual cameras with two sensors and digital switching between day and night modes operate reliably with no mechanical components in all lighting conditions. Simultaneous Recording, Event Search And Live Viewing Live video for multiple users, simultaneous recording and event search possible in seconds from anywhere in the world via a network connection.
-
Page 16: Product Overview
An Overview Of The D14D DualDome HiRes DualDome Camera With Two Independent Image Sensors And Lenses With its compact and elegant dome-shaped housing, the MOBOTIX DualDome camera system has become an indispensable feature of the now global market of high-resolution network security cameras. - Page 17 Original image: Telephoto lens (left) and wide angle lens (right) – simultaneously in one image High-Resolution Sees More And Costs Less A single D14D camera is all that is required to fully monitor an entire shop floor, as well as providing a direct view of the checkout. The simultaneous generation and evaluation of...
- Page 18 D14D Model Versions And Lenses The D14D is available in a Secure and IT version, each of which has two day or night sensors, or a day/night combination. The main difference between Secure and IT models is that the two image sensors of the Secure models have a higher maximum resolution (two 3MEGA instead of two VGA).
- Page 19 An Overview Of The D14D DualDome D14D-180°: High-Resolution 180° Panoramic Image The D14D 180° is equipped with two fixed 90° Super Wide Angle lenses, which together ensure a high-resolution 180° panorama image that is up to 6 megapixels in size and is corrected by means of the camera software.
- Page 20 D14D Camera Manual: Product Overview Outdoor Wall Mount: Weatherproof And Room For Extensions Combined with the Outdoor Wall Mount, which is available as an accessory, the D14D is compliant with the higher protection class IP65 (fully dustproof and resistant to water jets) and can then be easily used in any unprotected outdoor areas.
- Page 21 The camera automatically chooses the ideal mode depending on lighting conditions: either the color sensor with daylight lens or the black and white image sensor with infrared lens. © MOBOTIX AG • Security-Vision-Systems • Made in Germany www.mobotix.com • sales@mobotix.com...
-
Page 22: The Most Important Benefits
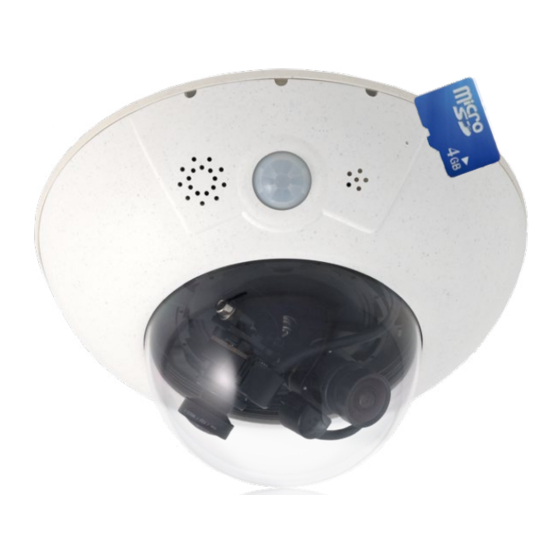
Up To 64 GB Of Internal Memory The MicroSD card now installed in the Secure versions of the MOBOTIX D14D has a 4-GB memory (max. 64 GB) and allows for decentralized storage and additional reliability. -
Page 23: New Features Compared To The D12D
New condensation openings must always be located at the bottom of the camera Ethernet connection Directly to the D14D via MOBOTIX patch cable, otherwise via connector Inputs and outputs Via ExtIO/MX 232 IO Box/MX Audio Box, HD15 of D12D discontinued... -
Page 24: General Camera Functions
D14D Camera Manual: Product Overview General Camera Functions Like all MOBOTIX cameras, the D14D line has a variety of software functions: from motion detection and long-term storage right through to alarm notification via video IP telephony. Unlike camera systems from other manufacturers, buying and installing additional software on the computer is thus unnecessary. - Page 25 30 frames per second each, including sound, on a single computer. Internal DVR: Storage On MicroSD And CF Cards MOBOTIX cameras support the direct storage on an internal MicroSD/SD card. By using the integrated DVR, the camera is able to offer the following additional applications: •...
- Page 26 Remote Alerting In case of an alarm, MOBOTIX cameras can automatically pop up windows or activate other functions at a remote security control center. The cameras can use network/wi-fi, GSM/GPRS/UMTS (3G), or Internet connections for this purpose.
- Page 27 MxControlCenter from the MOBOTIX website. This program allows live images from high- on a standard PC resolution MOBOTIX cameras to be displayed on one monitor with sound. In addition, MxControlCenter can activate alarms with lip-synchronous sound and also enables convenient event search. The integrated Layout Editor of MxControlCenter provides for quickly creating floor plans by simply dragging/dropping the cameras onto a background image.
- Page 28 MxEasy is available as a free-of-charge download for Windows and Mac OS X at www.mobotix.com. Diverse Installation Options Not only can MOBOTIX cameras be used under almost all weather and temperature conditions, they also offer suitable installation materials from a wide range of accessories for any conceivable application scenario.
- Page 29 SSL-protected transmission of the video sequences and the data (using SSL encryption and X.509 certificates). Free Software Updates (www.mobotix.com) Free-of-charge software MOBOTIX provides software updates free of charge at regular intervals that improve and updates from expand the camera’s functionalities. Chapter 6, Software Update , in the Software Manual www.mobotix.com provides more information on the process.
-
Page 30: Lenses, Equipment And Technical Data
MOBOTIX original L22 Super Wide Angle image In the case of the special model D14D 180°, two L22 lenses are installed in such a way that the camera can optically combine the two 90° images using software to form a single large and corrected 180°... - Page 31 Another benefit is that you can easily set a 35 mm camera (analog or digital) to the same focal length as the MOBOTIX lens (Lxx) to obtain the same field of vision. This approach greatly facilitates lens selection.
- Page 32 Warranty (months) Concealed cabling Special D14D Software Features Dual image display Dual image storage Dual image adjustment for 180° – – Special exposure mode for 180° – – © MOBOTIX AG • Security-Vision-Systems • Made in Germany www.mobotix.com • sales@mobotix.com...
- Page 33 IEEE 802.1X) module (available soon) Model Feature List Image size 3 MEGA 3 MEGA Image sensor Color Color Color & B/W Color & B/W Audio support (Microphone/Loudspeaker) –/L –/L © MOBOTIX AG • Security-Vision-Systems • Made in Germany www.mobotix.com • sales@mobotix.com...
-
Page 34: Technical Specifications
RS232 via accessories Video telephony VoIP/SIP, two-way communication intercom, remote controlling with key code, event notification Security User/Group management, HTTPS/SSL, IP address filter, IEEE 802.1x, intrusion detection, digital image signature © MOBOTIX AG • Security-Vision-Systems • Made in Germany www.mobotix.com • sales@mobotix.com... - Page 35 Operating conditions IP54/IP65 (without/with wall mount) -30°C to +60°C/-22°F to +140°F Dimensions Ø x H: 205 x 108 mm (D14D), 205 x 125 mm (D14D-180°); Weight: approx. 750 g (including lenses) Standard delivery Housing (high-resistance composite, PBT-PC), white, shock-resistant dome (transparent), free choice of lens,...
-
Page 36: Standard Delivery
MicroSD card, max. of 4 GB (inserted) Installation accessories Item Count Part Name M.1.1 Dowels 8 mm M.1.2 Stainless steel washers Ø 5.3 mm M.1.3 Stainless steel wood 4.5x60 mm screws with TX20 head © MOBOTIX AG • Security-Vision-Systems • Made in Germany www.mobotix.com • sales@mobotix.com... - Page 37 /132 Standard delivery D14D Camera Housing And Connectors The MOBOTIX D14D consists of three main components (camera housing, body shell and dome). The D14D is also delivered with PIR sensor, microphone and speaker. LED defaults: Power (on), error (flashes) Washer...
- Page 38 MicroSD card, max. of 4 GB (inserted) Installation accessories Item Count Part Name M.2.1 Dowels 8 mm M.2.2 Stainless steel washers Ø 5.3 mm M.2.3 Stainless steel wood 4.5x60 mm screws with TX20 head © MOBOTIX AG • Security-Vision-Systems • Made in Germany www.mobotix.com • sales@mobotix.com...
- Page 39 Standard delivery D14D-180° – Camera Housing And Connectors The MOBOTIX D14D-180° consists of three main components (camera housing, body shell and dome). The D14D is also delivered with PIR sensor, microphone and speaker. LED defaults: Power (on), error (flashes) Washer...
-
Page 40: Delivered With The D14D-Sec-Dnight-Fix
MicroSD card, max. of 4 GB (inserted) Installation accessories Item Number Part name M.2.1 Dowels 8 mm M.2.2 Stainless steel washers Ø 5,3 mm M.2.3 Stainless steel wood 4.5x60 mm screws with TX20 head © MOBOTIX AG • Security-Vision-Systems • Made in Germany www.mobotix.com • sales@mobotix.com... - Page 41 Standard delivery D14D-Sec-DNight-Fix – Camera Housing and Connectors The MOBOTIX D14D-Sec-DNight-Fix consists of three main components (camera housing, body shell and dome). The D14D is also delivered with PIR sensor, microphone and speaker. LED defaults: Power (on), error (flashes) Washer...
-
Page 42: Delivered Parts Of The Outdoor Wall Mount (Accessories)
The 90 x 90 mm space covers in-wall and on-wall sockets, as well as an MX-Patch-Box that is attached to the wall (MX-OPT-Patch1-EXT) Depth: 275 mm Width: 293 mm © MOBOTIX AG • Security-Vision-Systems • Made in Germany www.mobotix.com • sales@mobotix.com... -
Page 43: Delivered Parts Of The Corner And Pole Mount (Accessories)
Corner and Pole Mount Stainless steel Allen screws M8x30 mm Stainless steel washers Ø 9 mm Stainless steel lock nuts M8 Stainless steel straps Width: 293 mm Depth: 175 mm © MOBOTIX AG • Security-Vision-Systems • Made in Germany www.mobotix.com • sales@mobotix.com... -
Page 44: Available Accessories
The NPA-PoE-Set connects and remotely supplies a D14D camera with power via an Ethernet cable up to 100 m in length. The blue adapter can also be connected to mobile voltage sources from 12 V to 42 V by means of an additionally available battery... -
Page 45: Ethernet Patch Cable With Bayonet Catch
It is ideal for door communication, elevators, access control, etc. The ExtIO is suitable for use as direct connection to the D14D via a Mini USB cable (max. 5 m), which can be ordered separately, or as a network connection via the PoE switch. -
Page 46: Mx2Wire+ Media Converter
(for example, Cat 5) or network patch cable (RJ45 connector) in a weatherproof manner and fits into the 90 x 90 mm space of the Outdoor Wall Mount (see diagram). © MOBOTIX AG • Security-Vision-Systems • Made in Germany www.mobotix.com • sales@mobotix.com... -
Page 47: Mx-Npa-Box
The MX-NPA-Box is a weatherproof PoE injector conforming to the IEEE 802-3af standard and is designed to connect to a MOBOTIX camera external power supply (12 to 57 V DC). The MX-NPA-Box is equipped with the PatchBox’s weatherproof and extremely compact outer housing (protection class IP65, -30°C to +60°C/-22°F to +140°F),... -
Page 48: Mounting
Mounting Indoor Cameras To A Ceiling Or Wall (Without Accessories) In order to mount the MOBOTIX D14D to a ceiling or wall, you need to drill the holes for the fixtures. Use the supplied drilling template (fold-out at the end of this manual) to mark... -
Page 49: Outdoor Installation On A Wall, Pole Or Corner (With Accessories)
If you would like to mount the MOBOTIX D14D to the corner of a building or a pole, you should consider using the MOBOTIX Corner and Pole Mount. This mount can only be used together with the Outdoor Wall Mount. -
Page 50: Overview Of Network Connection
Overview Of Network Connection 2.2.1 Power over Ethernet (PoE Conforming to IEEE 802.3af) All D14D models are supplied with power using the PoE standard. The PoE Adapter Set The D14D supports (MX-NPA-PoE Set) may be used for smaller installations. For larger installations, it is worth... -
Page 51: Uninterruptible Power Supplies (Ups)
5 watts is very low. This, in turn, means that you can centralize the UPS-protected power supply by injecting power into the Ethernet cables (max. 100 m). This kind of protected power supply can be used either with MOBOTIX PoE products (MX-NPA-PoE with Universal Power Supply) or with PoE-compliant switches according to IEEE 802.3af. -
Page 52: Wiring, Fire Prevention, Lightning And Surge Protection
When installing the wiring inside or outside of buildings, make sure you always adhere to the relevant regulations on wiring, fire prevention, and protection against lightning. MOBOTIX cameras are protected against the effects of small electrical surges by numerous measures. These measures, however, cannot prevent the camera from being damaged when stronger electrical surges occur. - Page 53 More information on preventing lightning or surge damage is available from organizations such as the International Electrotechnical Commission (www.iec.ch) or from the manufacturers of lightning and surge protectors. © MOBOTIX AG • Security-Vision-Systems • Made in Germany www.mobotix.com • sales@mobotix.com...
-
Page 54: First Installation Steps
First Installation Steps 2.3.1 Mounting Lens Units The standard models in the MOBOTIX D14D family are supplied with a pre-installed dome. Lens units (lens mount, image sensor and lens) are usually delivered separately. Lens units are installed as described below if this is the case. - Page 55 4. Remove the lens cover on the image sensors: Press the two bars on the side of each lens cover (red arrow) and remove the covers one after another in the direction of the gray arrow. © MOBOTIX AG • Security-Vision-Systems • Made in Germany www.mobotix.com • sales@mobotix.com...
- Page 56 Connect the R and L sensor cables with the image sensors in accordance with the table. Example: In the case of a D14D-DNight (color/black and white), the R sensor cable must always be connected to the lens mount marked with RGB, while the L sensor cable must always be connected to the lens mount marked SW.
- Page 57 Special Case: Mounting The D14D-180° To A Wall Without The Wall Mount The lens mount unit has to be rotated by 180° so that you do not get an upside down panorama image in the vertically mounted camera (PIR sensor points downwards, see Section 2.1.1):...
-
Page 58: Overview Of Cable Connections
The following cables can be used with the D14: • MOBOTIX Ethernet cable: This MOBOTIX cable is pre-installed at delivery and is intended for direct connection to a network outlet. If the D14D is to be installed outdoors, the MOBOTIX MX-Patch-Box should be used (optional accessory). -
Page 59: Connecting Ethernet Cable With The Mx-Patch-Box
Box at www.mobotix.com under the section Products > Accessories > Functional Boxes. 2.3.4 Connecting The Mini USB Cable Existing additional modules like the MOBOTIX ExtIO (USB) can be connected via the Mini USB connector. 1. Remove the outer shell: Remove the outer shell using Use the supplied the supplied custom tool. - Page 60 /132 D14D Camera Manual: Mounting 5. Insert USB cable: Insert the MOBOTIX USB cable from below through the cable outlet (see figure) and wrap it around the camera within the cable guides. 6. Plug in the USB connector: Insert the Mini USB connector in the relevant socket.
-
Page 61: Connecting Mxbus Modules
(each of which is blue/red or +/–): cable for the MxBus • 2x MxBus inputs to connect the D14D to the MxBus cable connector’s inputs and outputs (left or right) • 2x MxBus outputs to connect an MxBus module to the D14D... -
Page 62: Replacing The Microsd Card
MicroSD card into the mount until you hear a click. Push the MicroSD card in, then pull it out The card now protrudes from its seat and can be removed (tweezers may be used to facilitate removal). © MOBOTIX AG • Security-Vision-Systems • Made in Germany www.mobotix.com • sales@mobotix.com... - Page 63 PIR sensor of the camera. Gently press the shell into the shell’s seats in the camera housing. Old outer shells (D10D, D12D) may no longer be used! © MOBOTIX AG • Security-Vision-Systems • Made in Germany www.mobotix.com • sales@mobotix.com...
-
Page 64: Mounting The Camera With Outdoor Wall Mount
The PIR sensor has a range of approximately 10 m and a detection angle of approximately ±15 degrees. The available positions are identified by means of the mounting height of the MOBOTIX D14D and the alignment of the bottom plate, which can be completed in 15° increments. PIR data: 45°... -
Page 65: Mounting The Outdoor Wall Mount
MOBOTIX Ethernet patch cable (1 m) D14D Outdoor Wall Mount Mounting the Outdoor Wall Mount over the MX-Patch-Box or a socket D14D The 90 x 90 mm space also fits the MX-Patch-Box (MX-OPT-Patch1-EXT) © MOBOTIX AG • Security-Vision-Systems • Made in Germany www.mobotix.com • sales@mobotix.com... - Page 66 3. The rectangular opening on the wall mount’s rear side is intended to cover the in-wall socket or the MX-Patch-Box. © MOBOTIX AG • Security-Vision-Systems • Made in Germany www.mobotix.com • sales@mobotix.com...
-
Page 67: Aiming The Camera
3. PIR sensor of the camera looks to the left: Only use the PIR looking to the left: 7 holes numbered with 7 for the M4 hex nuts. © MOBOTIX AG • Security-Vision-Systems • Made in Germany www.mobotix.com • sales@mobotix.com... -
Page 68: Connecting The Camera With Bottom Plate
When fastening the Allen screws using the 3 mm Allen wrench, make sure that you do not scratch the camera dome! 1. Please exchange the original (short) Ethernet cable of the D14D against the extended 1 m (3 ft 3 in) Ethernet cable that is delivered with the wall mount. Guide the connection cables of the camera from below (smooth side) through the round opening of the bottom plate. -
Page 69: Connecting And Securing The Camera
4. Mount the bottom plate to the wall mount (eight M4x10 Allen screws) and make Max. torque for all Allen screws: 4 Nm sure the screws are all properly fastened. © MOBOTIX AG • Security-Vision-Systems • Made in Germany www.mobotix.com • sales@mobotix.com... -
Page 70: Mounting The Corner And Pole Mount
Mounting The Corner And Pole Mount 2.5.1 Overview If you would like to mount the MOBOTIX D14D to the corner of a building or a pole, you should consider using the MOBOTIX Corner and Pole Mount. This mount is designed as an additional mounting option for the Outdoor Wall Mount. -
Page 71: Mounting To The Corner Of A Building
Corner and Pole Mount to the corner of the building using the 8x70 screws and washers (dia. 9 mm). Attach the Outdoor Wall Mount to the Corner and Pole Mount as described in Section 2.5.4. © MOBOTIX AG • Security-Vision-Systems • Made in Germany www.mobotix.com • sales@mobotix.com... -
Page 72: Mounting To A Pole
The cable length from the pole should be at least 80 cm! 3. Firmly tighten the screws of the stainless steel straps. If required, clip the ends of the stainless steel straps. © MOBOTIX AG • Security-Vision-Systems • Made in Germany www.mobotix.com • sales@mobotix.com... -
Page 73: Mounting The Outdoor Wall Mount
Pole Mount to attach the Outdoor Wall Mount to the Corner and Pole Mount. Mount the camera to the Outdoor Wall Mount, as described from Section 2.4.3 onwards (Aiming The Camera). © MOBOTIX AG • Security-Vision-Systems • Made in Germany www.mobotix.com • sales@mobotix.com... -
Page 74: Adjusting The Lens
Notes The focusing aid provides a visual aid when setting the image sharpness of a MOBOTIX camera lens (see Section 4.3.3 Image and Audio Settings, Quick Controls in the Software Manual ). Image focus: Due to the lens effect of the dome, the focus of the 135 mm telephoto lens shifts slightly once the dome has been mounted. - Page 75 /132 Adjusting The Lens © MOBOTIX AG • Security-Vision-Systems • Made in Germany www.mobotix.com • sales@mobotix.com...
-
Page 76: Network And Power Connection
2.7.1 Notes On Cable Lengths And Power Supply • Power may only be supplied to the camera via its Ethernet connector. We recommend using a MOBOTIX PoE adapter or another similar high-quality PoE product to loop-in the power supply: • one camera: with the PoE adapter (MX-NPA-PoE) •... -
Page 77: Power Supply Using A Switch
/132 Network And Power Connection The MOBOTIX factory default is PoE class 2. This default is usually fine and nothing needs Variable PoE: multiple cameras can be operated to be changed. However, the PoE power class must be changed in the browser if the... -
Page 78: Power Supply When Connected Directly To A Computer
PoE switch/router. The switch/router must support the PoE standards IEEE 802.3af or IEEE 802.3at. PoE/PoE+ LAN/www The IP addresses in switch/router the diagram are shown only as an example (10.8.0.11/255.0.0.0) Camera (10.8.0.99) © MOBOTIX AG • Security-Vision-Systems • Made in Germany www.mobotix.com • sales@mobotix.com... -
Page 79: Camera Startup Sequence
Note During the startup sequence of the camera, the LEDs will always light up, even if they have been deactivated in Admin Menu > LED Setup. © MOBOTIX AG • Security-Vision-Systems • Made in Germany www.mobotix.com • sales@mobotix.com... -
Page 80: Operating The Camera
(for example, 10.8.0.99). Local computer networks usually have IP addresses in the 172 or 192 ranges. In order to access a MOBOTIX camera via the network, the camera needs to get an IP address in the same address range. You can set up the network parameters of the MOBOTIX camera using one of the following methods: Manually, using MxCC and MxEasy or by DHCP. -
Page 81: Manually Using A Computer In The 10.X.x.x Ip Address Range
• The computer or the network need to operate in the 10.x.x.x IP address range or need to be able to access such a network. • The setup does not work automatically. • You need to know the relevant network parameters. © MOBOTIX AG • Security-Vision-Systems • Made in Germany www.mobotix.com • sales@mobotix.com... -
Page 82: Automatically Using Mxcontrolcenter Or Mxeasy
You can set up the camera's network parameters using the free-of-charge video management software MxControlCenter or MxEasy (see Sections 3.2.3 and 3.2.4). You can also use one of these applications to automatically configure the network parameters of MOBOTIX cameras that are not operating on the same IP address range as the computer. -
Page 83: Automatically Using Dhcp
• The camera needs to be physically accessible as you need to press a key on the camera housing to boot it using DHCP. • Requires a running DHCP server on the network. © MOBOTIX AG • Security-Vision-Systems • Made in Germany www.mobotix.com • sales@mobotix.com... -
Page 84: First Images And The Most Important Settings
3.2.1 Manually Setting Up The Network Parameters In A Browser In order to manually set up the network parameters of the MOBOTIX camera, you need a computer that is using a 10.x.x.x IP address. The computer's network parameters usually have to be changed for this purpose. - Page 85 Pressing Enter displays the user interface of the MOBOTIX camera (see also Section 3.2.2 First Images And The Most Important Settings In The Browser). 2. Click the Admin Menu soft key in the user interface of the MOBOTIX camera. The Default user data...
-
Page 86: First Images And The Most Important Settings In The Browser
3.2.2 First Images And The Most Important Settings In The Browser Once the MOBOTIX camera has been connected to the power supply and to the network, you can access the user interface with the live camera image in the web browser. Internet Explorer, Firefox, Safari or any other graphical browser with activated JavaScript is suitable. - Page 87 For more information on camera screens, see Section 4.1.1 Camera Screens in the Browser, the Camera Software Manual Part 2, or the online help of the camera's browser interface. © MOBOTIX AG • Security-Vision-Systems • Made in Germany www.mobotix.com • sales@mobotix.com...
-
Page 88: First Images And Network Parameter Configuration In Mxcontrolcenter
If you want to install the current version of the software, you can download the current Windows installer from the MOBOTIX website as an MSI file, which you can install manually. The latest versions are available at www.mobotix.com in the Support > Software Downloads >... - Page 89 MOBOTIX cameras in the local network. To perform a camera search at a later time, select Video Source > Add from the menu. If your MOBOTIX camera is properly connected, it should appear together with the existing video sources in the following list:...
- Page 90 For more information, see Section Creating A New Layout. Reconfiguring Cameras In A Different Subnet If one or more MOBOTIX cameras are displayed with the status Different subnet (for example, cameras with a factory IP address), MxControlCenter automatically offers to configure the network settings of these cameras.
- Page 91 MxControlCenter • Camera: Here, you can enter the known IP address or DNS name of an MOBOTIX camera or a third-party IP camera if it was not found by the automatic search feature.
- Page 92 If you select the second option, the video sources you selected are simply integrated in the MxCC system, where you can use them to generate a layout at a later time. Click on OK to confirm your selection. © MOBOTIX AG • Security-Vision-Systems • Made in Germany www.mobotix.com • sales@mobotix.com...
-
Page 93: First Images And Network Parameter Configuration In Mxeasy
When you start MxEasy for the first time on a computer, the MxEasy Assistant automatically begins to search for MOBOTIX cameras, and displays all cameras found in a list. The camera list will be updated automatically as soon as new MOBOTIX cameras are connected to, or removed from the network. - Page 94 D14D Camera Manual: Operating The Camera Reconfiguring Network Addresses Of Cameras Using Bonjour*, MxEasy finds not only cameras on the same network as your computer, but also MOBOTIX cameras located in other subnets (Status Invalid Network). In such a * Bonjour: automatic recognition of network...
- Page 95 For more information, see the MxEasy User Manual, which can be downloaded as a PDF file from the MOBOTIX website: www.mobotix.com > Support > Manuals. © MOBOTIX AG • Security-Vision-Systems • Made in Germany www.mobotix.com • sales@mobotix.com...
-
Page 96: Starting The Camera With The Factory Ip Address
As opposed to resetting the camera using Admin Menu > Reset configuration to Users and passwords factory defaults, the user information will not be reset if the camera is booted using will be reset! the factory IP address. © MOBOTIX AG • Security-Vision-Systems • Made in Germany www.mobotix.com • sales@mobotix.com... -
Page 97: Starting The Camera With An Automatic Ip Address (Dhcp)
First Images And The Most Important Settings 3.2.6 Starting The Camera With An Automatic IP Address (DHCP) If your network has a DHCP server, you can start the MOBOTIX camera with DHCP support. The camera automatically obtains an IP address from the DHCP server and announces the new network data. -
Page 98: Virtual Ptz And Full Image Recording
Settings and uncheck the Lock Mouse Wheel Zoom item. Then save the settings by clicking on Set and Close. You can now use the scroll wheel to zoom + (roll upwards) or zoom – (roll downwards). © MOBOTIX AG • Security-Vision-Systems • Made in Germany www.mobotix.com • sales@mobotix.com... - Page 99 For more information and details regarding vPTZ, see the Camera Software Manual, the manual for MxEasy and the manual for MxControlCenter. The latest versions of all manuals are available at www.mobotix.com under the main menu item Support in the bar on the left-hand side (“Manuals”).
-
Page 100: Full Image Storage
The main advantage of full image storage lies in the special functionality of the D14D, in that it can always ensure the availability of a maximum size (full) image for later searches, despite vPTZ actions carried out on the live image. - Page 101 Activate/Deactivate Full Image Storage In The Browser To configure this feature, open the Setup Menu > Event Control > Recording dialog box and activate or deactivate the Full Image Recording option. © MOBOTIX AG • Security-Vision-Systems • Made in Germany www.mobotix.com • sales@mobotix.com...
-
Page 102: Image Optimization
To hide this cushion effect, you simply have to zoom in on the image slightly. Although this reduces the size of the captured area, the image is almost distortion-free compared to the original. © MOBOTIX AG • Security-Vision-Systems • Made in Germany www.mobotix.com • sales@mobotix.com... - Page 103 An automatically corrected (live) image is displayed that can be panned, tilted, or zoomed. Switching to the Full Image option will deactivate the automatic distortion correction function. © MOBOTIX AG • Security-Vision-Systems • Made in Germany www.mobotix.com • sales@mobotix.com...
-
Page 104: Adjusting The Panorama Image (D14D 180° Only)
Adjusting The Panorama Image In The Web Browser You need to follow these extra steps when installing a D14D 180° to create a good combined image from the two single images (left and right image sensor). - Page 105 Rotate images: You can rotate the sensor images to the left or right individually or together synchronously by clicking on the edges of the rectangles on the bottom of the range. This way, you can correct any offset in the lens mounts. © MOBOTIX AG • Security-Vision-Systems • Made in Germany www.mobotix.com • sales@mobotix.com...
- Page 106 View in the Quick Control and set the value field to the right to activated. The OnScreen Control opens and you can proceed as described starting with Step 2. © MOBOTIX AG • Security-Vision-Systems • Made in Germany www.mobotix.com • sales@mobotix.com...
- Page 107 Image Optimization Adjusting The Panorama Image In MxEasy Configuration for the panorama view of a D14D-180° is also possible with MxEasy. Select the Image menu item from the Image Formats And Views option in the menu bar at the top of the screen. Then click on Compass in the toolbar.
- Page 108 You can also use MxControlCenter (MxCC) to configure the panorama view of a D14D-180°. Select the D14D-180° you would like to configure and open the PTZ Control control on the left-hand sidebar of MxControlCenter. Click on the Activate button under configuration of the panorama view.
-
Page 109: Dual Image Exposure
The Coupled image control exposure setting is generally activated automatically to create an evenly lit, harmonious dual image with the D14D 180° (with two 90° individual images combined to create a 180° panorama). This setting determines the best average exposure value for the combined panorama image and sets this value automatically. -
Page 110: Microsd Card Recording
Admin Menu > Camera Status dialog box. Conservative Memory Usage Thanks To MOBOTIX MxFFS File System MxFFS formatting of the MicroSD card means that MOBOTIX camera software will use the flash device as evenly as possible, thus allowing for the maximum possible number of write/delete cycles. - Page 111 (for example, via e-mail) if it detects a critical error while storing data (Admin Menu > Error Notification). You can then exchange the MicroSD card in order to secure the stored data. © MOBOTIX AG • Security Vision Systems • Made in Germany www.mobotix.com • sales@mobotix.com...
-
Page 112: Formatting The Card
MxFFS-formatted). The following steps are necessary to format a storage device Flash Device (Admin Menu > Storage on External File Server / Flash Device): 1. Make sure that the MicroSD card is in the card slot of the MOBOTIX camera. 2. Click on the Format button under SD Flash Card. -
Page 113: Activate Recording
Storage on External File Server / Flash Device 1. Make sure that there is a MicroSD card in the card slot of the MOBOTIX camera. 2. Make sure that the MicroSD card is formatted in MxFFS format. 3. Activate the SD Flash Card option. -
Page 114: Accessing Camera Data
• In MxControlCenter: Play back the recorded video sequences with audio by accessing the MicroSD card in the MOBOTIX camera via the camera or with a direct access to the MicroSD card via a card reader connected to the computer. Access the card by setting the MicroSD card's drive/volume as a directory in MxControlCenter. -
Page 115: Using A Microsd Card In A Different Mobotix Camera
Due to MxFFS formatting, this is limited to 4 MB of lost data per incident. 3.5.6 Using A MicroSD Card In A Different MOBOTIX Camera A MicroSD card containing recorded video data from a MOBOTIX camera can be inserted into any MicroSD card-enabled MOBOTIX camera. Once MicroSD card recording has been activated (requires a reboot), the “new”... -
Page 116: Configuration In The Browser
HTTP commands using programs and scripts of the embedded software. The settings are stored in the camera's flash memory. This section contains an overview of the general browser settings of the MOBOTIX camera, as well as further configuration options. The Software Camera Manual Part 2 contains more detailed descriptions of the software features. - Page 117 (Image Programs Quick Control). => ( Software Camera Manual Part 2 , Section 5.5.2) • Set the resolution of the live image: By factory default, all MOBOTIX cameras are delivered with an image resolution of 640 x 480 pixels. You can select the desired resolution using the Resolution Quick Control.
- Page 118 Click on the Arm & Record button to activate event control. This will activate video motion detection and recording. Cameras with integrated flash memory (MOBOTIX R models and models with SD card) will use the flash memory by default to store the image and video data (recording target). If desired, you can set additional events and adjust the settings of the recording and storage parameters (Setup Menu >...
-
Page 119: Additional Configuration Options
MOBOTIX camera. The camera can use either NTP time servers or Time Protocol servers. For additional information, see Section 5.4.2 Date and Time/ Time Zones and Time Servers in the Camera Software Manual Part 2 . -
Page 120: Additional Notes
If the camera's IP address is not known, you can start the camera with its factory IP address. Section 3.2.6 Starting the Camera with the Factory IP Address describes this procedure in more detail. © MOBOTIX AG • Security-Vision-Systems • Made in Germany www.mobotix.com • sales@mobotix.com... -
Page 121: Reset The Camera To Factory Settings
MOBOTIX camera displays only the text WWW.MOBOTIX.COM, the time stamp and individually configured the MOBOTIX logo at the top of the image. Once the camera arming has been activated, the text at the bottom of the live image (event, action, messaging, and recording symbols) will also appear. -
Page 122: Browser
• Make sure you instruct cleaning personnel on how to clean the camera. 3.7.10 Safety Warnings Electrical surges: MOBOTIX cameras are protected against the effects of small electrical surges by numerous measures. These measures, however, cannot prevent the camera from being damaged when stronger electrical surges occur. Particular care should be taken when installing the camera outside to ensure proper protection against lightning, as this also protects the building and the entire network infrastructure. -
Page 123: Online Help In The Browser
3.7.14 Disclaimer MOBOTIX AG does not assume any liability for damage that is the result of improper use of its products or failure to comply with the manuals or the applicable rules and regulations. Our General Terms and Conditions apply. - Page 124 IP address of the device you are looking for. CamIO MOBOTIX signal module that the camera uses to directly operate lamps, sirens and access controls, as well as external audio components (speakers and microphones). CCTV Abbreviation for Closed-Circuit Television.
- Page 125 16 Mbps for a typical household. DualDome Dome camera with two lenses and image sensors such as the MOBOTIX D14D. These lenses can deliver wide angle and telephoto images independently of one another. Abbreviation for Digital Video Recorder.
- Page 126 /132 D14D Camera Manual: MOBOTIX Glossary ExtIO MOBOTIX signal module that the camera uses to directly operate lamps, sirens and door openers, as well as external audio components (speakers and microphones). Fixdome Camera without moving parts in a dome-shaped housing.
- Page 127 MOBOTIX cameras and add-on modules that emits light when a current flows through the component in the correct direction. Linux Free and open source operating system. Serves as the operating system for all MOBOTIX cameras. Megapixel Images that have more than 1 million pixels.
- Page 128 /132 D14D Camera Manual: MOBOTIX Glossary video and audio data from MOBOTIX cameras to be displayed in other applications (includ- ing Internet Explorer). Abbreviation for Network Attached Storage. A storage system connected via an Ethernet cable. All network devices (cameras) have access to this storage system.
- Page 129 VoIP Voice over IP. Telephony using computer networks. WLAN Wireless Local Area Network. Used to provide Internet connections without the need for cables. © MOBOTIX AG • Security-Vision-Systems • Made in Germany www.mobotix.com • sales@mobotix.com...
- Page 130 /132 D14D Camera Manual: Notes © MOBOTIX AG • Security-Vision-Systems • Made in Germany www.mobotix.com • sales@mobotix.com...
- Page 131 /132 © MOBOTIX AG • Security-Vision-Systems • Made in Germany www.mobotix.com • sales@mobotix.com...
- Page 132 /132 D14D Camera Manual: Declaration Of Conformity D14D DualDome Camera Declaration Of Conformity www.mobotix.com > Support > Media Library > Certificates © MOBOTIX AG • Security-Vision-Systems • Made in Germany www.mobotix.com • sales@mobotix.com...
- Page 133 Tax Offi ce: Worms-Kirchheimbolanden, Germany http://www.mobotix.com VAT ID: sales@mobotix.com DE202203501 You can fi nd the latest version of this document at www.mobotix.com under Support. Technical specifi cations subject to change without notice! © MOBOTIX AG • Security-Vision-Systems • Made in Germany www.mobotix.com • sales@mobotix.com...
- Page 134 Two lenses, two HiRes image sensors, up to 64 GB internal storage and a dual image of a maximum of 6 megapixels make the D14D DualDome an efficient security solution: It is possible to secure two different areas using just one camera. All without vulnerable mechanical components!
Need help?
Do you have a question about the D14D and is the answer not in the manual?
Questions and answers