Table of Contents
Advertisement
Quick Links
Download this manual
See also:
Manual
3 Megapixels
2048 x 1536
8x software zoom
30 Frames/s
VGA (640 x 480)
12 fps Mega
-22°F to +140°F
Weatherproof
-30°C to +60°C, IP65
no heating necessary
IEEE 802.3af
PoE
network power
even in winter
microphone & speaker
Audio
bi-directional via IP
variable frame rates
Video SIP Client
IP Telephony
alarm notify,
camera remote control
Video motion
multiple windows
precision pixel-based
lip-syncronized audio
Recording
event ring buffer
30 cams each 30 fps
Live viewing
30 cams at 30 fps
all on one screen
Backlight
safe using CMOS
without mechanical iris
Wall mount
with cable cover
for RJ45 wall outlet
Robust
no moving parts
fiber glass housing
D12
Camera Manual
Complete integration for web and security
MOBOTIX AG • Security-Vision-Systems • Made in Germany
www.mobotix.com • sales@mobotix.com • 08.09.2008
Part 1
Current PDF File:
www.mobotix.com > Support > Manuals
Security-Vision-Systems
X
MOBOTIX
Advertisement
Table of Contents

Related Manuals for Mobotix D12


Summary of Contents for Mobotix D12
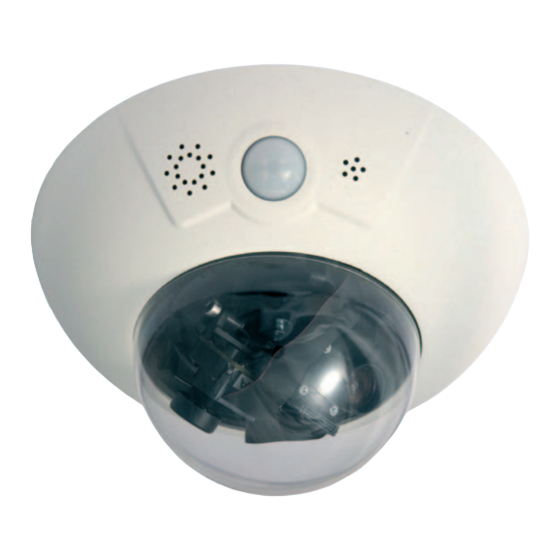
- Page 1 CMOS www.mobotix.com > Support > Manuals without mechanical iris Wall mount with cable cover for RJ45 wall outlet MOBOTIX AG • Security-Vision-Systems • Made in Germany Robust no moving parts www.mobotix.com • sales@mobotix.com • 08.09.2008 fiber glass housing...
- Page 2 Admin User Name: Admin Password: ISDN Dial-In Number: ISDN User Name: ISDN Password: Notes: Note: MOBOTIX offers inexpensive seminars that include a workshop and practical excercises: Basic Seminar 3 days, Advanced Seminar 2 days. For more information, see www.mobotix.com © MOBOTIX AG • Security-Vision-Systems • Made in Germany...
-
Page 3: Table Of Contents
2.10 Delivered Parts of the Corner and Pole Mount (Optional Accessory) 55 2.11 Mounting the Corner and Pole Mount 2.11.1 Overview 2.11.2 Mounting to the Corner of a Building 2.11.3 Mounting to a Pole © MOBOTIX AG • Security-Vision-Systems • Made in Germany www.mobotix.com • sales@mobotix.com... - Page 4 2.13 Finishing the Installation 2.13.1 Establishing a Connection to the Camera 2.13.2 Adjusting the Lenses, Visual Check 2.13.2 Adjusting the Single Images of a MOBOTIX D12D-180° 2.13.3 Mounting the Dome and the Camera's Outer Shell 2.14 Dismantling the Camera 2.15 Mounting the Camera to Different Surfaces 2.15.1 Mounting to a Wooden Wall or Surface...
- Page 5 3.5.3 Activating the Recording on an SD Card 3.5.4 Accessing the Data on an SD Card 3.5.5 Using an SD Card in a Different MOBOTIX Camera 3.5.6 Deactivating SD Card Recording and Removing the Card 3.5.7 Limitations on Warranty When Using Flash Storage Media 3.5.8 Problems Accessing an SD Card...
- Page 6 Basic Settings Image Controls Logos Exposure Settings Day & Night Modes Managing Settings 5.10 Enhanced Security Settings SOFTWARE UPDATES Overview Preparatory Steps Updating the Camera Software Update Checklist © MOBOTIX AG • Security-Vision-Systems • Made in Germany www.mobotix.com • sales@mobotix.com...
- Page 7 Sample Configurations for IP Telephony on a LAN Video Telephony MOBOTIX CAMERAS ON THE WEB 10.1 Overview 10.2 Indirectly Accessing MOBOTIX Cameras via the Web, FTP Uploads 10.3 Directly Accessing MOBOTIX Cameras via the Web 10.4 Configuring the Router 10.5 DynDNS ©...
- Page 8 Copyright © 1999-2008 MOBOTIX AG, Kaiserslautern, Germany. All rights reserved. MOBOTIX, MxPEG and MxControlCenter are worldwide trademarks of MOBOTIX AG. Microsoft, Windows and Windows Server are reg- istered trademarks of Microsoft Corporation. Apple, the Apple logo, Mac and Mac OS X are trademarks of Apple Inc. Linux is a trademark of Linus Torvalds.
- Page 9 D12 Camera Manual Part 1 /132 Notes: © MOBOTIX AG • Security-Vision-Systems • Made in Germany www.mobotix.com • sales@mobotix.com...
- Page 10 Additional functions and other extras included Audio support, lens, wall mount and weatherproof housing (-30° to +60°C, -22° to +140°F) included; microphone & speaker available in certain models © MOBOTIX AG • Security-Vision-Systems • Made in Germany www.mobotix.com • sales@mobotix.com...
- Page 11 SIP standard with automatic alarm call and remote control MxControlCenter included Dual screen technology with building plans, free camera positioning, event search, image processing, lens distortion correction and PTZ support © MOBOTIX AG • Security-Vision-Systems • Made in Germany www.mobotix.com • sales@mobotix.com...
-
Page 12: Introduction
PoE products. All models can cover wall out- lets, thus providing for perfectly protected cabling. Like all other MOBOTIX cameras, the D12 models have more to offer than only the camera features. The integrated software features include a multitude of functions,... - Page 13 Image section with cor- The current MOBOTIX cameras support direct storage on the rection of wide-angle dis- integrated Flash storage media, internal SD cards and tortion external USB media. The...
- Page 14 Perfect weather protection for an innovative camera system Together with the Outdoor Wall Mount, the MOBOTIX D12D reaches protection class IP65 (absolutely dustproof, resistant against water jets). Operating temperatures may vary between -30°C and +60°C (-22°F to 140°F), making it the ideal camera for the most demanding weather situations.
- Page 15 /132 mounting the camera. After the position of the wall mount has been determined, Room for additional mod- the installer of the MOBOTIX camera system can connect the camera system to an ules in the interior of the wall mount installed network outlet, which has been properly tested and configured by the network installer.
- Page 16 Outdoor wall mount with Corner and Pole mount Corner and Pole Mount (rear view) MOBOTIX D12D-Outdoor Product Advantages Besides the many product advantages inherent to the MOBOTIX D12, the MOBOTIX D12D-Outdoor offers these additional benefits: • Attractive design blends in well with building façades.
- Page 17 D12 Camera Manual Part 1 /132 Notes: © MOBOTIX AG • Security-Vision-Systems • Made in Germany www.mobotix.com • sales@mobotix.com...
-
Page 18: Mobotix D12 Concept
Low bandwidth requirements MOBOTIX' patent pending MxPEG streaming format allows fast live video with audio at extremely low network loads (1 to 2 Mbps). Since the MOBOTIX camera itself detects movements in the image (and not the computer), video is only trans- mitted if movements occur, and when the video and audio data are being stored. - Page 19 D12 Camera Manual Part 1 /132 Recording on Flash, USB and SD storage media The current MOBOTIX cameras support direct storage on the integrated Flash *Integrated Flash stor- age has to be installed storage media, internal SD cards and external USB media.
- Page 20 Day & Night The Night versions of the MOBOTIX cameras with only one image sensor (Mono) deliver crisp and clear B/W images of moving objects even at night, MOBOTIX Day/ Night models (M12D-DNight und D12D-DNight) with two image sensors (1x color, 1x B/W) deliver brilliant color images during the day and crisp B/W images at night.
- Page 21 15 HD socket also provides a Line In pin, a Line Out pin, power supply for USB devices, USB master data signals and a pin for connecting a backup power supply (can also be used by solar panels). © MOBOTIX AG • Security-Vision-Systems • Made in Germany www.mobotix.com • sales@mobotix.com...
- Page 22 • True software scaling using the proven and continuously improved MOBOTIX algorithms, which delivers brilliant images even with smaller image formats (e.g. 320 x 240/CIF). *Telephony features can •...
- Page 23 Internet connection, announcement of retrieved IP address, intercom feature, etc.). • MxPEG video compression using MOBOTIX MxControlCenter. The ActiveX plug-in for Internet Explorer users brings all advantages of MxPEG to the browser-based user interface (including the audio stream from and to the camera).
-
Page 24: Lens Options, Hardware And Software Features
Angle L22 with 22 mm focal length up to the tele lens L135 with 135 mm focal length (equiv. to 35 mm camera). Since MOBOTIX cameras are backlight-proof, they do not require a mechanical auto iris. This makes all MOBOTIX lenses extremely robust and maintenance-free. - Page 25 41.0 30.5 20.0 Note The focal lengths of MOBOTIX lenses do not reflect the actual focal length of the lenses, but the focal length (L xx mm) converted to 35 mm Focal lengths of MOBOTIX lenses are camera format. For example, the MOBOTIX Super Wide-Angle lens has always given as compared an actual focal length of 4 mm.
- Page 26 1 (2 put is only available with Concealed cabling attached MOBOTIX ExtIO! In stock Wall mount (optional accessory) *L32 and L65 lenses are not available for M12 cameras © MOBOTIX AG • Security-Vision-Systems • Made in Germany www.mobotix.com • sales@mobotix.com...
- Page 27 Color Color Color/BW Color/BW ered with the lenses Standard lens for software version L22* L22* L22* L22* specified by the customer Audio support (Microphone/Speaker) -/S* -/S* M/S* M/S* © MOBOTIX AG • Security-Vision-Systems • Made in Germany www.mobotix.com • sales@mobotix.com...
-
Page 28: Mounting
D12 standard has freely positionable lens mounts • D12D-180°: The panorama version of the D12 has a horizontal field of view of 180° (2 x 90° L22 Super Wide-Angle lenses) and delivers dual Mega images (max. -
Page 29: Directions
2.10: Delivered Parts of the Corner and Pole Mount 2.11: Mounting the Corner and Pole Mount 2.12: Mounting the Camera With Outdoor Wall Mount 2.13: Finishing the Installation © MOBOTIX AG • Security-Vision-Systems • Made in Germany www.mobotix.com • sales@mobotix.com... -
Page 30: Preparatory Steps
D12 Camera Manual Part 1 /132 2.3 Preparatory Steps Before mounting the MOBOTIX D12 and (if required) the Outdoor Wall Mount (see sections 2.9 and 2.12), the following questions should be solved: • Which connections should the camera use (network/ISDN/RS232)? •... -
Page 31: Mounting To A Wall
The notch should be 3 mm wide (as wide as the Allen wrench) and should point downwards when camera mounted. © MOBOTIX AG • Security-Vision-Systems • Made in Germany www.mobotix.com • sales@mobotix.com... -
Page 32: Deciding On The Connections (Network/Isdn/Rs232)
SIP telephony reduces costs ISDN connection of MOBOTIX cameras is not required if the network permits SIP connections for Internet phone connections. Thanks to the SIP capabilities of the (see chapter 9, Telephony Features , in the Software Manual ), the... -
Page 33: Selecting The Power Supply
Caution It is not possible to use an ISDN NT and the S0 bus to supply power to the MOBOTIX D12. Using the ISDN split cable and MO- BOTIX PoE products (see section 2.17, Camera Accessories), the power can be injected into the ISDN data cable (8-wire cable re- quired). -
Page 34: Using Uninterruptible Power Supplies (Ups)
(e.g. switches, routers, PoE switches, etc.). Since MOBOTIX cameras do not require any heating even in the wintertime, the power consumption of 3 W is quite low. This in turn means that you can centralize the USP-protected power supply by injecting power into the network cables (max. -
Page 35: Providing The Connections (Network/Isdn/Rs232)
Once the camera position, the position of the cable outlets, and the method of power supply have been decided upon, the cabling should be installed. Before mounting the MOBOTIX D12, you should make sure that the network and ISDN connections have been properly tested, so that the proper functioning of the camera is guaranteed. - Page 36 • Properly lead the cable through the cable guides at the outer rim of the housing and make sure that the outer shell can be prop- erly mounted later on. © MOBOTIX AG • Security-Vision-Systems • Made in Germany www.mobotix.com • sales@mobotix.com...
-
Page 37: Connecting A Cable To The Serial Interface (Rs232)
D12 Camera Manual Part 1 /132 2.3.8 Connecting a Cable to the Serial interface (RS232) If the RS232 interface of the MOBOTIX D12 is to be used for switching external Switching external relays using the RS232 interface lays (lights, alarm sirens, gates, etc.), evaluating... -
Page 38: Delivered Parts, Components And Dimensions - D12D Standard
Allen wrench 3 mm 1.12 Custom tool with magnet Mounting Supply Item Count Part Name Dowels 10 mm Stainless steel washers Ø 9 mm Stainless steel wood screws with hex head 8x70 mm © MOBOTIX AG • Security-Vision-Systems • Made in Germany www.mobotix.com • sales@mobotix.com... -
Page 39: Camera Housing And Connectors - D12D Standard
2.4.2 Camera Housing and Connectors - D12D Standard The MOBOTIX D12D consists of three main components (camera housing (item 1.1), outer shell (item 1.9) and dome (item 1.8)). Like the MOBOTIX M12 mod- els, the MOBOTIX D12D is also delivered with PIR sensor, microphone and speaker. -
Page 40: Dimensions - D12D Standard
D12 Camera Manual Part 1 /132 2.4.3 Dimensions - D12D Standard Two freely positionable camera modules ø 201 mm/7.9 in © MOBOTIX AG • Security-Vision-Systems • Made in Germany www.mobotix.com • sales@mobotix.com... - Page 41 D12 Camera Manual Part 1 /132 Notes: © MOBOTIX AG • Security-Vision-Systems • Made in Germany www.mobotix.com • sales@mobotix.com...
-
Page 42: Installing The Lens Units - D12D Standard
/132 2.5 Installing the Lens Units - D12D Standard The standard models of the MOBOTIX D12 are delivered with a pre-mounted dome. Lens units (lens mount, image sensor and lens) are delivered separately and need to be installed as described in the following:... - Page 43 Make sure that the ribbon cables are running properly along the inside of the dome's rim. The ribbon cables must not obstruct the line of vision of the lenses! © MOBOTIX AG • Security-Vision-Systems • Made in Germany www.mobotix.com • sales@mobotix.com...
- Page 44 Note: The camera is delivered with an additional tinted dome with reduced transparency! (6) Adjust the lenses and install the outer shell For additional information on this topic, see section 2.13, Finishing the Instal- lation . © MOBOTIX AG • Security-Vision-Systems • Made in Germany www.mobotix.com • sales@mobotix.com...
-
Page 45: Activating The Camera Configuration In The Quick Installation Wizard
This is done either in the Quick min Menu > Image Sen- Installation wizard or in the Admin Menu > Image Sensor Configuration dialog. sor Configuration © MOBOTIX AG • Security-Vision-Systems • Made in Germany www.mobotix.com • sales@mobotix.com... -
Page 46: Delivered Parts, Components And Dimensions - D12D-180
Custom tool with magnet 2.13 Lens bridge Mounting Supply Item Count Part Name Dowels 10 mm Stainless steel washers Ø 9 mm Stainless steel wood screws with hex head 8x70 mm © MOBOTIX AG • Security-Vision-Systems • Made in Germany www.mobotix.com • sales@mobotix.com... -
Page 47: Camera Housing And Connectors - D12D-180
2.6.2 Camera Housing and Connectors - D12D-180° The MOBOTIX D12D-180° consists of three main components (camera housing (item 2.1), outer shell (item 2.9) and dome (item 2.8)). Like the MOBOTIX M12 models, the MOBOTIX D12D-180° is also delivered with PIR sensor, microphone and speaker. -
Page 48: Dimensions - D12D-180
D12 Camera Manual Part 1 /132 2.6.3 Dimensions - D12D-180° Two 90° lenses (180°) ø 201 mm/7.9 in © MOBOTIX AG • Security-Vision-Systems • Made in Germany www.mobotix.com • sales@mobotix.com... - Page 49 D12 Camera Manual Part 1 /132 Notes: © MOBOTIX AG • Security-Vision-Systems • Made in Germany www.mobotix.com • sales@mobotix.com...
-
Page 50: Delivered Parts, Components And Dimensions - D12M-Cs
Custom tool with magnet 3.13 Lens bridge Mounting Supply Item Count Part Name Dowels 10 mm Stainless steel washers Ø 9 mm Stainless steel wood screws with hex head 8x70 mm © MOBOTIX AG • Security-Vision-Systems • Made in Germany www.mobotix.com • sales@mobotix.com... -
Page 51: Camera Housing And Connectors - D12M-Cs
2.7.2 Camera Housing and Connectors - D12M-CS The MOBOTIX D12M-CS consists of three main components (camera housing (item 3.1), outer shell (item 3.9) and dome (item 3.8)). Like the MOBOTIX M12 models, the MOBOTIX D12M-CS is also delivered with PIR sensor, microphone and speaker. -
Page 52: Dimensions - D12M-Cs
D12 Camera Manual Part 1 /132 2.7.3 Dimensions - D12M-CS CS-Mount lens unit ø 201 mm/7.9 in © MOBOTIX AG • Security-Vision-Systems • Made in Germany www.mobotix.com • sales@mobotix.com... - Page 53 D12 Camera Manual Part 1 /132 Notes: © MOBOTIX AG • Security-Vision-Systems • Made in Germany www.mobotix.com • sales@mobotix.com...
-
Page 54: Indoor/Outdoor Mounting Instructions
2.8 Indoor/Outdoor Mounting Instructions 2.8.1 Mounting Indoor Cameras to a Wall or Ceiling In order to mount the MOBOTIX D12 to a ceiling or wall, you need to drill the holes Please also observe the for the fixtures. Use the supplied drilling template to mark the position of the holes... -
Page 55: Mounting Outdoor Cameras To A Wall
2.8.3 Mounting Outdoor Cameras to a Wall or Pole If you would like to mount the MOBOTIX D12 to the corner of a building or a pole, you should consider using the MOBOTIX Corner and Pole Mount. The Corner and Pole Mount can be used only together with the Outdoor Wall Mount. -
Page 56: Delivered Parts Of The Outdoor Wall Mount (Optional Accessory)
Stainless steel hex nuts M4 Stainless steel Allen screws M4x25 mm 4.10 Stainless steel washers Ø 4.3 mm rectangular hole in the center of the rear covers the wall outlet Depth: 275 mm/10.8 in Width: 293 mm/11.5 in © MOBOTIX AG • Security-Vision-Systems • Made in Germany www.mobotix.com • sales@mobotix.com... -
Page 57: Delivered Parts Of The Corner And Pole Mount (Optional Accessory)
4 Muttern M8 (item 5.3) Item Count Part Name Stainless steel Allen screws M8x30 mm Stainless steel washers Ø 9 mm Stainless steel lock nuts M8 Stainless steel straps Width: 293 mm/11.5 in Depth: 175 mm/6.9 in © MOBOTIX AG • Security-Vision-Systems • Made in Germany www.mobotix.com • sales@mobotix.com... -
Page 58: Mounting The Corner And Pole Mount
2.11 Mounting the Corner and Pole Mount 2.11.1 Overview If you would like to mount the MOBOTIX D12 to the corner of a building or a pole, you should consider using the MOBOTIX Corner and Pole Mount. This mount is made of 3 mm powder-coated stainless steel (white) and has been designed... -
Page 59: Mounting To The Corner Of A Building
Next, mount the Outdoor Wall Mount to the Corner and Pole Mount, as de- scribed in section 2.11.4, Mounting the Outdoor Wall Mount to the Corner and Pole Mount . © MOBOTIX AG • Security-Vision-Systems • Made in Germany www.mobotix.com • sales@mobotix.com... -
Page 60: Mounting To A Pole
Next, mount the Outdoor Wall Mount to the Corner and Pole Mount, as de- scribed in section 2.11.4, Mounting the Outdoor Wall Mount to the Corner and Pole Mount . © MOBOTIX AG • Security-Vision-Systems • Made in Germany www.mobotix.com • sales@mobotix.com... -
Page 61: Mounting The Outdoor Wall Mount To The Corner And Pole Mount
Corner and Pole Mount. Next, mount the camera to the Outdoor Wall Mount, as described in section 2.12.3, Determining the Position of the Camera on the Bottom Plate . © MOBOTIX AG • Security-Vision-Systems • Made in Germany www.mobotix.com • sales@mobotix.com... -
Page 62: Mounting The Camera With The Outdoor Wall Mount
The PIR sensor reaches about 10 me- ters (33 ft) and has a field of view of ±15°. The positions that are available depend on how high the MOBOTIX D12D-Outdoor has been mounted and the position of the camera on the bottom plate (item 4.2), which can be adjusted in steps of 15 degrees... -
Page 63: Mounting The Outdoor Wall Mount
Wall outlet D12 Outdoor Wall Mount CAT5 cable Mounting the Outdoor Wall Mount and the cam- 90 mm/3.5 in 15 mm/0.6 in 160 mm/6.3 in 293 mm/11.5 in © MOBOTIX AG • Security-Vision-Systems • Made in Germany www.mobotix.com • sales@mobotix.com... - Page 64 70 cm (28 in) from the wall or wall out- using the Corner and Pole (80 cm (32 in) when using the Corner and Mount Pole Mount, see section 2.11). © MOBOTIX AG • Security-Vision-Systems • Made in Germany www.mobotix.com • sales@mobotix.com...
-
Page 65: Determining The Position Of The Camera On The Bottom Plate
• PIR sensor of the camera looks to the left: Use the PIR looking to the left: 7 holes marked by the number for the M4 hex nuts (item 4.8). © MOBOTIX AG • Security-Vision-Systems • Made in Germany www.mobotix.com • sales@mobotix.com... -
Page 66: Mounting The Camera On The Bottom Plate
Allen screws M4x25 mm (item 4.9) with the corre- sponding washers to mount the cam- era to the bottom plate. © MOBOTIX AG • Security-Vision-Systems • Made in Germany www.mobotix.com • sales@mobotix.com... -
Page 67: Connecting The Camera And Mounting The Bottom Plate
Max. torque for all • Mount the bottom plate to the wall mount (eight Allen screws M4x10 mm; screws: 4 Nm item 4.7) and make sure the screws are all properly fastened. (2.95 lbf ft) © MOBOTIX AG • Security-Vision-Systems • Made in Germany www.mobotix.com • sales@mobotix.com... -
Page 68: Finishing The Installation
• Mount the dome again using the cotton cloth and finally check the focus of both lenses on the monitor. © MOBOTIX AG • Security-Vision-Systems • Made in Germany www.mobotix.com • sales@mobotix.com... -
Page 69: Adjusting The Single Images Of A Mobotix D12D-180
D12 Camera Manual Part 1 /132 2.13.3 Adjusting the Single Images of a MOBOTIX D12D-180° MOBOTIX D12D-180° has two 90° wide-angle lenses that are mounted on a Make sure to use a mo- nitor with a high resolu- lens bridge in such a way that they produce a 180° dual image. Due to tiny manu- tion and a wide screen facturing tolerances, the images of the two lenses do not always fit perfectly. - Page 70 View Configuration Quick Control and set the value in the field alongside to Dis- able . In order to use the new configuration after the next reboot, the camera will © MOBOTIX AG • Security-Vision-Systems • Made in Germany www.mobotix.com • sales@mobotix.com...
- Page 71 D12D-180° tilted too far down: Level area seems to buckle Optimum adjustment of D12D-180°: Level area is displayed correctly © MOBOTIX AG • Security-Vision-Systems • Made in Germany www.mobotix.com • sales@mobotix.com...
-
Page 72: Mounting The Dome And The Camera's Outer Shell
(see section 2.14, Dis- mantling the Camera ). Caution The MOBOTIX D12D-Outdoor is only weatherproof if the camera hous- ing has been mounted tightly to the bottom plate and both the camera dome and the outer shell are properly seated. -
Page 73: Dismantling The Camera
Start dismantling the camera by removing the outer shell of the D12. For removing the outer shell of the D12, you need the supplied custom tool; for dismounting the dome, a lint-free cotton cloth is required (see section 2.16.1, Cleaning Instructions ). - Page 74 (4) Remove the dome Take a cotton cloth and remove the transpar- Dismount the dome by turning it counter-clock- ent dome by turning it in counter-clockwise wise direction. © MOBOTIX AG • Security-Vision-Systems • Made in Germany www.mobotix.com • sales@mobotix.com...
- Page 75 (7) Remove the central lens screw and the lens units Remove the central lens screw using the sup- plied 3 mm Allen wrench. Lift the lens units out of their seats. © MOBOTIX AG • Security-Vision-Systems • Made in Germany www.mobotix.com • sales@mobotix.com...
-
Page 76: Mounting The Camera To Different Surfaces
Find the folded drilling template at the end of the manual! Caution Never use screws with countersunk heads to fasten the mount, as these screws will destroy the mount. © MOBOTIX AG • Security-Vision-Systems • Made in Germany www.mobotix.com • sales@mobotix.com... -
Page 77: Mounting To A Wooden Wall Or Surface
• Insert the screws (with washers) into the openings in the foot of the camera. Max. torque for all • Tighten the screws using the wrench or ratchet (max. torque is 4 Nm/ screws: 4 Nm 2.95 lbf ft). (2.95 lbf ft) © MOBOTIX AG • Security-Vision-Systems • Made in Germany www.mobotix.com • sales@mobotix.com... -
Page 78: Mounting To A Drywall
• Insert the screws (with washers) into the openings in the foot of the camera and into the dowels. Max. torque for all • Tighten the screws using the wrench or ratchet (max. torque is 4 Nm/ screws: 4 Nm 2.95 lbf ft). (2.95 lbf ft) © MOBOTIX AG • Security-Vision-Systems • Made in Germany www.mobotix.com • sales@mobotix.com... -
Page 79: Mounting To A Concrete Or Brick Wall
• Insert the four screws (with washers) into the openings in the foot of the cam- era and into the dowels. Max. torque for all • Tighten the screws using the wrench or ratchet (max. torque is 4 Nm/ screws: 4 Nm 2.95 lbf ft). (2.95 lbf ft) © MOBOTIX AG • Security-Vision-Systems • Made in Germany www.mobotix.com • sales@mobotix.com... -
Page 80: After Mounting The Camera
Make sure that you insert the dome into the housing with the mark of the dome pointing towards the camera's PIR sensor, in order to pre- serve the camera's weatherproofness! © MOBOTIX AG • Security-Vision-Systems • Made in Germany www.mobotix.com • sales@mobotix.com... - Page 81 D12 Camera Manual Part 1 /132 Notes: © MOBOTIX AG • Security-Vision-Systems • Made in Germany www.mobotix.com • sales@mobotix.com...
-
Page 82: Notes
MOBOTIX recommends having MOBOTIX cameras installed only by certified spe- cialists accustomed to installing network devices and having proper respect for the applicable regulations regarding lightning protection and... - Page 83 This includes surge protectors for 19" racks, add- ing an uninterruptible power supply (UPS) to the MOBOTIX camera, and in- stalling surge arresters or similar for routers, switches, servers, etc.
-
Page 84: Camera Accessories
/132 2.17 Camera Accessories Power supply (MX-SNT-E/U/GB/J/AUS01-30-RJ) Not required if network The MOBOTIX power supply is required if you do not components are used that support the PoE (Power use a Network Power Rack or Network Power over Ethernet) standard Box, or a PoE-compatible switch or router. - Page 85 D12 Camera Manual Part 1 /132 Outdoor Wall Mount (MX-WH-Dome) When mounted to the Outdoor Wall Mount, the D12 can be used outside for enhanced outdoor sur- Outdoor Wall Mount from veillance. Together with the Outdoor Wall Mount, the sturdy PBT 30GF MOBOTIX D12 reaches protection class IP65 (abso- lutely dustproof, resistant against water jets).
-
Page 86: Operating The Camera
OPERATING THE CAMERA 3.1 General Procedure The MOBOTIX camera does not require any software installation; all you need is your preferred browser with JavaScript support to operate the camera. Thus, the MOBOTIX camera is supported by all common operating systems (such as Win- dows, Linux, Macintosh, ...). - Page 87 Note Always use Quick Instal- lation for initial configu- After first booting a new MOBOTIX camera or after resetting to factory ration! defaults, accessing the Administration menu (Admin Menu button) will automatically start the Quick Installation wizard. This is where you configure the most important camera parameters in a step-by-step manner.
-
Page 88: Connecting The Camera To The Network And To The Power Supply
MOBOTIX cameras, make sure that these compo- Use the MOBOTIX MX- NPR-4 for smaller instal- nents do not have a fan. Since the power consumption of MOBOTIX cameras lations is very low compared to other products, the reliability of the entire system is increased, thus extending the life of these components. -
Page 89: Camera Startup Sequence
During the startup sequence, the LEDs will always light up, even if they have been deactivated in Admin Menu > LED Setup. "L" key Default signals of the camera LEDs: Power Image processing/event Ethernet Image processing/event Microphone © MOBOTIX AG • Security-Vision-Systems • Made in Germany www.mobotix.com • sales@mobotix.com... -
Page 90: Power Supply (Mxpoe) Using A Switch
(3) Plug the RJ45 connector of the external power unit into the LAN/Power con- nector of the Network Power Adapter. The Network Power Adapter replaces the crossover cable when di- rectly connecting to a computer © MOBOTIX AG • Security-Vision-Systems • Made in Germany www.mobotix.com • sales@mobotix.com... -
Page 91: Power Supply Using A Network Power Rack (Mxpoe)
Connect the factory pre-installed cable of the camera to the Ethernet connector of the PoE switch/router. The switch/router needs to support the PoE standard IEEE 802.3af. PoE IEEE 802.3af! © MOBOTIX AG • Security-Vision-Systems • Made in Germany www.mobotix.com • sales@mobotix.com... -
Page 92: Isdn: Power Supply Using A Network Power Adapter
(4) Plug the RJ45 connector of the external power unit into the PC/Power con- nector of the Network Power Adapter. 1 cable MX Split (pin 7-8,30V) Cable Max. 10 m/30 ft Max. 20 m/ 60 ft © MOBOTIX AG • Security-Vision-Systems • Made in Germany www.mobotix.com • sales@mobotix.com... -
Page 93: Isdn: Directly Supplying Power Using The External Power Supply
Power is supplied only via the Ethernet cable and the 10BaseT/NET connector of the camera (using MOBOTIX PoE products or Power over Ethernet according to IEEE 802.af). Ethernet ISDN © MOBOTIX AG • Security-Vision-Systems • Made in Germany... -
Page 94: The First Image From The Camera
/132 3.3 The First Image from the Camera 3.3.1 Preparing the Ethernet and ISDN Connections In order to establish the first connection to the MOBOTIX camera, choose one of the following options: • Ethernet (10/100 Mbps network): Automatic camera search •... - Page 95 If you receive an answer from another network device although the camera is not connected, you will have to remove that device until you have reset the MOBOTIX camera to a free IP address. We recommend using the Quick Installation wizard for assigning a new IP address to the camera.
- Page 96 Password: Simultaneously Using ISDN and Ethernet Connections In most cases, MOBOTIX cameras will be used either on an Ethernet LAN or on ISDN, not both. The gateway (for accessing computers outside of the local network) needs to be set manually for Ethernet; it is usually obtained automatically for ISDN.
-
Page 97: The First Image In The Browser
Make sure that you use http:// the IP address of your 10.1.0.99), you will see the Live screen of the MOBOTIX camera with its user camera instead of interface controls, such as softbuttons, buttons for the different camera screens, 10.1.0.99! - Page 98 D12 Camera Manual Part 1 /132 Camera Screens in the Browser Browser Screens Per factory default, the MOBOTIX camera automatically shows the Live screen. You can set a different start page (e.g. the Guest screen) in Admin Menu > Language Live: Live screen of...
- Page 99 D12 Camera Manual Part 1 /132 Notizen: © MOBOTIX AG • Security-Vision-Systems • Made in Germany www.mobotix.com • sales@mobotix.com...
-
Page 100: The First Image In Mxcontrolcenter
If this is not the case or if you would like to update to a newer version, you Download MxControlCen- can download the latest MSI or ZIP file from the MOBOTIX website. The latest ter free of charge from version is available at www.mobotix.com > Support > Software Downloads in www.mobotix.com... - Page 101 Automated Search for MOBOTIX Cameras If you start MxControlCenter for the first time or if you have not yet stored a start layout with the desired video sources (i.e. MOBOTIX cameras), the Open Video Sources dialog will open and automatically starts scanning the network.
- Page 102 Anytime you connect a new camera to the local network, you can initiate the search in the Open Video Sources dialog again by pushing the button. If the desired MOBOTIX cameras are highlighted as OK in the video source list (status OK ), proceed to the Selecting Video Sources section further below.
- Page 103 MOBOTIX camera as a video source. • Add file server path: Adds the alarm images previously stored by a MOBOTIX camera on an external file server as a video source. Selecting Video Sources Highlight the desired video sources you would like to manage and display in MxControlCenter.
- Page 104 MxControlCenter. If you interrupt the discovery process (section Configuring MOBOTIX Cameras for a Different Subnet ) or require a password that is different from the factory-preset password, you can always relaunch the configuration process from the context menu at a later time and enter the appropriate user name and password.
-
Page 105: The First Image In Mxeasy
MxEasy version for your operating system from the MOBOTIX website. MxEasy will be available from Q4/2008 at www.mobotix.com MxEasy is currently under >... - Page 106 All recon- figured cameras are now run- OK status ning in the same subnet as the computer and are displayed with an in the camera list. © MOBOTIX AG • Security-Vision-Systems • Made in Germany www.mobotix.com • sales@mobotix.com...
- Page 107 MOBOTIX cameras to MxEasy, simply click the Add cameras button (max. 16 cameras in total). © MOBOTIX AG • Security-Vision-Systems • Made in Germany www.mobotix.com • sales@mobotix.com...
-
Page 108: Starting The Camera With An Automatic Ip Address (Dhcp)
DHCP server. If this is not the case, the camera cannot obtain a valid IP address and will fall back to its last known IP address. © MOBOTIX AG • Security-Vision-Systems • Made in Germany www.mobotix.com • sales@mobotix.com... -
Page 109: Starting The Camera Using The Factory Ip Address
, the user information will not be Users and passwords will reset if the camera is booted using the factory IP address. be changed! © MOBOTIX AG • Security-Vision-Systems • Made in Germany www.mobotix.com • sales@mobotix.com... -
Page 110: Configuring The Camera In The Browser
MOBOTIX camera as well as information on further configuration options. For infor- mation on configuration steps specific to the D12D-180°, see section 2.13.3, Adjust- Software Manual Part 2: ing the Single Images of a MOBOTIX D12D-180° . Please see the Software Manual www.mobotix.com Part 2 for more detailed information on the software features. - Page 111 => (Software Manual, section 5.5.2) • Set the resolution of the live image: By factory default, all MOBOTIX cam- eras are delivered with an image resolution of 640x480 pixels. You can select the desired resolution using the Resolution Quick Control.
-
Page 112: Additional Configuration Options
This allows you to keep the camera in synch manually with a computer or fully automatic using a time server or another MOBOTIX camera. The camera can use either NTP time servers or Time Protocol servers. For additional infor- mation on this topic, see section 5.4.2, Date and Time / Time Zones and Time... - Page 113 D12 Camera Manual Part 1 /132 Notes: © MOBOTIX AG • Security-Vision-Systems • Made in Germany www.mobotix.com • sales@mobotix.com...
-
Page 114: Sd Card Recording
Note that no data is lost in this process. In addition, MOBOTIX cameras constantly monitor the wear of activated Flash stor- age devices. MOBOTIX has developed a technology to test the wear of the Flash device by logging the number of write/delete cycles (patent pending). Open Admin Menu >... - Page 115 SD card against a new one after one year of operation. When storing to an SD card, you should limit event recording to the minimum required frame rate instead of the default Max fps setting (Setup Menu > Recording). © MOBOTIX AG • Security-Vision-Systems • Made in Germany www.mobotix.com • sales@mobotix.com...
- Page 116 The maximum data rate (write speed) of the memory used in MOBOTIX R models is by far higher than the maximum data output of the MOBOTIX camera even in extreme situations.
-
Page 117: Formatting An Sd Card With The Mxffs Format
D12 Camera Manual Part 1 /132 3.5.2 Formatting an SD Card With the MxFFS Format Before a MOBOTIX camera can store image and video sequences on an SD card, it Follow these steps to for- mat an SD card in Admin... -
Page 118: Activating The Recording On An Sd Card
MxFFS-formatted (Admin Menu > Storage on External File Server / Flash Device): 1) Make sure that an SD card is in the SD card slot of the MOBOTIX camera. 2) Make sure that the SD card has been MxFFS-formatted (see section 3.5.2, Formatting an SD Card With the MxFFS Format ). -
Page 119: Using An Sd Card In A Different Mobotix Camera
3.5.5 Using an SD Card in a Different MOBOTIX Camera An SD card containing recorded video data from a MOBOTIX camera can be inserted into any SD card-enabled MOBOTIX camera. Once SD card recording has been activated (requires a reboot), the "new"... -
Page 120: Deactivating Sd Card Recording And Removing The Card
MOBOTIX will not assume any responsibility for Flash storage devices (e.g. SD cards or connected USB storage devices) deliv- ered with or integrated in MOBOTIX cameras. The same applies to damages to Flash storage media not acquired through MOBOTIX or by the use of such media. -
Page 121: Problems Accessing An Sd Card
3.5.8 Problems Accessing an SD Card Caution Some SD cards cannot be set back reliably by the MOBOTIX cam- era when rebooting. In rare occasions, the camera cannot access such an SD card after the camera has executed a soft reboot. If... -
Page 122: Connecting External Devices And Sensors: Mx Interface Connector
3.6.1 MX Interface Connector for Direct Connections MOBOTIX M12, D12 and V12 cameras have an MX Interface Connector (D Sub 15 HD), which features one signal input and one signal output for switch- ing loads. In addition, the interface also provides two signal inputs and two signal outputs. - Page 123 D12 Camera Manual Part 1 /132 Notes: © MOBOTIX AG • Security-Vision-Systems • Made in Germany www.mobotix.com • sales@mobotix.com...
-
Page 124: Signal Input/Output, Rs232 Interface
3.7 Signal Input/Output, RS232 Interface The signal lines of the The MOBOTIX M12, D12 and V12 models provide one signal input and one signal serial interface can also output as well as two additional signal input pins and two signal output pins on be programmed as addi- its RS232 interface (only available in IT and Secure models). -
Page 125: Signal Output Pins
/132 3.7.2 Signal Output Pins Activate the signal output When an event is detected, the MOBOTIX camera can switch the signal output in Admin Menu > LED (pin 1). Use the corresponding options in Setup Menu > Actions to specify how Setup or for specific long the camera should close the signal output. -
Page 126: Important Notes
(absolutely dustproof, resistant against water jets). Without the wall mount, the D12 reaches IP54. 3.8.2 Passwords for the Administration Menu and ISDN Dial-In Accessing the administration area of the camera (Admin Menu button) is only pos- sible after entering a user name and password. -
Page 127: Starting The Camera Using The Factory Ip Address
Text and logos can be also deactivated or customized time stamp and the MOBOTIX logo at the top of the image. Once the camera arm- to your liking ing has been activated, the text at the bottom of the live image (event, action, mes- saging and recording symbols) will also appear. -
Page 128: Deactivating The Automatic Daily Reboot Of The Camera
3.8.9 ISDN Compatibility Notes MOBOTIX Q22M, M22M and D22M models do not possess ISDN functionality. MOBOTIX M12, D12 and V12 cameras are compatible with Euro ISDN standard TBR3/TBR3 A1. MOBOTIX offers special models for the Japanese market that sup- port the Japanese ISDN standard. For additional information on this topic, see the Japanese section at www.mobotix.com. -
Page 129: Additional Information
Make sure that you always include the full model name of the camera when ordering the dome as a replacement part! © MOBOTIX AG • Security-Vision-Systems • Made in Germany www.mobotix.com • sales@mobotix.com... -
Page 130: Drilling Templates
Sample! Find the 1:1 scale drilling template at the end of the manual as a fold- Find the drilling templates out! (scale 1:1) at the end of the manual as a fold-out © MOBOTIX AG • Security-Vision-Systems • Made in Germany www.mobotix.com • sales@mobotix.com... - Page 131 D12 Camera Manual Part 1 /132 Sample! Find the 1:1 scale D12 wall mount and drilling template at the end weather protection of the manual as a fold- out! © MOBOTIX AG • Security-Vision-Systems • Made in Germany www.mobotix.com • sales@mobotix.com...
- Page 132 D12 Camera Manual Part 1 /132 IP65 Certificate © MOBOTIX AG • Security-Vision-Systems • Made in Germany www.mobotix.com • sales@mobotix.com...
- Page 133 D12 Camera Manual Part 1 /132 Declaration of Conformity © MOBOTIX AG • Security-Vision-Systems • Made in Germany www.mobotix.com • sales@mobotix.com...
- Page 134 D12 Camera Manual Part 1 /132 Notes: © MOBOTIX AG • Security-Vision-Systems • Made in Germany www.mobotix.com • sales@mobotix.com...
- Page 135 MOBOTIX – The HiRes Video Company To demonstrate our confidence in the quality of our products, MOBOTIX cameras were used to capture all the images that appear in this manual. Manufacturer Executive Board MOBOTIX AG Dr. Ralf Hinkel Kaiserstrasse D-67722 Langmeil...
- Page 136 CMOS www.mobotix.com > Support > Manuals without mechanical iris Wall mount with cable cover for RJ45 wall outlet MOBOTIX AG • Security-Vision-Systems • Made in Germany Robust no moving parts www.mobotix.com • sales@mobotix.com • 08.09.2008 fiber glass housing...
Need help?
Do you have a question about the D12 and is the answer not in the manual?
Questions and answers