Xerox Color 800 User Manual
Industrial printing system
Hide thumbs
Also See for Color 800:
- Operator's manual (16 pages) ,
- System administration manual (78 pages)
Table of Contents
Advertisement
Quick Links
Advertisement
Table of Contents

Related Manuals for Xerox Color 800


Summary of Contents for Xerox Color 800
-
Page 1: User Guide
Version 3.0 March 2012 ® Xerox Color 800/1000 Press User Guide... - Page 2 FreeFlow , SquareFold , Xerox prInteract , MeterAssistant , SuppliesAssistant , and RemoteAssistant are trademarks of Xerox Corporation in the United States and/or other countries. Product status, build status, and/or specifications are subject to change without notice. Microsoft, Windows, Windows 2000, Windows XP, Windows Vista, and Windows 7 are registered trademarks of Microsoft Corporation.
-
Page 3: Table Of Contents
User Interface help......................2-1 Help on the World Wide Web..................2-2 Print server customer documentation.................2-2 3 Machine/job status...................3-1 Machine status........................3-1 System menu......................3-1 Dry ink/toner status area..................3-2 Billing and Counters....................3-2 Viewing/reseting Billing Meters/Usage Counters......3-2 Billing and counters information............3-3 ® Xerox Color 800/1000 Press User Guide... - Page 4 4 Submitting a print job................4-1 Printing from your computer...................4-1 Printing from the Xerox FreeFlow Print Server............4-1 Printing from the Xerox EX Print Server, Powered by EFI........4-2 Printing from the Xerox CX Print Server, Powered by Creo........4-2 5 System Administrator overview............5-1 Logging on as Administrator...................5-1...
- Page 5 Machine serial number on the UI..............10-1 Serial number on the machine...............10-1 Calling for service......................10-2 General problems......................10-3 Jam clearance........................10-7 Paper jams in Trays 1 and 2................10-7 Paper jams in area 2...................10-8 Paper jams in areas 3 and 4.................10-11 ® Xerox Color 800/1000 Press User Guide...
- Page 6 Tray stock mismatch......................13-10 OHCF problem solving....................13-11 Clearing OHCF jams..................13-11 Paper jams inside the OHCF trays..........13-12 OHCF paper jams at lever 1a and knob 1c........13-13 OHCF paper jams at lever 1b and knob 1c........13-14 ® Xerox Color 800/1000 Press User Guide...
- Page 7 HCS top tray jam (E7)................15-8 HCS exit jam (E8)..................15-9 Hints and tips for using the HCS..............15-10 Loss of power......................15-11 Fault codes......................15-11 Specifications........................15-15 16 Perfect Binder..................16-1 Binder components......................16-1 External components..................16-1 Cover inserter......................16-3 Internal components..................16-4 Binder control panel....................16-5 ® Xerox Color 800/1000 Press User Guide...
- Page 8 Print Server..................16-14 Printing/binding from a single file to the FreeFlow Print Server....................16-16 Printing from the Xerox CX Print Server, Powered by Creo to the Perfect Binder....................16-17 Binder manual mode with the CX Print Server......16-17 Printing/binding from a single file to the CX Print Server....................16-18...
- Page 9 Paper jams at the optional booklet maker tray........17-33 Stapler faults.......................17-34 Staple jams in the standard staple cartridge......17-35 Staple jams in the booklet maker cartridge......17-36 Reinserting the standard staple cartridge..........17-38 Fault codes......................17-40 Specifications........................17-43 Standard/Booklet Maker Finisher...............17-43 Optional C/Z Folder..................17-46 ® Xerox Color 800/1000 Press User Guide...
- Page 10 Finishing Transport main components............19-6 Finishing Transport status indicators............19-7 Standard Finisher Plus maintenance.................19-8 Standard Finisher Plus consumable supplies..........19-8 Replace the standard staple cartridge............19-8 Replacing the Staple Waste Container on the finisher......19-10 Empty the Punch Waste Container............19-12 viii ® Xerox Color 800/1000 Press User Guide...
- Page 11 Staple jams in the standard staple cartridge......19-37 Standard Finisher Plus fault codes.............19-39 Finisher Module fault codes.............19-39 Finishing Transport fault codes............19-40 Third-party DFA fault codes.............19-40 Specifications........................19-41 Finisher Module specifications..............19-41 Optional C/Z Folder................19-45 Finishing Transport specifications..............19-45 ® Xerox Color 800/1000 Press User Guide...
- Page 12 Table of Contents ® Xerox Color 800/1000 Press User Guide...
-
Page 13: Product Overview
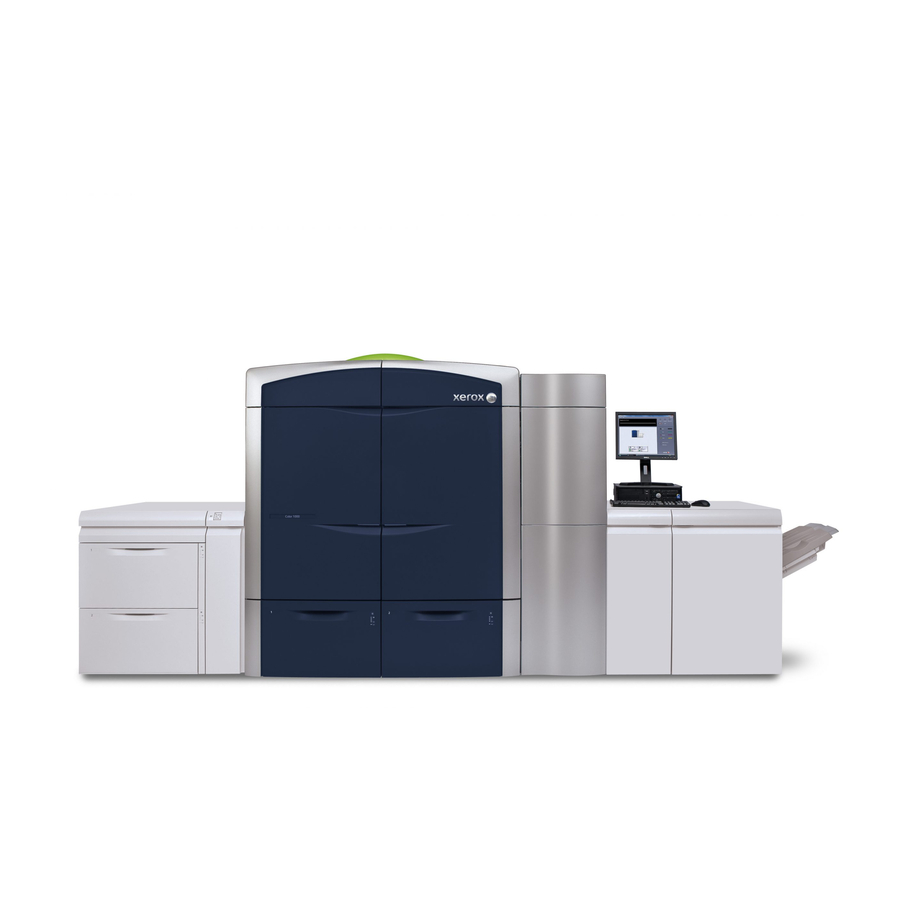
Product overview The Xerox 800/1000 Color Press is a full color/black and white network printer that operates at a speed of 80/100 prints per minute. The following illustration shows a basic configuration of the digital press: 1. Print engine - left side a. -
Page 14: Quick Start/Links
• Replacing a dry ink/toner waste bottle • Logging on as Administrator User Interface The User Interface (UI) displays messages that indicate the status of the machine during idle, run, or fault conditions. ® Xerox Color 800/1000 Press User Guide... -
Page 15: Logon
• Technical Key Operator: This level is reserved for users who are certified by Xerox to perform certain maintenance activities that are normally done by a customer service engineer (CSE). -
Page 16: Change Language
Refer to the System Administration Guide for more information on this feature. Print server overview One of three print servers may be used with your digital press: ® ® • Xerox FreeFlow Print Server, for the Xerox Color 800/1000 Press ® ® • Xerox CX Print Server, Powered by Creo ®... -
Page 17: Full Width Array
Note The Full Width Array is an OPTIONAL feature that can be purchased for your system. For more information, contact your Xerox representative. The Full Width Array feature uses xerographic parameters and diagnostics to scan the finished image and correct errors in registration, density and color. This is the process of calibrating the Print Server with the digital press. -
Page 18: Productivity
• Highlight images for visual variety to make them lift off the page (a three-dimensional affect) • Draw attention to headline text • Highlight photos, logos, or other image areas • Highlight watermarks ® Xerox Color 800/1000 Press User Guide... -
Page 19: Power On/Off The Machine
Feeding and finishing devices Available with your machine is a variety of optional feeding and finishing devices. These devices are briefly discussed on the following pages along with where to find specific information on each device. ® Xerox Color 800/1000 Press User Guide... -
Page 20: Oversized High Capacity Feeder (Ohcf)
The Interface Module is required with ALL finishing devices. The Interface Module provides communication and a paper path between the print engine and any attached finishing device or devices. Related Topics: Interface Module ® Xerox Color 800/1000 Press User Guide... -
Page 21: Gbc Advancedpunch
User Documentation link. High Capacity Stacker (HCS) The High Capacity Stacker (HCS) is an optional finishing device that provides stacking and offsetting capabilities for output to a Stacker Tray. Related Topics: High Capacity Stacker (HCS) ® Xerox Color 800/1000 Press User Guide... -
Page 22: Perfect Binder
Front and back covers may be included if desired. The final output is a finished, perfect bound book with a wrap-around cover. Note The Perfect Binder requires the Interface Module. Related Topics: Perfect Binder 1-10 ® Xerox Color 800/1000 Press User Guide... -
Page 23: Standard Finisher
This finisher provides a wide range of finishing/folding options. Note The Booklet Maker Finisher is shown here with the required Interface Module and with the optional C/Z Folder. Related Topics: Standard/Booklet Maker Finisher ® 1-11 Xerox Color 800/1000 Press User Guide... -
Page 24: Squarefold Trimmer Module
The Standard Finisher Plus serves as an interface to transfer paper between the print engine and any third-party, Document Finishing Architecture (DFA) device attached to the machine. Note The Standard Finisher Plus requires the Interface Module. Related Topics: Standard Finisher Plus 1-12 ® Xerox Color 800/1000 Press User Guide... -
Page 25: Third-Party Finishing Devices
Product overview Third-party finishing devices Additional third-party, Document Finishing Architecture (DFA) devices are also available. Always refer to the Finishing Solutions Guide and/or contact the Xerox sales representataive for more information. Note All third-party, DFA devices require BOTH the Inteface Module and the Standard Finisher Plus. - Page 26 Product overview 1-14 ® Xerox Color 800/1000 Press User Guide...
-
Page 27: Where To Find Help
• How to use and maintain your machine and optional accessories • How to set up and change passwords and default settings Selecting Color 800/1000 Help from the Help pull-down menu opens a new window which displays the same type of information as provided in both this guide and the System Administration Guide. -
Page 28: Help On The World Wide Web
• The right and left arrow buttons advance forward or backward one topic at a time using the same order as displayed on the Content tab. Help on the World Wide Web Xerox on the World Wide Web: For system support, user help, customer documentation, and service support, go to www.xerox.com and click on the Contact Us link for specific contact information/telephone numbers in your area. -
Page 29: Machine/Job Status
• Machine Details: This option provides information about the installed system software, any attached optional feeding/finishing accessories, error log details, customer support telephone number, and the machine serial number. • Shutdown System PC: This option shuts down the User Interface and the system ® Xerox Color 800/1000 Press User Guide... -
Page 30: Dry Ink/Toner Status Area
The Billing Meters CANNOT be reset. 1. From the machine’s UI, select the Billing and Counters feature. 2. The Billing Meters and Usage Counters screen is displayed. 3. To reset the counters, perform the following: ® Xerox Color 800/1000 Press User Guide... -
Page 31: Billing And Counters Information
- For each black-only, two-sided printed output, the meter increases by two. • Total Impressions: This value (number) represents the total number of ALL impressions regardless of size or color. It is the sum of the Color Impressions and the Black Impressions combined. ® Xerox Color 800/1000 Press User Guide... -
Page 32: Maintenance (On The Ui)
Selecting Maintenance on the UI opens a window which displays a status of each consumable. If logged on as Administrator, the additional Maintenance tab is available. Refer to the System Administration Guide for more information ® Xerox Color 800/1000 Press User Guide... -
Page 33: Job Status
Job/machine status area This area of the screen displays the status of the machine as well as displaying the status of any currently printing job (Summary button). 1. Job status area 2. Machine status area ® Xerox Color 800/1000 Press User Guide... -
Page 34: Job Summary
Depending on the Administrator setting, your machine may automatically resume printing after a preset period of time without selecting the Resume button. Ask your Administrator about this, or refer to the System Administration Guide for more information. ® Xerox Color 800/1000 Press User Guide... -
Page 35: Submitting A Print Job
6. Select OK to close the Properties window. 7. Select OK to send the job to the printer. Printing from the Xerox FreeFlow Print Server 1. Copy the customer documentation PDF files onto a storage device (such as a flash drive or CD/DVD). -
Page 36: Printing From The Xerox Ex Print Server, Powered By Efi
1. Copy the customer documentation PDF files onto a storage device (such as a flash drive or CD/DVD). 2. Connect your storage device to the print server. 3. From the Xerox EX Printer Server, select File > Import Job. 4. Select the desired queue (such as Print or Hold). 5. Select Add. -
Page 37: System Administrator Overview
• Running test prints (for changes made to Advanced Stock Setup options) • System Setting functions, including: - Language - Changing the Administrator password - Resetting the Technical Key Operator password - Automatic display of fault windows ® Xerox Color 800/1000 Press User Guide... - Page 38 Finishing Architecture (DFA) device is attached to your system. This feature allows you to choose specific settings for that attached DFA device. For detailed information and instructions on the various Administrator functions, refer to the System Administration Guide. ® Xerox Color 800/1000 Press User Guide...
-
Page 39: Paper Information
3. Fan the tab paper before loading into the tray. 4. Load and align the edge of the tab paper against the right edge of the tray in the LEF direction as shown in following illustration: ® Xerox Color 800/1000 Press User Guide... -
Page 40: Loading Transparencies
6. If necessary, set the skew adjustment levers to the desired position for your print job. 7. Gently push in the tray until it comes to a stop. If enabled by your System Administrator, the Paper Tray Properties screen may be displayed on the UI. ® Xerox Color 800/1000 Press User Guide... -
Page 41: Loading Pre-Drilled Stock For 1-Sided Print Jobs
1. Select the appropriate paper stock for your print job. 2. Pull out the tray slowly until it stops. 3. Open the ream of paper with the seam side facing up. 4. Fan the sheets before loading them into the tray. ® Xerox Color 800/1000 Press User Guide... -
Page 42: Skew Adjustment Levers
11. Select OK to save the information and close the Tray Properties window. Skew adjustment levers The skew adjustment levers are found in all paper trays. These levers are used to improve paper feed accuracy and to reduce paper skew problems. ® Xerox Color 800/1000 Press User Guide... - Page 43 10. Gently push in the tray until it comes to a stop. 11. From the Tray Properties window, enter the correct paper information, including size, type, weight, and if necessary, paper curl and/or alignment option. ® Xerox Color 800/1000 Press User Guide...
- Page 44 16. Gently push in the tray until it comes to a stop. 17. If you are still having skew adjustment problems, refer to the Advanced Stock Setup information located in the System Administration Guide. ® Xerox Color 800/1000 Press User Guide...
-
Page 45: Tray Properties
LEF or SEF direction. • Enable Tray: Permits the selected tray to be used. • Disable Tray: Prohibits the selected tray to be used. ® Xerox Color 800/1000 Press User Guide... -
Page 46: Tray Stock Mismatch
UI may alert you with a message. Tray Stock Size Mismatch Note This functionality is available only if it is enabled by the Administrator: refer to the System Administration Guide for more information. ® Xerox Color 800/1000 Press User Guide... - Page 47 2. Change the Tray Properties to match the contents of the tray. a) Verify the paper size, type (coated, uncoated), and weight of the paper loaded in the tray. b) Enter that information on the Tray Properties window. ® Xerox Color 800/1000 Press User Guide...
- Page 48 Paper information 6-10 ® Xerox Color 800/1000 Press User Guide...
-
Page 49: Manage Stock Library
The Manage Stock Library window contains the Recommended Media List (RML) and the Stock Library list: • Recommended Media List (RML): This list contains the names of all the preprogrammed stocks that are available for the machine. ® Xerox Color 800/1000 Press User Guide... -
Page 50: Recommended Media List (Rml)
Media List is updated as required to include new papers and other media. The RML is available at www.xerox.com. The RML is also available on your machine either through the Tray Properties window or from the Stock Library feature. ® Xerox Color 800/1000 Press User Guide... -
Page 51: Stock Management
• Create and save a new stock; these stocks can be created in one of two ways: - From Manage Stock Library - From Tray Properties • Remove/delete a stock entry • Change the order stocks are shown by moving a stock up/down in the Stock Library list ® Xerox Color 800/1000 Press User Guide... -
Page 52: Manage Stock Library Window
7. Add to Stock Library: Allows the user to add a stock from the RML to the Stock Library list. 8. Sorting: Select either Use Columns or Sort Manually. 9. Up/down buttons: Moves a stock up or down in the Stock Library list. 10. Close: Closes/exits the Manage Stock Library window. ® Xerox Color 800/1000 Press User Guide... -
Page 53: Adding A Stock Entry
The Manage Stock Library window opens. 2. Select the desired stock from the RML. 3. Select the Add Stock Library button. The RML stock is added to the bottom of the Stock Library list. ® Xerox Color 800/1000 Press User Guide... -
Page 54: Copying A Stock Entry
The stock is added to the bottom of the Stock Library List. 7. Use the Up/Down buttons to move the stock within the Stock Library List. 8. Select Close to exit Manage Stock Library. ® Xerox Color 800/1000 Press User Guide... -
Page 55: Creating A New Stock (From Manage Stock Library)
The stock is added to the bottom of the Stock Library List. 6. Use the Up/Down buttons to move the stock within the Stock Library List. 7. Select Close to exit Manage Stock Library. ® Xerox Color 800/1000 Press User Guide... -
Page 56: Creating A New Stock (From Tray Properties)
Select the various Advanced Stock Setup options as required. b) Select OK to save any selections made and close the Advanced Stock Setup window. 5. The stock may be either a temporary stock or a permanent stock in the Stock Library: ® Xerox Color 800/1000 Press User Guide... -
Page 57: Editing An Existing Stock In The Stock Library
Create/modify Advanced Stock Setup options Creating a new stock (from Manage Stock Library) Editing an existing stock in the Stock Library Use the following procedure to edit an existing stock in the Stock Library. ® Xerox Color 800/1000 Press User Guide... -
Page 58: Removing A Stock From The Stock Library
7. Select Close to exit Manage Stock Library. Related Topics: Advanced Stock Setup options Create/modify Advanced Stock Setup options Removing a stock from the Stock Library Use the following procedure to remove a stock from the Stock Library list. 7-10 ® Xerox Color 800/1000 Press User Guide... - Page 59 A question window opens and asks Are you sure you want to Delete this stock? Select Yes to delete the stock from the Stock Library list. 4. Select Close to exit Manage Stock Library. ® 7-11 Xerox Color 800/1000 Press User Guide...
- Page 60 Manage Stock Library 7-12 ® Xerox Color 800/1000 Press User Guide...
-
Page 61: Advanced Stock Setup
For example, some media types may skew or curl as they progress through the printing path of the machine. This may occur on frequently-run jobs and/or on jobs with a high volume output. ® Xerox Color 800/1000 Press User Guide... -
Page 62: Advanced Stock Setup Options
• Paper tray/paper feed, including: - Stock By Name Only - Near Empty Detection Level - Tray Air Assist - Multifeed Detection - Enable Tray Heater • Paper path/paper transportation, including: - Aligner Roll Pressure ® Xerox Color 800/1000 Press User Guide... -
Page 63: Tips For Using Advanced Stock Setup Options
This is especially relevant if the room in which the machine is located experiences changes in temperature and humidity. ® Xerox Color 800/1000 Press User Guide... -
Page 64: Create/Modify Advanced Stock Setup Options
(if applicable). 3. Select the Advanced Setup button. The Advanced Stock Setup window opens. 4. Select the desired Advanced Stock Setup window, select the various options as required, including: ® Xerox Color 800/1000 Press User Guide... -
Page 65: Paper Tray/Paper Feed Options
Selecting this option (placing a checkmark in the box) prevents the inadvertent use of expensive or specialty stocks for slip-sheets, automatic paper selection, or generic paper requests by the user. ® Xerox Color 800/1000 Press User Guide... -
Page 66: Multifeed Detection
When available, this option informs the user that a tray is nearing an empty level. This message is displayed to the user depending on where the Near Empty Detection Level indicator is set. ® Xerox Color 800/1000 Press User Guide... -
Page 67: Tray Air Assist
• System Default: As its name states, this is the default selection. With this selection the paper tray blowers automatically adjust by using system settings that are optimized for Xerox papers. • Multifeed Support Table: Select this option when you have a multifeed condition. -
Page 68: Enable Tray Heater
If none of the other options remedy the situation, your Xerox representative works with both the customer and the Xerox personnel to create a custom setting. This is based on the stock being used and the best air assist values for producing the desired outcome. -
Page 69: Second (2Nd) Bias Transfer Roll
When using either heavier or lighter weight paper, you may want or need to adjust Side 1 for all 1-sided jobs. ® Xerox Color 800/1000 Press User Guide... - Page 70 2nd Bias Transfer Roll option. However, in order to run test prints, you must be logged in as Administrator. The Test Print option is available ONLY in the Administrator mode. 8-10 ® Xerox Color 800/1000 Press User Guide...
-
Page 71: Mottle
If mottle exists, increase one or both of the 2nd BTR values. Evaluate the image quality. If the image quality is equal to or worse than the 100% default setting, decrease one or both of the 2nd BTR values until a satisfactory image quality is obtained. ® 8-11 Xerox Color 800/1000 Press User Guide... -
Page 72: Color Shift
Changing the default setting should be considered a temporary solution because environmental conditions vary from day to day. It is recommended that upon completion of the print job, you return the option to its default setting. 8-12 ® Xerox Color 800/1000 Press User Guide... -
Page 73: Selecting The 2Nd Bias Transfer Roll Settings
5. Select the desired 2nd Bias Transfer Roll settings for Side 1 and/or Side 2 as required by using the up/down arrow buttons. 6. Select OK to close the Advanced Stock Setup window. ® 8-13 Xerox Color 800/1000 Press User Guide... -
Page 74: Fuser Temperature
The Fuser Temperature option allows the user to set the temperature within a range of -1 degree to +5 degrees Celsius (30.2 - 41.5 degrees Fahrenheit). 8-14 ® Xerox Color 800/1000 Press User Guide... -
Page 75: Fold Adjustment Profile
From the Fold Adjustment Profile pull-down menu, select the desired profile, as required. These profiles are preset profiles, which are created and maintained from the Profiles feature on the UI. Note Refer to the Profiles chapter of the System Administration Guide for detailed information. ® 8-15 Xerox Color 800/1000 Press User Guide... - Page 76 Advanced Stock Setup 8-16 ® Xerox Color 800/1000 Press User Guide...
-
Page 77: Maintenance
Clean the UI screen at the start of each day. Remove all dust and fingerprints by wiping the screen with a clean, lint-free cloth. Caution To avoid damage, do not use any Xerox cleaner, water, or commercial cleaner on the screen. Cleaning the paper path... -
Page 78: Cleaning The Paper Path Area 2
Maintenance Note If large amounts of paper dust are frequently observed, contact your Xerox supplies representative for alternate paper recommendations. If a Xerox analysis determines that persistent paper contamination is due to cut papers or the use of non-recommended material, the customer may be liable for any extended costs that fall outside the scope of their service contract. - Page 79 Open each area and clean the surfaces of the green-handle areas. b) Remove any residual moisture with a dry, lint-free cloth. 3. Return all the green levers to their original positions. 4. Close the left and right front doors (print engine left side). ® Xerox Color 800/1000 Press User Guide...
-
Page 80: Cleaning The Paper Path Areas 3 And 4
Cleaning the paper path areas 3 and 4 1. Open the left and right front doors (print engine left side). 2. Grasp handle 3 and rotate it in the direction of the arrow. ® Xerox Color 800/1000 Press User Guide... - Page 81 Rotate the belts by using a lint-free cloth. 7. Grasp handle 3 and slowly push in the paper transport drawer until it stops. Turn the handle in the direction of the arrow to lock the module in place. ® Xerox Color 800/1000 Press User Guide...
- Page 82 Do not rotate the belts with your bare hands as this will leave grease and dirt on them and may create paper jams. Rotate the belts by using a lint-free cloth. 9. Close the left and right front doors (print engine left side). ® Xerox Color 800/1000 Press User Guide...
-
Page 83: Cleaning The Paper Path Area 5
Maintenance Cleaning the paper path area 5 1. Open the left front door (print engine right side). ® Xerox Color 800/1000 Press User Guide... - Page 84 Continue to wipe the belts as you rotate them until all the belts are clean. Note Do not rotate the belts with your bare hands as this will leave grease and dirt on them and may create paper jams. Rotate the belts by using a lint-free cloth. ® Xerox Color 800/1000 Press User Guide...
- Page 85 Rotate the belts by using a lint-free cloth. 5. Grasp handle 5 and gently push in the fuser until it stops. 6. Close the left front door (print engine right side). ® Xerox Color 800/1000 Press User Guide...
-
Page 86: Cleaning The Paper Path Area 6
Maintenance Cleaning the paper path area 6 1. Open the left and right front doors (print engine right side). 9-10 ® Xerox Color 800/1000 Press User Guide... - Page 87 Note Avoid touching the White Reference Roll when cleaning area 6. a) Open each area and clean the surfaces of the green-handle areas. ® 9-11 Xerox Color 800/1000 Press User Guide...
- Page 88 8. Grasp handle 6 and gently push in the exit drawer assembly until it stops. 9. Rotate handle 6 in the direction of the arrow to lock the exit drawer assembly in place. 10. Close the left front door (print engine right side). 9-12 ® Xerox Color 800/1000 Press User Guide...
-
Page 89: Cleaning The Paper Path Area 7
Maintenance Cleaning the paper path area 7 1. Open the left and right front doors (print engine right side). ® 9-13 Xerox Color 800/1000 Press User Guide... - Page 90 Open each area and clean the surfaces of the green-handle areas. b) Remove any residual moisture with a dry, lint-free cloth. 7. Return lever 7f to its original position. 9-14 ® Xerox Color 800/1000 Press User Guide...
- Page 91 Open each area and clean the surfaces of the green-handle areas. b) Remove any residual moisture with a dry, lint-free cloth. 13. Return lever 7e to its original position. ® 9-15 Xerox Color 800/1000 Press User Guide...
- Page 92 Open each area and clean the surfaces of the green-handle areas. b) Remove any residual moisture with a dry, lint-free cloth. 19. Return lever 7b to its original position. 20. Grasp lever 7a and move it to the left. 9-16 ® Xerox Color 800/1000 Press User Guide...
-
Page 93: Replacing Consumable Supplies
Note • Dry Ink/Toner yield projections are based on 7.5 percent area coverage per color (4 colors = 30 percent) at standardized conditions on A4 (8.5 x 11 in.) Xerox Digital Color Xpressions+, 24 lb. (90 g/m ) and Colotech Plus 90 g/m reference paper. -
Page 94: Replacing A Dry Ink/Toner Cartridge
• Please call your Xerox service representative to reorder the Dry Ink/Toner Bottle Waste, the Fuser Web Assembly, and any of the charge corotron units. These parts are provided to you at no charge when ordered by a Xerox service representative. Important The charge corotrons can only be replaced by a trained, qualified Technical Key Operator (TKO). - Page 95 Dry ink/toner settles and compacts during shipping and must be loosened before inserting the cartridge into the machine. Failure to completely loosen the material may cause damage to the gear at the end of the cartridge. ® 9-19 Xerox Color 800/1000 Press User Guide...
-
Page 96: Dry Ink/Toner Waste Bottle
The dry ink/toner waste bottle collects the waste dry ink/toner that occurs during the printing process. The machine contains two dry ink/toner waste bottles which are both located in the rear of the machine. 9-20 ® Xerox Color 800/1000 Press User Guide... -
Page 97: Replacing A Dry Ink/Toner Waste Bottle
This will prevent any dry ink/toner from from spilling out of a full waste bottle. 1. Open the dry ink/toner waste bottle panel at the rear of the machine. 2. Grasp the handle of the full bottle and pull it out of the machine. ® 9-21 Xerox Color 800/1000 Press User Guide... - Page 98 6. Remove a new, empty bottle from the carton and insert it into the machine. 7. Gently push the new bottle into the machine. 8. Close the dry ink/toner waste bottle panel at the rear of the machine. 9-22 ® Xerox Color 800/1000 Press User Guide...
-
Page 99: Replacing The Fuser Web Assembly
1. Open the left and right front doors (print engine right side). 2. Grasp handle 5 and rotate it in the direction of the arrow, and slowly pull out the fuser until it stops. ® 9-23 Xerox Color 800/1000 Press User Guide... - Page 100 4. Grasp the handles on the fuser web assembly and pull it up and out to remove the assembly. Dispose of the old fuser web assembly according to your local regulations. 5. Remove the new fuser web assembly from the box and the protective covering. 9-24 ® Xerox Color 800/1000 Press User Guide...
- Page 101 9. Rotate handle 5 in the direction of the arrow to lock the fuser module in place. 10. Close the left and right front doors (print engine right side). 11. Follow the instructions on the UI to restart your print job. ® 9-25 Xerox Color 800/1000 Press User Guide...
- Page 102 Maintenance 9-26 ® Xerox Color 800/1000 Press User Guide...
-
Page 103: Problem Solving
Serial number on the machine If the machine loses power and it is impossible to access the Machine Details tab, the serial number can be found on the machine frame on the lower left side. ® 10-1 Xerox Color 800/1000 Press User Guide... -
Page 104: Calling For Service
5. For system support, user help, and service support, call the appropriate number. For the specific number in your area, go to www.xerox.com and select the Support link. Related Topics: Locating the machine serial number 10-2 ®... -
Page 105: General Problems
The serial number label is in the center of the bottom frame of the machine. If the problem persists after following all the instructions, contact your Xerox representative. Note If your print server indicates that the machine has a fault and the UI does not readily display a message, select System >... - Page 106 PC. • Ensure that the correct weight is set on the Tray Properties window. • Ensure that “Fit to Paper” or an equivalent selection is not selected in your print driver. 10-4 ® Xerox Color 800/1000 Press User Guide...
- Page 107 • Ensure that the edge guides of the paper tray fit snugly against the Paper Trays the paper stack. • Do not fill the paper trays above the MAX fill line indicator. • Close the tray slowly to avoid shifting the paper stack. ® 10-5 Xerox Color 800/1000 Press User Guide...
- Page 108 LogHarvest Plus tool is shown as a house icon on the bottom right that is running on the side of the UI screen. System Computer did To resolve this error, select Programs > Startup > LogHarvest respond properly. Plus. 10-6 ® Xerox Color 800/1000 Press User Guide...
-
Page 109: Jam Clearance
1. Pull out the tray slowly until it stops. 2. Remove jammed paper. Note If paper is torn, check inside the machine and remove it. 3. Gently push in the tray until it comes to a stop. ® 10-7 Xerox Color 800/1000 Press User Guide... - Page 110 4. Follow the instructions on the UI to clear other areas or to resume your print job. Paper jams in area 2 1. Open the left and right front doors (print engine left side). 2. Lift lever 2e to remove jammed paper. 10-8 ® Xerox Color 800/1000 Press User Guide...
- Page 111 6. Return lever 2d to its original position. 7. Grasp lever 2b and move it to the right. Rotate knob 2c in the direction of the arrow to remove jammed paper. ® 10-9 Xerox Color 800/1000 Press User Guide...
- Page 112 10. Return lever 2a to its original position. 11. Close the left and right front doors (print engine left side). 12. Follow the instructions on the UI to clear other areas or to resume your print job. 10-10 ® Xerox Color 800/1000 Press User Guide...
-
Page 113: Paper Jams In Areas 3 And 4
Paper jams in areas 3 and 4 1. Open the left and right front doors (print engine left side). 2. Grasp handle 3 and rotate it in the direction of the arrow. ® 10-11 Xerox Color 800/1000 Press User Guide... - Page 114 4. Lift lever 3b, move it to the left, and remove the jammed paper. 5. Return lever 3b to its original position. 6. Lift lever 3a, move it to the left, and rotate knob 3c in the direction of the arrow to remove jammed paper. 10-12 ® Xerox Color 800/1000 Press User Guide...
- Page 115 9. Remove any paper from area 4. 10. Close the left and right front doors (print engine left side). 11. Follow the instructions on the UI to clear other areas or to resume your print job. ® 10-13 Xerox Color 800/1000 Press User Guide...
-
Page 116: Paper Jams In Area 6
Paper jams in area 5 Warning Be careful when clearing jams in the fuser area, the fuser is extremely hot and will cause injury. 1. Open the left front door (print engine right side). 10-14 ® Xerox Color 800/1000 Press User Guide... - Page 117 2. Grasp handle 5 and rotate it in the direction of the arrow, and slowly pull out the fuser until it stops. 3. Carefully remove any jammed paper on the left side of the fuser. ® 10-15 Xerox Color 800/1000 Press User Guide...
- Page 118 7. Rotate handle 5 in the direction of the arrow to lock the fuser module in place. 8. Close the left front door (print engine right side). 9. Follow the instructions on the UI to clear other areas or to resume your print job. 10-16 ® Xerox Color 800/1000 Press User Guide...
-
Page 119: Paper Jams In Area 7
Problem solving Paper jams in area 6 1. Open the left and right front doors (print engine right side). ® 10-17 Xerox Color 800/1000 Press User Guide... - Page 120 2. Grasp handle 6 and rotate it in the direction of the arrow, and slowly pull out the exit drawer assembly until it stops. 3. Lift levers 6a and 6b and remove the jammed paper. 4. Return levers 6a and 6b to their originals positions. 10-18 ® Xerox Color 800/1000 Press User Guide...
- Page 121 10. Rotate handle 6 in the direction of the arrow to lock the exit drawer assembly in place. 11. Close the left and right front doors (print engine right side). 12. Follow the instructions on the UI to clear other areas or to resume your print job. ® 10-19 Xerox Color 800/1000 Press User Guide...
- Page 122 Problem solving Paper jams in area 7 Note Area 7 is used for 2-sided (duplexing) only. 1. Open the left and right front doors (print engine right side). 10-20 ® Xerox Color 800/1000 Press User Guide...
- Page 123 2. Lift lever 7g and move it to right to remove jammed paper. 3. Return lever 7g to its original position. 4. Grasp lever 7f, move it downward, and remove the jammed paper. 5. Return lever 7f to its original position. ® 10-21 Xerox Color 800/1000 Press User Guide...
- Page 124 6. Grasp lever 7d, move it to the left, and remove the jammed paper. 7. Return lever 7d to its original position. 8. Grasp lever 7e, move it downward, and remove the jammed paper. 9. Return lever 7e to its original position. 10-22 ® Xerox Color 800/1000 Press User Guide...
- Page 125 15. Return lever 7a to its original position. 16. Close the left and right front doors (print engine right side). 17. Follow the instructions on the UI to clear other areas or to resume your print job. ® 10-23 Xerox Color 800/1000 Press User Guide...
-
Page 126: Fault Codes
If a fault code appears on the machine and it is not listed in the table below, or if a fault persists after following the listed solution, then contact your Xerox Customer Support Center. If a fault code is displayed, all print data on the machine as well as print data stored in the machine’s built-in memory is discarded. - Page 127 Customer Support Center. 010 406 Fuser Belt fault Power Off/On the machine. If the error persists, consult your trained Xerox Productivity Plus (XPP) representative; this person is also known as the Technical Key Operator (TKO). If error persists, contact the Customer Support Center.
- Page 128 Recommended solution 010 409 Presser Role Finger fault Power Off/On the machine. If the error persists, consult your trained Xerox Productivity Plus (XPP) representative; this person is also known as the Technical Key Operator (TKO). If error persists, contact the Customer Support Center.
- Page 129 Recommended solution 010 416 Lower Cooling Belt fault Power Off/On the machine. If the error persists, consult your trained Xerox Productivity Plus (XPP) representative; this person is also known as the Technical Key Operator (TKO). If error persists, contact the Customer Support Center.
- Page 130 If error persists, contact the Customer Support Center. 027 400 Print job is stopped at the Print Resume job at Print Server. Server Power Off/On the machine. If error persists, contact the Customer Support Center. 10-28 ® Xerox Color 800/1000 Press User Guide...
- Page 131 Various machine faults Power Off/On the machine. 042 403, 042 404, 042 405, If the error persists, consult your trained Xerox Productivity 042 406, 042 407, 042 408, Plus (XPP) representative; this 042 409, 042 410 person is also known as the Technical Key Operator (TKO).
- Page 132 Detected a Drive Mother Board Power Off/On the machine. faults 045 352 045 354, 045 355, 045 356, Software mismatch Power Off/On the machine. 045 357 If error persists, contact the Customer Support Center. 10-30 ® Xerox Color 800/1000 Press User Guide...
- Page 133 GBC AdvancedPunch and the optional finishing device. • After clearing all jams, a sheet will be ejected from the GBC AdvancedPunch to the optional finishing device; remove the ejected sheet. ® 10-31 Xerox Color 800/1000 Press User Guide...
- Page 134 If error persists, contact the Customer Support Center. 071 101 Feed Out sensor issue in Tray Remove jammed paper in Tray Power Off/On the machine. If error persists, contact the Customer Support Center. 10-32 ® Xerox Color 800/1000 Press User Guide...
- Page 135 (Tray 1 or Tray 2) is effected. 071 401 Fault for the If the error persists, consult Feed/Retard/Nudger Roll in your trained Xerox Productivity Tray 1 Plus (XPP) representative; this person is also known as the Technical Key Operator (TKO). If error persists, contact the Customer Support Center.
- Page 136 If error persists, contact the Customer Support Center. 073 900 Paper jam in the Duplex sensor Remove jammed paper. 073 901 Power Off/On the machine. If error persists, contact the Customer Support Center. 10-34 ® Xerox Color 800/1000 Press User Guide...
- Page 137 Customer Support Center. 077 305 The Exit Drawer is open Visually inspect the Exit Door. Open, then close the door. Power Off/On the machine. If error persists, contact the Customer Support Center. ® 10-35 Xerox Color 800/1000 Press User Guide...
- Page 138 Customer Support Center. 077 401 V-Tra Brush Life limit fault Power Off/On the machine. If the error persists, consult your trained Xerox Productivity Plus (XPP) representative; this person is also known as the Technical Key Operator (TKO). If error persists, contact the Customer Support Center.
- Page 139 089 313, 089 314, 089 315 089 600, 089 601, 089 602 Sensor failure or E Patch was Power Off/On the machine. not created correctly If error persists, contact the Customer Support Center. ® 10-37 Xerox Color 800/1000 Press User Guide...
- Page 140 Power Off/On the machine. Drum Customer Replaceable 089 928, 089 929 If the error persists, consult Unit Memory your trained Xerox Productivity Plus (XPP) representative; this person is also known as the Technical Key Operator (TKO). Important Drum cartridges can be...
- Page 141 Charge Corotron Cleaner Power Off/On the machine. Motor error 091 320, 091 321, 091 322, If the error persists, consult your trained Xerox Productivity 091 323 Plus (XPP) representative; this person is also known as the Technical Key Operator (TKO).
- Page 142 092 356, 092 357, 092 358, There is a problem with the Power Off/On the machine. Imaging System. 092 359, 092 360, 092 361 If error persists, contact the Customer Support Center. 10-40 ® Xerox Color 800/1000 Press User Guide...
- Page 143 If error persists, contact the Customer Support Center. 092 926, 092 927, 092 928, 092 929, 092 930, 092 931, 092 932, 092 933, 092 934, 092 935, 092 936, 092 937 ® 10-41 Xerox Color 800/1000 Press User Guide...
- Page 144 If error persists, contact the Customer Support Center. 094 312 Second Bias Transfer Belt does Power Off/On the machine. not make contact or retract If error persists, contact the Customer Support Center. 10-42 ® Xerox Color 800/1000 Press User Guide...
- Page 145 Bias Transfer Belt fault Power Off/On the machine. 094 418, 094 419 If the error persists, consult your trained Xerox Productivity Plus (XPP) representative; this person is also known as the Technical Key Operator (TKO). If error persists, contact the Customer Support Center.
- Page 146 If error persists, contact the USB port on the PC UI. Customer Support Center. 124 315 Inconsistency with the Billing Power Off/On the machine. Counter If error persists, contact the Customer Support Center. 10-44 ® Xerox Color 800/1000 Press User Guide...
- Page 147 Paper jams in Trays 1 and 2 Paper jams in area 2 Paper jams in areas 3 and 4 Paper jams in area 5 Paper jams in area 6 Paper jams in area 7 ® 10-45 Xerox Color 800/1000 Press User Guide...
-
Page 148: Image Quality
• If spots or bands occur every 126 mm on the prints, the Yellow, Magenta, or Cyan Drum is damaged or light-shocked. Important Drum cartridges can be replaced ONLY by a trained, qualified Technical Key Operator (TKO). 10-46 ® Xerox Color 800/1000 Press User Guide... - Page 149 If this defect occurs, return the Productivity Setting to the Single Paper Weight setting. If the defect still occurs after running another print, call your Xerox service representative for further assistance. Output is completely black Before calling the Welcome and Support Center, write down your or gray over the entire machine’s serial number.
-
Page 150: Charge Corotrons
• If output is still unacceptable, contact the Customer Support Center Charge corotrons Important The charge corotrons can only be replaced by a trained, qualified Technical Key Operator (TKO). 10-48 ® Xerox Color 800/1000 Press User Guide... -
Page 151: When To Replace A Charge Corotron Assembly
The following examples of the test print show banding in the color bar of the corotron that needs to be replaced and in the three-color bar. The three-color bar (CMY) is there to help you identify which color is showing banding. ® 10-49 Xerox Color 800/1000 Press User Guide... - Page 152 Problem solving 1. Black banding 2. Cyan banding 3. Magenta banding 4. Yellow banding 10-50 ® Xerox Color 800/1000 Press User Guide...
-
Page 153: Technical Data
For tray capacity information on the optional Oversized High Capacity Feeder (OHCF), refer to the appropriate section later in this guide. Throughput information for all paper trays • Type: Coated or uncoated paper, transparencies, labels, transfer paper, tabbed inserts, drilled (LEF), carbonless paper ® 11-1 Xerox Color 800/1000 Press User Guide... -
Page 154: Machine Warmup Time
From standby mode, system usually takes less than 1 minute to the start printing • From a cold start (power on or power saver), system takes less than 5 minutes to start printing 11-2 ® Xerox Color 800/1000 Press User Guide... -
Page 155: Paper Specifications
Paper specifications Note Always refer to the Recommended Media List (RML) for a comprehensive list of recommended media. The RML can be access from the Manage Stock Library and can also be downloaded from www.xerox.com. Paper Type Paper Size Dimensions... -
Page 156: Environmental Specifications
The factory default time of 15 minutes can be changed when logged on as the Administrator. For more information, refer to the System Administration Guide. Ambient temperature and humidity 10 to 32o C, 15 to 85% Relative Humidity (RH) J zone (Dew condensation is inhibited) 11-4 ® Xerox Color 800/1000 Press User Guide... -
Page 157: Offset Catch Tray (Oct)
5. Ensure that Offset Catch Tray is selected for the Output Tray. 6. Select the Offset Mode (shown with a check mark in the box). 7. Select OK to save and close the Properties window. 8. Resend the print job. ® 12-1 Xerox Color 800/1000 Press User Guide... - Page 158 Offset Catch Tray (OCT) 12-2 ® Xerox Color 800/1000 Press User Guide...
-
Page 159: Oversized High Capacity Feeder (Ohcf)
The Postcard bracket is delivered with the OHCF from manufacturing. The Postcard bracket allows you to print on smaller size media without requiring post-processing cutting or sorting. The Postcard bracket specifically accommodates 4 x 6 in. (101.6 x 152.4 mm) SEF media. ® 13-1 Xerox Color 800/1000 Press User Guide... -
Page 160: Using The Postcard Bracket
1. Slowly open one of the paper trays until it stops and remove the paper. 2. Move the paper guides out to their largest position. 3. Open the front cover of the OHCF. 4. Remove the Postcard bracket from inside the OHCF front cover. 13-2 ® Xerox Color 800/1000 Press User Guide... - Page 161 9. Run your print job. 10. Upon completion of your print job, remove the postcard stock and the Postcard bracket from the tray. 11. Store the Postcard bracket inside the OHCF front cover area. ® 13-3 Xerox Color 800/1000 Press User Guide...
-
Page 162: Loading Media In The Ohcf
3. Fan the tab paper before loading into the tray. 4. Load and align the edge of the tab paper against the right edge of the tray in the LEF direction as shown in following illustration: 13-4 ® Xerox Color 800/1000 Press User Guide... -
Page 163: Loading Transparencies In The Ohcf
Loading pre-drilled stock into the OHCF for 1-sided print jobs 1. Select the appropriate paper stock for your print job. 2. Pull out the tray slowly until it stops. ® 13-5 Xerox Color 800/1000 Press User Guide... -
Page 164: Loading Pre-Drilled Stock Into The Ohcf For 2-Sided Print Jobs
3. Open the ream of paper with the seam side facing up. 4. Fan the sheets before loading them into the tray. 5. Load and register the paper against the right side of the tray as depicted below for LEF direction: 13-6 ® Xerox Color 800/1000 Press User Guide... -
Page 165: Skew Adjustment Levers
Skew adjustment levers The skew adjustment levers are found in all paper trays. These levers are used to improve paper feed accuracy and to reduce paper skew problems. 1. Rear skew adjustment lever ® 13-7 Xerox Color 800/1000 Press User Guide... - Page 166 16. Gently push in the tray until it comes to a stop. 17. If you are still having skew adjustment problems, refer to the Advanced Stock Setup information located in the System Administration Guide. 13-8 ® Xerox Color 800/1000 Press User Guide...
-
Page 167: Tray Properties
LEF or SEF direction. • Enable Tray: Permits the selected tray to be used. • Disable Tray: Prohibits the selected tray to be used. ® 13-9 Xerox Color 800/1000 Press User Guide... -
Page 168: Tray Stock Mismatch
UI may alert you with a message. Tray Stock Size Mismatch Note This functionality is available only if it is enabled by the Administrator: refer to the System Administration Guide for more information. 13-10 ® Xerox Color 800/1000 Press User Guide... -
Page 169: Ohcf Problem Solving
Always ensure that all paper jams, including any small ripped pieces of paper, are cleared before proceeding with your print jobs. Note Remedies differ according to the paper jam location. Follow the instructions displayed to remove the jammed paper. ® 13-11 Xerox Color 800/1000 Press User Guide... -
Page 170: Paper Jams Inside The Ohcf Trays
1. Pull out the tray where the paper jam occurred. 2. Remove the jammed paper. Note If paper is torn, check inside the machine and remove it. 3. Gently push in the tray until it comes to a stop. 13-12 ® Xerox Color 800/1000 Press User Guide... -
Page 171: Ohcf Paper Jams At Lever 1A And Knob 1C
2. Move the lever 1a to the rightward and turn the knob 1c to the right. Remove the jammed paper. Note If paper is torn, check inside the machine and remove it. 3. Return the lever 1a to the original position. ® 13-13 Xerox Color 800/1000 Press User Guide... -
Page 172: Ohcf Paper Jams At Lever 1B And Knob 1C
2. Move the lever 1b to the rightward and turn the knob 1c to the right. Remove the jammed paper. Note If paper is torn, check inside the machine and remove it. 13-14 ® Xerox Color 800/1000 Press User Guide... -
Page 173: Ohcf Paper Jams At Lever 1D And Knob 1C
If the front cover of the OHCF is not completely closed, a message will appear and the machine will not operate. OHCF paper jams at lever 1d and knob 1c 1. Open the front cover of the OHCF. ® 13-15 Xerox Color 800/1000 Press User Guide... - Page 174 If paper is torn, check inside the machine and remove it. 3. If the paper cannot be removed, turn the knob 1c clockwise, and then remove the jammed paper. Note If paper is torn, check inside the machine and remove it. 13-16 ® Xerox Color 800/1000 Press User Guide...
-
Page 175: Ohcf Fault Codes
078 100, 078 101, 078 An OHCF tray has malfunctioned 1. Check the paper in the malfunctioning tray. 2. Power Off/On the machine. 3. If the errors persist, contact the Customer Support Center. ® 13-17 Xerox Color 800/1000 Press User Guide... -
Page 176: Ohcf Specifications
LEF: B5, 7.25 x 10.5 in. (executive), A4, 8.5 x 11 in., 8.0 x 10 in. Custom sizes: 182-330 mm (7.2-13 in.) width and 182-488 mm (7.2-19.2 in.) length Paper weight 18 lb. to 130 lb. cover/55-350 gsm 13-18 ® Xerox Color 800/1000 Press User Guide... - Page 177 Oversized High Capacity Feeder (OHCF) (continued) Item Specification Paper capacity 2000 sheets/drawer Important: When using up to Xerox 24 lb./90 gsm paper. ® 13-19 Xerox Color 800/1000 Press User Guide...
- Page 178 Oversized High Capacity Feeder (OHCF) 13-20 ® Xerox Color 800/1000 Press User Guide...
-
Page 179: Interface Module
Interface Module Overview The Interface Module is an optional finishing device that is used in conjunction with other optional finishing devices. It is shown here with the optional High Capacity Stacker. ® 14-1 Xerox Color 800/1000 Press User Guide... -
Page 180: Control Panel
Administration Guide for information on adjusting the paper curl by using the Paper Curl Correction feature (Advanced Stock Setup). The Interface Module paper curl buttons are discussed in more detail later in this section. 14-2 ® Xerox Color 800/1000 Press User Guide... -
Page 181: Paper Path
Down-curl correction, plus a No correction level. The amount of curl correction is changed by selecting a related button. The current selected amount of curl correction is displayed by the Control Panel LEDs. ® 14-3 Xerox Color 800/1000 Press User Guide... -
Page 182: Problem Solving
Remedies differ according to the paper jam location. Follow the instructions displayed to remove the jammed paper. Paper jams at lever 1a 1. Open the front cover of the Interface Module. 2. Move the lever 1a downwards and remove the jammed paper. 14-4 ® Xerox Color 800/1000 Press User Guide... -
Page 183: Paper Jams At Lever 2A
4. Close the front cover of the Interface Module. 5. Follow the instructions on the UI to clear other areas or to resume your print job. Paper jams at lever 2a 1. Open the front cover of the Interface Module. ® 14-5 Xerox Color 800/1000 Press User Guide... - Page 184 3. Return the lever 2a to the original position. 4. Close the front cover of the Interface Module. 5. Follow the instructions on the UI to clear other areas or to resume your print job. 14-6 ® Xerox Color 800/1000 Press User Guide...
-
Page 185: Paper Jams At Lever 2B
1. Open the front cover of the Interface Module. 2. Move the lever downwards, turn the knob 2c counterclockwise, and remove the jammed paper. 3. Return the lever 2b to the original position. ® 14-7 Xerox Color 800/1000 Press User Guide... -
Page 186: Fault Codes
5. Follow the instructions on the UI to clear other areas or to resume your print job. Fault codes The fault code table lists problems and suggested solutions that apply to the Interface Module. If the problem persists after following all instructions, call your Xerox Customer Support Center. Fault code... - Page 187 048-326 • Ensure all jam clearance handles/levers 048-327 are returned to their closed positions. • After clearing all jams, remove any ejected paper fromthe finishing output area. • Power Off/On the machine. ® 14-9 Xerox Color 800/1000 Press User Guide...
- Page 188 Interface Module 14-10 ® Xerox Color 800/1000 Press User Guide...
-
Page 189: High Capacity Stacker (Hcs)
If your system has two stackers attached, they are referred to as B1 and B2. Also, with two stackers attached, and when one of them is full, automatic switching occurs between the two stackers to ensure maximum productivity for your system. ® 15-1 Xerox Color 800/1000 Press User Guide... -
Page 190: Identifying The Components
HCS to another connected finishing device. 4. Stacker Tray/Cart: Collated sets (up to a total of 5000 sheets) are transported to the Stacker Tray, which is located on a moveable Stacker Cart. 15-2 ® Xerox Color 800/1000 Press User Guide... -
Page 191: Control Panel
• Copies/prints are aligned easily without folds or wrinkles in the output. • To enable easier pick-up of the output, the HCS can be stopped by selecting the Stop button on the machine’s UI. ® 15-3 Xerox Color 800/1000 Press User Guide... -
Page 192: Unloading The Stacker Tray
7. Push the empty Stacker Cart straight into the HCS. 8. Position the securing bar on the fixed area inside the HCS. 9. Close the front door; the tray will rise to the operate position. 15-4 ® Xerox Color 800/1000 Press User Guide... -
Page 193: Problem Solving
Remedies differ according to the paper jam location. Follow the instructions displayed to remove the jammed paper. HCS entrance jams (E1, E2, and E3) Perform the following steps to clear the jam and resume printing: 1. Open the HCS Front Cover. ® 15-5 Xerox Color 800/1000 Press User Guide... -
Page 194: Hcs Transport Jams (E4, E5, And E6)
6. Follow the instructions displayed on the UI to resume printing. HCS transport jams (E4, E5, and E6) Perform the following steps to clear the jam and resume printing: 1. Open the HCS Front Cover. 15-6 ® Xerox Color 800/1000 Press User Guide... - Page 195 6. Open the front door after the Unload indicator lights. 7. Pull out the stacker cart and gently remove the jammed paper. 8. Push the stacker cart straight into the HCS. 9. Close the front door. ® 15-7 Xerox Color 800/1000 Press User Guide...
-
Page 196: Hcs Top Tray Jam (E7)
11. Follow the instructions displayed on the UI to resume printing. HCS top tray jam (E7) Perform the following steps to clear the jam and resume printing: 1. Remove any output delivered to the Top Tray. 2. Open the HCS Front Cover. 15-8 ® Xerox Color 800/1000 Press User Guide... -
Page 197: Hcs Exit Jam (E8)
7. Follow the instructions displayed on the UI to resume printing. HCS exit jam (E8) Perform the following steps to clear the jam and resume printing: 1. Open the HCS Front Cover. ® 15-9 Xerox Color 800/1000 Press User Guide... -
Page 198: Hints And Tips For Using The Hcs
3. Adjust the paper curl by using the decurler controls on the top of the Interface Module. 4. If the output has not improved, adjust the paper curl again. 5. If the output still has not improved, call the Customer Support Center. 15-10 ® Xerox Color 800/1000 Press User Guide... -
Page 199: Loss Of Power
Stacker exit sensor jam • Carefully remove all sheets and paper scraps from jam clearance areas. • Power Off/On the machine • If the problem still exists, contact the Customer Support Center. ® 15-11 Xerox Color 800/1000 Press User Guide... - Page 200 Paper in/out sensor failure • Carefully remove all sheets and paper 049 225 scraps from jam clearance areas. • Power Off/On the machine • If the problem still exists, contact the Customer Support Center. 15-12 ® Xerox Color 800/1000 Press User Guide...
- Page 201 HCS detects Top Tray as • Carefully remove all sheets and paper always full scraps from jam clearance areas. • Power Off/On the machine • If the problem still exists, contact the Customer Support Center. ® 15-13 Xerox Color 800/1000 Press User Guide...
- Page 202 049 971 • Remove any paper from stacker cart. 049 972 • Close front door • If necessary, power Off/On the machine • If the problem still exists, contact the Customer Support Center. 15-14 ® Xerox Color 800/1000 Press User Guide...
-
Page 203: Specifications
(8.3 in.) minimum measurement across the feed direction. • Non-standard papers shorter than 254 mm (10 in.) in the cross-feed direction require 330 mm (13 in.) minimum measurement in the feed direction. ® 15-15 Xerox Color 800/1000 Press User Guide... - Page 204 High Capacity Stacker (HCS) 15-16 ® Xerox Color 800/1000 Press User Guide...
-
Page 205: Perfect Binder
The adhesive holds the interior sheets of the book together. Front and back covers may be included if desired. The final output is a finished, perfect bound book with a wrap-around cover. Binder components External components ® 16-1 Xerox Color 800/1000 Press User Guide... - Page 206 Press this button to open the book stacker tray. A flashing green light indicates that the tray is in the process of being opened or closed. A steady green light indicates that the tray is open, and completed books may be removed. 16-2 ® Xerox Color 800/1000 Press User Guide...
-
Page 207: Cover Inserter
Adjust this guide so that it touches the loaded media in the tray. 3 Inserter cover Open this cover to access internal components. 4 Inserter inner cover Open this cover to clear jams. 5 Right inserter baffle Open this baffle to clear jams. ® 16-3 Xerox Color 800/1000 Press User Guide... -
Page 208: Internal Components
This area binds book block to the cover material. 5 Cutter area This area is where the book block pages are cut/trimmed. Finished books then are transported to the book stacker tray. 16-4 ® Xerox Color 800/1000 Press User Guide... -
Page 209: Binder Control Panel
Indicator is on (steady light) The binder is ready for operation. 3 Start/Adhesive temperature button Press this button to warm up the adhesive or to start the manual mode process for a job. ® 16-5 Xerox Color 800/1000 Press User Guide... -
Page 210: Binder Circuit Breaker
Off position. The overload condition is reset by flipping the switch to the On position. 2 Circuit breaker Test button This button may be activated with a pencil point to test the circuit breaker. 16-6 ® Xerox Color 800/1000 Press User Guide... -
Page 211: Book Binding Path
The bypass path is used when an incoming job does not require the binder. The job enters from the printer’s paper path, is fed through the binder, and is delivered to the next finishing device in line. ® 16-7 Xerox Color 800/1000 Press User Guide... -
Page 212: Standard Path
7 Trimming The three unbound edges of the book are trimmed to size by the cutter unit. 16-8 ® Xerox Color 800/1000 Press User Guide... -
Page 213: Cover Inserter Path
5 Bypass transport The bypass transport moves the cover media to the adhesive unit where it awaits the book block. 6 Adhesive unit Adhesive is applied to the spin of the book block. ® 16-9 Xerox Color 800/1000 Press User Guide... -
Page 214: Power On/Off
1-240 minutes; you must enter the Administrator mode to change it. Note To keep the binder at maximum running efficiency, it is recommended that the power saver time interval for the binder is kept at the default 10 minutes. 16-10 ® Xerox Color 800/1000 Press User Guide... -
Page 215: Loading Media In The Cover Inserter Tray
Inserter. a) Load the paper with the outside facing upwards and the top towards the rear of the tray. b) Align the sheets against the back wall of the tray. ® 16-11 Xerox Color 800/1000 Press User Guide... -
Page 216: Removing Books From The Binder
6. Go the print server that is connected to the printer. 7. To print the job, go the correct print server procedure in this section and follow the instructions to setup and release the job for printing to the binder. 16-12 ® Xerox Color 800/1000 Press User Guide... -
Page 217: Printing From The Xerox Freeflow Print Server To The Perfect Binder
Perfect Binder Printing from the Xerox FreeFlow Print Server to the Perfect Binder The following procedures provide instructions on different types of binder print jobs sent from the print server to the binder. Carefully read and perform the steps to successfully print your job. -
Page 218: Printing/Binding With Preprinted Covers To The Freeflow Print Server
3. For the book block pages, load the desired stock into one of the printer’s trays and confirm on the settings on the system’s UI. 4. Send the job containing both your cover and the book block pages to the print server’s Hold queue. 16-14 ® Xerox Color 800/1000 Press User Guide... - Page 219 21. From the binder, the book stacker tray LED lights indicating that a finished book was delivered to book stacker tray. 22. Press the button to open the book stacker tray. 23. Remove the book and close the tray. ® 16-15 Xerox Color 800/1000 Press User Guide...
-
Page 220: Printing/Binding From A Single File To The Freeflow Print Server
This trims the three sides of the bound book that are not bound. This selection provides the best quality output. 17. From the Standard Size drop down menu, select the size you want for the finished book. 18. For Vertical Position, leave the default value of 0.00. 16-16 ® Xerox Color 800/1000 Press User Guide... -
Page 221: Printing From The Xerox Cx Print Server, Powered By Creo To The Perfect Binder
22. Press the button to open the book stacker tray. 23. Remove the book and close the tray. Printing from the Xerox CX Print Server, Powered by Creo to the Perfect Binder The following procedures provide instructions on different types of binder print jobs sent from the print server to the binder. -
Page 222: Printing/Binding From A Single File To The Cx Print Server
3. Send the job containing both your cover and the book block pages to the print server’s Hold queue. 4. From the print server, select the job in the Hold queue and then select Job Properties. 16-18 ® Xerox Color 800/1000 Press User Guide... -
Page 223: Printing/Binding From Two Files To The Cx Print Server
2. From the print server’s Hold queue, open the cover file’s Job Properties. 3. On the Copies and pages screen, enter the number of copies to print and bind. 4. Select Print Method, and select Simplex or Duplex from the menu. ® 16-19 Xerox Color 800/1000 Press User Guide... - Page 224 21. From the binder, the book stacker tray LED lights indicating that a finished book was delivered to book stacker tray. 22. Press the button to open the book stacker tray. 23. Remove the book and close the tray. 16-20 ® Xerox Color 800/1000 Press User Guide...
-
Page 225: Printing From The Xerox Ex Print Server, Powered By Efi To The Perfect Binder
Perfect Binder Printing from the Xerox EX Print Server, Powered by EFI to the Perfect Binder The following procedures provide instructions on different types of binder print jobs sent from the print server to the binder. Carefully read and perform the steps to successfully print your job. - Page 226 14. Select the Cover Paper Size for the paper that you loaded in the printer tray for the covers. 15. In the Cover Content area of the window, for Content input, select Pre-Printed. 16-22 ® Xerox Color 800/1000 Press User Guide...
-
Page 227: Printing/Binding From A Single File To The Ex Print Server
• Left Binding: this is the default and commonly used for books printed in the west. • Top: this provides a calendar-type binding. • Right Binding: This is used for books published in Asian or Middle-Eastern languages. ® 16-23 Xerox Color 800/1000 Press User Guide... - Page 228 15. For Spine Width, use the arrows to set the size of the spine. For Spine Content, select Document Page if you want to print on the spine and the image is located in the file. 16-24 ® Xerox Color 800/1000 Press User Guide...
-
Page 229: Maintenance
Read the following before performing this procedure: • Do not open the trimmer waste tray while the binder is in operation. Wait until the completion of a job before opening and emptying the tray. ® 16-25 Xerox Color 800/1000 Press User Guide... -
Page 230: Adhesive Filling Tray
The adhesive may combust if placed in an area with open flame or high temperature. • Do not over-fill the adhesive replenishment hopper; otherwise the covers may not close properly and adhesive pellets may get into other areas of the binder causing malfunctions. 16-26 ® Xerox Color 800/1000 Press User Guide... -
Page 231: Replenishing The Adhesive Filling Tray
• Paper jams are displayed on both the printer’s UI and the binder’s control panel. • Clear multiple paper jams in the sequence indicated on the printer’s UI and on the binder’s control panel. ® 16-27 Xerox Color 800/1000 Press User Guide... -
Page 232: Paper Jams In Areas E1 And E2
Paper jams in area E3 Note If a jam occurs after the book block leaves the compiler area, the paper is purged with the spin glued to the book block but without a cover attached. 16-28 ® Xerox Color 800/1000 Press User Guide... - Page 233 5. Close the areas 3b, 3a, and the inserter cover. 6. If desired, reload paper into the cover inserter tray. 7. Follow the instructions displayed on the system’s UI to restart your print job. ® 16-29 Xerox Color 800/1000 Press User Guide...
-
Page 234: Paper Jams In Area E4
3. Open area 4b and remove any jammed paper. 4. Remove handles 4b and 4c to their original positions. 5. Follow the instructions displayed on the system’s UI to restart your print job. 16-30 ® Xerox Color 800/1000 Press User Guide... -
Page 235: Paper Jams In Areas E5 And E6
The binder’s left and right front doors will not open when the front cover LED is lit. 1. Open the left and right doors. 2. Lift handle 5a and remove any jammed paper. 3. Return handle 5a to its original position. ® 16-31 Xerox Color 800/1000 Press User Guide... - Page 236 Perfect Binder 4. Lift handle 5b, rotate knob 6d, and remove any jammed paper. 5. Return handle 5b to its original position. 6. Open areas 6a and 6b. 16-32 ® Xerox Color 800/1000 Press User Guide...
- Page 237 9. Open area 6c and remove any jammed paper. 10. Return handle 6c to its original position. 11. Close the binder’s left and right front doors. 12. Follow the instructions displayed on the system’s UI to restart your print job. ® 16-33 Xerox Color 800/1000 Press User Guide...
-
Page 238: General Problems
Remedy: Remove the jammed paper; follow the instructions displayed on the system’s UI to restart your job. 053 102 Cause: Paper jam Remedy: Remove the jammed paper; follow the instructions displayed on the system’s UI to restart your job. 16-34 ® Xerox Color 800/1000 Press User Guide... - Page 239 Remedy: Remove the jammed paper; follow the instructions displayed on the system’s UI to restart your job. 053 111 Cause: Paper jam Remedy: Remove the jammed paper; follow the instructions displayed on the system’s UI to restart your job. ® 16-35 Xerox Color 800/1000 Press User Guide...
- Page 240 Remedy: Remove the jammed paper; follow the instructions displayed on the system’s UI to restart your job. 053 120 Cause: Paper jam Remedy: Remove the jammed paper; follow the instructions displayed on the system’s UI to restart your job. 16-36 ® Xerox Color 800/1000 Press User Guide...
- Page 241 Remedy: Remove the jammed paper; follow the instructions displayed on the system’s UI to restart your job. 053 129 Cause: Paper jam Remedy: Remove the jammed paper; follow the instructions displayed on the system’s UI to restart your job. ® 16-37 Xerox Color 800/1000 Press User Guide...
- Page 242 Remedy: Remove the jammed paper; follow the instructions displayed on the system’s UI to restart your job. 053 138 Cause: Paper jam Remedy: Remove the jammed paper; follow the instructions displayed on the system’s UI to restart your job. 16-38 ® Xerox Color 800/1000 Press User Guide...
- Page 243 Remedy: Remove the jammed paper; follow the instructions displayed on the system’s UI to restart your job. 053 147 Cause: Paper jam Remedy: Remove the jammed paper; follow the instructions displayed on the system’s UI to restart your job. ® 16-39 Xerox Color 800/1000 Press User Guide...
- Page 244 Remedy: Power off/on the system. If fault continues, contact the Customer Support Center. 053 217 Cause: Internal component failure Remedy: Power off/on the system. If fault continues, contact the Customer Support Center. 16-40 ® Xerox Color 800/1000 Press User Guide...
- Page 245 Remedy: Power off/on the system. If fault continues, contact the Customer Support Center. 053 226 Cause: Internal component failure Remedy: Power off/on the system. If fault continues, contact the Customer Support Center. ® 16-41 Xerox Color 800/1000 Press User Guide...
- Page 246 Remedy: Power off/on the system. If fault continues, contact the Customer Support Center. 053 235 Cause: Internal component failure Remedy: Power off/on the system. If fault continues, contact the Customer Support Center. 16-42 ® Xerox Color 800/1000 Press User Guide...
- Page 247 Remedy: Power off/on the system. If fault continues, contact the Customer Support Center. 053 244 Cause: Internal component failure Remedy: Power off/on the system. If fault continues, contact the Customer Support Center. ® 16-43 Xerox Color 800/1000 Press User Guide...
- Page 248 Remedy: Power off/on the system. If fault continues, contact the Customer Support Center. 053 253 Cause: Internal component failure Remedy: Power off/on the system. If fault continues, contact the Customer Support Center. 16-44 ® Xerox Color 800/1000 Press User Guide...
- Page 249 Remedy: Power off/on the system. If fault continues, contact the Customer Support Center. 053 262 Cause: Internal component failure Remedy: Power off/on the system. If fault continues, contact the Customer Support Center. ® 16-45 Xerox Color 800/1000 Press User Guide...
- Page 250 Remedy: Power off/on the system. If fault continues, contact the Customer Support Center. 053 271 Cause: Internal component failure Remedy: Power off/on the system. If fault continues, contact the Customer Support Center. 16-46 ® Xerox Color 800/1000 Press User Guide...
- Page 251 Remedy: Power off/on the system. If fault continues, contact the Customer Support Center. 053 280 Cause: Internal component failure Remedy: Power off/on the system. If fault continues, contact the Customer Support Center. ® 16-47 Xerox Color 800/1000 Press User Guide...
- Page 252 Remedy: Power off/on the system. If fault continues, contact the Customer Support Center. 053 289 Cause: Internal component failure Remedy: Power off/on the system. If fault continues, contact the Customer Support Center. 16-48 ® Xerox Color 800/1000 Press User Guide...
- Page 253 Remedy: Power off/on the system. If fault continues, contact the Customer Support Center. 053 298 Cause: Internal component failure Remedy: Power off/on the system. If fault continues, contact the Customer Support Center. ® 16-49 Xerox Color 800/1000 Press User Guide...
- Page 254 Remedy: Power off/on the system. If fault continues, contact the Customer Support Center. 053 312 Cause: Internal component failure Remedy: Power off/on the system. If fault continues, contact the Customer Support Center. 16-50 ® Xerox Color 800/1000 Press User Guide...
- Page 255 Remedy: Power off/on the system. If fault continues, contact the Customer Support Center. 053 333 Cause: Internal component failure Remedy: Power off/on the system. If fault continues, contact the Customer Support Center. ® 16-51 Xerox Color 800/1000 Press User Guide...
- Page 256 Cause: Cutter blade is nearing or at end of life Remedy: Contact your service representative. 053 409 Cause: Adhesive level is low or empty Remedy: Add more adhesive pellets to the adhesive filling tray. 16-52 ® Xerox Color 800/1000 Press User Guide...
- Page 257 Remedy: Remove the jammed paper; follow the instructions displayed on the system’s UI to restart your job. 053 905 Cause: Paper jam Remedy: Remove the jammed paper; follow the instructions displayed on the system’s UI to restart your job. ® 16-53 Xerox Color 800/1000 Press User Guide...
- Page 258 Remedy: Remove the jammed paper; follow the instructions displayed on the system’s UI to restart your job. 053 914 Cause: Paper jam Remedy: Remove the jammed paper; follow the instructions displayed on the system’s UI to restart your job. 16-54 ® Xerox Color 800/1000 Press User Guide...
- Page 259 Remedy: Power off/on the system. If fault continues, contact the Customer Support Center. 054 215 Cause: Internal component failure Remedy: Power off/on the system. If fault continues, contact the Customer Support Center. ® 16-55 Xerox Color 800/1000 Press User Guide...
- Page 260 Remedy: Power off/on the system. If fault continues, contact the Customer Support Center. 054 224 Cause: Internal component failure Remedy: Power off/on the system. If fault continues, contact the Customer Support Center. 16-56 ® Xerox Color 800/1000 Press User Guide...
- Page 261 Remedy: Power off/on the system. If fault continues, contact the Customer Support Center. 054 233 Cause: Internal component failure Remedy: Power off/on the system. If fault continues, contact the Customer Support Center. ® 16-57 Xerox Color 800/1000 Press User Guide...
- Page 262 Remedy: Power off/on the system. If fault continues, contact the Customer Support Center. 054 242 Cause: Internal component failure Remedy: Power off/on the system. If fault continues, contact the Customer Support Center. 16-58 ® Xerox Color 800/1000 Press User Guide...
- Page 263 Remedy: Power off/on the system. If fault continues, contact the Customer Support Center. 054 251 Cause: Internal component failure Remedy: Power off/on the system. If fault continues, contact the Customer Support Center. ® 16-59 Xerox Color 800/1000 Press User Guide...
- Page 264 Remedy: Power off/on the system. If fault continues, contact the Customer Support Center. 054 260 Cause: Internal component failure Remedy: Power off/on the system. If fault continues, contact the Customer Support Center. 16-60 ® Xerox Color 800/1000 Press User Guide...
- Page 265 Remedy: Power off/on the system. If fault continues, contact the Customer Support Center. 054 269 Cause: Internal component failure Remedy: Power off/on the system. If fault continues, contact the Customer Support Center. ® 16-61 Xerox Color 800/1000 Press User Guide...
- Page 266 Remedy: Power off/on the system. If fault continues, contact the Customer Support Center. 054 278 Cause: Internal component failure Remedy: Power off/on the system. If fault continues, contact the Customer Support Center. 16-62 ® Xerox Color 800/1000 Press User Guide...
- Page 267 Remedy: Power off/on the system. If fault continues, contact the Customer Support Center. 054 287 Cause: Internal component failure Remedy: Power off/on the system. If fault continues, contact the Customer Support Center. ® 16-63 Xerox Color 800/1000 Press User Guide...
- Page 268 Remedy: Power off/on the system. If fault continues, contact the Customer Support Center. 054 296 Cause: Internal component failure Remedy: Power off/on the system. If fault continues, contact the Customer Support Center. 16-64 ® Xerox Color 800/1000 Press User Guide...
- Page 269 Remedy: Power off/on the system. If fault continues, contact the Customer Support Center. 055 215 Cause: Internal component failure Remedy: Power off/on the system. If fault continues, contact the Customer Support Center. ® 16-65 Xerox Color 800/1000 Press User Guide...
- Page 270 Remedy: Power off/on the system. If fault continues, contact the Customer Support Center. 055 224 Cause: Internal component failure Remedy: Power off/on the system. If fault continues, contact the Customer Support Center. 16-66 ® Xerox Color 800/1000 Press User Guide...
- Page 271 Remedy: Power off/on the system. If fault continues, contact the Customer Support Center. 055 233 Cause: Internal component failure Remedy: Power off/on the system. If fault continues, contact the Customer Support Center. ® 16-67 Xerox Color 800/1000 Press User Guide...
- Page 272 Remedy: Power off/on the system. If fault continues, contact the Customer Support Center. 055 242 Cause: Internal component failure Remedy: Power off/on the system. If fault continues, contact the Customer Support Center. 16-68 ® Xerox Color 800/1000 Press User Guide...
- Page 273 Remedy: Power off/on the system. If fault continues, contact the Customer Support Center. 055 251 Cause: Internal component failure Remedy: Power off/on the system. If fault continues, contact the Customer Support Center. ® 16-69 Xerox Color 800/1000 Press User Guide...
- Page 274 Customer Support Center. 153 705 Cause: Trimmer waste tray is open Remedy: Close the tray. If fault continues, power on/off the system. If fault continues, contact the Customer Support Center. 16-70 ® Xerox Color 800/1000 Press User Guide...
-
Page 275: Binder Specifications
Full Bleed, Face cut, and No cut Cutting distance Top/bottom: Minimum: 0.55 in./14 mm; maximum: 2.125 in./54 mm Fore Edge: Minimum: 0.275 in./7 mm; maximum: 1.34 in./34 mm Book thickness Minimum: 0.118 in./3 mm Maximum: 1 in./25.4 mm ® 16-71 Xerox Color 800/1000 Press User Guide... - Page 276 Minimum: 10.1 in./257 mm Maximum: 12.6 in./320 mm Note The minimum 2 Book block (body pages) Minimum: 7.16 in./182 mm Maximum: 9 in./182-228.6 mm 3 Cover Minimum: 14.22 in./364 mm Maximum: 19.2 in./488 mm 16-72 ® Xerox Color 800/1000 Press User Guide...
- Page 277 11 x 17 in./A3 (SEF), 9.84 x 13.90 in./B4 (SEF), SRA3/12.59 x 17.71 in. (SEF) Acceptable paper weights: 24-80 lb. bond (90-300 gsm), 350 gsm Xerox Colotech Binder s bypass mode Refer to the printer’s specifications for acceptable paper sizes and weights. These paper types can be transported through the binder’s bypass mode directly to the next inline...
- Page 278 Perfect Binder Book stacker tray capacity Approximately 4.17 in./106 mm width capacity Warm-up time Approximately 440 seconds (7 minutes) or less 16-74 ® Xerox Color 800/1000 Press User Guide...
-
Page 279: Standard/Booklet Maker Finisher
2. Standard or Booklet Maker Finisher: These finishers provide a wide range of finishing and folding options. The Booklet Maker Finisher is shown in the above illustration. Note The Standard Finisher or Booklet Maker Finisher may be referred to simply as the finisher. ® 17-1 Xerox Color 800/1000 Press User Guide... - Page 280 This is available only with the Booklet Maker Finisher. There booklet are two staple cartridge for booklet. Remove this cartridge to replace staples and clear staple jams. Punch scrap container Collects the scraps from the puncher. Open to remove the scraps. 17-2 ® Xerox Color 800/1000 Press User Guide...
-
Page 281: Manual Decurling Feature On The Finisher
The finisher provides a manual decurling feature which allows you to adjust the curl of the print output at point of need. Pressing the Decurler button on the finisher switches the decurl feature between the Auto, On, and Off modes. ® 17-3 Xerox Color 800/1000 Press User Guide... -
Page 282: Folding Feature
In order to use the folding option, the orientation of documents must be short-edge feed (SEF). You must select a paper tray that contains SEF stock. Fold types These fold types are available: 17-4 ® Xerox Color 800/1000 Press User Guide... - Page 283 The Single Fold option is available only with the Booklet Maker Finisher. C-Fold A C-Fold has two folds which creates a three-panel output. Z-Fold A Z-Fold has two folds that are folded in opposite directions, resulting in a type of fan fold. ® 17-5 Xerox Color 800/1000 Press User Guide...
-
Page 284: Loading Paper/Tabs In Tray 8/T1 (Post-Process Inserter)
(Post-Process Inserter) 1. If necessary, remove any remaining media that is currently loaded in Tray 8/T1. 2. Hold the center of the paper guides and slide them to their desired paper size. 17-6 ® Xerox Color 800/1000 Press User Guide... -
Page 285: Maintenance
Always refer to www.xerox.com for the latest Consumable Replaceable Units (CRUs) part numbers. Store supply items and Xerox parts in their original packages in a convenient location. Supply Item Supply Unit Shipped with finisher/Reorder Quantity Staple cartridge/staple waste 4 staple cartridges (5000 staples per cartridge) and 1... -
Page 286: Replace The Standard Staple Cartridge
3. Grasp the Staple Cartridge handle located at R1, and pull out the staple cartridge from the finisher. 4. Hold the positions as indicated by the arrow and remove the staple cartridge from the unit. 17-8 ® Xerox Color 800/1000 Press User Guide... -
Page 287: Replace The Booklet Staple Cartridge
When this booklet stapler needs to be replaced, a message appears on the UI. 1. Make sure that the machine has stopped printing. 2. Open the Right Cover on the finisher. ® 17-9 Xerox Color 800/1000 Press User Guide... - Page 288 6. Push the staple cartridge unit to its original position in the machine. 7. Close the Right Cover on the finisher. Note A message will display and the machine will not operate if the right cover is open even slightly. 17-10 ® Xerox Color 800/1000 Press User Guide...
-
Page 289: Replacing The Staple Waste Container On The Finisher
3. Locate the Staple Waste Container ( R5) in the finisher, and move the lock lever to the unlock position. 4. Hold R5 as shown in the figure and remove the staple waste container from the machine. ® 17-11 Xerox Color 800/1000 Press User Guide... - Page 290 6. Hold the new staple waste container by the R5 handle area and push it into the machine. Note To prevent injury, do not put your fingers on top of the container. 7. Push R5 until the lock lever moves to the locked position. 17-12 ® Xerox Color 800/1000 Press User Guide...
-
Page 291: Empty The Punch Waste Container
1. Make sure that the machine has stopped printing. 2. Open the Right Cover on the finisher. 3. Pull the container out of the finisher ( R4). ® 17-13 Xerox Color 800/1000 Press User Guide... -
Page 292: Finisher Problem Solving
Always ensure that all paper jams, including any small ripped pieces of paper, are cleared before proceeding with your print jobs. Note Remedies differ according to the paper jam location. Follow the instructions displayed to remove the jammed paper. 17-14 ® Xerox Color 800/1000 Press User Guide... -
Page 293: Paper Jams In Tray 8/T1 (Post-Process Inserter)
If paper is torn, check inside the machine and remove it. 3. Fan the paper you removed, making sure that all four corners are neatly aligned, and then load them again. 4. Push cover 1e until you hear it click into place. ® 17-15 Xerox Color 800/1000 Press User Guide... -
Page 294: Paper Jams At Lever 1A And Knob 1C
2. Open the finisher left cover. 3. Move lever 1a downwards and turn knob 1c left. Remove the jammed paper. Note If paper is torn, check inside the machine and remove it. 17-16 ® Xerox Color 800/1000 Press User Guide... -
Page 295: Paper Jams At Lever 1D
The machine will not operate if the cover is open even slightly. Paper jams at lever 1d 1. Make sure that the machine has stopped printing. 2. Open the finisher left cover. 3. Move lever 1d upwards and remove the jammed paper. ® 17-17 Xerox Color 800/1000 Press User Guide... -
Page 296: Paper Jams At Lever 1B
The machine will not operate if the cover is open even slightly. Paper jams at lever 1b 1. Make sure that the machine has stopped printing. 2. Open the finisher left cover. 17-18 ® Xerox Color 800/1000 Press User Guide... -
Page 297: Paper Jams At Lever 3B And 3D
5. Close the finisher left cover completely. Note The machine will not operate if the cover is open even slightly. Paper jams at lever 3b and 3d 1. Make sure that the machine has stopped printing. ® 17-19 Xerox Color 800/1000 Press User Guide... - Page 298 4. Return the levers 3b and 3d to their original positions. 5. Close the Right Cover on the finisher. Note A message will display and the machine will not operate if the right cover is open even slightly. 17-20 ® Xerox Color 800/1000 Press User Guide...
-
Page 299: Paper Jams At Lever 3E And Knob 3C
3. Move the lever 3e and turn the knob 3c; remove the jammed paper. Note If paper is torn, check inside the machine and remove it. 4. Return the lever 3e its original position. ® 17-21 Xerox Color 800/1000 Press User Guide... -
Page 300: Paper Jams At Lever 3G And Knob 3F
2. Open the Right Cover on the finisher. 3. Move the lever 3g and turn the knob 3f and remove the jammed paper. Note If paper is torn, check inside the machine and remove it. 17-22 ® Xerox Color 800/1000 Press User Guide... -
Page 301: Paper Jams At Lever 4B And Knob 3A
Paper jams at lever 4b and knob 3a 1. Make sure that the machine has stopped printing. 2. Open the Right Cover on the finisher. 3. Move the lever 4b and turn the knob 3a; remove the jammed paper. ® 17-23 Xerox Color 800/1000 Press User Guide... -
Page 302: Paper Jams At Lever 2A And Knob 3A
A message will display and the machine will not operate if the right cover is open even slightly. Paper jams at lever 2a and knob 3a 1. Make sure that the machine has stopped printing. 2. Open the Right Cover on the finisher. 17-24 ® Xerox Color 800/1000 Press User Guide... -
Page 303: Paper Jams At Lever 2B And Knob 2C
A message will display and the machine will not operate if the right cover is open even slightly. Paper jams at lever 2b and knob 2c 1. Make sure that the machine has stopped printing. ® 17-25 Xerox Color 800/1000 Press User Guide... - Page 304 4. Return the lever 2b to its original position. 5. Close the Right Cover on the finisher. Note A message will display and the machine will not operate if the right cover is open even slightly. 17-26 ® Xerox Color 800/1000 Press User Guide...
-
Page 305: Paper Jams At 2C, 2E, 2F, And 2D
If paper is torn, check inside the machine and remove it. 4. If you cannot remove the paper, return the lever 2e/2f to its original position. Swing the lever 2e/2f, turn the knob 2c to the right, and remove the jammed paper. ® 17-27 Xerox Color 800/1000 Press User Guide... -
Page 306: Paper Jams At 2D And Lever 2G
A message will display and the machine will not operate if the right cover is open even slightly. Paper jams at 2d and lever 2g 1. Make sure that the machine has stopped printing. 2. Open the Right Cover on the finisher. 17-28 ® Xerox Color 800/1000 Press User Guide... -
Page 307: Paper Jams At Unit 4 And Knob 4A
A message will display and the machine will not operate if the right cover is open even slightly. Paper jams at unit 4 and knob 4a 1. Make sure that the machine has stopped printing. ® 17-29 Xerox Color 800/1000 Press User Guide... - Page 308 3. Pull out unit 4. 4. Turn the knob 4a to remove the jammed paper from the left side of unit 4. Note If paper is torn, check inside the machine and remove it. 17-30 ® Xerox Color 800/1000 Press User Guide...
-
Page 309: Paper Jams At Finisher Top Tray
Paper jams at finisher top tray 1. Make sure that the machine has stopped printing. 2. Remove jammed paper from the finisher top tray. Note If paper is torn, check inside the machine and remove it. ® 17-31 Xerox Color 800/1000 Press User Guide... -
Page 310: Paper Jams At Finisher Stacker Tray
Paper jams at finisher stacker tray 1. Make sure that the machine has stopped printing. 2. Remove jammed paper from the finisher stacker tray. Note If paper is torn, check inside the machine and remove it. 17-32 ® Xerox Color 800/1000 Press User Guide... -
Page 311: Paper Jams At The Optional Booklet Maker Tray
1. Make sure that the machine has stopped printing. 2. Open the Right Cover on the finisher. 3. Turn knob 4a and remove any jammed paper from the optional booklet maker tray. ® 17-33 Xerox Color 800/1000 Press User Guide... -
Page 312: Stapler Faults
Remove the bent staple when opening the staple cartridge cover. If you do not remove the bent staple, a staple jam may occur as a result. Use the staple cartridge cover only when removing the bent staple. 17-34 ® Xerox Color 800/1000 Press User Guide... -
Page 313: Staple Jams In The Standard Staple Cartridge
4. Check the inside of the finisher for any remaining staples, and if necessary, remove them. 5. Open the staple cartridge unit as shown and remove the jammed staple. Warning To avoid injury to your fingers, carefully remove the jammed staples from the cartridge. ® 17-35 Xerox Color 800/1000 Press User Guide... -
Page 314: Staple Jams In The Booklet Maker Cartridge
Staple jams in the booklet maker cartridge Note Always check inside the finisher for any individual staples or staple remnants. 1. Make sure that the machine has stopped printing. 2. Open the Right Cover on the finisher. 17-36 ® Xerox Color 800/1000 Press User Guide... - Page 315 5. Remove the jammed staples from the cartridge. Warning To avoid injury to your fingers, carefully remove the jammed staples from the cartridge. 6. While holding the tabs of a new staple cartridge, push it into the unit. ® 17-37 Xerox Color 800/1000 Press User Guide...
-
Page 316: Reinserting The Standard Staple Cartridge
Use this procedure if the standard staple cartridge is inserted incorrectly into the machine. Note Always check inside the finisher for any individual staples or staple remnants. 1. Make sure that the machine has stopped printing. 2. Open the Right Cover on the finisher. 17-38 ® Xerox Color 800/1000 Press User Guide... - Page 317 5. Move the lever on the rear of the staple cartridge unit in the downward direction. 6. While holding the lever down, turn over the unit and remove the staple cartridge from the unit. ® 17-39 Xerox Color 800/1000 Press User Guide...
-
Page 318: Fault Codes
Booklet Maker Finisher, then an error code is displayed. If an error code appears that is not listed in the table below, or if an error persists after following the listed solution, then contact your Xerox Customer Support Center. 17-40 ®... - Page 319 Check staples and reset correctly. 024 977 Finisher staple feeding is Check staples and reset correctly. not ready 024 978 Booklet Finisher staple Check staples and reset correctly. operation is not ready ® 17-41 Xerox Color 800/1000 Press User Guide...
- Page 320 124 709 The number of pages Decrease the number of pages, or exceeds the number of cancel the stapling settings, then try pages that can be stapled to print again. 17-42 ® Xerox Color 800/1000 Press User Guide...
-
Page 321: Specifications
*When using A4 LEF, B5 LEF, 8.5 x 11 in. LEF, 8 x 10 in. LEF, 7.5 x 10.5 in. LEF only. When using paper of other sizes, tray capacity is 1,500 sheets and 100 sets. **Tray may not support some paper types. ® 17-43 Xerox Color 800/1000 Press User Guide... - Page 322 Hole Punching Supported paper size: • Maximum: A3/11 x 17 in. • Minimum: B5 LEF (2 holes), A4 LEF (4 holes) Number of holes: 2, 4, 3 (optional) Paper type: 55-220 gsm 17-44 ® Xerox Color 800/1000 Press User Guide...
- Page 323 Maximum number of sheets: Fold • Fold and Staple: 25 sheets • Fold only: 5 sheets When using Xerox 20 lb./75 gsm paper, only 14 sheets can be stapled if adding a cover. Paper size: • Maximum: A3, 13 x 18 in.
-
Page 324: Optional C/Z Folder
Z-Fold Half Sheet • Z-paper size: 11 x 17 in./A3, 10 x 14 in./B4, 8K • Capacity: Maximum: 80 sheets (A3/11 x 17 in. Xerox 20 lb./75 gsm paper Z folding) 20 sheets for 8K and 10 x 14 in./B4 •... -
Page 325: Squarefold Trimmer Module
SquareFold Trimmer Module already assembled. Any adjustments to the image of the original and its placement on the booklet page must be done from the machine UI, your print driver, or from the print server. ® 18-1 Xerox Color 800/1000 Press User Guide... -
Page 326: Identifying The Components
The top covers cannot be opened during normal operation or when the machine is idle. The covers can be opened only when an indicator is lit and a jam/fault occurs within the SquareFold Trimmer Module. 18-2 ® Xerox Color 800/1000 Press User Guide... -
Page 327: Paper Path
Booklets exiting/leaving the SquareFold Trimmer Module may contain trim remnants/scraps from the previously trimmed booklet. This is due to static electricity build-up and is normal. If booklets contain trim remnants/scraps, simply remove and discard them. ® 18-3 Xerox Color 800/1000 Press User Guide... -
Page 328: Control Panel
Square Fold options: Select the desired setting; these settings are discussed in more detail in the section entitled “Square Fold options.” Square Fold feature The Square Fold feature can be selected/accessed from your computer print driver, the machine UI, or from the print server. 18-4 ® Xerox Color 800/1000 Press User Guide... -
Page 329: Square Fold Options
4. +1/High/High 1: Use this setting when you want a greater amount of pressure applied to the spine of the booklet, but not as much pressure as the +2 setting uses. 5. Auto/Normal: This is the machine default setting and is used for most jobs. ® 18-5 Xerox Color 800/1000 Press User Guide... -
Page 330: Accessing The Square Fold Options
Microsoft Word or Adobe Reader). a) Select File and Print. b) From the Print window, select the desired machine (with the SquareFold Trimmer Module attached to it), and then select Properties for that machine. 18-6 ® Xerox Color 800/1000 Press User Guide... -
Page 331: Trimmer Feature
The descriptions given for each of the Trimmer options are applicable for network print jobs, and apply to any print server/print driver connected to the machine. ® 18-7 Xerox Color 800/1000 Press User Guide... -
Page 332: Trim Guidelines
Trim guidelines The following table shows various scenarios using different paper weights, media types, and trim setting selections. Use this table as a guideline when selecting a trim setting for your specific job. 18-8 ® Xerox Color 800/1000 Press User Guide... - Page 333 12 x 18 in./305 x 6 x 9 in./152 x 28 lbs./105 458 mm 229 mm 12 x 18 in./305 x 6 x 9 in./152 x 80 lbs./120 458 mm 229 mm ® 18-9 Xerox Color 800/1000 Press User Guide...
-
Page 334: Accessing The Trimmer Options
Printing full-page images on booklets When using full-page images, ensure that the finished booklet size accommodates any full-page images, and that when the booklet is trimmed, these images are not truncated. Refer to the illustration. 18-10 ® Xerox Color 800/1000 Press User Guide... -
Page 335: Follow These Tips
• If any images/text need shifting, use the various selections from your application’s print driver; refer to your print driver’s Help information. • Remember: it may take one or more test prints before you achieve your desired output. ® 18-11 Xerox Color 800/1000 Press User Guide... -
Page 336: Problem Solving
4. Check for loose trim scraps along the paper path and remove them. 5. Close the Top Left and Right Covers. 6. Empty the Trimmer Waste Container. 7. Ensure that the Trimmer Waste Container is completely pushed in/closed. 18-12 ® Xerox Color 800/1000 Press User Guide... -
Page 337: Clearing E1/E2 Jams
SquareFold Trimmer Module control panel. 1. Make sure that the machine is not in operation, and press the button on the left cover of the Trimmer unit to open the cover. 2. Remove the jammed paper. ® 18-13 Xerox Color 800/1000 Press User Guide... - Page 338 6. If you opened the right cover of the finisher in Step 3, close the cover. Note A message will be displayed and the machine will not operate if the right cover of the finisher is even slightly open. 18-14 ® Xerox Color 800/1000 Press User Guide...
-
Page 339: Clearing E3 Jams
1. Make sure that the machine is not in operation, and press the button on the right cover of the Trimmer unit to open the cover. 2. Remove the jammed paper. 3. Close the right cover of the Trimmer unit. ® 18-15 Xerox Color 800/1000 Press User Guide... -
Page 340: Fault Codes
013-916 push it completely in. 013-917 If necessary, follow any remaining 013-918 instructions on the machine’s UI. 013-919 If fault persists, repeat Steps 1-5; if fault persists after that, call for service. 18-16 ® Xerox Color 800/1000 Press User Guide... - Page 341 Ensure that the container is fully pushed in, and that the indicator light is not lit. If fault persists, repeat Steps 1-3. If fault persists, power off/on the machine. If fault persists, call for service. ® 18-17 Xerox Color 800/1000 Press User Guide...
-
Page 342: Technical Data
• 5-20 sheet booklet (up to 80 imaged sides) at 24 lb./90 gsm • 5-25 sheet booklet (up to 100 imaged sides) at 200 lb./80 gsm Cut amount: 2-20 mm, adjustable in 0.1 mm increments Paper weights 16 lb. bond-90 lb. cover (60-220 gsm) 18-18 ® Xerox Color 800/1000 Press User Guide... -
Page 343: Standard Finisher Plus
Overview Note The Standard Finisher Plus requires the Interface Module. The Standard Finisher Plus is comprised of these two modules: 1. Finisher Module 2. Finishing Transport ® 19-1 Xerox Color 800/1000 Press User Guide... -
Page 344: Finisher Module
• Tray 8 holds a maximum of 200 sheets when using 20 lb./75 gsm paper. • Paper can be loaded in the LEF or SEF direction. Punch scrap container Collects the scraps from the puncher. Open to remove the scraps. 19-2 ® Xerox Color 800/1000 Press User Guide... -
Page 345: Folding Feature
In order to use the folding option, the orientation of documents must be short-edge feed (SEF). You must select a paper tray that contains SEF stock. Fold types These fold types are available: ® 19-3 Xerox Color 800/1000 Press User Guide... - Page 346 The Single Fold option is available only with the Booklet Maker Finisher. C-Fold A C-Fold has two folds which creates a three-panel output. Z-Fold A Z-Fold has two folds that are folded in opposite directions, resulting in a type of fan fold. 19-4 ® Xerox Color 800/1000 Press User Guide...
-
Page 347: Loading Paper/Tabs In Tray 8/T1 (Post-Process Inserter)
1. If necessary, remove any remaining media that is currently loaded in Tray 8/T1. 2. Hold the center of the paper guides and slide them to their desired paper size. 3. Load the paper/tabs, aligning it to the front side of the tray. ® 19-5 Xerox Color 800/1000 Press User Guide... -
Page 348: Finishing Transport
Finisher Module and the attached third-party output device.. Finishing Transport status display This display indicates the status of the Finishing Transport and shows the locations of any paper jams. 19-6 ® Xerox Color 800/1000 Press User Guide... -
Page 349: Finishing Transport Status Indicators
• Open front door Area 1 Paper jam in Area 1 Area 2 Paper jam in Area 2 Area 3 Paper jam in Area 3 Area 4 Paper jam in Area 4 ® 19-7 Xerox Color 800/1000 Press User Guide... -
Page 350: Standard Finisher Plus Maintenance
Standard Finisher Plus Standard Finisher Plus maintenance Standard Finisher Plus consumable supplies Xerox supplies, paper, and throughput material can be ordered from Xerox by going to www.xerox.com and clicking on either the Contact Us link for specific contact information/telephone numbers in your area or by clicking on the Supplies and entering/selecting your specific machine information (product family and model type). - Page 351 6. Reinstall the cartridge unit to its original position in the finisher. 7. Close the Right Cover on the finisher. Note A message will display and the machine will not operate if the right cover is open even slightly. ® 19-9 Xerox Color 800/1000 Press User Guide...
-
Page 352: Replacing The Staple Waste Container On The Finisher
3. Locate the Staple Waste Container ( R5) in the finisher, and move the lock lever to the unlock position. 4. Hold R5 as shown in the figure and remove the staple waste container from the machine. 19-10 ® Xerox Color 800/1000 Press User Guide... - Page 353 6. Hold the new staple waste container by the R5 handle area and push it into the machine. Note To prevent injury, do not put your fingers on top of the container. 7. Push R5 until the lock lever moves to the locked position. ® 19-11 Xerox Color 800/1000 Press User Guide...
-
Page 354: Empty The Punch Waste Container
1. Make sure that the machine has stopped printing. 2. Open the Right Cover on the finisher. 3. Pull the container out of the finisher ( R4). 19-12 ® Xerox Color 800/1000 Press User Guide... - Page 355 5. Reinsert the empty container into the machine. 6. Close the Right Cover on the finisher. Note A message will display and the machine will not operate if the right cover is open even slightly. ® 19-13 Xerox Color 800/1000 Press User Guide...
-
Page 356: Problem Solving
Note If paper is torn, check inside the machine and remove it. 3. Fan the paper you removed, making sure that all four corners are neatly aligned, and then load them again. 19-14 ® Xerox Color 800/1000 Press User Guide... -
Page 357: Paper Jams Inside The Finisher Left Cover
Paper jams at lever 1a and knob 1c 1. Make sure that the machine has stopped printing. 2. Open the finisher left cover. 3. Move lever 1a downwards and turn knob 1c left. Remove the jammed paper. ® 19-15 Xerox Color 800/1000 Press User Guide... -
Page 358: Paper Jams At Lever 1D
The machine will not operate if the cover is open even slightly. Paper jams at lever 1d 1. Make sure that the machine has stopped printing. 2. Open the finisher left cover. 19-16 ® Xerox Color 800/1000 Press User Guide... -
Page 359: Paper Jams At Lever 1B
5. Close the finisher left cover completely. Note The machine will not operate if the cover is open even slightly. Paper jams at lever 1b 1. Make sure that the machine has stopped printing. ® 19-17 Xerox Color 800/1000 Press User Guide... - Page 360 If paper is torn, check inside the machine and remove it. 4. Move the lever 1b to the original position. 5. Close the finisher left cover completely. Note The machine will not operate if the cover is open even slightly. 19-18 ® Xerox Color 800/1000 Press User Guide...
-
Page 361: Paper Jams Inside The Finisher Right Cover
1. Make sure that the machine has stopped printing. 2. Open the Right Cover on the finisher. 3. Move the levers 3b and 3d; remove the jammed paper. Note If paper is torn, check inside the machine and remove it. ® 19-19 Xerox Color 800/1000 Press User Guide... -
Page 362: Paper Jams At Lever 3E And Knob 3C
Always ensure that all paper jams, including any small ripped pieces of paper, are cleared before proceeding with your print jobs. 1. Make sure that the machine has stopped printing. 2. Open the Right Cover on the finisher. 19-20 ® Xerox Color 800/1000 Press User Guide... -
Page 363: Paper Jams At Lever 3G And Knob 3F
Paper jams at lever 3g and knob 3f Always ensure that all paper jams, including any small ripped pieces of paper, are cleared before proceeding with your print jobs. 1. Make sure that the machine has stopped printing. ® 19-21 Xerox Color 800/1000 Press User Guide... - Page 364 4. Return the lever 3g its original position. 5. Close the Right Cover on the finisher. Note A message will display and the machine will not operate if the right cover is open even slightly. 19-22 ® Xerox Color 800/1000 Press User Guide...
-
Page 365: Paper Jams At Lever 4B And Knob 3A
3. Move the lever 4b and turn the knob 3a; remove the jammed paper. Note If paper is torn, check inside the machine and remove it. 4. Return the lever 4b its original position. ® 19-23 Xerox Color 800/1000 Press User Guide... -
Page 366: Paper Jams At The Optional C/Z Folder
Always ensure that all paper jams, including any small ripped pieces of paper, are cleared before proceeding with your print jobs. 1. Make sure that the machine has stopped printing. 2. Open the Right Cover on the finisher. 19-24 ® Xerox Color 800/1000 Press User Guide... -
Page 367: Paper Jams At Lever 2B And Knob 2C
Paper jams at lever 2b and knob 2c Always ensure that all paper jams, including any small ripped pieces of paper, are cleared before proceeding with your print jobs. 1. Make sure that the machine has stopped printing. ® 19-25 Xerox Color 800/1000 Press User Guide... - Page 368 4. Return the lever 2b to its original position. 5. Close the Right Cover on the finisher. Note A message will display and the machine will not operate if the right cover is open even slightly. 19-26 ® Xerox Color 800/1000 Press User Guide...
-
Page 369: Paper Jams At 2C, 2E, 2F, And 2D
3. Pull out the folder output tray ( 2d), swing lever 2e to the right, and remove the jammed paper. Note If paper is torn, check inside the machine and remove it. ® 19-27 Xerox Color 800/1000 Press User Guide... -
Page 370: Paper Jams At 2D And Lever 2G
Paper jams at 2d and lever 2g Always ensure that all paper jams, including any small ripped pieces of paper, are cleared before proceeding with your print jobs. 1. Make sure that the machine has stopped printing. 19-28 ® Xerox Color 800/1000 Press User Guide... - Page 371 4. Return the opened lever ( 2g) to its original position, and close the output tray ( 2d). 5. Close the Right Cover on the finisher. Note A message will display and the machine will not operate if the right cover is open even slightly. ® 19-29 Xerox Color 800/1000 Press User Guide...
-
Page 372: Paper Jams In Areas 4B And 4C
4. Return the opened levers ( 4b and 4c) their original positions. 5. Close the Right Cover on the finisher. Note A message will display and the machine will not operate if the right cover is open even slightly. 19-30 ® Xerox Color 800/1000 Press User Guide... -
Page 373: Paper Jams At The Finisher Output Area
1. Make sure that the machine has stopped printing. 2. Remove jammed paper from the finisher top tray. Note If paper is torn, check inside the machine and remove it. 3. Open and close the finisher right cover. ® 19-31 Xerox Color 800/1000 Press User Guide... -
Page 374: Paper Jams At Finisher Stacker Tray
If paper is torn, check inside the machine and remove it. 3. Open and close the finisher right cover. Note The machine will not operate if the cover is open even slightly. 19-32 ® Xerox Color 800/1000 Press User Guide... -
Page 375: Paper Jams In The Finishing Transport
For a paper jam at the exit of the Finisher Module and the entry of the Finishing Transport, remove it by pulling the paper towards the Finishing Transport. 4. Return the green handle 1 to its original position. 5. Close the Finishing Transport front door. ® 19-33 Xerox Color 800/1000 Press User Guide... -
Page 376: Paper Jams In Area 2
4. If necessary, rotate the green knob in the direction shown to remove any jammed paper in this area. 5. Return the green handle 2 to its original position. 6. Close the Finishing Transport front door. 19-34 ® Xerox Color 800/1000 Press User Guide... -
Page 377: Paper Jams In Area 3
4. Return the green handle 3 to its original position. 5. Close the Finishing Transport front door. 6. Ensure that the paper jam indication is cleared from the Finishing Transport status display. ® 19-35 Xerox Color 800/1000 Press User Guide... -
Page 378: Paper Jams In Area 4
5. Return the green handle 4 to its original position. 6. Close the Finishing Transport front door. 7. Ensure that the paper jam indication is cleared from the Finishing Transport status display. 19-36 ® Xerox Color 800/1000 Press User Guide... -
Page 379: Stapler Faults
Perform the following procedure to clear staple jams in the standard stapel cartridge Note Always check inside the finisher for any individual staples or staple remnants. 1. Make sure that the machine has stopped printing. ® 19-37 Xerox Color 800/1000 Press User Guide... - Page 380 4. Check the inside of the finisher for any remaining staples, and if necessary, remove them. 5. Open the staple cartridge unit as shown and remove the jammed staple. Warning To avoid injury to your fingers, carefully remove the jammed staples from the cartridge. 19-38 ® Xerox Color 800/1000 Press User Guide...
-
Page 381: Standard Finisher Plus Fault Codes
Standard Finisher Plus fault codes Finisher Module fault codes If an error code appears that is not listed in the table below, or if an error persists after following the listed solution, then contact your Xerox Customer Support Center. Fault code Possible cause... -
Page 382: Finishing Transport Fault Codes
Standard Finisher Plus Finishing Transport fault codes If an error code appears that is not listed in the table below, or if an error persists after following the listed solution, then contact your Xerox Customer Support Center. Fault code Possible cause... -
Page 383: Specifications
• If the fault persists, contact the Customer Support Center. Specifications This section provides specifications on the Standard Finisher Plus. Finisher Module specifications Item Specification Tray Type • Top Tray: Collated/Uncollated • Stacker (middle) Tray: Collated/Uncollated (Offset available) ® 19-41 Xerox Color 800/1000 Press User Guide... - Page 384 *When using A4 LEF, B5 LEF, 8.5 x 11 in. LEF, 8 x 10 in. LEF, 7.5 x 10.5 in. LEF only. When using paper of other sizes, tray capacity is 1,500 sheets and 100 sets. **Tray may not support some paper types. 19-42 ® Xerox Color 800/1000 Press User Guide...
- Page 385 Hole Punching Supported paper size: • Maximum: A3/11 x 17 in. • Minimum: B5 LEF (2 holes), A4 LEF (4 holes) Number of holes: 2, 4, 3 (optional) Paper type: 55-220 gsm ® 19-43 Xerox Color 800/1000 Press User Guide...
- Page 386 Maximum number of sheets: Fold • Fold and Staple: 25 sheets • Fold only: 5 sheets When using Xerox 20 lb./75 gsm paper, only 14 sheets can be stapled if adding a cover. Paper size: • Maximum: A3, 13 x 18 in.
-
Page 387: Optional C/Z Folder
Z-Fold Half Sheet • Z-paper size: 11 x 17 in./A3, 10 x 14 in./B4, 8K • Capacity: Maximum: 80 sheets (A3/11 x 17 in. Xerox 20 lb./75 gsm paper Z folding) 20 sheets for 8K and 10 x 14 in./B4 •... - Page 388 Standard Finisher Plus 19-46 ® Xerox Color 800/1000 Press User Guide...
- Page 389 Full Width Array 1-5 Clear dry ink Fuser Web Assembly Clear toner 1-5 replacing the Fuser Web Assembly 9-23 Color calibration 1-5 Consumable supplies list CRU list 9-17 Counters 3-3 GBC AdvancedPunch 1-9 ® Xerox Color 800/1000 Press User Guide...
- Page 390 14-3 CRU list 9-17 preset decurler settings on the Interface Oversized High Capacity Feeder Module 14-3 OHCF 1-8, 13-1 problem solving 14-4 OHCF problem solving 13-11 OHCF specifications 13-18 Job summary 3-6 ® Xerox Color 800/1000 Press User Guide...
- Page 391 E3 18-15 paper jams Standard Finisher Plus area E1 and area E2 16-28 area 1 19-33 area E3 16-28 area 2 19-34 area E4 16-30 area 3 19-35 area E5 and area E6 16-31 ® Xerox Color 800/1000 Press User Guide...
- Page 392 16-34 wrinkled 10-5 power saver mode 16-10 Printing 4-1 printing from the Xerox CX Print Server 4-2 FreeFlow Printer Server to binder from the Xerox EX Print Server 4-2 16-13 from the Xerox FreeFlow Print Server 4-1...
- Page 393 Stock Library fault codes 19-39 Submitting a print job 4-1 fold types 17-4, 19-3 from the Xerox CX Print Server 4-2 specifications 19-41 from the Xerox EX Print Server 4-2 optional C/Z folder 19-45 from the Xerox FreeFlow Print Server 4-1...
- Page 394 UI 1-2 UI does not respond 10-5 UI help 2-1 UI is locked up 10-5 UI monitor screen is blank 10-5 User Interface help 2-1 Warmup time 10-4 from a cold start 11-2 ® Xerox Color 800/1000 Press User Guide...