
Related Manuals for Xerox 6204


Summary of Contents for Xerox 6204
-
Page 1: User Guide
Xerox 6204 Wide Format Solution Copy/Scan Version 1.0 November 2006 User Guide 701P45702 User Guide for the FreeFlow Accxes Print Server V12.0... - Page 2 User Guide and what appears on the actual machine. Damage related to computer viruses: Xerox is not responsible for any machine breakdown or software malfunction caused by a computer virus. Important (1) This manual is copyrighted with all rights reserved.
-
Page 3: Table Of Contents
Usable Originals ... 33 Use the Document Carrier for These Originals ... 33 Precautions When Handling Originals ... 33 Size Series Settings for Originals ... 34 Media Types and Loading ... 35 Xerox 6204 Wide Format Solution Table of Contents... - Page 4 Create a Destination (Mailbox) ... 80 Scanning Overview ... 81 Step 1 Selecting a Mailbox ... 81 Step 2 Selecting Features ... 82 Step 3 Scanning the Document ... 83 Step 4 Importing Scanned Data ... 84 Xerox 6204 Wide Format Solution...
- Page 5 Date and Time ... 121 Date Format ... 121 Clock ... 122 Control Panel ... 123 Custom Buttons ... 123 Audible Tones ... 125 Default Screen ... 127 Custom Menus ... 129 Network Settings ... 132 Xerox 6204 Wide Format Solution...
- Page 6 Cleaning the Machine ... 181 10 Problem Solving ... 183 Troubleshooting ... 184 General Problems ... 185 Problems during Copying ... 186 Problems during Scanning ... 191 Problems during Printing ... 193 Error Messages ... 196 Xerox 6204 Wide Format Solution...
- Page 7 Paper Jams in Fuser Unit ... 206 11 Appendix ... 209 Space Requirements ... 210 Specifications ... 211 Options ... 217 Printer Drivers/Client Tools ... 217 Cautions and Limitations ... 218 Notes and Restrictions on Use of the Machine ... 218 Xerox 6204 Wide Format Solution...
- Page 8 Table of Contents Xerox 6204 Wide Format Solution...
-
Page 9: Before Using The Machine
Related Information Sources and CDs ...3 Options...3 Using This Guide ...4 Safety Notes ...6 Regulatory Information...11 Illegal Copies and Printouts ...13 Product Recycling and Disposal ...16 Power Connection...16 Environment and Temperature ...17 Warning and Caution Label Locations ...18 Xerox 6204 Wide Format Solution... -
Page 10: Preface
1 Before Using the Machine Preface Thank you for selecting the Xerox 6204 Wide Format Solution with FreeFlow Accxes Print Server. This machine provides high quality, low cost, 600 dpi monochrome copying, scanning, and printing, and is rated at four D-size (A1) prints per minute, or an optional five D-size (A-1) prints per minute. -
Page 11: Related Information Sources And Cds
We provide the following documentation to help you make optimum use of the machine. User Guide The Xerox 6204 Wide Format Solution Copy/Scan User Guide for the FreeFlow Accxes Print Server contains the procedures for setting up, operating, and maintaining the machine. -
Page 12: Using This Guide
1 Before Using the Machine Using This Guide This guide was produced for people who operate the Xerox 6204 Wide Format Solution with FreeFlow Accxes Print Server on a regular basis. When using this guide, read the chapter that relates to the operation you are performing for a broader understanding of the process. -
Page 13: Conventions
< > button < > key Xerox 6204 Wide Format Solution : The cross-reference is within this manual. : Refers to CD-ROM, names of features, touch screen messages, and input text. : Refers to folders, files, applications, button or menu names... -
Page 14: Safety Notes
Read these Safety Notes carefully before using this product to ensure that you operate the equipment safely. Your Xerox product and recommended supplies have been designed and tested to meet strict safety requirements. These include safety agency approval, and compliance to established environmental standards. Please read the following instructions carefully before operating the product, and refer to them as needed to ensure the continued safe operation of your product. - Page 15 If you do not know whether or not an outlet is grounded, consult a qualified electrician. If this machine needs to be moved to a different location, contact a Xerox service representative or your authorized local representative or service support organization.
-
Page 16: Operational Safety Information
1 Before Using the Machine Operational Safety Information To ensure the continued safe operation of your Xerox equipment, follow these safety guidelines at all times. Do These: Always connect equipment to a correctly grounded power outlet. If in doubt, have the outlet checked by a qualified electrician. -
Page 17: Maintenance Information
Xerox Installation procedure will ensure that the concentration levels meet safe limits. If you need additional information about ozone, please request the Xerox publication Ozone by calling 1-800-828-6571 in the United States and Canada. In other markets, please contact your Authorized Local Dealer or Service Provider. -
Page 18: Product Safety Certification
1 Before Using the Machine Product Safety Certification This product is certified by the following Agency using the Safety standards listed: Agency TUV Rhineland of North America NEMKO Standard UL60950-1 1st(2003) (USA/Canada) IEC60950-1 Edition 1 (2001) Xerox 6204 Wide Format Solution... -
Page 19: Regulatory Information
Xerox ENERGY STAR equipment is preset at the factory to enter a "low power" state and/or shut off completely after a specified period of use. The energy-saving features can reduce product energy consumption in half when compared to conventional equipment. - Page 20 Currently, Environmental Choice has more than 1600 approved products and 140 licensees. Xerox has been a leader in offering EcoLogo approved products.
-
Page 21: Illegal Copies And Printouts
Passports. (Foreign Passports may be photographed.) Immigration Papers. Draft Registration Cards. Selective Service Induction Papers that bear any of the following Registrant’s information: Xerox 6204 Wide Format Solution Illegal Copies and Printouts National Bank Currency Federal Reserve Bank Notes Gold Certificates... -
Page 22: Canada
The above list is provided for your convenience and assistance, but it is not all- inclusive, and no liability is assumed for its completeness or accuracy. In case of doubt, consult your solicitor. Dependency Status Previous military service Xerox 6204 Wide Format Solution... -
Page 23: Other Countries
Copyrighted material or trademarks without the consent of the owner. Postage stamps. Other negotiable instruments. This list is not all-inclusive and no liability is assumed for either its completeness or accuracy. In case of doubt, contact your legal counsel. Xerox 6204 Wide Format Solution Illegal Copies and Printouts... -
Page 24: Product Recycling And Disposal
1 Before Using the Machine Product Recycling and Disposal If you are managing the disposal of your Xerox product, please note that the product contains lead, mercury, and other materials whose disposal may be regulate due to environmental considerations in certain countries or states. The presence of lead and mercury is fully consistent with global regulations applicable at the time that the product was placed on the market. -
Page 25: Environment And Temperature
Sudden temperature fluctuations can affect copy quality. Heating a cold room too quickly can cause condensation to form inside the machine, which can interfere with image transfer. Xerox 6204 Wide Format Solution Environment and Temperature 50 - 90°F (10 - 32°C) -
Page 26: Warning And Caution Label Locations
1 Before Using the Machine Warning and Caution Label Locations These are the locations of warning and caution labels on the Xerox 6204 Wide Format Solution with FreeFlow Accxes Print Server. Xerox 6204 Wide Format Solution... -
Page 27: Product Overview
Machine Components ...20 Powering the System On/Off ...28 Checking the Circuit Breaker ...32 Using the Power Saver Feature...28 Size Series Settings for Originals ...34 Media Types and Loading...35 Media Settings ...42 Xerox 6204 Wide Format Solution... -
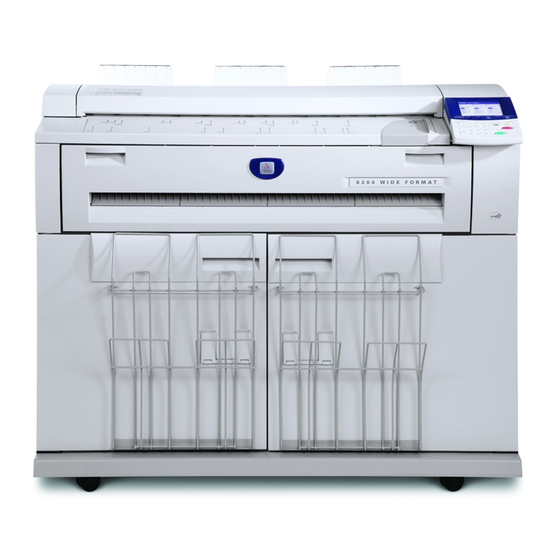
Page 28: Machine Components
2 Product Overview Machine Components This section describes the main components of the Xerox 6204 Wide Format Solution with FreeFlow Accxes Print Server. Machine Components Front View (controller not shown) Component Feed-in shelf Document handler cover Original guide Control panel... - Page 29 Scanned originals exit here. Returns scanned originals to the front. An optional Document Catch Tray may be installed on the rear of the machine. Ask your Xerox representative for more information about this option. Toner is added through this port.
- Page 30 Power Cable Ethernet Cable Connection USB Cables: 2 on Printer model; 3 on Copier/Printer model The USB cables provide com- munication pathways between the controller and the Xerox 6204 Wide Format Solution. Xerox 6204 Wide Format Solution...
-
Page 31: Control Panel
<Menu> button <Copy from Memory> button/indicator <Power Saver> button Xerox 6204 Wide Format Solution Function Displays messages and on-screen buttons for selecting features. Touch the screen to select features and options. Illuminates while the machine is communicating with the controller. - Page 32 Used to stop the scanning of the current original, and to stop the current copy, scan, or print job. Used to enter numeric values in data entry fields. Used to start the scanning of an original. Clears incorrect value(s) entered using the numeric keypad. Xerox 6204 Wide Format Solution...
-
Page 33: Using The Touch Screen
You may select the default screen from the options below. The procedure for changing the default screen is located at "Default Screen" (P.127) [Menu] screen [Scan] screen Xerox 6204 Wide Format Solution Machine Components [Copy] screen [Printer Status] screen... - Page 34 Touch to select an option. When selected, the button highlights. Note: When you touch the on-screen button More..., another screen with additional options displays. Touch to display the feature setup screens. Copy quantity Tabs Selection buttons Xerox 6204 Wide Format Solution...
-
Page 35: Entering Text
Entering symbols Deleting a character Canceling or saving your input Xerox 6204 Wide Format Solution Function Displays the characters entered on the numeric keypad. The numbers within the parentheses ( ) indicate the setting ranges. Use the arrow buttons [ The items and buttons that cannot be selected are displayed in light gray. -
Page 36: Powering The System On/Off
Manual Method: Press the <Power Saver> button on the control panel. The button will illuminate, the machine will enter the [Low Power mode], and the touch screen’s backlight will extinguish. <Power Saver> Xerox 6204 Wide Format Solution... -
Page 37: Exiting The Power Saver Mode
The power button lamp will illuminate. After about one- half minute, the control panel will display the message Printer Warming Up. The machine will be print-ready in about three minutes. Xerox 6204 Wide Format Solution Powering the System On/Off <Power Saver> 2 Power Switch... -
Page 38: System Power Off Procedure
The controller will complete its shutdown within 30 seconds from the moment the control panel and printer shut down. The controller’s power button lamp will go out when the controller completes its shutdown. Xerox 6204 Wide Format Solution... - Page 39 The control panel, printer, and controller will undergo the same power down process as was described above. Move the printer power switch to the off < > position. Move the printer circuit breaker switch to the off position. Xerox 6204 Wide Format Solution Powering the System On/Off...
-
Page 40: Checking The Circuit Breaker
Press the TEST button while the circuit breaker switch is in the on [ breaker turns off, it is operating correctly. Reset the circuit breaker switch and perform the "System Power On Procedure" (P.29). ] position. If the circuit Test Button Xerox 6204 Wide Format Solution... -
Page 41: Usable Originals
Standard See the Original Size Series table on the next page for a list of the sizes of originals that can be used with the Xerox 6204 Wide Format Solution. Non-standard Width: 7.2 - 36 inches (182 - 914.4 mm) Length: 8.3 - 59 inches (210-15000 mm) -
Page 42: Size Series Settings For Originals
JIS B1, JIS B2, JIS B3, JIS B4 B1, B2, B3, B4 880x1, 230mm, 620x871mm, 440x625mm, A3, A4 860x1, 210mm, 620x871mm, A2, A3, A4 36x48", 24x36", 18x24", 12x18", 9x12" 30x42", 24x36", 18x24", 12x18", 9x12" 34x44", 22x34", 17x22", 11x17", 8.5x11" <Original/Media Settings> Xerox 6204 Wide Format Solution... -
Page 43: Media Types And Loading
To make the most effective use of the machine, we recommend that you use only the media recommended by Xerox. Note: Media may be ordered from Xerox at www.xerox.com. From the home page, select Supplies > Paper and Media Type > For Wide Format Products. -
Page 44: Handling And Storing Media
Premium Translucent Length: 297-15000mm 100 micron Premium Opaque 100 ) is a measure of a substance/weight of a paper expressed in grams per square Standard Paper Grams/ Name SquareM Lbs. eter 75g/m 75g/m 90g/m 112g/m Xerox 6204 Wide Format Solution... -
Page 45: Loading Media
Note: Pinching the lever releases the spring tension roll media lock, making it possible for you can remove the shaft from the core. Xerox 6204 Wide Format Solution Media Types and Loading... - Page 46 When the cutter button is held down, the roll media feeds continuously until the cutter button is released. The roll media is cut when the cutter button is released. Remove the piece of paper that was cut. Xerox 6204 Wide Format Solution...
- Page 47 • Hold the media while it feeds. If you release the media too soon, a jam may occur. Xerox 6204 Wide Format Solution Media Types and Loading...
-
Page 48: Cutting Roll Media
When the cutter button is held down, the roll media feeds continuously until the cutter button is released. The roll media is cut when the cutter button is released. Remove the piece of paper that was cut. Xerox 6204 Wide Format Solution... - Page 49 Gently slide the Roll 1 or Roll 2 drawer into the machine until it stops and latches. Close the front doors. Xerox 6204 Wide Format Solution Media Types and Loading...
-
Page 50: Media Settings
Premium Tracing 90 Film Premium Translucent 75 micron Bond Presentation Vellum Premium Tracing 112gsm Film Premium Translucent 100 micron Weight 18 lb. 20 lb. 20 lb. 20 lb. 80g/m 80g/m 90g/m 75µm 110g/m 112g/m 100µm Xerox 6204 Wide Format Solution... - Page 51 Under the Type and Thickness headings, select the button for the new media you are setting up, e.g., Roll 1, Roll 2, or Manual. The corresponding [Media Type/Thickness] screen will display. Xerox 6204 Wide Format Solution Media Settings <Original/Media Settings>...
- Page 52 2 Product Overview Select the Media Type and Media Thickness buttons that define the new media, and then select [Save]. The [Media Settings] tab will redisplay. Select [Close]. Xerox 6204 Wide Format Solution...
-
Page 53: Copy
Making Copies using the Manual Feed Tray (Bypass) ...55 Interrupting a Print Job...57 Copying from Memory...58 Setting up the [Basic Copy] selections...60 Setting up the [Image Quality] selections...65 Setting up the [More Features] selections ...68 Xerox 6204 Wide Format Solution... -
Page 54: Copying Procedure
[Image Quality] tab. Touching the tab moves it to the top. For more information about this tab, refer Note: to "Setting up the [Image Quality] selections" (P.65), which appears later in this chapter. <Copy> Xerox 6204 Wide Format Solution... -
Page 55: Step 2 Entering The Copy Quantity
The copy quantity that you enter will appear at the upper right corner of the touch screen. If you enter an incorrect value, press the <C> button to clear the entry, and then enter the correct value. Xerox 6204 Wide Format Solution Copying Procedure Numeric keypad < C >... -
Page 56: Step 3 Scanning The Original
If the scanner is equipped with front return guides, the original will exit toward the front of the machine. You may wish to guide the lead edge of the original as it travels toward you. riginal Guide Xerox 6204 Wide Format Solution... -
Page 57: Stopping Scanning & Copying
All> button or the <Machine Status> button. Method 1: Pressing the <Clear All> button Press the <Clear All> button. The [Print] screen will display, showing the status of the current copy job. Xerox 6204 Wide Format Solution Stopping Scanning & Copying <Stop> <Clear All>... - Page 58 Method 2: Pressing the <Machine Status> button Pressing the <Machine Status> button will lead you through a path that is similar to the one described above. Press the <Machine Status> button. The [Machine Status] menu will display. <Machine Status> Xerox 6204 Wide Format Solution...
- Page 59 After a job is deleted, the [Copy] (or other selected default screen) will reappear. To Continue Printing Select [Cancel]. The copy job will continue printing. Xerox 6204 Wide Format Solution Stopping Scanning & Copying...
-
Page 60: Creating Collated Copies
If the originals are scanned from number n to 1, page 1 will be at the bottom of the output stack. [Checkplot] Select [Checkplot] if you want a printed, proof copy (checkplot) after you scan each document and before they are printed as sets. Uncollated Collated Xerox 6204 Wide Format Solution... - Page 61 Displays the [Copy] screen, enabling you to change the settings for the next original, that is, such items as reduction/enlargement, original type, media selection, etc., from the [Basic Copy], [Image Quality], and [More Features] tabs. Xerox 6204 Wide Format Solution Creating Collated Copies...
- Page 62 Press the [Print] button on the [Quantity] screen. The machine will start printing collated sets of copies. Press <Clear All> to return the control panel to the default settings. Xerox 6204 Wide Format Solution...
-
Page 63: Making Copies Using The Manual Feed Tray (Bypass)
The [Manual Size Series] screen will display. Select the button for the size series of the media to be printed, and then select [Save]. The [Media Settings] tab will redisplay. Xerox 6204 Wide Format Solution Making Copies using the Manual Feed Tray (Bypass) - Page 64 Scan the original. After the original scans, the media will feed into the machine and the copy will be Close the manual feed tray (bypass) when the copy job is completed. made. Xerox 6204 Wide Format Solution...
-
Page 65: Interrupting A Print Job
99 minutes. This is accomplished by selecting the [Setup] button on the control panel, then selecting the [Timers] feature, and finally, [4. Print interrupt]. Use either the numeric keypad or the scroll buttons to select a different timeout period. Xerox 6204 Wide Format Solution Interrupting a Print Job <Interrupt>... -
Page 66: Copying From Memory
To print the job as is, select [Print]. The <Transmitting> indicator will illuminate, the <Copy from Memory> indicator will go out, the [Copy] screen will display, and the stored job will print. <Copy from Memory> Xerox 6204 Wide Format Solution... - Page 67 [Copy] screen will display, and the stored job will print.The changed settings are applied only to the reprints. The original copy job settings are retained unchanged in memory. The Copy from Memory mode will cancel automatically after a predetermined period Note: elapses without a copy being made. Xerox 6204 Wide Format Solution Copying from Memory...
-
Page 68: Setting Up The [Basic Copy] Selections
To access the [Copy] screen and the [Basic Copy] tab: Press the <Copy> button, or select [Copy] on the [Menu] screen. The [Copy] screen will display. Select the required features on the [Basic Copy] tab. <Copy> Xerox 6204 Wide Format Solution... -
Page 69: Reduce/Enlarge
To select a reduction/enlargement ratio that does not appear on the [Basic Copy] screen, follow the procedure below. Procedure Select [More...] on the [Basic Copy] tab. The [Reduce / Enlarge] screen will display. Xerox 6204 Wide Format Solution Setting up the [Basic Copy] selections... - Page 70 The machine will not accept a value that is out of range. Presets Select any one of the six preset ratios. You can change the presets. For information Note: about this procedure, refer to "Custom R/E" (P.143). Select [Save]. Xerox 6204 Wide Format Solution...
-
Page 71: Media Source
[Copy] screen. Select the [Bond], [Vellum], or [Film] button to specify the media type. When [Media Source] is selected, the media Note: type loaded in the tray is automatically selected. Xerox 6204 Wide Format Solution Setting up the [Basic Copy] selections... -
Page 72: Output Format
Select the desired option, and press [Save]. Manual The roll media will be cut to a customized size that you specify. A screen with data entry fields will display when you select [Manual] Enter the desired size information, and press [Save]. Xerox 6204 Wide Format Solution... -
Page 73: Setting Up The [Image Quality] Selections
Select this mode when documents contain a grayscale or half tone color image, such as a printed graphic. Photo (contone) Select this mode when documents contain a continuous tone, black and white or color image, such as a photograph. Xerox 6204 Wide Format Solution Setting up the [Image Quality] selections... -
Page 74: Copy Density
[Photo (halftone)] or [Photo (contone)]. Procedure Select [Off] or [On]. Background suppression is disabled. The system applies background suppression to remove from the copies the background that may be present on the original. ] and Xerox 6204 Wide Format Solution... -
Page 75: Contrast
You can select from five contrast levels between [Lowest] and [Highest]. The closer the level is to [Highest], the greater the difference between the light and dark portions. Xerox 6204 Wide Format Solution Setting up the [Image Quality] selections ] and [ ] buttons,... -
Page 76: Setting Up The [More Features] Selections
The procedures in this section are listed below. Sample Copy... 69 Image Location... 70 Scan Width ... 71 Margins... 72 Invert Image ... 73 Rendering... 74 Mirror Image ... 75 Sharpness ... 76 Scan Offset... 77 Xerox 6204 Wide Format Solution... -
Page 77: Sample Copy
A confirmation screen will display after the sample copy prints. If the image quality and other selected features are acceptable, select [Print]. If additional adjustments need to be made on the [Copy] screen, select [Cancel]. Xerox 6204 Wide Format Solution Setting up the [More Features] selections... -
Page 78: Image Location
The center of the original is centered on the copy. Corner Shift The original image is shifted to the edges or corners of the media. Use the arrow buttons to shift the image to the desired location. Select [Save] after making your selections. Xerox 6204 Wide Format Solution... -
Page 79: Scan Width
Scan Width Procedure The 6204 Wide Format Solution is set up by default to scan standard size originals. If you wish to copy a non-standard width original, define the width using the [Scan Width] selection. This feature allows you to define a variable scan width of from 8.2 to 36 inches, in increments of 0.1 inch. -
Page 80: Margins
When making copies from a book or other unique originals, black shadows sometimes appear along the edges of the paper. If this happens, you can make copies with the shadows erased. When Reduce/Enlarge is set up, the border erase amount is proportionately changed. Note: button. Trail Copy Xerox 6204 Wide Format Solution... -
Page 81: Invert Image
Negative image is applied to copies, so that the black and white colors are reversed. Negative Image is not applied to copies. When the original size is smaller than the Note: media size, white margins will appear. Xerox 6204 Wide Format Solution Setting up the [More Features] selections... -
Page 82: Rendering
This reproduces images with white and black in two gradations. Error Diffusion Select this item when scanning an original that needs to be reproduced with halftones, such as photos. Select [Save]. photographs. The factory default setting is Xerox 6204 Wide Format Solution... -
Page 83: Mirror Image
Copies are made with the top and bottom of the original image, and with the left and right sides of the original image reversed. Select [Save]. Xerox 6204 Wide Format Solution Setting up the [More Features] selections... -
Page 84: Sharpness
Features] tab to display the [Sharpness] feature button. Select [Sharpness]. The [Sharpness] screen will display. Use the arrow buttons to scroll to a higher or a lower sharpness level. The higher the setting, the greater the sharpness. Select [Save]. Xerox 6204 Wide Format Solution... -
Page 85: Scan Offset
[Save]. When a Reduce/Enlarge ratio of other than 100 Note: percent has been set up for the copy job, the scan start position will be enlarged or reduced proportionately. Xerox 6204 Wide Format Solution Setting up the [More Features] selections... - Page 86 3 Copy Xerox 6204 Wide Format Solution...
-
Page 87: Scan
4 Scan This chapter describes the scan features of the Xerox 6204 Wide Format Solution with FreeFlow Accxes Print Server. Important • Scan features are not available for some models. An optional package is necessary. For more information, contact your Xerox Customer Support Center. -
Page 88: Preparation For Scanning
4 Scan Preparation for Scanning This section describes the steps you must take before you can begin scanning with the Xerox 6204 Wide Format Solution with FreeFlow Accxes Print Server. The following must be set up: The network settings A destination (mailbox) to receive the image information from the documents you... -
Page 89: Scanning Overview
] to display the next screen. You also can access a mailbox by entering its two-digit number in [Go to], using the numeric keypad, and then selecting [Go]. Xerox 6204 Wide Format Solution ] to display the previous screen or Scanning Overview... -
Page 90: Step 2 Selecting Features
Press the <Original/Media Settings> button. The [Original Size Series] and [Media Settings] tabs will display. Select the [Original Size Series] option that corresponds with the original to be scanned, and then select [Close]. <Original/Media Settings> Xerox 6204 Wide Format Solution... -
Page 91: Step 3 Scanning The Document
“n” is the sequential number assigned to the image file, and "xxx" is the selected file type extension, e.g., TIF, PDF, etc.). If the [Preview] option on the [More Features] tab is enabled, a thumbnail will be created, in a.JPG format. Xerox 6204 Wide Format Solution Scanning Overview riginal Guide... -
Page 92: Step 4 Importing Scanned Data
Step 4 Importing Scanned Data Import the scanned data stored in a mailbox to your computer. Importing can be performed using the Accxes Client Tools Document Retrieval Tool. Refer to the Accxes Client Tools User Guide for additional information. Xerox 6204 Wide Format Solution... -
Page 93: Stopping A Scan
If the original is still in the scanner when scanning stops, a [Document Jam] message will display. Perform the steps listed on the touch screen to remove the document and clear the jam. Xerox 6204 Wide Format Solution Stopping a Scan <Stop>... -
Page 94: Interrupting A Print Job To Scan A Document
The [Scan] screen will appear. Select [Destination]. Select the appropriate mailbox on the [Destination] screen. When the [Scan] screen reappears, set up the necessary [Basic Scan], [Image Quality], and [More Features] selections. Scan the original(s). <Interrupt> Xerox 6204 Wide Format Solution... - Page 95 This is accomplished by selecting the [Setup] button on the control panel, then selecting the [Timers] feature, and finally, [4. Print interrupt]. Use either the numeric keypad or the scroll buttons to select a different timeout period. Xerox 6204 Wide Format Solution Interrupting a Print Job to Scan a Document...
-
Page 96: Setting Up The [Basic Scan] Selections
Text/Line (clear) Select this mode to scan transparent (clear) originals. This option is suitable for film and vellum originals where the background color is water-clear, white, bluish, or brown. <Scan> Xerox 6204 Wide Format Solution... -
Page 97: Scan Resolution
Scanned image data may be saved in TIFF, PDF, or CALS formats. The default is [TIFF]. Procedure Select the file format in which the scanned image data will be stored: [TIFF], [PDF], or [CALS]. Xerox 6204 Wide Format Solution Setting Up the [Basic Scan] selections... -
Page 98: Setting Up The [Image Quality] Selections
This reproduces images with white and black in two gradations. Error Diffusion Select this item when scanning an original that needs to be reproduced with halftones, such as photos. photographs. The factory default setting is Xerox 6204 Wide Format Solution... -
Page 99: Sharpness
Select the [Scan Density] setting using the scroll buttons. You can select from nine levels between [Light] and [Dark]. The density increases as the level approaches [Dark], and decreases as the level approaches [Light]. Xerox 6204 Wide Format Solution Setting Up the [Image Quality] selections... -
Page 100: Background Suppression
Note: It may be necessary to rotate the image 90° to obtain the correct amount of background when copying or scanning originals. Procedure Select the required [BG.Suppression] option: The background of the original is included during scanning. The background of the original is excluded during scanning. Xerox 6204 Wide Format Solution... -
Page 101: Contrast
[Normal]. Procedure Select [Contrast]. The [Contrast] screen will display. Adjust the settings using the scroll buttons. You can select from five contrast levels between [Lowest] and [Highest]. Select [Save]. Xerox 6204 Wide Format Solution Setting Up the [Image Quality] selections... -
Page 102: Setting Up The [More Features] Selections
Scan Width The 6204 Wide Format Solution is, by default, set up to scan standard size originals. If you wish to copy a non-standard width original, define the width using the [Scan Width] selection. This feature allows you to define a variable scan width of from 8.2 to 36 inches, in increments of 0.1 inch. -
Page 103: Scan Offset
0 to 39.3 inches, in 0.1 inch increments.The factory default setting is [Disabled]. Procedure Select the [Scan Offset] button. The [Scan Offset] screen will display. Xerox 6204 Wide Format Solution Setting Up the [More Features] selections... -
Page 104: Invert Image
Procedure Select the [Invert Image] button. The [Invert Image] screen will display. Select [On] or [Off]. Negative Image is not applied. Negative image is applied, and the black and white colors are reversed. Select [Save]. Xerox 6204 Wide Format Solution... -
Page 105: Mirror Image
Note: When the width of the original is less than the Scan Width, such as occurs with non-standard originals, a margin will be present on the left side. Original detection width Xerox 6204 Wide Format Solution Setting Up the [More Features] selections Original detection width... - Page 106 • When the original width is slightly larger than the original detection width, the non-scanned portion is omitted. Original Original detection width Original width Scan Size Original detection width Xerox 6204 Wide Format Solution...
-
Page 107: Preview
The controller will not create a thumbnail image file. Create Preview Image The controller will create a thumbnail image file which can be downloaded into Accxes Client Tools. Select [Save]. Xerox 6204 Wide Format Solution Setting Up the [More Features] selections... -
Page 108: Scan To Print
The [Scan to Print] screen will display. Select the desired option. Do not print image The controller will not generate a print of the scanned image. Scan image to printer The controller will print the scanned image. Select [Save]. Xerox 6204 Wide Format Solution... -
Page 109: Deleting Documents From A Mailbox
[Go] button. Select [Document Delete] on the [Destination] screen. Note: Once the documents are deleted, they cannot be recovered. The [Mailbox - Delete] dialogue will display. Xerox 6204 Wide Format Solution Deleting Documents from a Mailbox <Scan>... -
Page 110: Delete A Document
[Go to], and then select the [Go] button. The contents of the mailbox will display. ] to display the previous five mailboxes ] to display the next five mailboxes. <Scan> Xerox 6204 Wide Format Solution... - Page 111 Note: A deleted document cannot be recovered. The document will be deleted, and the [Mailbox: xx] screen will redisplay. The remaining documents will renumber, with the previous number 002 document becoming 001, and so on. Xerox 6204 Wide Format Solution Deleting Documents from a Mailbox...
-
Page 112: Creating & Deleting A Mailbox
[Go] button. The [Change/Delete] screen will display Select [1. Mailbox Name]. The alphanumeric keyboard will display. ] to display the previous five mailboxes ] to display the next five mailboxes. <Scan> Xerox 6204 Wide Format Solution... - Page 113 Note: The default mailbox appears as the selected mailbox when the machine enters the Scan mode. Select [Close] on the screens that display until you return to the [Scan] screen. Xerox 6204 Wide Format Solution Creating & Deleting a Mailbox...
-
Page 114: Deleting A Mailbox
] to display the next screen. The [Change/Delete] screen will display. Select [Delete]. A confirmation screen will display. Select [OK] to delete the selected mailbox. The mailbox will be deleted. ] to display the previous screen and select Xerox 6204 Wide Format Solution... -
Page 115: Store/Recall
[Save Default Template] enables you to save the settings from the current job as the default template. Refer to "Save Default Template" (P.116). [Restore Factory Defaults] enables you to recall the factory default settings as the active default settings. Refer to "Restore Factory Defaults" (P.117). Xerox 6204 Wide Format Solution... -
Page 116: Accessing The [Store/Recall] Menu
5 Store/Recall Accessing the [Store/Recall] Menu Press the [Store/Recall] button on the [Menu] screen. The [Store/Recall] menu will display. Select the desired option. The menu or screen for the selected option will display. Xerox 6204 Wide Format Solution... -
Page 117: Recall Last Copy Job
If there is no last job to be restored, as is the case at power up or after the last job has been deleted, a warning message will advise you. Xerox 6204 Wide Format Solution Accessing the [Store/Recall] Menu... - Page 118 [Last Original] This selection informs the machine that scanning is done and printing can begin. Select this button after the final original in the set has been scanned. Xerox 6204 Wide Format Solution...
-
Page 119: Delete Last Copy Job
Press the Store/Recall button. The [Store/Recall] menu screen will display. Select [Delete Last Copy Job]. The [Delete Job] dialogue will display. Select [OK]. The last job images and parameters will be deleted. Xerox 6204 Wide Format Solution Accessing the [Store/Recall] Menu... -
Page 120: Copy Job Templates
(0 - 9), using the numeric keypad. This number will appear in the [Templates in use] field after it is saved. Templates that are no longer in use should be deleted to free up space in memory. screen will display. Xerox 6204 Wide Format Solution... -
Page 121: Recall Template
[Template] field. Select [Recall Template]. Select [Close] on the [Copy Job Templates] and [Store/Recall] screens to return to the [Menu] screen. Insert the documents in the scanner and run the recalled job. Xerox 6204 Wide Format Solution Accessing the [Store/Recall] Menu... -
Page 122: Save Template
The number you enter will appear in the [Template] field. Select [Save Template]. The settings for the current copy job will be saved at the designated location (0 - 9). Xerox 6204 Wide Format Solution... -
Page 123: Delete Template
[Delete Template]. The template and saved job settings are deleted, and the template number is removed from the list in the [Templates in use] field. Xerox 6204 Wide Format Solution Accessing the [Store/Recall] Menu... -
Page 124: Save Default Template
Press the Store/Recall button. The [Store/Recall] menu will display. Select [Save Default Template]. A confirmation screen will display, indicating that the job parameters have been saved. Select [OK] to save the current settings as the default template. Xerox 6204 Wide Format Solution... -
Page 125: Restore Factory Defaults
Procedure Press the Store/Recall button. The [Store/Recall] menu will display. Select [Restore Factory Defaults]. A confirmation dialogue will display. Select [OK] to continue. The factory default settings are restored immediately. Xerox 6204 Wide Format Solution Accessing the [Store/Recall] Menu... - Page 126 5 Store/Recall Xerox 6204 Wide Format Solution...
-
Page 127: System Setup
Contained in this chapter are the setup procedures for the following: Localization ...120 Date and Time ...121 Control Panel ...123 Network Settings...132 Timers ...134 Custom Original Series ...140 Copy Options ...141 Xerox 6204 Wide Format Solution... -
Page 128: Localization
Select the [Localization] button on the [Menu] screen. The [Localization] screen will display. Select the button of the appropriate language. Select the [Inches] or the [Millimeters] button to set up the default units of measurement. Select [Save]. Xerox 6204 Wide Format Solution... -
Page 129: Date And Time
Select [Date Format]. The [Date Format] screen will display. Select the appropriate item: International The date will display in the format DD/MM/YYYY. Imperial The date will display in the format MM/DD/YYYY. Select [Save]. Xerox 6204 Wide Format Solution Date and Time... -
Page 130: Clock
Continue setting up the Machine Clock by selecting the [Month], [Day], [Hours], and [Minutes] numeric entry fields, and for each, using either the numeric keypad or the scroll buttons to enter the correct setting. Select [Save]. Xerox 6204 Wide Format Solution... -
Page 131: Control Panel
<Custom 2> button. Procedure Select the [Setup] button on the [Menu] screen. The [Setup] menu will display. Select [Control Panel] on the [Setup] menu. The [Control Panel] menu will display. Xerox 6204 Wide Format Solution Control Panel <Custom Buttons>... - Page 132 Select the feature that you wish to display when the custom button is selected. Select [Save] to return to the [Custom Buttons] screen, where you can set up the other <Custom Button>. Select [Close] to return to the [Control Panel] menu. Xerox 6204 Wide Format Solution...
-
Page 133: Audible Tones
2. Invalid Entry A short tone followed by a slightly longer tone will sound when the user makes an invalid selection on the control panel or touch screen. Xerox 6204 Wide Format Solution Control Panel... - Page 134 Note: [On] enables a tone; [Off] disables it. Select [Save]. Repeat steps 4 and 5 to set up additional Audible Tones. Select [Close] on the [Audible Tones] menu to return to the [Control Panel] menu. Xerox 6204 Wide Format Solution...
-
Page 135: Default Screen
Select the [Setup] button on the [Menu] screen. The [Setup] menu will display. Select [Control Panel] on the [Setup] menu. The [Control Panel] menu will display. Select [Default Screen]. The [Default Screen] selections will display. Xerox 6204 Wide Format Solution Control Panel... - Page 136 Select one of the four options: [Menu], [Printer Status], [Copy], or [Scan], and then select [Save]. Select [Close] on the [Control Panel] menu to return to the [Setup] menu, or continue making [Control Panel] settings. Xerox 6204 Wide Format Solution...
-
Page 137: Custom Menus
[Setup] screen, you can select it to appear as one of the two custom series on the [Original Size Series] tab. Original Size Series 1 Original Size Series 2 Procedure Select the [Setup] button on the [Menu] screen. The [Setup] menu will display. Xerox 6204 Wide Format Solution Control Panel... - Page 138 [Original Series 1] screen. You may select any one of the four options. Notice that the default series selections shown here and on the next screen display as options on the [Original Size Series] tab shown on the previous page. Xerox 6204 Wide Format Solution...
- Page 139 Selecting [3. Original Series 2] displays the [Original Series 2] screen. You may select any one of the four options. Select [Save]. Select [Close] on the [Custom Menus] menu to return to the [Control Panel] menu. Xerox 6204 Wide Format Solution Control Panel...
-
Page 140: Network Settings
The [Setup] menu will display. Select [Network Settings] on the [Setup] menu. The [Network Settings] menu will display. Select [DHCP]. The [DHCP] screen will display. Set DHCP to either [Off] or [On], and then select [Save]. Xerox 6204 Wide Format Solution... - Page 141 Subnet Mask Enter the Subnet Mask in the format XXX.XXX.XXX.XXX. Gateway Enter the Gateway in the format XXX.XXX.XXX.XXX. Select [Save]. Select [Close] on the [Network Settings] menu to return to the [Setup] menu. Xerox 6204 Wide Format Solution Network Settings...
-
Page 142: Timers
Select the [Setup] button on the [Menu] screen. The [Setup] menu will display. Select [Timers] on the [Setup] menu. The [Timers] menu will display. Select [1. Low Power]. The [Auto Power Saver] screen will display. Xerox 6204 Wide Format Solution... - Page 143 Note: This setting is the amount of time that must elapse since the last user operation, e.g., a button press or document scan, until the machine enters the [Low Power mode]. Select [Close] on the [Timers] menu to return to the [Setup] menu. Xerox 6204 Wide Format Solution Timers...
-
Page 144: Sleep
[Sleep mode]. Note: The [Sleep Mode] setting cannot be less than the [Low-Power Mode] setting. Select [Close] on the [Timers] menu to return to the [Setup] menu. Xerox 6204 Wide Format Solution... -
Page 145: Features
The [Feature Timeout] screen will display. Use either the scroll buttons or the numeric keypad to select the desired setting, and then select [Save]. Select [Close] on the [Timers] menu to return to the [Setup] menu. Xerox 6204 Wide Format Solution Timers... -
Page 146: Print Interrupt
The [Print Interrupt] screen will display. Use the scroll buttons or the numeric keypad to select a timeout setting, and then select [Save]. Select [Close] on the [Timers] menu to return to the [Setup] screen. Xerox 6204 Wide Format Solution... -
Page 147: File Deletion
Specifies the maximum amount of time a scanned image file remains on the server before being deleted. This timer pertains only to files scanned when the 6204 Wide Format Solution with FreeFlow Accxes Print Server is in the READY TO SCAN mode. -
Page 148: Custom Original Series
Note: The permissible size range for each custom size appears within the parentheses. Repeat steps 3 and 4 to set up additional custom original sizes. Select [Close] on the [Custom Original Series] menu to return to the [Setup] menu. Xerox 6204 Wide Format Solution... -
Page 149: Copy Options
Select the [Setup] button on the [Menu] screen. The [Setup] menu will display. Select [Copy Options] on the [Setup] menu. The [Copy Options] menu will display. Select [Output Media Series]. The [Output Media Series] screen will display. Xerox 6204 Wide Format Solution Copy Options... - Page 150 6 System Setup Select the appropriate option from the available selections. Select [Close] to return to the [Copy Options] menu. Xerox 6204 Wide Format Solution...
-
Page 151: Custom R/E
Select [Copy Options] on the [Setup] menu. The [Copy Options] menu will display. Select [Custom R/E]. The [Custom R/E] menu will display. Select one of the [Custom R/E...] items. The corresponding [Reduce / Enlarge] setup screen will display. Xerox 6204 Wide Format Solution Copy Options... - Page 152 Select [Save]. Repeat steps 4 through 6 to set up the remaining [Custom R/E...] presets. Select [Close] to return to the [Copy Options] menu. Xerox 6204 Wide Format Solution...
-
Page 153: Reduction Line Preservation
The [Copy Options] menu will display. Select [Reduction Line Preservation]. The [Reduction Line Preservation] screen will display. Select the desired option, either [Disabled] or [Enabled]. Select [Save] to return to the [Copy Options] menu. Xerox 6204 Wide Format Solution Copy Options... -
Page 154: Custom Formats
The [Setup] menu will display. Select [Copy Options] on the [Setup] menu. The [Copy Options] menu will display. Select [Custom Formats]. The [Custom Formats] screen will display. Select a [Custom Formats] buttons. The [Custom Formats] setup screen will display. Xerox 6204 Wide Format Solution... - Page 155 Select [Customize] if you wish to define a customized output media size. Enter the dimensions of the customized output format, and then select [Save]. Repeat steps 4 through 6 to set up additional custom formats. Xerox 6204 Wide Format Solution Copy Options...
-
Page 156: Auto Rotate
The [Setup] menu will display. Select [Copy Options] on the [Setup] menu. The [Copy Options] menu will display. Select [Auto-Rotate]. The [Auto-Rotate] screen will display. Select either [Disabled] or [Enabled]. Select [Save] to return to the [Copy Options] menu. Xerox 6204 Wide Format Solution... -
Page 157: Scan Start
Manual Start You must press the <Start> button to initiate scanning after the document prefeeds. Select [Close] on the [Setup] menu to return to the [Menu] screen. Xerox 6204 Wide Format Solution Scan Start... - Page 158 6 System Setup Xerox 6204 Wide Format Solution...
-
Page 159: System Administration
7 System Administration The System Administration features of the Xerox 6204 Wide Format Solution with FreeFlow Accxes Print Server allow the administrator to enable or disable job accounting, change the system administration password, output diagnostic prints from images stored on the controller, and enable or disable the image recall feature. The contents of this chapter appear below. -
Page 160: System Administration Overview
7 System Administration System Administration Overview Although most of the features of the Xerox 6204 Wide Format Solution with FreeFlow Accxes Print Server can be selected from the [Menu] screen, which is accessible to all users, the System Administration features must be accessed by logging in to the system. -
Page 161: Exiting The System Administration Mode
The system will exit System Administration mode and the default screen will display. Note: The default screen may be changed from the [Menu] screen by selecting [Setup] > [Control Panel] > [Default Screen], and selecting one of the available options. Xerox 6204 Wide Format Solution System Administration Overview... -
Page 162: System Administration Features
You can select and print one or more of three diagnostic test prints. Refer to "Diagnostic Prints" (P.157). Image Recall You can enable or disable the [Copy from Memory] feature. Refer to "Image Recall" (P.159). Xerox 6204 Wide Format Solution... -
Page 163: Job Accounting
User ID, Account ID, and Printer ID. It then collects and tallies the stored data from the networked devices. For the Xerox 6204 Wide Format Solution with FreeFlow Accxes Print Server, Job Accounting can be set up from both the control panel and the Web Printer Manager Tool. -
Page 164: Change Password
Select the [Confirm Password] field. The [Confirm Password] field will highlight and accept a numeric entry. Enter the password in the [Confirm Password [field], and then press the [Save] button. The new password will take effect immediately. <Log In/Out> Xerox 6204 Wide Format Solution... -
Page 165: Diagnostic Prints
[System Administration] menu. Select [Diagnostic Prints]. The [Diagnostic Prints] screen will display. Select the appropriate option: Basic Pattern Print Quality Pattern IIT Chart Select [Print]. The selected item will print. Xerox 6204 Wide Format Solution Diagnostic Prints <Log In/Out>... -
Page 166: Shutdown
Select the appropriate option: Shutdown Selecting [Shutdown] safely powers down the system (Copier/Printer and controller). Restart Selecting [Restart] reboots the system. Use this selection if there appear to be problems with queued jobs not printing. <Log In/Out> Xerox 6204 Wide Format Solution... -
Page 167: Image Recall
[System Administration] menu. Select [Image Recall]. The [Image Recall] screen will display. Select the appropriate option: Disabled Users cannot reprint copy jobs. Enabled Users can recall and reprint copy jobs. Select [Save]. Xerox 6204 Wide Format Solution Image Recall <Log In/Out>... - Page 168 7 System Administration Xerox 6204 Wide Format Solution...
-
Page 169: Machine Status
This chapter describes the features for checking the machine status. Overview of Machine Status ...162 Printer Status ...163 Media Status ...164 Configuration Prints ...165 Printer Settings Report...167 Show Current Print Job...171 System Description ...173 Recent Faults...174 Xerox 6204 Wide Format Solution... -
Page 170: Overview Of Machine Status
Refer to "Show Current Print Job" (P.171). System Description The System Description option provides information about the model identity and firmware version for each component installed on the Xerox 6204 Wide Format Solution with Accxes FreeFlow Print Server. Refer to "System Description" (P.173). Recent Faults This feature lists the fault codes and copy count of the 20 most recent faults. -
Page 171: Printer Status
If a print job is in process when [Offline] is selected, the job will print to completion. Note: You must use the Print Management Tool to view the print queue . Xerox 6204 Wide Format Solution Overview of Machine Status <Machine Status>... -
Page 172: Media Status
The status is displayed in three levels: Full, Low, and No Media. Low appears when the amount of remaining media is about one-fifth of a roll. Select [Close] to return to the [Machine Status] menu. <Machine Status> Xerox 6204 Wide Format Solution... -
Page 173: Configuration Prints
Prints a one page Printer Settings report. [Pen Palette] Prints a multi-page Pen Palette Settings report. Select [Print] to obtain the selected report(s), or [Cancel] to return to the [Machine Status] menu. Xerox 6204 Wide Format Solution Overview of Machine Status <Machine Status>... -
Page 174: Configuration Print Samples
8 Machine Status Configuration Print Samples Printer Configuration Report Xerox 6204 Wide Format Solution... -
Page 175: Printer Settings Report
Overview of Machine Status Printer Settings Report Xerox 6204 Wide Format Solution... - Page 176 8 Machine Status Pen Palette Report Xerox 6204 Wide Format Solution...
- Page 177 Overview of Machine Status Adobe PostScript Configuration Report Xerox 6204 Wide Format Solution...
-
Page 178: Billing Meters
Reports the total length of media printed until now in feet or meters, depending on the installation location. Serial Number The machine serial number is displayed. Select [Close] to return to the [Machine Status] menu. <Machine Status> Xerox 6204 Wide Format Solution... -
Page 179: Show Current Print Job
The page that is currently printing. Data Format The name of the data format will display, for example, HP-GL, PDF, TIFF, etc. [Close] Closes the screen and returns you to the [Machine Status] menu. Xerox 6204 Wide Format Solution Overview of Machine Status <Machine Status>... - Page 180 [Delete All] Select [Delete All] to delete all jobs stored in memory. Select [OK] on the [Print - Delete All] dialogue to confirm the choice. Select [Close] to return to the [Machine Status] menu. Xerox 6204 Wide Format Solution...
-
Page 181: System Description
System Description The System Description option provides information about the model identity and firmware version for each component installed on the Xerox 6204 Wide Format Solution with Accxes FreeFlow Print Server. Procedure Press the <Machine Status> button. The [Machine Status] menu will display. -
Page 182: Recent Faults
This is the copy count at the time the fault occurred. Select the up and down arrows to display the next or previous screens and view additional fault information. Select [Close] to return to the [Machine Status] menu. <Machine Status> Xerox 6204 Wide Format Solution... -
Page 183: Maintenance
9 Maintenance This chapter describes how to replace consumables and clean the machine. Replacing Consumables ...176 Cleaning the Machine ...181 Xerox 6204 Wide Format Solution... -
Page 184: Replacing Consumables
Important • The use of consumables not recommended by Xerox may impair image quality and machine performance. Use only consumables recommended by Xerox for the machine. -
Page 185: Loading Toner
2) Lower the left side of the toner cartridge, and push the toner cartridge into the toner supply port until it clicks. Replacing Consumables Number of pages About 500 pages oner Supply Port oner Supply Port Notch Xerox 6204 Wide Format Solution... - Page 186 Important • Toner may adhere to the bottom surface of the toner bottle. Be careful not to get toner on your hands or clothes. • Follow the instructions provided for disposal. Close the back cover. Xerox 6204 Wide Format Solution...
-
Page 187: Replacing The Waste Toner Bottle
Cover the hole of the removed waste toner bottle with the provided cap. Important • Follow the instructions provided for disposal of the waste toner bottle. Replacing Consumables Number of pages About 500 pages pper nit Releasing Lever Xerox 6204 Wide Format Solution... - Page 188 Close the upper unit. Note: If you do not attach the waste toner bottle correctly, a message will appear on the touch screen when you close the upper unit, and the machine will not come to Ready. Xerox 6204 Wide Format Solution...
-
Page 189: Cleaning The Machine
If the dirt is difficult to remove, try gently wiping with a firmly wrung out soft cloth moistened with a small amount of Xerox lens/ glass cleaner. Then, wipe again with a dry cloth. Important • Do not use cleaning agents other than water, a neutral detergent, or Xerox lens/glass cleaner. - Page 190 9 Maintenance Replace the document handler. Power the machine on, as directed in "Powering the System On/Off" (P.28). Xerox 6204 Wide Format Solution...
-
Page 191: 10 Problem Solving
This chapter describes problems that may occur with the machine and the recommended solutions. Troubleshooting ...184 General Problems ...185 Problems during Copying...186 Problems during Scanning...191 Problems during Printing...193 Error Messages...196 Document Jams ...197 Paper Jams...199 Xerox 6204 Wide Format Solution... -
Page 192: Troubleshooting
Trouble during scanning Trouble during printing If the machine does not work properly even after performing the troubleshooting recommended above, then contact your Xerox Customer Support Center. Action Refer to "General Problems" (P.185). Action Refer to "General Problems" (P.185). Action Refer to "General Problems" (P.185). -
Page 193: General Problems
Power is not switched On. Touch screen is dark. A message is displayed. Xerox 6204 Wide Format Solution Check Is the circuit breaker (main Turn on the circuit breaker and then the power switch) or the power power switch. switch of the machine off? Refer to "Powering the System On/Off"... -
Page 194: Problems During Copying
182mm/7inches wide by 210mm/8.25 inches long. Some thick originals may require the removal of the front return guides. Refer to "Usable Originals" (P.33). Is the original curled? Flatten out the curl and insert the original again. Remedy Xerox 6204 Wide Format Solution... - Page 195 The copy has black lines. The copy is too dark. The copies are too light. Xerox 6204 Wide Format Solution Check Is the correct type of media Load a correct type of media. used? Refer to "Media Type" (P.35). Is the media loaded Correctly load the media.
- Page 196 Refer to "Loading Media" (P.37). Dirt on the paper feed path. Copy a few pages. Internal components are Contact your Xerox Customer Support dirty. Center. Internal components are Contact your Xerox Customer Support dirty. Center. Remedy Xerox 6204 Wide Format Solution...
- Page 197 The paper is dirtied with toner. The entire paper area is printed black. Xerox 6204 Wide Format Solution Check Is the scanning area dirty? Clean the platen glass. Refer to "Cleaning the Machine" (P.181). Internal components are Contact your Xerox Customer Support dirty.
- Page 198 Is the original pasted Adjust the copy density and original type together or folded in? settings. Refer to "Copy Density" (P.66), "Original Is the original made of Type" (P.65). highly transparent material? Remedy Xerox 6204 Wide Format Solution...
-
Page 199: Problems During Scanning
The scanned image is too dark. The scanned image is too light. Xerox 6204 Wide Format Solution Check Is the original too small? The minimum size original that can be fed is approximately 182mm/7inches wide by 210mm/8.25 inches long. - Page 200 Is the scan resolution set Select a higher resolution. too low? Refer to "Scan Resolution" (P.89). Did you select the correct Select the correct rendering setting. rendering setting? Refer to "Rendering" (P.90). Remedy Xerox 6204 Wide Format Solution...
-
Page 201: Problems During Printing
(Bypass). Media often jams or is wrinkled. The prints are too light. Xerox 6204 Wide Format Solution Check Is the machine’s circuit Turn on the circuit breaker (main power breaker or power switch off? switch) and the power switch. - Page 202 Print a few pages. Internal components are Contact your Xerox Customer Support dirty. Center. Internal components are Contact your Xerox Customer Support dirty. Center. Internal components are Contact your Xerox Customer Support dirty. Center. Remedy Xerox 6204 Wide Format Solution...
- Page 203 Nothing is printed. Part of the image is "lost" on the edge of paper. Xerox 6204 Wide Format Solution Check Is the correct type of media Load a correct type of media. being used? Refer to "Loading Media" (P.37).
-
Page 204: Error Messages
If the message persists, record the displayed contents for [(XXX-XXX)]. Switch off the machine immediately, wait for the touch screen to go dark, and contact your Xerox Customer Support Center. [Cause] An internal error occurred. [Remedy] Select the [Restart] button on the display. -
Page 205: Document Jams
Clear the jammed original according to the instructions displayed, and then reload the original. Pull the document handler toward you until it stops, and lift up to remove it. Remove the jammed original. Replace the document handler. Xerox 6204 Wide Format Solution Document Jams... - Page 206 10 Problem Solving Confirm that the original is not torn, folded, or riginal Guide wrinkled, and load the original again according to the message on the touch screen. Xerox 6204 Wide Format Solution...
-
Page 207: Paper Jams
Paper Jams in Roll 1 or Roll 2 (P.201) Paper Jams in Manual Feed Tray (Bypass) (P.203) Paper Jams in Upper Unit (P.204) Paper Jams in Fuser Unit (P.206) Xerox 6204 Wide Format Solution Roll 1 Roll 1 back, Paper Jams Roll 2. - Page 208 WARNING: If a sheet of paper is wrapped around the heat roller, or the jammed paper is difficult or impossible to see, do not try to remove it yourself. Doing so may cause injuries or burns. Switch off the machine immediately and contact your Xerox Customer Support Center.
-
Page 209: Paper Jams In Roll 1 Or Roll 2
Important • Gently remove the paper, taking care not to tear it. • If paper is torn, check for any torn pieces of paper inside the machine. Xerox 6204 Wide Format Solution Roll 1. Roll 1 back Paper Jams Roll 2. - Page 210 Gently slide Roll 1 or Roll 2 until it is firmly in position. Close the front cover. tear it. paper inside the machine. not attempt to rewind the roll. to "Loading Media" (P.37). tear it. paper inside the machine. Xerox 6204 Wide Format Solution...
-
Page 211: Paper Jams In Manual Feed Tray (Bypass)
The following describes how to clear paper jams that occur in the Manual Feed Tray (Bypass). Pull the paper toward you gently, and remove it. Note: Be careful not to tear the sheet. Xerox 6204 Wide Format Solution Paper Jams... -
Page 212: Paper Jams In Upper Unit
Remove the jammed paper through the opening. • Gently remove the paper, taking care not to • If the paper is torn, make sure to remove all tear it. torn paper from the machine. pper nit Releasing Lever Xerox 6204 Wide Format Solution... - Page 213 The following message is displayed. Lift up the green knob (lever [A]), and remove the jammed paper from the paper feed path. Lower the knob (lever [A]) to its original position. Close the upper unit. Xerox 6204 Wide Format Solution...
-
Page 214: Paper Jams In Fuser Unit
• If the paper is torn, make sure to remove all When the jammed paper is not visible from the opening, open the manual feed tray and the fuser cover. tear it. torn paper from the machine. pper nit Releasing Lever Xerox 6204 Wide Format Solution... - Page 215 • If the paper is torn, make sure to remove all torn paper from the machine. Lower the baffle. Close the fuser cover and the manual feed tray. Close the upper unit. Xerox 6204 Wide Format Solution Paper Jams...
- Page 216 10 Problem Solving Xerox 6204 Wide Format Solution...
-
Page 217: 11 Appendix
11 Appendix This chapter contains descriptions about the following: Space Requirements ...210 Specifications...211 Options...217 Printer Drivers/Client Tools ...217 Cautions and Limitations...218 Xerox 6204 Wide Format Solution... -
Page 218: Space Requirements
11 Appendix Space Requirements The Xerox 6204 Wide Format Solution with FreeFlow Access Print Server occupies a minimum of 52.6 square feet (4.89m inches (457mm) clearance from its rear vents to the wall. The required clearance from the floor to the nearest overhead obstruction within the floor space area is (2135mm). -
Page 219: Specifications
Specifications This section lists the Xerox 6204 Wide Format Solution specifications. In the interest of product development, product specifications and external appearance are subject to change without prior notice. Xerox 6204 Wide Format Solution Specifications Type Recording method Development method... - Page 220 Minimum length is 11" (279.4 mm). Important • We recommend that you use Xerox media to achieve the best results. Other media may not perform as well, depending on the printing conditions.
- Page 221 Continuous copy pages Fast copy time Copy reduction/ enlargement ratios Xerox 6204 Wide Format Solution 23 lbs. (10.4kg) Power consumption when circuit breaker is off:0 W Power consumption when circuit breaker is on:1.5 W or less 1440 BTU/h (Standby), and 5330 BTU/h (Running)
- Page 222 Important • The performance may be reduced depending on the paper type used. 55 seconds or less (with A0 size original/1,434KB data) Standard:1GB Ethernet (10Base-T /100Base-TX/1000Base-TX) lpr, lpd, TCP/IP (Ports 2000 & 9100), TFTP (put) Xerox 6204 Wide Format Solution...
- Page 223 70.7% JIS B3 61.3% 50.0% 35.3% 25.0% Xerox 6204 Wide Format Solution Standard: HP-GL (in conformity with HP75XX series) HP-GL2/RTL (in conformity with HP Design Jet 750C) TIFF (Version 6.0) CALS (Type-1 and Type-2) CGM (Version 2) JPEG (JFIF Version 1.02)
- Page 224 Copy Size 100.0% 70.7% 50.0% 35.4% 141.4% 100.0% 70.7% 50.0% 200.0% 141.4% 100.0% 70.7% 282.8% 200.0% 141.4% 100.0% 400.0% 282.8% 200.0% 141.4% 100.0% 25.0% 32.4% 50.0% 64.7% 25.0% 33.3% 50.0% 66.7% 25.0% 35.4% 50.0% 70.7% Xerox 6204 Wide Format Solution...
-
Page 225: Options
FreeFlow Accxes Account Management Tool Windows print driver (GDI) AutoCAD print driver (HDI) Adobe PostScript print driver Xerox 6204 Wide Format Solution Table 10 Notes Receives originals that are delivered to the rear of the machine. Adds a second roll drawer to the machine. -
Page 226: Cautions And Limitations
Chapter 1 of this User Guide. Notes and Restrictions on Use of the Machine Installing and Moving the Machine Contact your Xerox Customer Support Center if you are considering relocating the machine. Do not block the ventilation opening of the machine’s exhaust fan.
Need help?
Do you have a question about the 6204 and is the answer not in the manual?
Questions and answers