AMX Optima AVS-OP-1616-110 Instruction Manual
Distribution matrix
Hide thumbs
Also See for Optima AVS-OP-1616-110:
- Product view (1 page) ,
- Configuration manual (4 pages)
Table of Contents
Advertisement
Quick Links
Download this manual
See also:
Configuration Manual
Advertisement
Table of Contents

Related Manuals for AMX Optima AVS-OP-1616-110


Summary of Contents for AMX Optima AVS-OP-1616-110
- Page 1 Instruction Manual Optima Distribution Matrix M a t r i x S w i t c h e r s R e l e a s e : 0 5 / 2 7 / 2 0 0 8...
- Page 2 Products repaired under this policy will carry a ninety (90) day warranty on material and labor. • AMX will notify the AMX Authorized Partner with the cost of repair, if cost is greater than the Standard Repair Fee, within five (5) days of receipt.
- Page 3 Export Control laws prohibit the export of certain technical data and software to certain territories. No software from this Site may be downloaded or exported (i) into (or to a national or resident of) Cuba, Iraq, Libya, North Korea, Iran, Syria, or any other coun- try to which the United States has embargoed goods;...
-
Page 4: Table Of Contents
Discovering a System ......................44 Navigating the Interface......................45 Modifying a Configuration File ....................46 Loading a Configuration File ....................50 Appendix B – Advanced Configuration: Modifying Virtual Matrices ....51 Overview ..........................51 Joining Virtual Matrices......................52 Creating Virtual Matrix Breakaways ..................53 Creating a New Virtual Matrix.................... - Page 5 Appendix C – Paralleling Inputs................ 61 Cabling Parallel Inputs ......................61 Controlling Paralleled Inputs ....................62 Appendix D – Adding or Replacing I/O Boards ..........63 Removing I/O Boards......................64 Adding I/O Boards......................... 67 Updating the System Configuration ..................70 Appendix E –...
- Page 6 8x8 DVI Input/Output Board Specifications ................ 114 Attaching Cables ......................... 116 Special Information for the 8x8 DVI Board................117 The EDID Programmer (for use with 8x8 DVI board only) ........... 119 ® S/PDIF & TosLink Digital Audio Input/Output Boards ........125 S/PDIF Digital Audio Input/Output Boards Specifications...........
- Page 7 Contents Optima Instruction Manual...
-
Page 8: Esd Warning
Anyone performing field maintenance on AMX AutoPatch equipment should use an appropriate ESD field service kit complete with at least a dissipative work mat with a ground cord and a UL listed adjustable wrist strap with another ground cord. These items should not be manufactured locally, since they are generally composed of highly resistive conductive materials to safely drain static charges, without increasing an electrocution risk in the event of an accident. -
Page 9: Important Safety Information & Instructions
There are no user serviceable parts inside an AMX AutoPatch product; service should only be done by qualified personnel. If you see smoke or smell a strange odor coming from your AMX AutoPatch product, turn it off immediately and call technical support. -
Page 10: Information Et Directives De Sécurité Importantes
Placez uniquement des fusibles de calibre exact dans les boîtiers. Veillez à ce que la prise de courant soit proche de l’appareil et facile d’accès. Veillez à ce que votre appareil AMX AutoPatch soit installé sur une surface stable ou qu’il y soit fermement maintenu. -
Page 11: Notices
Federal Communication Commission Radio Frequency Interference Statement: “This equipment has been tested and found to comply with the limits for a Class A digital device, pursuant to Part 15 of the FCC Rules. These limits are designed to provide reasonable protection against harmful interference when the equipment is operated in a commercial environment. - Page 12 Other products mentioned herein may be the trademarks of their respective owners. Warnings & Cautions This manual uses the following conventions and icons to draw attention to actions or conditions that could potentially cause problems with equipment or lead to personal risk.
- Page 13 Notices Optima Instruction Manual...
-
Page 14: Overview & General Specifications
Pre-configured systems will also contain boards from these tables. 500 MHz Video I/O boards are not listed in the tables, since they are not sold individually. 500 MHz Video I/O boards are available only in pre-configured (Slam Dunk) systems in several configuration sizes with or without stereo audio (see page 101). - Page 15 SD-SDI (BNC Connectors) FG1046-491 HD-SDI FG1046-590 (BNC Connectors) DVI* FG1046-479 (DVI-I Connectors) FG1046-659 * These boards are not HDCP compliant at this time. Optima Audio I/O Boards & Sales # Signal Configuration Sales # FG1046-539 FG1046-494 16x16 FG1046-533 Stereo Audio...
-
Page 16: Product Notes
SA1046-310 Product Notes An Optima Distribution Matrix can stand alone or be linked as part of a larger system, including any other AMX AutoPatch products that are XNNet compatible. The Optima is available in a variety of input to output configuration sizes and can contain audio, video, and data boards in the same enclosure. -
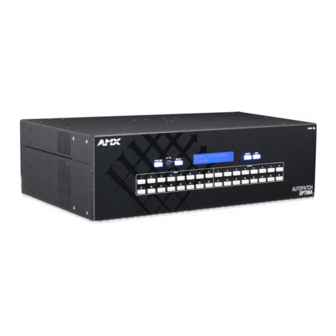
Page 17: Front View
Supports AMX AutoPatch’s simple BCS serial control protocol Supports third-party controllers * BCS is sent as ASCII characters through the RS-232 port. For information on BCS commands, see the BCS Protocol Instruction Manual on the AMX AutoPatch CD or at www.amx.com. -
Page 18: Rear View
Overview & General Specifications Rear View The enclosure’s appearance, as viewed from the rear (FIG. 1), will vary depending on the configuration and signal types. Expansion slots CPU/Control board Serial number Input connectors Output connectors Power receptacle I/O boards Expansion slots... - Page 19 Maximum power specifications are on the power receptacle. The power receptacle will accept all major international standard power sources. (Standard US power cords are provided for installations within the US.) The fuse is internal and is not field serviceable. If you believe the fuse needs to be replaced, contact technical support (see page 39).
- Page 20 Input and output connectors are the attachment points for source and destination devices that connect to the system. Viewed from the rear of the enclosure, the inputs (sources) are on the left side of each board, and the outputs (destinations) are on the right side of the board. BNC connectors are color coded; the white connectors are inputs and the black connectors are outputs.
-
Page 21: Optima Specifications
Weight Approximately 12 lb. (5.44 kg) per loaded enclosure * The fuse is internal and is not field serviceable. If you believe the fuse needs to be replaced, contact technical support (see page 39). For individual board information and specifications, see the specific board chapter in this manual. -
Page 22: Configuration & Control
Configuration Information A copy of the custom configuration file is provided on the AMX AutoPatch CD that is shipped with each system. The configuration software, XNConnect, is provided on the CD and can be used to further customize the configuration file (see “Appendix A – Managing Configuration Files” on page 41). - Page 23 BCS commands, see the BCS Protocol Instruction Manual on the AMX AutoPatch CD or at www.amx.com. Third-Party Controllers A third-party controller can also be attached to an Optima enclosure. If using a third-party controller, see the controller documentation for operating instructions. Optima Instruction Manual...
-
Page 24: Installation & Setup
Power should come from a building branch circuit. We recommend using a dedicated line for the system’s power. Use a minimum breaker current rating of 15 A for 110 V or 30 A for 230 V. To avoid an overload, note the power consumption rating of all the equipment connected to the circuit breaker before applying power. -
Page 25: Unpacking
AutoPatch Optima Connector Guide For orders comprising multiple enclosures, the shipping boxes are marked as “Box __ of __,” where the first blank is the box number and the second blank is the total number of boxes in the shipment. Unpacking Tips Before fully unpacking the enclosure(s), inspect the shipping box(es) for any signs of damage. -
Page 26: Rack Installation & System Setup
Write the system’s serial number in an easily accessible location before installing the Optima in a rack. The system’s serial number is located in two places on the enclosure; on the left rear and on the left side of the enclosure (near the power receptacle). - Page 27 Startup” on page 34). We recommend using a surge protector and/or an AC line conditioner. Execute a test switch to ensure the system is working properly (see “Executing a Test Switch” on page 37). When the test switch works correctly, attach the remaining source and destination devices (refer to the “AutoPatch Optima Connector Guide”...
-
Page 28: Linking Enclosures
To install an enclosure in a rack: Align the holes on one of the rack ears with the empty holes on the side of the enclosure (FIG. 5); insert and tighten each of the four screws provided. - Page 29 (see page 39) for important information not included here. An Optima can be linked directly to another Optima, to a Precis 500 MHz, or to an Epica DG enclosure with the appropriate cable because they all use Ethernet 10Base-T (10/100) connectors for linking (see page 24).
- Page 30 Green LED off – speed status is 10 Mbps Amber LED on – link status is active Note: The Comm (Communication Status) indicator at the top of the CPU board indicates if there is Ethernet traffic on the system. Optima Instruction Manual...
- Page 31 Installation & Setup Linking an Optima to an Optima, a Precis 500 MHz, or an Epica DG An Optima can be directly linked to another Optima or to a Precis 500 MHz or to an Epica DG via the Ethernet ports.
- Page 32 Attach the other end of the RG-58 coax cable to the T-connector. If applicable – Attach additional enclosures with T-connectors and RG-58 coax cables. Add a 50-ohm termination connector to the open end of the T-connector on the last enclosure of the cable run.
- Page 33 Installation & Setup Linking More Than Two Enclosures Linking an Optima enclosure to multiple other types of enclosures (other than linking in a daisy chain off an enclosure with a 10Base-2 / BNC connector) requires a Multi-Port Switch and RJ-45 straight-through patch cables.
- Page 34 (see page 23). * Applies to Modula, 8Y-3000, Epica-128, and Epica-256 enclosures. ** The total length of all RG-58 coax cables between the Media Converter and the last enclosure in the daisy chain cannot exceed 500 ft. (150 m).
-
Page 35: Attaching External Controllers
APControl 3.0 software (for control and scheduling) runs on a PC connected to an Optima via the serial port (DB-9) port and is available on the AMX AutoPatch CD. APControl 3.0 has a setup wizard that discovers the system’s configuration information. - Page 36 FIG. 10 RS-232 null modem pin diagram, no hardware flow control Use a null modem cable that matches the pin diagram in FIG. 10 for RS-232 without hardware flow control. AMX AutoPatch equipment requires pins 2, 3, and 5 only.
- Page 37 Installation & Setup Plug one end of the null modem serial cable into the serial port on the enclosure (FIG. 11) FIG. 11 Attach null modem serial cable to serial port Plug the other end of the serial cable into the serial port on the serial controller/device.
- Page 38 AMX AutoPatch XNNet accessory devices include SBCs and Preset SBCs. The instructions below are for attaching a device to the Link A (XNNet) port, found on the CPU board (3 RU enclosures) or on the XNNet Expansion board (2 RU enclosures). For more information, see the individual device’s documentation.
-
Page 39: Attaching Inputs & Outputs
Input and output connectors are the attachment points for source and destination devices that connect to the system. Looking at the rear of the enclosure, the inputs (for sources) are on the left side of each board, and the outputs (for destinations) are on the right side of the board. - Page 40 Video Connectors The video BNC connectors are color coded; the white connectors are inputs and the black connectors are outputs. In addition, the first connector on each board has a colored band that designates the signal type of that board.
-
Page 41: Applying Power & Startup
Power should come from a building branch circuit. We strongly recommend using a dedicated line for the system’s power. Use a minimum breaker current rating of 15 A for 110 V or 30 A for 230 V. To avoid an overload, note the power consumption rating of all the equipment connected to the circuit breaker before applying power. - Page 42 After applying power and turning on the enclosure(s), the LED on the control panel illuminates and displays the menu screen. (See FIG. 14 and FIG. 15 for examples of control panel startup screens.) The system is ready for a test switch (see page 37).
-
Page 43: Serial Control Device Startup
Installation & Setup Serial Control Device Startup If you have not already done so, attach the serial control device to the enclosure (see page 28) and open the control program. ® NetLinx Compatible ® AMX AutoPatch Distribution Matrices are NetLinx compatible. -
Page 44: Executing A Test Switch
Executing a Test Switch Execute a test switch to verify the system is working properly before attaching all inputs and outputs. Aside from having signal cables attached, the system is ready to execute switches when it ships from the factory. - Page 45 HyperTerminal when the enclosure responds). When all of the entered characters appear in HyperTerminal, the command has been successfully executed. The following test switch routes Input 1 to Output 2 on Level 0 (or use the level indicated on your system’s “AutoPatch Optima Connector Guide”).
-
Page 46: Technical Support
AMX representative or technical support. Have your system’s serial number ready. The system’s serial number is normally located in two places on the enclosure; on the left rear and on the left side (near the power receptacle). - Page 47 Installation & Setup Optima Instruction Manual...
-
Page 48: Appendix A - Managing Configuration Files
Make a copy of the current file every time the file is modified. A copy of the configuration file (with an .xcl file extension) is found on the AMX AutoPatch CD shipped with each system. If you lose the AMX AutoPatch CD, either download XNConnect from the AMX website and see Discovering a System on page 44 or contact technical support (see page 39) with your system’s serial number for a replacement file. -
Page 49: Installing Xnconnect
Use this software only if you need to customize or change the configuration information from the original specification. Even if XNConnect is already on your PC, install the newest version that shipped on the same CD as the configuration file. We strongly recommend uninstalling the old version of XNConnect before installing a new version. -
Page 50: Opening A Configuration File
The default location is in the MyXCL folder on the AMX AutoPatch CD. Using Save As (under the File menu), make a duplicate copy of the file with a new name and save it to the PC. (We strongly recommend making a duplicate copy every time the file is modified.) The file is ready to be modified. -
Page 51: Discovering A System
Save the discovered system’s configuration file, make a duplicate copy with a new name, and save it to the PC. The new configuration file is ready to be modified. If changes are made, the new file must be loaded onto the system to implement the changes (see page 50). -
Page 52: Navigating The Interface
XNConnect displays configuration information in two panes. The graphics are located in the left pane, and the properties of the currently selected graphic are in the right pane. At the top of the left pane are two tabs, Hardware and Virtual Matrices, for accessing the Hardware and Virtual Matrix views (see below). -
Page 53: Modifying A Configuration File
In Optima systems, each matrix is a signal path. When you select a connector in the virtual matrix view, the properties box in the right pane indicates the signal and the signal path for the connector. If the signal has multiple signal paths (e.g., component signals), each of the signals will be displayed and each signal path will display an appended number. - Page 54 Enter Channel Name Default Channel Name Note: If a channel is in more than one VM (virtual matrix), you must repeat Step 4 for the channel in each of the VMs. Customize additional channels by repeating Steps 3 and 4.
- Page 55 Local presets are defined using XNConnect and can be executed using a control panel (local or remote) or using BCS commands as part of a macro in APControl 3.0 or APWeb or entered in a terminal emulation program. The process for creating local presets involves three dialog boxes that cover managing, naming, and modifying presets.
- Page 56 “Configure All Local Presets” option. 14. Using Save As (under the File menu), make a duplicate copy of the modified file with a new name and save it to the PC. (We strongly recommend making a duplicate copy every time the file is modified.)
-
Page 57: Loading A Configuration File
To load the modified configuration file from XNConnect to the Optima CPU: Using Save As (under the File menu), make a duplicate copy of the modified file with a new name and save it to the PC. (We strongly recommend making a duplicate copy every time the file is modified.) -
Page 58: Appendix B - Advanced Configuration: Modifying Virtual Matrices
A virtual channel is assigned to a physical connector or group of physical connectors. The signals in the virtual channels will be switched in unison (e.g., a Y signal and a c signal on a Y/c board are each assigned to a different connector but are switched in unison). A virtual channel can also be a subset of a signal on a single connector (e.g., the left channel of a stereo audio connector). -
Page 59: Joining Virtual Matrices
If one of the VMs to be joined is smaller than the other, the combined VM will only include the number of channels in the smaller VM. For example, if VM 1 is 8x8 and VM 2 is 16x16, the combined VM will include all of the channels of VM 1 and the first 8 input and 8 output channels of VM 2. -
Page 60: Creating Virtual Matrix Breakaways
The information in the dialog boxes for this section is based on the following scenario. The original system was configured to switch RGBHV and stereo signals together on Virtual Matrix 0, and now they need to be switched independently. - Page 61 10. Load the configuration file onto the system; see page 50. 11. Using Save As (under the File menu), make a duplicate copy of the modified file with a new name and save it to the PC. (We strongly recommend making a duplicate copy every time the file is modified.)
-
Page 62: Creating A New Virtual Matrix
When creating a VM to replace an existing one, delete the old VM or (if reuse is likely) change its number. Always exercise caution and make a backup copy before deleting any part of the existing file. - Page 63 The information in the dialog boxes for the following section is based on the following scenario. A dual- connector 20x20 standard video board in slots 3 and 4 is reconfigured to switch 10x10 Y/c by creating a new VM 2 that switches 10 channels of “Y” and 10 channels of “c” using the previous “composite”...
- Page 64 13. Select the first signal from the Available Signals list. 14. If applicable – If not using the entire set of connectors that are available for the signal, change the Starting Channel, Number of Channels to Create, and Available Connectors as necessary.
- Page 65 21. Load the configuring file onto the system; see page 50. 22. Using Save As (under the File menu), make a duplicate copy of the modified file with a new name and save it to the PC. (We strongly recommend making a duplicate copy every time the file is modified.)
-
Page 66: Grouping Pattern Examples
Video and audio breakaway signals can also be routed by using virtual matrices that are configured to do so. In the example below, when you switch Input 1 on VM 1, the Y/c signal is routed. When you switch Input 1 on VM 2, the stereo audio signal is routed. - Page 67 Video and audio breakaway signals can also be routed by using virtual matrices that are configured to do so. In the example below, when you switch Input 1 on VM 1, the RGBS signal is routed. When you switch Input 1 on VM 2, the stereo audio signal is routed.
-
Page 68: Appendix C - Paralleling Inputs
To parallel inputs between two boards: Fasten a T-connector to the source cable (FIG. 22). Fasten one end of a short signal cable, which is approximately 3.0 in. (7.6 cm) long, to the T-Connector and the other end to the input on the first board. -
Page 69: Controlling Paralleled Inputs
For a system where the paralleled boards are configured as Level 1 and 2, entering the commands below switches paralleled Input 2 to Output 3 on the first board (Level 1) and also switches paralleled Input 2 to Output 15 on the second board (Level 2). -
Page 70: Appendix D - Adding Or Replacing I/O Boards
The number of input and output signals an enclosure can switch is determined by the number and type of connectors on each board and by the number of boards. An Optima 2 RU holds up to four boards (or two double boards) while an Optima 3 RU holds up to six boards (or three double boards). -
Page 71: Removing I/O Boards
Removing I/O Boards To remove an Optima I/O board (or blank board plate): 1a: Remove the five screws indicated (four on top and one on the side). 1b: Remove the rack ear indicated (four screws). Stand the enclosure on this side for Steps 2 and 3. - Page 72 Appendix D – Adding or Replacing I/O Boards 3a: Carefully pull the CPU/board unit straight out of the enclosure frame. 3b: Pull up on the CPU board, wiggling slightly to loosen it from the board unit. Tip the board unit to the left for Step 4.
- Page 73 6a: Remove the screw(s) indicated. 6b: Remove the board(s) or the blank board plate(s). If removing a board, place the board in an ESD approved static shield bag and set aside. Double-connector boards will require removal of 2 screws FIG. 28 Remove screw(s) &...
-
Page 74: Adding I/O Boards
2b: Replace the side screw. 2c. Line up the connectors on the CPU unit with the gold card edges on the board unit and push the units together until they snap into place. Stand the CPU/board unit on its slide-key end for Step 3. - Page 75 Boards and board slots each require a spacer; dual-connector boards require two spacers. Boards will be parallel when spacers are placed correctly. Line up the edge of the CPU on the board guide and push the CPU/board unit until it snaps into place.
- Page 76 FIG. 34 Replace 5 screws & rack ear (4 screws) Important: If the slot was previously empty or if the board type has changed, the system’s configuration file must be updated before signals can be routed on the new board (see page 70).
-
Page 77: Updating The System Configuration
Appendix D – Adding or Replacing I/O Boards Updating the System Configuration The configuration file stored in the CPU may or may not need to be updated, depending on the type of board being installed. If an input or output board is replaced with the same type of board or if the system was configured for expansion, the configuration file will not need to be updated. - Page 78 For XNConnect versions prior to 2.4.0 – from the Configure menu, select Reboot All Devices. 10. Execute a test switch that includes a signal routed on the new board to ensure the system is working correctly. (Repeat for any additional new boards.) If the test switch does not execute correctly, contact technical support (see page 39).
- Page 79 Appendix D – Adding or Replacing I/O Boards Optima Instruction Manual...
-
Page 80: Appendix E - Replacing An Optima Power Supply
This appendix provides instructions for removing and installing an Optima Distribution Matrix power supply. This process can be done while the enclosure is in a rack. The 3 RU power supply instructions start below. The 2 RU power supply instructions start on page 81. - Page 81 (FIG. 37). FIG. 37 Remove front panel screws Lower the top edge of the front panel being careful not to pull or to put stress on the attached cables. Support the panel from below (FIG. 38). FIG. 38 Lower &...
- Page 82 If applicable – Carefully cut the tie straps on the enclosure’s cables to loosen the wires (FIG. 41, left). Unplug the enclosure’s AC wire harness from the AC connector on the power supply (FIG. 41, right). Note that the connector has a locking tab on the right. The AC cable remains attached to the enclosure.
- Page 83 FIG. 45 Slide power supply right 12. Carefully lift the power supply just high enough to avoid the bridge guides and slide it as far left as possible. 13. Slowly pull the left-hand side forward as you pull the power supply out from behind the Backplane.
- Page 84 Rest the power supply flat on the enclosure floor and butt against the angle bracket attached to the top cover of the enclosure. Line up the two visible tabs on the power supply mount to the right of the double-bridge guides on the floor of the enclosure (FIG. 47).
- Page 85 Place the ring terminal of the enclosure’s ground wire over the screwhole in the mount. Replace the single screw at the top of the power supply mount, securing the ground wire to the mount, and the power supply mount to the enclosure.
- Page 86 Caution: Carefully route the cables to keep them from being pinched under the front panel. 10. Push the front panel back into place, being careful to not strain the cables. Replace and tighten one screw each on the upper and lower edges of the front panel.
- Page 87 13. Unplug the AC power cord from the enclosure. 14. Replace and tighten all the remaining screws on the upper and lower edges of the front panel. 15. Push the enclosure back into the rack; replace and tighten the rack ear screws.
-
Page 88: Ru Enclosures - Removal & Installation
Loosen the rack ears from the rack, support the enclosure from below, and slide it forward far enough to reach the front panel screws. Remove the six screws on the upper and lower edges of the front panel (FIG. 55). - Page 89 Appendix E – Replacing an Optima Power Supply Lower the top edge of the front panel being careful not to pull or to put stress on the attached cables. Support the panel from below (FIG. 56). FIG. 56 Support front panel from below Unplug the front panel power indicator cable from the “STBY PWR SWITCH”...
- Page 90 If applicable – carefully cut the tie straps on the enclosure’s wiring harness to free the power supply’s cables. Unplug the enclosure’s AC cable from the power supply’s AC connector (FIG. 59). Note that the connector has a locking tab on the left. The other end of the AC cable remains attached to the enclosure.
- Page 91 Appendix E – Replacing an Optima Power Supply 10. Remove the single screw at the top of the power supply plate that secures the power supply in the enclosure and the ground wire to the mounting plate (FIG. 62). The other end of the ground wire remains attached to the enclosure.
- Page 92 Slide the power supply to the left until all three tabs on the power supply mount fit firmly into the double-bridge guides as far as they will go (FIG. 65). The screw holes in the power supply plate and the angle bracket must be lined up.
- Page 93 Place the ring terminal of the enclosure’s ground wire over the screwhole in the mount. Replace the single screw at the top of the power supply mount, securing the ground wire to the mount and the power supply mount to the enclosure.
- Page 94 Caution: Carefully route the cables to keep them from being pinched under the front panel. 10. Push the front panel back into place, being careful to not strain the cables. Replace and tighten one screw each on the upper and lower edges of the front panel.
-
Page 95: Troubleshooting
16. Plug in the external AC power cord. Troubleshooting If the status of the front panel power light or the LCD screen is not normal, check the following: Check the external AC power cord to be sure it is securely connected to both the enclosure and its source of power. -
Page 96: Standard Video & Hi-Z Sync Input/Output Boards
Standard video, Hi-Z sync, and HV Hi-Z sync (with a double-row of 8x8 connectors) I/O boards listed in the first table below that are ordered individually for custom systems Standard video, Hi-Z sync, or HV Hi-Z sync I/O boards listed in the first table below that are included when ordering numerous pre-configured systems... -
Page 97: Standard Video Input/Output Boards Specifications
Standard Video & Hi-Z Sync Input/Output Boards Signals may only be routed from the inputs on a board to the outputs on the same board because each board has its own switching matrix. FIG. 72 Standard video input/output boards (with a stereo audio board) -
Page 98: Hi-Z & Hv Hi-Z Sync Input/Output Boards Specifications
When attaching video input and output cables, refer to the sheet labeled “AutoPatch Optima Connector Guide” that shipped with the system. The sheet shows where to attach each cable on the rear of each enclosure. Follow the sheet exactly; the system was programmed at the factory to operate only as indicated on the sheet. - Page 99 Standard Video & Hi-Z Sync Input/Output Boards Optima Instruction Manual...
-
Page 100: S-Video Input/Output Boards
FG1046-446 16x16 FG1046-488 Signals may only be routed from the inputs on a board to the outputs on the same board because each board has its own switching matrix. FIG. 74 Optima S-Video I/O boards (shown with a stereo audio board and a Y/c board) S-Video Input/Output Boards Specifications Applies to I/O boards FG1046-446, FG1046-488. -
Page 101: Attaching Cables
3”) on a label located on the left side (near the power receptacle). The input connectors are on the left side of each Optima board, and the output connectors are on the right side. Input and output connectors are numbered separately. The number of S-Video connectors depends on the I/O configuration. -
Page 102: Y/C Input/Output Board
Configuration Board Sales # 8x8 (BNC) FG1046-476 Signals may only be routed from the inputs on a board to the outputs on the same board because each board has its own switching matrix. FIG. 77 Optima Y/c I/O boards Y/c Input/Output Boards Specifications Applies to I/O board FG1046-476. -
Page 103: Attaching Cables
When attaching video input and output cables, refer to the sheet labeled “AutoPatch Optima Connector Guide” that shipped with the system. The sheet shows where to attach each cable on the rear of each enclosure. Follow the sheet exactly; the system was programmed at the factory to operate only as indicated on the sheet. -
Page 104: Wideband Video (300 Mhz) Input/Output Boards
R, G, and B in an RGBHV signal. (Hi-Z sync boards or HV Hi-Z sync boards can be used in a wideband system to route horizontal or vertical sync signals.) Signals may only be routed from the inputs on a board to the outputs on the same board because each board has its own switching matrix. -
Page 105: Wideband Video (300 Mhz) Input/Output Boards Specifications
Input Impedance 75 ohms Output Level (max.) ± 1.5 V Output Level (max.), FG1046-410 only ± 1.2 V Output Impedance 75 ohms Connector Type AMX reserves the right to modify its products and their specifications without notice. Optima Instruction Manual... -
Page 106: Attaching Cables
(black BNCs) are on the right side. Input and output connectors are numbered separately. The number of BNC connectors depends on the wideband video I/O configuration. The example in FIG. 80 shows a BNC cable attached to Output 9 on each board to route the R, Gs, and B components of an RGsB signal. - Page 107 Wideband Video (300 MHz) Input/Output Boards Optima Instruction Manual...
-
Page 108: 500 Mhz Video Input/Output Boards
For information on the stereo audio boards in systems which route stereo audio signals, see the “Stereo Audio Input/Output Boards” chapter. Signals may only be routed from the inputs on a board to the outputs on the same board because each board has its own switching matrix. -
Page 109: 500 Mhz Video Input/Output Boards Specifications
BNC connectors depends on the 500 MHz video I/O configuration. The example in FIG. 82 shows a BNC cable attached to Output 7 on each board to route the R, G, and B components of an RGBHV signal. -
Page 110: Rgbhv/Hd-15 Input/Output Boards
FG1046-536 15x15 FG1046-593 Signals may only be routed from the inputs on a board to the outputs on the same board because each board has its own switching matrix. FIG. 83 8x4 RGBHV/HD-15 I/O board (shown with an 8x8 digital audio board) -
Page 111: Rgbhv/Hd-15 Input/Output Boards Specifications
Output Level max. (HV) +5.5 V Output Impedance (HV) 75 ohms HV Polarity Active high or low Output follows input polarity Connector Type HD-15 AMX reserves the right to modify its products and their specifications without notice. Optima Instruction Manual... -
Page 112: Attaching Cables
3”) on a label located on the left side (near the power receptacle). The input connectors are on the left side of each Optima board, and the output connectors are on the right side. Input and output connectors are numbered separately. The number of HD-15 connectors depends on the I/O configuration. - Page 113 RGBHV/HD-15 Input/Output Boards Optima Instruction Manual...
-
Page 114: Sd-Sdi & Hd-Sdi Digital Video Input/Output Boards
Two HD-SDI boards in the same enclosure can be used to route dual link HD-SDI* if they were ordered to do so and are wired in conjunction with each other. The configuration file is set up at the factory with a virtual matrix that routes the first input on the first board simultaneously with the first input on the second board, the second input with the second input, etc. -
Page 115: Sd-Sdi Input/Output Boards Specifications
Connector Type * Data not available for 177 Mbps and 540 Mbps bit rates. ** Data not available for SMPTE 372M dual link format (using two I/O boards wired in conjunction for routing dual link HD-SDI signals). AMX reserves the right to modify its products and their specifications without notice. -
Page 116: Attaching Cables
When attaching digital video input and output cables, refer to the sheet labeled “AutoPatch Optima Connector Guide” that shipped with the system. The sheet shows where to attach each cable on the rear of each enclosure. Follow the sheet exactly; the system was programmed at the factory to operate only as indicated on the sheet. - Page 117 SD-SDI & HD-SDI Input/Output Boards Optima Instruction Manual...
-
Page 118: Dvi (Digital Visual Interface) Input/Output Boards
DDC (Display Data Channel) support with plug-and-play information provided by the Optima Distribution Matrix. Signals may only be routed from the inputs on a board to the outputs on the same board because each board has its own switching matrix. -
Page 119: 4X4 Dvi Input/Output Board Specifications
DVI Input/Output Boards 4x4 DVI Input/Output Board Specifications Applies to I/O board FG1046-479 (whether ordered for a custom system or as part of a pre-configured system). Specifications Parameter Value Data Rate (max.) 1.65 Gbps Pixel Clock (max.) 165 MHz Resolution Support... - Page 120 DVI Input/Output Boards EDID Resolutions Supported through Local DDC* for 4x4 DVI Board Standard and established timings are provided in the tables below. Standard Timings Standard Timing Resolution Refresh Rate Max.** Identification ID 1 1600x1200 included in the 75 Hz...
-
Page 121: 8X8 Dvi Input/Output Board Specifications
DVI Input/Output Boards 8x8 DVI Input/Output Board Specifications Applies to I/O board FG1046-659 (whether ordered for a custom system or as part of a pre-configured system). Specifications Parameter Value Data Rate (max.) 1.65 Gbps Pixel Clock (max.) 165 MHz Resolution Support... - Page 122 75 Hz 1152x870 75 Hz * Additional resolutions may be supported through local DDC. ** Some monitors may not support the maximum refresh rate. AMX reserves the right to modify its products and their specifications without notice. Optima Instruction Manual...
-
Page 123: Attaching Cables
3”) on a label located on the left side (near the power receptacle). The input connectors are on the left side of each DVI board, and the output connectors are on the right side. Input and output connectors are numbered separately. The number of DVI connectors depends on the I/O configuration. -
Page 124: Special Information For The 8X8 Dvi Board
(see page 39) for instructions on upgrading the Application Code. To determine the enclosure’s Application Code version: Before applying power to the system, attach a PC to the Optima’s serial port with a null modem serial cable (for full instructions, see page 28). - Page 125 Tip: If the device is attached to one of the second set of outputs (5 through 8), it may resolve the problem to attach the device to one of the first set of outputs (1 through 4), which have a higher output power rating.
-
Page 126: The Edid Programmer (For Use With 8X8 Dvi Board Only)
The protection condition responds to a cumulative power draw. For example, the protection condition may occur after Device 4 is attached because its current draw puts the cumulative power draw over the board’s limit, not because Device 4 itself is defective. It may be necessary to experiment with the order of reattaching devices. - Page 127 As long as the source signal being routed is supported by all of the display devices, the result would be a good image on each display. If the source signal being routed is not supported by a display device, the result would be either a badly distorted image or no image at all.
- Page 128 Ideally the EDID analysis will have been completed during installation specification. If this was not possible but all of the system’s devices are now available, the most effective way to proceed is to test if the DVI signal from each of the source devices can be routed through the Optima to each of the destination devices.
- Page 129 Tip: The Save button in the EDID Programmer can be used to save the EDID information as an .edid file, which can be opened as a text file (click the Open button) and edited or opened and written to an input (click the Write button).
- Page 130 Click the Query AutoPatch Device button to obtain the enclosure address from the Optima. Note: If your laptop has an HD-15 (VGA) port, see FIG. 93 on page 122 and the asterisk note immediately above it for information on connecting an HD-15 (VGA) port to a DVI port.
- Page 131 DVI Input/Output Boards Optima Instruction Manual...
-
Page 132: S/Pdif & Toslink ® Digital Audio Input/Output Boards
FG1046-455 4 S/PDIF plus 4 TosLink 8x8 (coaxial & optical combined) FG1046-461 Signals may only be routed from the inputs on a board to the outputs on the same board because each board has its own switching matrix. FIG. 96 S/PDIF and TosLink digital audio I/O boards (shown with a Y/c board) TosLink is a registered trademark of the Toshiba Corporation. -
Page 133: Toslink Digital Audio Input/Output Boards Specifications
For multi-enclosure systems, each enclosure will be numbered (e.g., “Chassis 1 of 3”) on a label located on the left side (near the power receptacle). Follow the sheet exactly; the system was programmed at the factory to operate only as indicated on the sheet. -
Page 134: Stereo Audio Input/Output Boards
FIG. 98 A stereo audio board (shown with two video boards) Signals may only be routed from the inputs on a board to the outputs on the same board because each board has its own switching matrix. Optima Instruction Manual... -
Page 135: Stereo Audio Input/Output Boards Specifications
3”) on a label located on the left side (near the power receptacle). The input connectors are on the left side of each stereo audio board, and the output connectors are on the right side. Input and output connectors are numbered separately. The number of stereo pair connectors depends on the configuration. - Page 136 FIG. 100 illustrates the options for wiring between the sources and the input connectors and between the output connectors and the destinations. More than one of these options can be used in the same system. For balanced and unbalanced wiring details, see FIG. 99.
-
Page 137: Adjusting Output Volume
(see the control panel’s instruction manual) or BCS commands. Inputs are set to unity gain at the factory and have a gain adjustment range of -10 dB to +10 dB. Caution: We strongly recommend that input gain adjustment be made only by a qualified installer or dealer. - Page 138 CL#I#VA^^^T Example Adjust the input gain of Input 4 to +10 dB on Level 2 (VM 2) by entering the following BCS command line: CL2I4VA100T Note: Alternative methods for adjusting input gain with BCS commands can be found in the BCS Protocol Instruction Manual.
- Page 139 Stereo Audio Input/Output Boards Optima Instruction Manual...
-
Page 140: Rgbhv+Stereo To Catpro Input/Output Boards
Board Sales # FG1046-581 FG1046-575 Signals may only be routed from the inputs on a board to the outputs on the same board because each board has its own switching matrix. FIG. 101 An 8x8 RGBHV+Stereo to CatPro I/O board (shown below an RGBHV/HD-15 board and a stereo audio board) -
Page 141: Rgbhv+Stereo To Catpro Boards Input/Output Boards Specifications
+8 dBu Audio Input Impedance 18 kohms * Signals displayed using a resolution of 1600x1200 at 60 Hz may exhibit slightly visible background noise in certain circumstances (particularly with LCD monitors). RGB Output Signal Level Range +0.75 V to -0.3 V typical (terminated, user adjustable (max.) -
Page 142: Attaching Cables & Wires
The sheet shows where to attach the cables and wires. Follow the sheet exactly; the system was programmed to operate only as indicated on the sheet. For multi-enclosure systems, each enclosure will be numbered (e.g., “Chassis 1 of 3”) on a label located on the left side (near the power receptacle). - Page 143 Source devices will require either balanced (differential) or unbalanced (single-ended) connections. Options for wiring between the sources and the input connectors are illustrated in FIG. 105. More than one of these options can be used in the same system. For balanced and unbalanced wiring details, see FIG. 104.
-
Page 144: System Setup & Requirements
To guarantee 1,000 feet (305 m) skew compensation, the inter-pair skew must equal <20 ns /100 m. The cables should be tested for skew which will determine whether the run has less than 62 ns skew and is within 1,000 feet (305 m). -
Page 145: Video Display Adjustment
The Source PC is connected to the HD-15 and stereo audio input connectors, which are routed to the RJ-45 output connectors. Adobe Acrobat Reader Adobe Acrobat Reader is required to view the test image .pdf file. It is a free software program available at www.adobe.com. Destination Monitor (or destination device) The Destination Monitor receives signals from the Source PC via the CatPro RX Module. - Page 146 A small screwdriver works well for turning and pressing the knob. The knob does not have a mechanical start or stop point. If the LED blinks when the knob is turned, the setting has reached its minimum or maximum adjustment point.
- Page 147 If necessary, restore the video factory default by adjusting the R, G, and B fully counterclockwise and restore unity gain by adjusting the audio six clicks left from “full on” (which is blinking); press the Adjust knob to save.
-
Page 148: Catpro Rgbhv+Stereo Rx Module
To adjust the volume without changing the skew settings: Press the Adjust knob until the LED turns white and then complete Steps 9 and 10 on page 140. Tip: For optimal results on flat panel LCDs, press the auto-adjust button on the panel after using the potentiometers and the Adjust knob. -
Page 149: Catpro Rgbhv+Stereo Rx Module Specifications
1.42 in. (3.61 cm) w/out feet Weight Approx. 1.5 lb. (0.68 kg) * When used in conjunction with an AMX AutoPatch Distribution Matrix, the overall cable length cannot exceed 1,000 feet (305 m). Specifications at 1000 ft. – RGBHV+Stereo Audio... -
Page 150: Attaching Cables & Wires (Rx Module)
Important: To guarantee 1,000 ft. (305 m) skew compensation, the inter-pair skew must equal <20 ns/ 100 m. Pre-installed cables should be tested for skew. Cables will work if they test less than 62 ns skew and are within 1,000 ft. (305 m). - Page 151 RGBHV+Stereo to CatPro Input/Output Boards Optima Instruction Manual...
-
Page 152: Apweb Expansion Board
AMX AutoPatch CD or at www.amx.com. In addition, the APWeb board functions as a Tunneling Access Point (TAP). As a TAP, it can be used to configure the system with XNConnect (the communication setting in XNConnect must be changed; see the Help file) and can also be used to control a system using any software that supports XNNet protocol over TCP/IP (e.g., third party controllers). -
Page 153: The Apweb Board
Note: The two small rectangular LEDs on the RJ-45 connector are not used on this product. Service Switch Below the TCP/IP connector is a Service switch that can be used to override system security if the username and password are lost. The APWeb Instruction Manual includes instructions for restoring the default username and password. -
Page 154: System Setup
The system setup example in FIG. 117 illustrates an Optima Distribution Matrix with an APWeb expansion board connected to a LAN. Both computers in the illustration have access to the Optima. If only one computer will be used, the APWeb board can be connected directly to the computer’s network card. -
Page 155: Adding An Apweb Board
APWeb Expansion Board Adding an APWeb Board If the APWeb board has been pre-installed, go directly to the instructions on page 149 for cabling and applying power to the enclosure. If the APWeb board was ordered to upgrade a system, complete the steps below and then see the instructions on page 149 for cabling and applying power. -
Page 156: Cabling & Applying Power
During the initial setup (see below), the APWeb board discovers the system. After the initial setup, it does not need to rediscover the system (even if power is cycled). If connecting to a PC, the PC’s settings may need to be changed (contact your Network Administrator). -
Page 157: Testing The Connection
The connection between the APWeb board and the LAN should be tested to complete the setup. The instructions below open the APWeb site to the user’s Home page, which has limited access to the APWeb server. If you need full access to configuration and security settings, see the APWeb Instruction Manual. - Page 158 (see page 39) for a firmware upgrade. * The serial port settings on the PC must be set at: baud – 9600, data bits – 8, stop bit – 1, parity – none, and flow control – none.
- Page 159 APWeb Expansion Board If APWeb opens, but the Home page displays a message that says, “There is no VM configuration information available”: Log on APWeb using the Network Administrator’s user name and password (found in the APWeb Instruction Manual). Click the Configuration link. Check to be sure that Force VM Discovery is turned on.
-
Page 160: Xnnet Expansion Board
If ordered with the system, the XNNet board is installed at the factory. For information on connecting a device to the XNNet board, see page 155. If the board is ordered as an upgrade for an existing system, it will need to be installed. For instructions on installing an expansion board, see page 154. -
Page 161: Adding An Xnnet Board
If the XNNet board was ordered separately as an upgrade to an existing system, complete the steps below and then see the instructions on page 155 for cabling the board and applying power to the system. To add an XNNet board to an enclosure: Unplug the enclosure’s power cord (in multi-enclosure systems, turn off all power switches and... -
Page 162: Connecting An Xnnet Device
Unplug the Link A (XNNet) connector from the Optima’s XNNet board. Loosen the screws on the Link A connector. Insert the two wires from the other end of the XNNet link cable into the Link A connector leaving the center slot empty (FIG. 123). - Page 163 XNNet Expansion Board Optima Instruction Manual...
- Page 164 It’s Your World - Take Control™ 3000 RESEARCH DRIVE, RICHARDSON, TX 75082 USA • 800.222.0193 • 469.624.8000 • 469-624-7153 fax • 800.932.6993 technical support • www.amx.com...
Need help?
Do you have a question about the Optima AVS-OP-1616-110 and is the answer not in the manual?
Questions and answers