Table of Contents
Advertisement
Quick Links
Advertisement
Table of Contents

Related Manuals for Bay-Tek Big Bass Wheel


Summary of Contents for Bay-Tek Big Bass Wheel
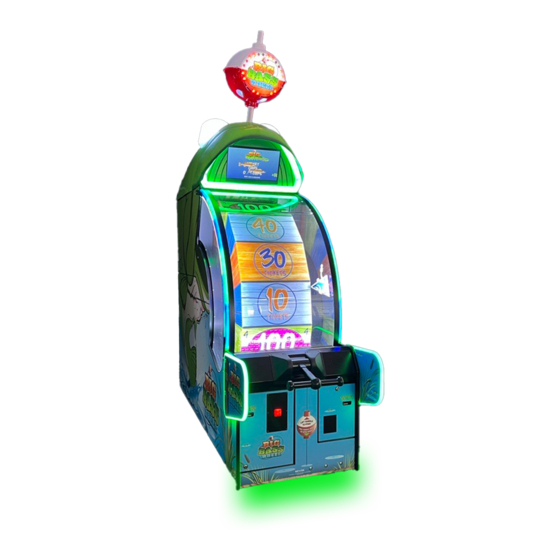
- Page 1 SERVICE MANUAL PLACE SERIAL NUMBER LABEL HERE...
-
Page 2: Factory Contact Information
FACTORY CONTACT INFORMATION BAY TEK ENTERTAINMENT Pulaski Industrial Park 1077 East Glenbrook Drive Pulaski, WI 54162 USA SIGN UP TO RECEIVE OUR E-MAILS! Stay up to date on the latest game information, new products launches, early notification of parts specials, updates of retro fit parts, software upgrades, best practices and more! Visit baytekent.com and enter your email to sign up! You can also register your new game at baytekent.com/register SALES... -
Page 3: Table Of Contents
TABLE OF CONTENTS FACTORY CONTACT INFORMATION ……………………..……..…. 2 TABLE OF CONTENTS ……..………………………..…….…………. 3 WELCOME TO BIG BASS WHEEL …………...……………………. 4 SAFETY PRECAUTIONS ………………………………..………. 4 - 5 GAME SPECIFICATIONS ………………………………………...……. 6 GAME SET UP ………………………………………………………. 7 - 11 HOW TO PLAY ……………………..…………………………………… 11 CARD SWIPE INSTALLATION ……………………………………….. -
Page 4: Welcome To Big Bass Wheel
WELCOME TO BIG BASS WHEEL Congratulations on your purchase! Please take a moment to read through this manual and be sure to contact us if you have any questions, or would like more information. Thank you for your purchase! Your business is important to us and we hope you enjoy this game as much as we do! Please inspect the game for any damaged, loose, or missing parts. - Page 5 SAFETY PRECAUTIONS Big Bass Wheel has three acrylic shields inside the game to protect against personal injury. These guards must remain on at all times. If game repair is required, service should be performed by authorized professional technicians only. These guards are clearly decaled and should remain on the game at all times.
-
Page 6: Game Specifications
GAME SPECIFICATIONS WEIGHT POWER REQUIREMENTS NET WEIGHT 1050 lbs 476 kg INPUT VOLTAGE 100 to 120 220 to 240 SHIP WEIGHT 1979 lbs 898 kg RANGE INPUT FREQUENCY GAME DIMENSIONS 60 Hz 50 Hz RANGE WIDTH 33.5 inches 104 cm DEPTH 99.25 inches 123 cm... -
Page 7: Game Set Up
BIG BASS WHEEL GAME SETUP The game will arrive on 2 pallets, one large pallet for the game, one small pallet for the head. Please inspect the pallets for shipping damage and report immediately to the freight company if any damage found. - Page 8 BIG BASS WHEEL GAME SETUP USING TWO PEOPLE, PLACE THE MONITOR UNIT ON TOP OF THE GAME CABINET. THERE ARE HOLES ON THE UNIT THAT WILL LINE UP WITH HOLES ON TOP OF THE GAME CABINET. PLUG IN THE MONITOR POWER CABLE AND VGA SIGNAAL CABLE.
- Page 9 BIG BASS WHEEL GAME SETUP USE THE BROWN 1 1/4" FLAT HEAD SCREWS TO SECURE THE FISH HEAD TO THE CABINET AT THE SIDES AND BACK. YOUR GAME WAS SHIPPED WITHOUT THE HANDLE ATTACHED: RETRIEVE THE HANDLE, REMOVE THE MOUNTING BOLT AND LOCKNUT FROM THE END OF THE HANDLE.
- Page 10 BIG BASS WHEEL GAME SETUP...
-
Page 11: How To Play
The game is now ready to play! Enter the menu to verify your location specific settings, and enjoy! HOW TO PLAY The Big Bass Wheel game consists of a T-handle mechanically linked to a solenoid mechanism at the center of a large wheel. A 19” monitor provides information to the player. -
Page 12: Card Swipe Installation
Card swipe cable may plug directly into the UCL connector at the coin door. Note: A separate power supply is recommended for Big Bass Wheel to supply 12 volts to the card system. If the game does not pay out the correct tickets, definitely install a separate power supply to power card system inside game. -
Page 13: Main Menu Functions
MAIN MENU FUNCTIONS The Menu and Menu Select buttons are located inside the front left door. Hold the MENU button down for 5 seconds to enter the main menu. Press MENU to scroll through the options, and MENU SELECT to change the settings. - Page 14 MAIN MENU FUNCTIONS Scroll through the options by pressing the “MENU” button. Change selection with the “SELECT” button. Scroll to “BACK” and press the “SELECT” button to go back to the main menu. Default settings are highlighted in yellow below. Ticket Pattern 22 different choices for the wheel ticket patterns.
- Page 15 TICKET PATTERNS The numbers listed at the bottom of each pattern are estimated ticket payouts per game based on customer feedback, and may vary depending on the skill of the individual player. Please use the numbers as a guide only.
- Page 16 TICKET PATTERNS Jackpot Sign Version Patterns Free Spin when Bonus is Hit 32-35 50-53 60-63 14-17 74-77 54-58 33-37 TICKETS/GAME TICKETS/GAME TICKETS/GAME TICKETS/GAME TICKETS/GAME TICKETS/GAME TICKETS/GAME The numbers listed at the bottom of each pattern are estimated ticket payouts per game based on customer feedback, and may vary depending on the skill of the individual player.
- Page 17 PRINTER MENU Early Big Bass Wheel games had an option to use a Custom brand printer instead of paying tickets. This option is no longer valid, because the printer manufacture has discontinued the printers and they are no longer available.
- Page 18 GAME STATISTICS MENU Total Games: Shows the total number of games played since the last reset. Total Tickets: Shows the total number of tickets dispensed since the last reset. Tickets Per Game: Shows the average amount of tickets dispensed per game since the last reset. Total Motor Assists: Shows the total number times the motor engaged due to spin not fast enough since the last reset.
- Page 19 GAME DIAGNOSTIC MENU Scroll through the options by pressing the “MENU” button. Change selection with the “SELECT” button. Scroll to “BACK” and press the “SELECT” button to go back to the main menu. Error: Refer to “Game Errors” section for further information. Software Versions: Displays the motherboard version followed by the I/O board version.
-
Page 20: Circuit Board Layout
CIRCUIT BOARD LAYOUT A5CEAU010 Speaker AACE1618 AACE1648 AACE1621 Signal In Door Open Speakers or Power in from Switches AACE1648 AACE1605 Used Power Supply Speakers A5CB9600 AACE1613 AACE1608 AACE1609 AACE1609 Audio Amplifier Menu Buttons Encoder Sensor Low Tickets Coin Mech AACE1611 or CE1610 Bill Acceptor on older... -
Page 21: Wiring Diagrams
WIRING DIAGRAM I/O Aux Board - Located inside front left door. Coin Door plate without mechs is part # A5PL1000 Coin Door with mechs is part # A5DR-xxx Blank plate for Coin Door hole is part # A5PL9998 AACB1900AMP I/O Aux Board UCL Connector Card Swipe system cable would be plugged into this connector. - Page 22 WIRING DIAGRAM AACE4102 To J2 Socket on Light Refresh Note: The small white Board in top of jumper cables are all game Blank plate for Bill From Part # AACE1619 Acceptor hole is CE4114 part # A5PL9097 CE1604 & Power From Supply Power...
- Page 23 WIRING DIAGRAM Older Game without the Light Refresh Kit White Wheel LED lighting Bobber AALS1701 AALS1701 AACE4252 Wheel AACB1905 Illumination AACE1623 AACE4251 AACE4112 AACE4112 AACE1620 AACE1623 Wheel Side Guard Side Guard Illumination Lights Lights AALS1700 AACE1625 (Part of power supply) AABD1055 Jumper Board AACE1634...
- Page 24 TOP OF GAME LIGHTING KIT WIRING AACE22506 AACE22506 Eye Light Board Eye Light Board AACE4105 AACE4107 Power to Light Board Power Supply Harness AACE4110 AACE4113 Outside LED Strip AACE4111 Inside LED Strip A5PS1013 Power Supply Power Supply Harness AACE4109 AACE4109 Colored Wheel Colored Wheel Side Lights...
-
Page 25: Speaker Wiring Options
SPEAKER WIRING OPTIONS A5CEAU010 Audio Jack from green socket on Motherboard to Audio Filter Speaker AACE8811 A5CE2300 Audio Filter AACE1605 AAMB10E-FHDP/BBW Motherboard AACB1900AMP Plug “input” I/O Aux Board cable into end of A5CEAU010 Current Production Version: The amplifier on the I/O Aux has been improved. As a result, on 5/8/18 a Audio Filter has been added to the Audio Jack. -
Page 26: Motherboard & Software Options
MOTHERBOARD / SOFTWARE OPTIONS Big Bass Wheels may have 6 different types of motherboards. As motherboards become obsolete and can not be purchased, different motherboards have had to be sourced to be backward compatible in most cases. There are 2 paths of software that work in the different motherboards. If the wrong version is used, there will be sound issues, or may not boot at all. -
Page 27: Motherboard Communication Options
MOTHERBOARD COMMUNICATION OPTIONS Production Change: The communication cable from motherboard to I/O Aux Board needed to be changed with the use of the MB10 & MB10E motherboards. As a result, on 12/27/17 a change was made to a different communication cable. Important! - the direction which this cable plugs into the motherboard is different between the 10 and 10E ! The motherboard will be damaged if this cable is plugged in incorrectly! Current Production Version:... -
Page 28: Game Errors
GAME ERRORS Door Open The I/O board is seeing one of the 5 doors switches being open. (Front left door, front right door, back door, side left door, & side right door) All 5 door switches are wired in series, so if one is open, it will show open. Cable CE1618 plugs into the yellow socket on the top of the I/O board. -
Page 29: Troubleshooting Guide
TROUBLESHOOTING GUIDE Troubleshooting Strategy Use common sense and a systematic method of troubleshooting to determine the exact problem, probable cause and remedy. Use the process of elimination to find the faulty component. Always check for the simple and obvious causes first such as unplugged, loose or broken wires and bad sensors, bent, pinched, stuck or jammed components. - Page 30 TROUBLESHOOTING GUIDE Problem Probable Cause Remedy Game does not coin up Card Swipe System Special Set “Game drive voltage threshold” to 2 volts. Instructions- Coin signal Game should have an audio wires are white and black wires. Refer to wiring doink sound from speakers when Pinched, broken, or diagram...
- Page 31 TROUBLESHOOTING GUIDE Troubleshooting Chart Problem Probable Cause Remedy Jackpot Enabled in menu Disable Jackpot in menu. The Red LED’s will Bobber Red LED lights are not flash without the AAKIT-BBW-CHASE if not working. Jackpot Sign is used. LED strip faulty Remove bobber and examine LED strip.
- Page 32 Flip tickets and load upside-down to have large showing on shallow. cut notch toward opto sensor. monitor. Incorrect software version. Check to see if Big Bass Wheel Pro software is If the game is Monitor paying 6 tickets in the motherboard instead of Big Bass Wheel showing...
- Page 33 TROUBLESHOOTING GUIDE Problem Probable Cause Remedy Weak encoder sensor. Replace sensor. Game says you won tickets even (AACB1901) though wheel is still spinning. Attract mode spinning wheel should slow down Game gives tickets as soon as money is inserted during attract mode. enough so it will not trigger win.
- Page 34 TROUBLESHOOTING GUIDE Problem Probable Cause Remedy Monitor will have to be removed from game, and adjusted from Monitor problems. front of screen. Refer to “How to Replace Monitor” Remove fish head. Blurry Monitor Remove 2 wood braces holding monitor. Too bright, or dim. Peel monitor back away from sticky tape.
- Page 35 TROUBLESHOOTING GUIDE Problem Probable Cause Remedy Enter menu, ensure this is not Change to “Motor Assist” , then power game off and then back on. set to “Abandon Game”. Motor will not assist the slow Enter menu, check diagnostic Change “abandon game” to “Motor Assist”. spin.
- Page 36 TROUBLESHOOTING GUIDE Problem Probable Cause Remedy Spin meter never Encoder sensor dirty or faulty. Clean sensor and replace if needed. (AACB1901) increases. Pinched, broken, or Inspect wiring and replace cable if needed. disconnected wiring. Encoder sensor not (AACE1608) seeing wheel spin. I/O board faulty.
- Page 37 TROUBLESHOOTING GUIDE Problem Probable Cause Remedy The 2 crimped wires may be Inspect crimps on AACO1000 to ensure good Meters do not work. faulty connection. Game counter clicks at start Pinched, broken, or Check connections from counters to main board. of each game.
-
Page 38: Bill Acceptor Diagnostics
BILL ACCEPTOR DIAGNOSTICS Note: There are many different models and brands of Bill Acceptors that are used on redemption games. Your Bill Acceptor may differ from the unit shown. Standard DBA is MEI # AE2451-U5E Part # A5AC9091 Determine if Bill Acceptor has power: Turn game ON—The bill acceptor should make noise as stacker cycles and green lights on outside bezel should flash. -
Page 39: Power Supply Diagnostics
POWER SUPPLY DIAGNOSTICS 1.) Verify AC power to front of game. Check power strip in bottom front. Check for illuminated power switch. 2.) Check AC power connection to power supply. 3.) Ensure Power Supply switch is set to 115V (or 230V) (Some model power supplies may not have this) 4.) Ensure Power switch is on. -
Page 40: Door Open Error
DOOR OPEN ERROR AACE1604 There are 5 door switches in total: Note: The small white 1 in back, 1 in left side door, 1 in right side door, 1 in left jumper cables are all front door, and 1 in right front door. Part # AACE1619 Back Door Switch... -
Page 41: Wheel Encoder Sensor
WHEEL ENCODER SENSOR The arrow pointer will show the customer which ticket value they have won. Remember: There is a ½ inch buffer zone between panels that provide a small margin of error. This space is also present on the big bonus values. It allows a big bonus value to score even though the pointer may be slightly above or below the actual sticker on the wheel. -
Page 42: Brake Adjustments
BRAKE ADJUSTMENTS Wheel coast time is a number related to how long the wheel spins as it coasts to a stop. A long coast time will increase the time per game, and customer will wait too long to play game. The higher the number, the faster the wheel stops. -
Page 43: Top 7 Things You Do Not Know
TOP 7 THINGS YOU DO NOT KNOW ABOUT BIG BASS WHEEL 1.) If game goes into menu by itself - scrolls through it by itself. The solenoid is bad. 2.) If pays out 5 or 6 tickets every time, then enter the secret menu by holding the menu button down for 30 seconds, and turn off “show settings”... -
Page 44: How To Replace Handle
PUPPY VIDEO WIZARD If the monitor has been changed, or game looses monitor settings, This screen will come up on power up. The settings will have to be re-saved 1.) Plug a PS/2 keyboard into the keyboard port of the mother- board. -
Page 45: How To Clean The Window
HOW TO CLEAN THE WINDOWS Open the front doors, unlock the 2 clasps holding the front window down, and slide the front window up like a roll-top desk. Remove the back door, the top of the front window can now be reached. Use the provided swiffer™... -
Page 46: Stay Put Kit
STAY PUT KIT Part # AAKIT-BBW-STAY Symptom: Big Bass Wheel game moves away from the wall and across floor over time. Solution: Simple wood block with rubber matting to block front wheels. Directions: Place dolly under front lip of game. -
Page 47: How Remove Wheel
HOW TO REMOVE WHEEL The large wheel may have to be removed from the cabinet to replace certain parts of the wheel assembly. The entire wheel can be slid out the back of the game on wooden rails. The drive chain will come out with the wheel. -
Page 48: How To Jump Start Motherboard
HOW TO “JUMP START” MOTHERBOARD Symptom: The game is turned ON, but the power supply is not running. (The fan on the power supply is not turning with no lights on cabinet.) If the green LED on the motherboard is ON, then the motherboard itself is turned off. This could happen with a power surge or AC voltage dip. -
Page 49: How To Replace Monitor
HOW TO INSTALL A NEW MONITOR The new monitor may be a slightly different size than the existing monitor. There will be a black plastic form and wood spacer included with the monitor in case it is needed. -
Page 50: Bobber Light Kit
BOBBER LIGHT KIT... -
Page 52: Pivot Assy Exploded View
PIVOT ASSEMBLY EXPLODED VIEW... -
Page 53: Adjusting Master Volume Using Keyboard
Solution: The original amplifier used on the I/O board has been discontinued, and the replacement amplifier has a higher gain level. Therefore, the motherboard’s master volume on the desktop has to be modified to provide normal sound levels. Instructions are different for Ticket Monster and Big Bass Wheel:... - Page 54 KEYBOARD/MOUSE ADJUSTING OF MASTER VOLUME Symptom: No volume at all on game, usually caused by swapping software between different versions of motherboards. Instructions: Plug a USB keyboard and USB mouse into the motherboard. Turn on game and allow to boot up as normal. Hit the Q on the keyboard to quit program.
-
Page 55: Decal Diagram
DECAL DIAGRAM... -
Page 56: Parts Pictures
PARTS PICTURES A5AC4150 A5AC4151 A5BK9999 A5BKSW001 A5BKSW002 A5BR1001 A5BURU040 A5BURU050 A5CA1005 A5CB8020 A5CH1003 A5CL1004 A5EB9000 A5ER0001 A5FI9010 A5HA9091 A5KIT-BBW1-HDWR A5KIT-BBW-HDWR A5GE4202 A5GE4203 A5LK2001 A5LK5002 A5PICV025 A5PICZ001 A5PL9097 A5PL9995 A5PL9998 A5RICZ010 A5PYTH010 A5SP1003 A5SW7000 A5SWIFFER AAGU4158 AAGU4159 AAHA4150 W5HG1025 W5HG1065 W5KE5000 W5TM4000 WARR0006-BBWP A5VF4153... - Page 57 PARTS PICTURES A5DE4162 A5DE4163 A5DE4164 A5DE4165 A5DE4166-B A5DE4166-G A5DE4166-O A5ME4150 A5ME4151 A5ME4152 A5ME4153 A5ME4154 A5ME4155 A5ME4156 A5ME4157 A5ME4159 A5ME4160 A5ME4161 A5ME4162 A5ME4169 A5ME4170 A5ME4171 A5ME4172 A5ME4174 A5ME4175 A5ME4176 A5ME4177 A5ME4178 A5ME4179 A5ME4180 A5ME4181 A5ME4182 A5ME4183 A5ME4184 A5TT4100 A5TT4101 A5CEAU010 A5CE2300 A5CORD1 A5CORD11 A5CORD12...
- Page 58 PARTS PICTURES AACE1611 AACE1612 AACE1613 AACE1614 AACE1616 AACE1618 AACE1619 AACE1620 AACE1624 AACE1625 AACE1628 AACE1629 AACE1630 AACE1634 AACE1710 AACE1713 AACE1715 AACE3219 AACE8811 AACE9730 AACO1000 AAJP9090 AAJP9092 AALS1700 AALS1701 AAKIT-LINKAGE-BBW A5TD1 AABK4150 AABOBBER-BBW AACB1905 AACBDI030 AAMO4100 AAPB2700 AASO4150 AASW200 AAWD4173 AABD1055 AACB1900AMP AACB1901 A5CB9600 AAMB10-FHD...
-
Page 59: Parts List
PARTS LIST PART # DESCRIPTION PART # DESCRIPTION GENERAL PARTS AATT4181 Left Side Ticket Tray Assembly A5MA4150 Game Mat (No Discount) A5ME4150 Metal Left Wheel Guard A5SW200 A5ME4151 Low Ticket Switch (2 per game) Metal Right Wheel Guard W5TM4000 13/16 Black T-Molding A5ME4152 Metal Sliding Window Handle A5BR1001... - Page 60 PARTS LIST PART # DESCRIPTION PART # DESCRIPTION AACE1618 Aux Board Door Switch Jumper A5DE4168-40O Wheel Front, Orange #40 (Circle Cover-up) AACE1619 Door Switch Jumper A5DE4168-5B Wheel Front, Blue # 5 (Circle Cover-up) AACE1620 Power Supply to Chaselight Jumper A5DE4168-50O Wheel Front, Orange #50 (Circle Cover-up) AACE1623 Coupler to Bobber Chaselight Cable...
- Page 61 PARTS LIST PART # DESCRIPTION PART # DESCRIPTION AACE4143 CIRCUIT BOARDS 12V Power In Cable AACBDI030 19" LCD Monitor, Wood (No Discount) AACE4144 Jumper to Bell Cable A5FI9011 AACE4145 Inline Filter AC Split Cable AACO1000 AACE4146 Counter Bell Cable (Not Available) AACE8811 AACE8868 Game Speaker With Cable...
-
Page 62: Repair/Maintenance Log
REPAIR/MAINTENANCE LOG If you need to make repairs or order replacement parts it is a good idea to keep a log. Below is a chart you can use to track repairs and maintenance. DATE MAINTENANCE PERFORMED PARTS ORDERED MISC. NOTES... -
Page 63: Technical Support / Warranty
TECHNICAL SUPPORT Excellent customer service is very important to Bay Tek Entertainment! We know that keeping your games in great operating condition is important to your business. When you need us, we are here to help. You can call us for free technical assistance, and you can count on us to have parts on-hand to support your game.
Need help?
Do you have a question about the Big Bass Wheel and is the answer not in the manual?
Questions and answers