Table of Contents
Advertisement
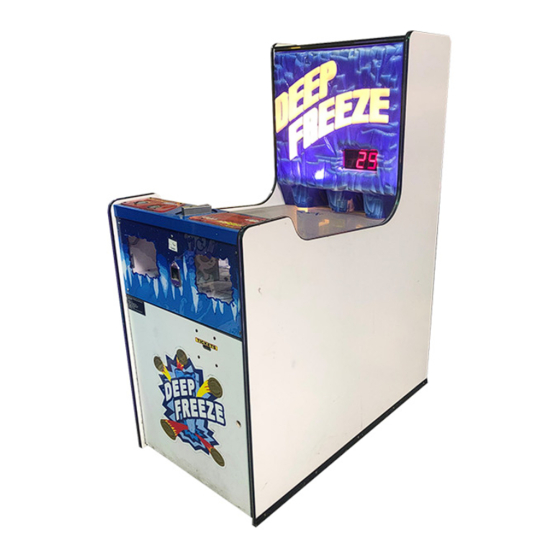
BAY-TEK INC.
1077 East Glenbrook Drive
Pulaski, WI 54162
E-mail:
service@bay-tek.com
Web site: www.bay-tek.com
OWNER'S MANUAL
Version 1.05
November 2004
Service: ............. (920) 822-3951 ext. 1102
Parts: ................. (920) 822-3951 ext. 1101
Fax: ................................... (920) 822-8936
Service Fax: ...................... (920) 822-1496
Sales: ................................ (920) 822-3951
Advertisement
Table of Contents
Troubleshooting

Subscribe to Our Youtube Channel
Related Manuals for Bay-Tek Deep Freeze


Summary of Contents for Bay-Tek Deep Freeze
- Page 1 November 2004 BAY-TEK INC. Service: ..... (920) 822-3951 ext. 1102 Parts: ....(920) 822-3951 ext. 1101 1077 East Glenbrook Drive Fax: ........(920) 822-8936 Pulaski, WI 54162 Service Fax: ...... (920) 822-1496 E-mail: service@bay-tek.com Sales: ........ (920) 822-3951 Web site: www.bay-tek.com...
-
Page 2: Table Of Contents
TABLE OF CONTENTS OPERATION AND SETUP SECTION..................3 Safety Precautions ......................... 3 How the Game Works ......................3 Service Connections ......................4 Unpacking, Assembly and Installation..................4 Alarm/Sounds ........................5 Counters ..........................5 PROGRAMMING SECTION...................... 6 Programmable Options ......................6 Dipswitches.......................... - Page 3 Output Section B – Q17 – Q24 .................... 29 Output Section C – Q5 – Q12 ....................30 Power Section........................31 Processor Section – Input RD....................32 SPARE PARTS – DEEP FREEZE ..................33 WARRANTY INFORMATION ....................34 NOTES ............................ 35 Deep Freeze...
-
Page 4: Operation And Setup Section
If the coin misses the target slot but Figure 1 Deep Freeze Playfield instead falls into one of the ‘holes in the ice’ below the icicles, tickets are paid out according to the indicated amount. -
Page 5: Service Connections
7. The game is set up for standard factory defaults. See the Programming section on page 6 for default values. Make any dipswitch setting All Bay-Tek games are 110V or 220V(optional) changes you need to make prior to operating and draw 2-3 amps at startup. Outlets should the game. -
Page 6: Alarm/Sounds
WORKING Figure 2 Counters, Volume Control, Ticket Clear Counters Counters are mounted inside the front cabinet door next to the ticket dispenser. The counters tracks the number of games played and tickets dispensed. The counters cannot be reset. Deep Freeze... -
Page 7: Programming Section
IMPORTANT: Power must be OFF to the game when setting dipswitches. Turn OFF the power strip inside the cabinet. Set the dipswitches to the desired settings, wait 30 seconds and then turn ON power at the power strip. Deep Freeze... -
Page 8: Group S1 Dipswitches
Icicles * scores or when either the left, center or Center right icicle scores. Icicle * Indicates the factory default setting. Indicates CEC setting. † 1 2 3 4 5 6 7 8 Deep Freeze... -
Page 9: Group S2 Dipswitches
The default setting is zero. Not used on this game and should OFF OFF OFF Disable * remain in the disabled/OFF position. * Indicates the factory default setting. 1 2 3 4 5 6 7 8 Deep Freeze... -
Page 10: Ticket Patterns
Ice Hole PATTERN # 8 Left Front Left Rear Center Right Rear Right Front Top Row Bottom Row BONUS * Ice Hole * For BONUS values, see dipswitches #4, #5, & #6 group 1 (S1) on page 7. Deep Freeze... -
Page 11: Lubrication & Preventive Maintenance Section
Do not wax icicles or other surfaces Lubricate playfield incline lift arm pivots with light oil. ** Check all hardware for tightness. ** ** See Service Procedures on page 15 for information on playfield access and steps required for service, repair and adjustments. Deep Freeze... -
Page 12: Troubleshooting & Diagnostics Section
See chart below for c. Coin not tripping switch identification of faulty target. For in coin mechanism. replacement see page 17. c. Check operation of the coin mechanism and switch. Replace if necessary. Deep Freeze... - Page 13 Faulty ticket dispenser. c. Test by replacing with working dispenser d. Faulty main circuit board. from another game. d. Replace main board with a spare Gen 5 board if possible to isolate the problem to the main circuit board. Deep Freeze...
-
Page 14: Troubleshooting Strategy
Figure 4 Fuse Block Error Codes Error codes E1 through E13 indicate a faulty target sensor. The following figure illustrates the position of the faulty board. See Service and Repair section on page 15 for replacement information. Figure 5 Target References Deep Freeze... -
Page 15: Diagnose Power Supply
ON. A related component such as a solenoid is causing an overload. See Jumper Cable Pin-Outs beginning on page Green LED Light That cable is OK. 21 to see which component comes ON. might be at fault. Deep Freeze... -
Page 16: Service And Repair Section
Do not use flammable substances such as gasoline, kerosene or 6. Reinstall top glass and control service panel thinners. and check operation of the game. Deep Freeze... -
Page 17: Playfield Incline Motor & Sensor Replacement
ROLL PIN the under side of the table. Remove the four hex head bolts and lock washers attaching the Figure 11 Motor Replacement motor mounting bracket to the inner mounting surface. Deep Freeze... -
Page 18: Kicker Solenoid Replacement
4. Install the new solenoid in reverse order and test the game to insure it is working properly. Be sure the green ground wire is fastened under a mounting bolt. FOUR MOUNTING BOLTS Figure 13 Ticket Display Board Figure 12 Kicker Solenoid Deep Freeze... -
Page 19: Coin/Token Sensor Boards
CHUTES disassembly of the game. Contact Bay-Tek Service Department for additional assistance if needed. Figure 14 Target Sensor Access The following is an abbreviated procedure for 2. If the faulty sensor is behind a coin chute, the replacement of these components. -
Page 20: Main Circuit Board
See Figure 17. 5. Remove the four hex head locknuts holding the circuit board to the mounting board. 6. Replace the circuit board. Re-install the tray assembly and back components. 7. Test the game again for proper operation. Deep Freeze... - Page 21 SOUND CHIP SOFTWARE CHIP Figure 18 Main Gen 5 Circuit Board Deep Freeze...
-
Page 22: Electrical Drawings Section
12 VOLT RIGHT INPUT RIGHT AUDIO AUDIO WHITE OUTPUT GROUND WHITE GREEN 12 VOLT GROUND LEFT GREEN LEFT AUDIO IN FROM AUDIO OUTPUT POWER GROUND 12 VOLT SUPPLY, BLACK INPUT TO MAIN WHITE BOARD 12 VOLT GROUND GREEN Deep Freeze... -
Page 23: Sensor Cable (J3) Connector
TOP LEFT ICICLE SENSOR SIGNAL LOWER LEFT ICICLE SENSOR SIGNAL ORANGE/RED BACK LEFT & RIGHT SENSORS TOP & BOTTOM ICICLE SENSOR GROUND GREEN/WHITE GROUND BLACK/WHITE BACK LEFT & RIGHT SENSORS + 12V TOP & BOTTOM ICICLE SENSOR +12 V RED/GREEN WHITE/RED Deep Freeze... -
Page 24: Jumper (J4) Connector
LOW TICKET SWITCH OUTPUT LOW TICKET SWITCH GROUND ORANGE GREEN COIN MECH SWITCH GROUND BLACK COIN MECH SWITCH OUTPUT MOTOR HOME SENSOR – 12V TICKET DISPENSER GROUND TICKET DISPENSER NOTCH SIGNAL BLACK BLUE TICKET DISPENSER ENABLE TICKET DISPENSER – 12V WHITE Deep Freeze... -
Page 25: Gen 5 Main Board Schematics
Gen 5 Main Board Schematics Deep Freeze... -
Page 26: Communications - Serial Eeprom
Communications – Serial EEprom Deep Freeze... -
Page 27: Input Section A - Configuration Switches
Input Section A – Configuration Switches Deep Freeze... -
Page 28: Input Section B - Inputs Re, Rc
Input Section B – Inputs RE, RC Deep Freeze... -
Page 29: Output Section A - Chase Lights, Q13 - Q16
Output Section A – Chase Lights, Q13 - Q16 Deep Freeze... -
Page 30: Output Section B - Q17 - Q24
Output Section B – Q17 – Q24 Deep Freeze... - Page 31 Output Section C – Q5 – Q12 Deep Freeze...
-
Page 32: Power Section
Power Section Deep Freeze... -
Page 33: Processor Section - Input Rd
Processor Section – Input RD Deep Freeze... -
Page 34: Spare Parts - Deep Freeze
SPARE PARTS – DEEP FREEZE Always use genuine Bay-Tek replacement parts. For 24 hour pricing and ordering visit our web site at www.bay-tek.com. Description Part # Power Supply ......................... A5PS1001 Extension Cord 6’ ........................A5CORD1 Ticket Dispenser ..........................A5TD1 Speaker ........................... A5SP1050 Coin Mech. -
Page 35: Warranty Information
WARRANTY INFORMATION Bay-Tek, Inc. warrants to the original purchaser that the game will be free of defects in workmanship and materials for a period of six months from the date of installation. Bay-Tek, Inc. will, without charge, repair or replace at its option defective product or component parts upon notification to the factory service department. -
Page 36: Notes
NOTES Deep Freeze... - Page 37 NOTES Deep Freeze...
Need help?
Do you have a question about the Deep Freeze and is the answer not in the manual?
Questions and answers