ProMinent DULCOMETER Installation And Configuration Manual
Measuring and control unit aegis s for cooling water applications
Hide thumbs
Also See for DULCOMETER:
- Assembly and operating instructions manual (185 pages) ,
- Assembly and operating instructions manual (104 pages) ,
- Assembly and operating instructions manual (95 pages)
Table of Contents
Advertisement
Quick Links
Installation and configuration manual
DULCOMETER Measuring and Control Unit
AEGIS S for Cooling Water Applications
EN
A3649
Please carefully read these operating instructions before use. · Do not discard.
The operator shall be liable for any damage caused by installation or operating errors.
The latest version of the operating instructions are available on our homepage.
990330
Zielgruppe: geschulte Anwender.
Version: BA_DM_243_07/23_EN
Advertisement
Table of Contents

Related Manuals for ProMinent DULCOMETER


Summary of Contents for ProMinent DULCOMETER
- Page 1 Installation and configuration manual DULCOMETER Measuring and Control Unit AEGIS S for Cooling Water Applications A3649 Please carefully read these operating instructions before use. · Do not discard. The operator shall be liable for any damage caused by installation or operating errors.
- Page 2 Supplemental directives General non-discriminatory approach In order to make it easier to read, this document uses the male form in grammatical structures but with an implied neutral sense. The document is always aimed equally at women, men and gender-neutral persons. We kindly ask readers for their under‐ standing in this simplification of the text.
-
Page 3: Table Of Contents
Table of contents Table of contents Introduction................5 Safety and responsibility............6 2.1 Labelling of Warning Information........6 2.2 General safety information..........7 2.3 Intended use..............8 2.4 User qualification............9 2.5 Network security............10 Storage and Transport............11 Assembly and Installation........... 12 4.1 Wall mounting............. - Page 4 Table of contents 7.2.4 SETPOINT ALARMS..........61 7.2.5 TANK LEVEL............64 7.2.6 OUTPUTS 4…20mA..........65 7.2.7 CALIBRATION............66 7.3 USER MENU.............. 67 7.3.1 GENERAL CONFIGURATION........ 68 7.3.2 DISPLAY..............69 7.3.3 DATE & TIME............69 7.3.4 LANGUAGE............. 70 7.3.5 USB................. 70 7.3.6 INPUT TEST............
-
Page 5: Introduction
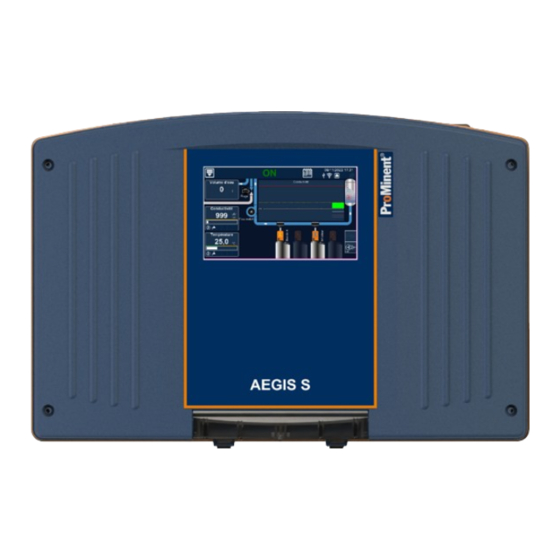
Introduction Introduction AEGIS S is an easy-to-use water treatment controller for evapora‐ tive cooling systems. With AEGIS S, users can easily monitor and control their process parameters with accuracy and reliability, helping to ensure an optimal cooling process. Thanks to a time- or measurement-based biocide metering and monitoring of electrolytic conductivity, AEGIS S prevents biological growth, keeping pipelines and heat exchangers clean. -
Page 6: Safety And Responsibility
Safety and responsibility Safety and responsibility 2.1 Labelling of Warning Information Introduction These operating instructions provide information on the technical data and functions of the product. These operating instructions pro‐ vide detailed warning information and are provided as clear step- by-step instructions. -
Page 7: General Safety Information
Safety and responsibility Type of information Hints on use and additional information. Source of the information. Additional measures. Denotes hints on use and other useful informa‐ – tion. It does not indicate a hazardous or dam‐ aging situation. 2.2 General safety information WARNING! Danger from hazardous substances! Possible consequence: Fatal or very serious inju‐... -
Page 8: Intended Use
Safety and responsibility Only carry out the electrical installation once the mechanical instal‐ lation has been completed. Make sure that there is unimpeded access for operation. Ensure safe and low-vibration installation. Avoid direct sunlight. 2.3 Intended use INFORMATION: Intended use The device is designed to measure and regulate liquid media. -
Page 9: User Qualification
Safety and responsibility 2.4 User qualification WARNING! Danger of injury with inadequately qualified per‐ sonnel The operator of the system / equipment is respon‐ sible for ensuring that the qualifications are ful‐ filled. If inadequately qualified personnel work on the unit or loiter in the hazard zone of the unit, this could result in dangers that could cause serious injuries and material damage. -
Page 10: Network Security
Responsibility for network security lies with the operator of the system. ProMinent GmbH in particular is not liable for any con‐ sequences resulting from inadequate security measures and the potential misuse of the user’s authentication features. -
Page 11: Storage And Transport
Storage and Transport Storage and Transport Ä Chapter 2 ‘Safety and User qualification: Instructed user, see responsibility’ on page 6 . Scope of Delivery Ambient conditions for transport and storage: Temperature: -10 °C to +70 °C Air humidity: < 90 % (non-condensing) Disposal of Packaging Packaging material Dispose of packaging material in an environmen‐... -
Page 12: Assembly And Installation
Assembly and Installation Assembly and Installation User qualification, mechanical assembly: Trained specialist User qualification, electrical assembly: Electrician The measuring/control device must be installed in such a way that the mains plug can be easily pulled out or the mains disconnection switch can be reached. - Page 13 Assembly and Installation A0491 Fig. 2: Fitting the wall bracket Screw the wall bracket into position using the washers, see Fig. 2 A0492 Fig. 3: Fitting the wall bracket Hook the bottom of the housing (1) into the wall bracket Lightly press the housing at the top (2) against the wall bracket Then check that the housing is hooked in at the top and...
-
Page 14: Control Panel Mounting
Assembly and Installation 4.2 Control panel mounting CAUTION! Thickness of the control panel The control panel must be sufficiently thick to ensure that it does not bend once it has been fitted. Steel panels must be at least 2 mm thick, with plastic correspondingly thicker. -
Page 15: Electrical Installation
Assembly and Installation Screw the back part onto the control panel (using the PT screws supplied). Reattach the ribbon cable. Position the front part in its parked position. ð First electrically wire the controller and then complete the control panel installation. Position the front part on the rear part of the housing and screw the housing in place. -
Page 16: Preparation
Assembly and Installation 4.3.2 Preparation NOTICE! Cable strain relief With control panel mounting, route the cables in a cable duct provided on site to provide strain relief. Plan which threaded holes are to be broken out and label them. A0494 Fig. - Page 17 Assembly and Installation A0495 Fig. 6: Fitting the threaded connectors 1. Blanking plug 2. Union nut 3. Multiple sealing insert 4. Threaded connector 5. Locking nut Screw the appropriate threaded connectors (4) using the cor‐ responding locking nuts (5) and tighten firmly. Insert multiple sealing inserts (3) into the threaded connec‐...
-
Page 18: Connecting The Terminals
Assembly and Installation 4.3.3 Connecting the terminals There is also a field containing connection information next to the terminals on the modules. Strip the sleeve from the end of the cable as shown in Fig. 7 and press on the corresponding cable end sleeves. To install the cables, push the screwdriver supplied right into the square opening of the respective terminal to insert the cable end into the terminal block. -
Page 19: Pt100 / Pt1000 Input Ri1
Assembly and Installation 4.5.1 PT100 / Pt1000 input RI1 A3756 Fig. 9: PT100 / Pt1000 input RI1 Connection of the sensor to RI1: 1. Connect the sensor (+) strand to RI1 + (1). 2. Connect the sensor (-) strand to RI1 - (2). 4.5.2 Conductivity input RI2 A3757 Fig. -
Page 20: Isolated Analog Inputs 4
Assembly and Installation 4.5.3 Isolated analog inputs 4…20mA AI1 & AI2 A3758 Fig. 11: Isolated analog inputs 4…20mA AI1 & AI2 AEGIS S has 2 isolated analog inputs 4…20 mA for direct connec‐ tion of chlorine, bromine, chlorine dioxide, and connection of pH and ORP sensors via transmitter. -
Page 21: Digital Inputs Di1 To Di5
Assembly and Installation Connection of the sensor to AI2: 1. Connect the sensor (+) strand to AI2 + (7). 2. Connect the sensor (-) strand to AI2- (8). 3. Tighten the cable gland to seal. 4.5.4 Digital inputs DI1 to DI5 A3759 Fig. -
Page 22: Serial Input Si1
Assembly and Installation 4.5.5 Serial input SI1 A3760 Fig. 13: Serial input SI1 Connection of a CTFS sensor on SI1: Remove the protective sheath. Strip the wires on 7 mm. Pass the cable through the cable gland. Connect the red power strand to SI1 + (9). Connect the black power strand to SI1 –... - Page 23 Assembly and Installation A3762 Fig. 15: F01 Remove the protective sheath. Strip wires on 7 mm. Pass the cable through a cable gland. Connect a cable on the midpoint COMMON (39) of the ter‐ minal block. Connect the second cable on the WORK (38) of the terminal block or on the REST (40) depending on the function to be performed.
-
Page 24: Electronic Relay Outputs Connections Ro1
Assembly and Installation Remove the protective sheath and strip wires on 7 mm. Pass the cable through a cable gland. Connect a cable on the midpoint COMMUN (42) of the ter‐ minal block. Connect the second cable on the WORK (41) of the terminal block or on the REST (43) depending on the function to be performed. -
Page 25: Ma Outputs (Ao1 To Ao2)
Assembly and Installation Connect a cable on the midpoint COMMON (36) of the ter‐ minal block. Connect the second cable on the WORK (35) of the terminal block or on the REST (37) depending on the function to be performed. 4.9 4…20 mA outputs (AO1 to AO2) 4…20 mA outputs are used to transfer data to a PLC or to control a dosing pump via a 4…20 mA signal. -
Page 26: Rs485 Communication Bus Connections
Assembly and Installation A3769 Fig. 22: Power Supply Output 4.11 RS485 communication bus connections AEGIS S has a RS485 communication port to connect it to a com‐ puter equipped with a 485 port and a communication software to record the measurement values, alarms and different states of the device. -
Page 27: Polarization And Termination Of The Rs485 Bus
Assembly and Installation Reference Name INF1021 Converter USB => 485 Devices can be chained considering the order of cables (Parallel wiring). 4.11.2 Polarization and termination of the RS485 bus The bus can be polarized from your device if necessary. To do this you must switch the two micro-switches (Pol. -
Page 28: Commissioning
Commissioning Commissioning Switch on the device. Check that everything is good, your control panel is switched on and other elements of your installation haven’t been dis‐ turbed. AEGIS S doesn’t automatically start the treatment and dosing of chemical product when you switch on. - Page 29 Commissioning Fig. 25: Empty front card and Ethernet Modem socket Green/white Green Orange/white Orange Blue/white Blue Brown/white Brown Earth...
-
Page 30: Display Mode And Type
Display Mode and Type Display Mode and Type AEGIS S is fitted with a colour touch screen. The touch screen is a resistive technology, you must press firmly on the screen to vali‐ date the action. Make sure that your AEGIS S controller is correctly programmed! An excess of product, or even a mixture, can cause harmful actions on human health and the environment. - Page 31 Display Mode and Type Communica‐ Press it to display communication information: tion Info USB connection WiFi connection Ethernet or GSM connection MyProMinent connection Notifications No connections to MyProMinent server. USB key detected but not compatible, not read‐ able (USB key must be formatted in FAT32) Connections to WIFI impossible.
- Page 32 Display Mode and Type Stop Measured value and unit value higher the value not diplayable scale value lower the scale value unmeasurable (technical alarm) Servitude notifications area Polarization in pro‐ Flow gress Water level Timer R.I.C Sensor - Out of order Empty tank Sensor - Mainte‐...
-
Page 33: Operating Graph
Display Mode and Type An orange arrow indicates a maintenance task is scheduled on that date. A red arrow indicates a maintenance task was planned on that date but it was either not carried out or indicated as carried out. A green arrow indicates the current day. -
Page 34: General Menu
General Menu General Menu To open the general menu, press the key. Fig. 29: General menu If access restrictions are activated, the lock symbol appears. Fig. 30: Main menu - lock symbol 7.1 SETUP MENU The menu contains all submenus for initial commissioning. 7.1.1 OPTIONS This menu offers the several options for the menus SETUP and SETTINGS. - Page 35 General Menu Fig. 31: Setup menu Fig. 32: Setup options 1/3 Password «Setup» Activation of access for the SETUP menu Password «Set‐ Activation of access for the SETTINGS tings» menu Lock the «Settings» Use SETUP password also for SETTINGS level with the «Setup»...
- Page 36 General Menu Fig. 33: Setup options 2/3 Enable base load If activated, this option allows manual setting for dosing adjustment of base load. Enable the setting of If activated, this option allows manual the activation time adjustment of maximum dosing time. max.
-
Page 37: Analog Input Settings
General Menu Create a This option enables the automatic creation of a meas‐ measure‐ urement channel in Measurement menu corre‐ ment sponding to the type of sensor is created automati‐ channel cally. The automatic generated measuring channel automati‐ has to be checked and adapted to the application. cally for each sensor... - Page 38 General Menu For your comfort, you will find the notation of the RIx, SIx and AIx inputs silkscreen in front of the corresponding connection terminal block of your device. Temperature input settings Fig. 36: Menu temperature input settings RI1 Temperature Enables/disables the temperature sensor. Range Select the measurement range.
- Page 39 General Menu CTFS input settings Fig. 38: Menu CTFS input settings SI1 - Conductivity Enables/disables the CTFS sensor. - Temperature - Flow switch: Sensor enabled Conductivity Indicates the measuring range which is defined for CTFS sensor. Temperature Indicates the temperature range (0…50°C) of the CTFS sensor which is defined for CTFS sensor.
-
Page 40: Digital Input Settings
General Menu AI1 – Sensor Select the parameter of the connected sensor. Range Select the measurement range depending on the sensor. Starting delay Enter boot delay (polarization). time Adjustment possible from 0 à 480 minute(s). 7.1.3 DIGITAL INPUT SETTINGS In this menu digital inputs can be configured. Fig. -
Page 41: Measurement Settings
General Menu Fig. 41: Menu digital input settings DI1 – Function Digital input operation mode selection. On this selection button you will find the information of the input in the process of modification (e. g. DI1) and the currently selected function (e. g. Water Flow switch). - Page 42 General Menu Fig. 42: Menu measurement settings The menu Measurement shows an overview of enabled and disa‐ bled measurements. Volume measurement settings Fig. 43: Menu Volume measurement settings E01 - Water Enables/disables the conductivity sensor. volume: Meas‐ urement enabled Sensor Select the according input.
- Page 43 General Menu Conductivity measurement settings Fig. 44: Menu conductivity measurement settings E02 – Conduc‐ Enables/disables the conductivity sensor. tivity: Measure‐ ment enabled Sensor Select the according input. Unit Select the unit for the measurement. Decimal places Select the number of decimals of the dis‐ played measured value.
-
Page 44: Output Settings
General Menu E03 – Tempera‐ Enables/disables the conductivity sensor. ture: Measure‐ ment enabled Sensor Select the according input. Unit Select the unit for the measurement. Decimal places Select the number of decimals of the dis‐ played measured value. Measurement settings of analog input Fig. - Page 45 General Menu This menu shows an overview of enabled and disabled outputs. PO1 220V relay outputs is fixed for Bleed valve FO1 & FO2 CRT relay outputs are fixed for Biocide A and Biocide B FO3 CRT relay output could be used for Inhibitor or Dosing.
- Page 46 General Menu FO3 andFO4 relays Fig. 49: Menu FO3 and FO4 relays F03 – Function FO3 can be configured for inhibitor dosing or dosing in general. Operating mode As Operating mode for inhibitor dosing contin‐ uous and percent of bleed are selectable. For information on the fields Tank low level detection, Pump flow rate, Tank volume, Enable compute see FO1 and FO2 relays.
- Page 47 General Menu 4…20mA output settings Fig. 51: Menu 4...20mA output settings AO1 - Function The analog outputs can be configured for con‐ trol of dosing pumps or to transfer a value to a PLC. Assignment For the transfer of a measurement to a PLC, select measurement and assign the measure‐...
-
Page 48: Conditions & Funcions
General Menu Maximum Enter the value of the Maximim. Possible adjustment from 0 to 100 %. Keep active after The option is automatically activated and cannot be modified. 7.1.6 CONDITIONS & FUNCIONS In this menu the flow switch conditions and tower management can be configured. -
Page 49: Communication
General Menu Management Choose the tower management mode associ‐ mode ated with your controller. Master or Slave. Input remote con‐ Input remote control / state selection, on this trol selection button you can choose the input remote control / state. 7.1.7 COMMUNICATION To connect AEGIS S on the bus, the RS485 communication of AEGIS S and other systems, connected on the same bus, must be... - Page 50 General Menu Mode Selection of the Modbus communication mode. On this selection button you will find the information of the selected mode (e. g. RTU). Speed Selection of the Modbus communication speed. On this selection button you will find the information of the selected speed (e. g. 19200).
- Page 51 General Menu 7.1.7.2 WIFI settings Fig. 56: Menu wifi settings WIFI Activation of the WIFI integrated in your controller. ena‐ bled SSID Enter the name of the WIFI network on which you want to connect. Press to open the alphanumeric keyboard and enter the desired value.
- Page 52 General Menu Gatew If you disable DHCP you must enter the gateway of your network. Press it to open the numeric keyboard and enter the desired value. Choice of DNS configuration. Auto‐ Press it to ACTIVATE / DEACTIVATE DNS. matic Pre‐...
- Page 53 General Menu DNS Automatic Choice of DNS configuration. Press it to ACTIVATE / DEACTIVATE DNS. Preferred DNS If the DNS management is not automatic, you must enter the IP address of the Pri‐ mary DNS. Press it to open the numeric keyboard and enter the desired value.
- Page 54 General Menu Customize NTP Your controller already has an SNTP server # 1 server address. You can however cus‐ tomize the servers used for the setting and enter the first address here. Customize NTP When setting if server #1 cannot be server # 2 reached, your controller will make an attempt to this second server if the box is...
- Page 55 General Menu Server Entering the address of mypool web server. adress Press to open the alphanumeric keyboard and enter the desired value. Port Entering the TCP connection port to mypool site. Press to open the alphanumeric keyboard and enter the desired value. Remote Entering the remote connection code from mypool to code...
-
Page 56: Factory Reset
General Menu 7.1.7.7 Communication info Fig. 61: Menu communicaton info 7.1.8 FACTORY RESET In this menu the controller can be reset to factory settings or prede‐ fined configurations can be selected. Fig. 62: Menu factory reset... -
Page 57: Settings
General Menu Factory Click on it to select the desired default setting: default set‐ Custom (select sensors and outputs) tings Configuration 1 : CTFS conductivity Volume – Bio A - Inhibitor Configuration 2 : CTFS conductivity Volume – Bio A – Inhibitor - ORP Configuration 3 : CTFS conductivity Volume –... -
Page 58: Tower Management
General Menu Fig. 64: Menu settings 7.2.1 TOWER MANAGEMENT In this menu the tower management can be configured. Fig. 65: Menu tower management The menu shows an overview of configured timers. Force Power ON for Activate the relay when it need to inject biocide cycle biocide event if it’s out of “normal”... -
Page 59: Biocide A Timers
General Menu Start time – End time You have 2 possibilities: – Duration Select Start time then End time and Duration will be automatically calcu‐ lated. Select Start time then the Duration you want, and the End time will be automat‐ ically calculated. -
Page 60: Biocide B Timers
General Menu Winter You have 8 timers (in white in the “Winter” part) at your dis‐ posal. These timers are valid throughout the year (From Jan‐ uary to December). Summer/ You have 16 timers at your dis‐ Winter posal. The 8 timers of the “Summer” part will be active for the months of May, June, July, August and September (In grey... -
Page 61: Setpoint Alarms
General Menu Inhibitor – Dispersant Injection There are 3 possibilities that depend on the set‐ ting of the output. Continuous Injection every Inhibitor or dispersant is dosed at periodic intervals. During the purge period, operation is sus‐ pended. Enter the desired inhibitor or dispersant time value. - Page 62 General Menu Bleed – Conductivity mode Setpoint Enter the conductivity setpoint value. Pos‐ sible adjustment from 0 to 20000 µS/cm. Hysteresis Enter the conductivity hysteresis value. Possible adjustment from 0 to 20000 µS/cm. Duration Security for bleed duration on conductivity bleed.
- Page 63 General Menu High alarm Limit You must check this option to enable high alarm limit settings. Enter the high alarm limit value. Hysteresis Enter the hysteresis value of the alarm threshold. This setting is only available if the unlock option is enabled in the setting options. This value sets a value delta in which the alarm remains active.
-
Page 64: Tank Level
General Menu Fig. 73: Diagram increasing parameter E04 Free clorine AI1 Parameter identification, includes informa‐ tion on parameter number (e. g. E04), type (e. g. Free chlorine) and associated main sensor input (e. g. AI1) Setpoint Enter the setpoint value. Hysteresis Enter the hysteresis value. -
Page 65: Outputs 4
General Menu Fig. 75: Menu tank level limit settings Tank level menu is accessible if an analog input in mode volume is set or active and set a “compute enabled” in a relay setting. Low level limit Enter the low level limit value. Compute low level Enter the low level limit value. -
Page 66: Calibration
General Menu A02 Free clorine Parameter identification. You will find the parameter number identification (e. g. A01), type (e. g. Free chlorine) and associ‐ ated sensor input (e. g. E04). Value at 4 mA Enter the corresponding pH value for 4mA at transfer output. -
Page 67: User Menu
General Menu Fig. 79: Calibration status Status 1 Very unstable sensor (measurement value changes rapidly). Status 2 Sensor disconnected or out of order (Measurement and raw signal displays “- - -”). Status 3 Sensor being stabilized. Status 4 Stabilized sensor. Authorized calibration. Offset calibration Wait for the sensor stabilization. -
Page 68: General Configuration
General Menu Fig. 80: User Menu 7.3.1 GENERAL CONFIGURATION In this menu audio and visual configuration of the graphical inter‐ face can be adapted. SCREEN Fig. 81: Menu general settings Back-light Use the cursor to adjust the back-light level as desired. Enabled power Enables screen protection management. -
Page 69: Display
General Menu SOUNDS Beep on screen Enables sound management at each valid touch F tap on the screen. Beep on alarm Enables the management of a beep every second in case of a general alarm. Sound adjustment requency and duration of the sound can be adapted. -
Page 70: Language
General Menu Fig. 82: Menu date and time settings Automatic time If the selected time zone has Summer change Time / Winter Time, your dispatcher will automatically change time. You can cancel this automatic time change by unchecking this box. 7.3.4 LANGUAGE Click on LANGUAGE to change the operating language. -
Page 71: Input Test
General Menu Fig. 84: Menu USB To access this menu, you need to insert a USB key. The USB key must be formatted to FAT32. Firmware updates When a firmware for the front face is avail‐ able on the key, the corresponding update button activates. -
Page 72: Output Test
General Menu Fig. 85: Menu input test 7.3.7 OUTPUT TEST In this menu outputs can be switched on/off. Fig. 86: Menu output tests Press to switch the relay ON/OFF. Enter the desired value. Even unconfigured outputs can be tested. 7.3.8 INFO This menu provides information on versions of the installed mod‐... - Page 73 General Menu Fig. 87: Infoscreen Software versios AEGIS S is composed of several firmware. On this screen you see the installed module and their versions. Serial number Your device serial number (unique). If an element is greyed out this means that the function is not available.
-
Page 74: Maintenance And Repair
Maintenance and Repair Maintenance and Repair 8.1 Backup Battery Exchange WARNING! Before changing the battery, switch off the power supply! Always use the same battery as the orig‐ inal. Carefully disconnect the connection flat cable connecting the bottom card and the upper part of the device. Fig. -
Page 75: Technical Data
Technical Data Technical Data 9.1 Technical Characteristics Main features Type(s) Specification(s) Marker(s) Consumption 6,5A Max (Without connected dosing accessories) Power supply requirements 100 - 240 VAC (± 10%) 50/60Hz Electrical protection Fuse 550mA, Reset by power interruption F4 & F5 Operating temperature (°C) -5 °C to 45 °C (23 °F to 113 °F) Case material... - Page 76 Technical Data Main features Type(s) Specification(s) Marker(s) Electromagnetic compatibility Class B disruption tests comply with EN61326-1 Class B disruption tests comply with EN61326-2-6 Class B disruption tests comply with EN55011 Harmonics tests comply with EN61000-3-2 Harmonics tests comply with EN61000-3-3 Immunity tests comply with EN61000-4-2 Immunity tests comply with EN61000-4-3 Immunity test EN61000-4-4...
-
Page 77: Radio Technologies In Equipment
Technical Data Communication port Type(s) Specification(s) Marker(s) RS485 1 RS485 communication port RS485 Ethernet 1 Ethernet output Protection of dosing outputs Type(s) Specification(s) Marker(s) Internal fuse 1 TR5 3,15 A 250 V Time delay fuses Save Type(s) Specification(s) Marker(s) Button cell Type BR2032 Bat1 9.2 Radio Technologies in Equipment... -
Page 78: Standards Complied With And Declaration Of Conformity
Standards complied with and Declaration of Conformity Standards complied with and Declaration of Conformity ProMinent GmbH Im Schuhmachergewann 5 - 11 D - 69123 Heidelberg, Germany, hereby declare that the product specified below complies with the relevant basic health and safety requirements of the EU Directives, on the basis of its functional concept and design and in the version distributed by us. -
Page 79: Modbus Communication Register
Modbus Communication Register Modbus Communication Register 11.1 Address of Modbus Registers The registers are numbered in accordance with the Modbus standard. These are “HOLDINGS REGISTER” on the range of reg‐ isters from 40001 to 49999. Some software and Modbus controllers use an address from 0 to 65535. - Page 80 Modbus Communication Register Modbus Number Name Access Format Description register of regis‐ ters Interfaces 41077 state_HI2 BOOL 0=Out of range / 1=In range (Schedule Biocid A summer) 41078 state_HI3 BOOL 0=Out of range / 1=In range (Schedule Biocid A summer) 41079 state_HI4 BOOL...
- Page 81 Modbus Communication Register Modbus Number Name Access Format Description register of regis‐ ters Interfaces 41099 state_HI24 BOOL 0=Out of range / 1=In range (Schedule Biocid B summer) 41100 state_HI25 BOOL 0=Out of range / 1=In range (Schedule Biocid B winter) 41101 state_HI26 BOOL...
- Page 82 Modbus Communication Register Modbus Number Name Access Format Description register of regis‐ ters Values and states 41203 param_E1_measur REAL Measured value [unit of measure] e_value 41205 param_E1_con‐ REAL Regulation setpoint [unit of measure] trol_w 41207 param_E1_dosage_ REAL Dosing control [1/1] 41209 param_E1_alarm_hi REAL...
- Page 83 Modbus Communication Register Modbus Number Name Access Format Description register of regis‐ ters Values and states 41403 param_E5_measur REAL Measured value [unit of measure] e_value 41405 param_E5_con‐ REAL Regulation setpoint [unit of measure] trol_w 41407 param_E5_dosage_ REAL Dosing control [1/1] 41409 param_E5_alarm_hi REAL...
- Page 84 Modbus Communication Register Modbus Number Name Access Format Description register of regis‐ ters Channels 42101 param_E1 STRUC E1 channel states and value 42301 param_E2 STRUC E2 channel states and value 42501 param_E3 STRUC E3 channel states and value 42701 param_E4 STRUC E4 channel states and value 42901...
-
Page 85: Data Formatting
Modbus Communication Register Modbus Number Name Access Format Description register of regis‐ ters Contacts 46051 switch_DI1 STRUC Contact status DI1 46076 switch_DI2 STRUC Contact status DI2 46101 switch_DI3 STRUC Contact status DI3 46126 switch_DI4 STRUC Contact status DI4 46151 switch_DI5 STRUC Contact status DI5 46176... - Page 86 Modbus Communication Register Register 41041 is the state of the PO1relay. REG(41041) = 0: open relay REG(41041) = 1: close relay REAL “real” uses 2 registers and allows coding of floating-point values on 32bits. Example: Register 41303 is the measurement value of channel E03, the unit of this value is the unit selected in the measurement menu of the device.
- Page 87 Modbus Communication Register Bit 06 = 1 : Parameter stop dosing on alarm Bit 07 = 1 : Parameter in pause due to a timer Bit 08 = 1 : Associated sensor(s) out of scale or disconnected Bit 09 = 1 : Associated sensor(s) measuring low out of scale Bit 10 = 1 : Associated sensor(s) measuring high out of scale Bit 11 = 1 : Associated sensor(s) unstable measurement Bit 12 = 1 : Low alarm active parameter (alarm threshold crossed)
-
Page 88: Index
Index Index Action, step by step ......2 Applied harmonised standards ....78 Cable strain relief . - Page 92 ProMinent GmbH Im Schuhmachergewann 5 - 11 69123 Heidelberg Telephone: +49 6221 842-0 Fax: +49 6221 842-419 Email: info@prominent.com Internet: www.prominent.com 990330, 1, en_GB © 2023...
Need help?
Do you have a question about the DULCOMETER and is the answer not in the manual?
Questions and answers