Axis W800 User Manual
System controller, mini bullet sensor
Hide thumbs
Also See for W800:
- User manual (59 pages) ,
- Installation manual (18 pages) ,
- Manual (53 pages)

Related Manuals for Axis W800


Summary of Contents for Axis W800
- Page 1 Axis body worn solution Axis body worn solution AXIS W800 System Controller AXIS TW1200 Mini Bullet Sensor User manual...
-
Page 2: Table Of Contents
AXIS Body Worn Assistant ........ - Page 3 Axis body worn solution Table of Contents Need more help? ..........
-
Page 4: This Is The Axis Body Worn Solution
Network AXIS Body Worn Manager The Axis body worn solution (1) - is one or more Axis body worn systems (2) connected to a content destination (3). The body worn system functions only when it’s connected to a content destination. -
Page 5: What's New In The Latest Release
Support for the new AXIS W110 Body Worn Camera The system now supports AXIS W110 Body Worn Camera, the latest and lightest addition to the Axis body worn family. With a small form factor and low weight, it brings new features such as electronic image stabilization (EIS) and voice feedback. The image quality and performance have also been improved compared to previous models. -
Page 6: Get Started
The recommended workflow to install and configure your system is: 1. Install your system on page 7 2. Open AXIS Body Worn Manager and configure system settings. See Access AXIS Body Worn Manager for the first time on page 8 3. -
Page 7: Install Your System
Axis body worn solution Install your system Install your system Note You need these hardware components to install a body worn system: • System controller(s) • Docking station(s) • Body worn camera(s) • A computer • Optional RFID reader for self-assign camera assignment. -
Page 8: Configure Your System
Access AXIS Body Worn Manager for the first time Note • Use AXIS IP Utility version 4.14 or later. AXIS IP Utility helps you find Axis devices on your network. The device is identified by its name, IP address, and serial number. -
Page 9: Secure Passwords
Secure passwords Important Axis devices send the initially set password in clear text over the network. To protect your device after the first login, set up a secure and encrypted HTTPS connection and then change the password. The device password is the primary protection for your data and services. Axis devices do not impose a password policy as they may be used in various types of installations. -
Page 10: Configure The System Backup
Go to the AXIS Camera Station Integrator Guide for help on how to integrate an Axis body worn system with AXIS Camera Station. Connect to AXIS Case Insight Go to the AXIS Case Insight System Integrator Guide for help on how to integrate an Axis body worn system with AXIS Case Insight. Integrate with third party applications Go to Body worn integration Genetec for help on how to integrate with Genetec Security Center, and AXIS Optimizer Body Worn Extension for help on how to integrate with Milestone XProtect®. -
Page 11: Camera Profiles
Axis body worn solution Configure your system To watch this video, go to the web version of this document. help.axis.com/?&piaId=58704§ion=configure-the-system-backup Axis body worn system backup and restore To configure the system backup: 1. Go to > System backup. 2. Click Configure. - Page 12 Axis body worn solution Configure your system 7. Expand the devices in the list to edit the Camera profile settings on page 12. Camera profile settings AXIS Body Worn Cameras Support for the features and settings described in this section varies between camera models. This icon indicates that the feature or setting is available only for some camera models.
- Page 13 Axis body worn solution Configure your system Pre-buffer Pre-buffer adds recording time before the recording starts, to ensure that the whole event is captured. The pre-buffer has a dedicated space on the camera storage. When you use the maximum resolution 1080p in very complex scenes with a lot of movement, or in low light, the pre-buffer memory can get full.
- Page 14 The state of the indicator while the camera is recording: Front recording indicator • None • Steady • Flash When AXIS TW1201 Mini Cube Sensor is connected, the indicator behavior is applied to the sensor’s front recording indicator. Alert Camera feedback through: •...
-
Page 15: Create A User
Choose whether the camera user is allowed to view recordings in AXIS Body Worn Assistant, or not. AXIS Body Worn Live Only visible when you have connected your body worn system to AXIS Body Worn Live. Streaming Choose whether the camera user is allowed to stream to AXIS Body Worn Live, or not. -
Page 16: Import Users
• This option is presented only if you’re using AXIS Case Insight. • When you enter a user’s email address as username, a corresponding guest user is created in AXIS Case Insight. This guest user has no access to any recorded evidence in the system. Access rights for the user are managed in AXIS Case Insight. - Page 17 Axis body worn solution Configure your system • Fixed camera assignment on page 17 • Self-assign camera assignment on page 17 Fixed camera assignment The body worn system administrator assigns the camera user to a specific camera. The camera user always uses the same body worn camera.
- Page 18 Alternatively, to associate already existing RFIDs with all users at once, see Import users on page 16. 3. Disconnect the RFID reader from the system controller. 4. Connect the same RFID reader to the computer that you use for accessing AXIS Body Worn Manager. Note Setup through remote desktop solutions isn’t supported.
-
Page 19: Enable Live Streaming
Enable live streaming AXIS Body Worn Live is a cloud service that lets body worn camera users stream live video to our AXIS Body Worn Live web application. Go to the AXIS Body Worn Live user manual for more help. -
Page 20: Activate Recording Automatically
Axis body worn solution Configure your system Activate recording automatically In combination with pre-buffer, automatic recording activation ensures that the whole incident is captured without the need for the camera user to manually start a recording. You can set up cameras to start recording automatically using: •... - Page 21 Axis body worn solution Configure your system 3. Click to pair new equipment. 4. Click Pair (Holster sensor). 5. Dock the camera (do one of the following, based on camera assignment method): Fixed camera assignment: Dock the camera assigned to the body worn user that you want to pair the holster sensor with.
-
Page 22: Record Location
Limit access to recordings The Allow access to recordings setting lets you decide whether the camera user can view recordings in AXIS Body Worn Assistant, or not. You can turn it on or off in the camera profile. To turn off access to recordings: 1. - Page 23 Assisted firmware upgrade - Lets you install the latest system firmware without manually downloading it to your computer. It also shows you what’s new in a firmware upgrade, directly in AXIS Body Worn Manager, before you install it. You can choose to receive email notifications when there’s a new firmware version available.
- Page 24 Endpoint for fetching Global System controller 443 (HTTPS) worn.axis.cloud firmware binaries and release notes. (Azure Front Door) Global time.body- Web browser Time sync for AXIS Body 443 (HTTPS) worn.axis.com Worn Live video player.
- Page 25 Endpoint for fetching Europe (EU) 443 (HTTPS) worn.axis.cloud firmware binaries and release notes. bwo.de.body- Web browser API for AXIS Body Worn Europe (EU) 443 (HTTPS) worn.axis.cloud Live web application. axisb- Body worn camera, web Video upload from body Europe (EU) 443 (HTTPS) wsde.blob.core.win-...
- Page 26 Axis body worn solution Configure your system North America (US) API, *.useast.bodyworn.axis.cloud Region Domain Port Device type Purpose logs.useast.body- System controller Endpoint for uploading North America (US) 443 (HTTPS) worn.axis.cloud zipped logs from system controller. (Azure Front Door) flags.useast.body- System controller...
- Page 27 Axis body worn solution Configure your system Asia-Pacific (Australia) API, *.au.bodyworn.axis.cloud Region Domain Port Device type Purpose logs.au.body- System controller Endpoint for uploading Asia-Pacific (Australia) 443 (HTTPS) worn.axis.cloud zipped logs from system controller. (Azure Front Door) flags.au.body- System controller API for feature...
-
Page 28: Secure Your System
Signed video Signed video adds a cryptographic checksum into each video frame which is then signed by the Axis device ID. This allows video to be traced back to the camera it originated from, so it’s possible to verify that the recording hasn’t been tampered with after it left the camera, without proving the chain of custody of the video file. - Page 29 Axis body worn solution Secure your system 3. Click 4. Select Create self-signed certificate and click Next. 5. In Create self-signed certificate, enter your values and click Create. 6. Open the context menu next to the new certificate. 7. Click Create signing request.
- Page 30 Axis body worn solution Secure your system 10. Connect the body worn system to your 802.1x enabled network. Allow HTTPS only We recommend using HTTPS only to securely connect to your body worn system. 1. Go to > HTTP and HTTPS.
-
Page 31: Manage Users
4. Click Remove. Important Never remove camera users from your content destination. Always use AXIS Body Worn Manager to remove users. Export users You can export data for all your camera users to a CSV file. This can be useful when you need to make changes to your system that require a system reset, but you still want to keep all the user data. -
Page 32: Monitor Your System
If your system is located outside of North Contact bodywornlive.support@ America, all wireless network channels axis.com and provide your system ID in the camera need to be turned on and the country the system is located in, before you can start live streaming with so we can enable the required wireless AXIS Body Worn Live. - Page 33 2. Clean the connectors on the camera and the pogo pins in the docking bay, see Cleaning in the camera’s user manual at help.axis.com. If the alert remains when you dock the camera, continue to next step. 3. Dock the camera in another docking bay, where other cameras don’t get this alert.
- Page 34 Axis body worn solution Monitor your system 4. Connect a functioning docking station to the same docking station port on the system controller. If the message disappears, the original docking station is faulty and should be replaced. If the message remains, continue to next step.
-
Page 35: Download Camera Usage Report
Check how long a camera has been undocked In AXIS Body Worn Manager, you can check how long a camera has been undocked. This can, for example, give you an indication that a camera is lost or needs a firmware upgrade. -
Page 36: Get An Overview Of Cameras With Expired Certificates
Axis body worn solution Monitor your system Get an overview of cameras with expired certificates When a camera hasn’t been docked for several weeks, the certificate eventually expires. An expired certificate could indicate that the camera has been misplaced. To list all cameras with expired certificates: 1. -
Page 37: Maintain Your System
Axis body worn solution Maintain your system Maintain your system Important Always initiate all body worn system maintenance, such as resetting the system, or removing a camera, from AXIS Body Worn Manager. Change password 1. Go to > Admin accounts. -
Page 38: Change Connection File
Remove. 4. Click Remove. Important Never remove body worn cameras from your content destination. Always use AXIS Body Worn Manager to remove cameras. If the camera is lost or damaged beyond repair, see Force remove camera on page 39. - Page 39 Remove an extension system controller Note • Always remove the extension system controller from the system in AXIS Body Worn Manager before you physically disconnect it. • When you remove a system controller from the body worn system, all content is transferred to the content destination, and the system controller is reset to factory default settings.
-
Page 40: Replace System Hardware
You can reset an extension system controller to factory default settings by removing it from the body worn system, see Remove an extension system controller. If you can’t access the body worn system through AXIS Body Worn Manager, you can reset each extension system controller by accessing them separately: 1. -
Page 41: Remove Paired Equipment
When you restore the system from a backup saved on an extension system controller, that controller becomes the system controller where you access AXIS Body Worn Manager. The system restore takes about the same amount of time that it takes to restart the system. - Page 42 Remember to re-configure the backup when the system restore is done. The previous backup system controller is now where you access AXIS Body Worn Manager. You also need to replace the malfunctioning system controller with a new one. Restore a system with a single system controller 1.
-
Page 43: Retrieve Recordings From System Controller
Retrieve recordings from system controller Content destinations normally accept recordings from camera users and cameras that have been removed from the content destination. But if this isn’t supported, and you remove users or cameras in the content destination instead of in AXIS Body Worn... -
Page 44: Adjust Date And Time
• A correct system time is critical when using recordings as evidence material. To change the date and time settings: 1. Open AXIS Body Worn Manager on page 9 2. Go to > Date and time. Find out where a camera is docked 1. -
Page 45: System Firmware
For recommendations on the firmware track most suitable for your system, see AXIS OS tracks. Upgrade system firmware The body worn system detects new system firmware versions when they are released. A notification appears in AXIS Body Worn Manager. Note Automatic system firmware detection requires Cloud extensions and that the system has access to *.bodyworn.axis.cloud. - Page 46 Axis body worn solution Maintain your system Firmware version report The firmware version report shows the current firmware version for all cameras and system controllers that belong to the body worn system right now. You can choose to also get information about previous firmware versions for all devices, including those that are no longer part of the system.
-
Page 47: System Controller
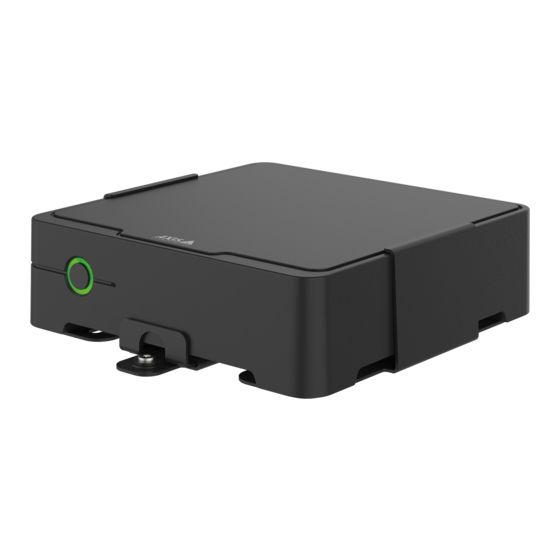
Axis body worn solution System controller System controller The system controller is the central integration and management point of the body worn solution. It controls that evidence is transferred from the body worn camera to the content destination in a secure way. -
Page 48: Daily Use
Axis body worn solution System controller Storage LED Green: Standby Flashing green: Accessing storage Red: Storage error USB connector Power connector Docking station ports (from left to right: 5, 4, 3, 2, 1) Network connector Daily use I want to... - Page 49 Axis body worn solution System controller Turn off the system controller Press and hold the power button Shut down begins when the status LED turns until the status LED turns amber. amber. The system controller is off when the status LED turns off.
-
Page 50: Axis Body Worn Cameras
Axis body worn cameras Axis body worn cameras For information about daily use and troubleshooting of body worn cameras, see the user manual for each camera model: • AXIS W100 Body Worn Camera • AXIS W101 Body Worn Camera •... -
Page 51: Axis Body Worn Assistant
To start using AXIS Body Worn Assistant, you have to pair the camera user with AXIS Body Worn Assistant. You generate a QR Code® and a PIN code in AXIS Body Worn Manager, and scan and enter them in AXIS Body Worn Assistant. This results in a secure pairing. -
Page 52: Remove Existing Pairing
7. Follow the on-screen instructions in AXIS Body Worn Manager and in AXIS Body Worn Assistant. Note • The QR Code® and the PIN code are valid for 24 hours. You can find them by clicking the user in AXIS Body Worn Manager, open the context menu for the paired equipment, and click Details. - Page 53 You can create bookmarks in a recording making it easier to find the most relevant information later. The bookmarks are shown on the timeline in AXIS Body Worn Assistant video player where you can skip back and forth between them. Bookmarks are a part of the recording’s metadata which means that they can also be used in a similar way in the content destination.
-
Page 54: Troubleshooting
Axis body worn solution Troubleshooting Troubleshooting Technical issues, clues, and solutions If you have issues with your body worn camera, check the camera’s user manual at help.axis.com. Issue Cause Solution Docking station Docking station LED doesn't The docking station doesn't Connect the docking station turn on. - Page 55 But if this isn’t supported, and you remove users or cameras in the content destination instead of in AXIS Body Worn Manager, recordings might not be transferred from the system controller. The time in the body worn...
-
Page 56: General Troubleshooting Steps
Axis body worn solution Troubleshooting Issue Cause Solution AXIS Body Worn Assistant Can’t complete pairing. The wireless range between Keep the mobile device and the mobile device and the the body worn camera closer Can’t connect to body worn body worn camera is limited. - Page 57 2. Upgrade the body worn camera with the latest firmware, see Upgrade system firmware. 3. Dock the camera and remove it from the system through AXIS Body Worn Manager. This resets the camera to factory default. Add the camera to the system again. See Reset camera.
- Page 58 User manual Ver. M30.6 Axis body worn solution Date: December 2023 © Axis Communications AB, 2020 - 2023 Part no. T10135878...
Need help?
Do you have a question about the W800 and is the answer not in the manual?
Questions and answers