
Related Manuals for G&D DP1.4-MUX2-NT


Summary of Contents for G&D DP1.4-MUX2-NT
- Page 1 G&D DP1.4-MUX2-NT DE Installation und Bedienung EN Installation and Operation A9100322-1.30...
- Page 2 © Guntermann & Drunck GmbH 2023. Alle Rechte vorbehalten. Version 1.30 – 15.09.2023 Firmware: 1.2.000 Guntermann & Drunck GmbH Obere Leimbach 9 57074 Siegen Germany Telefon +49 (0) 271 23872-0 Telefax +49 (0) 271 23872-120 www.gdsys.com sales@gdsys.com i · G&D DP1.4-MUX2-NT...
- Page 3 Erhöhen Sie den Abstand zwischen Gerät und Empfänger. Schließen Sie das Gerät an eine andere Steckdose oder einen anderen Stromkreis als den, mit dem das Empfangsgerät verbunden ist, an. Kontaktieren Sie den Händler oder einen erfahrenen Rundfunk-/Fernsehtechniker. G&D DP1.4-MUX2-NT · ii...
-
Page 4: Table Of Contents
Anschluss des KVM-Switches an das lokale Netzwerk ........21 Konfiguration des KVM-Switches ..............22 Bedienung der Webapplikation ................ 22 Weiterführende Informationen ............... 23 Pin-Belegung der RS232-Buchse ............... 23 Pin-Belegung der zusätzlichen RS232-Schnittstellen .......... 24 Anschluss von USB 3.0-Massenspeichergeräten ..........25 iii · G&D DP1.4-MUX2-NT... - Page 5 Aufschaltung des nächsten Kanals .............. 35 Aufschaltung des vorherigen Kanals ............36 Permanente Schaltung (Pinning) einzelner Signale ........36 Monitoring-Werte abfragen ................ 37 Technische Daten ................... 39 Allgemeine Eigenschaften der Serie ..............39 Individuelle Eigenschaften der Varianten ............41 G&D DP1.4-MUX2-NT · iv...
-
Page 6: Sicherheitshinweise
Ständigen Zugang zu den Netzsteckern der Geräte sicherstellen Achten Sie bei der Installation der Geräte darauf, dass die Netzstecker der Geräte jederzeit zugänglich bleiben. Lüftungsöffnungen nicht verdecken Bei Gerätevarianten mit Lüftungsöffnungen ist eine Verdeckung der Lüftungsöff- nungen unbedingt zu vermeiden. 1 · G&D DP1.4-MUX2-NT... - Page 7 Bei unbefugtem Entfernen erlischt die Garantie. Die Nichtbeach- tung dieser Vorsichtsmaßnahme kann zu Verletzungen und Geräteschäden führen! Betreiben Sie das Gerät ausschließlich im vorgesehenen Einsatzbereich Die Geräte sind für eine Verwendung im Innenbereich ausgelegt. Vermeiden Sie ex- treme Kälte, Hitze oder Feuchtigkeit. G&D DP1.4-MUX2-NT · 2...
- Page 8 Mettre au rebut les batteries usagées conformêment aux instructions du fabricant et de manière écologique. Les batteries usagées ne doivent pas être jetées dans les ordures ménagères. Respectez les prescriptions valables pour l'élimination des produits électroniques. 3 · G&D DP1.4-MUX2-NT...
-
Page 9: Der Kvm-Switch
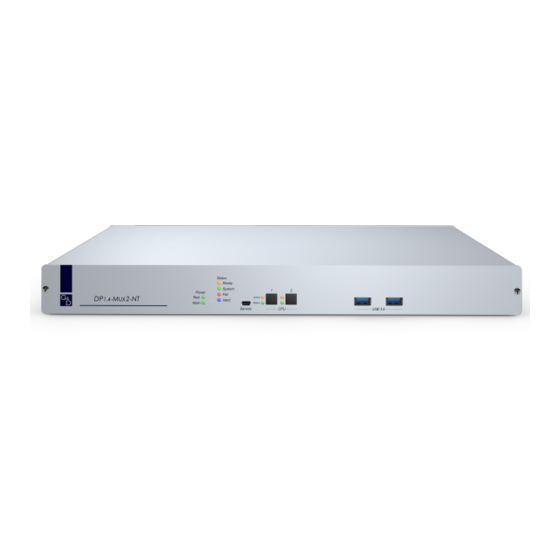
Der KVM-Switch Der KVM-Switch Der KVM-Switch DP1.4-MUX2-NT ermöglicht die Bedienung von bis zu zwei Rech- nern über einen Arbeitsplatz. HINWEIS: An die MC2-Variante des KVM-Switches können Sie Rechner mit max. zwei Videoausgängen anschließen. Die Videosignale dieser Rechner werden auf zwei separaten Monitoren des Arbeitsplatzes ausgegeben. -
Page 10: Installation
Beachten Sie hierbei die maximale Kabellänge von zwei Metern zwischen dem KVM-Switch und den anzuschließenden Rechnern. 3. Entscheiden Sie vor der Installation des KVM-Switches, welcher Taster an der Frontseite des Geräts, welchem Rechner zugewiesen werden soll. 5 · G&D DP1.4-MUX2-NT... -
Page 11: Anschluss Der Geräte Des Arbeitsplatzes
USB 3.0 Line In PS/2 K/M USB K/M USB 3.0 Abbildung 2: Schnittstellen zum Anschluss der Geräte des Arbeitsplatzes HINWEIS: Die Gerätevarianten DP1.4-MUX2-NT-R und DP1.4-MUX2-NT-MC2-R sind zusätzlich mit einer RS232 Device -Schnittstelle ausgestattet. Mit diesen Geräte- varianten kann auch das umgeschaltet werden. -
Page 12: Anschluss Der Rechner
Line In PS/2 K/M USB K/M Speaker USB 3.0 USB 3.0 Abbildung 3: Schnittstellen zum Anschluss der Rechner HINWEIS: Die Gerätevarianten DP1.4-MUX2-NT-R und DP1.4-MUX2-NT-MC2-R sind zusätzlich mit zwei -Schnittstellen ausgestattet. Mit diesen Geräte- RS232 CPU varianten kann auch das RS232-Signal umgeschaltet werden. - Page 13 Sie hierfür ein DisplayPort-Kabel. HINWEIS: Bei Geräten einer Multichannel-Variante sind oberhalb dieser Schnitt- stelle weitere Schnittstellen DP CPU x.y angeordnet. Verbinden Sie diese Schnittstelle mit den weiteren Grafikausgängen des Rechners. Verwenden Sie hierfür weitere DisplayPort-Kabel. G&D DP1.4-MUX2-NT · 8...
-
Page 14: Verbindung Mit Bis Zu Zwei Lokalen Netzwerken
Verbinden Sie ein Kaltgeräte-Kabel mit einer Netzsteckdose und dieser Buchse. Verbinden Sie – falls gewünscht – ein weiteres Kaltgeräte-Kabel mit Red. Power: einer Netzsteckdose und dieser Buchse. Hierdurch wird eine zweite, redundante Stromversorgung des Gerätes erreicht. 9 · G&D DP1.4-MUX2-NT... -
Page 15: Inbetriebnahme
über den Reset-Taster ausgelöst. Initialisierungsphase Fail Das Gerät ist (noch) nicht betriebsbereit. Das Gerät ist betriebsbereit oder ausgeschaltet. Ident. LED zur Identifizierung des Gerätes über die Webapplikation aktiviert. LED zur Identifizierung des Gerätes über die Webapplikation deaktiviert. G&D DP1.4-MUX2-NT · 10... - Page 16 Die an der Schnittstelle »USB 3.0 Devices« angeschlossenen Geräte sind fest auf diesen Kanal geschaltet (Pinning). Der Kanal ist derzeit nicht aufgeschaltet. Status Der angeschlossener Rechner ist eingeschaltet. Es ist kein Rechner angeschlossen oder der Rechner ist ausgeschaltet. 11 · G&D DP1.4-MUX2-NT...
-
Page 17: Kanal-Umschaltung
Betätigen Sie auf der Tastatur des Arbeitsplatzes die Tastenkombination Strg+Select-Key Im Auslieferungszustand ist die Umschaltung des Kanals über den Modifizierer und die Select-Keys möglich. Strg WICHTIG: Die Umschaltung des Kanals erfolgt, wenn die betätigte Tasten- kombination losgelassen wird. G&D DP1.4-MUX2-NT · 12... -
Page 18: Umschaltung Mit Step-Keys
NUM 1 … NUM 2 NUM 9 NUM 0 A … B F1 … F2 So schalten Sie mit Step-Keys auf einen bestimmten Kanal um: 1. Betätigen Sie auf der Tastatur des Arbeitsplatzes die Tastenkombination oder Hotkey+Step-Key »vor« Hotkey+Step-Key »zurück« 13 · G&D DP1.4-MUX2-NT... -
Page 19: Erweiterte Möglichkeiten Zur Kanalumschaltung
Der Befehl wird unmittelbar nach dem Senden des Befehls durch das seri- elle Gerät ausgeführt. Eine Meldung (s. unten) informiert das serielle Gerät über die korrekte Ausfüh- rung oder den Grund, weshalb die Umschaltung nicht erfolgt ist. G&D DP1.4-MUX2-NT · 14... -
Page 20: Umschaltung Über Die Webapplikation
Detaillierte Informationen hierzu finden Sie ebenfalls im separaten Handbuch zur Bedienung des Webapplikation. Umschaltung via SNMP So schalten Sie die Signalübertragung via SNMP um: Setzen Sie das Managed Object selectedChannel über die SNMP-Managementstation auf die Nummer des aufzuschaltenden Kanals. 15 · G&D DP1.4-MUX2-NT... -
Page 21: Verwendung Des Reset-Tasters
3. Halten Sie den Taster weiterhin gedrückt und schalten Sie das Gerät ein. 4. Sobald die grüne System-LED schnell blinkt, lassen Sie die Taste los. HINWEIS: Die Wiederherstellung der Standardeinstellungen ist alternativ auch über die Webapplikation Config Panel möglich. G&D DP1.4-MUX2-NT · 16... -
Page 22: Temporäre Deaktivierung Der Netzfilterregeln
2. Bearbeiten Sie die im Gerät gespeicherten Netzfilterregeln mit der Webapplika- tion Config Panel und speichern Sie die Regeln anschließend ab. WICHTIG: Wird innerhalb von 15 Minuten keine neue Netzfilterkonfiguration erstellt, werden die ursprünglichen Einstellungen wieder aktiviert. 17 · G&D DP1.4-MUX2-NT... -
Page 23: Erstkonfiguration Der Netzwerkeinstellungen
Kabel der Kategorie 5 (oder höher). 2. Stellen Sie sicher, dass die IP-Adresse der Netwerkschnittstelle des Rechners Teil des Subnetzes ist, welchem auch die IP-Adresse des Gerätes angehört. HINWEIS: Verwenden Sie beispielsweise die IP-Adresse 192.168.0.100. 3. Schalten Sie den KVM-Switch ein. G&D DP1.4-MUX2-NT · 18... -
Page 24: Start Der Webapplikation
Login-Information auf dem Etikett an der Geräteunterseite Passwort: HINWEIS: Das voreingestellte Admin-Passwort von Geräten mit Produktionsda- tum vor Januar 2021 lautet 4658 3. Klicken Sie auf Login 4. Klicken Sie auf das Icon Config Panel 21 19 · G&D DP1.4-MUX2-NT... -
Page 25: Konfiguration Der Netzwerkschnittstellen
Konfigurieren Sie die Netzwerkschnittstellen in diesem Fall im Bereich »Link-Aggregation«. IP-Adresse: Geben Sie – nur bei Auswahl des Betriebsmodus Statisch – die IP-Adresse der Schnittstelle an. Netzmaske: Geben Sie – nur bei Auswahl des Betriebsmodus Statisch – die Netzmaske des Netzwerkes an. G&D DP1.4-MUX2-NT · 20... -
Page 26: Konfiguration Der Globalen Netzwerkeinstellungen
Anschluss des KVM-Switches an das lokale Netzwerk So schließen Sie den KVM-Switch an das lokale Netzwerk an: 1. Entfernen Sie die Twisted-Pair-Kabelverbindung zwischen dem Rechner und dem Gerät. 2. Integrieren Sie das Gerät in das lokale Netzwerk. 21 · G&D DP1.4-MUX2-NT... -
Page 27: Konfiguration Des Kvm-Switches
Webapplikation Config Panel der MUX-NT -Serie beschrieben. WICHTIG: Grundlegende Voraussetzung für den Zugriff auf die Webapplikation des KVM-Switches ist die Konfiguration der Netzwerkeinstellungen des Gerätes. Befolgen Sie hierzu die Anweisungen im Kapitel Erstkonfiguration der Netzwerk- einstellungen ab Seite 18. G&D DP1.4-MUX2-NT · 22... -
Page 28: Weiterführende Informationen
Weiterführende Informationen Weiterführende Informationen Pin-Belegung der RS232-Buchse Die Geräte der DP1.4-MUX2-NT-Serie sind mit einer RS232-Buchse ausgestattet (siehe Umschaltung über ein serielles Gerät auf Seite 14). DP Monitor DP CPU 1 DP CPU 2 Network B RS232 CPU In 1 CPU In 2... -
Page 29: Pin-Belegung Der Zusätzlichen Rs232-Schnittstellen
Weiterführende Informationen Pin-Belegung der zusätzlichen RS232-Schnittstellen Die Gerätevarianten DP1.4-MUX2-NT-R und DP1.4-MUX2-NT-MC2-R sind mit zusätzlichen RS232-Schnittstellen ausgestattet. Mit diesen Gerätevarianten kann auch das RS232-Signal umgeschaltet werden. Die Pin-Belegung dieser Schnittstellen zeigt die folgende Abbildung: Die Tabelle zeigt die Zuordnung der verschiedenen Leitungen der Datenverbindung zu den entsprechenden Pins auf: Pin-Nr. -
Page 30: Anschluss Von Usb 3.0-Massenspeichergeräten
Zeitpunkt Daten auf das Massenspeichergerät schreibt, wird dieser Vorgang abgebrochen. Um einen Datenverlust zu vermeiden, verwenden Sie die Funktion zum sicheren Entfer- nen der Hardware des auf dem Rechner eingesetzten Betriebssystems vor der Umschaltung des Kanals. 25 · G&D DP1.4-MUX2-NT... -
Page 31: Xml-Steuerung Des Kvm-Switches
Gerät per Voreinstellung über die ID identifiziert. VERWENDUNG DES NAMENS EINES KVM-SWITCHES ZUR IDENTIFIZIERUNG <?xml version="1.0" encoding="utf-8"?> <root> <nextmuxchannel> <DlMux4 type="name">MUX-NT</DlMux4> </nextmuxchannel> </root> VERWENDUNG DER ID EINES KVM-SWITCHES ZUR IDENTIFIZIERUNG <?xml version="1.0" encoding="utf-8"?> <root> <nextmuxchannel> <DlMux4>0x11111111</DlMux4> </nextmuxchannel> </root> G&D DP1.4-MUX2-NT · 26... -
Page 32: Verwendung Von Geräte-Ids
AUFBAU EINES FEHLERDOKUMENTS <?xml version="1.0" encoding="utf-8"?> <root> <Error>Invalid request document</Error> </root> Antworten auf Befehle, die der XML-Dienst nicht selbst ausführt, sondern an den Gerätedienst des KVM-Switches delegiert, werden je nach Art der Meldung in unterschiedlichen XML-Container ausgegeben. 27 · G&D DP1.4-MUX2-NT... -
Page 33: Mehrere Befehle In Einem Xml-Dokument Kombinieren
über einen Kanalwechsel zu informieren. Solche Ereignisse werden in einem <pushNotification> -Container gemeldet. Der Typ der Benachrichtigung ist als Attribut type dieses Tags eingetragen. PUSH-NOTIFICATION BEI KANALWECHSEL <?xml version="1.0" encoding="utf-8"?> <root> <pushNotification type="channel_select_event"> <channel>1</channel> </pushNotification> </root> G&D DP1.4-MUX2-NT · 28... -
Page 34: Push-Notifications Abbestellen
Das Abonnement gilt nur für die Verbindung, über welche das subscribe- Kommando gesendet wurde. Verwenden Sie den <subscribe> -Container, um die Push-Notifications zu abonnieren. BENACHRICHTIGUNGEN BEI ÄNDERUNG DES GERÄTESTATUS AKTIVIEREN <?xml version="1.0" encoding="utf-8"?> <root> <subscribe> <Notification type="channel_select_event"/> </subscribe> </root> 29 · G&D DP1.4-MUX2-NT... -
Page 35: Konfiguration Und Verschlüsselung
2. Klicken Sie auf das zu konfigurierende Gerät und anschließend auf Konfiguration 3. Klicken Sie auf den Reiter Netzwerk 4. Wählen Sie den Bereich Remote-Control 5. Klicken Sie zur Einrichtung eines neuen Zugangs auf Hinzufügen Um einen bereits angelegten Zugang zu editieren, klicken Sie auf Bearbeiten G&D DP1.4-MUX2-NT · 30... - Page 36 Bei aktivierter können Sie nach dem TLS-Verschlüsselung Upload eines Zertifikates (im Bereich Remote Control des Netz- werk-Reiters) die Zertifikats-Authentifizierung zusätzlich aktivieren. 7. Klicken Sie auf , um die Daten zu speichern und den Dialog zu verlassen. 31 · G&D DP1.4-MUX2-NT...
-
Page 37: Hinweise Zur Passwort-Verschlüsselung
<?xml version=\"1.0\" encoding=\"utf-8\"?> <root> <logonmux> <DlMux4>0x000009CC</DlMux4> <User>JohnDoe</User> <Password> <EncryptedData xmlns="http://www.w3.org/2001/04/xmlenc#"> <CipherData> <CipherValue>B2Wmn52teOPvY31wq0l4nw==</CipherValue> </CipherData> </EncryptedData> </Password> </logonmux> </root> Der verschlüsselte Datenblock ( CipherValue ) besteht aus der Kombination von Initiali- sierungsvektor und verschlüsseltem Text mit Padding in BASE64-kodierter Darstellung. G&D DP1.4-MUX2-NT · 32... - Page 38 Byte des Padding die Anzahl hinzugefügter Füllbytes angibt. Die Füllbytes selbst sind zufällig zu wählen. Der Initialisierungsvektor wird für Stromchiffren (hier: ) benötigt. Er wird im Verschlüsselungsmodus Passwort-Verschlüsselung zufällig gewählt. Die Größe ent- spricht der Blockgröße der zu Grunde liegenden Verschlüsselung (8 Bytes). 33 · G&D DP1.4-MUX2-NT...
-
Page 39: Befehle
ANMELDUNG EINES BENUTZERS <?xml version="1.0" encoding="utf-8"?> <root> <logonmux> <DlMux4>0x000009CC</DlMux4> <User>JohnDoe</User> <Password>secret</Password> </logonmux> </root> HINWEIS: Informationen zur optionalen Passwort-Verschlüsselung finden Sie auf Seite 32. ABMELDUNG EINES BENUTZERS <?xml version="1.0" encoding="utf-8"?> <root> <logoffmux> <DlMux4>0x000009CC</DlMux4> </logoffmux> </root> G&D DP1.4-MUX2-NT · 34... -
Page 40: Aufschaltung Eines Bestimmten Kanals
Kanals des KVM-Switches. TRENNUNG DER AKTIVEN AUFSCHALTUNG <?xml version="1.0" encoding="utf-8"?> <root> <disconnectmux/> </root> Aufschaltung des nächsten Kanals Der Befehl schaltet den nächsten Kanal des KVM-Switches auf. <nextmuxchannel> AUFSCHALTUNG DES NÄCHSTEN KANALS <?xml version="1.0" encoding="utf-8"?> <root> <nextmuxchannel/> </root> 35 · G&D DP1.4-MUX2-NT... -
Page 41: Aufschaltung Des Vorherigen Kanals
<?xml version="1.0" encoding="utf-8"?> <root> <pinmux> <Channel>2</Channel> <Type>USB</Type> </pinmux> </root> ZWEITE VIDEOEBENE AUF DEM AKTUELLEN KANAL PINNEN <?xml version="1.0" encoding="utf-8"?> <root> <pinmux> <Channel>-1</Channel> <Type plane="1">VIDEO</Type> </pinmux> </root> AUFHEBEN EINES USB-PINNINGS <?xml version="1.0" encoding="utf-8"?> <root> <unpinmux> <Channel>2</Channel> <Type>USB</Type> </unpinmux> </root> G&D DP1.4-MUX2-NT · 36... -
Page 42: Monitoring-Werte Abfragen
<?xml version="1.0" encoding="utf-8"?> <root> <monitor> <DlMux4><id>0x11111111</id></DlMux4> </monitor> </root> Durch die Angabe des gewünschten Monitoring-Wertes können Sie die Auflistung zusätzlich eingeschränken. MONITORING-WERT »STATUS« DES KVM-SWITCHES 0X11111111 ABFRAGEN <?xml version="1.0" encoding="utf-8"?> <root> <monitor> <DlMux4> <id>0x11111111</id> <monitorName>Status</monitorName> </DlMux4> </monitor> </root> 37 · G&D DP1.4-MUX2-NT... - Page 43 Flags können Sie feststellen, ob sich der Monitoring-Wert im Sollbereich alarm befinden ( ) oder außerhalb ( entspricht der Funktion Gesehen in Acknowledged der Webapplikation Innerhalb des XML-Tags können Sie alternativ auch mehrere Geräteklas- <monitor> sen-Tags aufführen. G&D DP1.4-MUX2-NT · 38...
-
Page 44: Technische Daten
1 × Mini-USB-B-Buchse Audio Übertragungsart: LPCM (2/4/6/8 Kanäle), stereo DisplayPort Digital Auflösungen: 16/20/24 bit Abtastraten: bis 192 kHz Audio Art: analog, transparent Line In/Speaker Auflösung: 24 bit digital, Stereo Abtastrate 96 kHz Bandbreite: 22 kHz 39 · G&D DP1.4-MUX2-NT... - Page 45 Netzteil Stromversorgung Anschluss: Kaltgerätestecker (IEC-320 C14) Stromaufnahme maximal: siehe Eigenschaften der Varianten Einsatzumgebung Temperatur: +5°C bis +45°C Luftfeuchte: 20% bis 80%, nicht kondensierend Lagerumgebung Temperatur: -20°C bis +55°C Luftfeuchte: 15% bis 85%, nicht kondensierend G&D DP1.4-MUX2-NT · 40...
-
Page 46: Individuelle Eigenschaften Der Varianten
Video: 1 × DisplayPort-Buchse für Arbeitsplatz Schnittstellen Video: 1 × DisplayPort-Buchse pro Rechner Stromversorgung Stromaufnahme: 100-240VAC/60-50Hz/0,5-0,3A Gehäuse Material: Aluminium eloxiert Maße (B × H × T): 436 × 66 × 210 mm Gewicht: ca. 2,7 kg 41 · G&D DP1.4-MUX2-NT... - Page 47 Video: 2 × DisplayPort-Buchse für Arbeitsplatz Schnittstellen Video: 2 × DisplayPort-Buchse pro Rechner Stromversorgung Stromaufnahme: 100-240VAC/60-50Hz/0,6-0,4A Gehäuse Material: Aluminium eloxiert Maße (B × H × T): 436 × 88 × 210 mm Gewicht: ca. 2,7 kg G&D DP1.4-MUX2-NT · 42...
- Page 50 © Guntermann & Drunck GmbH 2023. All rights reserved. Version 1.30 – 15/09/2023 Firmware: 1.2.000 Guntermann & Drunck GmbH Obere Leimbach 9 57074 Siegen Germany Phone +49 (0) 271 23872-0 +49 (0) 271 23872-120 www.gdsys.com sales@gdsys.com i · G&D DP1.4-MUX2-NT...
- Page 51 Increase the separation between the equipment and receiver. Connect the equipment into an outlet on a circuit different from that to which the receiver is connected. Consult the dealer or an experienced radio/TV technician for help. G&D DP1.4-MUX2-NT · ii...
- Page 52 Configuring the KVM switch ................. 22 Operating the web application ................22 Further information ..................23 Pin assignment of the RS232 socket ..............23 Pin assignment of additional RS232 sockets ............24 Connecting USB 3.0 mass storage devices ............25 iii · G&D DP1.4-MUX2-NT...
- Page 53 Switching to the next channel ..............35 Switching to the previous channel .............. 36 Pinning individual signals ................36 Querying monitoring values ............... 37 Technical data ....................39 General features of the series ................39 Individual variant features ................41 G&D DP1.4-MUX2-NT · iv...
-
Page 54: Safety Guidelines
When installing the devices, ensure that the devices’ mains plugs remain accessible at all time. Do not cover the ventilation openings For device variants with ventilation openings, it must always be ensured that the ventilation openings are not covered. 1 · G&D DP1.4-MUX2-NT... - Page 55 Failure to observe this precautionary measure can result in injuries and damage to the device. Operate the device exclusively in the intended field of application The devices are designed for indoor use. Avoid extreme cold, heat or humidity. G&D DP1.4-MUX2-NT · 2...
- Page 56 VORSICHT: Es besteht Explosionsgefahr, wenn die Batterie durch einen falschen Batterie-Typ ersetzt wird. Entsorgen Sie gebrauchte Batterien umweltgerecht. Gebrauchte Batterien dürfen nicht in den Hausmüll geworfen werden. Beachten Sie die gültigen Vorschriften zur Entsorgung elektronischer Produkte. 3 · G&D DP1.4-MUX2-NT...
-
Page 57: The Kvm Switch
The KVM switch The KVM switch The KVM switch DP1.4-MUX2-NT lets users operate up to two computers from one workstation. NOTE: You can connect computers with up to two video outputs to the MC2 vari- ant of the KVM switch. The video signals from these computers are displayed on two separate monitors at the workstation. -
Page 58: Installation
KVM switch and the comput- ers to be connected. 3. Before installing the KVM switch, decide which button on the front of the device you want to assign to which computer. 5 · G&D DP1.4-MUX2-NT... -
Page 59: Connecting The Workstation Devices
USB 3.0 Line In PS/2 K/M USB K/M USB 3.0 Figure 2: Interfaces for connecting the workstation devices NOTE: The device variants DP1.4-MUX2-NT-R and DP1.4-MUX2-NT-MC2-R are additionally equipped with a interface. With this variants RS232 Device RS232 can be switched as well. -
Page 60: Connecting The Computers
Line In PS/2 K/M USB K/M Speaker USB 3.0 USB 3.0 Figure 3: Interfaces for connecting the computers NOTE: The device variants DP1.4-MUX2-NT-R and DP1.4-MUX2-NT-MC2-R are additionally equipped with two interfaces. With this variants RS232 CPU RS232 signals can be switched as well. - Page 61 Use the DisplayPort cable to connect the computer’s video output to this interface. NOTE: Multichannel devices provide further DP CPU x.y interfaces above this inter- face. Use further DisplayPort cables to connect this interface to further graphics outputs of the computer. G&D DP1.4-MUX2-NT · 8...
-
Page 62: Connection To Up To Two Networks
Connect a power cable to a mains socket and this socket. Main Power: Red. power: If desired, connect another power cable to a mains socket and this socket. This provides the device with a second, redundant power supply. 9 · G&D DP1.4-MUX2-NT... -
Page 63: Start-Up
The device is not (yet) ready for operation. The device is ready for operation or switched off. Ident. LED activated to identify the device via web application. LED activated to identify the device via web application. G&D DP1.4-MUX2-NT · 10... - Page 64 The devices connected to the »USB 3.0 Devices« inter- face are permanently switched to this channel (pin- ning). Inactive channel Status The connected computer is switched on. No computer is connected or the computer is switched off. 11 · G&D DP1.4-MUX2-NT...
-
Page 65: Switching Between Channels
Press the key combination on the keyboard of the workstation. Ctrl+Select key By default, you can use the modifier and the select keys to switch Ctrl between channels. IMPORTANT: The channel is switched after you release the key combination. G&D DP1.4-MUX2-NT · 12... -
Page 66: Switching Via Step Keys
NUM 1 … NUM 2 NUM 9 NUM 0 A … B F1 … F2 How to use select keys to switch to a particular channel: 1. Press Hotkey+»Forward« Step key Hotkey+»Back« Step key on the console keyboard. 13 · G&D DP1.4-MUX2-NT... -
Page 67: Advanced Options To Switch Between Channels
NOTE: The command is executed immediately after the serial device sends the com- mand. A message (see below) informs the serial device about the correct execution or the reason why the switching could not take place. G&D DP1.4-MUX2-NT · 14... -
Page 68: Switching Via Web Application
Detailed information on this topic are given in the separate manual for operating the web application. Switching via SNMP How to switch the signal transmission via SNMP: Use the SNMP management station to set the managed object to the selectedChannel number of the channel you want to access. 15 · G&D DP1.4-MUX2-NT... -
Page 69: Use Of The Reset Button
3. Keep the button pressed and switch the device on. 4. Release the button as soon as the green System LED starts blinking fast. NOTE: You can also use the web application Config Panel to reset the default set- tings. G&D DP1.4-MUX2-NT · 16... -
Page 70: Temporarily Disabling The Network Filter Rules
2. Use the web application Config Panel to edit the network filter rules stored in the device and save the rules. IMPORTANT: If you do not configure new network filters within 15 minutes, the original settings are reactivated. 17 · G&D DP1.4-MUX2-NT... -
Page 71: Initial Configuration Of The Network Settings
2. Make sure that the IP address of the computer’s network interface is part of the subnet to which the IP address of the device belongs. NOTE: Use the IP address 192.168.0.100, for example. 3. Turn on the KVM switch. G&D DP1.4-MUX2-NT · 18... -
Page 72: Starting The Web Application
Password: NOTE: The default admin password for devices manufactured before January 2021 is 4658 3. Click on Login 4. Click on the Config Panel 21 icon. 19 · G&D DP1.4-MUX2-NT... -
Page 73: Configuring The Network Interfaces
In this case, configure the network interfaces in the »Link aggregation« section. IP address: Only if the Static operating mode is selected, enter the IP address of the interface. Netmask Only if the Static operating mode is selected, enter the net- mask of the network. G&D DP1.4-MUX2-NT · 20... -
Page 74: Configuring Global Network Settings
Connecting the KVM switch to the local network How to connect the KVM switch to the local network: 1. Remove the twisted pair cabling between computer and device. 2. Integrate the device into the local network. 21 · G&D DP1.4-MUX2-NT... -
Page 75: Configuring The Kvm Switch
The basic requirement for accessing the web application of the KVM switch is the configuration of the device’s network settings. To do this, follow the instructions in the chapter Initial configuration of the network settings on page 18 ff.. G&D DP1.4-MUX2-NT · 22... -
Page 76: Further Information
Further information Further information Pin assignment of the RS232 socket The devices of the DP1.4-MUX2-NT series provide an RS232 socket (see Switching via serial device on page 14). DP Monitor DP CPU 1 DP CPU 2 Network B RS232 CPU In 1... -
Page 77: Pin Assignment Of Additional Rs232 Sockets
Further information Pin assignment of additional RS232 sockets The device variants DP1.4-MUX2-NT-R and DP1.4-MUX2-NT-MC2-R provide addi- tional RS232 sockets. With this variants can be switched as well. RS232 signals The following figures shows the pin assignments of the RS232 sockets:... -
Page 78: Connecting Usb 3.0 Mass Storage Devices
In case the computer writes data on the mass storage device at that time, this process is aborted. Before switching the channel, use the Safely remove hardware function of the applied operating system of the computer to avoid data loss. 25 · G&D DP1.4-MUX2-NT... -
Page 79: Controlling The Kvm Switch Via Xml
Using an attribute is optional. If you do not use a attribute, devices are identified via their ID. IDENTIFY THE KVM SWITCH BY NAME <?xml version="1.0" encoding="utf-8"?> <root> <nextmuxchannel> <DlMux4 type="name">MUX-NT</DlMux4> </nextmuxchannel> </root> IDENTIFY THE KVM SWITCH BY ID <?xml version="1.0" encoding="utf-8"?> <root> <nextmuxchannel> <DlMux4>0x11111111</DlMux4> </nextmuxchannel> </root> G&D DP1.4-MUX2-NT · 26... -
Page 80: Use Of Device Ids
</root> Depending on the type of message, responses to commands, which are not executed by the XML service itself, but are delegated to the device service of the KVM switch, are shown in different XML containers. 27 · G&D DP1.4-MUX2-NT... -
Page 81: Combining Multiple Commands In An Xml Document
Such events are reported in a <pushNotification> container. The type of notification is listed as attribute of this tag. type PUSH NOTIFICATIONS FOR SWITCHING BETWEEN CHANNELS <?xml version="1.0" encoding="utf-8"?> <root> <pushNotification type="channel_select_event"> <channel>1</channel> </pushNotification> </root> G&D DP1.4-MUX2-NT · 28... -
Page 82: Unsubscribing From Push Notifications
The subscription applies only for the connection on which the subscribe com- mand is sent. Use the <subscribe> container to subscribe to push notifications. ENABLING NOTIFICATIONS WHEN DEVICE STATUS CHANGES <?xml version="1.0" encoding="utf-8"?> <root> <subscribe> <Notification type="channel_select_event"/> </subscribe> </root> 29 · G&D DP1.4-MUX2-NT... -
Page 83: Configuration And Encryption
2. Click on the device you want to configure and then click on Configuration 3. Click on the tab Network 4. Go to Remote control 5. To create a new access, click on To edit an existing access, click on Edit G&D DP1.4-MUX2-NT · 30... - Page 84 With TLS encryption enabled, you can additionally enable Certi- ficate authentification after uploading a certificate (in the Remote Control section of the Network tab). 7. Click on to save your settings and to close the window. 31 · G&D DP1.4-MUX2-NT...
-
Page 85: Instructions For Encrypting Passwords
<?xml version=\"1.0\" encoding=\"utf-8\"?> <root> <logonmux> <DlMux4>0x000009CC</DlMux4> <User>JohnDoe</User> <Password> <EncryptedData xmlns="http://www.w3.org/2001/04/xmlenc#"> <CipherData> <CipherValue>B2Wmn52teOPvY31wq0l4nw==</CipherValue> </CipherData> </EncryptedData> </Password> </logonmux> </root> The encrypted data block ( CipherValue ) consists of a combination of initialization vec- tor and encrypted text with BASE64-coded padding. G&D DP1.4-MUX2-NT · 32... - Page 86 The padding bytes are to be randomly selected. The initialization vector is required for stream ciphers (here: ). It is randomly selected in the encryption mode Password encryption . Its size corresponds to the block size of the selected encryption (8 bytes). 33 · G&D DP1.4-MUX2-NT...
-
Page 87: Commands
Transmitting username and password is not required when logging in. USER LOGIN <?xml version="1.0" encoding="utf-8"?> <root> <logonmux> <DlMux4>0x000009CC</DlMux4> <User>JohnDoe</User> <Password>secret</Password> </logonmux> </root> NOTE: Information about optional password encryption is given on page 32. USER LOGOFF <?xml version="1.0" encoding="utf-8"?> <root> <logoffmux> <DlMux4>0x000009CC</DlMux4> </logoffmux> </root> G&D DP1.4-MUX2-NT · 34... -
Page 88: Switching To A Particular Channel
<?xml version="1.0" encoding="utf-8"?> <root> <disconnectmux/> </root> Switching to the next channel Use the command to switch to the next channel of the KVM switch. <nextmuxchannel> SWITCHING TO THE NEXT CHANNEL <?xml version="1.0" encoding="utf-8"?> <root> <nextmuxchannel/> </root> 35 · G&D DP1.4-MUX2-NT... -
Page 89: Switching To The Previous Channel
<?xml version="1.0" encoding="utf-8"?> <root> <pinmux> <Channel>2</Channel> <Type>USB</Type> </pinmux> </root> PIN SECOND VIDEO LEVEL TO CURRENT CHANNEL <?xml version="1.0" encoding="utf-8"?> <root> <pinmux> <Channel>-1</Channel> <Type plane="1">VIDEO</Type> </pinmux> </root> CANCEL USB PINNING <?xml version="1.0" encoding="utf-8"?> <root> <unpinmux> <Channel>2</Channel> <Type>USB</Type> </unpinmux> </root> G&D DP1.4-MUX2-NT · 36... -
Page 90: Querying Monitoring Values
<DlMux4><id>0x11111111</id></DlMux4> </monitor> </root> You can further restrict the list by specifying the desired monitoring value. QUERYING THE MONITORING VALUE »STATUS« OF THE KVM SWITCH 0X11111111 <?xml version="1.0" encoding="utf-8"?> <root> <monitor> <DlMux4> <id>0x11111111</id> <monitorName>Status</monitorName> </DlMux4> </monitor> </root> 37 · G&D DP1.4-MUX2-NT... - Page 91 ( ) or outside ( ) the required range. Acknowledged corresponds to the Acknowledged function in the web application. You can also include several device class tags in the XML tag <monitor> G&D DP1.4-MUX2-NT · 38...
-
Page 92: Technical Data
Transmission type: LPCM (2/4/6/8 channels), stereo DisplayPort Digital Resolutions: 16/20/24 bit Sampling rates: up to 192 kHz Audio Type: Analogue, transparent Line In/Speaker Resolution: 24 bit digital, stereo Sampling rate: 96 kHz Bandwidth 22 kHz 39 · G&D DP1.4-MUX2-NT... - Page 93 see variant features Operating environment Temperature: +5°C to +45°C Air humidity: 20% to 80%, non-condensing Storage environment Temperature: -20°C to +55°C Air humidity: 15% to 85%, non-condensing Conformity CE, UKCA, FCC class B, TAA, EAC, RoHS, WEEE, REACH G&D DP1.4-MUX2-NT · 40...
-
Page 94: Individual Variant Features
2 × DisplayPort socket for workstation Interfaces Video: 2 × DisplayPort socket per computer Power supply Power consumption: 100-240VAC/60-50Hz/0.6-0.4A Housing Material: Anodised aluminium Dimensions (W × H × D): 436 × 66 × 210 mm Weight: Approx. 2.6 kg 41 · G&D DP1.4-MUX2-NT... - Page 95 2 × DisplayPort socket for workstation Interfaces Video: 2 × DisplayPort socket per computer Power supply Power consumption: 100-240VAC/60-50Hz/0.6-0.4A Housing Material: Anodised aluminium Dimensions (W × H × D): 436 × 88 × 210 mm Weight: Approx. 2.7 kg G&D DP1.4-MUX2-NT · 42...
- Page 100 G&D. AND KVM FEELS RIGHT. Hauptsitz | Headquarter US-Büro | US-Office Guntermann & Drunck GmbH Systementwicklung G&D North America Inc. Obere Leimbach 9 | D-57074 Siegen | Phone +49 271 23872-0 4001 W. Alemada Avenue | Suite 100, Burbank, CA 91505 | Phone +1-818-748-3383 sales.us@gdsys.com | www.gdsys.com sales@gdsys.com | www.gdsys.com...
Need help?
Do you have a question about the DP1.4-MUX2-NT and is the answer not in the manual?
Questions and answers