
Related Manuals for G&D DP1.2-MUX3-ATC


Summary of Contents for G&D DP1.2-MUX3-ATC
- Page 1 Guntermann & Drunck GmbH www.gdsys.de G&D DP1.2-MUX3-ATC Installation und Bedienung Installation and Operation A9100300-1.12...
- Page 2 © Guntermann & Drunck GmbH 2021. Alle Rechte vorbehalten. Version 1.12 – 06.10.2021 Firmware: 1.1.002 Guntermann & Drunck GmbH Obere Leimbach 9 57074 Siegen Germany Telefon +49 (0) 271 23872-0 Telefax +49 (0) 271 23872-120 www.gdsys.de sales@gdsys.de i · G&D DP1.2-MUX3-ATC...
- Page 3 Erhöhen Sie den Abstand zwischen Gerät und Empfänger. Schließen Sie das Gerät an eine andere Steckdose oder einen anderen Stromkreis als den, mit dem das Empfangsgerät verbunden ist, an. Kontaktieren Sie den Händler oder einen erfahrenen Rundfunk-/Fernsehtechniker. G&D DP1.2-MUX3-ATC · ii...
-
Page 4: Table Of Contents
Umschaltung über die Webapplikation ............18 Umschaltung über das Umschalt-Tool ............18 Umschaltung via SNMP ................18 Umschaltung via XML-Steuerung .............. 18 Verwendung des Reset-Tasters ............... 19 Wiederherstellung der Standardeinstellungen ........... 19 Temporäre Deaktivierung der Netzfilterregeln ..........20 iii · G&D DP1.2-MUX3-ATC... - Page 5 Failover-Switching einrichten ..............39 Videokanal-Konfiguration ................40 Änderung des Namens eines Videokanals ........... 40 Änderung des Kommentares eines Videokanals .......... 40 EDID-Profil eines Monitores einlesen ............41 EDID-Profil eines Kanals festlegen ............41 Verwendung des Freeze-Modus ..............42 G&D DP1.2-MUX3-ATC · iv...
- Page 6 Berechtigung zum Ändern der Einstellungen des »Personal Profile«-Menüs . 65 Zugriff auf USB-Geräte ................66 Berechtigung zur Änderung des eigenen Passworts ........67 Zugriffsrecht auf einen KVM-Kanal ............67 Berechtigung für das Ausführen von Scripts einstellen ......... 68 v · G&D DP1.2-MUX3-ATC...
- Page 7 Aufschaltung des nächsten Kanals .............. 79 Aufschaltung des vorherigen Kanals ............80 Permanente Schaltung (Pinning) einzelner Signale ........80 Monitoring-Werte abfragen ................ 81 Technische Daten ................... 83 Allgemeine Eigenschaften der Serie ..............83 Individuelle Eigenschaften der Varianten ............85 G&D DP1.2-MUX3-ATC · vi...
-
Page 8: Sicherheitshinweise
Um das Risiko eines Stromschlags zu vermeiden, sollten Sie das Gerät nicht öffnen oder Abdeckungen entfernen. Im Servicefall wenden Sie sich bitte an unsere Techniker. Geerdete Spannungsquelle verwenden Betreiben Sie dieses Gerät nur an einer geerdeten Spannungsquelle. 1 · G&D DP1.2-MUX3-ATC... - Page 9 Vermeiden Sie bei der Verlegung der Kabel Stolperfallen. Betreiben Sie das Gerät ausschließlich im vorgesehenen Einsatzbereich Die Geräte sind für eine Verwendung im Innenbereich ausgelegt. Vermeiden Sie extreme Kälte, Hitze oder Feuchtigkeit. Die Geräte sind nicht für die Verwendung in gefährlichen Umgebungen zugelassen. G&D DP1.2-MUX3-ATC · 2...
- Page 10 Mettre au rebut les batteries usagées conformêment aux instructions du fabricant et de manière écologique. Les batteries usagées ne doivent pas être jetées dans les ordures ménagères. Respectez les prescriptions valables pour l'élimination des produits électroniques. 3 · G&D DP1.2-MUX3-ATC...
-
Page 11: Der Kvm-Switch
Der KVM-Switch Der KVM-Switch Der KVM-Switch DP1.2-MUX3-ATC ermöglicht die Bedienung von bis zu drei Rechnern über einen Arbeitsplatz. HINWEIS: An die MC2-Variante des KVM-Switches können Sie Rechner mit max. zwei Videoausgängen anschließen. Die Videosignale dieser Rechner werden auf zwei separaten Monitoren des Arbeitsplatzes ausgegeben. -
Page 12: Installation
Sie die Kabel der Eingabegeräte aus den PS/2- bzw. USB-Schnittstellen. 2. Platzieren Sie den KVM-Switch zwischen den Rechnern sowie dem Arbeitsplatz. Beachten Sie hierbei die maximale Kabellänge von zwei Metern zwischen dem KVM-Switch und den anzuschließenden Rechnern. 5 · G&D DP1.2-MUX3-ATC... -
Page 13: Anschluss Der Geräte Des Arbeitsplatzes
Line In PS/2 K/M USB K/M USB 3.0 Abbildung 2: Schnittstellen zum Anschluss der Geräte des Arbeitsplatzes HINWEIS: Die Gerätevarianten DP1.2-MUX3-ATC-R und DP1.2-MUX3-ATC-MC2-R sind zusätzlich mit einer RS232 Device -Schnittstelle ausgestattet. Verbinden Sie das serielle Endgerät des Arbeitsplatzes mit dieser Schnittstelle. -
Page 14: Anschluss Der Rechner
Line In PS/2 K/M USB K/M USB 3.0 Abbildung 3: Schnittstellen zum Anschluss der Rechner HINWEIS: Die Gerätevarianten DP1.2-MUX3-ATC-R und DP1.2-MUX3-ATC-MC2-R sind zusätzlich mit vier RS232 CPU -Schnittstellen ausgestattet. Verbinden Sie die 9-polige serielle Schnittstelle des Rechners mit dieser Schnitt- stelle. -
Page 15: Verbindung Mit Bis Zu Zwei Lokalen Netzwerken
Verbinden Sie ein Kaltgeräte-Kabel mit einer Netzsteckdose und dieser Buchse. Red. Power: Verbinden Sie – falls gewünscht – ein weiteres Kaltgeräte-Kabel mit einer Netzsteckdose und dieser Buchse. Hierdurch wird eine zweite, redundante Stromversorgung des Gerätes erreicht. G&D DP1.2-MUX3-ATC · 8... -
Page 16: Inbetriebnahme
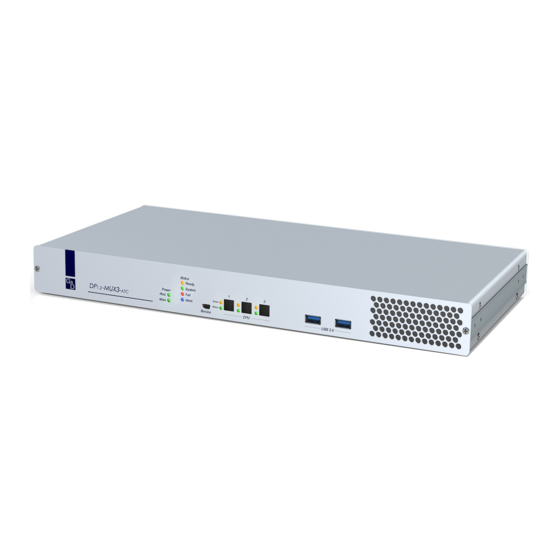
Das Gerät ist (noch) nicht betriebsbereit. Das Gerät ist betriebsbereit oder ausgeschaltet. Ident. LED zur Identifizierung des Gerätes über das OSD oder die Webapplikation aktiviert. LED zur Identifizierung des Gerätes über das OSD oder die Webapplikation deaktiviert. 9 · G&D DP1.2-MUX3-ATC... - Page 17 Die an die Schnittstelle »USB 3.0 Devices« angeschlosse- nen Geräte sind permanent auf diesen Kanal geschaltet (Pinning). Der Kanal ist derzeit nicht aufgeschaltet. Status Der angeschlossener Rechner ist eingeschaltet. Es ist kein Rechner angeschlossen oder der Rechner ist ausgeschaltet. G&D DP1.2-MUX3-ATC · 10...
-
Page 18: Open Access"-Betriebsart
Wurde die Funktion Default execution (s. Seite 46) für das Benutzerkonto aktiviert, wird nach der Anmeldung des Benutzers sofort die im Personal Profile- Menü ausgewählte Aufschaltung/Script-Ausführung durchgeführt. Starten Sie in diesem Fall das On-Screen-Display erneut (s. Seite 21) um das Select-Menü aufzurufen. 11 · G&D DP1.2-MUX3-ATC... -
Page 19: Kanal-Umschaltung
Betätigen Sie auf der Tastatur des Arbeitsplatzes die Tastenkombination Alt+Select-Key Im Auslieferungszustand ist die Umschaltung des Kanals über den Modifizierer und die Select-Keys möglich. WICHTIG: Die Umschaltung des Kanals erfolgt, wenn die betätigte Tasten- kombination losgelassen wird. G&D DP1.2-MUX3-ATC · 12... -
Page 20: Zuletzt Aktiven Kanal Aufschalten (Reconnect)
Bereits nach dem Aufruf des On-Screen-Displays können Sie im Select- Menü mit der Tastenkombination Strg+A die Stepscan-Funktion aktivieren. So beenden Sie die Autoscan-Funktion: 1. Betätigen Sie Strg+Num (Standard) zum Aufruf des On-Screen-Displays. Die Autoscan-Funktion wird hierdurch beendet. 13 · G&D DP1.2-MUX3-ATC... -
Page 21: Automatisches Durchschalten Aktiver Kanäle (Autoskip)
Bereits nach dem Aufruf des On-Screen-Displays können Sie im Select- Menü mit der Tastenkombination Strg+B die Stepscan-Funktion aktivieren. So beenden Sie die Autoskip-Funktion: 1. Betätigen Sie (Standard) zum Aufruf des On-Screen-Displays. Strg+Num Die Autoskip Funktion wird hierdurch beendet. G&D DP1.2-MUX3-ATC · 14... -
Page 22: Umschaltung Mit Step-Keys
4. Schalten Sie mit den konfigurierten Step-Keys (s. Seite 43) einen Kanal auf- oder abwärts. HINWEIS: In den Standardeinstellungen sind die Step-Keys Hoch Runter aktiv. So beenden Sie die Stepscan-Funktion: 1. Betätigen Sie Strg+Num (Standard) zum Aufruf des On-Screen-Displays. Die Stepscan-Funktion wird hierdurch beendet. 15 · G&D DP1.2-MUX3-ATC... -
Page 23: Geräte An Usb 3.0-Schnittstellen Permanent Umschalten
Nach dem Beenden der permanenten Schaltung werden die Geräte an den USB 3.0-Schnittstellen auf den aktuellen KVM-Kanal geschaltet. TIPP: Bereits nach dem Aufruf des On-Screen-Displays können Sie im Select- Menü mit der Tastenkombination Strg+U die Stepscan-Funktion aktivieren. G&D DP1.2-MUX3-ATC · 16... -
Page 24: Erweiterte Möglichkeiten Zur Kanalumschaltung
Der Befehl wird unmittelbar nach dem Senden des Befehls durch das seri- elle Gerät ausgeführt. Eine Meldung (s. unten) informiert das serielle Gerät über die korrekte Ausfüh- rung oder den Grund, weshalb die Umschaltung nicht erfolgt ist. 17 · G&D DP1.2-MUX3-ATC... -
Page 25: Umschaltung Über Die Webapplikation
über die SNMP-Managementstation auf die Nummer des aufzuschaltenden Kanals. Umschaltung via XML-Steuerung Die XML-Steuerung erlaubt die Steuerung des KVM-Switches über Dritthersteller- Geräte (beispielsweise AMX® und Crestron®). Ausführliche Informationen finden Sie im Kapitel XML-Steuerung des KVM-Switches ab Seite 71. G&D DP1.2-MUX3-ATC · 18... -
Page 26: Verwendung Des Reset-Tasters
3. Halten Sie den Taster weiterhin gedrückt und schalten Sie das Gerät ein. 4. Sobald die grüne System-LED schnell blinkt, lassen Sie die Taste los. HINWEIS: Die Wiederherstellung der Standardeinstellungen ist alternativ auch über das OSD und die Webapplikation Config Panel möglich. 19 · G&D DP1.2-MUX3-ATC... -
Page 27: Temporäre Deaktivierung Der Netzfilterregeln
2. Bearbeiten Sie die im Gerät gespeicherten Netzfilterregeln mit der Webapplika- tion Config Panel und speichern Sie die Regeln anschließend ab. WICHTIG: Wird innerhalb von 15 Minuten keine neue Netzfilterkonfiguration erstellt, werden die ursprünglichen Einstellungen wieder aktiviert. G&D DP1.2-MUX3-ATC · 20... -
Page 28: Das On-Screen-Display
Name des KVM-Switches und der Titel des aktuellen Menüs angezeigt. Im Listenfeld werden die aufschaltbaren Computer bzw. die Menüeinträge des geöffneten Menüs aufgeführt. In der werden die wichtigsten Tasten zur Bedienung des aktuell ange- Fußzeile zeigten Menüs aufgeführt. 21 · G&D DP1.2-MUX3-ATC... -
Page 29: Bedienung Des On-Screen-Displays
Spalte angezeigt. Betätigen Sie (mehrfach) die -Taste, um zwischen den verfügba- ren Optionen zu wählen. Betätigen Sie nach der Änderung der gewünschten Konfigurationseinstellungen eines Menüs die -Taste zur Speicherung Ihrer Auswahl und Rückkehr ins überge- ordnete Menü. G&D DP1.2-MUX3-ATC · 22... - Page 30 Untermenüs wird in der angezeigt. Fußzeile Textfelder: Geben Sie über die Tastatur den gewünschten Text ein. Die bisherige Eingabe wird hierdurch überschrieben. TIPP: Alternativ betätigen Sie die Eingabetaste und editieren anschließend den bereits erfassten Text. 23 · G&D DP1.2-MUX3-ATC...
-
Page 31: Konfigurationseinstellungen Im Osd
Comment mit den Pfeiltasten und betätigen Sie die Eingabetaste 5. Betätigen Sie die -Taste. 6. Geben Sie den gewünschten Kommentar ein und betätigen Sie die F2-Taste 7. Betätigen Sie die -Taste zur Speicherung der durchgeführten Änderungen. G&D DP1.2-MUX3-ATC · 24... -
Page 32: Netzwerkeinstellungen
Geben Sie – nur bei Auswahl des Betriebsmodus Static – die IP-Adresse der Schnittstelle an. Netmask: Geben Sie – nur bei Auswahl des Betriebsmodus Static – die Netzmaske des Netzwerkes an. 6. Betätigen Sie die -Taste zur Speicherung der durchgeführten Änderungen. 25 · G&D DP1.2-MUX3-ATC... -
Page 33: Konfiguration Der Globalen Netzwerkeinstellungen
(Standard) zum Aufruf des On-Screen-Displays. 2. Betätigen Sie die -Taste zum Aufruf der Konfigurationseinstellungen. 3. Wählen Sie mit den und betätigen Sie die Network Pfeiltasten Eingabetaste 4. Wählen Sie mit den und betätigen Sie die Link status Pfeiltasten Eingabetaste G&D DP1.2-MUX3-ATC · 26... -
Page 34: Erreichbarkeit Eines Hosts Im Netzwerk Prüfen (Ping)
Avg. RTT: mittlere Paketumlaufzeit Max. RTT: längste Paketumlaufzeit HINWEIS: Falls der eingebene Name des Hosts nicht in eine IP-Adresse aufge- löst werden kann, erscheint eine entsprechende Meldung. 6. Betätigen Sie die -Taste zum Verlassen des Menüs. 27 · G&D DP1.2-MUX3-ATC... -
Page 35: Reset Der Netzfilterregeln
(Standard) zum Aufruf des On-Screen-Displays. 2. Betätigen Sie die -Taste zum Aufruf der Konfigurationseinstellungen. 3. Wählen Sie mit den und betätigen Sie die General Pfeiltasten Eingabetaste 4. Wählen Sie mit den und betätigen Sie die Hotkey Pfeiltasten Eingabetaste G&D DP1.2-MUX3-ATC · 28... -
Page 36: On-Screen-Display Mit Doppeltem Tastendruck Starten
So (de)aktivieren Sie die Aktivierung des On-Screen-Displays mit doppeltem Tastendruck: 1. Betätigen Sie Strg+Num (Standard) zum Aufruf des On-Screen-Displays. 2. Betätigen Sie die -Taste zum Aufruf der Konfigurationseinstellungen. 3. Wählen Sie General mit den Pfeiltasten und betätigen Sie die Eingabetaste 29 · G&D DP1.2-MUX3-ATC... -
Page 37: Änderung Der Select-Keys
(Standard) zum Aufruf des On-Screen-Displays. Strg+Num 2. Betätigen Sie die -Taste zum Aufruf der Konfigurationseinstellungen. 3. Wählen Sie General mit den Pfeiltasten und betätigen Sie die Eingabetaste 4. Wählen Sie Select Keys mit den Pfeiltasten und betätigen Sie die Eingabetaste G&D DP1.2-MUX3-ATC · 30... -
Page 38: Switching (De)Aktivieren
(Standard) zum Aufruf des On-Screen-Displays. Strg+Num 2. Betätigen Sie die -Taste zum Aufruf der Konfigurationseinstellungen. 3. Wählen Sie General mit den Pfeiltasten und betätigen Sie die Eingabetaste 4. Wählen Sie Disable switching mit den Pfeiltasten und betätigen Sie die Eingabetaste 31 · G&D DP1.2-MUX3-ATC... -
Page 39: Änderung Des Scancode-Sets Einer Ps/2-Tastatur
Eingabetaste 4. Wählen Sie im Feld Scancode Set zwischen folgenden Optionen mit der -Taste: Aktivierung des Scancode-Sets 2 für PS/2-Tastatureingaben Aktivierung des Scancode-Sets 3 für PS/2-Tastatureingaben 5. Betätigen Sie die -Taste zur Speicherung der durchgeführten Änderungen. G&D DP1.2-MUX3-ATC · 32... -
Page 40: Reinitialisierung Von Usb-Eingabegeräten
-Übertragung wird für jeden Videokanal des KVM-Switches DDC/CI separat eingestellt. Bei Multichannel-Geräten kann die folgende Option für jeden Videokanal separat eingestellt werden. 1. Betätigen Sie Strg+Num (Standard) zum Aufruf des On-Screen-Displays. 2. Betätigen Sie die -Taste zum Aufruf der Konfigurationseinstellungen. 33 · G&D DP1.2-MUX3-ATC... -
Page 41: Osd-Konfiguration
Auflösung von 1024 × 768 Bildpunkten dargestellt, wenn der Monitor diese Auflösung unterstützt. Falls der Monitor diese Auflösung nicht unter- stützt, wird eine Auflösung von 640 × 480 Bildpunkten verwendet. Sie können alternativ eine feste OSD-Auflösung (s. Tabelle unten) wählen. G&D DP1.2-MUX3-ATC · 34... -
Page 42: Tastaturlayout Für Eingaben Innerhalb Des On-Screen-Displays Auswählen
(Standard) zum Aufruf des On-Screen-Displays. Strg+Num 2. Betätigen Sie die -Taste zum Aufruf der Konfigurationseinstellungen. 3. Wählen Sie General mit den Pfeiltasten und betätigen Sie die Eingabetaste 4. Wählen Sie OSD configuration mit den Pfeiltasten und betätigen Sie die Eingabetaste 35 · G&D DP1.2-MUX3-ATC... -
Page 43: Kanal-Konfiguration
2. Betätigen Sie die -Taste zum Aufruf der Konfigurationseinstellungen. 3. Wählen Sie CPUs mit den Pfeiltasten und betätigen Sie die Eingabetaste 4. Wählen Sie einen Kanal ( ) mit den und betätigen Sie die CPU1 CPU 3 Pfeiltasten Eingabetaste G&D DP1.2-MUX3-ATC · 36... -
Page 44: Aktivierung/Deaktivierung Eines Kanals
Sie die CPU1 CPU 3 Pfeiltasten Eingabetaste 5. Wählen Sie im Feld zwischen folgenden Optionen mit der Channel activated Taste: Yes: Kanal aktiviert (Standard) Kanal deaktiviert 6. Betätigen Sie die -Taste zur Speicherung der durchgeführten Änderungen. 37 · G&D DP1.2-MUX3-ATC... -
Page 45: Aktivierung/Deaktivierung Des Tastatur-Signals
2. Betätigen Sie die -Taste zum Aufruf der Konfigurationseinstellungen. 3. Wählen Sie mit den und betätigen Sie die CPUs Pfeiltasten Eingabetaste 4. Wählen Sie einen Kanal ( ) mit den und betätigen Sie die CPU1 CPU 3 Pfeiltasten Eingabetaste G&D DP1.2-MUX3-ATC · 38... -
Page 46: Failover-Switching Einrichten
2. Betätigen Sie die -Taste zum Aufruf der Konfigurationseinstellungen. 3. Wählen Sie CPUs mit den Pfeiltasten und betätigen Sie die Eingabetaste 4. Wählen Sie einen Kanal ( CPU1 CPU 3 ) mit den Pfeiltasten und betätigen Sie die Eingabetaste 39 · G&D DP1.2-MUX3-ATC... -
Page 47: Videokanal-Konfiguration
Eingabetaste 4. Wählen Sie einen Videokanal ( ) mit den und betätigen CPU1.x CPU 3.x Pfeiltasten Sie die Eingabetaste 5. Wählen Sie mit den und betätigen Sie die Comment Pfeiltasten Eingabetaste 6. Betätigen Sie die -Taste. G&D DP1.2-MUX3-ATC · 40... -
Page 48: Edid-Profil Eines Monitores Einlesen
So wählen Sie das EDID-Profil aus: 1. Betätigen Sie (Standard) zum Aufruf des On-Screen-Displays. Strg+Num 2. Betätigen Sie die -Taste zum Aufruf der Konfigurationseinstellungen. 3. Wählen Sie CPUs mit den Pfeiltasten und betätigen Sie die Eingabetaste 41 · G&D DP1.2-MUX3-ATC... -
Page 49: Verwendung Des Freeze-Modus
Sie die Eingabetaste 4. Wählen Sie einen Videokanal ( ) mit den und betätigen CPU1.x CPU 3.x Pfeiltasten Sie die Eingabetaste 5. Wählen Sie EDID profile mit den Pfeiltasten und betätigen Sie die Eingabetaste G&D DP1.2-MUX3-ATC · 42... -
Page 50: Persönliches Profil
Up|Down: Die Taste schaltet einen Kanal Hoch aufwärts. Die Taste schaltet einen Kanal Runter abwärts. PageUp|PageDown: Die Taste Bild hoch schaltet einen Kanal aufwärts. Die Taste Bild runter schaltet einen Kanal abwärts. 43 · G&D DP1.2-MUX3-ATC... -
Page 51: Verweildauer Der Autoscan- Bzw. Autoskip-Funktion Konfigurieren
Verweildauer der Autoscan- bzw. Autoskip-Funktion konfigurieren Standardmäßig wird jede automatische Aufschaltung 10 Sekunden gehalten, bevor die Verbindung getrennt und der nächste Kanal aufgeschaltet wird. Den Zeitraum der Verweildauer einer Aufschaltung können Sie im Bereich von 1 bis 99 Sekunden festlegen. G&D DP1.2-MUX3-ATC · 44... -
Page 52: Standard-Menü-Modus Ändern
Taste, um zwischen den folgenden Optionen zu wählen: Select CPU: Das Select-Menü wird nach dem Start des OSD angezeigt. Select script: Das Script-Menü wird nach dem Start des OSD angezeigt. 4. Betätigen Sie die F2-Taste zur Speicherung der durchgeführten Änderungen 45 · G&D DP1.2-MUX3-ATC... -
Page 53: Standardaktion Nach Der Benutzeranmeldung Konfigurieren
Zur Änderung des persönlichen Profils eines anderen Benutzers betä- tigen Sie die -Taste und wählen Users > [Benutzername] > Personal Profile 3. Wählen Sie die Zeile Default execution und betätigen Sie (mehrfach) die -Taste zur Auswahl der Einstellung Script G&D DP1.2-MUX3-ATC · 46... -
Page 54: Automatisches Aufschalten Des Zuletzt Aufgeschalteten Kanals
(Standard) zum Aufruf des On-Screen-Displays. 2. Betätigen Sie die -Taste zum Aufruf des persönlichen Profils des angemeldeten Benutzers. HINWEIS: Zur Änderung des persönlichen Profils eines anderen Benutzers betä- tigen Sie die -Taste und wählen Users > [Benutzername] > Personal Profile 47 · G&D DP1.2-MUX3-ATC... -
Page 55: Umschaltschwelle Für Änderung Des Menü-Modus Per Maus
4. Stellen Sie die Empfindlichkeit der Umschaltschwelle durch Eingabe eines Zah- lenwertes innerhalb des Bereichs von ein. HINWEIS: Zur Deaktivierung des Menü-Wechsels per Maus geben Sie die Zif- ein. 5. Betätigen Sie die -Taste zur Speicherung der durchgeführten Änderungen. G&D DP1.2-MUX3-ATC · 48... -
Page 56: Transparenz Des On-Screen-Displays Einstellen
(Standard) zum Aufruf des On-Screen-Displays. 2. Betätigen Sie die -Taste zum Aufruf des persönlichen Profils des angemeldeten Benutzers. HINWEIS: Zur Änderung des persönlichen Profils eines anderen Benutzers betä- tigen Sie die -Taste und wählen Users > [Benutzername] > Personal Profile 49 · G&D DP1.2-MUX3-ATC... -
Page 57: Farbe Der Informationseinblendung Ändern
Dark turquoise: Informationseinblendungen in dunkeltürkis Violet: Informationseinblendungen in violett White: Informationseinblendungen in weiß Black: Informationseinblendungen in schwarz Silver: Informationseinblendungen in silber Dark red: Informationseinblendungen in dunkelrot 4. Betätigen Sie die -Taste zur Speicherung der durchgeführten Änderungen. G&D DP1.2-MUX3-ATC · 50... -
Page 58: Position Der Informationseinblendung Ändern
Benutzers. HINWEIS: Zur Änderung des persönlichen Profils eines anderen Benutzers betä- tigen Sie die -Taste und wählen Users > [Benutzername] > Personal Profile 3. Wählen Sie die Zeile OSD menu position und betätigen Sie die Eingabetaste 51 · G&D DP1.2-MUX3-ATC... -
Page 59: Automatisches Schließen Des Osds (De)Aktivieren
Benutzers. HINWEIS: Zur Änderung des persönlichen Profils eines anderen Benutzers betä- tigen Sie die -Taste und wählen Users > [Benutzername] > Personal Profile 3. Wählen Sie die Zeile Change Password und betätigen Sie die Eingabetaste G&D DP1.2-MUX3-ATC · 52... -
Page 60: Statusinformationen Eines Kvm-Switches Einsehen
(Standard) zum Aufruf des On-Screen-Displays. 2. Betätigen Sie die -Taste zum Aufruf der Konfigurationseinstellungen. 3. Wählen Sie System information mit den Pfeiltasten und betätigen Sie die Eingabetaste 4. Wählen Sie Hardware information mit den Pfeiltasten und betätigen Sie die Eingabetaste 53 · G&D DP1.2-MUX3-ATC... - Page 61 Pfeiltasten und betätigen Sie die Eingabetaste 5. Im jetzt erscheinenden Dialog werden Ihnen folgende Informationen angezeigt: Software informationen physikalische ID des KVM-Switches Device: Geräteklasse des KVM-Switches Version: Firmware-Version Firmware: Bezeichnung der Firmware Name: Name des KVM-Switches G&D DP1.2-MUX3-ATC · 54...
-
Page 62: Service-Werkzeuge
(Standard) zum Aufruf des On-Screen-Displays. Strg+Num 2. Betätigen Sie die -Taste zum Aufruf der Service-Werkzeuge. 3. Wählen Sie Restart mit den Pfeiltasten und betätigen Sie die Eingabetaste 4. Bestätigen Sie die Sicherheitsabfrage durch Auswahl der Option betätigen Sie die Eingabetaste 55 · G&D DP1.2-MUX3-ATC... -
Page 63: Wiederherstellung Der Werkseinstellungen
Ausschließlich die lokalen Netzwerkeinstellun- local network settings: gen zurücksetzen. Set defaults for Alle Einstellungen außer den lokalen Netzwer- KVM applications: keinstellungen zurücksetzen. 5. Bestätigen Sie die Sicherheitsabfrage durch Auswahl der Option und betäti- gen Sie die Eingabetaste G&D DP1.2-MUX3-ATC · 56... -
Page 64: Benutzer Und Gruppen
Der Benutzer Muster ist Mitglied der Gruppen Office und MuxConfig. Die folgende Tabelle zeigt die Rechte des Benutzerkontos und der zugeordneten Gruppen sowie das daraus abgeleitete Effektivrecht: Recht Benutzer Gruppe Gruppe Effektivrecht Muster Office MuxConfig Mux config Change own password CPU access View Full Full 57 · G&D DP1.2-MUX3-ATC... -
Page 65: Effizienter Einsatz Der Benutzergruppen
-Taste zur Speicherung Ihrer Eingaben und Erstellung des Benutzerkontos. WICHTIG: Das neu erstellte Benutzerkonto ist weder mit Konfigurations- noch mit Zugriffsrechten ausgestattet. Fügen Sie das Benutzerkonto vor dessen Verwendung einer bestehenden Benutzer- gruppe hinzu oder erteilen Sie dem Benutzerkonto individuelle Rechte. G&D DP1.2-MUX3-ATC · 58... -
Page 66: Änderung Des Namens Eines Benutzerkontos
Benutzergruppen, welchen das Benutzerkonto zugeordnet ist, wer- den mit einer Pfeilmarkierung () angezeigt. 8. Wiederholen Sie ggf. die Schritte 6. und 7., falls Sie die Gruppenzugehörigkeit weiterer Konten bearbeiten möchten. 9. Betätigen Sie die -Taste zur Speicherung der durchgeführten Änderungen. 59 · G&D DP1.2-MUX3-ATC... -
Page 67: Aktivierung Oder Deaktivierung Eines Benutzerkontos
-Taste zum Aufruf des Configuration-Menüs. 3. Wählen Sie die Zeile und betätigen Sie die Users Eingabetaste 4. Wählen Sie das zu löschende Benutzerkonto und betätigen Sie die -Taste. 5. Wählen Sie den Eintrag der Sicherheitsabfrage und betätigen Sie die Eingabetaste G&D DP1.2-MUX3-ATC · 60... -
Page 68: Verwaltung Von Benutzergruppen
Sie die -Taste. 5. Wählen Sie die Zeile Name und betätigen Sie die Eingabetaste 6. Geben Sie den gewünschten Namen ein und betätigen Sie die Eingabetaste 7. Betätigen Sie die -Taste zur Speicherung der durchgeführten Änderungen. 61 · G&D DP1.2-MUX3-ATC... -
Page 69: Mitgliederverwaltung Einer Benutzergruppe
-Taste zur Auswahl einer der aufgelisteten Optionen: Yes: Benutzergruppe aktiviert Benutzergruppe deaktiviert WICHTIG: Ist die Benutzergruppe deaktiviert, wirken sich die Rechte der Gruppe nicht auf die zugeordneten Mitglieder aus. 6. Betätigen Sie die -Taste zur Speicherung der durchgeführten Änderungen. G&D DP1.2-MUX3-ATC · 62... -
Page 70: Löschen Einer Benutzergruppe
6. Wählen Sie die Zeile und betätigen Sie die -Taste zur Auswahl Superuser right einer der aufgelisteten Optionen: Zugriffsberechtigung gemäß den Benutzer- und Gruppenrechten Yes: uneingeschränkter Zugriff auf den KVM-Switch 7. Betätigen Sie die -Taste zur Speicherung der durchgeführten Änderungen. 63 · G&D DP1.2-MUX3-ATC... -
Page 71: Berechtigung Zur Konfiguration Des Kvm-Switches
User groups 4. Betätigen Sie die Eingabetaste 5. Wählen Sie das Benutzerkonto bzw. die Benutzergruppe, deren Recht Sie ändern möchten und betätigen Sie die -Taste. 6. Wählen Sie die Zeile Config rights und betätigen Sie die Eingabetaste G&D DP1.2-MUX3-ATC · 64... -
Page 72: Berechtigung Zum Ändern Der Einstellungen Des "Personal Profile"-Menüs
Sie die -Taste zur Aus- wahl einer der Optionen: Einsehen und Editieren des eigenen Benutzerprofils untersagt Yes: Einsehen und Editieren des eigenen Benutzerprofils erlaubt 8. Betätigen Sie die -Taste zur Speicherung der durchgeführten Änderungen. 65 · G&D DP1.2-MUX3-ATC... -
Page 73: Zugriff Auf Usb-Geräte
2. Betätigen Sie die -Taste zum Aufruf des Configuration-Menüs. 3. Möchten Sie dieses Recht eines Benutzerkontos ändern, wählen Sie die Zeile Users . Im Falle einer Benutzergruppe wählen Sie die Zeile User groups 4. Betätigen Sie die Eingabetaste G&D DP1.2-MUX3-ATC · 66... -
Page 74: Berechtigung Zur Änderung Des Eigenen Passworts
3. Möchten Sie dieses Recht eines Benutzerkontos ändern, wählen Sie die Zeile . Im Falle einer Benutzergruppe wählen Sie die Zeile Users User groups 4. Betätigen Sie die Eingabetaste 5. Wählen Sie das Benutzerkonto bzw. die Benutzergruppe, deren Recht Sie ändern möchten und betätigen Sie die -Taste. 67 · G&D DP1.2-MUX3-ATC... -
Page 75: Berechtigung Für Das Ausführen Von Scripts Einstellen
Ausführung des Scripts untersagt Yes: Ausführung des Scripts erlaubt 9. Wiederholen Sie ggf. die Schritte 7. und 8., falls Sie das Ausführungsrecht eines weiteren Scripts ändern möchten. 10.Betätigen Sie die -Taste zur Speicherung der durchgeführten Änderungen. G&D DP1.2-MUX3-ATC · 68... -
Page 76: Weiterführende Informationen
Weiterführende Informationen Weiterführende Informationen Pin-Belegung der RS232-Buchse Die Geräte der DP1.2-MUX3-ATC-Serie sind mit einer -Buchse ausgestattet. RS232 Die Pin-Belegung dieser Buchse zeigt die folgende Abbildung: Die Tabelle zeigt die Zuordnung der verschiedenen Leitungen der Datenverbindung zu den entsprechenden Pins auf: Pin-Nr. -
Page 77: Anschluss Von Usb 3.0-Massenspeichergeräten
Zeitpunkt Daten auf das Massenspeichergerät schreibt, wird dieser Vorgang abgebrochen. Um einen Datenverlust zu vermeiden, verwenden Sie die Funktion zum sicheren Entfer- nen der Hardware des auf dem Rechner eingesetzten Betriebssystems vor der Umschaltung des Kanals. G&D DP1.2-MUX3-ATC · 70... -
Page 78: Xml-Steuerung Des Kvm-Switches
Gerät per Voreinstellung über die ID identifiziert. VERWENDUNG DES NAMENS EINES KVM-SWITCHES ZUR IDENTIFIZIERUNG <?xml version="1.0" encoding="utf-8"?> <root> <nextmuxchannel> <DlMux4 type="name">MUX-ATC</DlMux4> </nextmuxchannel> </root> VERWENDUNG DER ID EINES KVM-SWITCHES ZUR IDENTIFIZIERUNG <?xml version="1.0" encoding="utf-8"?> <root> <nextmuxchannel> <DlMux4>0x11111111</DlMux4> </nextmuxchannel> </root> 71 · G&D DP1.2-MUX3-ATC... -
Page 79: Verwendung Von Geräte-Ids
AUFBAU EINES FEHLERDOKUMENTS <?xml version="1.0" encoding="utf-8"?> <root> <Error>Invalid request document</Error> </root> Antworten auf Befehle, die der XML-Dienst nicht selbst ausführt, sondern an den Gerätedienst des KVM-Switches delegiert, werden je nach Art der Meldung in unterschiedlichen XML-Container ausgegeben. G&D DP1.2-MUX3-ATC · 72... -
Page 80: Mehrere Befehle In Einem Xml-Dokument Kombinieren
über einen Kanalwechsel zu informieren. Solche Ereignisse werden in einem -Container gemeldet. Der Typ <pushNotification> der Benachrichtigung ist als Attribut dieses Tags eingetragen. type PUSH-NOTIFICATION BEI KANALWECHSEL <?xml version="1.0" encoding="utf-8"?> <root> <pushNotification type="channel_select_event"> <channel>1</channel> </pushNotification> </root> 73 · G&D DP1.2-MUX3-ATC... -
Page 81: Push-Notifications Abbestellen
In XML-Befehlen können Passwörter in diesem Modus wahlweise verschlüsselt (empfohlen) oder im Klartext an das Gerät versendet werden. Beide Verschlüsselungsarten verwenden als Algorithmus CBC-3DES . Den erforderli- che Schlüssel sowie den Initialisierungsvektor (nur bei Transportverschlüsselung erforderlich) konfigurieren Sie in der Web-Applikation Config Panel. G&D DP1.2-MUX3-ATC · 74... -
Page 82: Zugänge Des Gerätes Für Xml-Steuerung Konfigurieren
Bei Aktivierung der Verschlüsselung ist zusätzlich CBC-3DES vektor: ein Initialisierungsvektor erforderlich. Geben Sie den Initali- sierungsvektor (64 bit) in Form von 16 Hexziffern ein. 7. Klicken Sie auf , um die Daten zu speichern und den Dialog zu verlassen. 75 · G&D DP1.2-MUX3-ATC... -
Page 83: Hinweise Zur Passwort-Verschlüsselung
<?xml version=\"1.0\" encoding=\"utf-8\"?> <root> <logonmux> <DlMux4>0x000009CC</DlMux4> <User>JohnDoe</User> <Password> <EncryptedData xmlns="http://www.w3.org/2001/04/xmlenc#"> <CipherData> <CipherValue>B2Wmn52teOPvY31wq0l4nw==</CipherValue> </CipherData> </EncryptedData> </Password> </logonmux> </root> Der verschlüsselte Datenblock ( CipherValue ) besteht aus der Kombination von Initiali- sierungsvektor und verschlüsseltem Text mit Padding in BASE64-kodierter Darstellung. G&D DP1.2-MUX3-ATC · 76... - Page 84 Byte des Padding die Anzahl hinzugefügter Füllbytes angibt. Die Füllbytes selbst sind zufällig zu wählen. Der Initialisierungsvektor wird für Stromchiffren (hier: ) benötigt. Er wird im Verschlüsselungsmodus Passwort-Verschlüsselung zufällig gewählt. Die Größe ent- spricht der Blockgröße der zu Grunde liegenden Verschlüsselung (8 Bytes). 77 · G&D DP1.2-MUX3-ATC...
-
Page 85: Befehle
ANMELDUNG EINES BENUTZERS <?xml version="1.0" encoding="utf-8"?> <root> <logonmux> <DlMux4>0x000009CC</DlMux4> <User>JohnDoe</User> <Password>secret</Password> </logonmux> </root> HINWEIS: Informationen zur optionalen Passwort-Verschlüsselung finden Sie auf Seite 76. ABMELDUNG EINES BENUTZERS <?xml version="1.0" encoding="utf-8"?> <root> <logoffmux> <DlMux4>0x000009CC</DlMux4> </logoffmux> </root> G&D DP1.2-MUX3-ATC · 78... -
Page 86: Aufschaltung Eines Bestimmten Kanals
Kanals des KVM-Switches. TRENNUNG DER AKTIVEN AUFSCHALTUNG <?xml version="1.0" encoding="utf-8"?> <root> <disconnectmux/> </root> Aufschaltung des nächsten Kanals Der Befehl <nextmuxchannel> schaltet den nächsten Kanal des KVM-Switches auf. AUFSCHALTUNG DES NÄCHSTEN KANALS <?xml version="1.0" encoding="utf-8"?> <root> <nextmuxchannel/> </root> 79 · G&D DP1.2-MUX3-ATC... -
Page 87: Aufschaltung Des Vorherigen Kanals
<?xml version="1.0" encoding="utf-8"?> <root> <pinmux> <Channel>2</Channel> <Type>USB</Type> </pinmux> </root> ZWEITE VIDEOEBENE AUF DEM AKTUELLEN KANAL PINNEN <?xml version="1.0" encoding="utf-8"?> <root> <pinmux> <Channel>-1</Channel> <Type plane="1">VIDEO</Type> </pinmux> </root> AUFHEBEN EINES USB-PINNINGS <?xml version="1.0" encoding="utf-8"?> <root> <unpinmux> <Channel>2</Channel> <Type>USB</Type> </unpinmux> </root> G&D DP1.2-MUX3-ATC · 80... -
Page 88: Monitoring-Werte Abfragen
<?xml version="1.0" encoding="utf-8"?> <root> <monitor> <DlMux4><id>0x11111111</id></DlMux4> </monitor> </root> Durch die Angabe des gewünschten Monitoring-Wertes können Sie die Auflistung zusätzlich eingeschränken. MONITORING-WERT »STATUS« DES KVM-SWITCHES 0X11111111 ABFRAGEN <?xml version="1.0" encoding="utf-8"?> <root> <monitor> <DlMux4> <id>0x11111111</id> <monitorName>Status</monitorName> </DlMux4> </monitor> </root> 81 · G&D DP1.2-MUX3-ATC... - Page 89 Flags können Sie feststellen, ob sich der Monitoring-Wert im Sollbereich befinden ( ) oder außerhalb ( entspricht der Funktion Gesehen in Acknowledged der Webapplikation Innerhalb des XML-Tags können Sie alternativ auch mehrere Geräteklas- <monitor> sen-Tags aufführen. G&D DP1.2-MUX3-ATC · 82...
-
Page 90: Technische Daten
2 × RJ45-Buchse Service: 1 × Mini-USB-B-Buchse Audio Übertragungsart: digital, unidirektional, DisplayPort Digital embedded in DisplayPort-Signal Digital Audio Out Auflösungen: 16/20/24 bit Abtastraten: bis 48 kHz Digital Audio Out: De-Embedding von Embedded Audio in DisplayPort-Signal 83 · G&D DP1.2-MUX3-ATC... - Page 91 USB 3.1 Gen 1 (USB 3.0 /USB 2.0 kompatibel) Übertragungsrate: SuperSpeed 5.0 Gbps (Low-Speed, Full-Speed, Hi-Speed kompatibel) Power (Ausgang): HighPower (0.9A) max. Kabellänge: USB 3.0/USB 3.1: max. 3 m USB 2.0: max. 5 m G&D DP1.2-MUX3-ATC · 84...
-
Page 92: Individuelle Eigenschaften Der Varianten
2 × DisplayPort-Buchse für Arbeitsplatz Schnittstellen Video: 2 × DisplayPort-Buchse pro Rechner Stromversorgung Stromaufnahme: 0,5 A@240VAC; 1,2 mA@100VAC Gehäuse Material: Aluminium eloxiert Maße (B × H × T): 435 × 88 × 210 mm Gewicht: ca. 3,5 kg 85 · G&D DP1.2-MUX3-ATC... - Page 94 © Guntermann & Drunck GmbH 2021. All rights reserved. Version 1.12 – 06/10/2021 Firmware: 1.1.002 Guntermann & Drunck GmbH Obere Leimbach 9 57074 Siegen Germany Phone +49 (0) 271 23872-0 +49 (0) 271 23872-120 www.gdsys.de sales@gdsys.de i · G&D DP1.2-MUX3-ATC...
- Page 95 Increase the separation between the equipment and receiver. Connect the equipment into an outlet on a circuit different from that to which the receiver is connected. Consult the dealer or an experienced radio/TV technician for help. G&D DP1.2-MUX3-ATC · ii...
- Page 96 Switching via switching tool ............... 18 Switching via SNMP .................. 18 Switching via XML control ................ 18 Use of the Reset button ................... 19 Restoring the default settings ................19 Temporarily disabling the network filter rules ........... 20 iii · G&D DP1.2-MUX3-ATC...
- Page 97 Changing the name of a video channel ............40 Changing the comment of a video channel ..........40 Importing the EDID profile of a monitor ............ 41 Defining the EDID profile of a channel ............41 Using the Freeze mode ................42 G&D DP1.2-MUX3-ATC · iv...
- Page 98 Right to change the settings of the »Personal Profile« menu ......65 Access to USB devices ................66 Right to change your own password ............67 Access rights to a KVM channel ..............67 Right to execute scripts ................68 v · G&D DP1.2-MUX3-ATC...
- Page 99 Switching to the next channel ..............79 Switching to the previous channel .............. 80 Pinning individual signals ................80 Querying monitoring values ............... 81 Technical data ....................83 General features of the series ................83 Individual variant features ................85 G&D DP1.2-MUX3-ATC · vi...
-
Page 100: Safety Instructions
To avoid the risk of electric shock, do not open the device or remove the covers. If service is required, please contact our technicians. Only use a grounded voltage source Operate this device by using a grounded voltage source. 1 · G&D DP1.2-MUX3-ATC... - Page 101 Avoid tripping hazards while laying cables. Operate the device only in designated areas. The devices are designed for indoor use. Avoid exposure to extreme cold, heat or humidity. The devices are not approved for use in hazardous environments. G&D DP1.2-MUX3-ATC · 2...
- Page 102 VORSICHT: Es besteht Explosionsgefahr, wenn die Batterie durch einen falschen Batterie-Typ ersetzt wird. Entsorgen Sie gebrauchte Batterien umweltgerecht. Gebrauchte Batterien dürfen nicht in den Hausmüll geworfen werden. Beachten Sie die gültigen Vorschriften zur Entsorgung elektronischer Produkte. 3 · G&D DP1.2-MUX3-ATC...
-
Page 103: The Kvm Switch
The KVM switch The KVM switch The KVM switch DP1.2-MUX3-ATC lets users operate up to three computers from one workstation. NOTE: You can connect computers with up to two video outputs to the MC2 vari- ant of the KVM switch. The video signals from these computers are displayed on two separate monitors at the workstation. -
Page 104: Installation
PS/2 or USB interfaces. 2. Place the KVM switch between the computers and the workstation. Note the maximum cable length of two meters between the KVM switch and the comput- ers to be connected. 5 · G&D DP1.2-MUX3-ATC... -
Page 105: Connecting The Workstation Devices
Line In PS/2 K/M USB K/M USB 3.0 Figure 2: Interfaces for connecting the workstation devices NOTE: The device variants DP1.2-MUX3-ATC-R and DP1.2-MUX3-ATC-MC2-R are additionally equipped with a RS232 Device interface. Connect the serial terminal device of the console to this interface. -
Page 106: Connecting The Computers
Line In PS/2 K/M USB K/M USB 3.0 Figure 3: Interfaces for connecting the computers NOTE: The device variants DP1.2-MUX3-ATC-R and DP1.2-MUX3-ATC-MC2-R are additionally equipped with a RS232 CPU interface. Use the RS232-M/F-2 cable (available as an accessory) to connect the computer’s 9-pin serial interfaces to this interface. -
Page 107: Connecting The Power Supply
Connect a power cable to a mains socket and this socket. Red. power: If desired, connect another power cable to a mains socket and this socket. This provides the device with a second, redundant power supply. G&D DP1.2-MUX3-ATC · 8... -
Page 108: Start-Up
The device is not (yet) ready for operation. The device is ready for operation or switched off. Ident. LED activated to identify the device via OSD or web application. LED activated to identify the device via OSD or web application. 9 · G&D DP1.2-MUX3-ATC... - Page 109 The devices connected to the »USB 3.0 Devices« inter- face are permanently switched to this channel (pin- ning). Inactive channel Status The connected computer is switched on. No computer is connected or the computer is switched off. G&D DP1.2-MUX3-ATC · 10...
-
Page 110: Open Access" Operating Mode
If the Default execution (see page 46) function is activated for a user account, the switching/script execution selected in the Personal Profile menu is exe- cuted immediately after the user logs on. In this case, restart the on-screen display (see page 21) to open the Select menu. 11 · G&D DP1.2-MUX3-ATC... -
Page 111: Switching Between Channels
Press the key combination on the keyboard of the workstation. Alt+Select key By default, you can use the modifier and the select keys to switch between channels. IMPORTANT: The channel is switched after you release the key combination. G&D DP1.2-MUX3-ATC · 12... -
Page 112: Switching To The Last Active Channel (Reconnect)
After calling up the on-screen display, you can activate the Stepscan function in the Select menu with the key combination Ctrl+A How to stop the Autoscan function: 1. Press (default) to open the on-screen display. Ctrl+Num This stops the Autoscan function. 13 · G&D DP1.2-MUX3-ATC... -
Page 113: Auto-Skipping Active Channels
After calling up the on-screen display, you can activate the Stepscan function in the Select menu with the key combination Ctrl+B How to stop the Autoskip function: 1. Press Ctrl+Num (default) to open the on-screen display. This stops the Autoskip function. G&D DP1.2-MUX3-ATC · 14... -
Page 114: Switching Via Step Keys
4. Use the configured step keys (see page 43) to switch one channel up or one chan- nel down. NOTE: By default, the step keys Down are active. How to stop the Stepscan function: 1. Press Ctrl+Num (default) to open the on-screen display. This stops the Stepscan function. 15 · G&D DP1.2-MUX3-ATC... -
Page 115: Permanent Switching Of Devices Connected To Usb 3.0 Interfaces
After permanent switching has been cancelled, the devices connected to the »USB 3.0 Devices« interface are switched to the active channel. ADVICE: After calling up the on-screen display, you can activate the Stepscan function in the Select menu with the key combination Ctrl+U G&D DP1.2-MUX3-ATC · 16... -
Page 116: Advanced Options To Switch Between Channels
NOTE: The command is executed immediately after the serial device sends the com- mand. A message (see below) informs the serial device about the correct execution or the reason why the switching could not take place. 17 · G&D DP1.2-MUX3-ATC... -
Page 117: Switching Via Web Application
Switching via XML control XML control lets you control KVM switches via third-party devices (AMX® and Crestron®, for example). Detailed information on this topic is provided in the chapter Controlling the KVM switch via XML on page 71 ff.. G&D DP1.2-MUX3-ATC · 18... -
Page 118: Use Of The Reset Button
3. Keep the button pressed and switch the device on. 4. Release the button as soon as the green System LED starts blinking fast. NOTE: You can also use the OSD or the web application Config Panel to reset the default settings. 19 · G&D DP1.2-MUX3-ATC... -
Page 119: Temporarily Disabling The Network Filter Rules
2. Use the web application Config Panel to edit the network filter rules stored in the device and save the rules. IMPORTANT: If you do not configure new network filters within 15 minutes, the original settings are reactivated. G&D DP1.2-MUX3-ATC · 20... -
Page 120: On-Screen Display
KVM switch and the title of the opened menu. The shows the computers you can access or the menu items of the opened list field menus. The shows the most frequently used keys to operate the opened menu. footer 21 · G&D DP1.2-MUX3-ATC... -
Page 121: Operating The On-Screen Display
The active option of the setting is displayed in the right col- umn. Press (repeatedly) to choose between the available options. After changing the desired configuration settings of a menu, press to save your settings and to return to the parent menu. G&D DP1.2-MUX3-ATC · 22... - Page 122 The key to use to close a submenu is shown in the footer Text fields: Use the keyboard to enter your text. The previous entry is overwritten. ADVICE: You can also press Enter to edit the entry. 23 · G&D DP1.2-MUX3-ATC...
-
Page 123: Configuration Settings In The Osd
General and press Enter 4. Use the arrow keys to select Comment and press Enter 5. Press 6. Enter a comment about the KVM switch and press 7. Press to save your settings. G&D DP1.2-MUX3-ATC · 24... -
Page 124: Network Settings
Enter the IP address of the interface - only if the operating mode Static is selected. Netmask: Enter the network netmask - only if the operating mode Static is selected. 6. Press to save your settings. 25 · G&D DP1.2-MUX3-ATC... -
Page 125: Configuring Global Network Settings
(default) to open the on-screen display. 2. Press to open the configuration settings. 3. Use the to select and press arrow keys Network Enter 4. Use the to select and press arrow keys Link status Enter G&D DP1.2-MUX3-ATC · 26... -
Page 126: Checking The Availability Of A Host In The Network (Ping)
Average round trip time Max. RTT: Longest round trip time NOTE: If the entered name of the host cannot be resolved to an IP address, a corresponding message pops up. 6. Press to close the menu. 27 · G&D DP1.2-MUX3-ATC... -
Page 127: Resetting Network Filter Rules
Ctrl+Num (default) to open the on-screen display. 2. Press to open the configuration settings. 3. Use the to select and press arrow keys General Enter 4. Use the arrow keys to select Hotkey and press Enter G&D DP1.2-MUX3-ATC · 28... -
Page 128: Starting The On-Screen Display By Pressing A Key Twice
How to enable/disable opening the on-screen display by pressing a key twice: 1. Press Ctrl+Num (default) to open the on-screen display. 2. Press to open the configuration settings. 3. Use the arrow keys to select General and press Enter 29 · G&D DP1.2-MUX3-ATC... -
Page 129: Changing The Select Keys
(default) to open the on-screen display. 2. Press to open the configuration settings. 3. Use the arrow keys to select General and press Enter 4. Use the arrow keys to select Select Keys and press Enter G&D DP1.2-MUX3-ATC · 30... -
Page 130: Enabling/Disabling Switching
(default) to open the on-screen display. 2. Press to open the configuration settings. 3. Use the arrow keys to select General and press Enter 4. Use the arrow keys to select Disable switching and press Enter 31 · G&D DP1.2-MUX3-ATC... -
Page 131: Changing Scancode Sets Of A Ps/2 Keyboard
4. In the Scancode Set field select one of the following options by pressing Activates scancode set 2 for entries of PS/2 keyboards Activates scancode set 3 for entries of PS/2 keyboards 5. Press to save your settings. G&D DP1.2-MUX3-ATC · 32... -
Page 132: Reinitialising Usb Input Devices
KVM DDC/CI switch. For multichannel devices, the following option can be set separately for each video channel. 1. Press (default) to open the on-screen display. Ctrl+Num 2. Press to open the configuration settings. 33 · G&D DP1.2-MUX3-ATC... -
Page 133: Osd Configuration
1024 × 768 pixels if the monitor supports this resolu- tion. If the monitor does not support this resolution, a resolution of 640 × 480 pixels is used. You can also choose a fixed OSD resolution (see table below). G&D DP1.2-MUX3-ATC · 34... -
Page 134: Selecting The Keyboard Layout For Inputs On The On-Screen Display
(default) to open the on-screen display. 2. Press to open the configuration settings. 3. Use the arrow keys to select General and press Enter 4. Use the arrow keys to select OSD configuration and press Enter 35 · G&D DP1.2-MUX3-ATC... -
Page 135: Channel Configuration
(default) to open the on-screen display. 2. Press to open the configuration settings. 3. Use the arrow keys to select CPUs and press Enter 4. Use the to select a channel ( ) and press arrow keys CPU1 CPU 3 Enter G&D DP1.2-MUX3-ATC · 36... -
Page 136: Enabling/Disabling A Channel
( ) and press arrow keys CPU1 CPU 3 Enter 5. In the fields select one of the following options by pressing Channel activated Yes: Channel activated (default) Channel deactivated 6. Press to save your settings. 37 · G&D DP1.2-MUX3-ATC... -
Page 137: Enabling/Disabling The Keyboard Signal
Ctrl+Num 2. Press to open the configuration settings. 3. Use the arrow keys to select CPUs and press Enter 4. Use the arrow keys to select a channel ( CPU1 CPU 3 ) and press Enter G&D DP1.2-MUX3-ATC · 38... -
Page 138: Setting Up Failover Switching
2. Press to open the configuration settings. 3. Use the arrow keys to select CPUs and press Enter 4. Use the to select a video channel ( ) and press arrow keys CPU1 CPU 3 Enter 39 · G&D DP1.2-MUX3-ATC... -
Page 139: Configuring A Video Channel
CPUs Enter 4. Use the to select a video channel ( ) and press arrow keys CPU1.x CPU 3.x Enter 5. Use the arrow keys to select Comment and press Enter 6. Press G&D DP1.2-MUX3-ATC · 40... -
Page 140: Importing The Edid Profile Of A Monitor
Defining the EDID profile of a channel How to select the EDID profile: 1. Press Ctrl+Num (default) to open the on-screen display. 2. Press to open the configuration settings. 3. Use the arrow keys to select CPUs and press Enter 41 · G&D DP1.2-MUX3-ATC... -
Page 141: Using The Freeze Mode
CPUs and press Enter 4. Use the to select a video channel ( ) and press arrow keys CPU1.x CPU 3.x Enter 5. Use the to select and press arrow keys Edid profile Enter G&D DP1.2-MUX3-ATC · 42... -
Page 142: Personal Profile
Use the Down key to switch one channel down. PageUp|PageDown: Use the PageUp key to switch one channel Use the key to switch one channel PageDown down. 43 · G&D DP1.2-MUX3-ATC... -
Page 143: Configuring The Dwell Time Of Autoscan Or Autoskip Function
Configuring the dwell time of Autoscan or Autoskip function By default, each automatic connection is held for 10 seconds before it is terminated and the next channel is accessed. You can set the dwell time of switching between channels between 1 and 99 seconds. G&D DP1.2-MUX3-ATC · 44... -
Page 144: Changing The Default Menu Mode
(repeatedly) to select between the following options: Select CPU: The Select menu is displayed after you open the OSD. Select script: The Script menu is displayed after you open the OSD. 4. Press to save your settings. 45 · G&D DP1.2-MUX3-ATC... -
Page 145: Configuring Default Actions After A User Login
NOTE: To change the personal profile of another user, press select Users > [Username] > Personal Profile 3. Select the row Default execution and press (repeatedly) to select the option Script G&D DP1.2-MUX3-ATC · 46... -
Page 146: Auto-Switching To The Last Channel
(default) to open the on-screen display. Ctrl+Num 2. Press to open the personal profile of the user logged in. NOTE: To change the personal profile of another user, press select Users > [Username] > Personal Profile 47 · G&D DP1.2-MUX3-ATC... -
Page 147: Switching Threshold For Changing The Menu Mode By Mouse
3. Select the row Switch sel. menu by mouse 4. Adjust the sensitivity of the switching threshold by entering a value between NOTE: To disable switching between menus by mouse, enter the value 5. Press to save your settings. G&D DP1.2-MUX3-ATC · 48... -
Page 148: Adjusting The Transparency Of The On-Screen Display
Ctrl+Num (default) to open the on-screen display. 2. Press to open the personal profile of the user logged in. NOTE: To change the personal profile of another user, press select Users > [Username] > Personal Profile 49 · G&D DP1.2-MUX3-ATC... -
Page 149: Changing The Colour Of The Information Menu
Info menu displayed in violet White: Info menu displayed in white Black: Info menu displayed in black Silver: Info menu displayed in silver Dark red: Info menu displayed in dark red 4. Press to save your settings. G&D DP1.2-MUX3-ATC · 50... -
Page 150: Changing The Position Of The Info Menu
NOTE: To change the personal profile of another user, press select Users > [Username] > Personal Profile 3. Select the row and press OSD menu position Enter 51 · G&D DP1.2-MUX3-ATC... -
Page 151: Enabling Or Disabling Auto-Closing Of The Osd
NOTE: To change the personal profile of another user, press select Users > [Username] > Personal Profile 3. Select the row Change Password and press Enter G&D DP1.2-MUX3-ATC · 52... -
Page 152: Viewing The Status Information Of A Kvm Switch
(default) to open the on-screen display. 2. Press to open the configuration settings. 3. Use the arrow keys to select System information and press Enter 4. Use the arrow keys to select Hardware information and press Enter 53 · G&D DP1.2-MUX3-ATC... - Page 153 5. The following information is displayed in the dialog box that opens now: Software information Physical ID of the KVM switch Device: Device class of the KVM switch Version: Firmware version Firmware: Firmware name Name: Name of the KVM switch G&D DP1.2-MUX3-ATC · 54...
-
Page 154: Service Tools
1. Press (default) to open the on-screen display. Ctrl+Num 2. Pres to open the service tools. 3. Use the arrow keys to select Restart and press Enter 4. Confirm the security prompt by selecting and press Enter 55 · G&D DP1.2-MUX3-ATC... -
Page 155: Resetting The System Defaults
Set defaults for Reset local network settings only. local network settings: Set defaults for Reset all settings except local network settings. KVM applications: 5. Confirm the security prompt by selecting and press Enter G&D DP1.2-MUX3-ATC · 56... -
Page 156: Users And Groups
The following table shows the rights of the user account and the assigned groups as well as the resulting effective right: Right User Group Group Effective Sample Office MuxConfig right Mux config Change own password: CPU access View Full Full 57 · G&D DP1.2-MUX3-ATC... -
Page 157: Efficient Use Of User Groups
IMPORTANT: The new user account has neither configuration nor access rights. Before using a user account, add it to an existing user group or assign it with indivi- dual rights. G&D DP1.2-MUX3-ATC · 58... -
Page 158: Changing The Name Of A User Account
User groups to which the user account is assigned are marked with an arrow (). 8. Repeat steps 6 and 7 if you want to change the group assignment of other accounts. 9. Press to save your settings. 59 · G&D DP1.2-MUX3-ATC... -
Page 159: Enabling/Disabling A User Account
2. Press to open the Configuration menu. 3. Select the row Users and press Enter 4. Select the user account you want to delete and press 5. Select the entry from the security prompt and press Enter G&D DP1.2-MUX3-ATC · 60... -
Page 160: Managing User Groups
Enter 4. Select the user group whose name you want to change and press 5. Select the row Name and press Enter 6. Enter the desired name and press Enter 7. Press to save your settings. 61 · G&D DP1.2-MUX3-ATC... -
Page 161: Managing Members Of A User Group
Yes: User group is enabled User group is disabled IMPORTANT: If a user group is disabled, the group rights do not apply to the members assigned to this group. 6. Press to save your settings. G&D DP1.2-MUX3-ATC · 62... -
Page 162: Deleting A User Group
6. Select the row and press to select one of the following options: Superuser right Access rights according to user and group rights Yes: Unlimited access to the KVM switch 7. Press to save your settings. 63 · G&D DP1.2-MUX3-ATC... -
Page 163: Right To Configure The Kvm Switch
User groups 4. Press Enter 5. Select the user account or user group whose right you want to change and press 6. Select the row and press Config rights Enter G&D DP1.2-MUX3-ATC · 64... -
Page 164: Right To Change The Settings Of The "Personal Profile" Menu
7. Select the row and press to select one of the following options: Edit personal profile Viewing and editing of own user profile denied Yes: Viewing and editing of own user profile allowed 8. Press to save your settings. 65 · G&D DP1.2-MUX3-ATC... -
Page 165: Access To Usb Devices
Configuration menu. 3. If you want to change this right of a user account, select the row Users . To change this right for a user group, select the row User groups 4. Press Enter G&D DP1.2-MUX3-ATC · 66... -
Page 166: Right To Change Your Own Password
3. If you want to change this right of a user account, select the row . To change Users this right for a user group, select the row User groups 4. Press Enter 5. Select the user account or user group whose right you want to change and press 67 · G&D DP1.2-MUX3-ATC... -
Page 167: Right To Execute Scripts
Executing the script is denied Yes: Executing the script is allowed 9. Repeat steps 7 and 8 to change the right for executing other scripts. 10.Press to save your settings. G&D DP1.2-MUX3-ATC · 68... -
Page 168: Further Information
Further information Further information Pin assignment of the RS232 socket The devices of the DP1.2-MUX3-ATC series provide an socket. RS232 The pin assignment of this socket is shown in the following figure The table shows how the different conduits of the data connection are assigned to the according pins: Pin no. -
Page 169: Connecting Usb 2.0 Mass Storage Devices
In case the computer writes data on the mass storage device at that time, this process is aborted. Before switching the channel, use the Safely remove hardware function of the applied operating system of the computer to avoid data loss. G&D DP1.2-MUX3-ATC · 70... -
Page 170: Controlling The Kvm Switch Via Xml
Using an attribute is optional. If you do not use a attribute, devices are identified via their ID. IDENTIFY THE KVM SWITCH BY NAME <?xml version="1.0" encoding="utf-8"?> <root> <nextmuxchannel> <DlMux4 type="name">MUX-ATC</DlMux4> </nextmuxchannel> </root> IDENTIFY THE KVM SWITCH BY ID <?xml version="1.0" encoding="utf-8"?> <root> <nextmuxchannel> <DlMux4>0x11111111</DlMux4> </nextmuxchannel> </root> 71 · G&D DP1.2-MUX3-ATC... -
Page 171: Use Of Device Ids
</root> Depending on the type of message, responses to commands, which are not executed by the XML service itself, but are delegated to the device service of the KVM switch, are shown in different XML containers. G&D DP1.2-MUX3-ATC · 72... -
Page 172: Combining Multiple Commands In An Xml Document
Such events are reported in a <pushNotification> container. The type of notification is listed as type attribute of this tag. PUSH NOTIFICATIONS FOR SWITCHING BETWEEN CHANNELS <?xml version="1.0" encoding="utf-8"?> <root> <pushNotification type="channel_select_event"> <channel>1</channel> </pushNotification> </root> 73 · G&D DP1.2-MUX3-ATC... -
Page 173: Unsubscribing From Push Notifications
Using XML commands, you can send passwords in this mode either encrypted (recommended) or in plain text to the device. Both types of encryption use the CBC-3DES algorithm. Configure the required key and initialization vector (only required for transport encryption) in the Config Panel web application. G&D DP1.2-MUX3-ATC · 74... -
Page 174: Configuring The Device's Accesses For Xml Control
Enabling the encryption type CBC-3DES additionally requires vector: an initialization vector. Enter the initialization vector (64 bit) in the form of 16 hex digits. 7. Click on to save your settings and to close the window. 75 · G&D DP1.2-MUX3-ATC... -
Page 175: Instructions For Encrypting Passwords
<?xml version=\"1.0\" encoding=\"utf-8\"?> <root> <logonmux> <DlMux4>0x000009CC</DlMux4> <User>JohnDoe</User> <Password> <EncryptedData xmlns="http://www.w3.org/2001/04/xmlenc#"> <CipherData> <CipherValue>B2Wmn52teOPvY31wq0l4nw==</CipherValue> </CipherData> </EncryptedData> </Password> </logonmux> </root> The encrypted data block ( ) consists of a combination of initialization vec- CipherValue tor and encrypted text with BASE64-coded padding. G&D DP1.2-MUX3-ATC · 76... - Page 176 The padding bytes are to be randomly selected. The initialization vector is required for stream ciphers (here: ). It is randomly selected in the encryption mode Password encryption . Its size corresponds to the block size of the selected encryption (8 bytes). 77 · G&D DP1.2-MUX3-ATC...
-
Page 177: Commands
Transmitting username and password is not required when logging in. USER LOGIN <?xml version="1.0" encoding="utf-8"?> <root> <logonmux> <DlMux4>0x000009CC</DlMux4> <User>JohnDoe</User> <Password>secret</Password> </logonmux> </root> NOTE: Information about optional password encryption is given on page 76. USER LOGOFF <?xml version="1.0" encoding="utf-8"?> <root> <logoffmux> <DlMux4>0x000009CC</DlMux4> </logoffmux> </root> G&D DP1.2-MUX3-ATC · 78... -
Page 178: Switching To A Particular Channel
<?xml version="1.0" encoding="utf-8"?> <root> <disconnectmux/> </root> Switching to the next channel Use the command <nextmuxchannel> to switch to the next channel of the KVM switch. SWITCHING TO THE NEXT CHANNEL <?xml version="1.0" encoding="utf-8"?> <root> <nextmuxchannel/> </root> 79 · G&D DP1.2-MUX3-ATC... -
Page 179: Switching To The Previous Channel
<?xml version="1.0" encoding="utf-8"?> <root> <pinmux> <Channel>2</Channel> <Type>USB</Type> </pinmux> </root> PIN SECOND VIDEO LEVEL TO CURRENT CHANNEL <?xml version="1.0" encoding="utf-8"?> <root> <pinmux> <Channel>-1</Channel> <Type plane="1">VIDEO</Type> </pinmux> </root> CANCEL USB PINNING <?xml version="1.0" encoding="utf-8"?> <root> <unpinmux> <Channel>2</Channel> <Type>USB</Type> </unpinmux> </root> G&D DP1.2-MUX3-ATC · 80... -
Page 180: Querying Monitoring Values
<DlMux4><id>0x11111111</id></DlMux4> </monitor> </root> You can further restrict the list by specifying the desired monitoring value. QUERYING THE MONITORING VALUE »STATUS« OF THE KVM SWITCH 0X11111111 <?xml version="1.0" encoding="utf-8"?> <root> <monitor> <DlMux4> <id>0x11111111</id> <monitorName>Status</monitorName> </DlMux4> </monitor> </root> 81 · G&D DP1.2-MUX3-ATC... - Page 181 ( ) or outside ( ) the required range. Acknowledged corresponds to the Acknowledged function in the web application. You can also include several device class tags in the XML tag <monitor> G&D DP1.2-MUX3-ATC · 82...
-
Page 182: Technical Data
1 × Mini USB B socket Audio Transmission type: Digital, unidirectional, DisplayPort digital embedded in DisplayPort signal Digital audio out Resolutions: 16/20/24 bit Sampling rates: Up to 48 kHz Digital Audio Out: De-embedding of embedded audio in DisplayPort signal 83 · G&D DP1.2-MUX3-ATC... - Page 183 (USB 3.0 /USB 2.0 compatible) Transmission rate: SuperSpeed 5.0 Gbps (low speed, full speed, hi speed compatible) Power (output): HighPower (0.9A) Max. cable length: USB 3.0/USB 3.1: max. 3 m USB 2.0: max. 5 m G&D DP1.2-MUX3-ATC · 84...
-
Page 184: Individual Variant Features
Interfaces Video: 2 × DisplayPort socket per computer Power supply Power consumption: 0.5 A@240VAC; 1.2 mA@100VAC Housing Material: Anodised aluminium Dimensions (W × H × D): 435 × 88 × 210 mm Weight: Approx. 3.5 kg 85 · G&D DP1.2-MUX3-ATC... - Page 188 Das Handbuch wird fortlaufend aktualisiert und im Internet veröffentlicht. The manual is constantly updated and available on our website. https://gdsys.de/A9100300 Guntermann & Drunck GmbH Obere Leimbach 9 5 7074 Siegen Germany www.gdsys.de sales@gdsys.de...
Need help?
Do you have a question about the DP1.2-MUX3-ATC and is the answer not in the manual?
Questions and answers