
Subscribe to Our Youtube Channel
Related Manuals for JAI RM-670


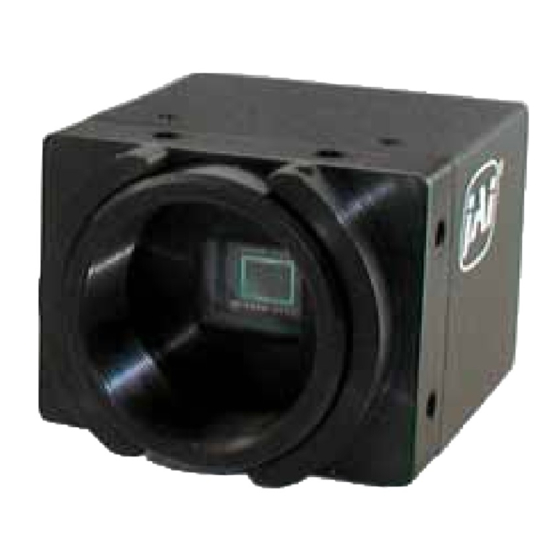
Summary of Contents for JAI RM-670
- Page 1 RM-670 RM-675NIR RM-673NIR Monochrome Interlaced Interline Transfer CCD Cameras Document Version: B Document P/N: 10734...
- Page 3 Disclaimer The material contained in this manual consists of information that is proprietary to JAI Inc., and may only be used by the purchasers of the product. JAI, Inc. makes no warranty for the use of its product and assumes no responsibility for any errors which may appear or for damages resulting from the use of the information contained herein.
- Page 4 Changes or modifications to this unit not expressly approved by the party responsible for FCC compliance could void the user’s authority to operate the equipment. RM-67X Operation Manual JAI Inc. 625 River Oaks Parkway San Jose, CA 95134 Tel:(408) 383-0300...
-
Page 5: Table Of Contents
RM-67X Series Table of Contents Disclaimer Notice ....................... iii Table of Contents ....................... v List of Figures ........................vii List of Tables ........................ix Hardware Introduction ..................11 Product description ..................... 11 Features......................11 Configurable Options Availability ................12 Applications ...................... 12 System Configuration ................... - Page 6 RM-67X Series 4.5.5 Advanced Iris Controls..................36 Configurable Options Available ................37 5.1.1 ALC (Option OP1-5) .................... 37 5.1.2 White Blemish Compensation (Option OP2-5) ............... 39 5.1.3 Extended Temperature Range (-45°C to +65°C) (Option OP22-5-1) ........39 5.1.4 Conformal Coat (Option OP22-5-5) ................39 Troubleshooting ....................
- Page 7 RM-67X Series 8.3.36 Focus Neutral ....................59 8.3.37 Gamma ......................60 8.3.38 Gamma Selection ....................60 8.3.39 Hue ......................60 8.3.40 Interpolator Phase ..................... 60 8.3.41 Iris Control Interval ................... 61 8.3.42 Impulse Filter ....................61 8.3.43 Iris Control ..................... 61 8.3.44 Iris Decrement ....................
- Page 8 RM-67X Series 8.3.96 Window Size Control (Obsolete in firmware 1.60 – replaced by WDS) ......... 77 8.3.97 WXN – Min ALC Window X Value................77 8.3.98 WYN – Min ALC Window Y Value ................77 8.3.99 WXX – Max ALC Window X Value ................78 8.3.100 WYX –...
- Page 9 RM-67X Series List of Figures Figure 1. RM-67X System Configuration .................. 13 Figure 2. 15-Pin Connector ....................14 Figure 3. Back Focus Set-Screw Locations ................16 Figure 4. 15P-02-9P Cable ....................16 Figure 5. 15P-02-9P-FULL Cable................... 17 Figure 6. Input Signals ...................... 18 Figure 7.
- Page 10 RM-67X Series List of Tables Table 1 RM-67X Product Specifications Table ................ 43 List of Tables...
-
Page 11: Hardware Introduction
RM-67X Series RM-67X Hardware Instructions Hardware Introduction Product description An RM-67X camera is a simple, yet high quality camera capable of meeting a variety of application requirements. Featuring an advanced HAD-type interline transfer CCD imager, this miniaturized high resolution camera offers many standard and optional features at a very affordable price. -
Page 12: Configurable Options Availability
Three Year Warranty The CCD solid state image sensor allows the camera to maintain a superior performance level indefinitely while requiring virtually no maintenance. JAI, Inc. backs all of the RM Series cameras with a three-year warranty. Warning: Unscrewing the camera cover or opening the camera in any way will void this warranty. -
Page 13: Figure 1. Rm-67X System Configuration
RM-67X Series Figure 1. RM-67X System Configuration Hardware Introduction... -
Page 14: Installation
Please begin by checking your order against the Components List (below) to assure that you have received everything as ordered, and that nothing has been overlooked in the packing materials. If any item is missing, please contact your JAI, Inc. -
Page 15: Power Supply And Power Cable Setup
15P-02-9P-FULL or 15P-02-9P, and the power supply is PD-12UU. JAI, Inc. Power Cables If you are using JAI, Inc. power cables please refer to the pin-out diagram. The color coded leads use Grey for Ground and Yellow for +12V DC. -
Page 16: Auto-Iris Lens Setup
Power down the camera before installing the auto-iris lens. To install the auto-iris lens in a JAI, Inc. camera, wire the signal on the lens to the 1 V peak-to-peak video output (pin 11) on the camera. -
Page 17: 02-9P-Full Cable
RM-67X Series Figure 5. 15P-02-9P-FULL Cable Hardware Installation... -
Page 18: Functions And Operations
RM-67X Series 3 Functions and Operations Apart from the standard continuous operation, the RM-67X features three external asynchronous trigger modes (edge pre- select, pulse width controlled and Async RESET). Input of Ext HD/VD Signals In the default setting the camera will accept external HD/VD signals on pin 13 and 14 of the 15 pin connector. If external HD/VD is applied, the camera will synchronize to it. -
Page 19: Modes Of Operation
RM-67X Series Modes of Operation 3.2.1 Continuous Operation (Non triggered) For applications that do not require asynchronous external trigger (continuous operation). This is the factory default setting of the camera. Figure 7. Horizontal timing details and pixel numbering for the CCD array. CCIR Function and Operations... -
Page 20: External Trigger Modes
RM-67X Series Figure 8. Vertical timing details for interlaced. CCIR Note: Fig. 9 through fig.10 on the following pages shows horizontal and vertical timing details for interlaced and non-interlaced. 3.2.2 External Trigger Modes This camera has 3 external asynchronous trigger modes, which can be set by RS-232C commands. Async Reset Trig resets start frame Edge Pre-select Mode. -
Page 21: Figure 9. Edge Pre-Select Ccir
RM-67X Series 3.2.2.2 Edge Pre-select Mode The falling edge of the trigger pulse initiates the exposure. The exposure time (accumulation time) is governed by the pre- defined shutter speed set by RS-232C. (see section 8.3.63) The leading edge of the trigger pulse initiates the exposure. The exposure time (accumulation time) is governed by the pre- defined shutter speed set by RS-232C. -
Page 22: Integrate Mode
RM-67X Series Figure 10. Pulse width control CCIR. Note: • Do not input external VD signal at Pin No. 7 of the 12-pin Hirose connector, as it may disturb the external trigger function. 3.2.3 Integrate Mode The standard factory setting for the RM-67X camera is FRAME MODE. In addition to the External Trigger modes, there is an External Integrate mode on pin 12 on the 15 pin connector. -
Page 23: Software Introduction
RM-67X Series RM-67X Camera Control Software 4 Software Introduction The RM-67X is supported by a software control tool that opens the RS-232 serial port (COM). This section addresses the JAI RM-67X camera software available for download at www.jai.com. Software Installation Following are instructions to install the RM-67X camera software on a PC. -
Page 24: Figure 12. Right Click To Extract The Compressed Files
4.Follow the installation instructions. Note: You can change the installation directory if you want. 4.1.2.1 Uninstalling Previous RM-67X JAI, Inc. Software • If you already have RM-67X software on the hard drive, the installer asks to uninstall the software. •... -
Page 25: Fresh Installation Of The Rm-67X Software
RM-67X Series Figure 14. Uninstall Existing RM-67X Software 4.1.3 Fresh Installation of the RM-67X Software • Start by clicking on the Setup icon in the software folder. • Click Next to begin a clean install. Figure 15. Clean Install of RM-67X Software •... -
Page 26: Figure 16. Accept The Default Install Path
RM-67X Series Figure 16. Accept the default install path. Figure 17. A bar indicates installation progress. Figure 18. The installer asks to close. • It is not necessary to restart the computer after installing the RM-67X software. • Click on the Windows Start menu to access a shortcut to the RM-67X software. •... -
Page 27: Using The Rm-67X Software
You must connect a camera via an RS-232 cable to the computer and power it up before starting the camera control software. Start the RM-67X software by clicking on the Start menu, and then selecting JAI_RM-67X and clicking the JAI RM-67X shortcut on the right. -
Page 28: Figure 22. Load Settings Selections
As a user you can create UserSet1 and UserSet2 by selecting the appropriate line of the drop down menu. Factory Defaults can not be overwritten. Figure 23. Saving Settings 4.2.1.4 Exit Selecting Exit closes the JAI RM-67X Camera Control program. Software Introduction & Installation... -
Page 29: Camera Control Main Window
RM-67X Series Camera Control Main Window The camera is configured using the main window. The main window has these controls: • Gain Selection (top left) − ALC/AGC (if enabled) − Manual Gain • Zoom Control (top right) − Zoom In Coarse −... -
Page 30: Manual Gain
RM-67X Series 4.3.1 Manual Gain In manual mode, the Manual Gain setting and Shutter Speed control may be adjusted to get the desired exposure. • Manual Gain The Manual Gain allows you to set the system gain. The range is from 0dB to 30dB (3dB to 30dB for RM-673NIR). 4.3.2 Zoom Control The zoon control allows you to remotely focus a motorized zoom lens when properly wired to the 15-pin connector. -
Page 31: Iris Control
RM-67X Series • Focus In Fine Pressing and holding this button causes the lens to “focus in” in a slow fashion. Releasing the button causes the focus to stop. The speed of the focus may be set using the Advanced Setting Menu (see section 4.4) •... -
Page 32: Shutter
RM-67X Series 4.3.5 Shutter Figure 27. Shutter Control Set • Shutter Speed The RM-67x can be set for a range of shutter speeds by selecting the desired speed from the drop down list box. The speed is adjustable in increments of one horizontal line time (~64 us), from 1 to 312 lines. 4.3.6 Trigger Modes −... -
Page 33: Mirror Image
RM-67X Series 4.3.9 Mirror Image This feature allows the user to flip the image horizontally (mirror image). “Off” corresponds to a normal image and “On” mirrors the image. Advanced Setting Window Software Introduction & Installation... -
Page 34: Advanced Setting Details
ID information. • Host Control Ver. The host software version is displayed. • Camera Model The JAI camera model number is displayed. • Firmware Ver. The camera firmware version is displayed. • FPGA Ver. -
Page 35: Advanced Zoom Controls
RM-67X Series 4.5.3 Advanced Zoom Controls Figure 30. Zoom Controls • Zoom Max Voltage This sets the maximum voltage that will be applied to the zoom motor. The range is 0V to 9V. • Zoom Coarse Step This sets the voltage that gets applied to the zoom motor when the coarse Zoom control is activated. It is specified as a percentage of the Zoom Maximum Voltage •... -
Page 36: Advanced Iris Controls
RM-67X Series 4.5.5 Advanced Iris Controls Figure 32. Iris Controls • Iris Max Voltage This sets the maximum voltage that will be applied to the iris motor. The range is 0V to 9V. • Iris Coarse Step This sets the voltage that gets applied to the iris motor when the coarse Iris control is activated. It is specified as a percentage of the Iris Maximum Voltage •... -
Page 37: Configurable Options Available
RM-67X Series 5 Configurable Options Available This section describes the additional options the RM-67X offers. These options are only applicable if the units have been ordered with theses options. Figure 33. ALC Controls Set 5.1.1 ALC (Option OP1-5) This optional feature provides an automatic level control (ALC) function for the camera. The ALC function combines both automatic gain and exposure control to give the best response to lighting conditions. -
Page 38: Figure 34. Alc Advanced Set
RM-67X Series Figure 34. ALC Advanced Set • ALC Window These parameters define the rectangular Region of Interest (ROI) that will be used to calculate the ALC exposure level. The user defines the upper left and bottom right corner of the ROI using X & Y coordinates. The ROI can target the center of the image, or can be set to avoid a certain portion of the image so that its light value will not affect the ALC function. -
Page 39: White Blemish Compensation (Option Op2-5)
RM-67X Series • High Sensitivity Mode When this box is checked, the camera’s “high sensitivity” mode is enabled. This mode uses special processing of the video signal to sum neighboring pixels and increase the level of the output signal as illumination decreases. The camera will automatically switch to high sensitivity processing under dark conditions when the video level from ALC drops below a minimum threshold. - Page 40 RM-67X Series Functional Options...
-
Page 41: Troubleshooting
Problems and Solutions Following are troubleshooting tips for common problems. Generally, problems can easily be solved by following these instructions. If the following remedies fail to offer a solution to your problems, please contact a JAI, Inc. representative. 6.1.1 Symptom: No Video Remedies: Check that the following are properly connected and operational. -
Page 42: Possible Solutions
First, find out which port has been selected by going to the Device Manager to determine the COM port. • Next, Open JAI Camera Control tool, select Preferences, and select the COM port. If working properly the camera should now be connected. -
Page 43: Specifications
RM-67X Series 7 Specifications Product Specifications Table 1 RM-67X Product Specifications Table Model RM-670 RM-675NIR RM-673NIR Sensor 2/3”interlace CCD 1/2” NIR interlace CCD 1/3” NIR interlace CCD IXC423AL IXC429AL IXC259AL Active pixels 752 (H) x 582(V) Chip size 10.25 mm x 8.5 mm 7.4 mm x 5.95 mm... -
Page 44: Physical Dimensions
RM-67X Series 7.1.1 Physical Dimensions Figure 36. Physical Dimensions Caution: When mounting the camera to any fixture, do not use screws that extend more than 5 mm into the camera housing to avoid possible damage to the internal circuitry. For attaching the tripod mounting plate, only the supplied screws should be used. -
Page 45: Appendix
RM-67X Series 8 Appendix Front End Detail Figure 38. Front End Assembly Camera Command Overview The RM-67X series camera can be controlled via RS-232 communications. Commands are sent to the camera as a string of ASCII characters. Each command begins with a start character of “:” and ends with the end character CR (Decimal 10, hex D) which is indicated as <cr>... -
Page 46: Detail List Of Camera Commands
RM-67X Series Detail List of Camera Commands Alphabetical Table of Camera Commands Commands marked with “*” are in-house commands. Command String Function AEC? AEC Mode AEC= AEC Mode AFA? AFE Register Address AFA= AFE Register Address AFW= AFE Write AGN? AGC Manual Gain AGN= AGC Manual Gain... - Page 47 RM-67X Series Command String Function DOU? * DOU Phase DOU= * DOU Phase DKS? Dark Speed DKS= Dark Speed ESH= Electronic Shutter for ALC ESH? Electronic Shutter for ALC FCI? Focus Control Interval FCI= Focus Control Interval FPGA? FPGA Version FOC? Focus Control FOC=...
- Page 48 RM-67X Series Command String Function MFT? Multifunction Input Termination MFT= Multifunction Input Termination MGA? MCP Manual Gate MGA= MCP Manual Gate MGN? MCP Manual Gain MGN= MCP Manual Gain MIR? Mirror Image Mode Mirror Image Mode MLV? MCP Level MLV= MCP Level MMD? MCP Mode...
- Page 49 RM-67X Series Command String Function VPD= Video Pedestal VPS? * Video Pedestal State VPS= * Video Pedestal State VSA? V-Sat VSA= V-Sat VWC? Video White Clip VWC= Video White Clip WBM? White Balance Mode WBM= White Balance Mode WSF= * WSF Write Factory Unit ID String WSTA= Save Camera State...
-
Page 50: Aec Mode
RM-67X Series 8.3.1 AEC Mode Function Command String Camera Response :AEC=[D]<cr> :o<cr> Set AEC Mode Set the Auto Exposure Control mode. [D] is the mode parameter. 0 = Manual. 1 = Auto. User access to control of the AEC feature is determined by the SB2 setting. -
Page 51: Agc Manual Gain
RM-67X Series 8.3.4 AGC Manual Gain Function Command String Camera Response :AGN=[DDD]<cr> :o<cr> Set AGC Manual Gain Set the AGC manual gain value. [DDD] is the gain count value with a range of 89-204. This is equivalent to a gain in dB from 32–5 dB. -
Page 52: Agc Mode
RM-67X Series 8.3.7 AGC Mode Function Command String Camera Response Set AGC Mode :AMD=[D]<cr> :o<cr> Set the AGC mode. [D] is the mode parameter. 0 = Manual. 1 = Auto. User access to control of the AGC feature is determined by the SB1 setting. -
Page 53: Awb Window Display
RM-67X Series 8.3.9 AWB Window Display Function Command String Camera Response Auto White Balance Window :AWW=[D]<cr> :o<cr> Disable/Enable Disable or enable the Auto White Balance window display. [D] is the enable parameter. 0 = AWB Window Disabled. 1 = AWB Window Enabled. :AWW?<cr>... -
Page 54: Blemish Count
RM-67X Series 8.3.13 Blemish Count Function Command String Camera Response :BCT?<cr> :oBCT[DDD]<cr> Get Blemish Count Enquire current blemish count. The camera keeps a list of blemish pixels that are bright regardless of the input signal. This function returns the number of blemishes that have been identified for this camera. -
Page 55: Chroma Filtering State - Cfa
RM-67X Series 8.3.17 Chroma Filtering State - CFA Function Command String Camera Response :CFA=[D]<cr> :o<cr> Set Chroma Filtering State Disable or enable the advanced color chroma filtering feature. [D] specifies to turn sharpening on or off. This feature only applies to the TMC-773 and TMC-775 models. 0 = Chroma filtering off. -
Page 56: Color Gain - Blue
RM-67X Series 8.3.20 Color Gain - Blue Function Command String Camera Response Set Blue Gain :CGB=[DDDD]<cr> :o<cr> Set the blue color gain. [DDDD] is the color gain value with a range of 1-4095. This is equivalent to a gain of x0.001 - x3.999. -
Page 57: Color Intensity - Red
RM-67X Series 8.3.25 Color Intensity - Red Function Command String Camera Response :CIR?<cr> :oCGR[DDDD]<cr> Get Red Intensity Enquire current red color intensity. [DDDD] is the current intensity value with a range of 1-4184394. 8.3.26 CID Customer ID String Function Command String Camera Response :CID=[XXX..]<cr>... -
Page 58: Dark Speed
RM-67X Series 8.3.29 Dark Speed Function Command String Camera Response :DKS=[DD]<cr> :o<cr> Set Dark Speed Set the DKS value (dark speed for ALC). [DD] is the level value with a range of 1-100. This command applies only to camera models TM-770. Get Dark Speed :DKS?<cr>... -
Page 59: Focus Control
RM-67X Series 8.3.33 Focus Control Function Command String Camera Response :FOC=[DDD]<cr> :o<cr> Set Focus Control Set the Focus Control. [DDD] is the focus value with a range of 0 to 127 for a voltage range of 0-9 V. Therefore there are 0.141 V/count. -
Page 60: Gamma
RM-67X Series 8.3.37 Gamma Function Command String Camera Response Set Gamma :GAM=[D]<cr> :o<cr> Sets the gamma value. [D] is the gamma flag. 0 = gamma 1.0. 1 = gamma 0.45. Get Gamma :GAM?<cr> :oGAM[D]<cr> Enquire current gamma setting. [D] is the current gamma setting. -
Page 61: Iris Control Interval
RM-67X Series 8.3.41 Iris Control Interval Function Command String Camera Response Set Iris Control Interval :ICI=[DDD]<cr> :o<cr> Set the Iris Control Interval. [DDD] is the interval value with a range of 1 – 500 msec. This value determines the amount of time the iris control motor is pulsed during the IRI (Iris Increment) and IRD (Iris Decrement) commands. -
Page 62: Iris Increment
RM-67X Series 8.3.45 Iris Increment Function Command String Camera Response :IRI=[DDD]<cr> :o<cr> Iris Increment Increment the iris control by DDD% of full scale. [DDD] is the percent of full scale to increment the zoom to with a range of 1 - 100. The iris control motor will be pulsed with a voltage equal to DDD% of full scale for the duration specified by the ICI (Iris Control Interval) command and then returned to a neutral position. -
Page 63: Color Coefficient - Red 2
RM-67X Series 8.3.48 Color Coefficient – Red 2 Function Command String Camera Response Set Color Coefficient R2 :KR2=[DDDD]<cr> :o<cr> Set the color correction coefficient for Red 2 (R2). This is the red component of the 2 row of a 9 element color correction matrix. -
Page 64: Color Coefficient - Green 2
RM-67X Series 8.3.51 Color Coefficient – Green 2 Function Command String Camera Response :KG2=[DDDD]<cr> :o<cr> Set Color Coefficient G2 Set the color correction coefficient for Green 2 (G2). This is the green component of the 2 row of a 9 element color correction matrix. -
Page 65: Color Coefficient - Blue 2
RM-67X Series 8.3.54 Color Coefficient – Blue 2 Function Command String Camera Response :KB2=[DDDD]<cr> :o<cr> Set Color Coefficient B2 Set the color correction coefficient for Blue 2 (B2). This is the blue component of the 2 row of a 9 element color correction matrix. -
Page 66: Alc Window - Lower Right X
RM-67X Series 8.3.58 ALC Window – Lower Right X Function Command String Camera Response Set ALC Window Lower Right :LRX=[DDD]<cr> :o<cr> X value Set the lower right X co-ordinate for the ALC control window. [DDD] is the size parameter with a range of 3-768. This command applies to camera models TM-770, TMC-773, and TMC-775. -
Page 67: Mcp Gate Disable
RM-67X Series 8.3.61 MCP Gate Disable Function Command String Camera Response :MDG=[D]<cr> :o<cr> MCP Gate Disable/Enable Disable or enable the MCP Gate. [D] is the enable parameter. 0 = MCP Gate Disabled. 1 = MCP Gate Enabled. Get MCP Gate Disable/Enable :MDG?<cr>... -
Page 68: Mcp Manual Gate
RM-67X Series 8.3.64 MCP Manual Gate Function Command String Camera Response :MGA=[DDD]<cr> :o<cr> Set MCP Manual Gate Set the MCP manual gate value. [DDD] is the gate code value with a range of 1-255. This is equivalent to a gate range of 0.065-17 msec. -
Page 69: Mcp Mode
RM-67X Series 8.3.68 MCP Mode Function Command String Camera Response :MMD=[D]<cr> :o<cr> Set MCP Mode Set the MCP exposure control mode. [D] is the mode parameter. 0 = Manual. 1 = Auto. :MMD?<cr> :oMMD[D]<cr> Get MCP Mode Enquire current MCP Mode. [D] is the current mode value. 0 = Manual. -
Page 70: Saturation Control - Blue And Red
RM-67X Series 8.3.72 Saturation Control – Blue and Red Function Command String Camera Response Set Saturation Control :SAC=[DDDD]<cr> :o<cr> Set the blue and red saturation register controls (BYSAT and RYSAT) for advanced color processing. The value [DDDD] is the combined values for red and blue saturation controls. For each color, the value has a range of x1.0 to x2.0 which is mapped to an integer value of 0-255. -
Page 71: Shd Level
RM-67X Series 8.3.74 SHD Level Function Command String Camera Response Set SHD Level :SHD=[DD]<cr> :o<cr> Set the SHD level. [DD] is the level value with a range of 0-47. This command applies only to camera models TM-770, TMC- 773, and TMC-775. Get SHD Level :SHD?<cr>... -
Page 72: Shutter Enable
RM-67X Series 8.3.77 Shutter Enable Function Command String Camera Response :SHE=[D]<cr> :o<cr> Shutter Enable Enables or disables electronic shutter control. [D] controls the shutter state: 0 = Shutter control disabled. 1 = Shutter control enabled. :SHE?<cr> :oSHE[D]<cr> Get Shutter Enable State Enquire current shutter control enable state. -
Page 73: Smx - Max Alc Shutter Speed
RM-67X Series 8.3.80 SMX – Max ALC Shutter Speed Function Command String Camera Response :SMX=[DDD]<cr> :o<cr> Set ALC Max Shutter Speed Set the max shutter speed value the ALC mode can use. [DDD] is the shutter speed value with a range of 1-260 (NTSC models) or 1-310 (PAL models). -
Page 74: Alc Window - Upper Left X
RM-67X Series 8.3.84 ALC Window – Upper Left X Function Command String Camera Response Set ALC Window Upper Left X :ULX=[DDD]<cr> :o<cr> value Set the upper left x co-ordinate for the ALC control window. [DDD] is the size parameter with a range of 1-766. This command applies to camera models TM-770, TMC-773, and TMC-775. -
Page 75: Video Encoder Address
RM-67X Series 8.3.87 Video Encoder Address Function Command String Camera Response :VEA=[DDD]<cr> :o<cr> Set Video Encoder Address Set the Video Encoder Address where subsequent video encoder writes (VEW) will place the value written. [DDD] is the address value with a range of 0-255. :VEA?<cr>... -
Page 76: V-Sat
RM-67X Series 8.3.92 V-Sat Function Command String Camera Response :VSA=[DDD]<cr> :o<cr> Set V-Sat Set the V saturation value for the TM-773. [DDD] is the saturation value with a range of 0-63. :VSA?<cr> :oVSA[DDD]<cr> Get V-Sat Enquire current V saturation value for the TM-773. [DDD] is the saturation value with a range of 0-63. -
Page 77: Window Display
RM-67X Series 8.3.95 Window Display Function Command String Camera Response :WDS=[D]<cr> :o<cr> Set Window Display State Turns the display of the window for ALC control on and off. [D] is the state value. This command applies to camera models TM-770, TMC-773, and TMC-775. 0 = ALC window display off. - Page 78 RM-67X Series 8.3.99 WXX – Max ALC Window X Value Function Command String Camera Response Get ALC X Maximum :WXX?<cr> :oWXX[DDD]<cr> Enquire maximum allowable value for ALC window X coordinate values. Different camera models may have a different value range. 8.3.100 WYX –...
- Page 79 RM-67X Series 8.3.104 Zoom Decrement Function Command String Camera Response Zoom Decrement :ZMD=[DDD]<cr> :o<cr> Decrement the zoom control by DDD% of full scale. [DDD] is the percent of full scale to decrement the zoom to with a range of 1 - 100. The zoom control motor will be pulsed with a negative voltage equal to DDD% of full scale for the duration specified by the ZCI (Zoom Control Interval) command and then returned to a neutral position.
- Page 80 RM-67X Series Appendix...
- Page 82 Europe, Middle East & Africa Phone +45 4457 8888 Fax +45 4491 3252 Asia Pacific Phone +81 45 440 0154 Fax +81 45 440 0166 Americas Phone (Toll-Free) 1 800 445-5444 Phone +1 408 383-0301 www.jai.com...
Need help?
Do you have a question about the RM-670 and is the answer not in the manual?
Questions and answers